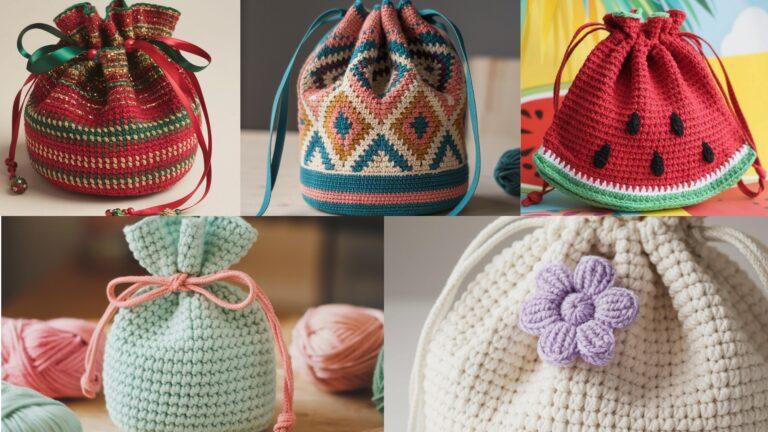
Crossbody bags are the everyday hero of hands-free living — roomy enough for essentials, built to wear comfortably, and endlessly customizable. Below you’ll find a friendly introduction covering materials, hardware, sizing, gauge math, and construction approaches, followed by five complete crossbody bag patterns with materials lists, clear step-by-step construction, finishing and lining tips, and variations you can use to adapt each design for markets, gifts, or your own wardrobe.
I wrote each pattern so you can make a polished, usable bag: stable bottoms, sturdy straps, optional lining and closures, and smart reinforcement where a bag takes stress.
Quick primer — materials, hardware, sizing, and gauge math
Yarn & fiber choices
- Cotton or cotton-blend: my top choice for bags — strong, holds shape, machine-washable, great stitch definition.
- T-shirt yarn / bulky cord: gives a very sturdy basket-like bag (no lining needed).
- Wool blends or acrylic: OK for softer, slouchy bags but consider lining.
- Choose a yarn weight and hook that produce fabric you like: DK + 3.5–4.5 mm for light bags; worsted + 5.0–6.5 mm for more substantial bags; t-shirt yarn with 8–10 mm hook for chunky baskets.
Hardware & notions
- Strap hardware: D-rings, sliders, swivel clips for removable/adjustable straps.
- Closures: magnetic snap, zipper, button + loop, drawstring eyelets.
- Base reinforcement: leather or cork bottom discs, cardboard reinforced with interfacing, or stitch-in plastic canvas.
- Lining: lightweight cotton, canvas, or ripstop nylon; fusible interfacing for stability.
- Other: tapestry needle, stitch markers, measuring tape, sewing thread and machine (for lining).
Typical finished sizes (choose based on use)
- Mini crossbody: 6–7″ wide × 5–6″ tall — phone + card.
- Everyday medium: 9–11″ wide × 7–9″ tall — wallet, phone, keys, small water.
- Large crossbody / market: 12–15″ wide × 10–12″ tall — roomy, good for groceries.
Gauge & stitch math (how to compute)
Always make a 4″ swatch in the stitch you plan to use and block it as you will the bag. Measure stitches per inch (spi).
Example (digit-by-digit) — compute foundation chain for a 10″ wide bag using 4.5 sc = 1 in:
- stitches per inch = 4.5.
- desired width = 10 in.
- Multiply 4.5 × 10:
- 4.5 × 10 = 45.
- Foundation stitches = 45 (round to nearest stitch-repeat multiple if your stitch pattern requires it).
If your stitch requires multiples (for example, a pattern repeat of 6), adjust: 45 ÷ 6 = 7 remainder 3, so nearest multiple is 7 × 6 = 42 or 8 × 6 = 48. Choose 48 for a wider bag or 42 and reduce width a little — pick what fits your design.
1. Crochet Street Fair Boho Crossbody Bag Pattern
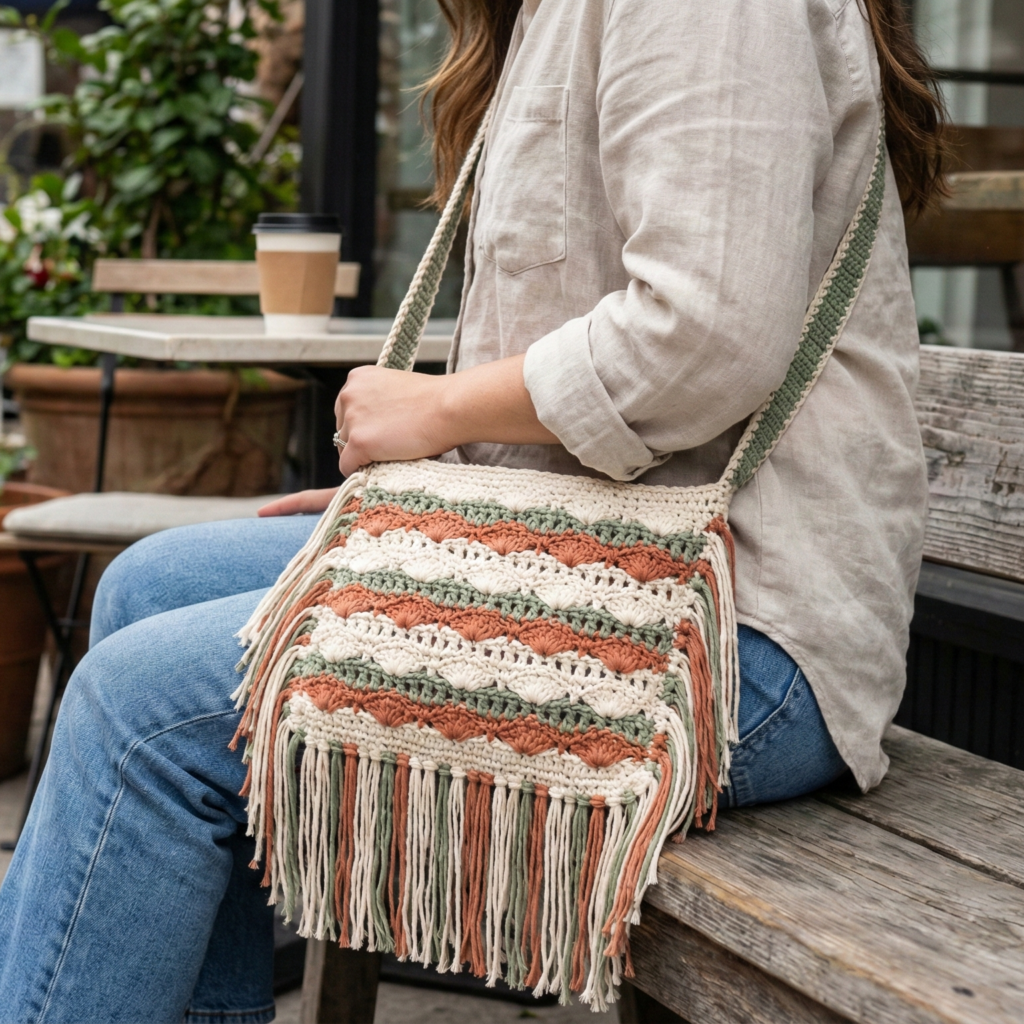
A slightly slouchy, boho-chic crossbody with a roomy body, fringe trims, and a long strap — great for markets, festivals, or daily errands.
Skill level: confident beginner → intermediate
Finished size (sample): 11″ wide × 9″ tall × 2.5″ deep (body before fringe)
Yarn & tools: DK cotton (approx. 600–900 yd depending on lining and fringe fullness), 4.5 mm hook, tapestry needle, 1 magnetic snap or zipper, sewing materials for lining.
Stitches used
sc, hdc, dc, shell (5 dc), puff/bobble (optional), BLO/FLO for optional texture.
Construction overview
Worked bottom-up: a flat oval or rectangle base worked in rounds/rows → body in the round with alternating textured bands (dc shells and mesh) → optional fringe and tassels → strap worked separately (long adjustable strap) and sewn or hardware-attached → lined and finished with a closure.
Step-by-step
A — Make the base (flat oval)
- Compute base width & depth from swatch. Example target base width = 11″, stitches per inch = 4.5 sc/in → 4.5 × 11 = 49.5 → use 50 foundation stitches for base edge if using a rectangular style, or build an oval via rounds.
- For oval base (recommended for boho slouch): MR, ch1, 8 sc in ring (8). R2: inc around (16). R3: sc1, inc around (24). Continue increasing evenly until circle reaches ~3.5–4″ diameter (this becomes the bag depth). Alternatively make a flat rectangle equal to desired length × depth and seam ends later.
B — Body (worked in the round)
3. Join a new color or continue and work in rounds without joining (use stitch marker). Work alternating bands: 6 rounds dc (for drape), then 2 rounds shell (create scallop texture), then 4 rounds mesh (dc, ch1, skip1, dc), repeat until side height reaches ~8–9″. Use stitch markers at the start of rounds to keep count.
C — Optional shaping at top (if fitted opening desired)
4. If you prefer a structured opening, do 2–3 rounds of sc and then BLO hdc rounds to fold inward for a subtle casing; this makes a neat edge and optional tie channel.
D — Fringe & tassel (boho detail)
5. Cut many 12–16″ lengths of yarn; fold and attach by lark’s head knot along the lower round of body (or just below the scallop rounds). Trim for evenness or stagger lengths for a free-spirited look.
E — Strap
6. For a sturdy strap: either crochet an i-cord strap (chain to desired length based on crossbody fit + allowance, then sc back over chains in multiple rows to get thickness), or create a long strap woven over a cotton webbing. Typical crossbody length is 48–54″ for adults, adjustable with a slider. Use hardware D-rings to attach strap ends to the bag sides or sew ends directly into the side seam before lining.
F — Lining & closure
7. Cut lining fabric (canvas or cotton) to bag dimensions with ½″ seam allowance. Sew lining into a bag-shaped sack, install zipper at top or stitch magnetic snap to lining and bag top. Insert lining and hand-stitch to top edge from inside. Reinforce strap attachment by sewing the strap ends into the lining and bag seam.
G — Finishing
8. Weave in ends, block lightly to align the shell bands, and ensure the fringe hangs straight.
Variations & styling
- Add a front pocket (crochet pocket panel) for quick-access items.
- Replace fringe with pom-poms or macramé bands for a different boho aesthetic.
- Convert to a tote by shortening strap to top handles.
2. Crochet Sunflower Granny Square Crossbody Bag Pattern
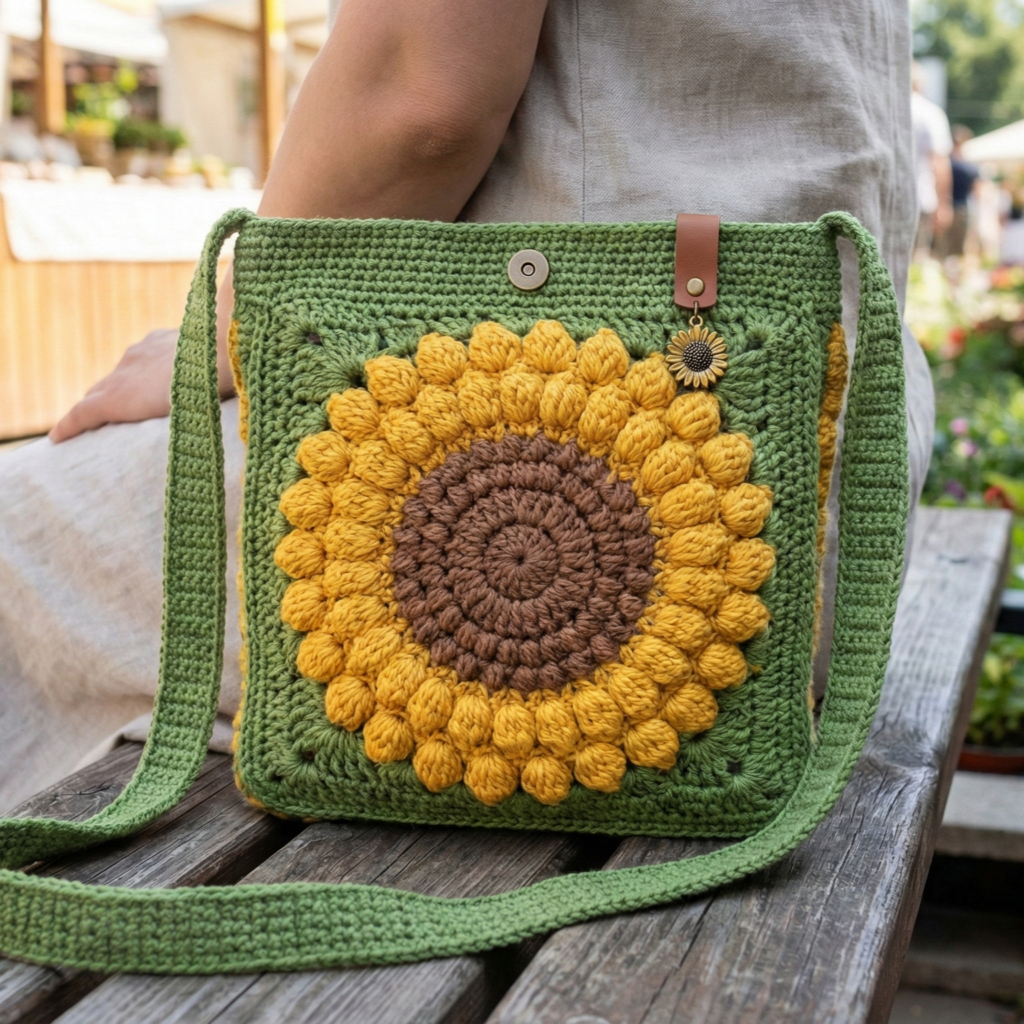
A bright, sunny crossbody built from granny squares — flattering for makers who love motifs and colorwork.
Skill level: confident beginner → intermediate
Finished size (sample): medium 10″ wide × 8″ tall (after joining & lining)
Yarn & tools: worsted or DK cotton in sunflower palette (brown, gold, green), 4.5–5.5 mm hook, 8–12 granny squares (depending on size), tapestry needle, barrette snap or zipper, lining supplies.
Stitches used
granny cluster (3 dc cluster), dc, sc, sl st, join-as-you-go or whip stitch.
Construction overview
Make multiple sunflower granny squares (centers brown, petals gold, outer round green) and join them into a rectangle that forms front and back, then work a base/band and optionally a gusset. Lining required for granny holes.
Step-by-step
A — Make the sunflower granny square (example: ~4.5–5″ square)
- Center (seed): with brown, MR, ch2, 12 dc in ring, join. (or MR, 12 dc)
- Petal round: change to gold; Round 2: ch3 (counts as dc), 2 dc in next st, ch2, skip next st around to create petal clusters; alternatively use a puff petal stitch for 3D petals.
- Outer granny rounds (green): join green, Round 3: 3 dc cluster in each ch2 space, ch1 around; Round 4: repeat to reach desired square size and blocking.
Make n squares: compute how many squares you need for your intended bag panel: if a square is 5″ and you want a bag ~10″ wide and 8″ tall, make 2 × 2 grid (4 squares for front) and 4 for back or make a single panel 2 across × 2 down total 4 squares per side. Example: 4 squares front + 4 squares back = 8 squares.
B — Joining squares
4. Block squares for uniformity. Join-as-you-go or whipstitch squares together into two panels (front/back). Use green or a contrasting join color for a visible seam detail if you like.
C — Bottom & gusset (optional)
5. For a boxed base, add a rectangular band in sc or hdc that you crochet along the bottom and sides of the joined panels to create depth. Compute the width of the gusset from desired depth (e.g., 2.5″) and stitch length accordingly.
D — Edge & strap
6. Add a firm top edge: sc in FLO around the top edge for a neat band and to create a place to attach lining. Attach strap by sewing webbing inside side seams or by making two short straps and connecting with D-rings for adjustability.
E — Lining & closure
7. Line heavily: granny holes require lining. Cut a cotton lining with boxed bottom (same shape as bag interior) and sew it into the bag. Install zipper or magnetic snap before stitching the lining closed to the bag top.
F — Finishing touches
8. Add a leather or faux-leather tab, tassel, or a tiny sunflower charm sewn to the front.
Variations & style notes
- Make mini sunflower squares for a dainty summer bag.
- Use neutrals for the outer granny and bright petals for a subtle floral accent.
3. Crochet Harry Potter–Inspired Crossbody Bag Pattern
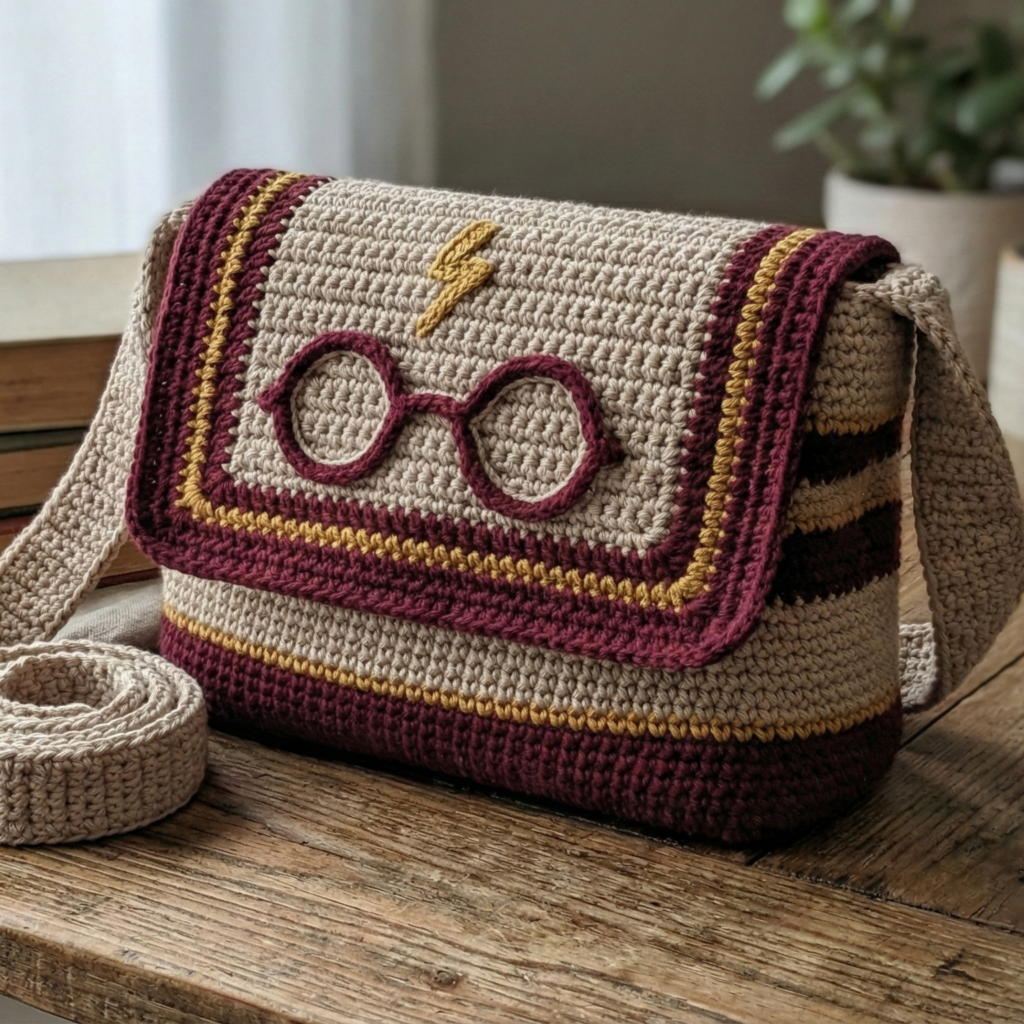
A fan-inspired crossbody with house-color accents and a bookish shape (avoid direct trademarked logos if selling — create a “wizarding book satchel” inspired look).
Skill level: intermediate (structured flap + lining + hardware)
Finished size (sample): 9″ wide × 7″ tall × 2.5″ deep (satchel shape)
Yarn & tools: DK cotton (neutral body + house-color accents), 4.0–4.5 mm hook, leather-look strap or adjustable webbing, antiqued brass studs/clip, magnetic snap, lining (canvas), tapestry needle.
Stitches used
sc, hdc, dc, bobble/puff, surface crochet for stripes/emblems.
Construction overview
Top-flap satchel: rectangular body with a separate flap, gusseted sides/bottom for depth, sturdy strap. The flap can be surface-crocheted with house stripes or stitched with an appliqué emblem (shield or lightning bolt motif).
Step-by-step
A — Make the main bag body
- Bottom: start with a rectangle that becomes the base. Example: ch 36 (4.5 spi × 9″ = 40.5 → round to 40 or 36 depending on repeat) and work in rows to create base depth of ~2.5″; fold and seam short ends to form a tube; or work flat panel and sew sides bottom closed.
- Body walls: pick up stitches around base and work in the round in sc or hdc for sturdy fabric until height ~5.5″. Consider an extra 2 rounds of dense stitches for top band.
B — Flap
3. Flap is worked as a separate piece: rectangle or rounded triangle. Example: ch 36, rows of sc until flap length ~6–7″, shape a rounded front by decreasing rows or follow a triangle pattern. Add house stripes via surface crochet: lay yarn across and use surface slip-stitch to create horizontal stripes in house colors.
C — Gusset & depth
4. When making a gusseted bag, create a long slender rectangle for the sides + bottom and join to main panel to create box shape. This is a common way to make a satchel without careful rounding math.
D — Strap & hardware
5. Use a sturdy strap (3/4″ webbing recommended) attached to bag with metal D-rings and rivets or sewn through a reinforced tab. Adjustable slider allows crossbody length 40–54″.
E — Lining & closure
6. Line with canvas and add internal pockets (zippered pocket for phone). Install magnetic snap centered under the flap for secure closure. For added charm, use brass studs or an enamel pin near the flap corner.
F — Surface emblems
7. Add an appliqué: a shield, lightning bolt, or book motif crocheted separately and sewn on. If you plan to sell, describe design as “wizarding-inspired” instead of using trademarked names.
Variations & tips
- Make one for each “house” with corresponding stripes and tassels.
- Use faux leather for strap and flap edge for a durable, vintage look.
4. Crochet Circle Crossbody Bag Pattern
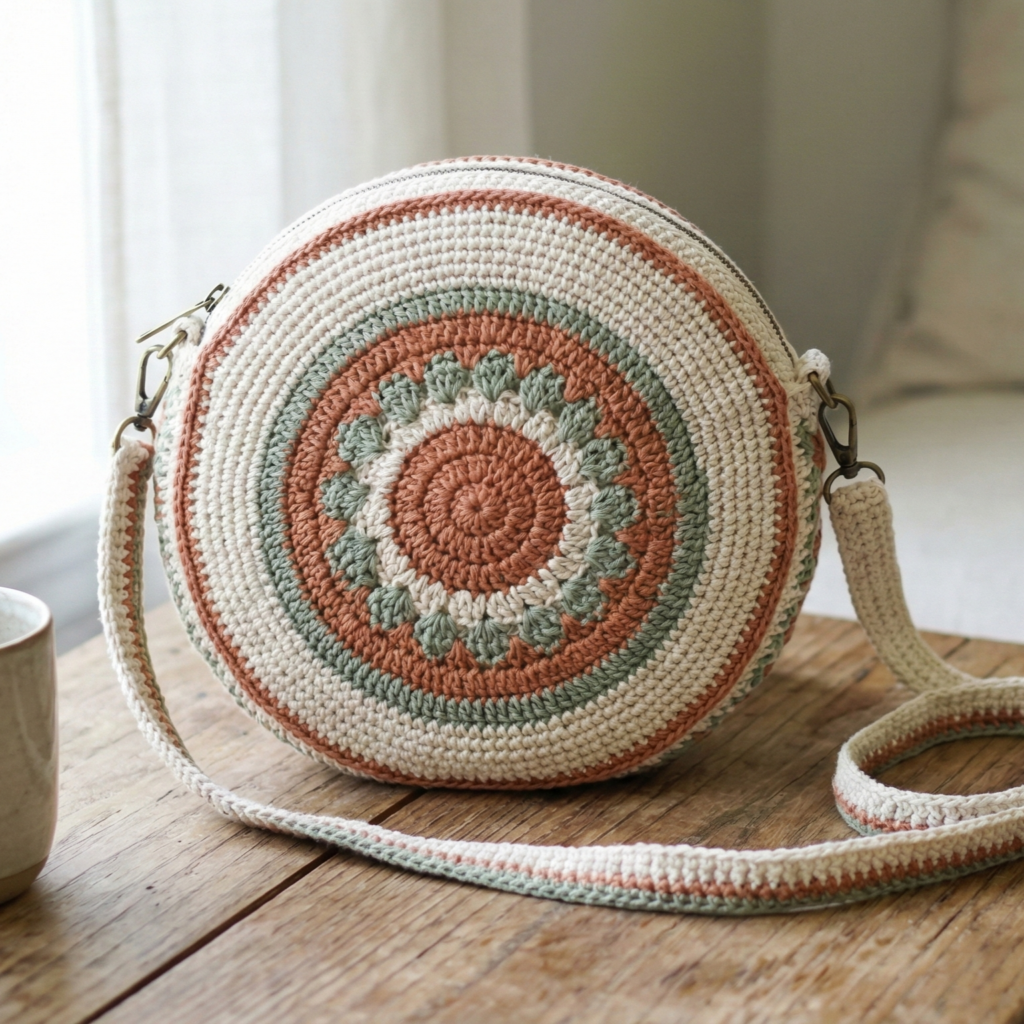
A sleek circular bag (coin-purse chic) with a long strap — modern and compact.
Skill level: confident beginner
Finished size (sample): 9″ diameter circle × 2.5″ depth
Yarn & tools: worsted or DK cotton for sturdiness, 5.0 mm hook for a tight but smooth circle, zipper closure, lining fabric, strap hardware optional.
Stitches used
sc, hdc, dc, continuous rounds for a round shape.
Construction overview
Work two matching circles (front/back) and a long rectangular strip for the side (the gusset). Join the strip to the edge of one circle, then attach the other circle to close the bag. Add zipper at top opening or use a curved zipper inserted into the seam.
Step-by-step
A — Make the rounds (front & back)
- MR, ch1, 6 sc in ring. (6)
- inc around → 12
- (sc1, inc) ×6 → 18
- (sc2, inc) ×6 → 24
- (sc3, inc) ×6 → 30
- Continue increasing evenly until circle reaches desired diameter (9″). Example: if you reach 30 stitches and your gauge is 10 sc = 2″, compute further. (Continue increases in same manner: add one more sc between increases each increase round.)
B — Make the side strip (gusset)
2. Chain to match circumference of the circle: compute circumference (digit-by-digit) — if diameter desired = 9 in, circumference ≈ π × d ≈ 3.1416 × 9 ≈ 28.2744 in → use 28.3 in. If gauge = 4 sc/in, then stitches needed = 4 × 28.3 = ?
- 4 × 28 = 112
- 4 × 0.3 = 1.2
- 112 + 1.2 = 113.2 → round to 113 or nearest repeat.
In practice, measure the circle edge and chain until the length equals circumference; you can also crochet a strip and seam up to test fit.
- Work the strip in sc for several rounds to desired depth (2.5–3″). Block and adjust.
C — Join & zipper
4. Pin the strip evenly around one circle and sc (or whipstitch) to attach; then add zipper along top or insert one into the top seam before fully closing with the second circle.
D — Strap & finishing
5. Add a long strap (crocheted rope, i-cord, or webbing) attached to two D-rings sewn to sides of gusset. Add lining and internal slip pocket if you like.
Variations & options
- Make mini versions for coin purses or larger versions for statement bags.
- Embroider the front circle with motifs (mandala, words) or color-block concentric rounds.
5. Crochet Heart Crossbody Bag with a Big Bow Pattern
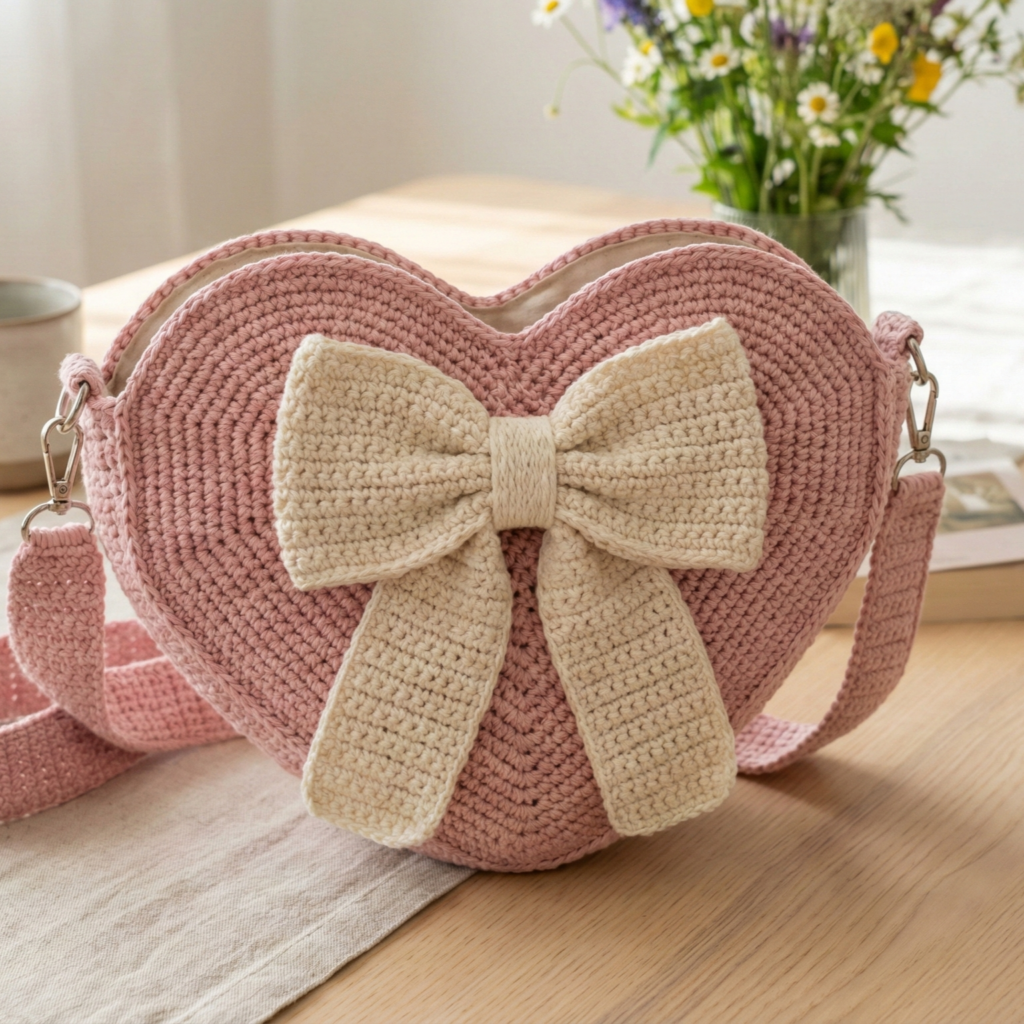
A sweet, statement crossbody shaped like a heart with a big bow — playful and feminine.
Skill level: intermediate (shaping + seam + embellishment)
Finished size (sample): heart height 10″ × width 11″; depth 2.5″
Yarn & tools: DK or worsted cotton (contrast for bow), 4.5–5.5 mm hook, felt backing, lining, strap hardware, magnetic or zipper closure.
Stitches used
sc, hdc, dc, shaping via increases/decreases, back post or front post for decorative ridges.
Construction overview
Make two identical heart-shaped panels (worked flat in rows or joined rounds with shaping), join them with a side gusset for depth, add big bow decoration and a sturdy strap.
Step-by-step
A — Heart panel (worked flat)
- Use a standard crochet heart chart or follow this shaping approach: start with two circles then join them and taper into a point.
Circle/top lobes (worked separately then joined)
- Make two small discs for the top lobes: MR, 8 sc; inc round to reach about 3″ across for each lobe. Block.
Lower V/point
- Chain a chain that becomes the center bridge between lobes: ch (stitches to bridge), then work decreases along rows to form the point:
- Example: ch 20; Row1: sc across; Row2: sc across; Row3: dec at each end to start tapering; continue decreasing until you reach a slender tail; sew bottom tip to the lobes to shape the heart.
Alternative: Use a heart chart pattern (many hearts are made by working sc rounds that create the top two lobes and then tapered rows down to a point).
- Make two panels same way.
B — Gusset (side strip for depth)
3. Chain a length equal to heart perimeter (measure curved edge) and work sc rows to desired depth (2–2.5″). Joining a strip to a heart shape requires even spacing and plenty of pins — use stitch markers to mark quarters and join evenly.
C — Big bow
4. Make a big rectangular strip for the bow body (e.g., 10″ × 6″). Fold and cinch center tightly with a wrapped band. Attach bow to front with strong stitches and also sew through the felt backing that secures the strap base.
D — Strap & hardware
5. For a statement bag, make a wide strap (1.5–2″) as a fabric-lined crocheted panel or use leather strap. Attach with D-rings sewn through reinforced tabs.
E — Lining & pocket
6. Line with cotton or canvas; add internal slip pocket and reinforce bow base with interfacing to prevent sagging.
F — Edge finish
7. Work a round of sc around the heart edge for tidy finish; for extra charm add small picot rounds or little scallops.
Variations
- Make smaller heart as a child’s crossbody and use snap closure; big bow optional.
- Convert bow to a removable clip so the bag can be everyday neutral when desired.
Final finishing & practical tips (applies to all patterns)
- Reinforce stress points: stitch the strap ends into the bag body and into the lining. For heavy loads, add a small leather patch or double-stitching inside the lining at strap anchors.
- Use interfacing for structure: fuse interfacing to the lining (or sew in lightweight canvas) for structured bags; for soft slouch use lighter interfacing.
- Adding pockets: sew a zip pocket into lining for valuables; add an exterior zip pocket for quick access.
- Zipper insertion: sew a zipper to the lining first, then stitch the lining to bag top; this hides raw zipper fabric inside.
- Care: Cotton bags: machine-wash gentle or hand-wash, reshape and dry flat. T-shirt yarn: hand wash and dry flat to avoid stretching. Remove hardware before washing if possible.
conclusion
These five practical crossbody bag patterns — Street Fair Boho, Sunflower Granny Square, Wizarding-Inspired Satchel, Circle Crossbody, and Heart with Big Bow — give you a full toolkit of bag styles: slouchy boho, motif-loving granny, structured satchel, modern circle, and playful heart statement. Each pattern includes structural guidance for bases and gussets, lining and hardware tips, and variations for market-ready customization.