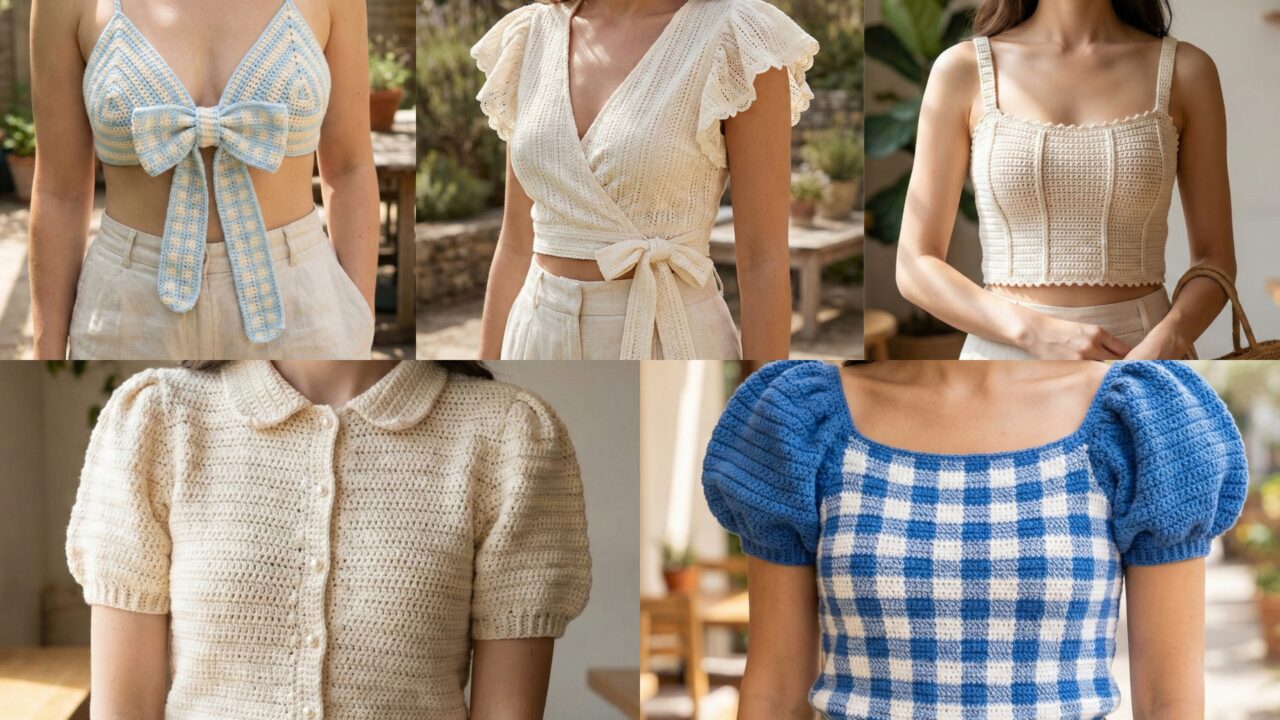
Light, handmade crochet tops are the perfect way to show off stitchwork and add personality to warm-weather outfits. Below you’ll find a friendly, practical introduction (materials, measuring, gauge math, and fit notes) followed by five complete top patterns: Amybeth Gingham Top, Charlotte Corset Top, Mari Bow Tie Top, Ruffle Sleeve Wrap Crop Top, and Collared Puffy Sleeves Buttoned Cardigan Top. Each pattern includes materials, suggested gauge, construction overview, step-by-step instructions, fitting notes, finishing tips and variations — everything you (and your readers) need to make a great-fitting top.
Quick primer — yarn, tools, measuring and gauge math
Yarn & hook choices
- Cotton / cotton-blend (DK or sport): best for summer — breathable with nice stitch definition.
- Linen / bamboo blends: excellent drape and lightweight feel; a slightly smaller hook makes fabric tidier.
- Acrylic blends: easy care and wide color range, but can be warm.
- Typical hooks: 3.5–4.5 mm for DK; 3.0–3.75 mm for sport/light fingering.
Notions
- Stitch markers, tapestry needle, measuring tape, row counter, optional elastic or narrow fabric for waist facing, small buttons for the cardigan top, thin boning or cord for corset shaping if desired.
Measuring & fit basics
Take these measurements:
- Bust (fullest point)
- High bust (under arms)
- Underbust (for corset fit)
- Waist (for cropped/waistband styles)
- Shoulder width and upper arm circumference (for sleeve fit)
Decide ease: - Fitted: −0.5″ to 0″ negative ease (i.e., garment a little smaller than body) — for structured corsets.
- Close/comfortable: +0.5″–2″ ease.
- Relaxed: +3″–6″ ease.
Gauge & exact stitch math (example)
Always make a 4″ (10 cm) blocked swatch in the stitch pattern you’ll use. Measure stitches per inch (spi) and rows per inch (rpi).
Example (digit-by-digit): swatch = 5 sc = 1 in and you want a finished bust width of 36 in.
- stitches per inch = 5
- needed stitches = 5 × 36
- 5 × 30 = 150
- 5 × 6 = 30
- 150 + 30 = 180 stitches
Round that number to match any stitch-pattern repeat requirement (e.g., multiple of 6). If your stitch repeat is 6, 180 ÷ 6 = 30 repeats — perfect.
1. Crochet Amybeth Gingham Top Pattern
A breezy gingham-style tank with a slightly cropped, boxy fit — great layered over tanks or worn alone.
Skill level: confident beginner
Suggested yarn: DK cotton or cotton-blend, 400–700 yd depending on size & length
Hook: 4.0 mm
Finished example: bust 36″, length 18″ (from shoulder)
Construction overview
Worked flat as a simple panel (back and two front halves or one full panel folded) using a checker/striped “gingham” color change. Minimal shaping: straps formed by leaving openings when seaming.
Materials & gauge
- Gauge (example in pattern): 18 sc × 24 rows = 4″ in the stitch used. Adapt measurements from your swatch.
Step-by-step
- Swatch & compute width
- If gauge = 18 sc = 4″, stitches per inch = 18 ÷ 4 = 4.5 sc/in. For 36″ bust: 4.5 × 36 = ?
- 4.5 × 30 = 135
- 4.5 × 6 = 27
- 135 + 27 = 162 stitches total across bust. If you’re making two front panels + back, divide accordingly (e.g., back 72, each front 45). Round to fit pattern repeat.
- If gauge = 18 sc = 4″, stitches per inch = 18 ÷ 4 = 4.5 sc/in. For 36″ bust: 4.5 × 36 = ?
- Work the panel(s)
- Chain foundation to your calculated stitch number (e.g., 162). Row 1: sc across. Row 2+: follow a simple gingham scheme: work sc background color for X rows, then switch to contrast for X rows, alternating in both directions to create blocks. Typical gingham block = 4 rows × 4 sc; adjust block size to your gauge/visual preference.
- Divide for armholes/neck
- When piece reaches your desired length from hem to underarm (e.g., 16″), mark center and divide for front neckline and straps if you’re working a single front panel: row-by-row short row the center out or seam to leave strap openings. Simpler: make two front panels (left & right) and a back panel that are seamed leaving armholes.
- Seam & finish
- Block pieces flat. Seam shoulders and sides using mattress stitch leaving armholes. Add a round of sc or a single picot edge around armholes and neckline for stability and cleaner finish. Weave ends.
- Strap options
- Use narrow straps: pick up stitches at shoulder and sc 6–8 rows to create strap width, or make i-cord straps and sew them on.
Fit & variation notes
- Make longer to full waist or shorter as a cropped piece.
- Use two shades of the same color for a tonal gingham look.
- Add tiny shell hem for a feminine finish.
2. Crochet Charlotte Corset Top Pattern
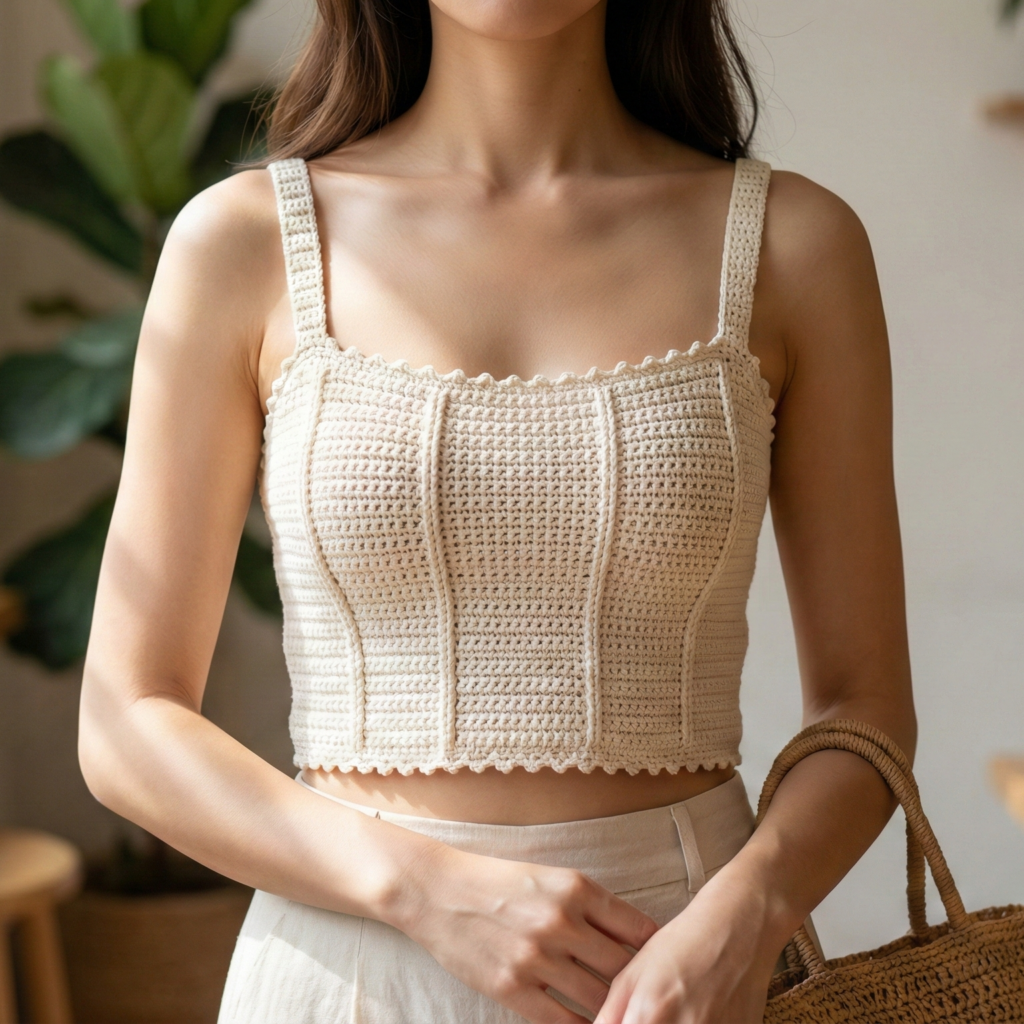
A structured, form-fitting corset-style top with vertical shaping — wear it over a tee or alone for a festival look.
Skill level: intermediate (shaping + optional lacing)
Suggested yarn: DK cotton with a touch of nylon for some give, 400–700 yd
Hook: 3.5–4.0 mm
Finished example: underbust 32″, overbust 36″, length 12–14″ from underbust to top edge
Construction overview
Worked in panels (front & back) with vertical waist and bust shaping through increases/decreases and optional boning channels or internal casing for modesty and structure. Optional eyelets for lacing at center back.
Materials & gauge
- Gauge (example): 18 hdc = 4″ (measure in your stitch pattern).
Step-by-step
- Measure & plan
- Measure underbust and bust. Decide where the top should sit: underbust + vertical height. For fitted look use −0.5″ to 0″ ease at underbust, and +0–1″ at bust depending on desired comfort.
- Calculate panel width
- Using gauge (e.g., 18 hdc = 4″ → 4.5 hdc/in). Example underbust = 32″: 4.5 × 32 = ?
- 4.5 × 30 = 135
- 4.5 × 2 = 9
- 135 + 9 = 144 stitches around underbust. Divide into panels: front panel ~40% (58 stitches), each side panel 30% etc., or make two identical halves (72 sts each).
- Using gauge (e.g., 18 hdc = 4″ → 4.5 hdc/in). Example underbust = 32″: 4.5 × 32 = ?
- Work bottom band
- Start with a firm band: foundation hdc in the round or flat for the underbust band, 1–2″ tall. Use BLO hdc for ribbiness if you want foldable casing.
- Bust shaping (panel method)
- For each front panel, work increases where needed for bust: add short increase rows (inc 1 st at each side of bust curve as you work upward) to obtain desired cup/flare. Use shaping math: spread total increases across several rows to curve smoothly.
- Top edge & closures
- For corset closure, add a reinforced center back panel with eyelets: fold a 1″ strip and topstitch; create eyelets by ch2 gap + sc spaced evenly. Alternatively, add small metal grommets. For easier wear, use side zipper inserted into a fabric-backed seam.
- Internal finishing & support
- For more structure add vertical channels: stitch narrow rows inside the top and slip in plastic boning or very thin cord. Or create a sewn fabric lining for stability.
- Edging & straps
- Add a neat sc or small picot edge at top. Straps: make narrow straps by crocheting I-cords or bands and attach to top front and back.
Fit tips
- Because corset tops are fitted, encourage trying on during construction: hold the band in place and check fit; take in seams if needed.
- If selling, add care instructions: “reshaping recommended after wash.”
3. Crochet Mari Bow Tie Top Pattern
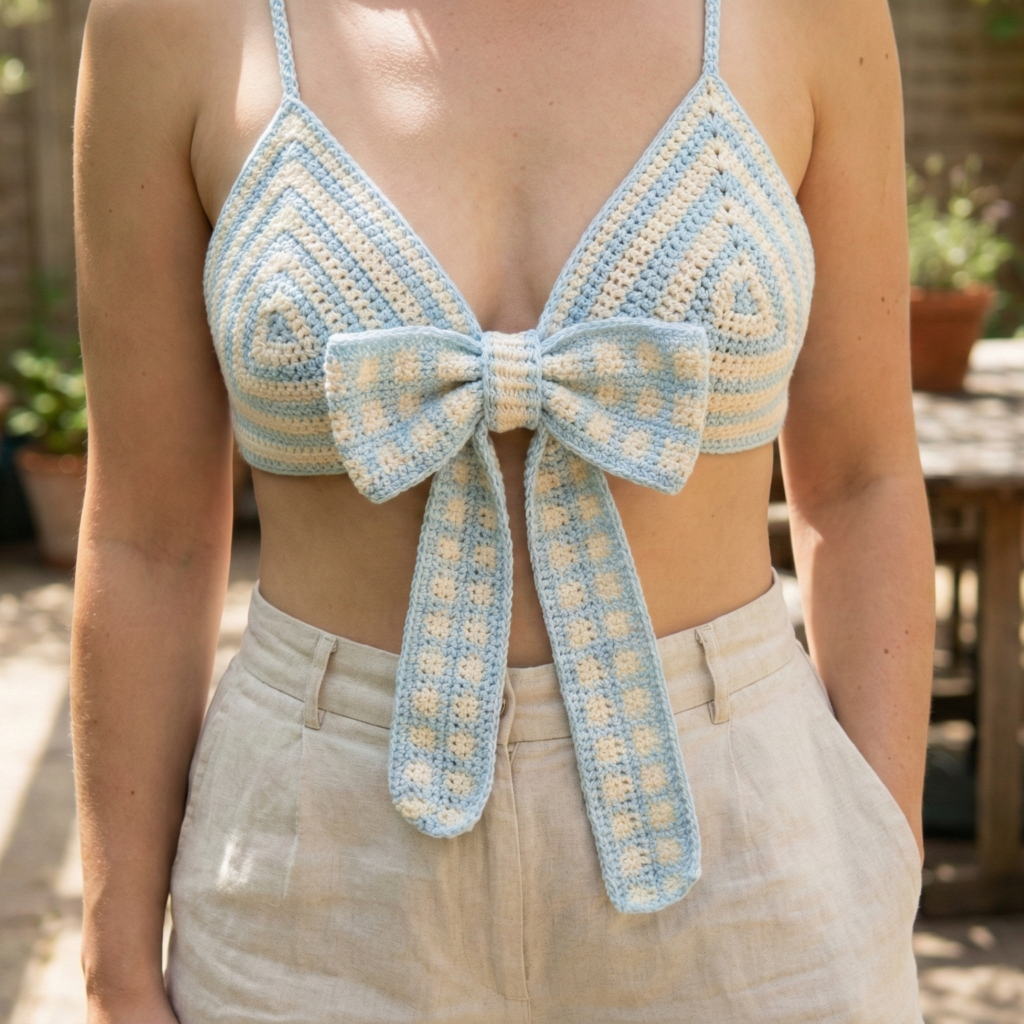
A playful tie-front top with a pretty bow — light and adjustable, great for warm days and easy fitting.
Skill level: confident beginner
Suggested yarn: sport/DK cotton, 300–600 yd
Hook: 3.5–4.0 mm
Finished example: underbust band fits 28–36″ thanks to tie adjustability; length adjustable
Construction overview
A fitted underbust band with two triangular cups worked from bottom up that tie in front with long bow tails.
Materials & gauge
- Example gauge: 18 sc = 4″ (use your swatch).
Step-by-step
- Underbust band
- Make a firm underbust band: foundation chain to fit underbust with desired ease. Work 6–8 rounds of hdc in the round or flat to make a 1.5–2″ wide band. Add a loop or seam for button if desired.
- Cups (make 2)
- For each cup, pick up stitches along the underbust band where you want the cup to sit or start separately and seam later. Cup pattern (example): ch20; R1: sc in 2nd ch and across (19); R2: ch1, sc across; R3: sc2tog, sc to shape decrease at top OR work triangle increases from a small MR if you prefer top-down cup.
- Better (triangle cup): MR; change color if wanted; R1: ch2, 6 dc in MR → 6 dc; R2: inc in each dc around → 12 dc; then increase rows with ch2 turning to shape triangle: dc in each st across, ch2, turn and at edges do increases (inc at start + end) until cup reaches desired size. Stop and fasten off, leaving long tail for seaming.
- Bow tails / ties
- From the sides of each cup, pick up and crochet long narrow ties: ch enough length for bow tails (e.g., 50–70 ch), then sc back across to create width, or crochet an I-cord using sc in back loop to make neat cord. Attach ends to cups; when worn, tie them across front into a bow.
- Assembly
- Place cups onto underbust band and sew in place evenly. Reinforce stitching where ties attach. Add a few rounds of sc along cup edges for a tidy finish.
- Fit & adjust
- Because ties are adjustable, this top fits many sizes; encourage the wearer to knot snug but comfortable. Add a small snap between cups for modesty if needed.
Styling
- Make it in gingham yarn or stripes for a cute picnic look; add ruffle edging for whimsy.
4. Crochet Ruffle Sleeve Wrap Crop Top Pattern
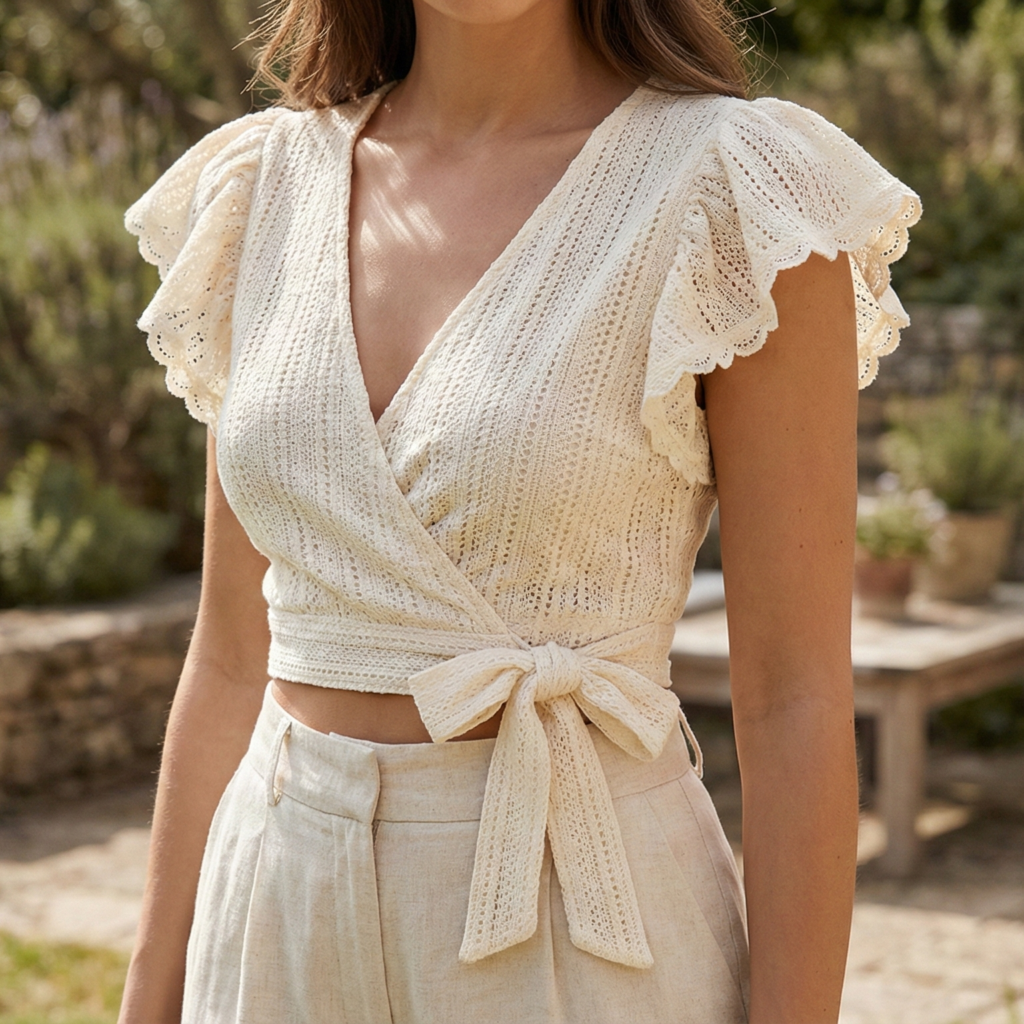
A feminine wrap crop top with short ruffle sleeves and a tie-wrap front — flattering and romantic.
Skill level: intermediate
Suggested yarn: DK cotton, 350–650 yd depending on size & ruffle fullness
Hook: 3.5–4.0 mm
Finished example: crop length ~14–16″ from shoulder; wrap fit for bust 32–40″ (adjust with tie length)
Construction overview
Top is made of a back panel and two overlapping front panels that wrap and tie. Short ruffle sleeves are worked as small cap sleeves with a scalloped edge.
Materials & gauge
- Example gauge: 16 dc = 4″ in the pattern used.
Step-by-step
- Back panel
- Chain to the back width: if full bust = 36″ with 3″ ease, total chest = 39″; back panel is about half minus center front wrap overlap: compute practical back width (e.g., 18–20″). Use your swatch for stitch count. Work in chosen stitch (dc rows or V-stitch) until panel reaches desired back length from shoulder to hem.
- Front panels (make 2, mirror)
- Make two rectangular panels equal in height to the back. Width should be enough to wrap across the front and tie: e.g., front width each = 10–12″ for cropped wrap, or more for more overlap. Work same stitch as back.
- Sleeve shaping
- For short ruffle sleeves, pick up stitches at armhole area (or seaming option: attach separate small cap sleeve panels). Add 6–8 rounds of sc or dc to form a little short sleeve, then work 2–4 rounds of shell scallop for ruffle edge: sc, skip1, 5 dc in next, skip1, sc around.
- Tie bands
- Pick up stitches along front edges and crocheted ties to desired length: either a wide band (3–4″) to tie at waist or two long narrow cords. For a neat look, make a long I-cord tie: ch desired length and sc back onto chain for stability.
- Assemble & finish
- Seam shoulders and sides, insert sleeves as needed. Work a neat edging along wrap fronts (sc rounds). Attach ties securely at side seams.
- Fit & finishing
- Try on while seaming: ensure wrap crosses neatly and tie length is comfortable. Add small button or snap inside for stability if wearer wants less exposing wrap.
Variation
- Add lettuce edge for a flirty finish — work hdc in FLO for short row ripple then sc picot edge.
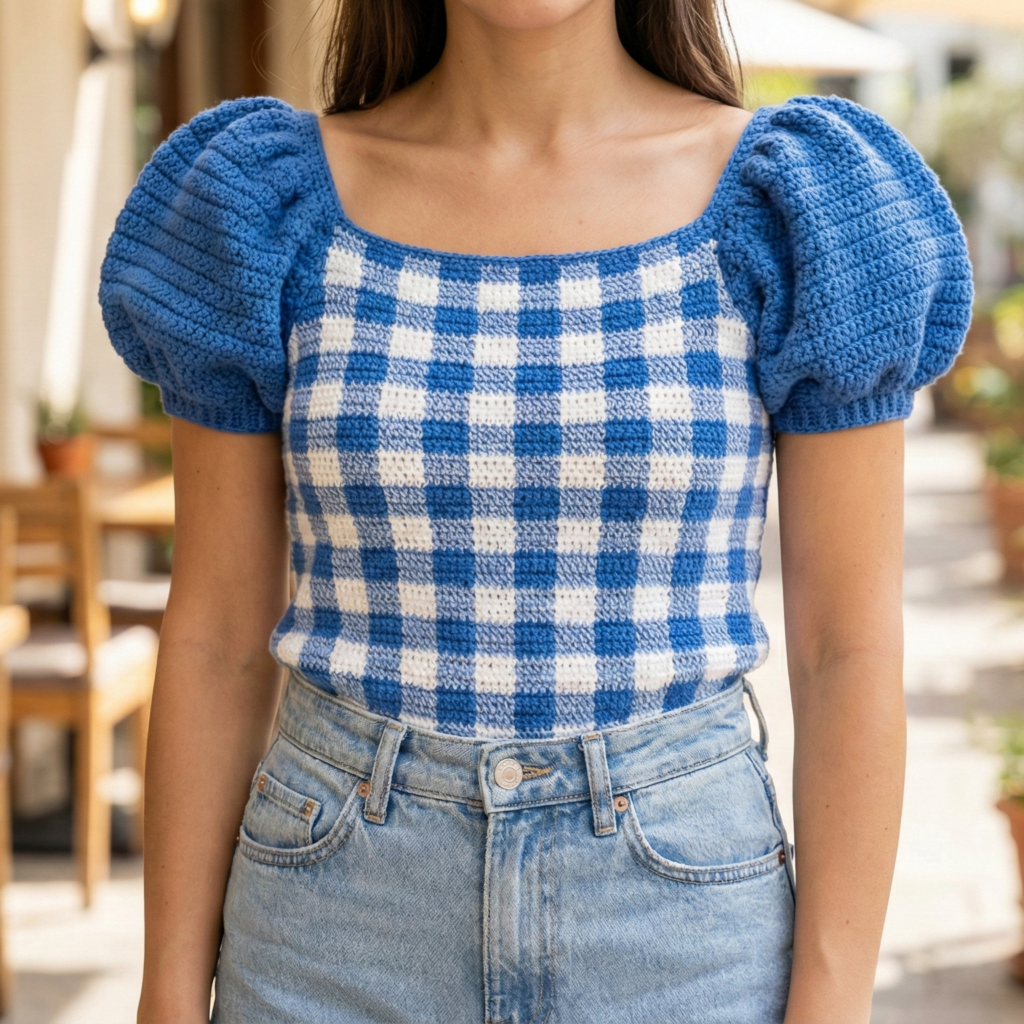
5. Crochet Collared Puffy Sleeves Buttoned Cardigan Top Pattern
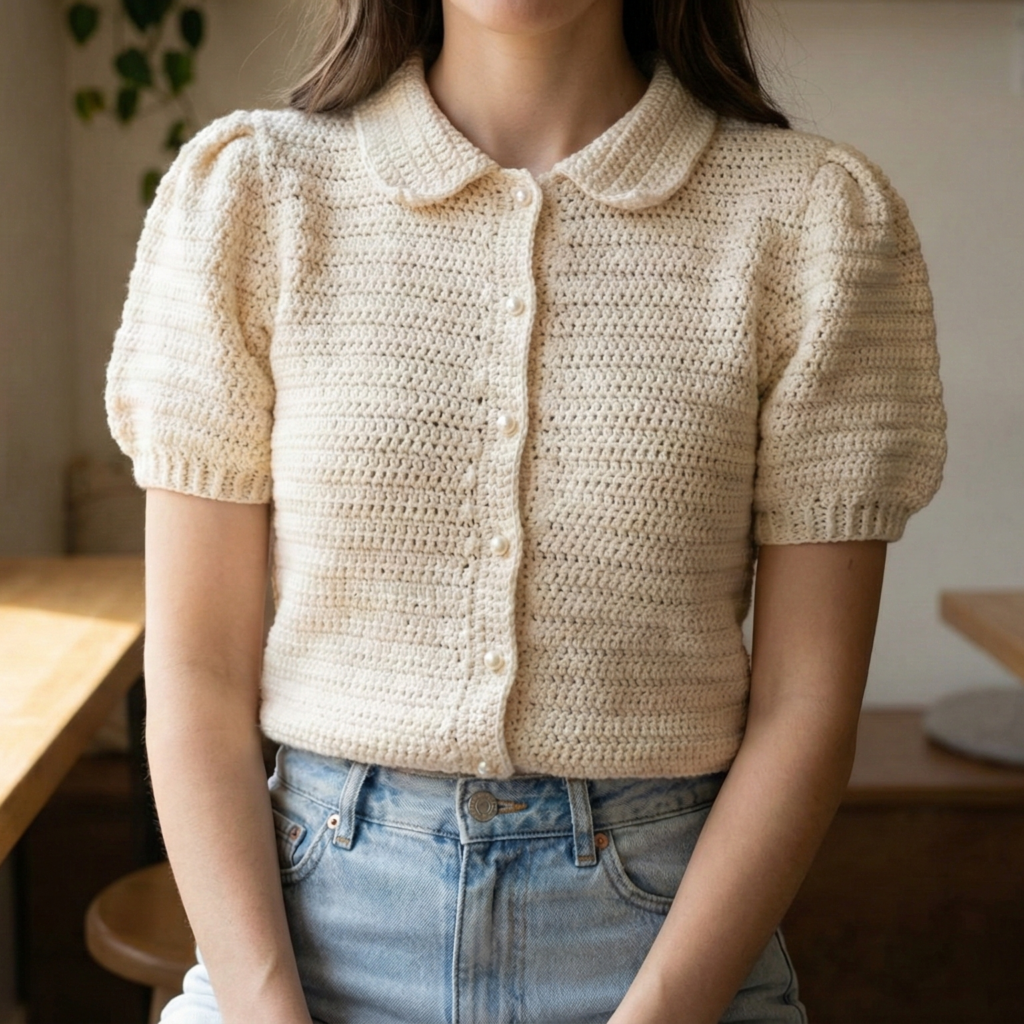
A charming collared cardigan-style top with puff sleeves and button closure — looks like a buttoned top and a cardigan in one.
Skill level: intermediate → advanced (sleeve shaping, button band sewing)
Suggested yarn: DK cotton or cotton-blend (for stable stitch & comfort), 700–1200 yd depending on length & size
Hook: 3.5–4.5 mm
Finished example: hip length cardigan top; tailored to bust measurement
Construction overview
Made from back panel, two front panels, and two sleeves. Puff sleeve is created by adding extra stitches at the sleeve cap and then gathering (or using puff stitch rows). A small collar and button band finish the top.
Materials & gauge
- Example gauge: 18 sc = 4″.
Step-by-step
- Back & front panels
- Work a back panel to desired length. Front panels are worked to mirror back but include buttonband area (pick up an extra ½–1″ width for the button band). Use the same stitch pattern to match texture.
- Shoulder shaping & sleeves
- For puffy sleeves: pick up stitches along the armhole and work the sleeve cap wider than the sleeve opening (e.g., pick up 1.5× the stitches). Work several rounds of puff stitch or increase rows across the cap to create volume: for instance, make a short body of shells or bobbles across the upper sleeve to create puff. Then decrease to a fitted cuff by working rounds with gradual decreases until cuff circumference equals upper arm measurement + ease.
- Example puff cap technique: pick up stitches equal to armhole width × gauge. Add 2–4 increase rounds across the top (distribute increases evenly) to create fullness. Then work down evenly to cuff.
- Collar & button band
- Add a narrow shirt-style collar: pick up along neck edge and work short rows of sc or hdc to form collar band. Add a small fold and seam to create a classic collar stand if desired.
- Button band: pick up stitches along front edge and work 6–10 rounds of sc to form a firm band. Mark button positions evenly and create buttonholes by making a ch2 gap every X stitches on the opposite band or use sewn eyelets.
- Assembly
- Seam shoulders with mattress stitch for a flat join. Set sleeves into open armholes and seam side seams.
- Cuff & finishing
- For fitted cuffs, work in BLO hdc ribbing or short rows until cuff measures desired length (2–3″). Sew buttons on and check match with buttonholes.
- Blocking & final shaping
- Block entire cardigan gently to even stitches and shape puff sleeves with soft steaming (avoid high heat for blends). Add light interfacing behind button band if you expect heavy use.
Styling & options
- Make a cropped cardigan top length and match to a high-waist bottom.
- For vintage vibes choose pearl buttons and a scalloped collar edge.
Final finishing tips (applies to all tops)
- Try on as you go: especially with fitted pieces (corset, cardigan). It’s much easier to adjust while you’re still crocheting than after seaming.
- Even edges: add one round of sc around hems, armholes, and necks for a tidy, stable finish that resists stretching.
- Seams: mattress stitch or whipstitch with mattress-style tension gives the cleanest joins.
- Blocking: essential for lace or textured patterns — block to measurements to open stitch patterns and relax the fabric. For linen or bamboo, wet block and let dry flat.
- Care: cotton/linen: machine wash gentle or hand wash; reshape and dry flat. Add care instructions in your pattern or tag.
conclusion
These five patterns give you a range of summer tops — from the playful Amybeth Gingham Top and flirty Mari Bow Tie Top, to the more structured Charlotte Corset Top, breezy Ruffle Sleeve Wrap Crop Top, and elegant Collared Puffy Sleeves Buttoned Cardigan Top. Each pattern is designed to be adaptable: change the length, add or remove ease, use different yarn/fiber to get the drape or structure you want, and always swatch and measure.