A crochet scarf is one of those projects that never goes out of style. It is practical, cozy, and endlessly customizable, which makes it one of the most satisfying things to make by hand. A scarf can be simple and elegant, colorful and playful, textured and warm, or soft and understated depending on the yarn and stitch pattern you choose. That is part of what makes scarf-making so enjoyable: even a straightforward shape can turn into something unique and beautiful with just a few thoughtful details.
What also makes crochet scarves especially appealing is how useful they are. They are perfect for winter wear, thoughtful handmade gifts, market items, and stash-busting projects. Because scarves are long and flexible, they give you room to explore stitch textures, striping, fringe, and color combinations without needing a complicated shape or fit. That makes them ideal for beginners who want a project that feels rewarding, but also for experienced crocheters who want a relaxing make with a polished result.
In this post, you will find five must-try crochet scarf patterns with detailed step-by-step guidance, helpful quick notes, and practical finishing tips. Each design is written to be clear and easy to follow while still giving you enough detail to create a scarf that looks polished and feels cozy. If you are looking for a winter project that is both functional and beautiful, these scarf ideas are a wonderful place to start.
Quick Notes
Project type: Crochet scarves
Best for: Winter wear, gifts, craft fairs, layering, and stash-busting
Skill level: Beginner to intermediate, depending on stitch detail
Hook size: Usually 4.0 mm to 6.0 mm, depending on yarn weight and drape
Yarn weight: DK, worsted, or light bulky yarn
Best yarn choice: Wool blends, acrylic blends, cotton blends, or soft yarns with good warmth and drape
Finished size: Usually 50 to 70 inches long, but can be customized
Time to complete: Several hours to several days depending on length and stitch pattern
Helpful stitches: Chain, slip stitch, single crochet, half double crochet, double crochet, V-stitch, moss stitch, block stitch, increase, decrease, fringe making, color changes
Common Materials
Most crochet scarf patterns use a similar set of supplies.
- Yarn in your chosen colors
- Crochet hook matched to the yarn
- Yarn needle
- Scissors
- Measuring tape
- Optional fringe or tassels
- Optional blocking tools
- Optional stitch markers
For scarves, yarn choice matters because the finished piece needs to be warm, comfortable, and pleasant against the skin. Soft yarn with a little drape often works best because it lets the scarf hang nicely without feeling stiff. If you want a very cozy winter scarf, a wool blend or warm acrylic blend is often a great choice.
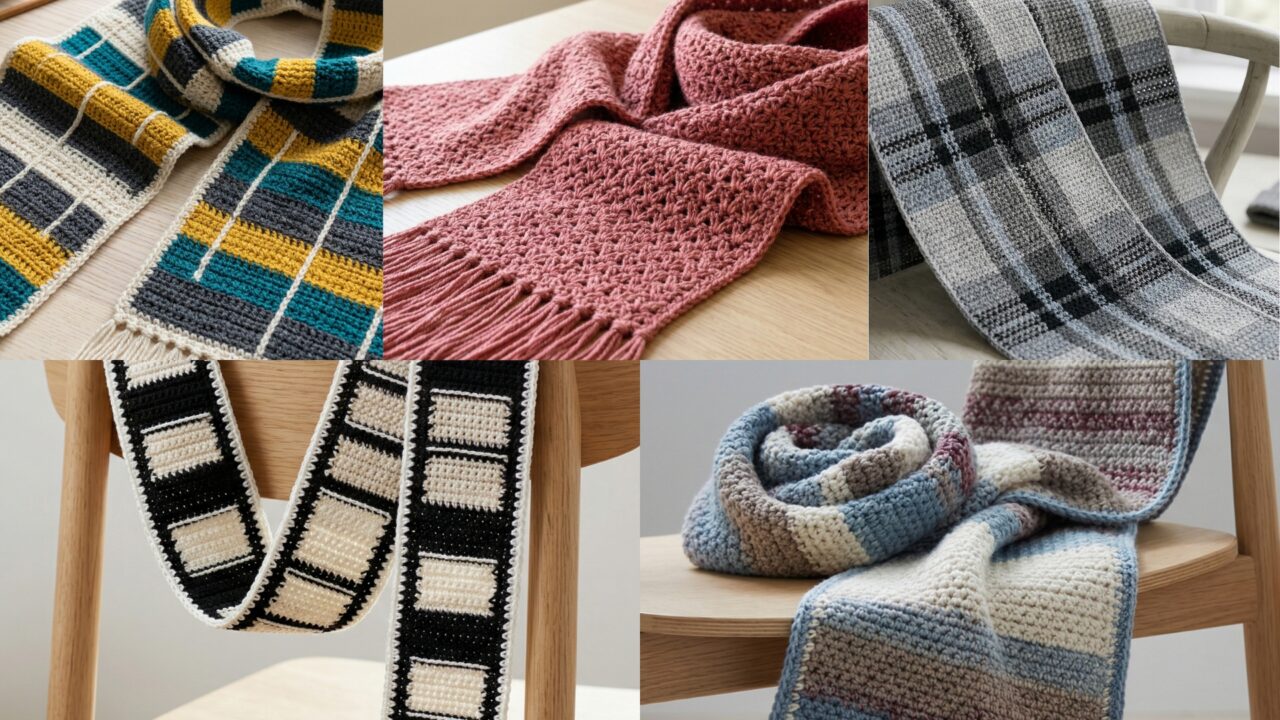
1. Crochet Moss Stitch Scarf Pattern
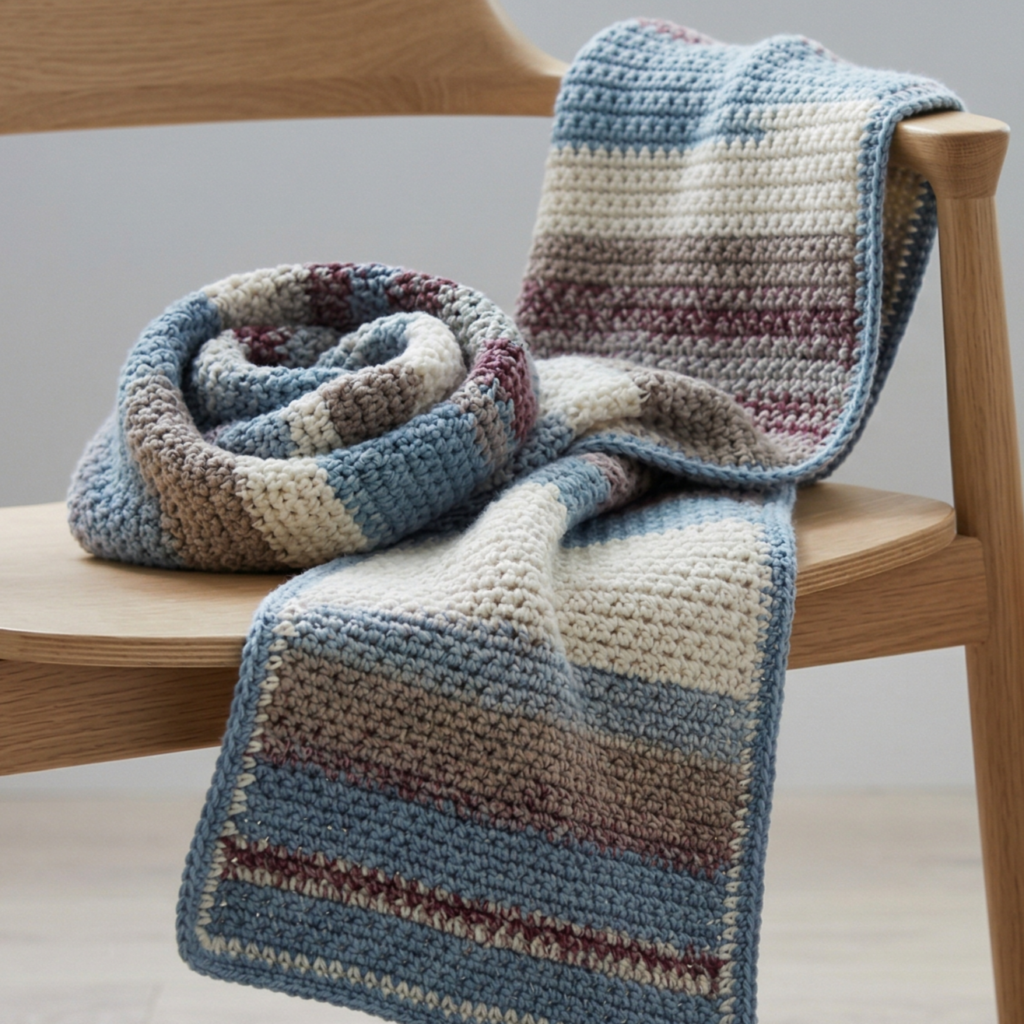
A moss stitch scarf is one of the easiest ways to create a scarf that looks beautiful without requiring complicated stitches. Moss stitch has a lovely textured, woven appearance that feels modern and cozy at the same time. It is especially great for beginners because the repeat is simple and relaxing once you get into the rhythm.
Quick Notes
Skill level: Beginner
Finished size: Long rectangular scarf, customizable width and length
Style: Textured, clean, modern, cozy
Best colors: Neutral tones, earth tones, muted blues, burgundy, charcoal, cream
Materials
- DK or worsted yarn
- Crochet hook suited to yarn
- Yarn needle
- Scissors
- Measuring tape
Step-by-Step Guide
Step 1: Choose the scarf width and length
Before starting, decide how wide and long you want the scarf to be. A narrower scarf feels light and easy to style, while a wider scarf feels more dramatic and cozy. A good everyday scarf often has a width that allows it to wrap comfortably around the neck without feeling too bulky.
Planning the size early helps you estimate yarn usage.
Step 2: Chain the foundation
Start with a chain that matches the width you want. Since moss stitch creates a denser and slightly textured fabric, make sure the chain is not too tight. A relaxed foundation helps the scarf lie flat and feel softer around the neck.
A flexible foundation makes the first row easier.
Step 3: Work the first moss stitch row
The moss stitch is usually made with a chain-one, skip-one repeat. Begin your first row carefully, making sure the stitch pattern stays even from the start. This simple structure creates the signature woven texture that makes moss stitch so attractive.
The first row sets the rhythm for the whole scarf.
Step 4: Continue the moss stitch repeat
Keep repeating the moss stitch row by row. The texture should appear compact and even, creating a fabric that feels both simple and elegant. As you work, watch the edges so they stay straight and balanced.
The repeating pattern is what gives the scarf its polished look.
Step 5: Add color changes if desired
Moss stitch scarves look lovely in a single color, but they also work beautifully with stripes or subtle color blocking. If you want to add color changes, switch yarn at the end of a row or at a consistent point in the pattern so the scarf looks neat.
Color changes can give the scarf a more personal style.
Step 6: Continue until the scarf is long enough
Work the rows until the scarf reaches the length you want. A longer scarf can be wrapped multiple times for warmth, while a shorter one may feel more lightweight and casual. Check the length every so often so you do not end up too short or too long.
Step 7: Finish the edges
A moss stitch scarf often looks best with a simple clean finish. If the edges feel slightly uneven, add a narrow border of single crochet or slip stitch. This can help frame the texture and make the scarf feel more finished.
Helpful Tips
Moss stitch scarves are very versatile and look beautiful in almost any color palette. If you want a quiet everyday accessory, choose soft neutrals. If you want a more modern look, try muted contrast colors or simple stripes. This is a great scarf for gifting because it feels polished even though it is easy to make.
2. Crochet Film Roll Scarf Pattern
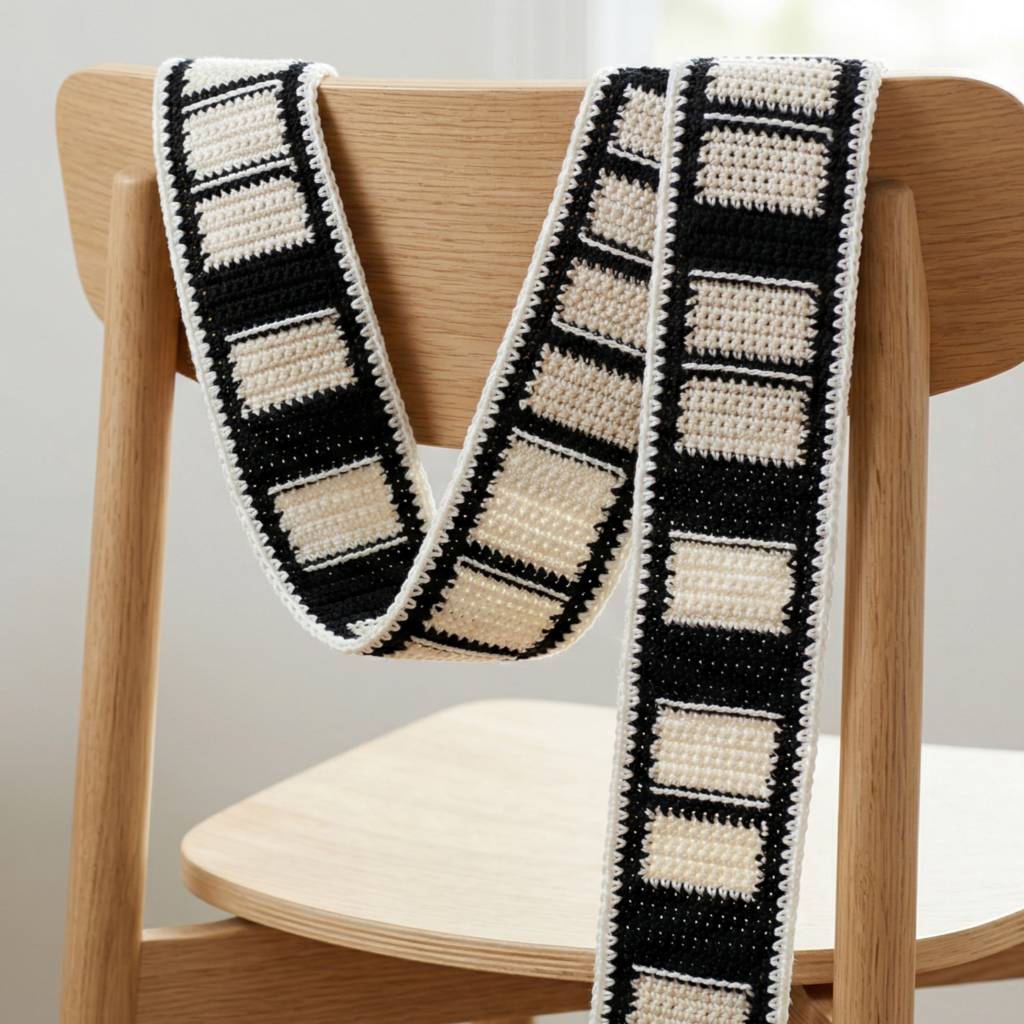
A film roll scarf has a playful, artistic feel that makes it stand out from more traditional scarf patterns. The name often suggests a design with repeated sections, striping, or textured blocks that feel like small frames or panels. This scarf is a great option if you want something creative and visually interesting for winter wear.
Quick Notes
Skill level: Beginner to intermediate
Finished size: Long scarf with repeated visual sections
Style: Artistic, modern, playful, graphic
Best colors: Black and white, muted rainbow, film-inspired neutrals, deep jewel tones
Materials
- Yarn in two or more colors
- Crochet hook suited to your yarn
- Yarn needle
- Scissors
- Measuring tape
Step-by-Step Guide
Step 1: Decide on the film roll effect
Before starting, decide how you want the scarf to look. You may want bold rectangular sections, alternating stripes, or repeated textured blocks that suggest a film strip. A planned design will help the scarf feel intentional and balanced.
The layout is what gives the scarf its unique identity.
Step 2: Create the base strip
Start with a foundation chain long enough for the scarf width. Keep the chain loose so the edges do not pull. This scarf usually looks best when the strip is clean and long, allowing the repeated sections to show clearly.
A neat base helps the design feel structured.
Step 3: Build the repeating sections
Work the scarf in repeated stitch blocks or color sections. These can be equal-sized parts or slightly varied, depending on the look you want. The goal is to create a visual rhythm that feels like a sequence of frames or film reels.
This repeat is the heart of the design.
Step 4: Add texture or color contrast
To make the film roll effect more visible, use contrasting yarn colors or small texture changes between sections. Even simple changes in stitch type can help the scarf feel more dynamic. Keep the transitions clean so the pattern remains easy to read.
The contrast helps the design stand out.
Step 5: Maintain even edges
Because the scarf is built from sections, it is important to keep the sides straight. Watch your tension carefully so the scarf does not curve or narrow unexpectedly. Straight edges make the repeated blocks look sharper.
Step 6: Repeat until the scarf is the desired length
Continue the repeating pattern until the scarf is long enough for your style preference. A longer scarf gives the sectioned design room to breathe, while a shorter scarf can feel more casual and fashion-forward.
Step 7: Add a finishing border
A simple border around the entire scarf can help unify the sections and make the edges feel complete. You can also add a small fringe if you want a softer ending, but keep it balanced so it does not distract from the block pattern.
Helpful Tips
The film roll scarf looks especially striking in black, white, and cream because the contrast makes the design feel graphic and modern. If you want a softer version, use muted tones that stay close in value. This is a great scarf if you want something creative and not too traditional.
3. Crochet V-Stitch with Fringes Scarf Pattern
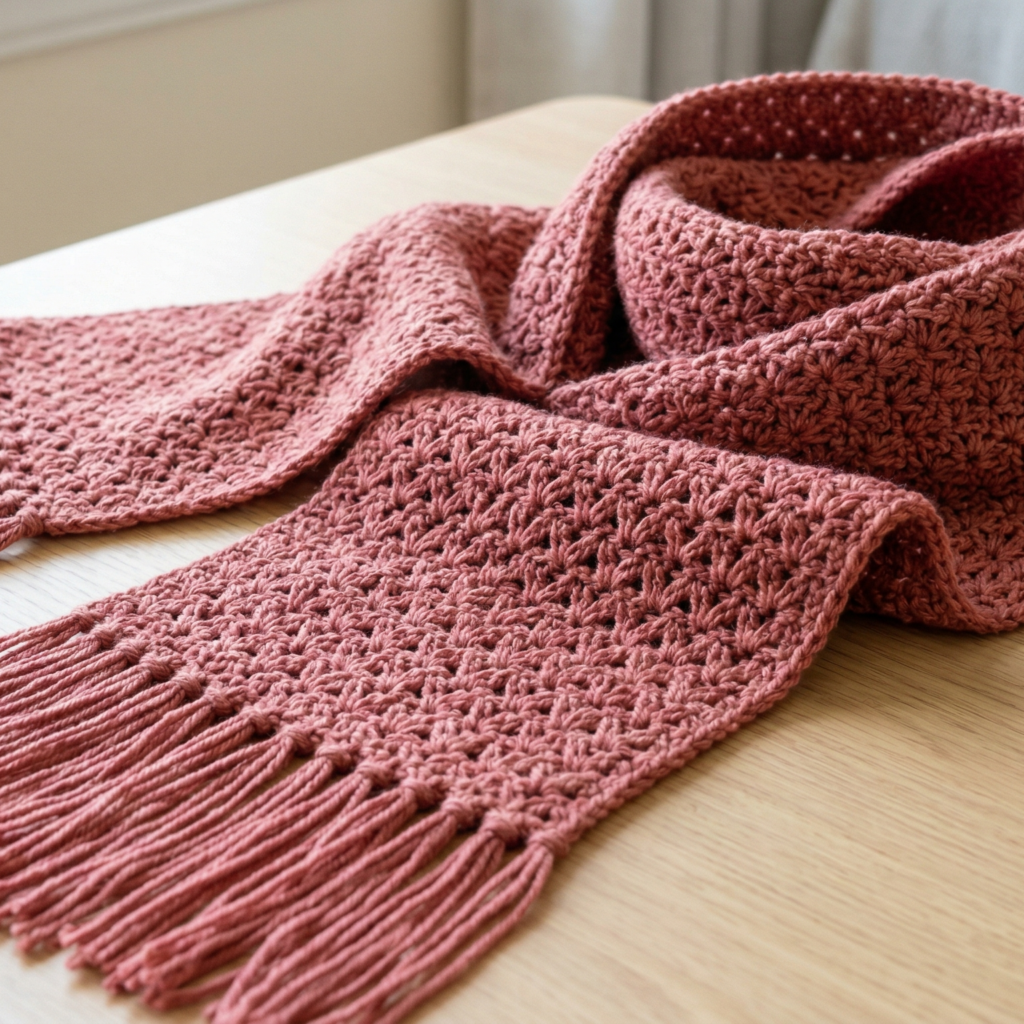
A V-stitch with fringes scarf is soft, airy, and easy to style. The V-stitch creates a delicate open texture that works well for a scarf because it feels light without losing warmth. Adding fringe gives it a relaxed, handmade finish that makes the whole piece feel complete and a little boho.
Quick Notes
Skill level: Beginner
Finished size: Long and lightweight scarf
Style: Airy, casual, boho, relaxed
Best colors: Cream, beige, rust, dusty rose, olive, soft blue, charcoal
Materials
- Light worsted or DK yarn
- Crochet hook suited to your yarn
- Yarn needle
- Scissors
- Measuring tape
- Fringe yarn in matching or contrast color
Step-by-Step Guide
Step 1: Decide the width and drape
A V-stitch scarf looks best when it has a little drape. Decide how wide you want the scarf to be, keeping in mind that the open texture will make it feel slightly lighter than a solid stitch scarf. A medium width usually works beautifully for wrapping around the neck.
A balanced width helps the lace feel wearable.
Step 2: Start the foundation chain
Chain the width you want, making sure the count works with your V-stitch repeat. Keep the chain loose enough that the scarf does not become stiff. A relaxed foundation helps the scarf hang nicely.
A soft foundation makes the opening pattern easier to see.
Step 3: Work the V-stitch pattern
Begin the V-stitch rows by placing stitches into the same space to create the V shape, then separating them with chain spaces. The stitch pattern creates a gentle open design that feels light but still cozy. Keep the repeats even so the scarf stays balanced.
The V-stitch gives the scarf its graceful texture.
Step 4: Maintain even row height
As you continue, make sure each row stays even in height and width. V-stitch patterns can sometimes loosen the fabric, so keep your tension consistent. The scarf should feel soft and flowing rather than floppy.
Step 5: Continue until the scarf is long enough
Work the pattern until the scarf reaches the length you want. Since the stitch is open, a little extra length can be helpful if you want a wraparound style. Check the length periodically to ensure the scarf stays proportional.
Step 6: Add fringe
Cut fringe pieces in matching or contrast yarn and attach them evenly to the ends. Fringe adds movement and gives the scarf a more finished look. Keep the fringe length consistent for a clean appearance.
Step 7: Trim and shape
Once the fringe is attached, trim it evenly and lightly block the scarf if needed. This helps the V-stitch open up and the fringe settle neatly.
Helpful Tips
This scarf looks especially lovely in earthy or neutral tones because the texture and fringe create a relaxed handmade vibe. If you want a more feminine version, choose blush or dusty rose. If you want a more seasonal winter feel, rust, cream, or olive work beautifully.
4. Crochet Gray Shades Tartan Scarf Pattern
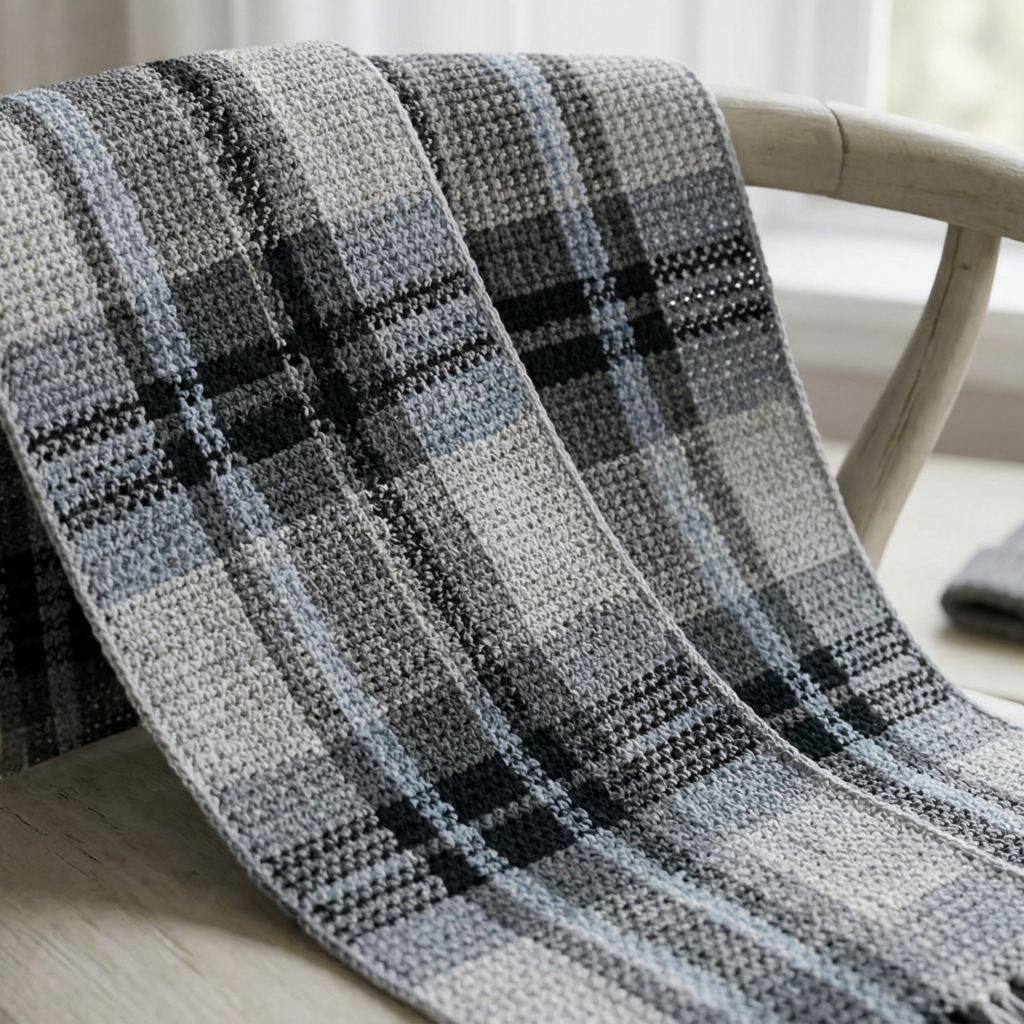
A gray shades tartan scarf is classic, elegant, and perfect for winter. The tartan style gives it a timeless plaid-inspired look, while the gray color palette keeps it versatile and easy to pair with everyday outfits. This scarf is ideal if you want something polished that feels both cozy and refined.
Quick Notes
Skill level: Beginner to intermediate
Finished size: Long, warm scarf with plaid effect
Style: Classic, neutral, structured, winter-friendly
Best colors: Light gray, charcoal, silver gray, black, white, soft gray-blue
Materials
- Yarn in several gray shades and possibly white or black
- Crochet hook suited to your yarn
- Yarn needle
- Scissors
- Measuring tape
Step-by-Step Guide
Step 1: Plan the plaid layout
Before you begin, sketch or plan your tartan pattern. Decide how wide each stripe should be and how the gray shades will repeat. A good plaid layout depends on consistent spacing, so planning ahead will help the design look intentional.
A clear plan makes the tartan pattern easier to follow.
Step 2: Start the scarf base
Chain the width you want and work your first rows in a solid base color. The scarf should feel smooth and sturdy before the plaid sections begin. Keep the row edges even so the tartan lines remain crisp later.
A neat foundation supports the plaid design.
Step 3: Add the main plaid stripes
Create your vertical or horizontal stripe pattern by switching colors in planned intervals. Use the gray shades to build the tartan effect. Keep the stripes consistent in width so the pattern feels balanced and recognizable.
The plaid style depends on orderly stripes.
Step 4: Layer the crossing lines
If you want a more detailed tartan effect, add crossing stripes in a different gray tone or black. This layered look creates the classic plaid appearance. Be sure the lines align well so the pattern stays clean.
This step brings the tartan feel to life.
Step 5: Maintain tension and edges
When working with multiple colors, watch your tension closely. It is easy for the edges to pull if you change colors too tightly. Keep the fabric even so the scarf hangs neatly and the plaid lines stay straight.
Step 6: Continue to full length
Work the pattern until the scarf reaches the length you want. Since tartan scarves often look best with a generous length, do not be afraid to make it slightly longer if you want a wraparound style.
Step 7: Finish with a border or fringe
A simple border in one of the gray shades can help frame the plaid. If you want a softer winter look, you can add a subtle fringe at the ends. Keep the finish clean so the tartan pattern remains the focus.
Helpful Tips
Gray tartan scarves are incredibly versatile and easy to wear with many outfits. If you want a stronger plaid effect, use high contrast between the shades. If you want a softer, more subtle version, use gray tones that are closer together. This is a beautiful gift scarf because it feels classic and useful.
5. Crochet Block Stitch Scarf Pattern
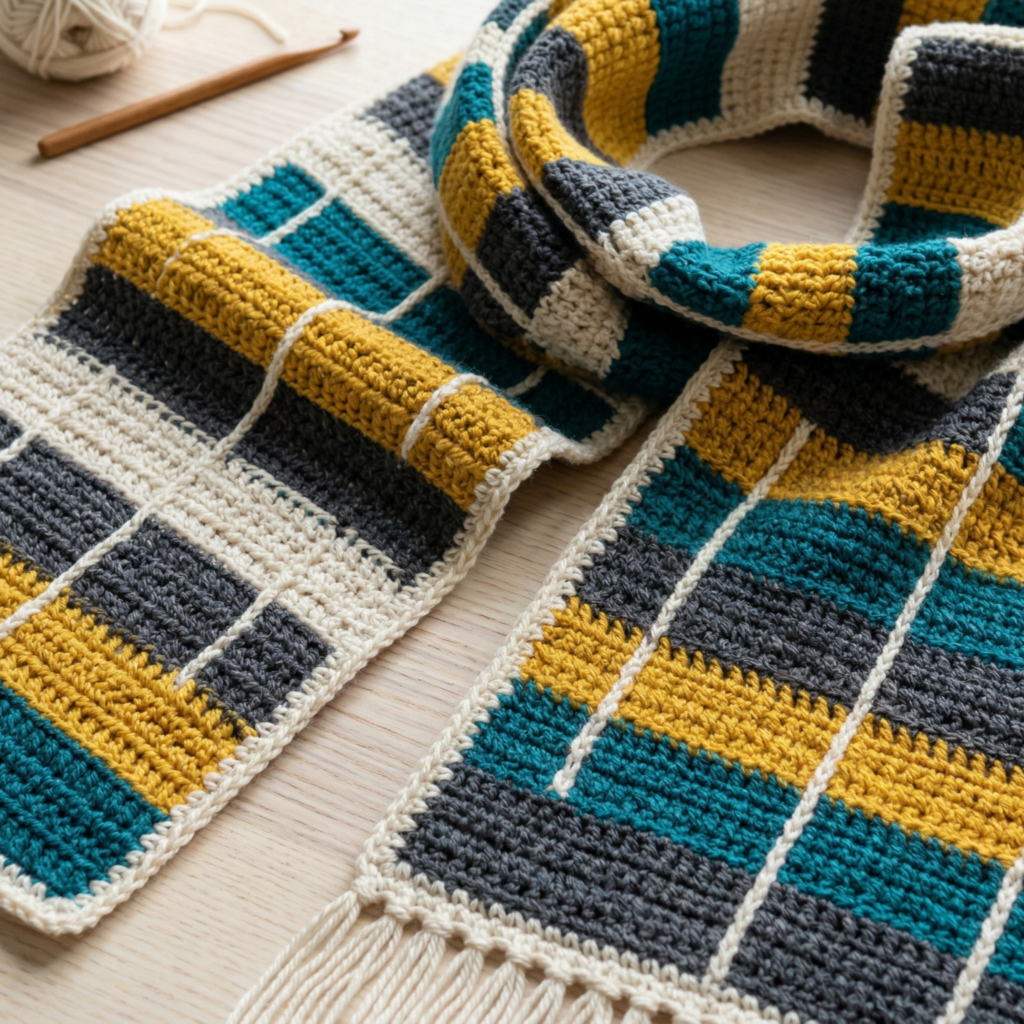
A block stitch scarf is simple, bold, and wonderfully geometric. It creates a clean, organized fabric with a slightly graphic look, which makes it perfect for people who like modern crochet pieces. The block stitch is easy to customize with colors, and it works especially well in scarves because the rows create a long, elegant visual effect.
Quick Notes
Skill level: Beginner to intermediate
Finished size: Long scarf with block texture
Style: Modern, geometric, clean, colorful
Best colors: Contrasting blocks, neutrals, jewel tones, soft pastels, bold rainbow shades
Materials
- Yarn in one or more colors
- Crochet hook suited to your yarn
- Yarn needle
- Scissors
- Measuring tape
Step-by-Step Guide
Step 1: Choose your block color palette
Decide how you want the blocks to look. You can keep the scarf in two colors for a clean modern feel or use several shades for a more playful design. A good color plan will make the block stitch look crisp and intentional.
The palette sets the mood of the whole scarf.
Step 2: Chain the scarf width
Start with a chain that matches the width you want. Keep the chain loose enough to allow drape. The block stitch pattern often looks best when the scarf has enough width to show off the repeating sections clearly.
A proper foundation helps the blocks stand out.
Step 3: Work the block stitch rows
Begin crocheting the block stitch repeat. This stitch creates rectangular, window-like sections that give the scarf its geometric texture. Keep the stitch pattern even so the blocks remain balanced and aligned.
The block shape is the main visual feature.
Step 4: Change colors if desired
Block stitch scarves are especially fun when worked in alternating colors. You can create stripes of blocks, color bands, or repeating contrast sections. Make sure your color changes are neat so the rows look polished.
The color arrangement adds personality.
Step 5: Continue the repeating pattern
Keep working row after row until the scarf reaches your desired length. The block stitch pattern creates a smooth rhythm that is enjoyable to crochet, and the scarf grows into a very clean-looking piece.
Step 6: Add a border
A simple border can help frame the block pattern and give the scarf a finished edge. You might choose a single crochet border or a subtle contrasting edge to sharpen the lines.
Step 7: Finish with fringe or keep it minimal
You can leave the scarf clean for a modern look or add fringe for a softer, more casual feel. Since the block stitch already gives the scarf a lot of visual structure, a minimal finish often looks especially elegant.
Helpful Tips
Block stitch scarves look especially good in strong color combinations because the stitch pattern is graphic and defined. If you want a calm everyday scarf, neutral shades work beautifully. If you want a bold statement piece, try contrasting colors that pop against one another.
Conclusio
Crochet scarves are one of the most rewarding projects you can make because they are useful, versatile, and easy to adapt to your own style. They can be cozy and practical for winter, thoughtful as handmade gifts, or stylish enough to wear as part of an everyday outfit. That combination of function and creativity is what makes scarf-making such a beloved crochet project.
These five scarf patterns each offer something different. The moss stitch scarf feels textured and timeless. The film roll scarf adds artistic visual rhythm. The V-stitch scarf with fringes is airy and relaxed. The gray shades tartan scarf is classic and elegant. The block stitch scarf is modern and bold. Together, they show how much style you can create with a simple rectangle and a good stitch pattern.
A handmade scarf is more than just something warm to wrap around your neck. It is a piece that reflects your creativity, your color choices, and your care in every stitch. With the right yarn, a comfortable length, and neat finishing, these scarf patterns can become favorites for yourself or for the people you make them for.