Crochet mini skirts are one of the most exciting handmade fashion projects because they combine creativity, texture, and personal style in a way that feels fresh and wearable. They are fun to make, easy to customize, and perfect for anyone who wants clothing that stands out from store-bought basics. A crochet mini skirt can be soft and romantic, bold and fitted, airy and beachy, or structured and fashion-forward depending on the yarn, stitches, and shaping you choose.
What makes crochet mini skirts especially appealing is how much style you can create in a relatively small garment. With the right stitch pattern and silhouette, a mini skirt can feel playful for summer, chic for layering, or cozy enough for transitional weather. Some designs work beautifully with a matching top, while others shine as a statement piece all on their own. If you enjoy handmade clothing that feels both trendy and personal, crochet mini skirts are a fantastic project to explore.
In this post, you will find five stylish mini skirt ideas with clear step-by-step guidance, helpful quick notes, material suggestions, skill level details, and practical finishing tips. Each design is written to feel approachable while still giving you enough detail to create a polished piece. Whether you are crocheting for yourself, a gift, or a handmade fashion collection, these skirt patterns are designed to inspire and help you make something you will actually want to wear.
Quick Notes
Project type: Crochet mini skirt patterns
Best for: Handmade fashion, summer outfits, layering pieces, gifts, and creative wardrobe staples
Skill level: Beginner to intermediate, depending on shaping and stitch complexity
Hook size: Usually 2.5 mm to 5 mm, depending on yarn and desired drape
Yarn weight: Lightweight cotton, DK, sport, or worsted depending on style
Best yarn choice: Cotton or cotton blends for structure, or soft blends for drape
Finished size: Typically mini length, with waistband and hip shaping as needed
Time to complete: Several hours to a few days, depending on detail level
Helpful stitches: Chain, slip stitch, single crochet, half double crochet, double crochet, treble crochet, increase, decrease, shell stitch, mesh stitch, zigzag stitch, ribbing, post stitches
Common Materials
Most crochet mini skirts can be made with a similar set of supplies.
- Yarn in your chosen colors
- Crochet hook matched to yarn weight
- Stitch markers
- Yarn needle
- Scissors
- Measuring tape
- Optional elastic for waistband
- Optional lining fabric
- Optional buttons, ties, or drawstring cord
For skirts, fit matters just as much as style. Choosing the right yarn and hook combination can make the difference between a skirt that feels comfortable and one that stretches too much. Cotton yarn is often a great choice because it is breathable and holds shape well, but softer blends can give a more fluid, draped look.
1. Crochet Meshy Layered Mini Skirt Pattern
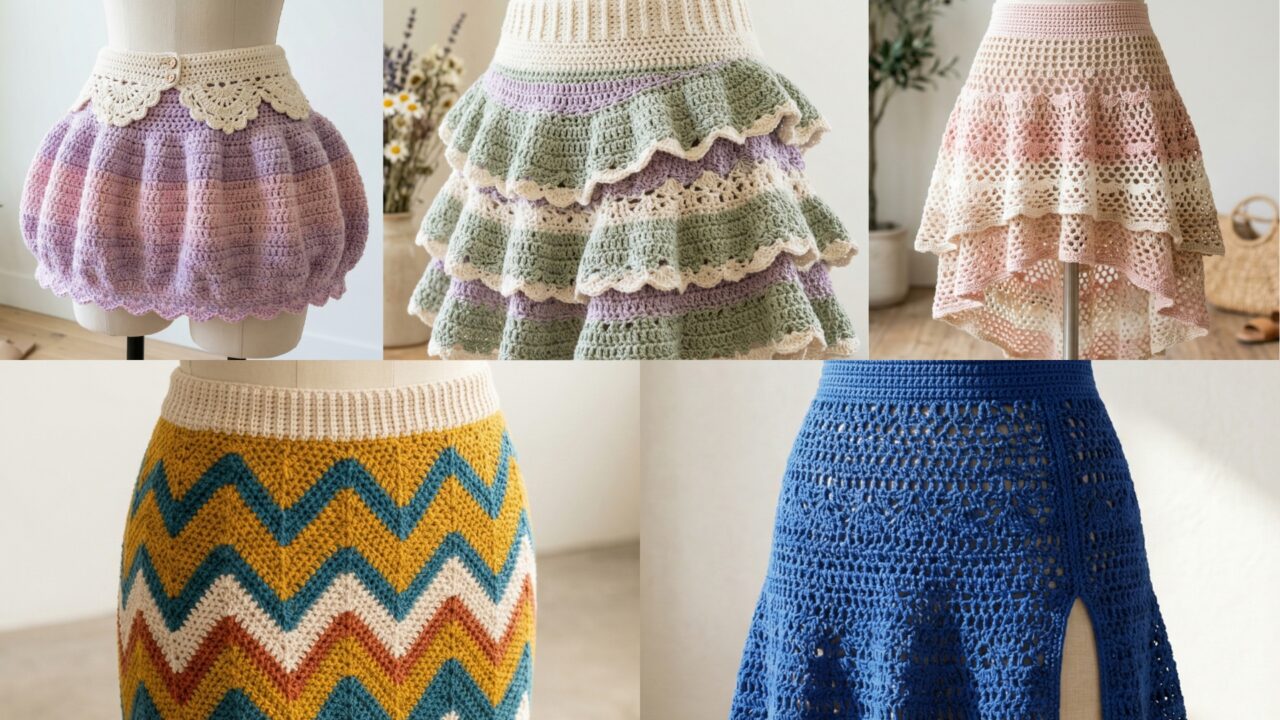
A meshy layered mini skirt is light, trendy, and perfect for warm-weather styling. It has an airy feel that works beautifully over a fitted lining, shorts, or swimwear depending on how you want to wear it. The mesh gives it a modern, textured look, while the layered effect adds movement and visual interest.
Quick Notes
Skill level: Beginner to intermediate
Finished size: Mini length, usually fitted at the waist and slightly flared at the hem
Style: Beachy, trendy, airy, layered
Best colors: White, cream, black, sand, blush, or soft pastels
Materials
- Lightweight cotton or cotton blend yarn
- Crochet hook suited to your yarn
- Measuring tape
- Yarn needle
- Optional lining skirt or shorts
- Optional elastic for waistband
Step-by-Step Guide
Step 1: Measure the waist and hip area
Before starting, measure your natural waist and the fullest part of your hips. A mini skirt needs enough stretch to pull on comfortably while still sitting securely. Since mesh has some flexibility, accurate measurements are especially important.
Decide whether you want a snug fit at the waist and a looser fall through the hips, or a more relaxed skirt overall.
Step 2: Create the waistband
Start with a firm waistband that will hold the skirt in place. You can crochet a ribbed band with tight stitches or make a simple foundation chain and work rows of single crochet. If you want extra support, you can later insert elastic inside the waistband.
A snug waistband helps the skirt stay comfortable and flattering.
Step 3: Begin the mesh section
Once the waistband is complete, start the mesh stitch pattern. A classic mesh stitch uses chains and skipped stitches to create open spaces. This gives the skirt a lightweight, breathable look that feels effortless and stylish.
Keep the mesh even so the fabric hangs neatly instead of twisting.
Step 4: Add layered texture
To create the layered effect, you can alternate mesh rows with denser rows such as double crochet or shell stitches. Another option is to crochet a base mesh layer and then add a second decorative layer over part of the skirt, especially around the hem.
Layering adds dimension and helps the skirt feel more fashion-forward.
Step 5: Shape the skirt
If you want a slight flare, increase gradually as you work downward. This prevents the skirt from clinging too tightly around the hips and gives the hem a soft, feminine movement. Keep the increases subtle so the mini skirt still feels streamlined.
Step 6: Finish the hem
The hem can be simple or decorative. A shell edge, picot edging, or neat single crochet border can give the skirt a polished finish. If you want a very trendy look, a slightly wavy hem works beautifully with the airy mesh design.
Step 7: Add lining if needed
Because the skirt is mesh, many makers choose to line it for comfort and coverage. You can sew in a fitted fabric lining or wear it with matching shorts underneath. This makes the skirt more practical and wearable in everyday outfits.
Helpful Tips
A meshy layered mini skirt looks best when the stitches are consistent and the fabric drapes naturally. If the mesh is too loose, it may lose shape. If it is too tight, the skirt may not have the light airy effect you want. A balanced tension is key.
This pattern is especially lovely in neutral tones or soft pastel colors, and it pairs well with crop tops, tanks, or oversized shirts.
2. Crochet Zigzag Mini Pencil Skirt Pattern
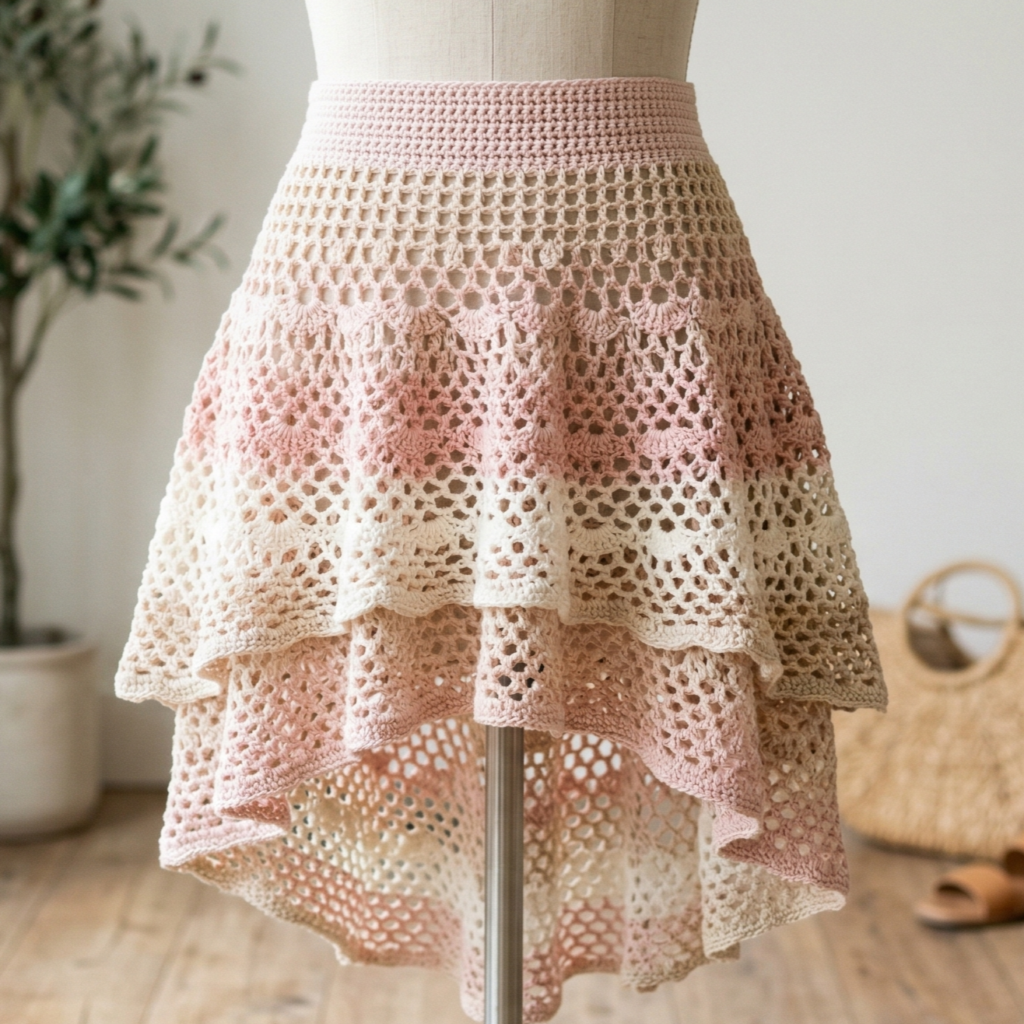
A zigzag mini pencil skirt is bold, structured, and very stylish. The zigzag pattern adds movement and visual interest, while the pencil silhouette keeps the skirt sleek and fitted. This design is perfect if you want something that feels modern and eye-catching without being overly complicated.
Quick Notes
Skill level: Intermediate
Finished size: Fitted mini skirt, usually close to the body
Style: Graphic, sleek, modern, statement-making
Best colors: Contrasting tones, monochrome, or retro combinations
Materials
- Medium-weight yarn with good stitch definition
- Crochet hook matched to yarn
- Stitch markers
- Yarn needle
- Measuring tape
- Optional elastic for waistband
Step-by-Step Guide
Step 1: Plan the zigzag design
Decide whether you want a bold high-contrast zigzag or a softer repeating wave pattern. Zigzag designs look best when the color changes are clear, so choose yarn shades that show the pattern well.
A strong visual contrast creates a more polished finished garment.
Step 2: Build the waistband
Start with a firm waistband that fits comfortably and stays in place. For a pencil skirt, the waistband should be snug but not restrictive. A ribbed waistband works well because it stretches and helps the skirt sit smoothly at the waist.
Step 3: Crochet the zigzag rows
Use a stitch pattern that creates peaks and valleys, such as increases and decreases placed strategically across the row. This will form the zigzag shape. Keep track of your repeats carefully so the pattern stays even and symmetrical.
Because this style is very visual, consistent stitch counts matter a lot.
Step 4: Shape the pencil silhouette
A pencil skirt should gently follow the body without becoming too tight. Work the skirt with minimal increases so it stays fitted through the hips and thighs. If you need more room for movement, add a few subtle increases near the back or side seams.
The goal is a sleek silhouette that still feels comfortable.
Step 5: Maintain even tension
Zigzag patterns can sometimes pull or curl if the tension changes too much. Keep your stitches uniform and check the skirt as you go. If one section feels tighter, adjust before continuing.
This step helps the skirt lie flat and look clean.
Step 6: Finish the hem and waistband
Keep the hem simple so the zigzag pattern remains the focal point. A narrow border can help neaten the edge without distracting from the design. For the waistband, add a tidy ribbed finish or insert elastic for extra comfort.
Step 7: Try on and adjust
Because pencil skirts rely on fit, try the skirt on as you work or at least before finishing. This helps you catch any shaping issues early. Slight adjustments around the hips or hem can make a huge difference in how the final skirt looks.
Helpful Tips
A zigzag mini pencil skirt is especially striking in two-color combinations, but it can also look beautiful with tonal shades for a more subtle effect. If you want a retro feel, try bright color blocking. If you want a chic everyday skirt, use black, cream, taupe, or muted jewel tones.
This design works well with fitted tops and boots or sandals depending on the season.
3. Crochet Cottagecore Ruffled Mini Skirt Pattern
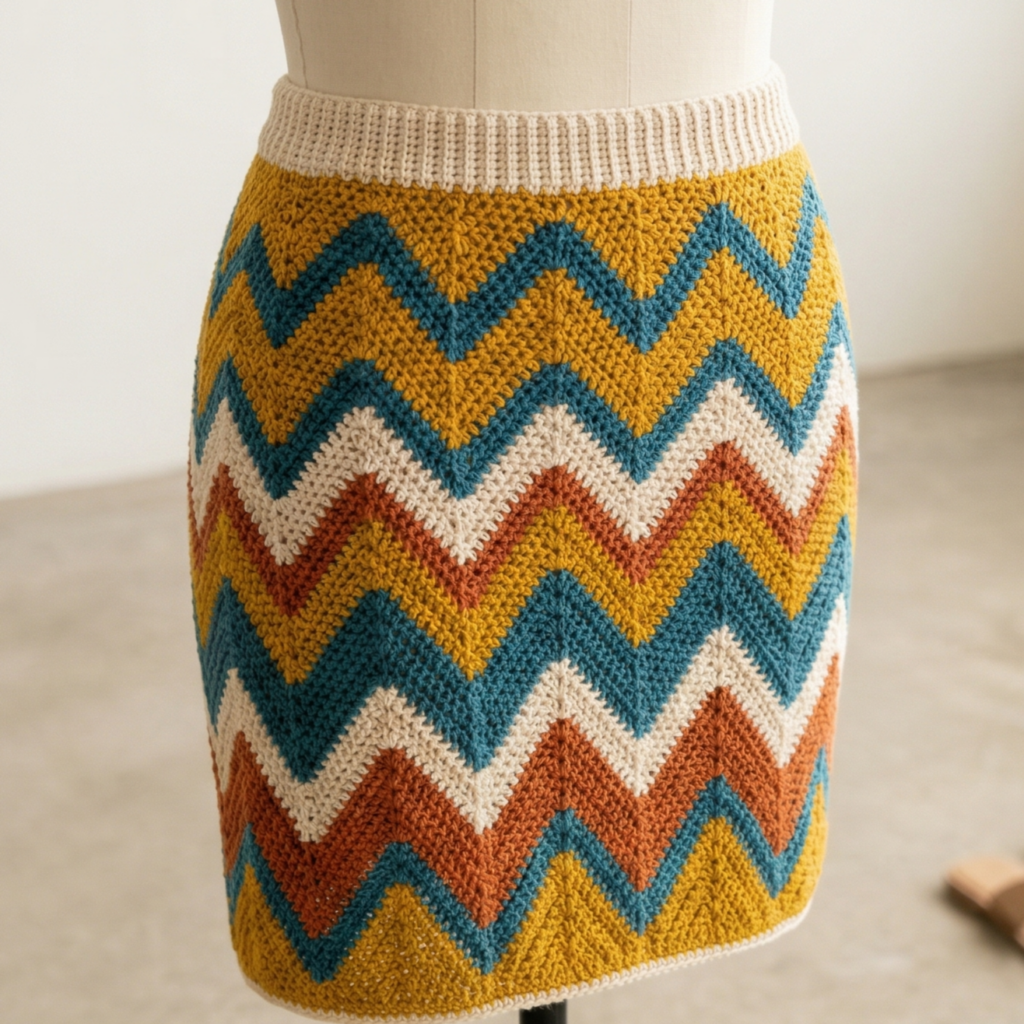
A cottagecore ruffled mini skirt feels romantic, soft, and full of handmade charm. It is the kind of piece that brings a gentle, dreamy quality to an outfit. Ruffles add movement and sweetness, while the mini length keeps the look playful and modern. This design is especially lovely in light, natural colors and soft textured yarns.
Quick Notes
Skill level: Beginner to intermediate
Finished size: Mini length with a flared or layered hem
Style: Romantic, feminine, soft, dreamy
Best colors: Cream, ivory, blush, sage, lavender, butter yellow
Materials
- Soft cotton or cotton blend yarn
- Crochet hook suited to yarn
- Measuring tape
- Yarn needle
- Scissors
- Optional elastic waistband
- Optional lace trim or ribbon
Step-by-Step Guide
Step 1: Choose a soft, flowing structure
A cottagecore skirt should feel delicate and comfortable. Decide whether you want a simple flared skirt with a ruffled hem or a fully ruffled design with more volume. The more layers you add, the more romantic the final look will be.
A soft structure works best with lighter yarn and gentle shaping.
Step 2: Create the waistband
Start with a fitted waistband that sits comfortably at the waist. You can use single crochet or ribbing for a firm base. Because the skirt will likely have some flare, the waistband should be stable enough to support the weight of the skirt below it.
Step 3: Crochet the body of the skirt
Work the main skirt in a simple stitch pattern such as single crochet, half double crochet, or double crochet. Keep the body smooth so the ruffles can stand out later. If you want extra flow, add gentle increases as you move downward.
Step 4: Add the first ruffle layer
Ruffles are usually created by increasing the number of stitches in each round or row, or by crocheting into chain spaces that allow the fabric to flare. Start with one soft ruffle layer near the hem. This gives the skirt movement without making it too bulky.
Make the ruffle full enough to show shape, but not so full that it becomes heavy.
Step 5: Add extra tiers if desired
For a more dramatic cottagecore effect, add a second ruffle tier above the hem or layer multiple ruffles in alternating rows. Each added layer creates more volume and gives the skirt a vintage-inspired feel.
The key is to keep the tiers soft and balanced.
Step 6: Finish with delicate edging
A picot edge, shell border, or scalloped hem works beautifully for this style. These small details make the skirt feel handcrafted and feminine. If you want an extra vintage touch, add ribbon through the waistband or along a tier seam.
Step 7: Block and shape
Blocking helps the ruffles settle into neat, even waves. Shape the skirt gently so the layers hang the way you want them to. This step can make the skirt look much more polished.
Helpful Tips
A cottagecore ruffled mini skirt looks beautiful in pale colors and natural fabrics. It pairs especially well with puff-sleeve tops, cardigans, Mary Jane-style shoes, or soft boots. If you want a more wearable everyday version, keep the ruffles minimal and the color palette neutral.
This design is perfect for anyone who loves romantic handmade fashion.
4. Crochet Split Flared Mini Skirt Pattern
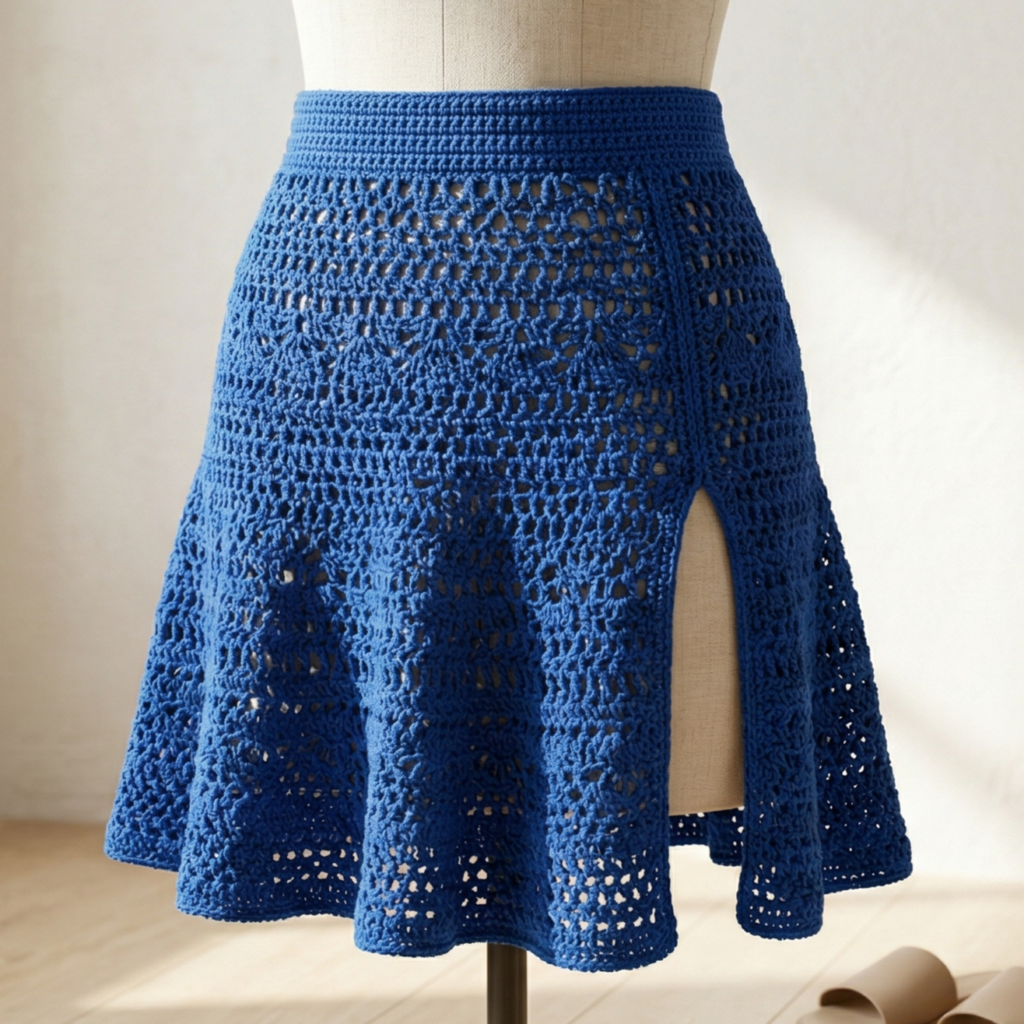
A split flared mini skirt combines movement, shape, and a little edge. The flare gives it an easy, flattering silhouette, while the split adds a stylish detail that makes the skirt feel more modern. This is a great option if you want something comfortable but still fashion-forward.
Quick Notes
Skill level: Intermediate
Finished size: Fitted at the waist with a flared hem and front or side split
Style: Modern, flattering, expressive
Best colors: Solid neutrals, deep seasonal tones, or bold fashion colors
Materials
- Yarn with good drape
- Crochet hook suited to yarn
- Stitch markers
- Yarn needle
- Measuring tape
- Optional lining or shorts
- Optional elastic for waistband
Step-by-Step Guide
Step 1: Decide where the split will go
The split can be placed in the front, side, or even slightly off-center for a more unique look. Front splits are bold and easy to style, while side splits can feel more subtle and elegant. Decide this before you begin so the shaping works properly.
A well-placed split can make the skirt much more comfortable to walk in.
Step 2: Make a strong waistband
Begin with a secure waistband that fits snugly. Since the skirt will flare outward, the waistband should anchor the silhouette and keep the skirt from slipping. A ribbed band or elastic-reinforced band works especially well.
Step 3: Build the fitted upper portion
Work the upper part of the skirt with a stitch pattern that keeps the shape close to the body. Single crochet, half double crochet, or double crochet can all work depending on the drape you want. This section should contour the hips without feeling restrictive.
Step 4: Create the split opening
Once you reach the point where the split should begin, stop joining the front and back evenly in that section. Instead, leave an opening and continue working each side separately. This creates the split and allows the fabric to move naturally.
Keep both sides symmetrical so the opening looks intentional and balanced.
Step 5: Add flare below the split
Below the split, increase gradually so the skirt opens out softly at the hem. This flare adds movement and keeps the mini skirt from feeling too tight or straight. The flare should feel fluid rather than dramatic unless you want a more statement look.
Step 6: Finish the split edges
The edges of the split should be neat and reinforced. Use a clean border to stop curling and help the opening keep its shape. A simple single crochet edging usually works well, but a decorative finish can also look beautiful.
Step 7: Add lining or shorts if needed
Because the split reveals more leg movement, some makers like to add a lining or wear shorts underneath for comfort. This makes the skirt more versatile and wearable in everyday outfits.
Helpful Tips
A split flared mini skirt looks especially stylish in a solid color because the shape becomes the main focus. If you want a dramatic effect, use black, deep red, or forest green. If you want a softer look, try beige, ivory, or dusty pink.
This design is easy to dress up or down, which makes it a useful handmade wardrobe piece.
5. Crochet Collared Puffy Mini Skirt Pattern
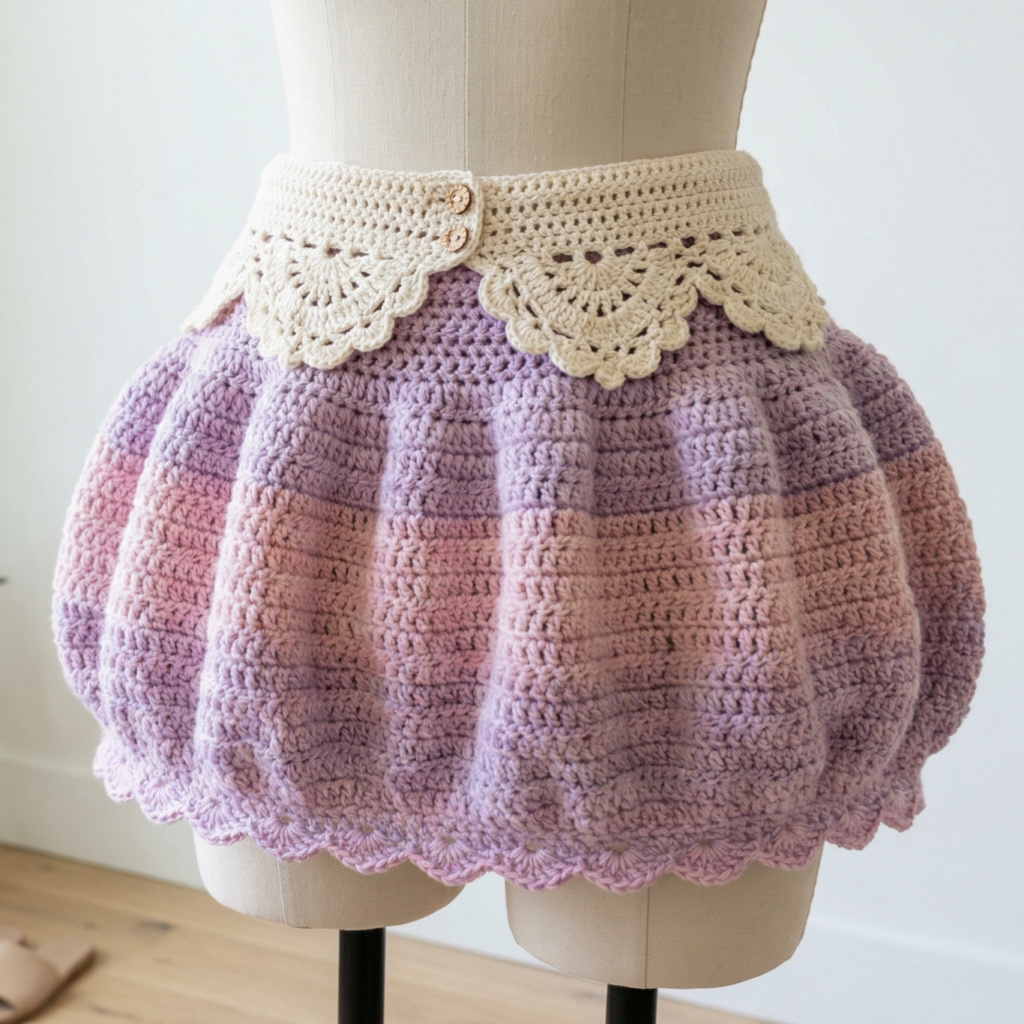
A collared puffy mini skirt is playful, unique, and full of personality. It combines a fuller skirt shape with a structured collar-style waistband or decorative upper panel, creating a design that feels a little unexpected and very fashionable. The puffiness gives it volume, while the collar detail adds a polished and creative finish.
Quick Notes
Skill level: Intermediate
Finished size: Mini length with a full or lightly puffed silhouette
Style: Cute, statement-making, fashion-forward
Best colors: Cream, pastel shades, bold primary colors, or classic neutrals
Materials
- Yarn with moderate structure
- Crochet hook suited to yarn
- Measuring tape
- Yarn needle
- Stitch markers
- Optional elastic waistband
- Optional lining
Step-by-Step Guide
Step 1: Plan the collar feature
The “collar” in this design can be interpreted as a structured waistband, a folded top band, or a decorative upper yoke. Decide what kind of look you want. A wider collar panel gives the skirt a more fashion-editor feel, while a simple folded band makes it feel playful and wearable.
The top section should frame the waist nicely.
Step 2: Create the upper structure
Begin with a firm, neat upper section that behaves almost like a collar or tailored band. Use tight stitches so the top portion holds its shape well. This helps contrast with the puffier lower part of the skirt.
A strong top section gives the skirt a more polished silhouette.
Step 3: Build fullness into the body
To create the puffy effect, add increases or use a stitch pattern that naturally expands. Shell stitches, clustered stitches, or frequent increases can all create volume. The skirt should feel rounded and airy without becoming too heavy.
The puffiness is what gives this design its charm, so don’t be afraid of a little extra shape.
Step 4: Keep the proportions balanced
Because the skirt has volume, the top should stay fitted and stable. This balance prevents the silhouette from becoming bulky. If the lower section feels too wide, reduce the increases or switch to a firmer stitch.
Good proportion is what makes the skirt look intentional rather than oversized.
Step 5: Shape the hem
The hem can be softly flared or gently gathered depending on the style you want. A subtle flare feels sweet and feminine, while a more gathered finish gives the skirt extra bounce and personality. Keep the hem smooth so it complements the puffiness above it.
Step 6: Finish the collar edge
The collar or waistband edge deserves careful finishing. You can use a decorative border, a picot edge, or a clean ribbed finish. This is one of the first things people will notice, so a neat edge makes the whole skirt look more refined.
Step 7: Try on and refine
Because this design relies on shape, trying it on before finishing is very helpful. Adjust the waistband, skirt fullness, or hem length as needed. Small refinements can improve comfort and style significantly.
Helpful Tips
A collared puffy mini skirt is a fun way to make something distinctive without relying on complicated shaping. It looks beautiful in soft pastels for a dreamy look, or in bold solids if you want it to stand out. Pair it with a fitted top to balance the volume.
This is one of those crochet fashion pieces that feels creative, youthful, and stylish all at once.
Conclusion
Crochet mini skirts are a wonderful way to bring handmade style into everyday fashion. They are expressive, versatile, and surprisingly adaptable, which means you can create looks that range from soft and romantic to modern and edgy. Whether you love the lightness of a meshy skirt, the structure of a zigzag pencil silhouette, the sweetness of cottagecore ruffles, the movement of a split flared design, or the personality of a collared puffy shape, each skirt offers a different style story.
The best part about making your own mini skirt is that you are not limited by store-bought trends. You can choose the fit, color, stitch pattern, and finishing details that suit your wardrobe and your comfort level. With the right yarn, careful shaping, and a little patience, a crochet mini skirt can become one of the most rewarding handmade garments you ever make.
These five patterns are a great place to start if you want to create a mini skirt that feels both wearable and special. They prove that crochet fashion can be playful, practical, and beautifully personal all at once.