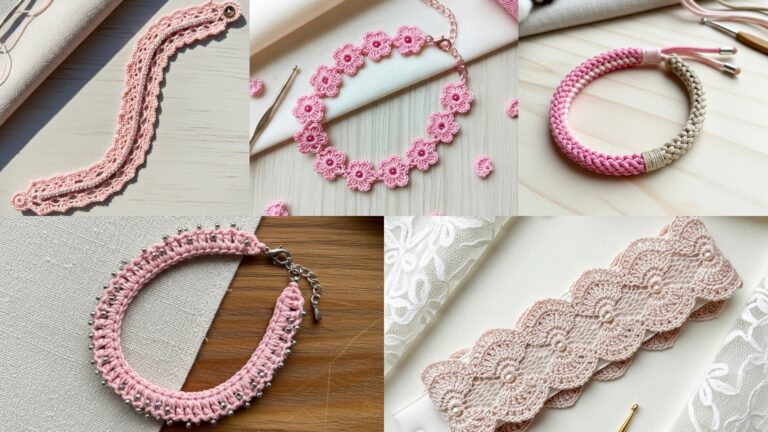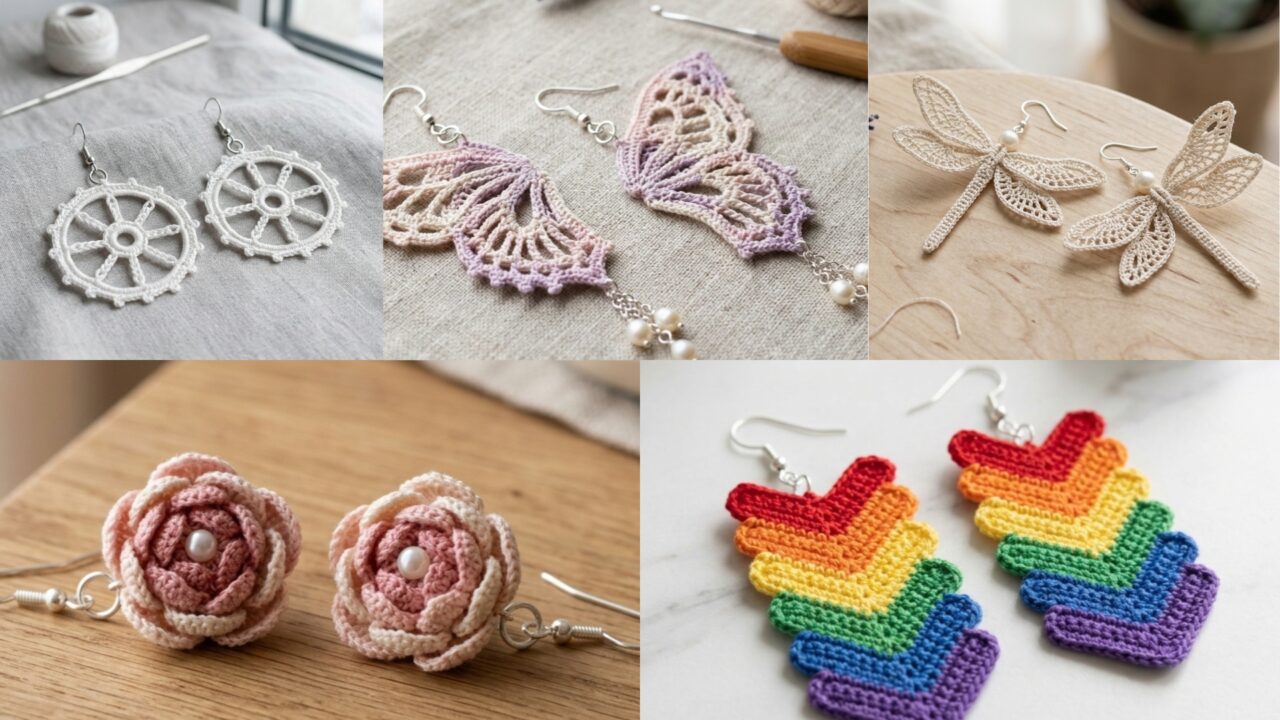
Crochet earrings are a beautiful way to combine creativity, style, and handmade charm. They are lightweight, quick to make, and easy to customize, which makes them perfect for personal wear, gifts, or small business products. Whether you prefer floral details, geometric shapes, or delicate pearl accents, crochet earrings allow you to turn simple thread into wearable art.
This collection features five stylish crochet earring patterns that are elegant, fun, and suitable for different skill levels. Each design includes a clear structure, helpful materials list, step-by-step instructions, and finishing tips so you can achieve neat, professional-looking results.
Quick Notes
- Use fine thread for a cleaner and more delicate finish.
- Keep stitches even, especially since earrings are small and detailed.
- Block the finished pieces to help them hold their shape.
- Match both earrings carefully so they look symmetrical.
- Secure all ends properly so the earrings stay neat and durable.
- Add beads, pearls, or color changes to personalize each design.
Common Materials
- Fine cotton thread or embroidery thread
- Small crochet hook, usually 1.25 mm to 2 mm
- Earring hooks
- Jump rings
- Tapestry needle
- Scissors
- Optional: beads, pearls, fabric stiffener, or starch
1. Crochet Ferris Wheel Earrings Pattern
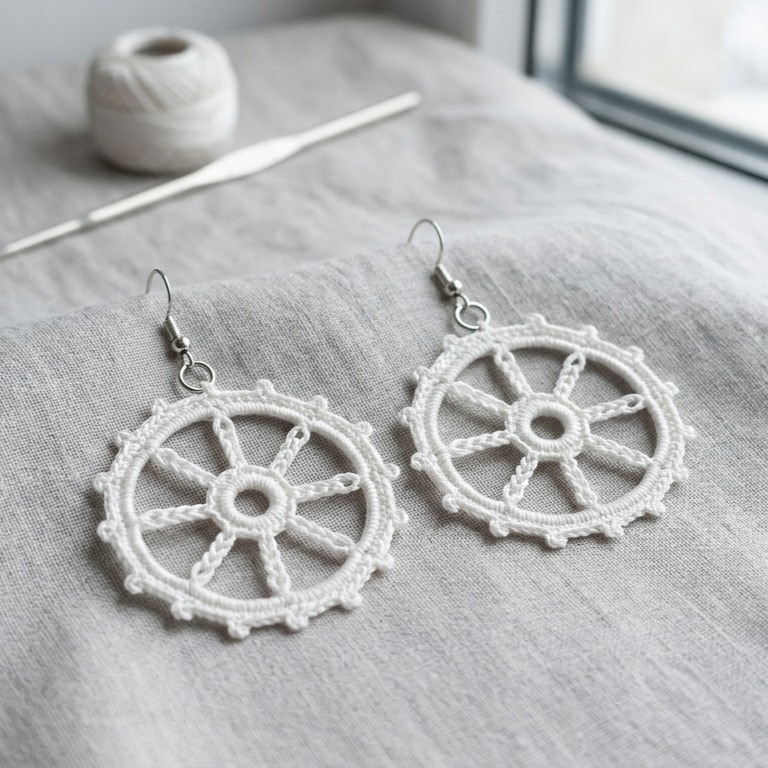
Ferris wheel earrings are playful, eye-catching, and ideal for makers who enjoy round, decorative shapes. The design feels whimsical but still elegant, making it a lovely choice for summer accessories, handmade gifts, or boutique-style jewelry.
Skill Level
Beginner to Intermediate
Materials
- Size 10 crochet thread or fine cotton thread
- 1.5 mm to 2 mm crochet hook
- Earring hooks
- Jump rings
- Tapestry needle
- Scissors
- Optional: a small bead for the center
- Optional: starch or fabric stiffener
Stitches Used
- Magic ring
- Chain (ch)
- Slip stitch (sl st)
- Single crochet (sc)
- Double crochet (dc)
- Picot, optional for edging
Step-by-Step Guide
Step 1: Make the center ring
Start with a magic ring. Work 12 single crochets into the ring and join with a slip stitch. This forms the center of the ferris wheel and gives the earring a solid base.
If you prefer, you can use a chain ring instead of a magic ring, but the magic ring usually gives a neater center.
Step 2: Build the spoke-like structure
Create evenly spaced chain loops around the center to mimic the open structure of a ferris wheel. For example, chain 3, skip 1 stitch, and slip stitch into the next stitch. Repeat around the circle.
These chain spaces act like the spokes and help create the wheel effect.
Step 3: Work the outer round
In each chain space, work a small decorative sequence such as single crochet, chain, single crochet. This helps define the outside edge and makes the wheel shape more visible.
Keep the outer edge neat and even so the round shape stays balanced.
Step 4: Add detail if desired
For a more decorative look, add picots or tiny chain loops along the outer edge. You can also sew a small bead into the center for a polished finish.
This extra detail makes the earrings feel more complete and jewelry-like.
Step 5: Shape and finish
Block the earrings flat so they hold a perfect round shape. If the design feels too soft, apply a light starch or stiffener.
Finishing
- Weave in all yarn ends securely
- Block the round shape
- Attach the earring hook with a jump ring
- Make sure both earrings are the same size and shape
Pro Tips
- Count stitches carefully so the circles remain even.
- Use a fine thread to keep the earrings light.
- Add contrasting thread color for a bolder, more modern look.
- If making them for sale, check that both earrings match exactly.
2. Crochet Rainbow Arrow Earrings Pattern
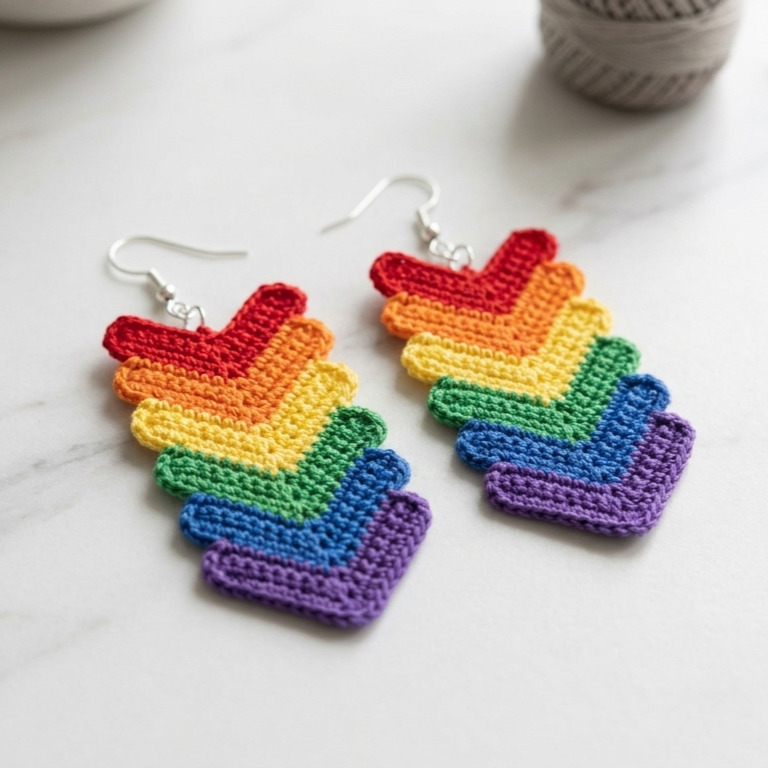
Rainbow arrow earrings are modern, bright, and full of personality. Their sharp shape gives them a stylish edge, while the rainbow colors make them lively and fun. This pattern is perfect for anyone who loves bold handmade accessories.
Skill Level
Intermediate
Materials
- Fine cotton thread or embroidery thread in multiple colors
- 1.25 mm to 1.75 mm crochet hook
- Earring hooks
- Tapestry needle
- Scissors
- Optional: thin wire or light stabilizer for shape
Stitches Used
- Chain (ch)
- Single crochet (sc)
- Half double crochet (hdc)
- Slip stitch (sl st)
- Increase and decrease, if needed for shaping
Step-by-Step Guide
Step 1: Create the arrowhead
Begin with a foundation chain of 5 or 6 stitches. Work short rows to form a pointed triangle shape. Increase at the edges to widen the arrowhead, then taper back down.
The goal is a clean point at the top with smooth, even sides.
Step 2: Form the shaft
After the arrowhead, work a narrow rectangular section for the arrow shaft. Use single crochet or half double crochet to keep the body firm and structured.
This section should be slim so the arrow shape remains clear.
Step 3: Add the tail
At the bottom, create two small extensions or chain-based fins to form the arrow tail. These should be symmetrical so the finished piece hangs evenly.
A neat tail helps the design look polished and intentional.
Step 4: Add rainbow color changes
Change colors in rows or sections to create the rainbow effect. You can use a full rainbow sequence or just a few bright shades.
Be sure to change colors neatly so the transitions look clean.
Step 5: Refine the shape
Once the crochet piece is complete, block it lightly to straighten the sides and sharpen the points. If necessary, add a tiny bit of stiffener to help the arrow stay firm.
Finishing
- Weave in all color-change ends carefully
- Block the piece flat
- Attach the hook at the top
- Check that both earrings match in length and width
Pro Tips
- Use bright but balanced colors so the design does not look crowded.
- Keep stitches tight for a crisp arrow shape.
- Make the second earring while following the first one closely to maintain symmetry.
- If you want a cleaner finish, line the back with a small piece of felt.
3. Crochet Dragonfly Pearl Earrings Pattern
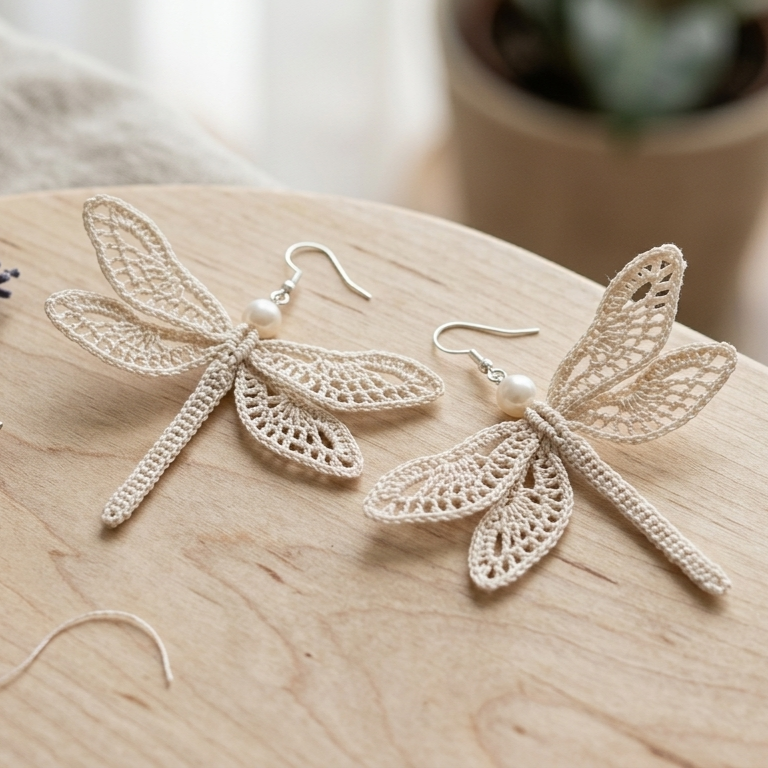
Dragonfly pearl earrings are delicate, elegant, and inspired by nature. The dragonfly shape gives them a graceful silhouette, while the pearl adds a soft and refined finish. This pattern is especially beautiful for feminine, romantic, or occasion-ready accessories.
Skill Level
Intermediate
Materials
- Fine cotton thread
- 1.5 mm crochet hook
- Small pearl bead
- Earring hooks
- Tapestry needle
- Scissors
- Optional: thin wire for wing support
Stitches Used
- Chain (ch)
- Slip stitch (sl st)
- Single crochet (sc)
- Double crochet (dc)
- Picot, optional for wing detail
Step-by-Step Guide
Step 1: Crochet the body
Start with a small chain for the dragonfly body. Work tightly so the body is slim and neat. You can make the body using slip stitches or single crochet, depending on how firm you want it to be.
This central shape should be narrow and slightly elongated.
Step 2: Create the upper wings
Attach the thread near the top half of the body and create two upper wings using chain loops or small curved crochet sections. These wings should be larger than the lower wings and gently open outward.
The upper wings are what give the dragonfly its signature look.
Step 3: Make the lower wings
Work the lower pair of wings just below the upper ones. These should be slightly smaller and sit neatly beneath the top pair.
Keep the wing shape airy and balanced so the design looks light and elegant.
Step 4: Add the pearl detail
Sew or attach a pearl bead near the top of the body or at the head area. This adds softness and a touch of sophistication to the earring.
Make sure the pearl is secure and centered.
Step 5: Shape and stabilize
If the wings feel too loose, block them carefully on a flat surface. You may also use a little starch or a thin wire inside the wings if you need extra structure.
Finishing
- Weave in all loose ends
- Block the wings symmetrically
- Attach the earring hook at the top
- Check that the earrings hang evenly
Pro Tips
- Use a light thread color for a soft, elegant look.
- Keep the wings delicate rather than heavy.
- Make both wings the same size for a balanced finish.
- A single pearl is often enough; too many embellishments can overpower the design.
4. Crochet Micro Peony Flower Earrings Pattern
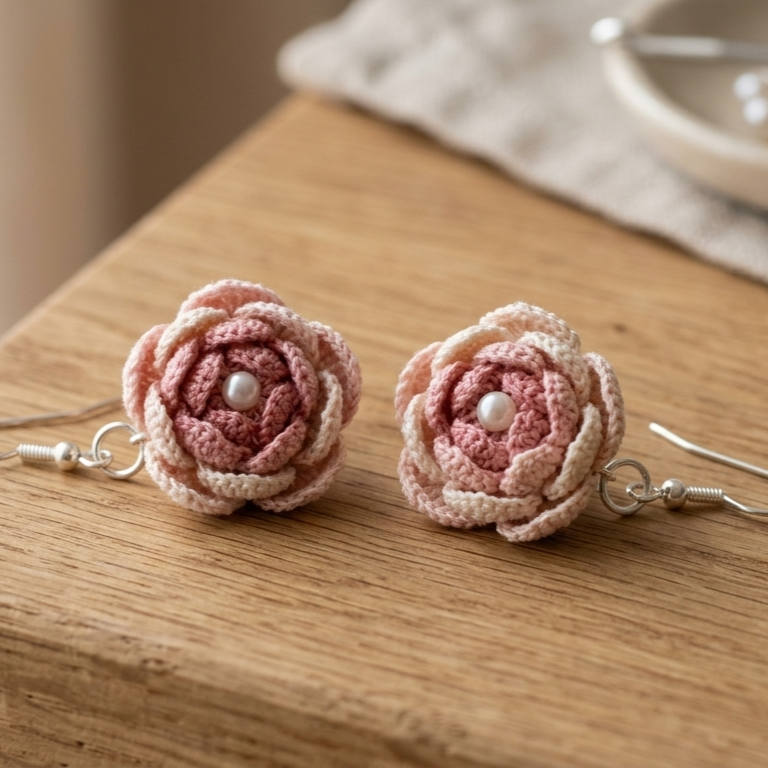
Micro peony flower earrings are tiny, romantic, and full of detail. Their layered petals create a soft floral look that feels elegant and handmade. This pattern is ideal for those who enjoy feminine accessories with a polished finish.
Skill Level
Beginner to Intermediate
Materials
- Size 10 crochet thread
- 1.25 mm to 1.5 mm crochet hook
- Small bead or pearl for the center
- Earring hooks
- Tapestry needle
- Scissors
- Optional: fabric stiffener
Stitches Used
- Magic ring
- Chain (ch)
- Single crochet (sc)
- Half double crochet (hdc)
- Double crochet (dc)
- Slip stitch (sl st)
Step-by-Step Guide
Step 1: Create the base
Begin with a magic ring and work a small round of single crochets into the center. This forms the flower base and gives the petals something to attach to.
The base should stay compact so the flower remains small and delicate.
Step 2: Make the first layer of petals
Work petal loops around the center using chains and taller stitches. A petal may include chain stitches, double crochets, and a slip stitch back into the base.
Repeat evenly around the circle to form the first layer of petals.
Step 3: Add a second petal layer
For a fuller peony look, add another layer behind the first one. This second row should overlap slightly and create a layered floral effect.
This is what gives the earring its soft, lush appearance.
Step 4: Add the center detail
Sew a tiny bead or pearl into the center of the flower. This creates a finished look and helps define the middle of the bloom.
A small center detail can make the design feel much more refined.
Step 5: Shape the petals
Gently arrange the petals with your fingers so they open naturally. If needed, block the flower lightly to help it keep its shape.
Finishing
- Secure all ends carefully
- Attach the center bead firmly
- Block the flower gently
- Add the earring hook at the back or top
Pro Tips
- Use soft shades like blush, cream, rose, or dusty pink for a classic peony look.
- Keep the petals slightly layered for volume.
- Make the two earrings at the same time if possible for better matching.
- A tiny amount of stiffener can help the petals stay open.
5. Crochet Pearl Butterfly Wings Earrings Pattern
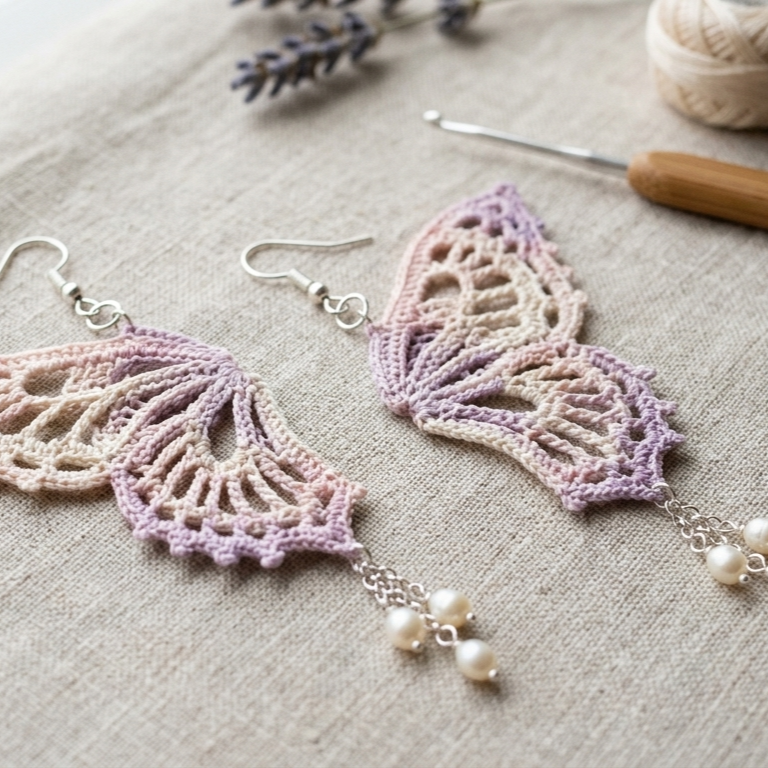
Pearl butterfly wings earrings are graceful, dreamy, and visually delicate. The butterfly shape adds movement and charm, while the pearls bring a soft shine that makes the design feel elegant and refined.
Skill Level
Intermediate
Materials
- Fine cotton thread or embroidery thread
- 1.5 mm crochet hook
- Small pearl beads
- Earring hooks
- Tapestry needle
- Scissors
- Optional: light fabric stiffener or thin wire
Stitches Used
- Chain (ch)
- Slip stitch (sl st)
- Single crochet (sc)
- Double crochet (dc)
- Treble crochet (tr), optional
Step-by-Step Guide
Step 1: Make the top wings
Start by creating the upper wing sections. These should be larger and more curved than the lower wings. Use chain arches and taller stitches to form a soft, open wing shape.
The top wings should look airy but clearly defined.
Step 2: Make the lower wings
Add the lower wings beneath the top pair. These are usually smaller and rounder. They help complete the butterfly silhouette and give the earrings a balanced shape.
Make sure the lower wings are proportional to the top wings.
Step 3: Add the body
Crochet a small central body that joins the wings together. This can be a narrow stitched strip or a tiny curved center section.
The body should be subtle so the wings remain the main focus.
Step 4: Add pearls
Place a pearl at the center, along the body, or near the wing edges for decoration. One pearl is often enough for a soft elegant look, but you can add more if you want a more decorative style.
The pearl detail should enhance the butterfly, not crowd it.
Step 5: Shape and stabilize
Block the wings carefully so they maintain their curves. If the wings are especially lacy, a light stiffener or thin wire can help them keep their form.
Finishing
- Weave in ends securely
- Block wings into shape
- Attach the hook at the top center
- Make sure both earrings mirror each other
Pro Tips
- Keep the butterfly shape symmetrical.
- Choose light thread colors for a soft, romantic result.
- Avoid making the wings too large, or the earrings may become heavy.
- Pearls work best when used sparingly.
Conclusion
Crochet earrings are one of the most rewarding small projects you can make. They are quick, stylish, and full of creative possibilities. With just a little thread, a hook, and some attention to detail, you can create handmade accessories that feel elegant, personal, and beautifully unique.
Each of the five patterns in this guide offers something different. The ferris wheel earrings are playful and round, the rainbow arrows are bold and modern, the dragonfly pearl earrings are delicate and graceful, the micro peony flowers are romantic and soft, and the butterfly wings are airy and refined. Together, they give you a wonderful range of styles to explore.
The best results come from clean stitches, careful shaping, and proper finishing. When you take the time to block, secure, and match your earrings well, the final piece looks much more professional. That is what transforms a simple handmade item into a polished accessory.
Whether you are making them for yourself, gifting them to someone special, or selling them in your shop, these crochet earring patterns are a beautiful way to turn creativity into something wearable and lasting.