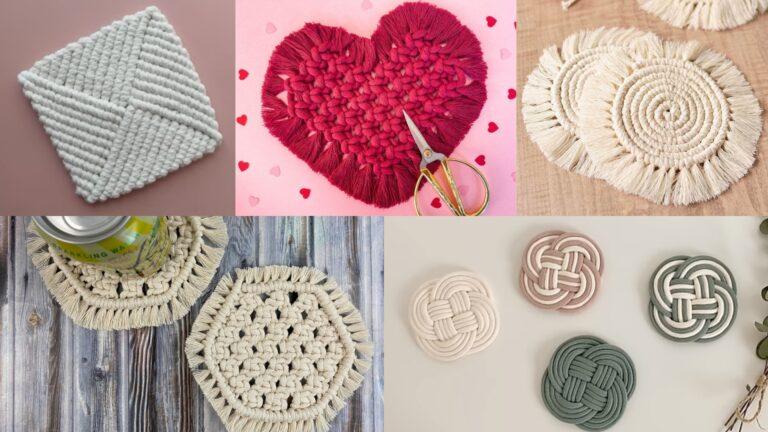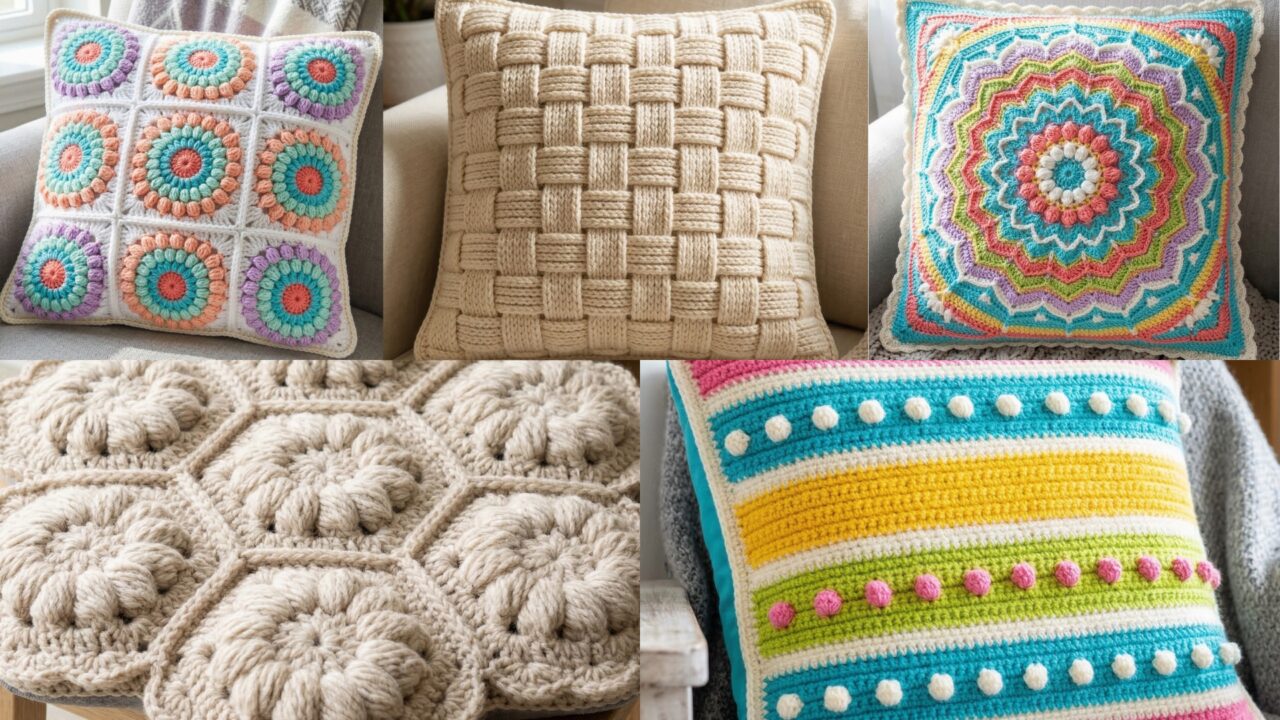
Handmade cushions are one of the easiest, most rewarding ways to refresh a room. They’re big enough to show off texture and technique, quick enough to finish in an evening or two, and endlessly customizable with color and yarn choice. Below you’ll find five detailed, ready-to-use cushion patterns — Celtic Weave, Hygge Burst, Mandala, Hexagon Puff Seat, and Stripy Candy — each with: skill level, finished size, materials, gauge, full step-by-step construction for the front panel (and back), assembly (lining, insert, zipper options), blocking/finishing, care, and variations so you can adapt them to your home.
Quick universal notes (applies to all five patterns)
- Yarn choice. For cushions that will be used daily choose washable yarn: cotton-cotton blends, acrylic, or washable wool blends. For luxe display cushions you can use alpaca/merino or a textured boucle.
- Hook sizing. Patterns below give recommended hooks — you may need to go up or down 0.5–1 mm to match gauge or to get the drape you want.
- Inserts. A slightly larger insert (1–2″ bigger than the cover) gives a plump, professional finish — e.g., for a 16″ cover use a 17″ or 18″ insert.
- Seams & closures. Mattress stitch gives the most invisible join; sc-join adds a decorative ridge and extra stability. I show a zipper method and an envelope/back method for easy care.
- Blocking. Always block panels before joining. It evens stitch tension and makes textured stitches pop.
- Safety/teen note. If you plan to wash your cushion frequently, pick yarn that tolerates machine washing; pre-wash yarn if shrinkage is a concern.
1. Crochet Celtic Weave Stitch Cushion Pattern
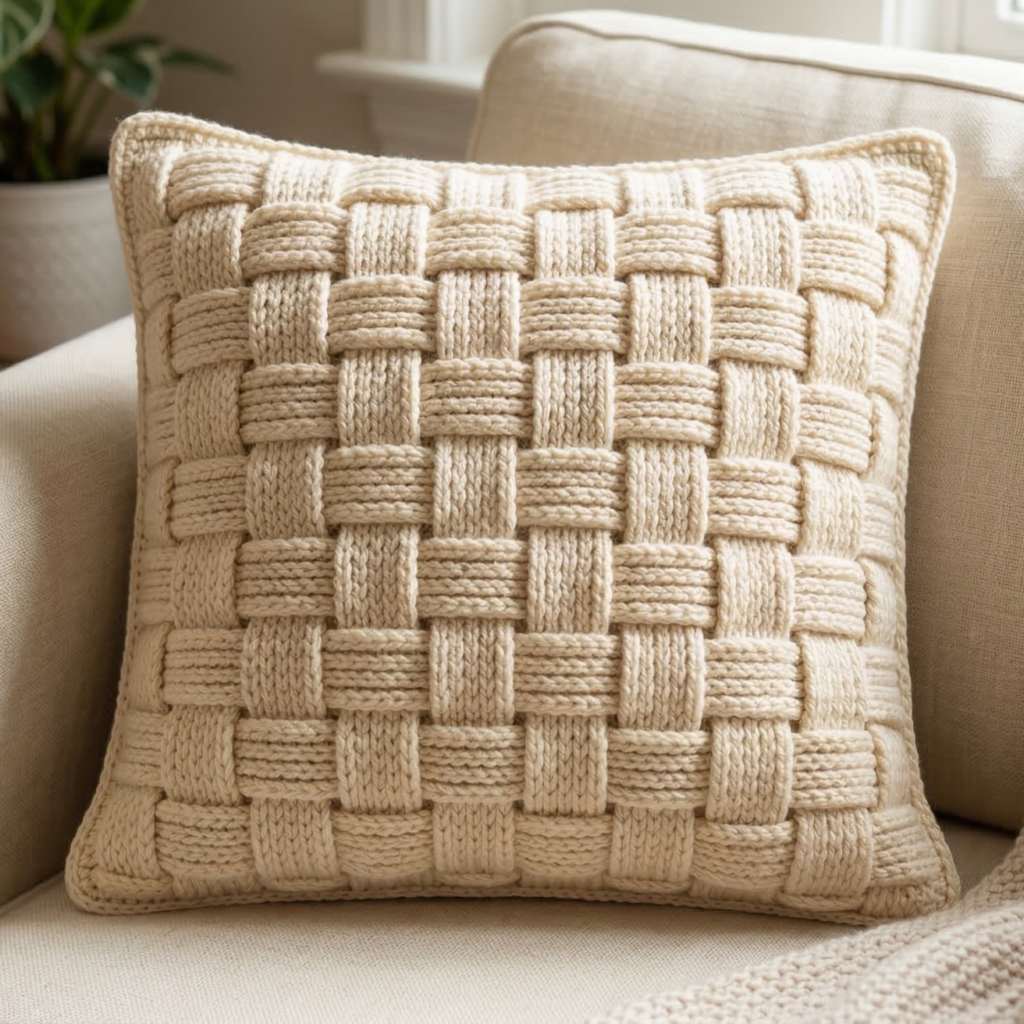
A structured, sculptural cushion that looks knit-but-is-crochet: cables and woven panels using front- and back-post stitches.
Skill level: Intermediate — post stitches and cable cross technique.
Finished size: 16″ × 16″ square (cover).
Materials
- Worsted weight yarn (category 4) — about 400–500 yards total (main color).
- Crochet hook 5.0 mm (H).
- Tapestry needle, stitch markers, scissors.
- 16″ cushion insert or stuffing + inner lining.
- Optional zipper: 16″ (invisible) + sewing needle & thread.
Gauge
- 16 sts × 18 rows in pattern = 4″ (10 cm) — check gauge; swap hooks if needed.
Stitch key
- sc = single crochet
- hdc = half double crochet
- dc = double crochet
- fpdc = front post double crochet
- bpdc = back post double crochet
- cable cross: working fpdc around stitches out of sequence to make a crossed cable.
Overview & sizing
This cushion front is worked flat — 2 panels (front + back) are made the same and joined. Panel width: chain 64 (multiple suited to 16″ after gauge). The pattern is in an 8-st repeat plus 2 edge sts (so 64 = 8×8). You’ll work rows of cables separated by narrow rib columns for the woven Celtic look.
Pattern — front panel (make 2 panels)
Foundation
- Chain 64. (If your gauge differs, make chain a multiple of 8 + 0 to reach approx 16″ width.) Turn.
Row 1 (base)
2. Sc in 2nd ch from hook and in each ch across. (63 sc) Turn.
Row 2 (establish pattern row)
3. Ch2 (counts as hdc), hdc in next 2, (fpdc around next 2, bpdc around next 2), hdc in next 2 — repeat across ending with hdc. Turn.
Row 3–6 (repeat to build height and rib)
4. Ch2, hdc across maintaining the fpdc/bpdc columns where they fall. Turn. Repeat so you have 4 rows of established pattern before doing cable crosses — this gives height for the cable to show.
Cable crossing (every 6th row do a cross)
5. On designated cross row: work up to cable start (use stitch markers), then perform a 4-st cable cross:
- Cable over to the right (C4R): fpdc around next 2 stitches, hold them on cable (slip onto stitch holder if you like), work fpdc around following 2 stitches, then go back and fpdc around the held 2 stitches. Practically in crochet you do: fpdc in 3rd st, fpdc in 4th st, then fpdc in 1st st, fpdc in 2nd st — doing the physical crossing by working the far posts before the near posts.
- After crossing, continue pattern (hdc columns and other fpdc/bpdc columns) across panel. Turn.
Repeat
6. Work Rows 3–6 as necessary; perform a cable cross every 6 rows (or every 8 rows for taller cables) until panel reaches desired height (~16″). End with a tidy hdc row. Fasten off and weave ends. Make a second panel the same.
Back panel & finishing options
- Option A: Make identical back panel for symmetric look.
- Option B: Make a plain panel in sc or a simple rib (hdc in BLO) for a quieter back.
Assembly — invisible mattress stitch (recommended) or zipper
- Block both panels flat to exact 16″ square.
- If using zipper: install zipper on one side before seaming the other three sides. Easiest method: sew zipper onto one panel RS to RS, then attach second panel RS to RS and sc-join remaining three sides.
- For mattress stitch join (flat seam): place RS faces out; whipstitch through back loops only or use mattress stitch to make a flat, nearly invisible join. Insert cushion and close remaining seam.
Finishing tips
- Use the same yarn to work a final sc round around the whole cushion for a tidy frame.
- Lining: if you expect heavy wear, sew a cotton lining slightly smaller than cover and insert the pillow into lining before closing; this protects stuffing.
Care
- Machine wash on gentle if yarn allows; reshape and dry flat. If cables puff up, steam them lightly with a cloth.
Variations
- Work cables in two colors: cable warps pop more against a contrasting background.
- Use bulky yarn for a chunkier, faster cushion that looks ultramodern.
2. Crochet Hygge Burst Cushion Pattern
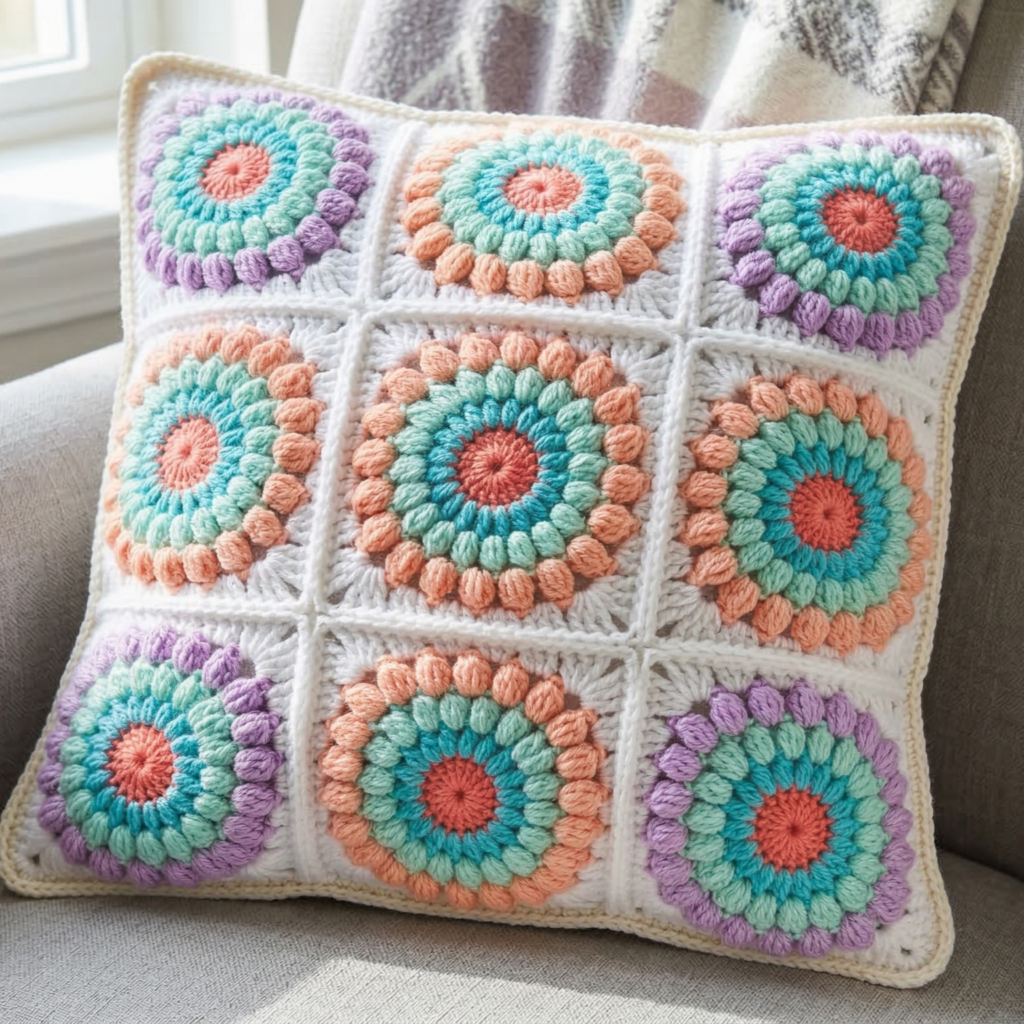
Soft, squishy, and hygge-inspired: a center burst of puff stitches radiates into gentle ribbed bands — cozy for snuggling.
Skill level: Beginner–Intermediate — puff stitches, working in rounds, and panel shaping.
Finished size: 16″ round cushion (or make square by squaring off final rounds).
Materials
- Bulky/worsted soft yarn — ~400–600 yards (bulky uses less yardage).
- Hook 6.5 mm (K) for worsted, 8–10 mm for bulky.
- 16″ round insert OR stuffing + inner lining.
- Tapestry needle, blocking pins (if needed).
Gauge
- Puff stitch texture is flexible; aim for about 8–10 puff clusters × 8 rounds = 4″ with chosen yarn.
Stitch key
- puff = (yo, insert, pull up loop) repeat 3–4 times, yo pull through all loops, ch1 to close.
- sc, hdc, dc as usual.
Overview
Work a round medallion: center cluster rounds of puff create a “burst” that is padded and soft. Continue in concentric rounds that alternate puff rounds and anchoring rounds (sc or hdc) until cushion diameter is reached. Create a back panel in same density or a plain sc round.
Pattern — front panel (worked in rounds)
Center
- MR, ch1, 8 sc in MR. Pull tight and sl st to join. (8). (This is stable small center.)
Round 2 (foundation for puffs)
2. ch2, puff in next sc, repeat around to create 8 puff loop anchors. Join.
Round 3 (puff round)
3. Into each ch-2 loop make a puff: (puff of 4 loops), ch1, sl st in same base — 8 puffs. Join.
Anchor round
4. Ch1, sc in each puff base and in sl st spaces across — this locks puffs in place.
Expand (repeat puff bands)
5. For larger burst, increase puff count each round by placing 2 puffs in certain spaces (work a 1-then-2 increase pattern) so the burst opens flat. Example: Round 4: puff, ch1, puff in same base; sc in next base — alternately increasing. Work an anchor sc round between puff rounds.
Continue
6. Alternate puff band, sc anchor, puff band, etc. until panel is ~16″ across. Do a final round of tight sc around to tidy edge.
Back panel
7. Make a matching back panel: either full puff for symmetry or a dense sc/hdc panel for sturdiness.
Assembly
- For round cushion, join both panels RS together with sc through both loops leaving a 3–4″ opening. Turn, insert stuffing or insert (if using insert, put it in first), then finish join and hide tails. For a plump cushion, use a slightly larger insert.
Finishing & hygge touches
- Add a central tuft: pass strong yarn through cushion center from front to back and tie off inside lining to create a tufted center. This compresses the puff a bit and gives that Scandinavian look.
- Add a soft pom-pom or loop with a small leather tag for a tactile accent.
Care
- Spot clean for puffs; check yarn care for washing. Bulky cushions with lots of texture often need gentle hand washing and flat drying.
Variations
- Try an ombré of three cozy neutrals for a true hygge palette.
- Work this motif into a large floor cushion by increasing rounds and using very bulky yarn.
3. Crochet Mandala Cushion Pattern
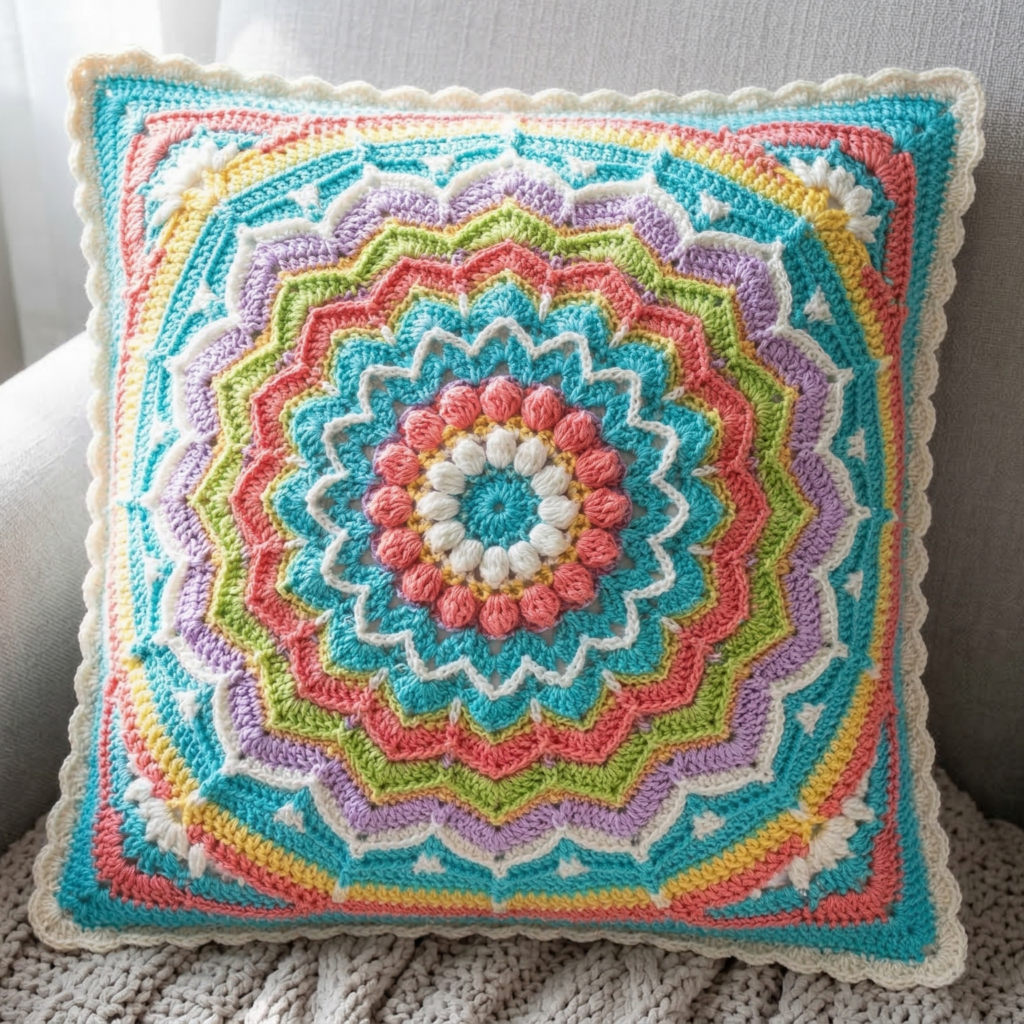
A colorful, decorative mandala front that reads like art — great when you want a statement pillow.
Skill level: Intermediate — multiple stitch types and color changes.
Finished size: 16″ square or round (make mandala then square off).
Materials
- Multiple colors of DK or worsted yarn — total ~500–700 yards depending on how many colors you use.
- Hook 4.0–5.0 mm depending on yarn.
- Tapestry needle, stitch markers.
Gauge
- Mandala patterns are flexible; gauge matters less than pleasing scale. Aim for the mandala to be ~16″ across before squaring. Adjust count or hook to get size.
Stitch key / techniques used
- MR, dc shells, puff stitches, picots, ch-spaces, clusters, join-as-you-go options.
Overview
Work a large round mandala in the round using shells, clusters and picot edging to create visual petals. After the mandala is the desired size, work extra rounds to square off the mandala into a square panel for easier assembly, or make a matching round back.
Pattern — mandala center to edge (example sequence)
This is a flexible design; below are explicit rounds to build a 16″ mandala with clear stitch counts.
Round 1 (center)
- MR, ch3 (counts as dc), 11 dc into MR. Join. (12 dc)
Round 2 (petal loops)
2. ch3, sl st into next dc around to make 12 ch-3 loops. Join.
Round 3 (small petals)
3. Into each ch-3 loop work: sc, hdc, dc, hdc, sc. Join. (12 petals)
Round 4 (shell row)
4. Ch3, 3 dc in next sc (shell), ch2, skip next petal top, sl st into the next petal top repeat around to get 12 shells. Join.
Round 5 (cluster band)
5. Work a cluster band between shell points: ch1, (puff or cluster), ch1, sc in next ch2 space from shell — repeat to add texture.
Round 6–10 (expand)
6. Alternate shell rounds, picot rounds, and textured bands, changing colors every 1–3 rounds for a bright mandala. Use 2–3 rounds of a larger shell (5 dc) to open the design. Increase evenly to maintain flatness: add shells into chain spaces rather than into the dense shells themselves.
Round 11 (size check)
7. At this point measure: if the mandala is ~16″ across you can square it; otherwise keep adding repeat cycles until it is the size you want.
Squaring the mandala (if making a square cushion)
- When the circle is the desired diameter, work a round of even sc to make an edge.
- Work 4 corner shaping sections: mark four equidistant points on the circle (12 o’clock, 3, 6, 9). Work short rectangular extensions at those points by working rows in back-and-forth manner anchored to the circle to create corners, turning the circle into a squarish panel. Many designers use a “square-up” method: sc around and then work 4 flat panels (rows) that extend at cardinal points and then fill in gaps with additional sc rounds to make a square. If you’d like an exact “how-to” to square to 16″, tell me your exact mandala diameter and I’ll calculate the row counts.
Back panel & assembly
- Option A: Make a plain sc square the same dimensions.
- Option B: Make a reverse monotone mandala.
- Join with invisible mattress stitch or add a zipper.
Finishing touches
- Edge with a decorative picot or shell to frame the mandala.
- Add tiny tassels at corners for a boho touch.
Care
- Hand wash or gentle machine wash depending on yarn; dry flat.
4. Crochet Hexagon Puff Seat Cushion Pattern
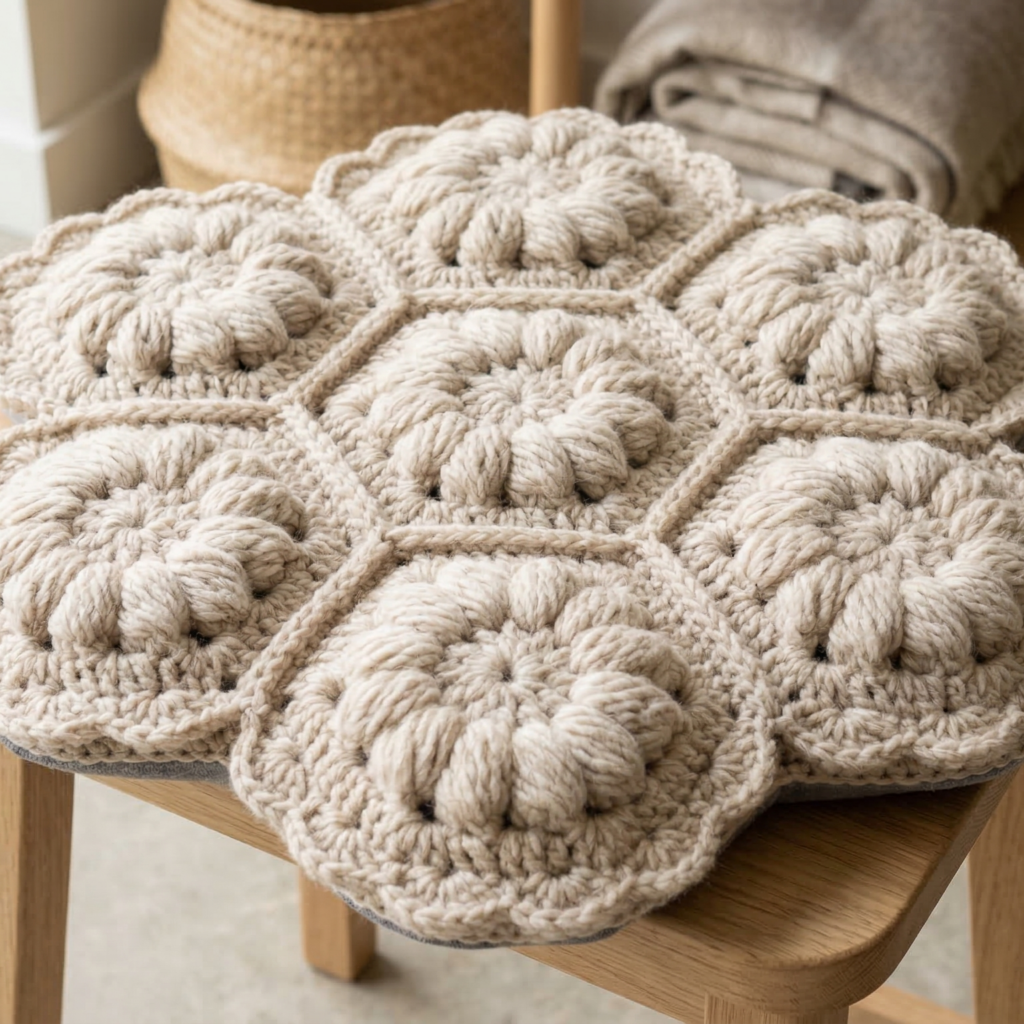
Large hexagon motifs with dramatic puff centers make a chunky seat cushion (works great as a floor seat or a stool top).
Skill level: Intermediate — puff stitches and motif join/as-you-go.
Finished size: Seat cushion approx 18″–20″ across (use 7 large hexagons joined into a hex cluster).
Materials
- Super bulky or 2 strands held together of worsted for a thick seat cushion — ~1200–2000 yards depending on size.
- Large hook 10–15 mm.
- Upholstery thread (if adding backing) and an inner seat pad (foam circle or tufted inner cushion).
- Non-slip fabric for underside optional.
Hexagon motif (large hex with puff center)
Each hexagon will be roughly 8–9″ across if worked with super bulky yarn.
Center puff
- MR, ch1, 10 sc in MR. (10)
- Round 2: ch2, puff in next sc around — make 10 puffs. Join.
Build hexagon rounds
3. Round 3: Into each ch-2 space work: ch3, (5 dc shell), ch3, sl st into next — this yields petal-like edges.
4. Round 4: Work a round of sc between shells to stabilize.
5. Rounds 5–7: Increase to make hexagon: on each corner you will work (3 dc, ch2, 3 dc) into designated corner spaces (standard hex join positions). Work even rounds between increases. Follow a hexagon increase cadence: each geometric “side” increases by adding shells into side chain spaces; aim for flatness.
Make 7 hexagons (one center + 6 around) and block if possible.
Join hexagons into seat top
- Arrange hexagons in a flower: one central hexagon and 6 surrounding it. Use join-as-you-go or whipstitch through both hexagon edges to join them firmly. A mattress stitch with bulky yarn creates a strong seam.
- Optionally work a round of sc around entire assembled top to tidy seams.
Backing, stuffing, and making a seat cushion
- For a seat cushion that will be sat on, you want structure:
- Method A (recommended): Make a matching backing hexagon or a full round backing in sturdy fabric; insert a cut foam disk/round seat pad (purchased foam seat pad) inside and hand-stitch the crochet top to the fabric backing with upholstery thread. Use a piping edge to hide seams.
- Method B: Make a full crochet underside and stuff with high-density foam or batting, but this will compress faster than foam.
Non-slip underside
- Sew a circle of non-slip rug pad or upholstery fabric to underside and stitch with a running hand-seam. This prevents sliding on chairs.
Finishing touches
- Add tufting with long upholstery needle through center and secure to underside for traditional seat cushion look. This helps keep filling evenly distributed.
Care
- Foam cushions: spot clean crochet shell only. Fully removable covers can be machine washed if yarn allows.
5. Crochet Stripy Candy Cushion Pattern

Bright, playful stripes and alternating bobble texture make a youth-friendly cushion that’s full of personality.
Skill level: Beginner — simple repeats and bobble stitch.
Finished size: 16″ × 16″ square.
Materials
- DK / worsted yarn in 3–5 bright colors (e.g., candy pastels or bold stripes) — total ~400–500 yards.
- Hook 4.5 mm (adjust for gauge).
- 16″ cushion insert, tapestry needle.
Gauge
- 16 sc × 18 rows = 4″ in sc.
Stitch key
- sc, dc, bobble (5-dc bobble or 4-dc bobble depending on yarn), sl st.
Pattern — front panel (make 2 panels)
Foundation
- Chain 64 (or your width multiple to get ~16″). Turn.
Stripe repeat
2. Work stripes in blocks of rows: for example, 6 rows Color A, 4 rows Color B, 6 rows Color A, 4 rows Color C, etc. Alternate a bobble row every third stripe band for texture.
Bobble row (texture)
3. On a bobble row: sc in next 2, bobble in next st, sc in next 2 — repeat across. The bobble will stand up and look like candy dots. Anchor next row with sc across.
Continue
4. Repeat color bands until panel reaches ~16″ height. Fasten off.
Back panel
5. Make a matching panel or a solid in one color. Option: make envelope back with two overlapping panels (each 8–9″ tall) to avoid a zipper.
Assembly
- Option 1 (envelope back): Make two back panels each 16″ × 9″ approx, overlap and seam edges. Place insert inside and close.
- Option 2 (zipper): sew zipper onto one panel edge, then join other edges.
Finishing touches
- Add a pom-pom in a contrasting color in the top corner for a playful look.
- Use white or neutral yarn for thin dividing rows to make stripes pop.
Care
- Machine washable on gentle if yarn allows; tumble dry low for acrylics, flat dry for cotton.
Conclusion
Those five cushion patterns cover a wide range of moods: structural and elegant (Celtic Weave), soft and hygge (Hygge Burst), colorful statement art (Mandala), functional seating (Hexagon Puff Seat), and playful everyday decor (Stripy Candy). A few closing tips to make your cushions look and last great:
- Measure & swatch. Make at least a small swatch in pattern to check gauge and texture before you chain the full width.
- Use a lining whenever you expect heavy use — it protects stuffing and makes washing easier.
- Choose inserts wisely. For sculptural cushions (cables, puffs) choose an oversize insert (1–2″ bigger) for fullness; for flat, graphic panels a snug insert is fine.
- Practice blocking. Blocking evens stitches and makes texture crisp — particularly for cables, mandalas, and hexagon joins.
- Label care. If you plan to gift or sell, include fiber content and care instructions on a small tag.