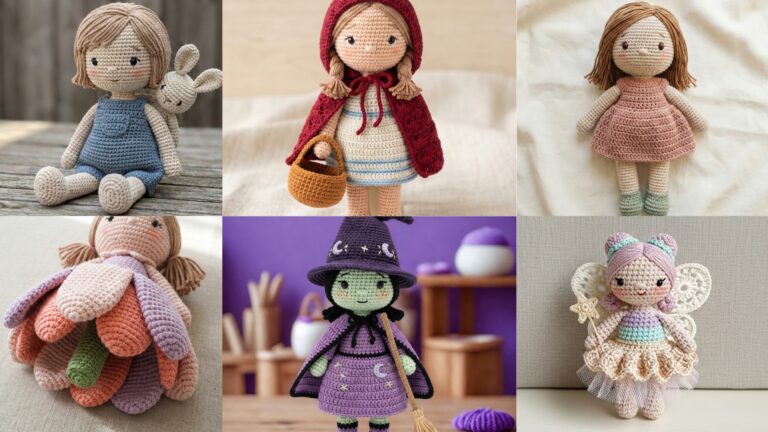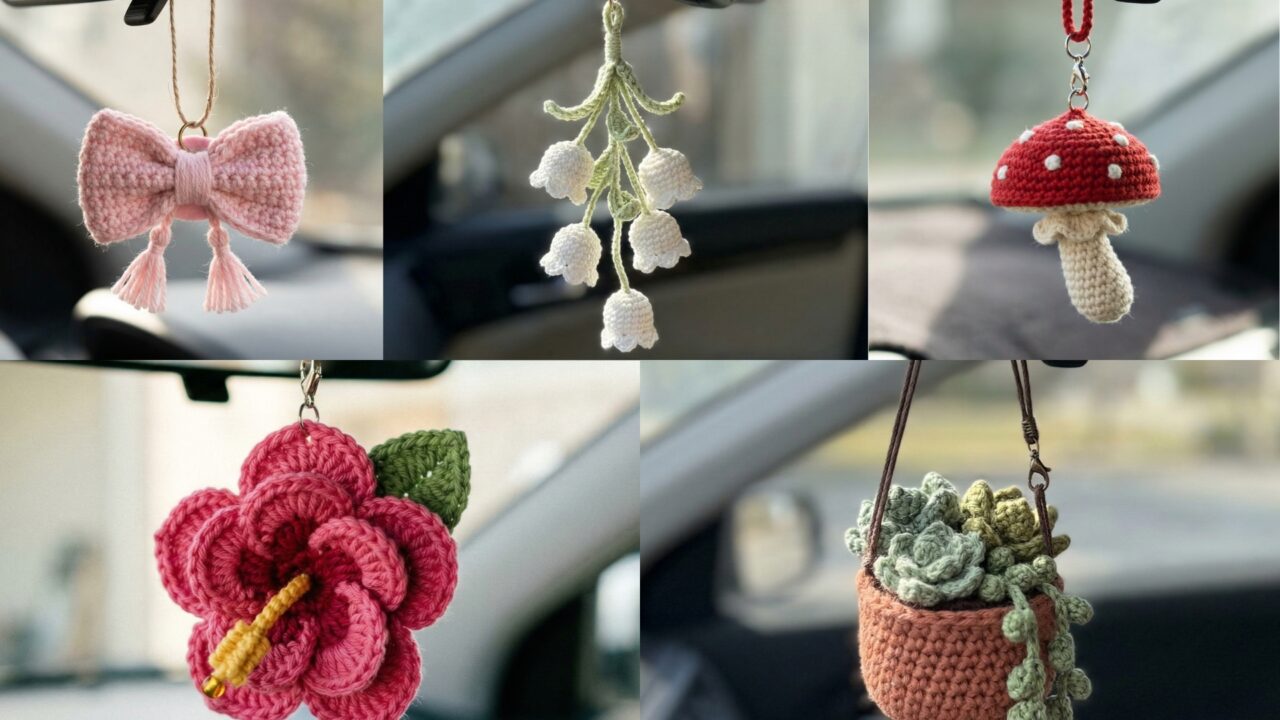
Add personality to your car with small, handmade hangings that sway at the rearview mirror, clip to a vent, or dangle from a suction cup on the window. This post walks you through five easy-to-make crochet car hangings: a hanging plant, Lily of the Valley, a mushroom, a hibiscus flower, and decorative bows. Each pattern includes: skill level, finished size, exact materials, stitch list/abbreviations, extremely detailed step-by-step instructions (construction, assembly, and how to attach it safely in a car), finishing tips, storage/care, and variations so you can customize the look.
Safety first: Make sure your hanging is small and doesn’t obstruct the driver’s view or interfere with airbags. Keep hangings light (under ~30 g) and avoid long cords that could tangle. If this will be used in a car driven by someone else, check they’re comfortable with it before attaching.
Quick shared supplies & techniques (used across patterns)
- Tapestry needle, small sharp scissors
- Small amounts of sport / DK yarn (or cotton for sturdiness) — most hangings use 5–20 g each
- Crochet hooks 2.5–4.5 mm (pattern will list recommended hook)
- Small stuffing (polyfil) for 3-D pieces (optional)
- Small jump rings, keyring, lobster clasp, split ring, or a tiny suction cup hook (clear, adhesive type) for hanging attachment
- Beads or wooden spacer beads (optional — avoid heavy beads)
- Thin cord / waxed cotton cord for loops (keep <3″ / 7.5 cm for safety)
- Glue (fabric glue or hot glue) for securing small parts if needed (use sparingly)
- Clear sealer for wood beads (if used)
- Stitch marker
Common abbreviations used in these patterns:
- ch = chain
- sl st = slip stitch
- sc = single crochet
- hdc = half double crochet
- dc = double crochet
- inc = increase (2 sc in same st)
- dec = decrease (sc2tog)
- BLO = back loop only
- FLO = front loop only
- MR = magic ring
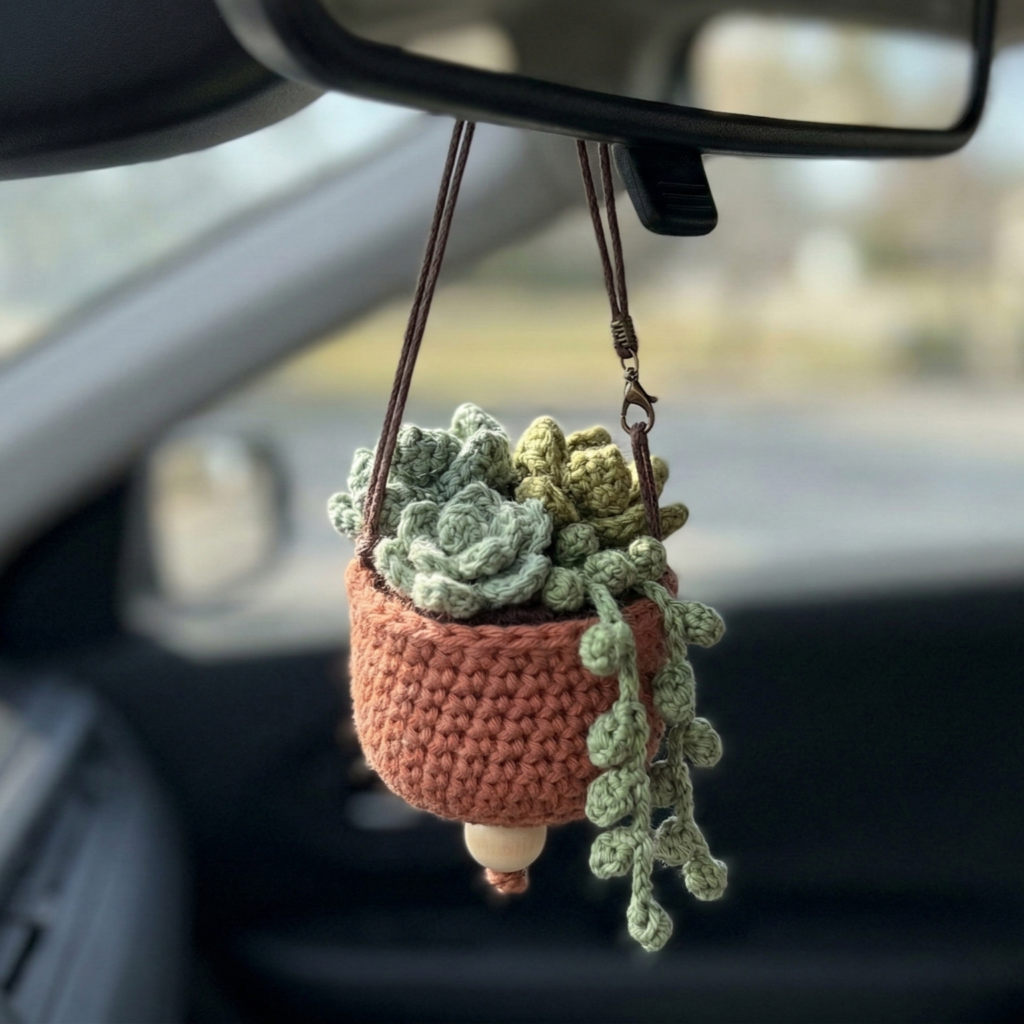
1. Crochet Car Hanging Plant Pattern
Skill level: Beginner–Intermediate
Finished size: plant pot ~1.5–2″ diameter; total hanging length with cord ~4–5″ (10–13 cm) — small and light.
Materials
- Worsted or DK cotton yarn: green (for leaves), terracotta/beige (pot) — tiny amounts, ~10 g each
- Hook: 3.0–3.5 mm
- Small amount polyfil (optional) — just a pinch for pot rim if you want plush look
- Tapestry needle, scissors
- Small wooden bead (10–12 mm) for pot base (optional)
- Thin waxed cotton cord ~6–8″ for loop (cut and knot to form loop)
- Small split ring or lobster clasp to attach to car
Concept
Create a tiny hanging pot with a few crocheted succulent/leaf sprouts that dangle a bit. The pot can be solid or hollow (hollow is lighter). Add a short cord and a split ring.
Step-by-step
Pot (worked in continuous rounds)
- MR, 6 sc into ring. (6)
- Inc in each st around. (12)
- (sc, inc) repeat around. (18)
- (sc in next 2, inc) around. (24)
- Work even sc around for 2–3 rounds to make pot height. (24 × 2–3 rows)
- Next round: (sc in next 2, dec) around to taper slightly if desired. (18)
- Optional rim: switch to a lighter color (terracotta rim) and work 1 round of hdc in BLO to form visible rim. Fasten off leaving a tail to sew in base or add bead.
Option A — Hollow pot: sew a small loop of cord through top rim and attach jump ring; leave pot hollow (no stuffing), insert small wooden bead at bottom inside pot for weight/shape and glue into place.
Option B — Filled pot: lightly stuff base with a little polyfill, then sew base closed by threading a yarn tail through the final stitches and pulling tight. Weave ends into pot interior.
Leaves / Succulents (make 3–4)
Simple small leaf:
- Ch6. Row 1: sc in 2nd ch from hook, sc, hdc, sc, sc in last ch — work back along opposite side of foundation: sc, sc, hdc, sc, sc; sl st to first sc to form a flat leaf. Fasten off, leave tail for sewing. (Adjust chains for larger leaves.)
Textured succulent rosette:
- Make a small spiral: ch12, join to form ring? Simpler: MR, 8 sc; Round 2: inc in each st (16) then sc, ch1 around and finish with small picot points. Roll and sew base to create rosette.
Attach 3–4 leaves/rosettes to rim or pop them inside the pot with short stitches so they drape outward.
Hanging cord
- Cut waxed cord ~6–8″. Fold to make a loop ~3–4 cm; tie with secure knot (double knot). Thread both loose ends through pot interior and stitch inside pot to anchor knot (or glue on inside base). Add a small split ring or lobster clasp to loop for easy attachment to car.
Finishing
- Weave and hide all tails inside the pot.
- If using wooden bead as base, glue it inside to give pot a flat bottom — this helps it hang squarely.
- Optionally, varnish bead for longevity.
Variations
- Make macramé–style holder by wrapping a small macramé net around pot and attaching cord.
- Use fuzzy yarn for a mossy plant look.
Care
- Spot clean yarn with damp cloth. Remove from car before washing a car interior or heated blowers.
2. Crochet Lily of the Valley Car Hanging Pattern
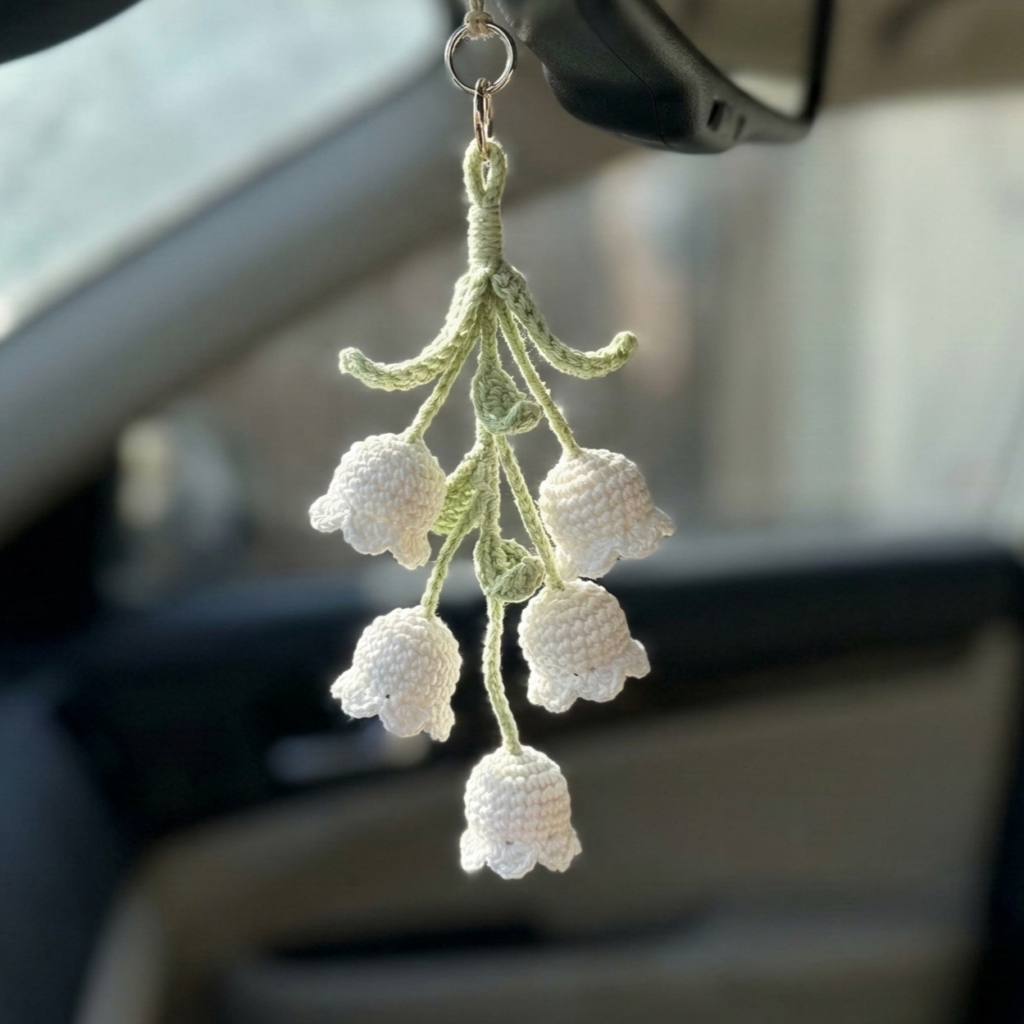
Skill level: Intermediate (small motifs + delicate joins)
Finished size: cluster length ~3–4″ (7.5–10 cm); bells ~0.4–0.6″ (1–1.5 cm) diameter.
Materials
- Fingering / sport weight cotton in white (bells) and pale green (stems/leaves) — tiny amounts
- Hook: 2.5–3.0 mm for tighter stitches so bells hold shape
- Tapestry needle, small stuffing (optional)
- Thin floral wire (optional) for shaping stems — if used, cover with floral tape or yarn wrap, but keep short and away from driver view
- Thin cord for hanging ~6″ and a small jump ring
Concept
Make a small cluster of several tiny bell-shaped flowers (the lily-of-the-valley) hanging gracefully from a short stem.
Step-by-step
Bell (make 6–8)
- MR, 5 sc into ring. (5)
- (sc, inc) ×5 → 10.
- sc around for 2 rounds. (10 × 2 rows)
- Next round: sc, dec around to form bell flare and leave opening — if you want a tiny bell that can hang, fold and sl st last round inside to make a narrow neck: (sc, dec) → 7–8 sts. Fasten off leaving tail. Stuff just slightly to keep dome shape (or leave unstuffed for super light weight). Weave tail through top and pull slightly to make small opening for hanging bead.
Optional scalloped edge: before finishing, work a round of picots (ch3, sl st in base) spaced evenly to mimic bell edge.
Stem & assembly
- Cut a short length of floral wire (~1.5–2″ / 4–5 cm) for each cluster if you want the flowers to dangle at slightly different lengths. Wrap wire with green yarn to hide metal. (If you’d rather avoid wire entirely, crochet short chains: ch12–20 and use thin cord for stems.)
- Attach bells to stems: sew top tail of bell around stem securely. For yarn-wrapped wire, stitch tightly and secure tail with knot and a dab of glue wrapped with yarn.
Leaves
Tiny leaf for silhouette (make 2–3):
- Ch6, sc back across foundation, or MR 6 sc and shape into small leaf as in plant pattern. Sew to top of stem cluster.
Hanging loop
- Gather stems together, wrap with yarn to create a small bouquet, leave a loop of cord above (knot it several times), and add a small jump ring. Keep overall length compact.
Finishing
- Trim tails. Ensure all knots and stitches are secure — these are small parts that will be jostled in a car.
- If you used wires, tuck and wrap ends so no sharp metal is exposed.
Variations
- Make monochrome white bells for a classic look, or tiny pastel bells for a playful vibe.
- Add a tiny bead at the mouth of each bell if you’d like a subtle shimmer (use seed beads and sew them inside the bell edge).
Care
- Avoid heavy perfumes or car air fresheners directly on the yarn as they can attract dust.
3. Crochet Mushroom Car Hanging Pattern
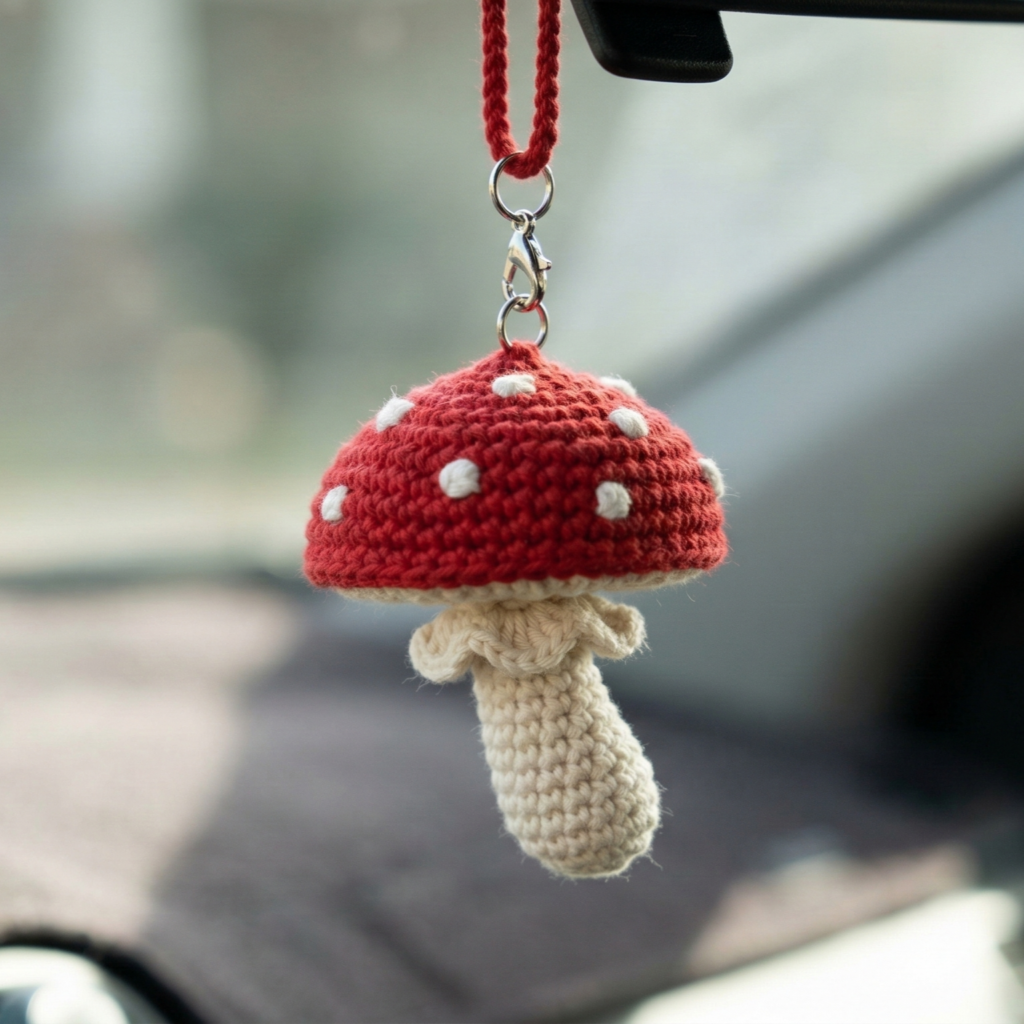
Skill level: Beginner–Intermediate (amigurumi basics)
Finished size: mushroom cap ~1–1.5″ diameter; total hanging length ~3–4″ (7.5–10 cm).
Materials
- DK/acrylic yarn: red (cap), cream/white (stipe & spots), optional brown (underside) — tiny amounts ~10 g total
- Hook: 2.5–3.5 mm (use smaller hook than yarn label for amigurumi firmness)
- Small amount stuffing
- Small jump ring / lobster clasp and short cord
- Tapestry needle, scissors
Concept
Make a cute mini mushroom (cap + stem) stuffed lightly. Add a short hanging loop from the cap top.
Step-by-step
Cap
- MR, 6 sc into ring. (6)
- inc ×6 → 12.
- (sc, inc) ×6 → 18.
- (2 sc, inc) ×6 → 24.
- Sc around for 2 rounds to shape dome. (24 × 2 rows)
- (2 sc, dec) ×6 → 18. — You can leave this round as the edge of cap. Fasten off leaving tail for sewing.
Spots (make 6–8)
- With white: MR, 5 sc into ring. Pull tight, fasten off leaving tail, flatten and sew random spots onto cap after finishing.
Underside (skirt)
- With cream: join at cap edge and sc around, working 2–3 rounds so the skirt hangs under the cap slightly for depth. Optionally work a round of hdc to create a neat edge. Fasten off.
Stem
- MR, 6 sc into ring. (6)
- sc around for 4–6 rounds to reach ~1″ height. Stuff lightly before closing.
- Dec rounds to close: dec until 6 sts, then close. Leave tail for joining.
Assembly
- Sew stem to underside center of cap. Add small stuffing to adjust shape as needed.
- Sew spots to cap with white yarn tails hidden inside.
- Create hanging loop: attach a short piece of cord or chain to top of cap by sewing through the top center; add jump ring + lobster clasp.
Finishing & variations
- Make the cap in pastel shades for a kawaii look.
- To reduce weight and wobble, keep stuffing minimal.
- Optionally, add a tiny embroidered face on the stem for personality.
Care
- Spot clean; remove before using automated car washes with high-pressure sources.
4. Crochet Hibiscus Flower Car Hanging Pattern
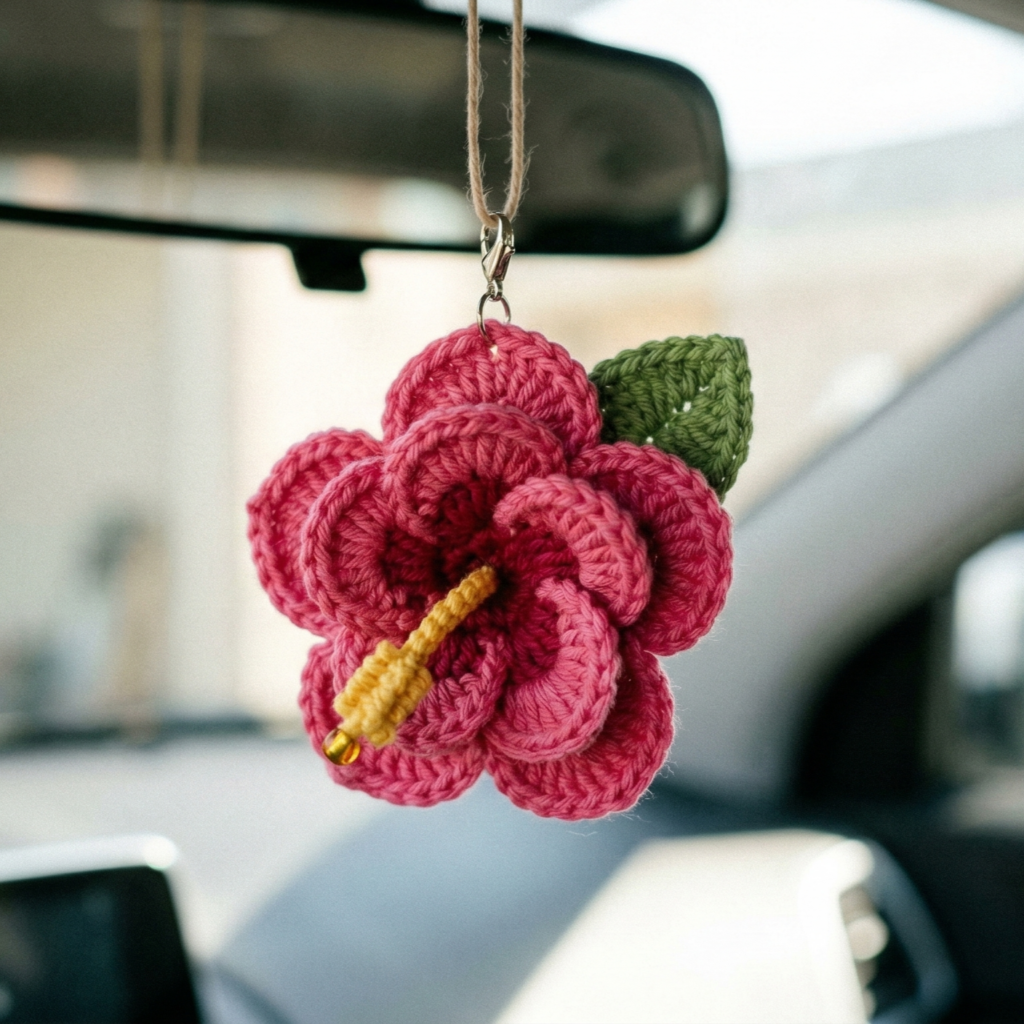
Skill level: Intermediate (floral shaping + layered petals)
Finished size: bloom diameter ~1.75–2.5″ (4.5–6.5 cm); total hanging length with stamen ~3–4″ (7.5–10 cm).
Materials
- Sport/DK cotton in hibiscus red/pink, yellow (stamen), and green (leaf) — small amounts
- Hook: 3.0–3.5 mm
- Tapestry needle, small stuffing (optional for slight dome), thin cord for loop
- Optional tiny bead for stamen tip
Concept
Create a layered hibiscus with 5 large petals and a protruding stamen (made from yellow yarn and a bead for the tip). Sew leaf behind flower and attach a short loop.
Step-by-step
Petal (make 5)
- Ch6. Row 1: sc in second ch from hook, hdc, dc, tr, dc, hdc, sc (fan-shaped petal).
- Turn and work 1 extra row: ch1, sc across petal to thicken it (or work (sc, hdc, dc, hdc, sc) mirrored over petal to make it fuller). Fasten off leaving long tail for joining.
Flower center join
- Make a small circular center: MR, 6 sc; Round 2: (sc, inc) ×3 → 9. Fasten off leaving tail. This is the flower’s base to attach petals.
Assembly
- Arrange 5 petals evenly around center circle and sew them in place using the long tails, overlapping slightly so petals meet cleanly. Leave underside tidy by weaving in tails.
Stamen
- Make a thin tube: ch10, join and work sc around to form short tube ~0.5–1″ long. Use yellow yarn.
- At tip, sew or glue a tiny bead (secure with multiple thread passes). Insert a little stuffing inside the tube if you want the stamen to have volume.
- Sew stamen to center top of flower, angling so it protrudes.
Leaf (optional)
- Ch6, sc, hdc, dc, hdc, sc — shape into leaf and sew behind flower to act as backing and color contrast.
Hanging loop
- Sew a small yarn loop to back of flower and anchor it with multiple stitches. Attach a jump ring and lobster clasp.
Finishing & variations
- For a fuller Hibiscus, make 2 rounds of petals: a larger outer set and a slightly smaller inner set offset for a dimensional bloom.
- Use variegated yarn for petals to add depth.
Care
- Keep away from direct sun for long periods to prevent color fading. Remove if interior heats up (cars can become very hot).
5. Crochet Bows Car Hanging Pattern
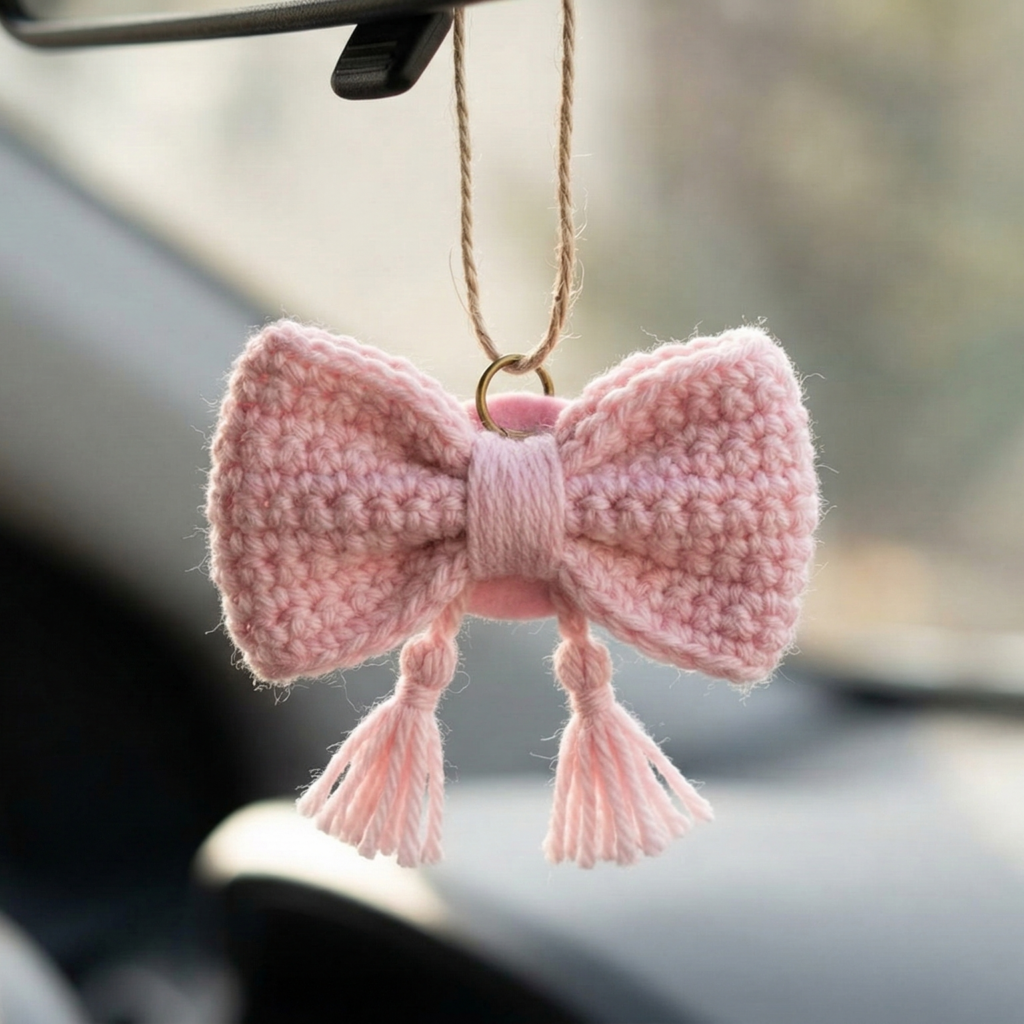
Skill level: Beginner
Finished size: bow ~1.5–2″ across; total length with tail ~3–4″ depending on design.
Materials
- DK or worsted yarn (cotton/acrylic) — small amounts per bow
- Hook: 3.5–4.5 mm
- Tapestry needle, scissors
- Small piece of felt (optional) to back bow for durability
- Small jump ring and short cord
Concept
Quick, flat bows that attach with a split ring to the mirror or clip to a vent. Make single bows, double-layer bows, or bow + tassel combos.
Step-by-step — simple bow
Bow body
- Ch 18 (adjust for desired width). Row 1: sc in 2nd ch from hook and across (17 sc). Turn.
- Rows 2–4: ch1, sc across to create a 3–4 row rectangle. Fasten off leaving long tail.
Bow center wrap
- Cut a 6″ length of yarn and wrap tightly around rectangle center multiple times to cinch into bow shape. Tie securely and weave tail ends through to the backside. Alternatively, crochet a small strip: ch6, sc 4 rows and use that to wrap center.
Optional tassel tails
- Attach 4–6 short strands folded in half at the bow bottom and knot them to create tails for a keychain-style look.
Backing & loop
- Optional felt backing: cut small oval of felt, glue or sew behind bow to hide wrap and add durability.
- Sew a small cord loop or attach a small jump ring to the back of felt or yarn wrap for hanging.
Variations
- Make double-layer bows (one small bow on top of a bigger bow) using two rectangles in different colors.
- Use metallic yarn for a glam console-mirror charm.
Care
- Spot clean; replace bow if it fades or frays from sun/exhaust.
Final tips for all car hangings
Attachment & placement
- Best practice: attach to rearview mirror only if it is compact and doesn’t swing into the driver’s sightline. Alternatively use a small suction-cup hook on the side window, clip to an air vent (lightweight only), or hang from a rearview mirror clip/hook that stays close to the mirror stem.
- Keep cord length under ~3–4″ (7.5–10 cm) to avoid interference.
- Use a quick-release clasp (lobster clasp) or split ring so the hanging can be removed quickly (useful if someone needs a clear view or for cleaning).
Weight & durability
- Keep pieces light: avoid heavy beads or metals. The total hanging should ideally weigh less than 20–30 g.
- Secure all beads and glued elements with multiple passes of thread and a drop of fabric glue if needed.
Cleaning
- Remove hangings before washing the car or using high-heat blowers. Hand wash gentle in cool water with mild detergent, reshape and dry flat. Cotton and acrylic hold up best.
Gift ideas & presentation
- Make a set (mushroom + bow) and present in a small kraft box with a ribbon and a tiny care tag: “Remove before car wash.”
- Personalize with a small initial charm (lightweight metal or embroidered initial) attached to the split ring.
conclusion
These five patterns give you a range of styles for car decor — from living-look hanging plants and delicate lily-of-the-valley sprays to cute mushrooms, tropical hibiscus blooms, and quick bows. Each project is compact, customizable, and designed with car safety in mind: keep them light, short, and easy to remove.