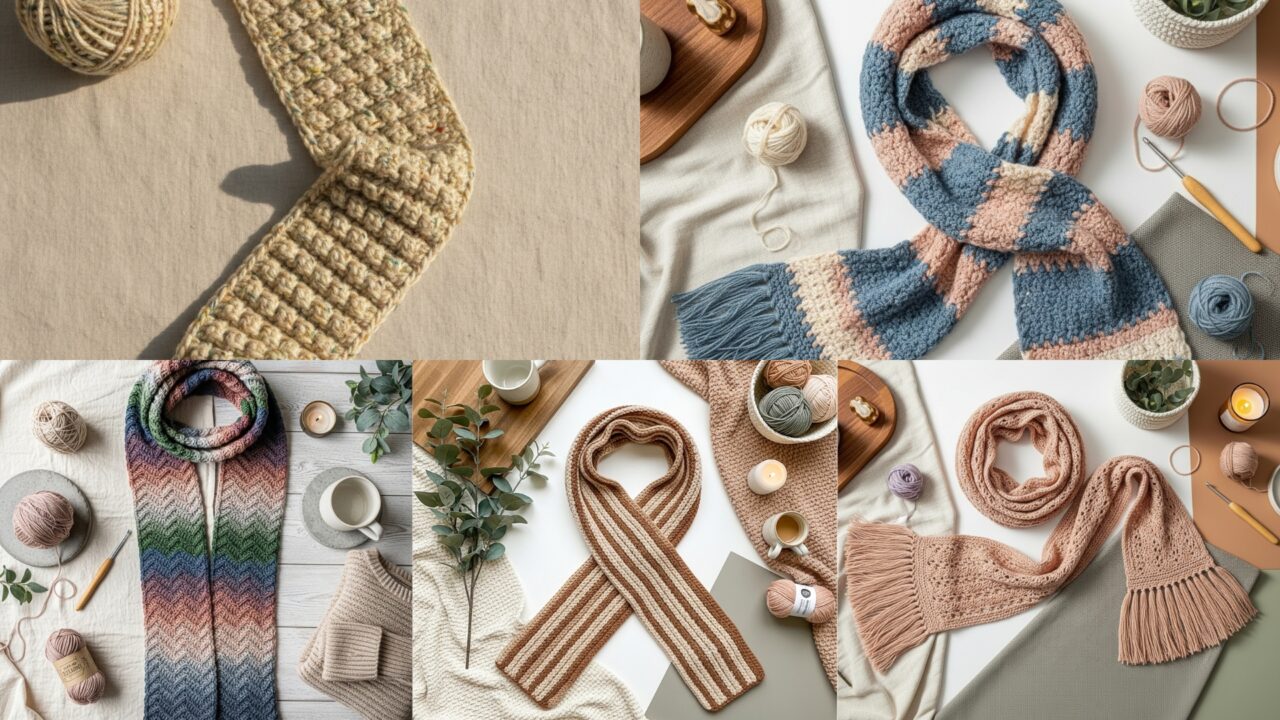
Fresh, wearable, and endlessly customizable — scarves are one of the best crochet projects: portable, quick to finish, and ideal for showing off a stitch texture or special yarn. This collection gives you five modern scarf patterns that suit a variety of skills and styles: from the calm minimalism of the Serenity Scarf to the playful texture of the Tweedy Puff Stitch Scarf, plus fringe, chevron, and striped options. Each pattern below includes a clear overview, skill level, recommended materials, gauge and finished-size guidance, a step-by-step construction (with stitch repeats and sample counts), variations, finishing & blocking tips, care instructions, and styling ideas.
All patterns use US crochet terms. If you’d like any pattern converted to a printable PDF or a photo-step checklist for your blog, tell me which one and I’ll expand it.
Quick project notes (read first)
- Yarn choice matters. I’ll recommend yarn weights for each scarf. For drape you’ll often want softer fibers (merino, alpaca, cotton blends); for structure use plied wool or cotton.
- Hooks & gauge. Always make a small gauge swatch before starting. I include example gauges and sample stitch counts for a medium-length scarf; adjust to personal preference.
- Finished sizes (samples). Scarf widths below are guidelines; feel free to change repeats to make narrower/wider versions. Example medium scarf length is ~60–72 in (150–180 cm) including fringe; width ranges 6–12 in depending on style.
- Blocking. Many stitches open up best with light blocking. I include blocking suggestions in finishing for each pattern.
1. Crochet Serenity Scarf Pattern
Overview
A clean, modern scarf focused on long vertical texture and gentle drape. Simple repeats make this a relaxing, meditative stitch for beginners who want a contemporary result.
Skill level: Confident beginner (basic stitches, working in rows)
Materials
- Yarn: DK / light worsted (approx. 300–400 yd / 275–365 m). Choose a soft merino blend or a cotton-bamboo blend for drape.
- Hook: 4.0 mm (adjust to match gauge).
- Tapestry needle, blocking pins, measuring tape.
Gauge (example)
- 20 sts × 24 rows = 4 in × 4 in in the main pattern (sc / hdc-based vertical rib). Make a swatch to confirm.
Finished size (sample)
- Width: 8 in (20 cm)
- Length: 64 in (162 cm) — sample length without fringe
Stitches & repeating
- ch = chain, sc = single crochet, hdc = half double crochet, dc = double crochet, BLO = back loop only.
Pattern foundation
Work a flat rectangular scarf in rows. The Serenity stitch is a vertical rib created by combining BLO hdc rows and regular hdc rows.
Step-by-step (sample)
- Foundation chain: Ch 40. This gives a fabric ~8 in wide at the example gauge. (Adjust multiple of 2 for repeat.)
- Row 1 (Right side): Hdc in 3rd ch from hook and across (counts as hdc + hdc across) — 38 hdc. Turn.
- Row 2 (BLO rib row): Ch 2 (counts as hdc), hdc in BLO of next st across. Turn. This creates one depressed rib.
- Row 3 (Regular texture row): Ch 2, hdc in each st across. Turn.
- Row 4: Repeat Row 2.
- Repeat Rows 2–3 until scarf length reaches about 62 in (leaving 2 in for blocking or fringe). Finish on Row 3 repeat, fasten off and weave in ends.
Variations
- Work the same pattern with a bulkier yarn and larger hook for a chunkier Serenity Scarf.
- Create stripes by switching colors every 6–8 rows. Keep floats loose on the wrong side.
Finishing & blocking
- Wet block lightly to even stitches and open the rib. Pin to shape and allow to dry flat.
- Optional fringe: add 3–4 in long fringe evenly along short edges; fold in half and pull ends through with a lark’s head knot.
Care
- Follow yarn label. For merino blends: hand wash or machine gentle, cool water; dry flat.
Styling
- Perfect as a wardrobe staple — fold once and wear with a tailored coat for a minimalist look.
2. Crochet Fringe Scarf Pattern
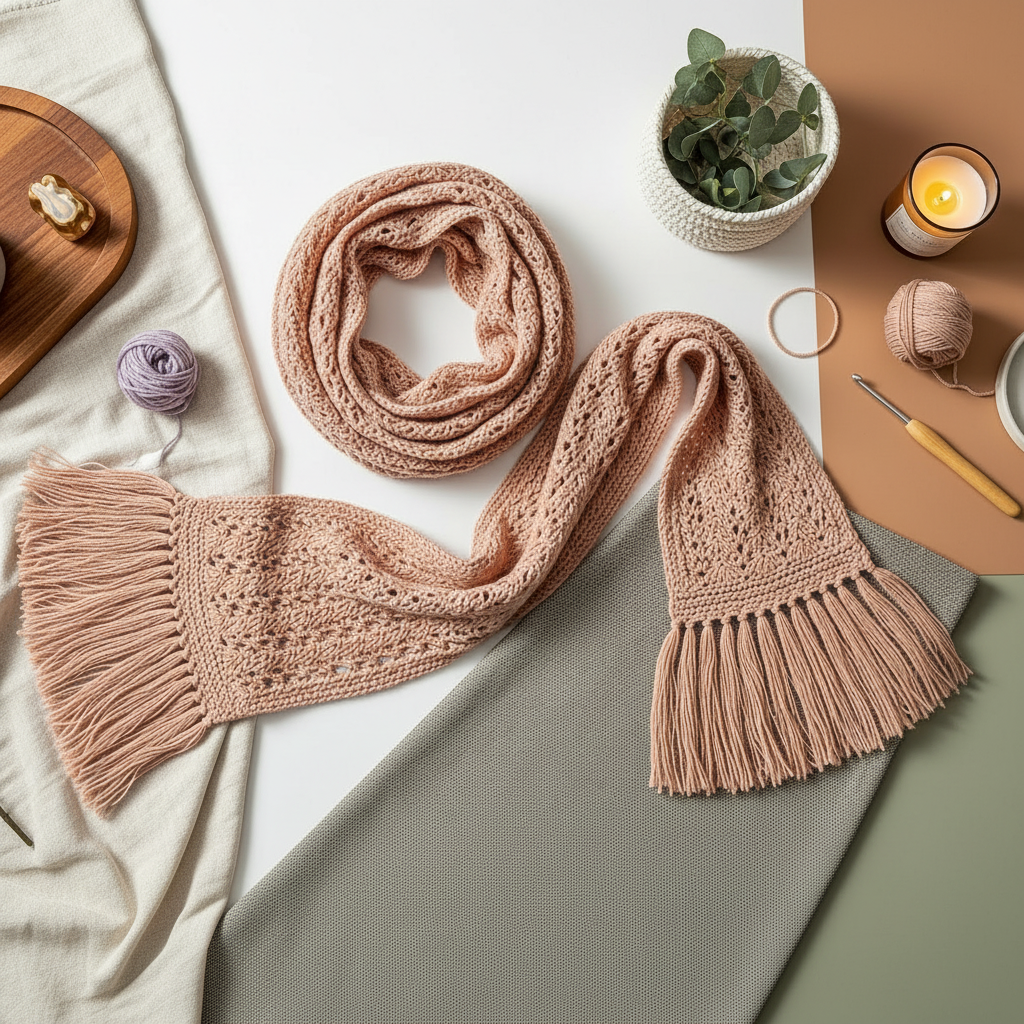
Overview
A flattering, classic scarf that highlights a lacy or open stitch and finishes with bold fringe for movement. This pattern is ideal when you want a light accessory that adds drama with a swinging fringe.
Skill level: Confident beginner → intermediate (lace stitches and even tension)
Materials
- Yarn: Sport to DK weight (approx. 350–450 yd / 320–410 m), or use fingering held double for a delicate open fabric.
- Hook: 3.75–4.5 mm depending on yarn choice.
- Scissors, tapestry needle, fringe comb (optional).
Gauge (example)
- 18 sts × 22 rows = 4 in × 4 in in pattern (a lacy stitch such as V-stitch or shell repeat).
Finished size (sample)
- Width: 7 in (18 cm)
- Length: 66 in (168 cm) excluding fringe
- Fringe: 4 in on each short end (adds movement and ~8 in to total drop when folded)
Stitches & repeating
- Use a V-stitch lace pattern for this scarf: V-stitch = (dc, ch1, dc) in same st.
Step-by-step (sample)
- Foundation chain: Ch 36 + 1 (multiple of 4 + 1 for V-stitch repeat).
- Row 1: Dc in 4th ch from hook (counts as dc), ch1, dc in same ch (creates first V), skip 2 ch, (dc, ch1, dc) in next ch repeat to last 3 ch, end with dc — 9 V-stitches across. Turn.
- Row 2: Ch3 (counts as dc), dc in ch-1 space, ch1, dc in same ch-1 space across (work V in each ch-1 space from previous row). Turn.
- Repeat Row 2 until scarf reaches desired length (~66 in).
- Edge rounds: Work one round of sc around to tidy if needed.
Add fringe
- Cut multiples of 4 strands for each fringe bundle (for a 4 in long fringe, cut strands 8 in long). Fold each bundle in half and use a crochet hook to pull folded loop through edge, pull ends through loop and tighten (lark’s head knot). Space evenly (e.g., every V or every other V) depending on density desired.
Variations
- Use a deeper lace (shells or fan stitch) for very airy scarves.
- Add beads to selected fringe bundles for an evening scarf (only for adult wear).
Finishing & blocking
- Pin the lace gently to open the stitches and set shape; steam or wet block per fiber content. Comb fringe lightly with fingers or a fringe comb to align.
Care
- Lacy scarves often need gentle care: hand wash or machine delicate, reshape and dry flat.
Styling
- Drape long and loose for breezy styling; add a belt over a coat and let fringe peek out at hem for a boho silhouette.
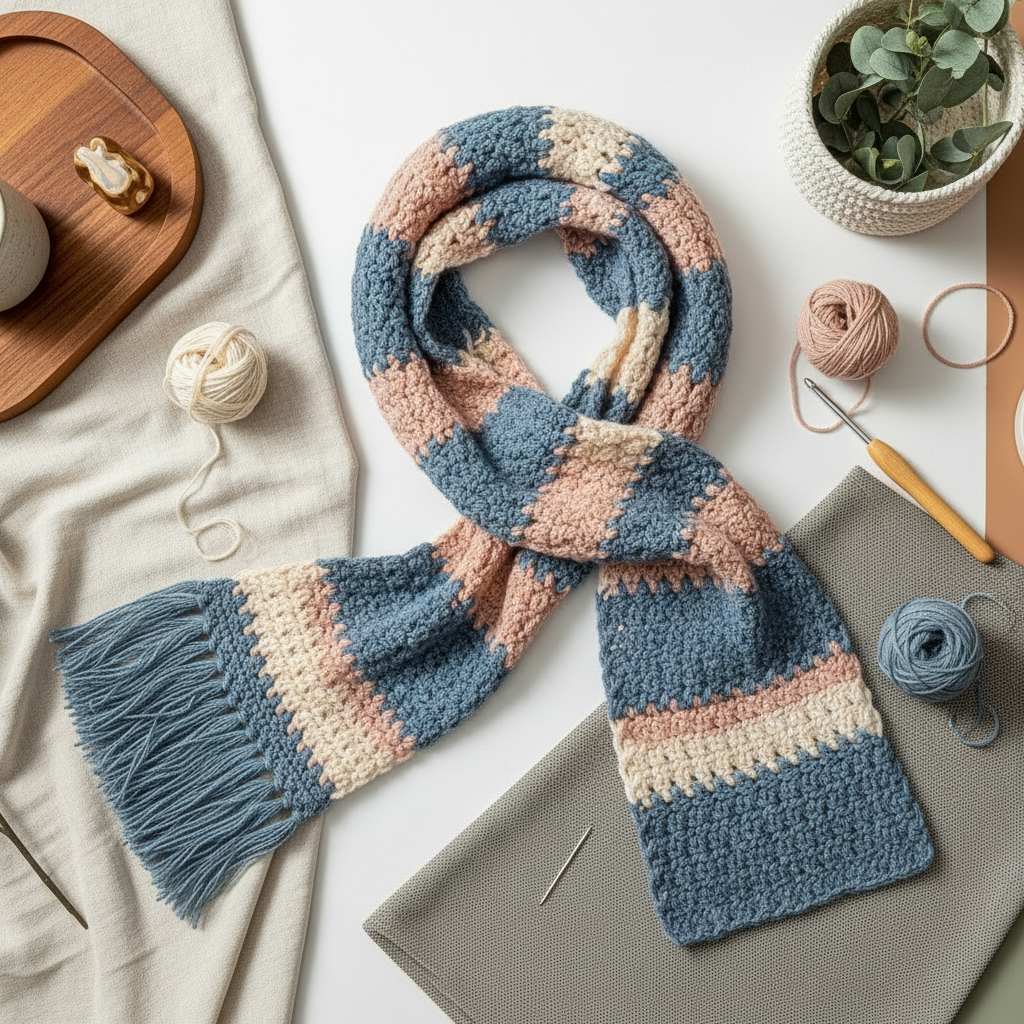
3. Crochet Chevron Stitch Scarf Pattern

Overview
Chevron (zigzag) scarves are a perennial favorite. The directional peaks create visual interest and texture. This modern chevron uses a slightly widened peak and shallow valley so the edge lies flat with minimal blocking.
Skill level: Confident beginner (working increases/decreases to make zigzags)
Materials
- Yarn: Worsted weight (approx. 300–450 yd / 275–410 m). Bulky chevrons are cozy; worsted gives a neat ripple.
- Hook: 5.0 mm (or as needed for gauge).
- Tapestry needle, blocking tools.
Gauge (example)
- 14 sts × 16 rows = 4 in × 4 in in pattern (dc-based chevron).
Finished size (sample)
- Width: 8–10 in (20–25 cm)
- Length: 70 in (178 cm) — helpful to wrap twice.
Stitch repeat
Chevron usually built over a multiple + turning stitches. A common repeat is multiple of 12 + 3.
Step-by-step (sample, dc-based chevron)
- Foundation chain: Ch 51 (multiple of 12 + 3 = 51).
- Row 1: Dc in 4th ch from hook and across. Turn. (This establishes base row.)
- Row 2 (pattern row): Ch3 (counts as dc), *dc2tog (dec), dc in next 4 sts, (dc, ch1, dc) in next st (peak), dc in next 4 sts, dc2tog over next 2 sts (dec), repeat from * across, end with dc in last st. Turn.
- The dc2tog forms the valley (decrease), and the (dc, ch1, dc) cluster creates the peak.
- Repeat Row 2 until desired length. Work even for final 2 rows of dc to tidy top edge. Fasten off.
Variations
- Carry two colors in stripes: change color every 6–8 rows to create wide chevrons.
- Use variegated yarn for a painterly chevron.
Finishing & blocking
- Chevron benefits from blocking to open peaks and valleys and reduce distortions. Stretch gently and pin peak points wider if you want dramatic chevrons.
Care
- Follow yarn care; wool-blend chevrons may need hand wash.
Styling
- Wear with a neutral coat to let the zigzag pattern pop. A chevron scarf is great for adding pattern to a streamlined outfit.
4. Tweedy Puff Stitch Scarf Pattern
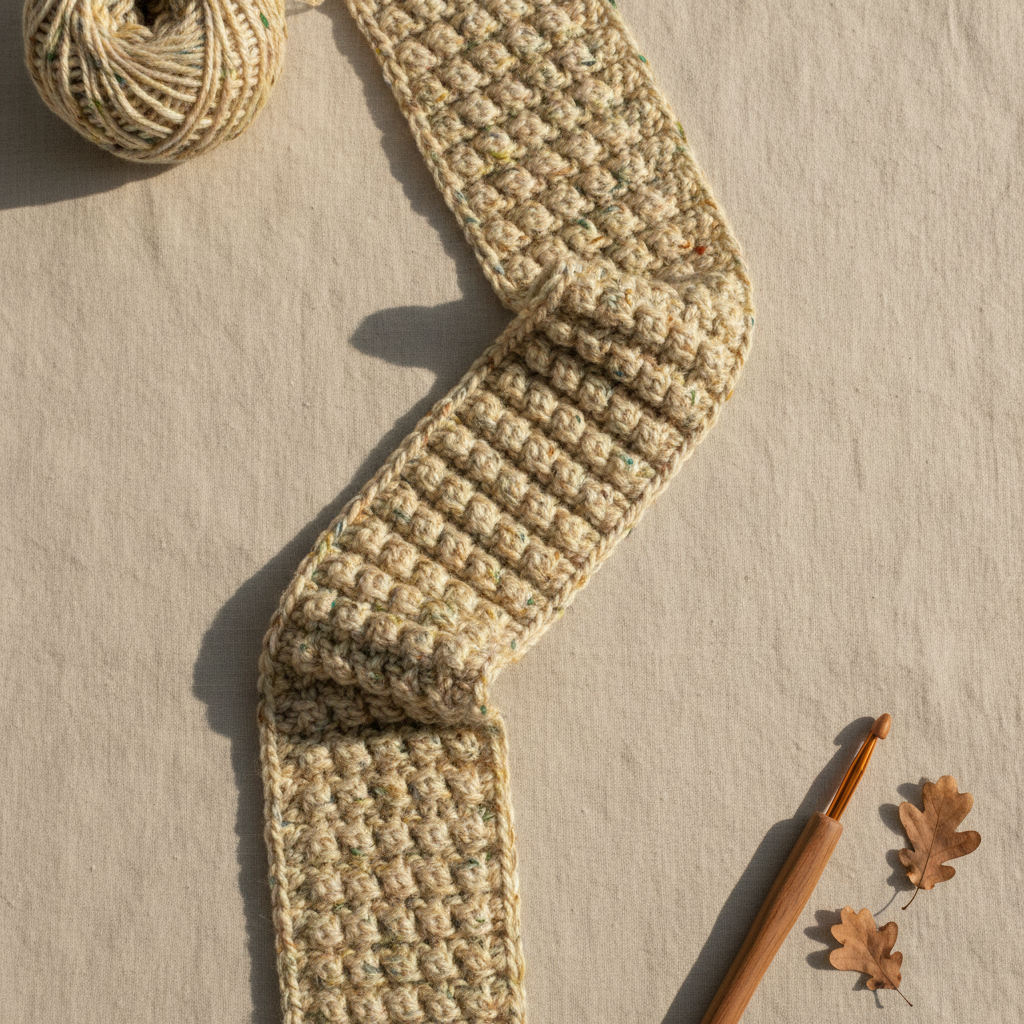
Overview
A tactile, cozy scarf using puff stitches (or bobbles) that create a nubby, tweedy texture — excellent with tweed or slubby yarns. This one is warm and textural, perfect for cold-weather styling.
Skill level: Intermediate (puff/bobble stitch technique and even tension)
Materials
- Yarn: Bulky or worsted tweed/space-dyed yarn (approx. 250–400 yd / 230–365 m depending on width/length). Puff stitches show well in solids or subtly tweedy yarn.
- Hook: 5.5–6.5 mm for bulky; 5.0 mm for worsted.
- Tapestry needle.
Gauge (example)
- Puff stitch fabric tends to be squishy; aim for a swatch to measure approximate width. Example: 12 sts × 14 rows = 4 in × 4 in in puff pattern.
Finished size (sample)
- Width: 7–9 in (18–23 cm)
- Length: 64 in (162 cm)
Stitch notes
- Puff stitch (example): yo, insert hook, pull up loop (repeat 4–5 times) — you will have multiple loops on hook; yo and pull through all loops, ch1 to close puff. Use 4 loops for a medium puff.
Step-by-step (sample)
- Foundation chain: Ch 28 (adjust multiples depending on puff repeat and desired width).
- Row 1 (base): Sc in 2nd ch from hook and across. Turn.
- Row 2 (setup): Ch 1, sc across. Turn.
- Row 3 (puff row): Skip next st, puff in next st, sc in next st repeat across (puff and sc alternate). Turn. The sc between puffs gives a grid that stabilizes the fabric.
- Row 4: Ch1, sc across (this works as spacer row). Turn.
- Repeat Rows 3–4 until scarf reaches desired length.
Variations
- Make larger puffs for a more sculptural scarf — use more loops per puff or taller closure chains.
- Alternate puff rows with simple seed-stitch bands for visual interest.
Finishing & blocking
- Block gently to even rows (puffs don’t need heavy stretching). Fluff puffs with fingers after drying. Trim fringe if desired.
Care
- Bulky tweed yarns often require gentle care: hand wash cool and dry flat.
Styling
- This scarf is an instant focal point — keep the rest of the outfit relatively simple. Puff stitch pairs beautifully with textured coats and chunky knits.
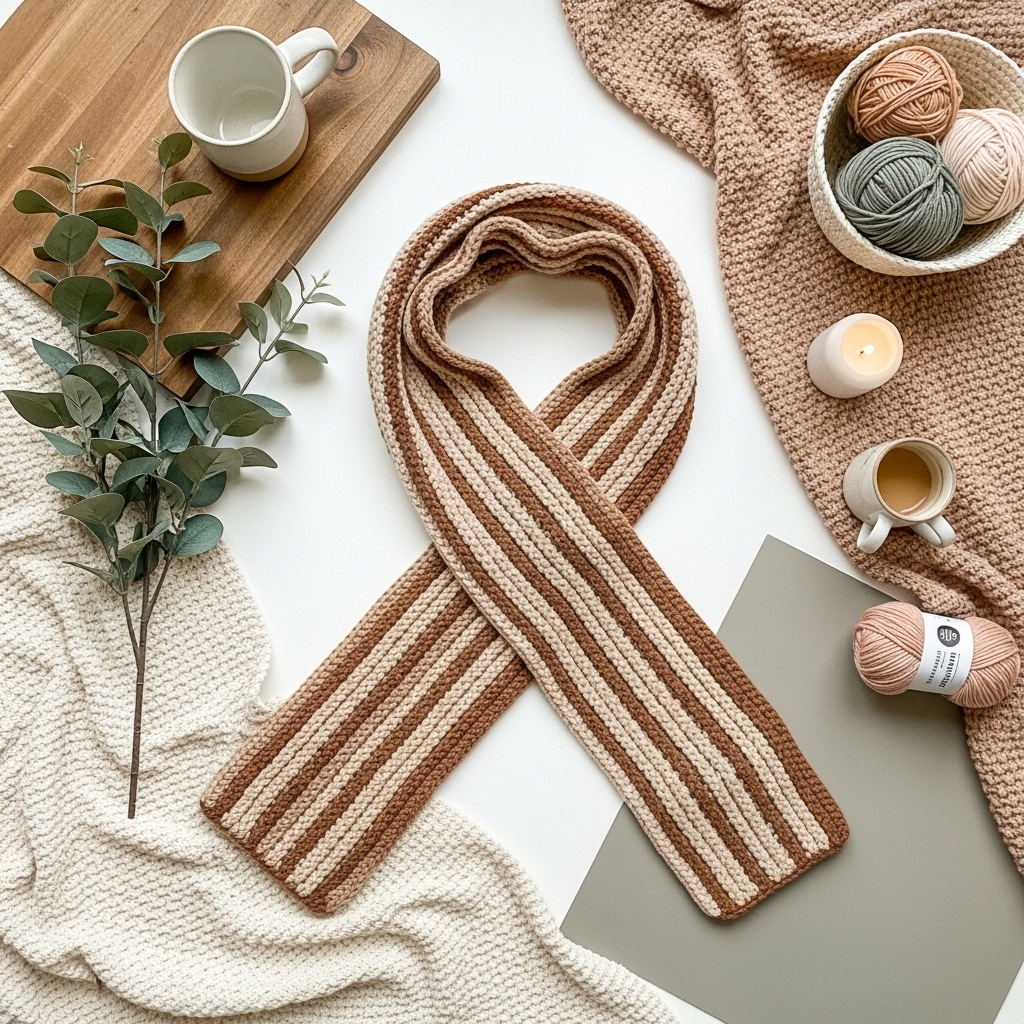
5. Crochet Striped Verso Scarf Pattern
Overview
A reversible striped scarf that looks great on both sides: a clever combination of two stitches (for example, waffle on one side and rib on the other) that creates a dense, warm fabric while maintaining a neat stripe effect. Versatility is the goal — wear either side forward.
Skill level: Intermediate (working reversible textures and even color changes)
Materials
- Yarn: Worsted weight in two or three contrasting colors (approx. 350–450 yd / 320–410 m total).
- Hook: 4.5–5.0 mm.
- Tapestry needle.
Gauge (example)
- 16 sts × 18 rows = 4 in × 4 in in combined textured stitch.
Finished size (sample)
- Width: 7 in (18 cm)
- Length: 68 in (173 cm) — long enough to wrap twice
Construction concept
- Use two-row stripe blocks: Work two rows in Color A in your reversible texture, then two rows in Color B. The stitch should be the same pattern worked in both colors so the texture reads on both sides (ex: waffle stitch/Tunisian-like bump, or 3D rib worked in single crochet and post-stitches).
Step-by-step (sample using a reversible waffle-like sc/fp/back-post combo)
- Foundation chain: Ch 34 (adjust for width). Join for working in rows.
- Row 1 (Color A): Sc across. Turn.
- Row 2 (Color A – texture): Ch1; fpdc around next st, bpdc around next st repeat across — this creates alternating raised ridges on both sides. Turn.
- Row 3–4 (Color B): Change to Color B and repeat two rows as above.
- Repeat color blocks (2 rows per color) until desired length. Finish with one or two rows in Color A for symmetry.
Color tips
- For tasteful stripes, choose a muted palette (e.g., slate + blush, navy + cream) or high contrast for punchy stripes.
Variations
- Wider stripe bands: do 6–10 rows per color for a bold stripe.
- Gradient stripe: shift colors gradually from dark to light.
Finishing & blocking
- Weave in color change tails neatly. Block to even edge; reversible textures generally benefit from mild blocking to set stitch definition.
Care
- Match washing instructions to the most delicate yarn used. Colors may bleed initially — launder separately the first time.
Styling
- Reversible scarves are travel-friendly: toss the scarf in a bag, turn it over to hide any wear, and you have two looks in one.
Final finishing & professional tips (applies to all scarves)
- Weave in ends neatly with a tapestry needle. For colorwork or stripes, weave the tails into adjacent color zones to prevent slip.
- Edge tidy: A simple round of sc or crab stitch (reverse sc) around edges can visually finish a scarf and prevent curling.
- Length & proportion: Classic scarf lengths vary—short (~50–54 in) for single-wrap styles, medium (~60–70 in) for double-wrap, long (~72+ in) for dramatic long-wrap looks. Keep width between 6–12 in based on yarn and intended styling.
- Hard-wearing details: For frequently used scarves, reinforce ends and add a few extra passes along the seam or edge. For bulky yarns, consider a narrower width so the scarf doesn’t overwhelm the wearer.
- Photography tips for your blog: Photograph scarves on neutral backgrounds, show drape on a mannequin or person, include close-ups of stitch texture, and show styling ideas (tied, looped, under a coat).
- SEO & alt text idea: Use keyword-rich descriptions like “modern crochet scarf pattern” and alt text such as “handmade chevron crochet scarf in navy and cream, cozy winter accessory.”
Conclusion
These five modern scarf patterns give you a range of styles — minimal vertical ribs (Serenity), airy lace with dramatic fringe, bold chevrons, nubby puff textures, and a smart reversible striped scarf. Each pattern is designed so you can swap yarn weights and hook sizes to make something uniquely yours. If you prefer, I can expand any single pattern into a printable, row-by-row PDF with exact stitch counts for multiple widths and three length options, or create photo-step captions for your blog tutorial.