Market totes are the perfect project: useful, fast to stitch, sustainable, and endlessly customizable. Below you’ll find five full tote designs — each with a single clear pattern concept, skill level, exact materials (with yardage estimates), sample gauge and finished-size guidance, a step-by-step construction (base, body, handles, finishing), practical variations, lining/closure/hardware suggestions and care notes. All patterns use US terms. Where I give stitch counts I also explain how to resize.
Quick notes that apply to every pattern
- Abbreviations: ch = chain, sc = single crochet, hdc = half double crochet, dc = double crochet, tr = treble (UK dc), sl st = slip stitch, inc = increase (2 sc in same stitch), dec = sc2tog, BLO/FLO = back/front loop only, MR = magic ring, rep = repeat, st(s) = stitch(es).
- Yarn & durability: Market totes should be sturdy — use cotton or cotton-blend worsted (weight 4) or t-shirt/tube yarn for structure. For lightweight, foldable bags use DK/cotton yarn. For extra strength, carry a second strand at the base or add a fabric lining.
- Hook size: Use the hook recommended for your yarn but consider going down one size for a denser, stronger fabric for bag bodies.
- Sizing & gauge: Always make a 4″ swatch in the stitch you plan to use to get stitches-per-inch. I give example counts based on a sample gauge of 14 sc = 4″ (≈3.5 sc/in) using worsted cotton + 5.0 mm hook. If your gauge differs, multiply stitches/inch by the desired width and round to appropriate pattern repeat.
- Finishing: Reinforce handle attachments with a few extra rows and hand-stitching; always weave in ends securely. Consider a fabric lining and an internal pocket for keys/phone.
1. Crochet Motif Market Tote Bag Pattern
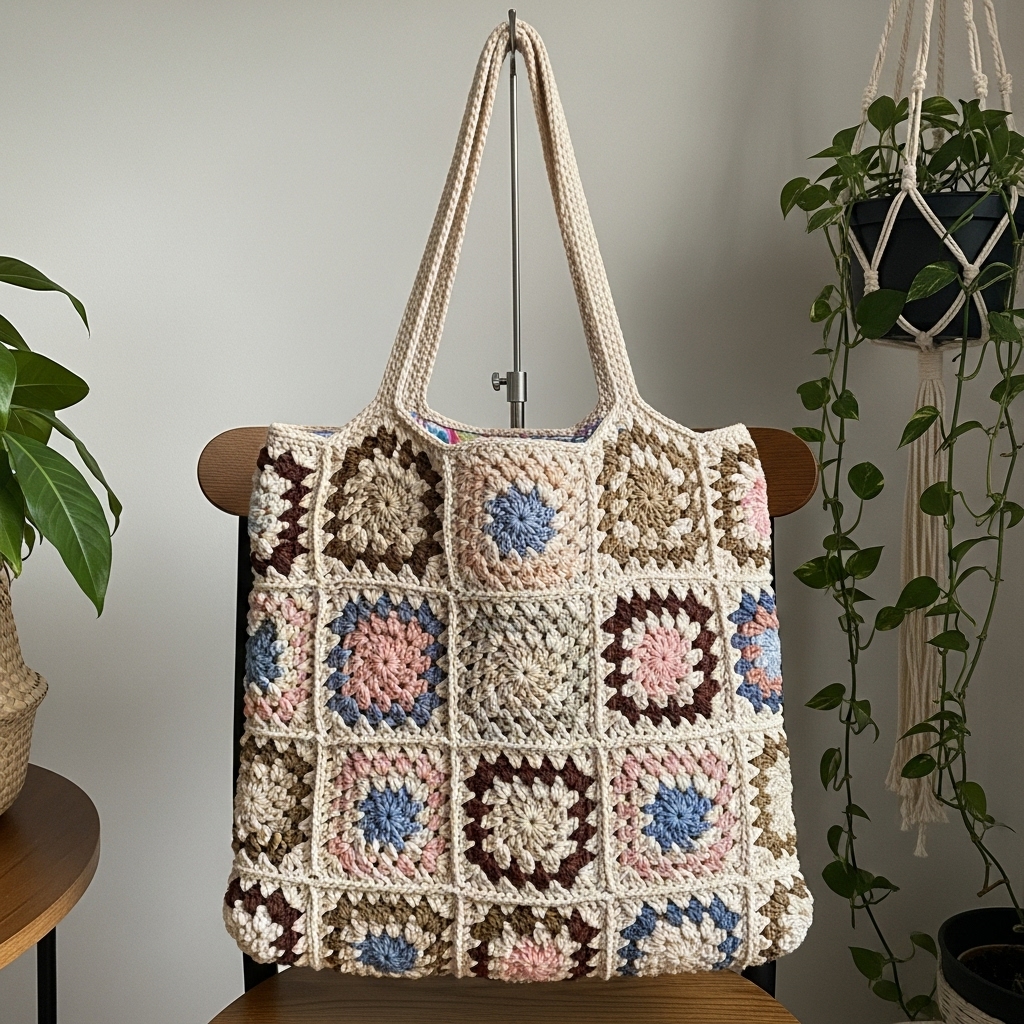
A modern patchwork tote built from square motifs (granny-style or mosaic motifs) joined into a roomy bag. It’s a great stash-busting, highly customizable design.
Skill level: Confident beginner → intermediate (making motifs, joining)
Materials (medium tote ~14–16″ W × 12″ H)
- Worst ed-weight cotton (MC + accents) total ~450–600 yds. If using motif contrast colors, allocate 50–100 yds per accent.
- Hook 4.5–5.5 mm (adjust to yarn).
- Tapestry needle, optional fabric lining (cotton), sewing needle & thread, buttons or magnetic snap.
Finished size (example): 16″ wide × 12″ tall (excluding handles); depth/gusset ~4–5″.
Construction concept
- Make 12–16 square motifs (e.g., 4×4 grid) sized to tessellate into the front and back panels. Join motifs with whipstitch or join-as-you-go, seam side panels and base, then add reinforced handles.
Step-by-step
- Make a motif template & swatch
- Choose a motif (granny square, mosaic 8×8 block, or floral square). Make one motif and measure its finished size. For a 16″ bag using 4×4 grid, each motif should be 4″ finished. Adjust hook to hit motif size.
- Create motifs
- Crochet 8–16 motifs (4×2 front + back or 3×3 for larger). Example granny square (4″ target):
- MR, ch3, 2 dc, ch2, 3 dc (first corner). Round 2: (3 dc, ch2, 3 dc) in corner spaces etc. Work until motif is 4″ across, finishing with a neat sc round to square it up.
- Crochet 8–16 motifs (4×2 front + back or 3×3 for larger). Example granny square (4″ target):
- Blocking
- Block motifs gently to exact size for even joins.
- Join motifs
- Lay motifs in desired grid. Use join-as-you-go or whipstitch with MC for a visible seam. For a neat seam, use mattress stitch across edges so joins sit flat.
- Make side panels / gusset
- If you want a boxed bottom add a rectangular strip for the base/gusset: chain (G) = desired bag depth × st/inch; work sc rows until length equals full perimeter = front width × 2 + side heights × 2 minus overlap for seams. Example: for a 4″ gusset and 16″ circumference you’d chain ~14–16 sts and work rows until 48–52″ long to wrap around.
- Assemble bag
- Lay front and back joined motif panels RS together with gusset strip around edges; seam with sturdy whipstitch leaving the top open. Turn RS out.
- Handles
- Option A (crochet handles): Join yarn at inside top edge, ch to desired handle length (20–28″ for shoulder), sc back for width ~6 rows to 0.75–1″ wide, attach other end. Reinforce with several rows and then hand-sew handle ends through multiple layers of bag and lining.
- Option B (webbing/leather): Sew webbing handles through bag top with bar tack stitch; attach rivets if desired.
- Optional lining & closure
- Make a cotton lining rectangle slightly smaller than bag interior and hand-sew into seams. Add a magnetic snap or zip to top; stitch a small internal pocket to lining and add a key loop.
Variations
- Make hexagon motifs or circle-in-square motifs for organic look.
- Use variegated yarn for each square for a patchwork effect.
Care
- Machine-washable cotton: gentle cycle, reshape, air-dry. Avoid heavy loads.
2. Crochet Granny Stitch Market Tote Bag Pattern

A timeless, airy tote made with classic granny clusters — fast, pretty, and excellent for produce.
Skill level: Confident beginner (granny stitches and seaming)
Materials (medium tote)
- Worsted cotton ~400–550 yds.
- Hook 5.0–6.0 mm for open fabric (bigger hook for slouchy bag).
- Tapestry needle, optional lining.
Finished size (example): 15″ W × 13″ H × 4″ depth
Construction concept
- Work a single-panel granny rectangle (or two panels joined) with a sturdy bottom band and reinforced handles.
Step-by-step
- Foundation chain
- Decide desired width (15″) × st/inch (example 3.5 sc/in) = ~52 sts. Granny cluster is worked in multiples of 3 + 1 for turning; so chain ~52 + 1 = 53 or round to 52 if using multiple of 3 adjust accordingly. Alternatively make starting chain a multiple of 3 + 1.
- Main body — granny rows
- Row 1: sc row across to establish base.
- Row 2: ch3 (counts as first dc), (3 dc in same st or space), ch1, sk 3 repeat along to form granny clusters (adjust pattern as granny cluster over 3 stitches). Work rows until piece measures height you want before top band (for example 13″ – 2″ top band = 11″). If working sideways, you can make a long strip and fold.
- Bottom reinforcement
- Add 2–3 rounds of sc or hdc at the base to reinforce and make the bag less stretchy.
- Handles
- Work a wide top band of sc around the bag (2–3 rounds) for handle anchors. For handles, make a sturdy strap: ch 70–80 for shoulder length, sc back across 6–8 rows width to create a flat strap. Attach ends to top hole spaces and reinforce with 3 extra rows and securing stitches through all layers.
- Assembly
- If you worked one rectangle, fold and seam sides and bottom. If you made front & back separately, seam together with whipstitch. For a boxed bottom cut a gusset and insert it between front/back then seam.
- Optional lining/closure
- For small items, add lining. For produce only, leave unlined for breathability.
Variations
- Work granny in color bands; alternate rows in two colors.
- Add a crocheted pocket on the outside for small items.
Care
- Cotton allows machine gentle wash; reshape while damp.
3. Crochet Color Block Market Tote Bag Pattern
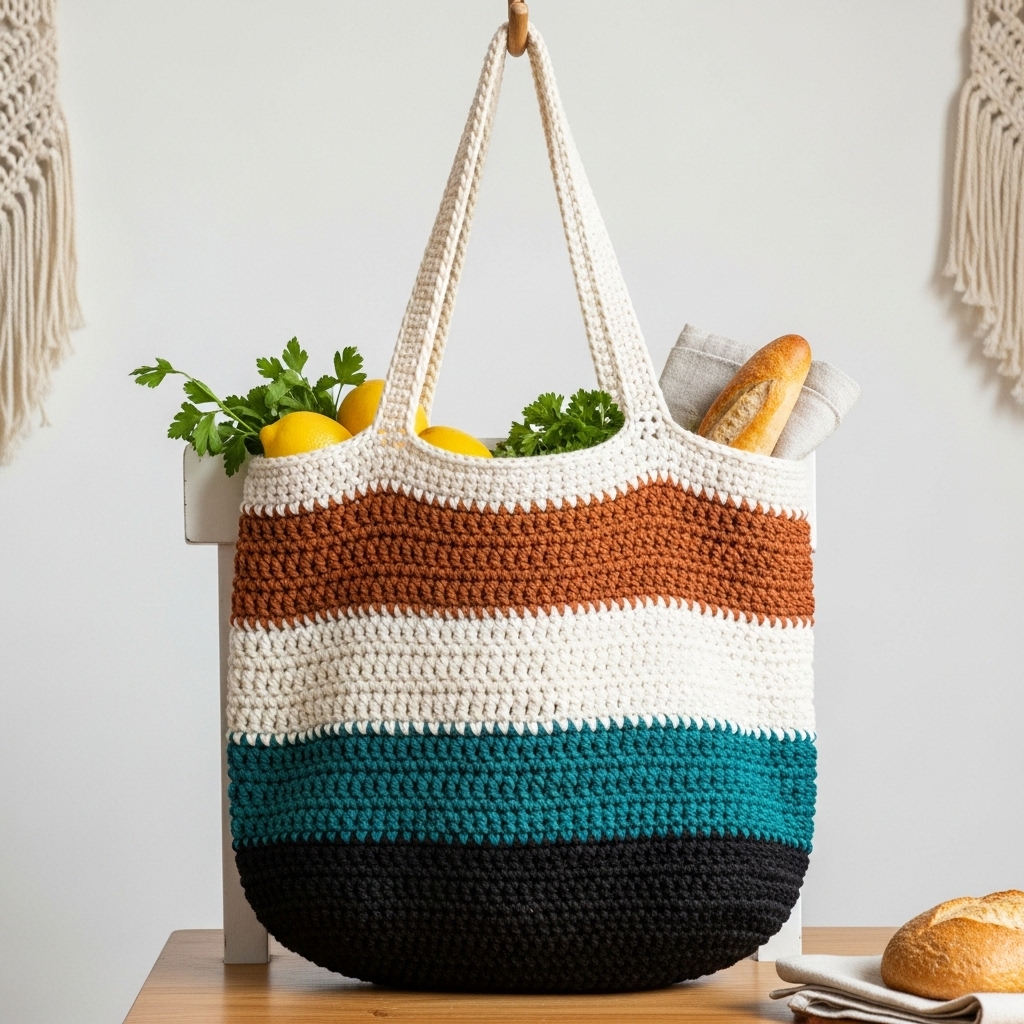
Modern and graphic: clean color blocks that show off hand-dyed or bold solids. Best in sturdy cotton.
Skill level: Confident beginner (color changes in rows)
Materials (medium tote)
- Worsted cotton in 2–3 contrasting colors — total ~450–600 yds.
- Hook 5.0 mm.
- Tapestry needle, optional lining and hardware.
Finished size (example): 16″ W × 14″ H × 4″ D
Construction concept
- Work a solid sc base, then color-block body in horizontal panels (each ~4–6″ tall). Seam sides or work in the round switching colors at panel boundaries.
Step-by-step
- Base
- Make a flat oval base using increases: MR then rounds of sc increasing evenly until base width = desired bottom width (e.g., 4″ × 10″). Alternatively chain foundation rectangle for boxed bottom.
- Body in the round
- Join and work sc/drop-in-dc in the round changing colors every X rounds:
- Panel 1 (bottom color): 6–8 rounds sc.
- Panel 2: change to Color B and work 6–8 rounds sc.
- Panel 3 (top): Color C for finishing band and handles.
- Join and work sc/drop-in-dc in the round changing colors every X rounds:
- Handles (integrated)
- For integrated wide strap: after finishing body to top edge, decide handle placement by marking two openings 6–7″ apart. Work sc to handle start, ch X, skip X sts, sc to next handle start to create chain loops for handles. Continue working additional rounds over ch loops to shape handles and make them solid.
- For separate strap, crochet flat strap and sew down reinforcedly.
- Finish
- Work a round of sc in the final color as a tidy rim. Add hardware: top edge can be reinforced with a stitched leather bar or sewn-in webbing for strength.
Variations
- Vertical color blocking: seam narrow panels together for a color-blocked patchwork panel.
- Striped ombré using gradient yarn.
Care
- Prewash colors and skeins to avoid bleeding on light fabrics. Hand wash if mixing hand-dyed with solids.
4. Crochet Lily Upcycle Market Tote Bag Pattern
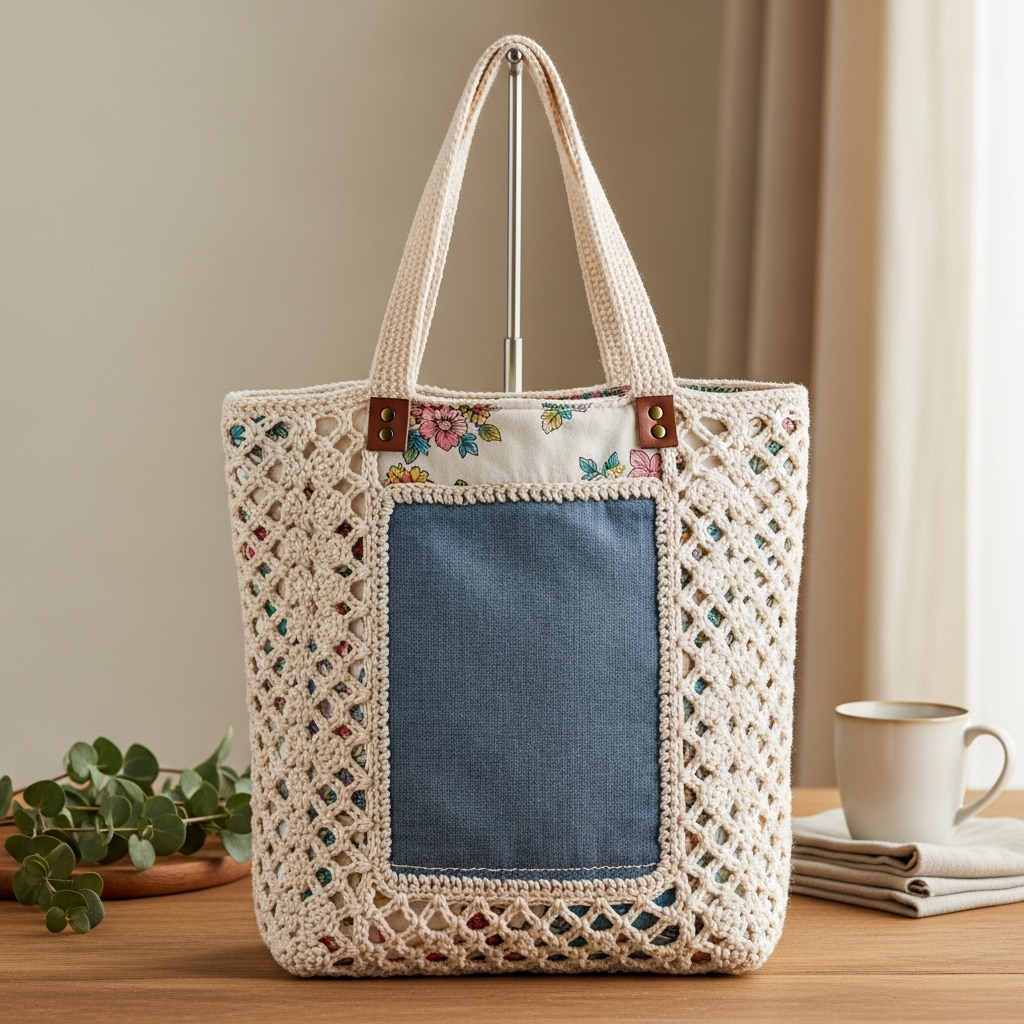
An upcycled tote that mixes crocheted panels with sewn-in repurposed cloth (e.g., vintage tablecloths or denim). Boho-luxe and sustainable.
Skill level: Intermediate (crochet + basic sewing)
Materials
- Worsted cotton for crochet panels ~300 yds.
- Repurposed fabric piece for panels (one large rectangle per side or patchwork), fusible interfacing, heavy-duty thread, strong zipper optional.
- Hook 5.0 mm, sewing machine or needle.
Finished size (example): 15″ W × 13″ H × 4″ D
Construction concept
- Make two crocheted side panels that frame or border upcycled fabric center panels. This blends soft crochet with stable fabric for structure and visual interest.
Step-by-step
- Prepare fabric panels
- Cut two fabric rectangles slightly smaller than finished bag side (e.g., 14″ × 12″) and fuse interfacing to back for stability. Hem raw edges or fold under before sewing.
- Crochet border panels
- Work an open lacy frame (e.g., filet mesh or shell border) sized so interior opening fits fabric piece snugly. Example: chain a border that creates 1–1.5″ frame around fabric: ch 52 and work rectangle until height 12″. Work a lacy edging and leave a 1/2″ seam allowance.
- Attach fabric to crochet
- Center fabric in frame then baste through crocheted edge and fabric with small hand stitches. Alternatively sew fabric to crochet by machine using zig-zag and careful feed (use walking foot).
- Assemble bag
- Make two sides (each crochet+fabric) and sew together with crochet gusset or fabric band to create depth. Reinforce seams where handles will attach.
- Handles & closure
- Attach leather or webbing handles with rivets or sew strongly through multiple layers. Add inner pocket sewn to fabric lining.
Variations
- Make one side crochet and the other full fabric for asymmetry.
- Use embroidered vintage linens for romantic Lily Upcycle look.
Care
- Spot clean fabric sections; wash depending on fabric content. Reinforce seams frequently.
5. Crochet Sea Shells by The Sea Shore Market Tote Bag Pattern
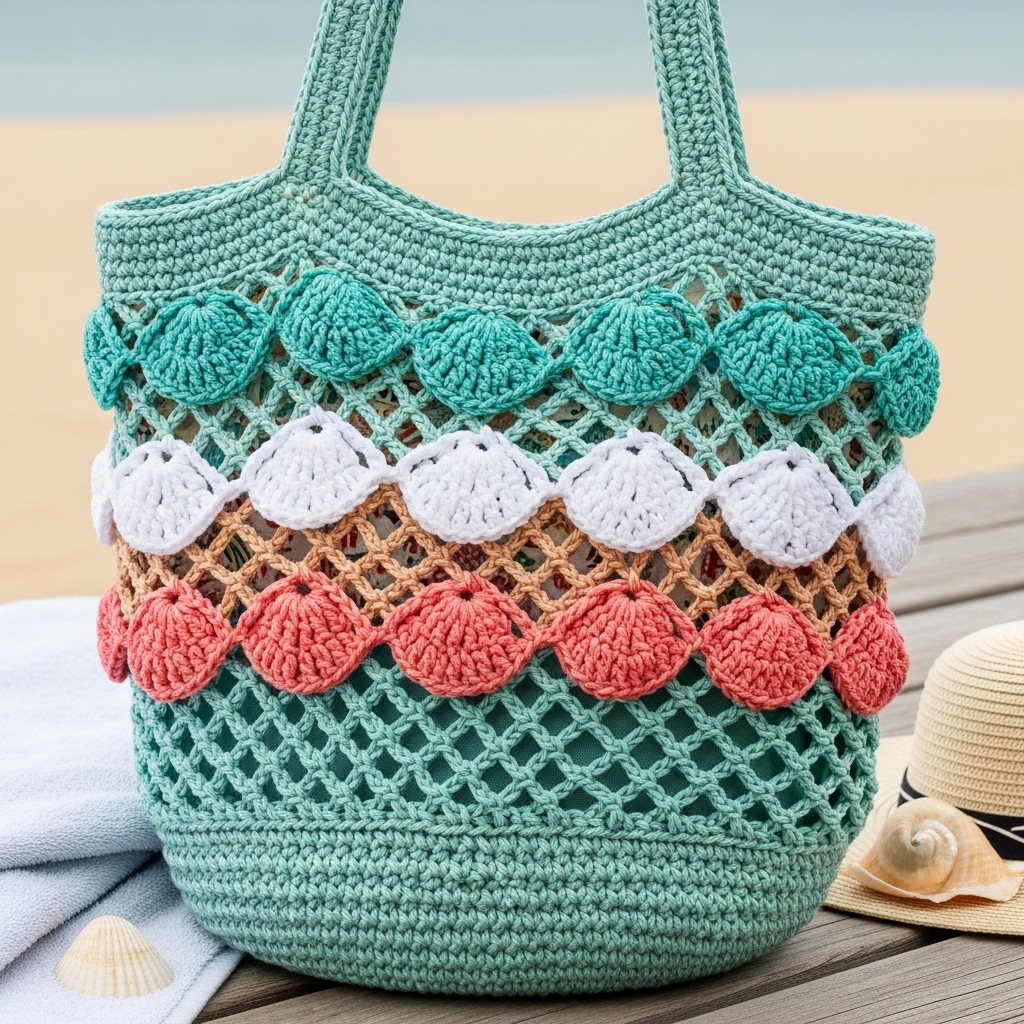
A beachy tote that uses shell clusters and open mesh for a breathable, attractive market bag that shows off produce and beach finds.
Skill level: Confident beginner → intermediate (shell stitch and mesh)
Materials (medium tote)
- Cotton or t-shirt yarn ~500–700 yds for roomy tote (heavier yarn gives structure).
- Hook 6.0–8.0 mm for bulky/t-shirt yarn; 5.0 mm for worsted.
- Tapestry needle, optional lining.
Finished size (example): 16″ W × 14″ H × 5″ D
Construction concept
- Solid base, then alternate bands of shell stitch (decorative) and mesh (functional) to create a collectible seaside aesthetic.
Step-by-step
- Base
- Make a sturdy flat oval base with sc in rounds (increase evenly) until base width equals 5–6″ × desired bottom length. For a circular base: MR → 6 sc → inc rounds until diameter ~5–6″. For rectangular base, chain width and work sc rows for depth.
- First solid band
- Work 3–4 rounds of sc or hdc for base reinforcement.
- Shell + mesh bands
- Shell row (decorative): ch1, sk 1, 5 dc in next st (shell), sk 1, sc in next st repeat — shells should alternate placement on next rows to create pattern.
- Mesh row (functional): ch 3, sc in next st repeat to create airy net that stretches for produce.
- Alternate 2–3 shell rows with 3–4 mesh rounds until bag reaches desired height.
- Top band & handles
- Finish with 3–4 rounds sc in BLO for a neat rim.
- Handles: make wide webbing-like straps by ch desired length and sc across into a few rows for width, fold and sew into top rim to attach. Reinforce heavily with extra rows and stitches.
- Optional lining
- Add a removable fabric liner with drawstring for small items and to stop sand from falling through at the beach. Liner can be snapped in or simply sit loose.
Variations
- Work shells in contrast color for seaside stripes.
- Add tassels at corners for playful movement.
Care
- T-shirt yarn tolerates machine wash; reshape while damp.
Final thoughts & tips
- Sizing tips: Measure a finished tote against a real object (a 1-qt jar or laminated paper bag) to confirm capacity. To resize quickly, change number of motifs or panels or increase/decrease stitch counts by your swatch-based conversion.
- Handles: If you plan heavy loads, consider adding a short sewn-in webbing handle or leather handles riveted through a small leather patch and the crochet fabric.
- Lining: Lining adds durability and prevents stretch; for heavier loads always line with cotton canvas or add interfacing.
- Sustainability: Use recycled/organic cotton or upcycle old tees for t-shirt yarn to make eco-friendly market bags.
Conclusion
These five market tote patterns — Motif Market Tote, Granny Stitch Tote, Color Block Tote, Lily Upcycle Tote, and Sea Shells by the Sea Shore Tote — give you a versatile toolkit for markets, beach days, and everyday carries. Each pattern is scalable, customizable in color and materials, and designed to balance beauty with function.