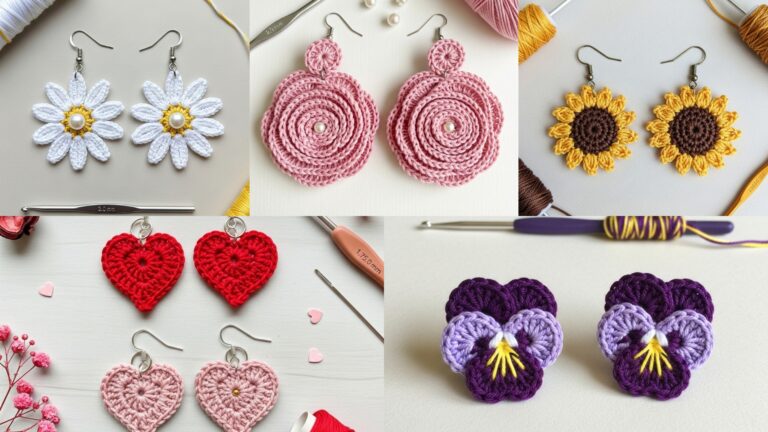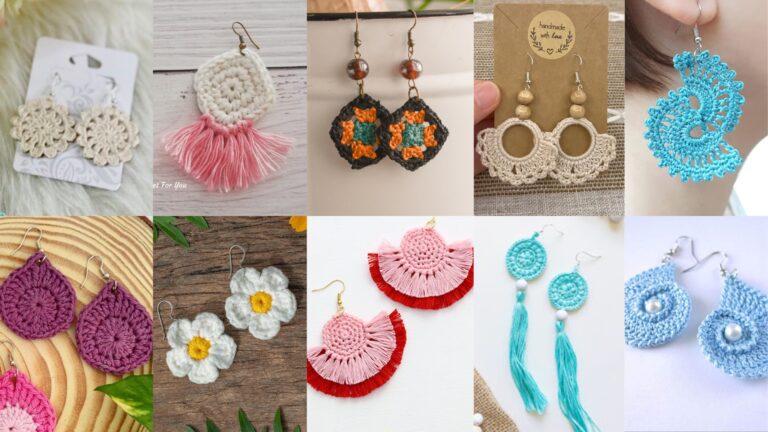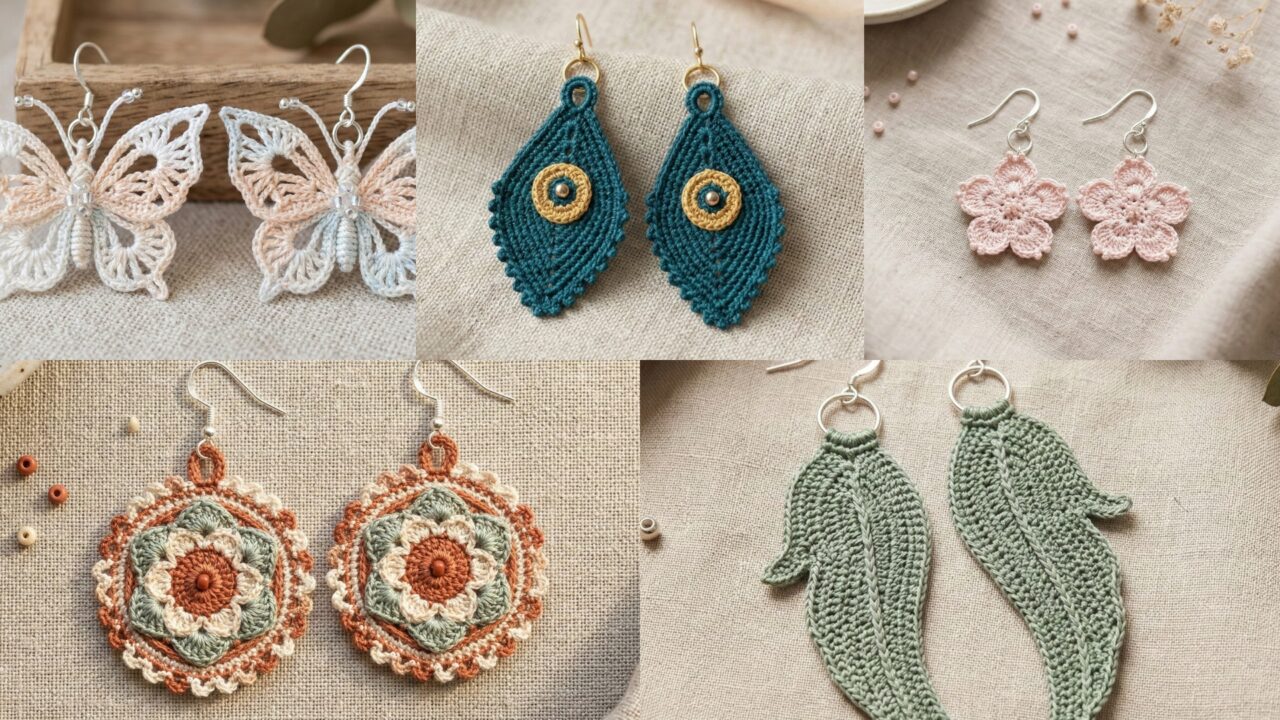
Handmade crochet earrings are tiny statements — light, fast to make, and endlessly customizable. Below you’ll find a friendly introduction (materials, hardware, sizing, gauge math, safety), followed by five fully detailed earring patterns: Micro Butterfly, Wings, Sakura, Mini Mandala, and French Mini Peacock Feather. Each pattern includes skill level, materials, exact step-by-step instructions, finishing/assembly, styling tips, variations, and care. I wrote them to be easy to follow and to adapt to different yarns and hook sizes.
Safety note: earrings are small jewelry items; use nickel-free findings if you or your customers have metal sensitivities. For pierced ears use standard ear hooks; for non-pierced ears use clip-on hardware. Keep tiny beads glued/stitched securely if the earrings will be handled frequently.
Quick primer — materials, tools, sizing, gauge & safety
Materials
- Yarn: for lightweight earrings use fingering, sport, or cotton thread (size 10) depending on how delicate you want them. Cotton gives crisp stitch definition; bamboo and blends give sheen and softness.
- Hook: typical ranges — 1.75–3.5 mm depending on yarn/thread. Use a smaller hook than the yarn label to get a firm fabric.
- Earring hardware: ear hooks (stainless steel, gold/rose gold plated, or niobium), jump rings (4–6 mm), small headpins or eye pins if adding beads, small pliers, flat nose pliers.
- Optional beads: seed beads (11/0), small freshwater pearls (2–3 mm), metal beads.
- Felt circles or jewelry glue for reinforcement if you add glued elements.
Tools
- Small scissors, tapestry/embroidery needle, fine point pliers, round-nose pliers.
Sizing
- Typical earring diameter for everyday wear: 0.8–1.6 in (2–4 cm). I give sample finished sizes for each pattern; you can scale by changing hook/yarn.
- If you want a 1.2 in finished circle and your gauge is 5 sc = 1 in, compute stitches: 5 × 1.2 = ?
- 5 × 1 = 5
- 5 × 0.2 = 1.0
- 5 + 1.0 = 6 stitches across 1.2 in (but you’d actually compute circumference for round items — this illustrates the approach). Always swatch.
Gauge & measurements (how to compute for earrings)
- Make a small 1″ swatch in the stitch you’ll use and measure stitches per inch (spi) and rows per inch (rpi).
- To estimate circumference for a round earring: measure desired diameter (d), compute circumference ≈ π × d (use π ≈ 3.1416). Example for d = 1.2 in:
- 3.1416 × 1.2 = ?
- 3.1416 × 1 = 3.1416
- 3.1416 × 0.2 = 0.62832
- 3.1416 + 0.62832 = 3.76992 in circumference.
- Then multiply circumference by stitches per inch to get total stitches around.
- 3.1416 × 1.2 = ?
Safety
- Use lightweight yarn/thread to avoid heavy earrings.
- When attaching beads or charms, prefer sewing or wire-wrapping the bead rather than glue alone. If you must glue, use a jewelry-grade adhesive and finish with stitches.
1. Crochet Micro Butterfly Earrings Pattern
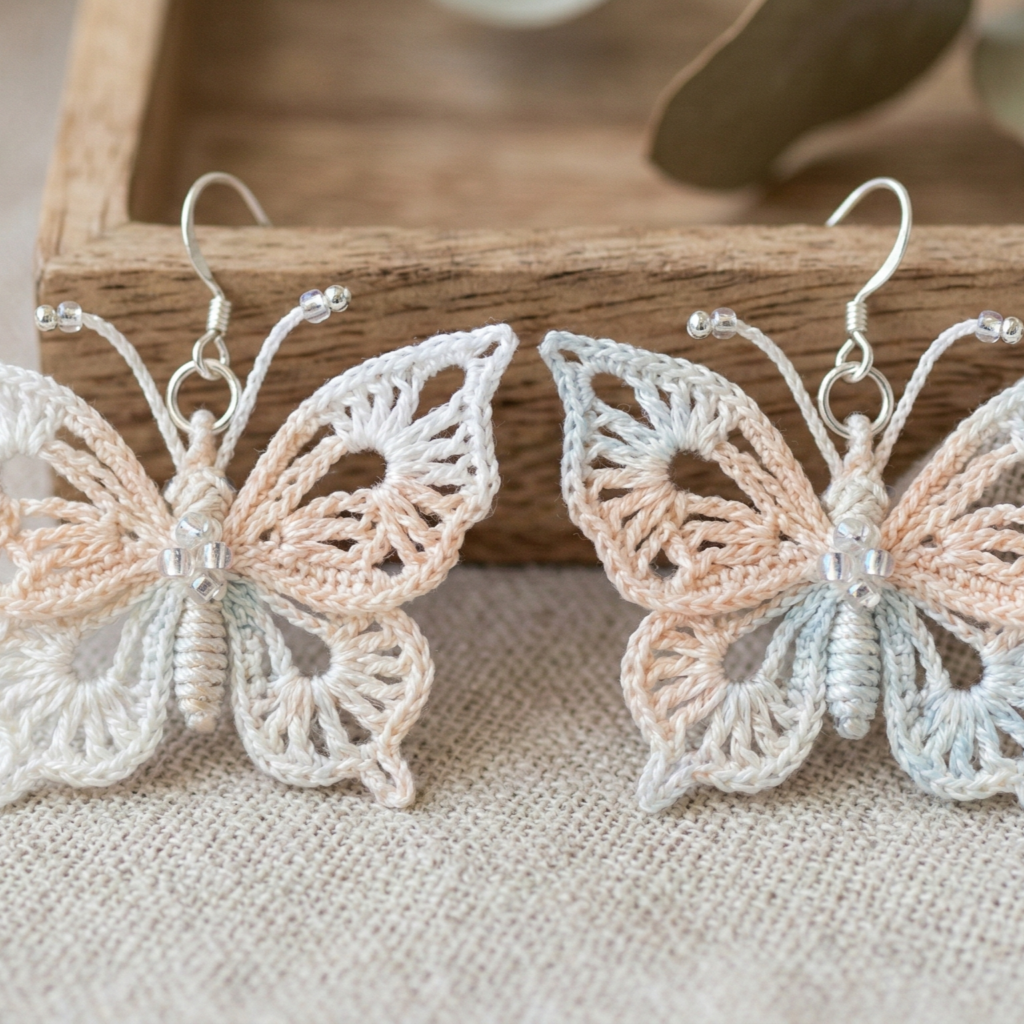
Delicate micro butterflies — feminine and airy. These are worked flat and stiffened lightly for shape.
Skill level: confident beginner
Finished size: ~1.1″ (2.8 cm) wingspan using fingering thread and 2.0 mm hook
Materials
- Size 10 cotton thread or fingering yarn ~5–10 yd per pair
- 2.0 mm crochet hook
- 2 ear hooks, 2 small jump rings (4 mm), tapestry needle, optional light fabric stiffener or diluted PVA glue.
Notes
These are small motifs worked flat; afterwards you fold/sew the body and attach hardware. You can make them slightly bigger by using thicker yarn and a 2.5–3.0 mm hook.
Abbreviations (US)
- ch, sc, hdc, dc, tr, sl st, inc = 2 sc in same st, dec = sc2tog
Step-by-step (make 2 mirrored butterflies)
Wing left (worked as a rounded triangle)
- ch 7. (This chain sets wing width.)
- R1: sc in 2nd ch from hook and across — 6 sc. Turn.
- R2: ch1, inc in first st, sc next 4, inc last st — 8 sc. Turn.
- R3: ch1, sc across 8. Turn.
- R4 (shape tip): ch3 (counts as dc), dc2 in next 2 sts, ch1, sl st in last st to bring a small scallop, fasten off leaving tail. Block gently to open the scallop.
Wing right — mirror the same wings by working the chain and shaping similarly or simply flip the left wing when assembling.
Body & antennae
6. Take two wings (left + right). With a length of thread, whipstitch bases together just at inner edge leaving wings flared. Leave a small loop at top for jump ring.
7. For antennae: tie a 6–8 cm length of thin jewelry wire or thread, fold in half, insert at the top center and secure with a few stitches; bend ends into tiny loops or beads for tips.
Stiffen (optional)
8. If you want crisper wings, apply light fabric stiffener or brush diluted PVA (white glue mixed 1:1 with water) on the wings, shape on blocking board and let dry.
Attach hardware
9. Sew through the small loop at top and attach a 4 mm jump ring, then ear hook.
Finishing & styling
- Make in soft white for bridesmaid sets or bright colors for playful looks.
- Add a tiny seed bead at wing center for sparkle.
2. Crochet Wings Earrings Pattern
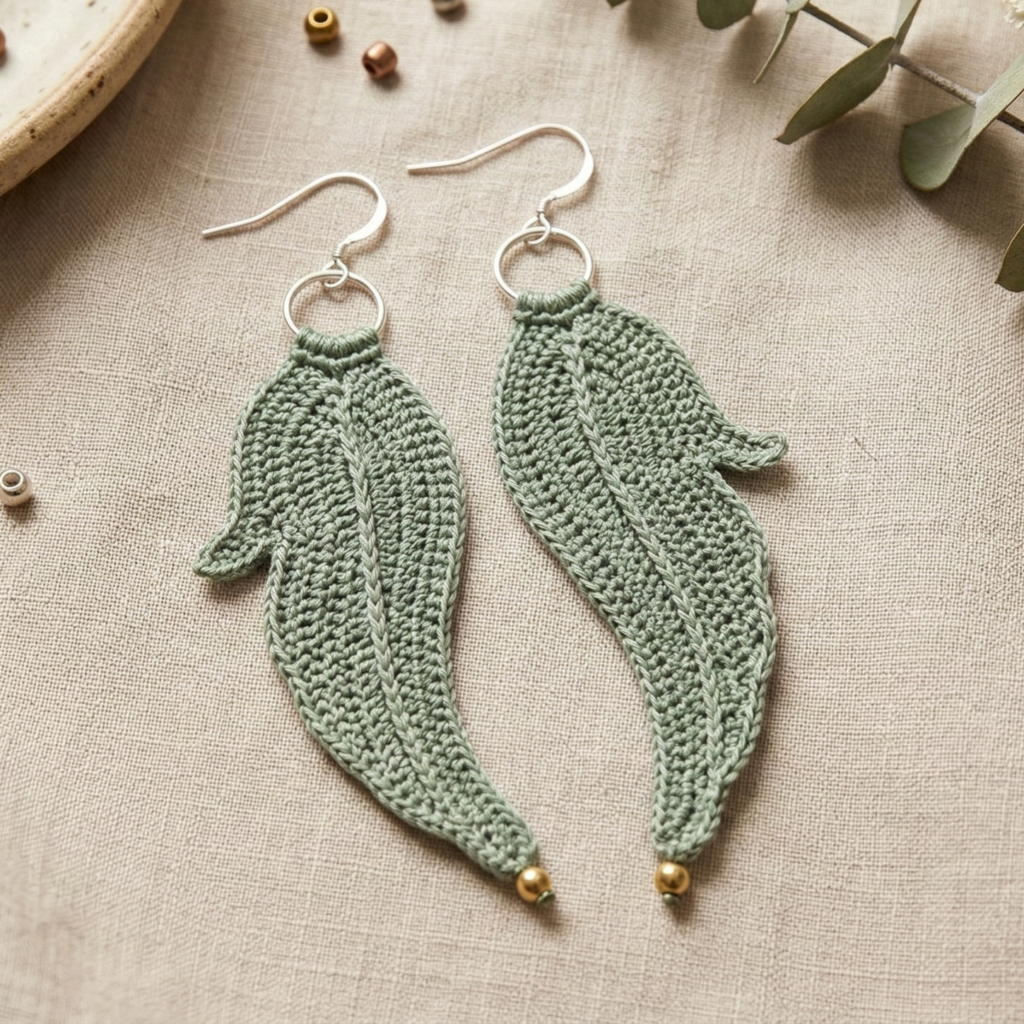
Elongated drop “wing” shapes: modern, sculptural and elegant — great in matte cotton or metallic thread.
Skill level: intermediate (shaping + surface detailing)
Finished size: ~1.6″ (4 cm) length × 0.6″ width using fingering yarn and 2.5 mm hook
Materials
- Fingering yarn or metallic thread, 2.5 mm hook
- 2 ear hooks, 2 jump rings, thin jewelry wire or headpins if adding bead dangles, tapestry needle
Structure
Each wing is worked as a tapered boat shape with a textured center rib (front post/back post technique suggested).
Abbreviations
- ch, sc, hdc, dc, fpdc (front post double crochet), bpdc
Step-by-step (make 2)
Wing body
- ch 18 (foundation width).
- R1: sc in 2nd ch from hook and across — 17 sc. Turn.
- R2: ch2, hdc in first 2 sts, fpdc around next st, hdc in next 3 rep across to create a ribbed vertical line; end with hdc. Turn.
- R3–R8: repeat R2 but on every other row decrease 1 st at one short edge to taper the wing: e.g., at start of R3 sc2tog once (or skip last st), so the shape narrows gradually. Work until piece measures desired length (~1.6″). Fasten off.
Edge shaping
5. Add one round sc around edges to smooth and narrow: join yarn at tapered tip and sc evenly around edge, increasing slightly at the broad end for curve.
Optional bead / dangle
6. If you want a bead at the wing bottom, thread a small headpin through a tiny bead, create a loop with round-nose pliers, and sew or wire-attach to wing tip.
Attach hardware
7. Sew a small loop at the top end and attach jump ring + ear hook.
Variations
- Make a pair in two gradient shades; stitch a little metallic running stitch down the center for contrast.
- Use metallic thread for evening wear — be careful: metal threads can be scratchy, back with soft felt for comfort.
3. Crochet Sakura Earrings Pattern

Delicate cherry blossom motifs — feminine and timeless. Worked flat as five-petal flowers with tiny center bead.
Skill level: confident beginner
Finished size: ~1.0″ diameter (2.5 cm) using size 10 thread and 1.75–2.0 mm hook
Materials
- Size 10 crochet thread (or fingering + 2.0 mm hook) in pale pink and tiny seed bead for center
- 2 ear hooks, jump rings, fine beading needle, tapestry needle
Stitch palette
MR, sc, ch, dc, picot (for petal tips), slip stitch
Step-by-step (make 2)
Flower
- MR, ch1, 5 sc in MR, sl st to join — (5 sc) — this makes the ring for petals. Pull tight.
- Petal: ch4, in next st work (sc, hdc, 3 dc, hdc, sc) into ch-loop to make a rounded petal; sl st back to ring. Repeat from * to make 5 petals total. Fasten off leaving tail.
- Add a tiny picot at each petal tip by working ch3, sl st in top of petal for delicate points if desired.
Center bead
4. Sew a small seed bead into center using beading needle and secure tightly.
Backing & hardware
5. Cut a tiny felt circle, glue or sew to the back to protect ear from thread knots. Sew small jump ring through felt and flower base, attach ear hook.
Styling
- Make them in soft blush for spring or white for an elegant neutral set.
- Scale up for statement brooches using thicker yarn.
4. Crochet Mini Mandala Earrings Pattern
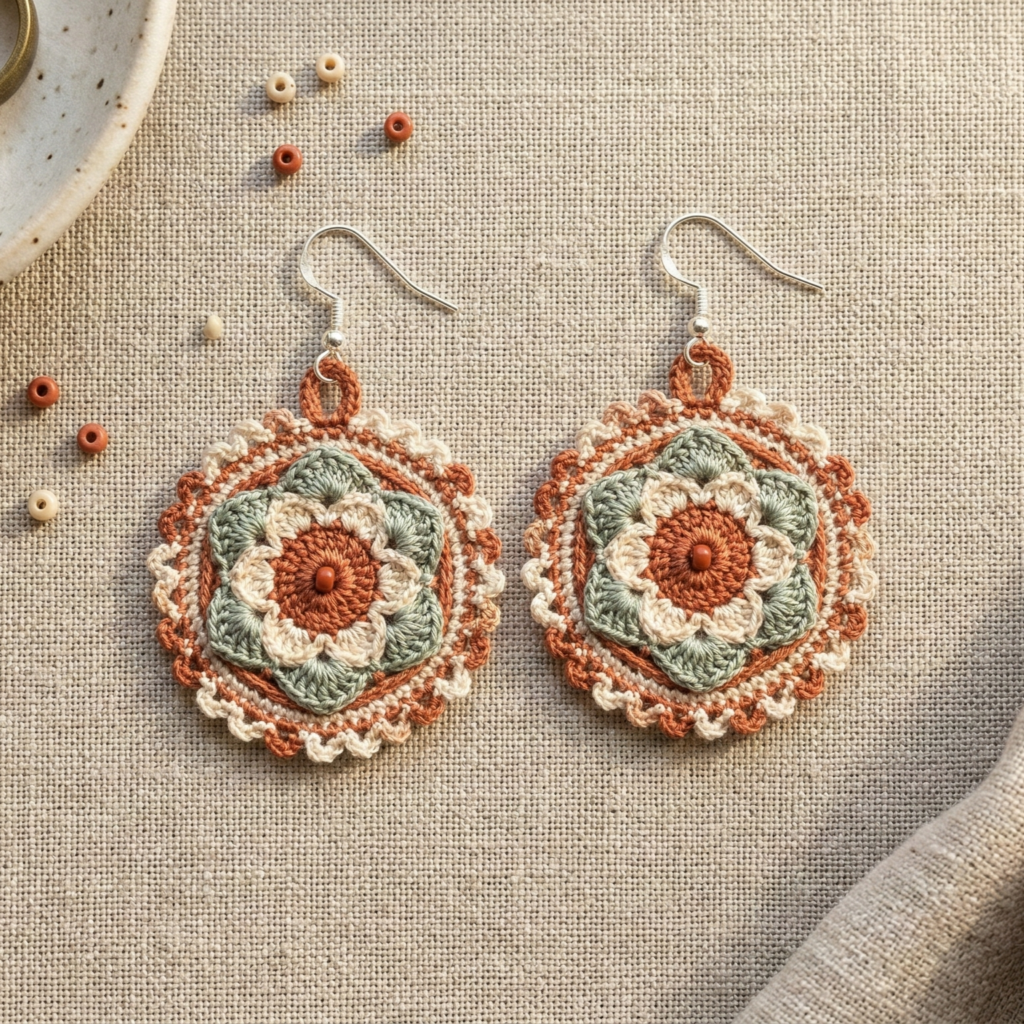
Intricate tiny mandalas — perfect for boho chic looks. These are worked in rounds and surface-decorated.
Skill level: intermediate (small rounds + color changes)
Finished size: ~1.2″ (3 cm) diameter with fingering yarn and 2.5 mm hook
Materials
- Fingering yarn in 2–3 colors, 2.0–2.5 mm hook, small bead or tiny pearl, 2 ear hooks, jump rings
Stitch palette
MR, sc, hdc, dc, tr, shell (5 dc), picot, surface slip stitch
Step-by-step (make 2)
Round 1—center
- MR, ch1, 8 sc in ring (8). Tighten and join with sl st.
Round 2—petal ring
2. ch3, 2 dc in next st, ch1, sl st in next st rep around to create spaced petals. End and change color if you like.
Round 3—shells
3. In each ch-space, work shell: sc in ch-space, (5 dc in same ch-space), sc in same space to make little shells all around. Join and fasten off color if using multiple.
Round 4—lacy edge
4. With new color, ch4, sl st in center of next shell rep around to create picot lacy loops. Fasten off and weave tails.
Optional surface decoration
5. Use surface slip stitch to draw concentric lines or tiny beads sewn onto the tips of shells.
Stiffen slightly?
6. For neatness, soak in diluted glue (optional) and pin on foam until dry to hold perfect round shape.
Assembly
7. Attach jump ring to top loop (from last round or a small ch loop on top) and add ear hook.
Variations
- Make monochrome or multi-color micro mandalas.
- Add a tiny fringe of metallic thread at bottom for movement.
5. Crochet French Mini Peacock Feather Earrings Pattern
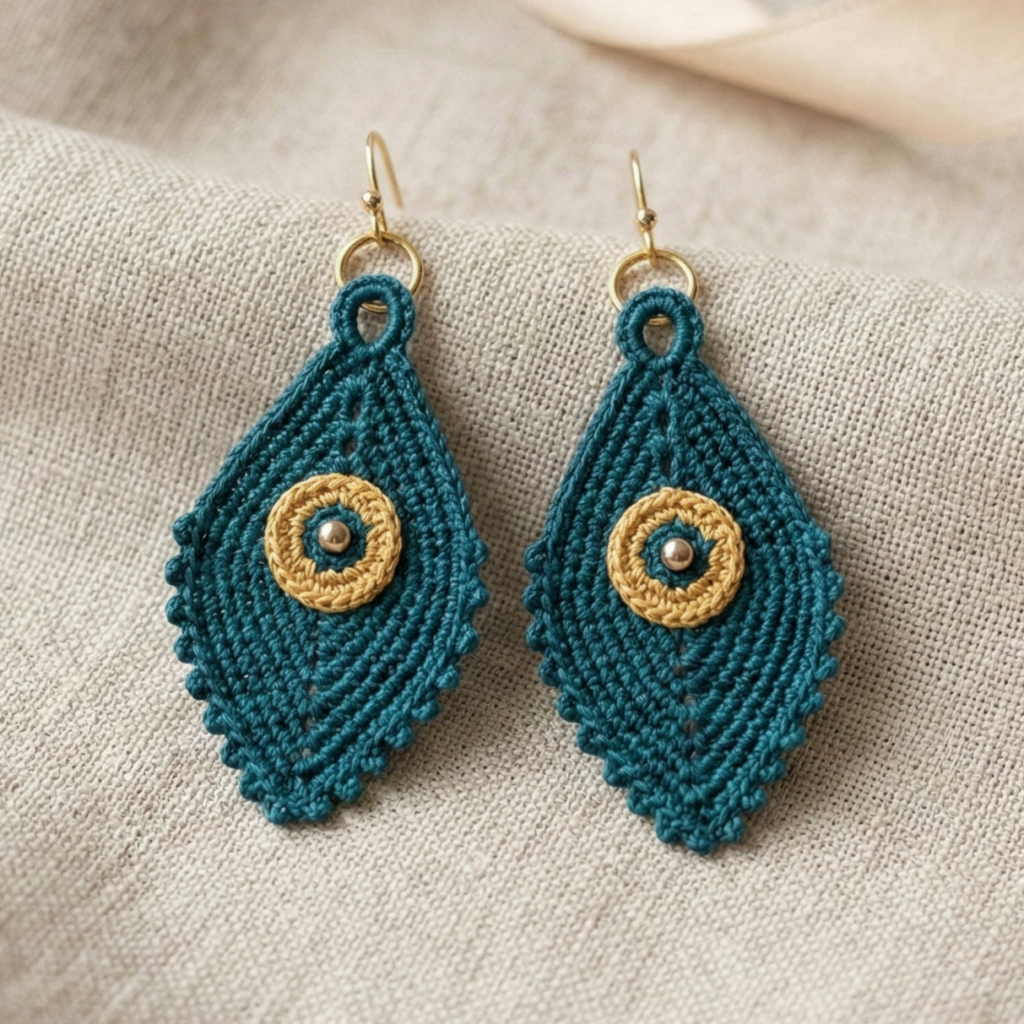
Elegant teardrop shape with a peacock-inspired eye — romantic, vintage French vibe.
Skill level: intermediate (shaping + color placement)
Finished size: ~1.5″ (4 cm) length × 0.6″ width using fingering yarn and 2.5 mm hook
Materials
- Fingering or light DK yarn in teal / navy / gold, 2.5 mm hook
- Small metallic bead for the “eye”, ear hooks, jump rings
Concept
Work a long teardrop shaped motif with an inner round “eye” crocheted or appliquéd in a contrasting color.
Step-by-step (make 2)
Outer teardrop
- ch 12. Row1: sc in 2nd ch and across (11 sc). Turn.
- Row2: ch1, sc across. Turn.
- Row3: ch1, sc2tog at start to begin tapering (sc across to last 2 sts, sc2tog), repeat alternating decrease rows every 2–3 rows until you reach a narrow tip. Fasten off leaving tail.
- For rounded top, at the start row where you have full width, work half-shells along the short edge: join yarn and work 3 dc, ch1, 3 dc into end stitch to round the top. This creates the curved head of the feather.
Inner eye
5. Make a tiny ring: MR, ch1, 6 sc in ring — make it in gold or bright teal. Sew this small circle onto the upper/middle of the teardrop to look like the feather eye. Add a tiny metallic bead in the very center.
Edge finish
6. Work a picot or shell edging around the teardrop: join yarn and do sc, ch2, sl st in next st to make tiny loops reminiscent of feather barbs.
Assembly
7. Sew a small jump ring through the top loop or last picot and attach ear hook.
Styling suggestions
- Metallic yarn for the eye to catch light.
- Pair with simple gold hoops for mixed metals.
Finishing, hardware notes & care
Finishing
- Weave in ends twice and hide tails inside motifs. Use small concentrated knots and weave far into the fabric to avoid unraveling.
- For small motifs that will see friction, consider a tiny dab of clear jewelry glue on interior knots (then hide under felt if visible).
Attaching hardware
- Use small 4–5 mm jump rings for most earring tops. Open with two pliers (twist open, don’t pull apart) and close tightly. If you solder or crimp closed with tiny crimp tubes, you get extra security.
Backing or lining
- For lacey pieces that may irritate skin, glue/sew tiny felt circles on the back to give a smooth surface.
Care
- Avoid soaking jewelry with metal components. Spot clean yarn parts with mild soap and a damp cloth; air dry flat. For cotton items, gentle hand wash recommended; remove metal hardware first if possible.
conclusion
Those are five modern crochet earring patterns — from the dainty Micro Butterfly and sculptural Wings to floral Sakura, intricate Mini Mandala, and the elegant French Mini Peacock Feather. Each design is made to be lightweight, wearable, and customizable: change colors, add tiny beads, scale by switching hook/yarn, or back with felt for durability. They make quick gifts, gorgeous market pieces, or a lovely addition to your own jewelry box.