Light, breathable, and effortless — a hand-crocheted summer top is one of the most satisfying warm-weather projects. Below you’ll find five wearable, well-explained patterns you can make with light yarn: Braided Wheat Summer Top, Summer Baby Doll Top, Granny Square Top, Classic Summer Top, and Lily Ruffle Sleeve Summer Top. Each pattern is written in US terms and includes:
- Skill level
- Materials & tools
- Gauge and how to swatch (with a simple method to size to your measurements)
- Sample sizes and how to customize to any bust size
- Full step-by-step construction for body + straps/sleeves + finishing
- Styling, variations, troubleshooting and care
Read the general notes below first (important sizing & yarn advice) then jump to the pattern you want.
Quick planning & general notes (read this first)
Who these are for: makers who want lightweight crochet tops for hot weather. Patterns range from beginner to intermediate.
Yarn choice: For summer tops I recommend breathable fibers:
- Sport / DK (light worsted) weight cotton, linen/cotton blends, bamboo blends, or mercerized cotton. These give structure + breathability. (Labels: Sport/#2 or DK/#3 — check yardage.)
- For more drape choose bamboo or a bamboo blend; for structure choose 100% cotton or cotton/linen.
Hook sizes: Most patterns below use 4.0–4.5 mm (G–7 to 7–7.5 US) for sport/DK; adjust for your yarn and desired drape. If you want more open lace, use a larger hook; for a firmer fabric use a smaller hook.
Gauge & swatching (must do this):
- Make a 4″ × 4″ (10 cm × 10 cm) swatch in the stitch pattern you intend to use — not just single crochet. Block it the way you will finish the top (spritz & pin or steam lightly for cotton).
- Measure horizontal stitches per inch (spi) and rows per inch (rpi). Write them down. Example: if you count 20 sts across 4″ → 5 sts/inch. Use your real spi for sizing math below.
How to size to your measurements (simple, reliable method):
- Measure your bust circumference at the fullest point (with minimal ease). Decide ease: for a fitted top choose 0–2″ positive ease; for loose summer top choose 2–6″ positive ease. Example: Bust 36″ + 3″ ease → finished bust 39″.
- Multiply finished bust in inches × your swatch’s stitches per inch = foundation stitch count. Round to meet the stitch pattern repeat (I note repeats for each pattern).
- Work a test panel to confirm that your counts make sense before beginning the full top.
Construction types used in these patterns:
- Top-down (worked from neckline to hem) — easy to try on as you go.
- Bottom-up (worked from hem to bust) — great when you prefer a straight hem.
- Panel construction (front + back + seam) — flexible for mixed yarns or granny motifs.
Abbreviations (US): ch = chain, sc = single crochet, hdc = half double crochet, dc = double crochet, tr = treble, sl st = slip stitch, st(s) = stitch(es), rep = repeat, RS = right side, FLO/BLO = front/back loop only, … repeat, sk = skip.
1. Crochet Braided Wheat Summer Top Pattern

A modern lacy tank with a braided wheat stitch (a textured lace that reads like small, slanted V’s). Great for beach coverups or city summer styling.
Skill level: Intermediate (comfortable with post stitches and stitch repeats)
Materials (sample size M)
- Sport/DK cotton or bamboo blend, ~600–800 yds total (depends on length/size; lighter if open lace)
- Hook: 4.0–4.5 mm (adjust after swatch)
- Tapestry needle, stitch markers, measuring tape
Stitch concept: Braided Wheat is a textured cluster/ crossed-stitch motif that creates slanted V motifs. The repeat is multiple of 6 sts + edge stitches. I’ll provide an easier-to-follow substitute if you prefer: a Wheat-like repeat using front-post/paired dcs for texture.
Gauge example (before blocking): 5 sts × 3.5 rows = 1″ in Braided Wheat on 4.5 mm — you must swatch.
Sizes (finished bust, sample)
- S: 34″ (fits 32–34″)
- M: 38″ (fits 36–38″)
- L: 42″ (fits 40–42″)
- XL: 46″ (fits 44–46″)
Use your spi to calculate foundation count (finished bust × spi). Round to multiple of 6.
Construction overview
Worked bottom up in bands of braided wheat stitch, with shallow armhole shaping and narrow straps added later. Hem is a slightly flared band for airiness.
Step-by-step
1 — Swatch & foundation
- Make a 4″ swatch in Braided Wheat; measure spi. For example, if spi = 5, and you want finished bust 38″ → foundation = 38 × 5 = 190 sts. Round to nearest multiple of 6: 190 → 192 (because 192 ÷ 6 = 32). Chain 192 + 1 (if pattern requires turning chain) or chain into ring if working joined.
2 — Hem band (optional flare)
- Ch foundation (multiple of 6). Join into a ring (no twist) or work back & forth (if you prefer a seam).
- Rnd 1: ch 1, sc in each ch around (or if back & forth sc across; join). This evens edge.
- Rnd 2–6: Work Braided Wheat pattern repeat around. This creates about 1.5–2″ of hem.
Braided Wheat (simple version) — multiple 6
- Row/Rnd pattern (worked in rounds): ch1, (dc in next st, fpdc around next st, bpdc around next st, dc in next) — this is a conceptual place-holder. If you prefer precise cluster language use: [skip 1, dc in next, dc crossed in previous etc]. The important bit: maintain the 6-st repeat so the slanted motif develops.
3 — Main body
- Continue rounds of patterned stitch until the piece measures from hem to underarm ~14–16″ (adjust for torso length). Try it on as you go or measure on the wearer.
4 — Armhole & yoke shaping
- For minimal shaping (tank): continue rounds until desired underarm depth, then split for front/back: work rows back & forth for front and back separately to shape shallow scooped neckline, or continue in the round and decrease evenly across two rounds to create shallow armhole curvature. Example simple split:
- Mark center front and center back. On next round, stop at mid-front and work row across front only for a few rows to create a scoop. Then rejoin rounds for back.
5 — Strap creation
- Once shoulder widths are determined (approx 3–4″ per strap), bind off front and back and rejoin yarn at edge to work straps:
- Option A: Chain 40 (strap length), sc back across. Attach to corresponding shoulder.
- Option B (fancier): Make braided strap (3 ch-cords braided) and sew on.
6 — Edging & finish
- Work 1 round sc around neckline and armholes for a clean finish. Optional picot or reverse single crochet. Weave ends and block lightly to open lace.
Variations & styling
- Make longer for tunic/dress length.
- Swap wheat stitch for simple shell stitch for easier execution (shells: 5 dc in one st, skip 2, sl st in next).
Troubleshooting
- If the pattern looks twisted, count repeats and ensure foundation matches multiple.
- If fabric is too dense, go up half a hook size.
Care
- Machine wash gentle if yarn allows; otherwise hand wash and dry flat. Block to shape.
2. Crochet Summer Baby Doll Top Pattern

An airy, empire-waist baby doll silhouette — roomy bust with band beneath that gives a breezy flared hem. Cute over shorts or swimsuits.
Skill level: Beginner → Easy
Materials (sample M)
- Sport/DK cotton ~700 yds (body and straps)
- Hook: 4.0 mm
- Tapestry needle, small amount elastic (optional for fit), buttons (optional for straps)
Gauge example: 5 sc = 1″ in sample pattern (use your swatch)
Construction overview
Worked top-down in three parts: yoke (fitted), underbust band with shaping, then flared skirt in open lacy stitch. Choose an empire high waist or just under bust.
Step-by-step
1 — Measure & decide yoke circumference
- For sample: finished yoke circumference = bust measurement at underbust + ease (usually 1–2″). Example for M: 34″ yoke. Calculate foundation using spi.
2 — Yoke (worked in rounds)
- Make a small neckring: MR, ch 1, 12 sc in ring, join.
- Increase evenly: Round 2: inc in each st → 24. Round 3: sc 2, inc around. Continue until yoke measures around to sit comfortably under bust—this builds bust circumference. Try on as you go: this top is fitted at yoke.
3 — Underbust band (shaping)
- Once yoke reaches underbust measurement, work 2–4 rounds of sc or hdc to give a firmer band. If you want shirring, add an elastic band inside the stitched band later. This band will be the anchor for flared skirt.
4 — Skirt (flare)
- Switch to lighter lacy stitch: Dc shell lace is excellent — Round 1 of skirt: ch 3, skip 2, shell in next st (5 dc in one st), ch 3, skip 2, sc in next st — this creates mesh & airflow.
- Repeat lace rounds until desired length (12–16″ for top length from underbust to hem; adjust shorter for crop style).
5 — Straps
- Options:
- Simple straps: Chain to length (e.g., 30–36 ch), attach to front/back edges with sc.
- Tie straps: Make long chains and tie at shoulders.
- Decorative: Make narrow triangular lace straps with shells to match skirt stitch.
6 — Edging & finish
- Work 1 round sc around hem and armholes (if cut for armholes) for stability. Add a tiny picot or shell trim to hem for feminine finish.
Styling & variations
- Add a tiny ruffle at hem with 2 rows of shell stitch for more movement.
- Add side slits for extra air and mobility.
Troubleshooting
- If skirt is too full, work fewer increases in first flare round or use a smaller hook for skirt.
- If yoke gapes, add one more round of increases before underbust band.
Care
- Cotton tops block well — soak & pin to desired dimensions.
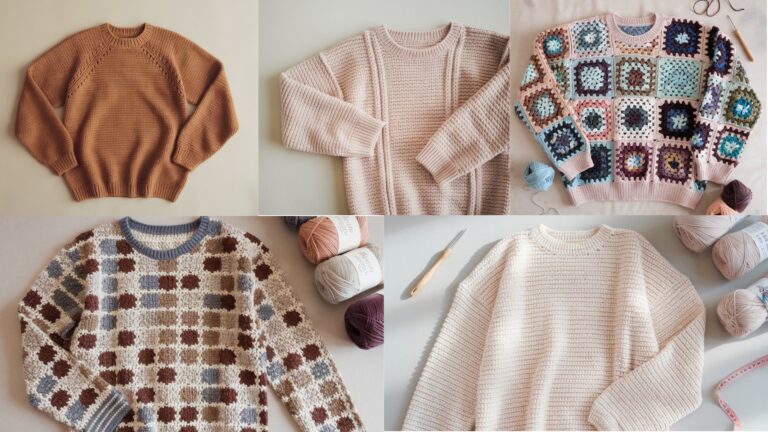
3. Crochet Granny Square Top Pattern

Timeless and modular: make front and back from Granny blocks for a playful summer piece. Great for stash-busting and color play.
Skill level: Beginner → Intermediate (joining squares & shaping)
Materials
- DK/sport cotton in multiple colors — total ~700 yds depending on size and number of squares
- Hook: 4.0–4.5 mm
- Tapestry needle, stitch markers
Construction overview
Make identical granny squares (or large granny panels), join into front/back, add side seams and straps. This pattern is modular so you can adapt to any size.
Square size & count (example)
- Make Granny squares 6″ finished (blocked) each. For a bust 38″ with 2″ ease you need ~40″ finished → width per side ~20″ → 20″ ÷ 6″ ≈ 3.3 → choose 3 squares across per side (three squares = 18″ → smaller than desired) or make larger squares (7″ or 4 across). Common approach: 4 squares across × 3 rows = 12 squares per front or make larger granny panels.
Step-by-step
1 — Make granny squares
- Classic granny: MR, ch 3 (counts as dc), 2 dc, ch 2, 3 dc in ring, ch 2 rep 3 times (4 clusters). Round 2 onward: 3 dc in ch-2 space, ch 2 around, increasing corners. Work rounds until square reaches desired size (6–8″ blocked). Join color changes as you like.
2 — Block squares
- Block each square to exact measurement to make joining easier.
3 — Layout & join
- Arrange squares for front/back: for a simple tank, make 3×3 squares for front and 3×3 for back (adjust for size). Join squares using whipstitch or join-as-you-go (JAYG) technique for a flat seam.
4 — Shaping neck & armholes
- After joining, leave the top row center squares partially separated to shape neckline: e.g., remove center 1–2 rows of top squares or cut small opening and reedge with sc to form a scoop. Alternatively make front panel slightly narrower at top by omitting some squares.
5 — Straps & finish
- Make straps by chaining and scrowing or make narrow panels of granny squares folded and sewn for thicker straps. Work 1 round sc around armholes and neckline to stabilize seams.
Styling & variations
- Use gradient palette for boho look.
- Make a cropped version by using fewer rows.
Troubleshooting
- Uneven square sizes? Block them again or rework borders to match final dimension.
Care
- Cotton squares: machine wash cold on gentle; reshape while damp.
4. Crochet Classic Summer Top Pattern

A simple, versatile top that reads like a knit tank — worked top-down with set-in shaping. Clean lines, minimal seams — perfect for everyday wear.
Skill level: Easy → Intermediate (top-down shaping)
Materials
- DK or light worsted cotton ~800 yds (longer if you want tunic length)
- Hook: 4.0 mm (smaller for firmer fabric)
- Tapestry needle, stitch markers
Stitch choice: Simple mesh or linen stitch (dense but breathable). Linen stitch is lovely in cotton: sc in next st, ch1, skip 1 (creates woven fabric).
Gauge example (linen stitch): 6 sts × 5 rows = 1″ (this is illustrative — swatch!)
Construction overview
Worked top-down: start with back neck, divide for armholes and work front/back separately for bust shaping (or continue in rounds and do short rows for bust darts). This pattern gives a close to body or slightly loose silhouette.
Step-by-step
1 — Neck and yoke
- Start with a foundation chain to make a small neckband: ch 60 (depends on spi and desired neck width). Join to work in rounds or rows for a crewneck rib of 1″.
- Pick up stitches and work yoke rounds in linen stitch — increase evenly at raglan-style points to shape shoulders if doing raglan; otherwise work straight tube to underarm.
2 — Divide for armholes
- Once yoke depth is achieved (approx 7–9″ from neck for sample), divide front/back:
- If working in the round, bind off a section for back neck and work front in rows for neckline. Alternatively, place markers and start working back & forth for front and back panels separately to control neckline shape.
3 — Bust shaping (optional)
- Add short rows on front for bust darts or simply flare slightly by adding increases under the bust.
4 — Body
- Continue in linen stitch (or chosen stitch) to desired length. For a boxy crop keep 16–18″ total length; for tunic 26–30″.
5 — Armholes & edgings
- Work 4–6 rounds sc around armholes and neckline for clean finish. Add a simple 1″ rib at bottom by working sc in BLO for 4 rounds.
6 — Straps / straps width
- If you made a tank with shoulder widths left intact this step is not needed. For narrow straps work small chains and sc loops and attach.
Styling & variations
- Add a lace inset panel at front with a vertical strip of openwork.
- Make it longer for a tunic; add side slits.
Troubleshooting
- If the linen stitch appears too open, switch to smaller hook or sc rounds to make fabric firmer.
Care
- Cotton: machine wash gentle and dry flat to maintain shape.
5. Crochet Lily Ruffle Sleeve Summer Top Pattern

A romantic lightweight top with flared ruffle sleeves inspired by lily petals. Works beautifully in bamboo blends for drape.
Skill level: Intermediate (sleeve shaping & short rows for petal shaping)
Materials
- DK / bamboo blend ~900–1100 yds depending on sleeve length and size
- Hook: 4.0–4.5 mm
- Tapestry needle, stitch markers
Stitch concept: Basic body uses mesh or linen stitch; sleeves are created with short rows and shell rounds to form ruffled petals.
Construction overview
Worked top-down with raglan or set-in sleeve shaping. After working body to armhole depth, pick up stitches for sleeve and work short petal-shaped ruffles.
Step-by-step
1 — Yoke & shoulder shaping
- Start similar to Classic Top: ch for neckband, work yoke increasing at 4 raglan points to shape shoulders for sleeves. Continue until underarm depth reached.
2 — Divide for body & sleeves
- After yoke depth, place sleeve stitches on holders: identify raglan increases and place sleeve sts on waste yarn (these stitches will form the hole for sleeves later). Continue to work body in the round to desired length.
3 — Sleeve cap & petal ruffle
- Rejoin yarn to sleeve armhole: pick up sleeve stitches from holder and add extra chains around armhole to fit.
- Work rounds of shell stitch for ruffle: skip 2, 5 dc shell in next st, skip 2, sc in next — each shell becomes a petal. Increase the number of shells each round to make ruffle flare (example: 2 shells in first shell of previous round every other round). Use short rows (work partial rounds) to create layered petal tiers — e.g., work shells only on the front half for the top tier, then the full round for next, which forms overlapping petals.
4 — Sleeve length
- Work ruffle tiers until sleeve reaches desired length (cap sleeve or short flutter sleeve ~4–6″ from armhole). Light yarn choice is key for delicate drape.
5 — Finishing
- Edging: work 1 round sc around neckline and hem. Weave ends and block lightly, pinning petals to open.
Styling & variations
- Make sleeves longer for flutter bell sleeve effect.
- Add a small bow at shoulder or button tab for adjustability.
Troubleshooting
- If ruffles are too stiff, switch to a drapey yarn (bamboo blend) or reduce shell size.
- If petals clump, ensure increases spread evenly.
Care
- Bamboo and blends: hand wash or machine gentle; dry flat to preserve petal shape.
Common finishing steps for every top
- Weaving ends: Use tapestry needle to bury ends across several sts on wrong side. For color changes tie securely and weave.
- Blocking: For cotton and linen, wet block and pin to measurements; this opens lace and evens rows. For bamboo and rayon, light steam blocking is best. Don’t stretch past intended dimensions.
- Seams: Use mattress stitch where panels join for invisible seams, or whipstitch for a rustic look. Many tops are best without side seams (work in rounds), but panels can be more forgiving for shaping.
Troubleshooting & fit adjustments (general)
- Too tight around bust: add 2–4″ by increasing foundation stitch count or selecting a larger size.
- Top too long/short: measure on body during work and adjust by adding or removing body rounds.
- Straps slip off shoulder: widen strap or add slight inward shaping to keep them in place, or use narrow elastic sewn into strap for grip.
- Openwork shows bra: layer with a light cami or make a lining (sewn cotton camisole) for modesty.
Sizing & measurement cheat sheet (simple)
- Measure bust circumference at fullest point.
- Decide finished ease (0–6″ depending on fit).
- Swatch for stitches per inch (spi).
- Foundation stitch count = finished bust × spi (round to pattern repeat multiple).
- For length, measure from shoulder or underbust to desired hem and convert to rows using rows per inch from swatch.
Final tips — make your summer top sing
- Choose yarn by drape: bamboo and rayon = fluid, cotton = structured, linen = crisp.
- Test pattern repeat early: once your foundations math matches pattern repeats the rest is steady.
- Try on as you go: especially tops worked top-down — it saves unpicking later.
- Keep motifs balanced: when using granny squares or color blocks, repeat colors in balanced order.
- Care: light blocking after every wash keeps tops looking new and helps drape settle.
Conclusion
Five lightweight, stylish crochet tops for hot weather — from textured Braided Wheat and flirty Baby Doll, to modular Granny Square, classic Top-down, and romantic Lily Ruffle Sleeve — give you options for every summer mood. Each pattern can be simplified or embellished: swap yarn for drape, change strap styles, add lining, or lengthen for a tunic.