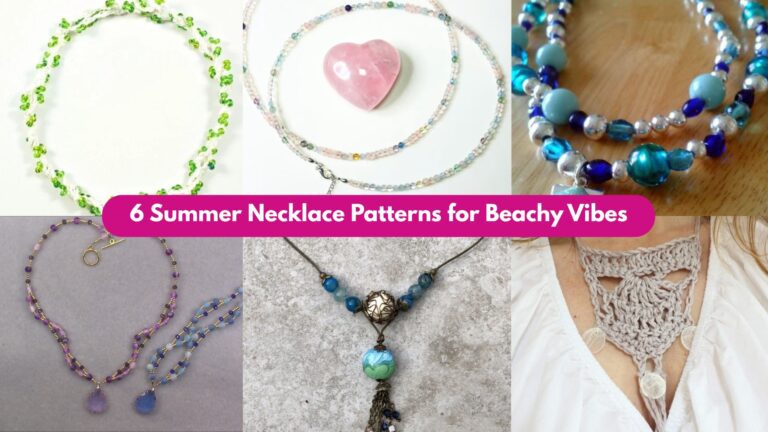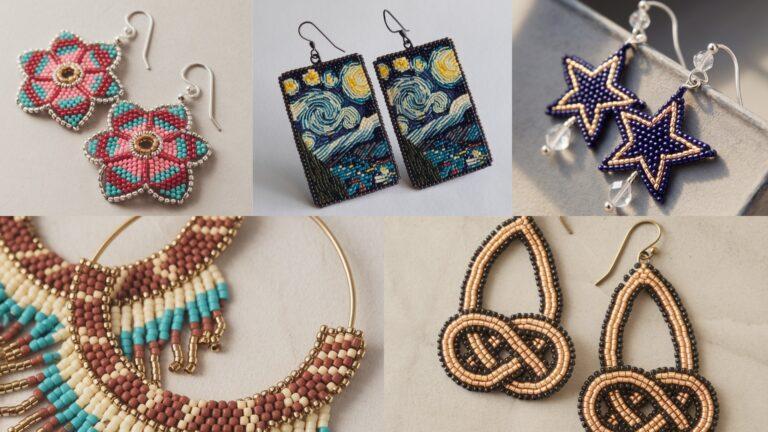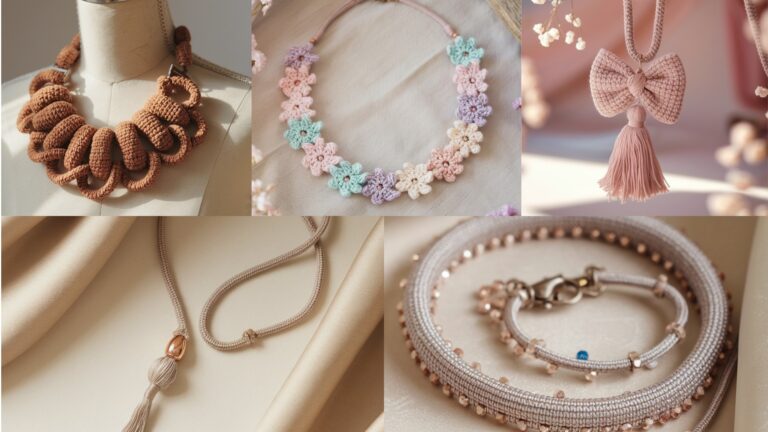
Crochet necklaces are such a lovely way to turn a little bit of yarn into something wearable, stylish, and personal. They are lightweight, creative, and perfect for adding a handmade touch to simple outfits without feeling heavy or overcomplicated. Unlike larger accessories, crochet necklaces are quick to make and easy to customize, which makes them ideal for everyday wear, gifts, or even small handmade items for a craft fair.
What makes crochet necklaces especially appealing is how much style you can create in such a small project. A cotton statement necklace can feel fresh and summery. A prickly pear necklace brings a playful botanical touch. A collar necklace feels polished and fashion-forward. A floral lace necklace adds elegance and softness. A beaded necklace gives you a delicate, refined finish. Each one has its own personality, but all of them are lightweight enough to wear comfortably and versatile enough to match many outfits.
In this post, you will find five lightweight crochet necklace patterns with detailed step-by-step guidance, useful notes, and practical finishing tips. Each section is written to be easy to follow while still giving you enough detail to create a necklace that looks polished and feels comfortable. Whether you are making one for yourself, for a gift, or for your handmade shop, these designs are a beautiful place to begin.
Quick Notes
Project type: Crochet necklaces and wearable accessories
Best for: Everyday wear, gifts, handmade fashion, craft fairs, and stash-busting
Skill level: Beginner to intermediate, depending on shaping and embellishment
Hook size: Usually 1.75 mm to 3.5 mm, depending on yarn weight
Yarn weight: Lace, fingering, crochet thread, or lightweight cotton works best
Best yarn choice: Cotton thread or lightweight cotton yarn for crisp shape and low weight
Finished size: Usually 12 to 20 inches long, depending on design and closure style
Time to complete: About 20 to 90 minutes per necklace
Helpful stitches: Chain, slip stitch, single crochet, half double crochet, double crochet, treble crochet, picot, shell stitch, bead attachment, simple appliqué, lace repeats
Common Materials
Most crochet necklaces can be made with a simple set of supplies.
- Lightweight yarn or crochet thread
- Small crochet hook
- Yarn needle
- Scissors
- Beads, charms, or pendant findings
- Necklace chain or ribbon, optional
- Small clasp or tie closure, optional
- Fabric stiffener, optional
- Stitch markers, optional
For necklaces, weight matters more than almost anything else. A necklace should feel soft against the skin and sit comfortably around the neck without pulling. Cotton thread or fine cotton yarn usually works best because it gives definition without adding bulk. If you want a more decorative or durable result, you can also add beads or a small closure.
1. Crochet Ocean Breeze Cotton Statement Necklace Pattern

A crochet ocean breeze necklace is fresh, airy, and perfect for everyday wear when you want something light but still eye-catching. It often uses cotton yarn in soft sea-inspired shades and may feature flowing shapes, wave-like elements, or layered motifs that feel relaxed and summery. This design is a beautiful choice if you want something that looks handmade and stylish without feeling too heavy.
Quick Notes
Skill level: Beginner to intermediate
Finished size: Lightweight statement necklace, usually 14 to 18 inches long
Style: Breezy, coastal, modern, relaxed
Best colors: Aqua, seafoam, white, turquoise, soft blue, sand, coral
Materials
- Lightweight cotton yarn
- 2.0 mm to 3.0 mm crochet hook
- Yarn needle
- Scissors
- Necklace clasp, ribbon, or chain
- Optional small beads or shell charm
Step-by-Step Guide
Step 1: Choose the necklace style
Before you begin, decide whether you want the necklace to be a single flowing strand, a layered motif necklace, or a short collar-style piece. For an ocean breeze look, soft curves and lightweight texture work especially well. The design should feel relaxed and easy to wear.
A clear style direction helps the necklace feel cohesive.
Step 2: Crochet the base strand
Start with a long narrow crochet strand or chain-based foundation. This will form the main body of the necklace. Keep the stitches neat and even so the piece lies smoothly around the neck. If you want a slightly firmer look, use single crochet or half double crochet instead of a loose chain.
A smooth base creates a polished necklace shape.
Step 3: Add ocean-inspired texture
Work a gentle wave stitch, shell stitch, or soft clustered texture along the strand. These details can suggest ripples, sea foam, or flowing water without becoming too literal. Keep the texture delicate so the necklace remains lightweight.
The texture gives the necklace its coastal personality.
Step 4: Add decorative accents
You can sew on tiny beads, shell charms, or small crocheted drops along the strand. Keep the accents spaced evenly and lightweight. The goal is to suggest the ocean breeze feeling, not overpower the neckpiece.
Small accents can make the design feel more refined.
Step 5: Shape the necklace curve
Try the strand on lightly as you go so you can check how it curves around the neckline. The necklace should sit comfortably and not curl awkwardly. If needed, adjust the stitch tension or add a few more rows to create the right drape.
Fit is very important for a wearable necklace.
Step 6: Add the closure
Attach a clasp, tie ends, or a short chain extension depending on how you want to wear it. A simple tie closure works well for casual styles, while a small clasp gives the necklace a cleaner finish. Make sure the closure is secure and easy to fasten.
Step 7: Finish and shape
Weave in all ends carefully and lay the necklace flat to check the shape. If it feels too soft, lightly block it so it settles into a smooth line. The final look should feel light, fresh, and wearable.
Helpful Tips
This necklace looks especially beautiful in sea-inspired colors and natural cotton yarn. If you want a more elegant version, choose white and soft blue. If you want a bolder summer version, try turquoise or coral accents.
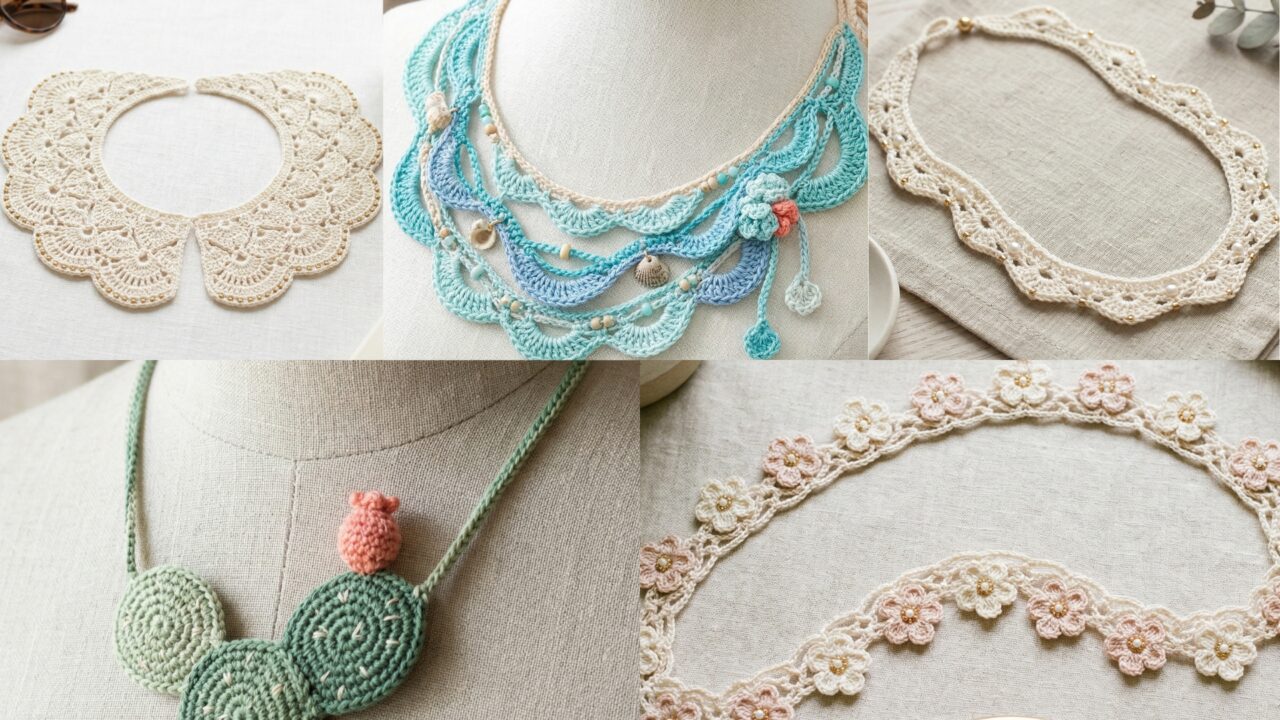
2. Crochet Prickly Pear Necklace Pattern
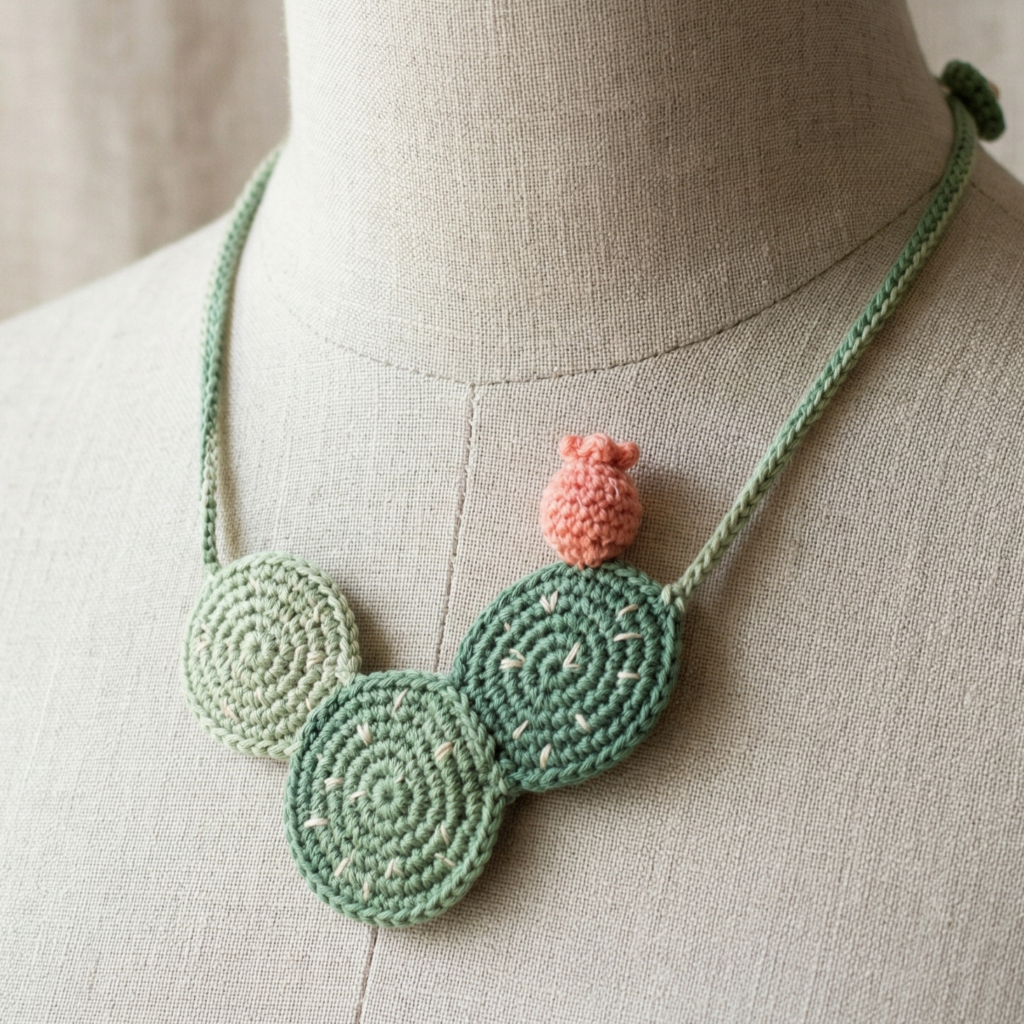
A prickly pear necklace is playful, botanical, and a little unexpected in the best way. It brings a fresh, nature-inspired look to crochet jewelry and is perfect if you want a necklace that feels unique but still simple enough for everyday wear. The shape can be stylized so it remains lightweight and comfortable.
Quick Notes
Skill level: Beginner to intermediate
Finished size: Usually 12 to 18 inches long with focal motif
Style: Botanical, playful, quirky, handmade
Best colors: Green, cactus green, soft pink, coral, cream, sage
Materials
- Lightweight cotton yarn in green and accent colors
- Small crochet hook
- Yarn needle
- Scissors
- Necklace cord, clasp, or tie closure
- Optional tiny beads or embroidery thread
Step-by-Step Guide
Step 1: Plan the prickly pear motif
Decide whether you want one central prickly pear pad as the focal point or several small pads linked together. A single motif is easiest and makes the necklace easy to wear. Keep the shape rounded or oval so it feels organic and natural.
The motif should be recognizable but simple.
Step 2: Crochet the cactus pad shape
Start by crocheting a small oval or rounded teardrop shape in green yarn. This will form the main cactus pad. Work in tight stitches so the shape stays crisp and does not become floppy. If needed, create two or three small pads and layer them slightly.
The pad is the main visual feature of the necklace.
Step 3: Add tiny prickly details
Use embroidery thread or very small stitched accents to suggest tiny cactus spines. Keep the details minimal because the necklace needs to remain soft and wearable. Tiny stitches are enough to give the motif its prickly pear identity.
Subtle details are usually more effective than heavy ones.
Step 4: Add the fruit accent
If you want a prickly pear cactus fruit look, crochet a tiny oval or teardrop in pink or coral and attach it to the top of the cactus pad. This small accent gives the design a fresh, colorful touch and helps the motif feel more distinctive.
The fruit detail adds a fun pop of color.
Step 5: Attach the motif to a necklace strand
Crochet a narrow strand or use a simple chain cord for the necklace base. Sew the prickly pear motif to the center or slightly off-center depending on the style you want. Keep the strand light and simple so the motif stands out.
The chain should support the motif without competing with it.
Step 6: Add a closure
Use a tie closure, clasp, or small button-and-loop finish. A simple closure works best because the motif should remain the main focus. Make sure the necklace lies comfortably and does not twist.
A clean closure helps the necklace look polished.
Step 7: Finish and check proportions
Weave in the ends securely and check that the cactus shape sits flat. The piece should feel playful, light, and balanced. If the motif is too thick, reduce stuffing or use fewer layered stitches next time.
Helpful Tips
This necklace is especially cute in soft green with blush or coral accents. It is a lovely choice for people who love botanical jewelry with a quirky twist. Keep it slim and simple so it stays comfortable for everyday wear.
3. Crochet Collar Necklace Pattern
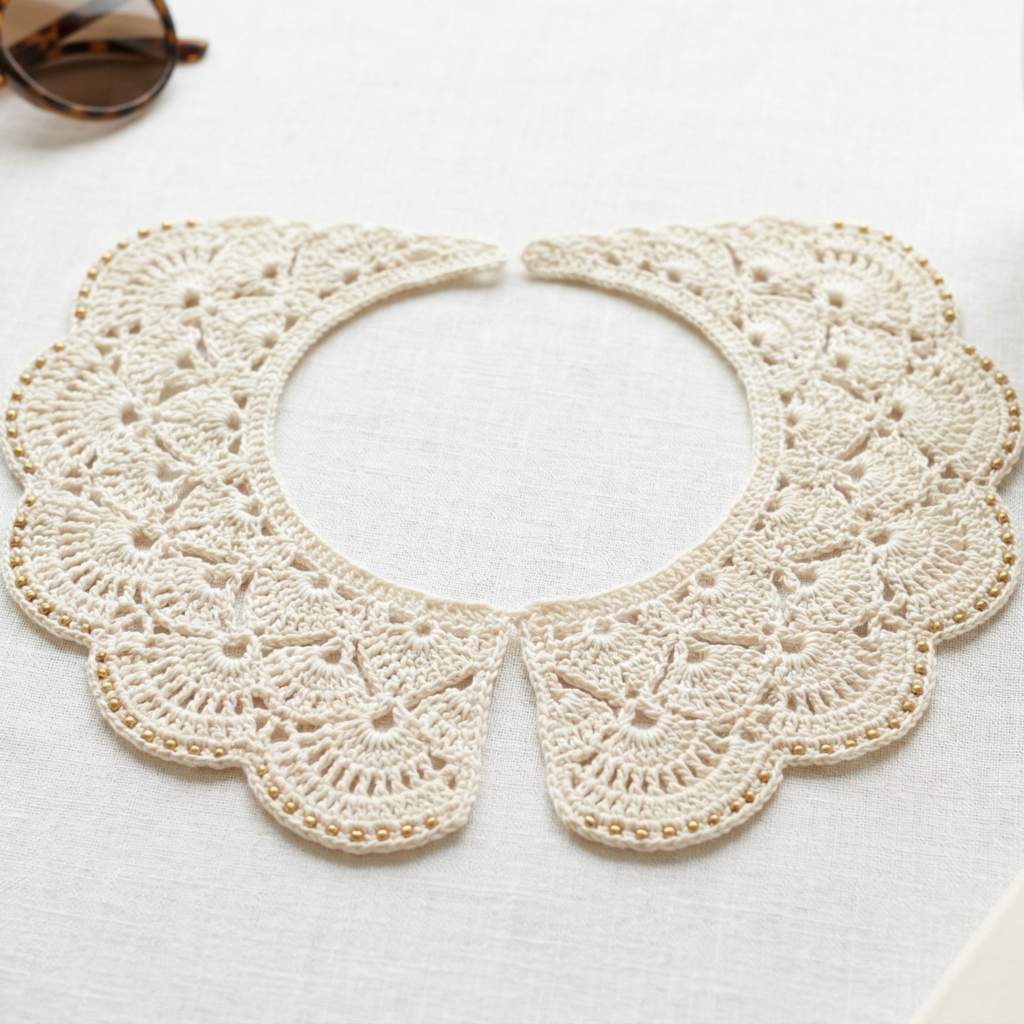
A crochet collar necklace feels elegant, fashionable, and a little more structured than a simple strand necklace. It sits closer to the neck and often has a rounded or layered shape that resembles a decorative collar. This makes it a great choice if you want a refined accessory that can dress up a plain top or simple dress.
Quick Notes
Skill level: Intermediate
Finished size: Neck-hugging collar, usually 14 to 18 inches depending on style
Style: Polished, structured, chic, statement-making
Best colors: Black, cream, ivory, gold, navy, dusty rose, deep green
Materials
- Lightweight cotton yarn or thread
- Small crochet hook
- Yarn needle
- Scissors
- Clasp or button closure
- Optional beads or decorative edging
Step-by-Step Guide
Step 1: Measure around the neckline
Since this necklace sits close to the neck, fit is important. Measure the area where you want it to sit so the collar feels comfortable and not restrictive. A slightly flexible fit is best because it keeps the necklace wearable for longer periods.
Good fit is the foundation of a collar necklace.
Step 2: Crochet the base band
Start with a narrow band or chain-based strip that will form the neckline of the collar. Keep the stitches firm and even so the necklace can hold its shape. If you want more structure, use single crochet or a stitch pattern that makes a denser fabric.
The base band supports the collar shape.
Step 3: Build the collar width
Once the band is formed, add width to the lower edge using increases, lace, or fan-shaped sections. The collar should gently flare outward away from the neck. This gives the necklace its elegant silhouette and helps it sit flat.
The widening shape is what makes it feel like a collar.
Step 4: Add decorative stitch detail
A collar necklace looks beautiful with lace panels, tiny shells, picots, or a repeating fan pattern. These details make the piece feel more refined and dressy. Keep the design balanced so it does not become too heavy for daily wear.
The decorative texture is part of the charm.
Step 5: Make it symmetrical
A collar necklace usually looks best when both sides match closely. Check the shape as you go and adjust any uneven edges. Symmetry helps the piece sit properly around the neckline and gives it a polished look.
Balance matters especially in structured jewelry.
Step 6: Add closures
A clasp, button, or tie closure will help the necklace stay in place. Make sure the closure is positioned so it does not show too much or distort the collar shape. If you want a cleaner finish, use a small hidden button or clasp.
Step 7: Block for shape
Blocking is especially helpful for collar necklaces because it helps the edges lay flat and opens up the stitch pattern. Shape the collar gently while it dries so it keeps the desired curve.
Helpful Tips
A collar necklace can look very different depending on the yarn color. Black feels dramatic and chic, while ivory or cream feels soft and elegant. If you want a fashionable everyday piece, use a simple color and let the shape be the statement.
4. Crochet Floral Lacey Necklace Pattern
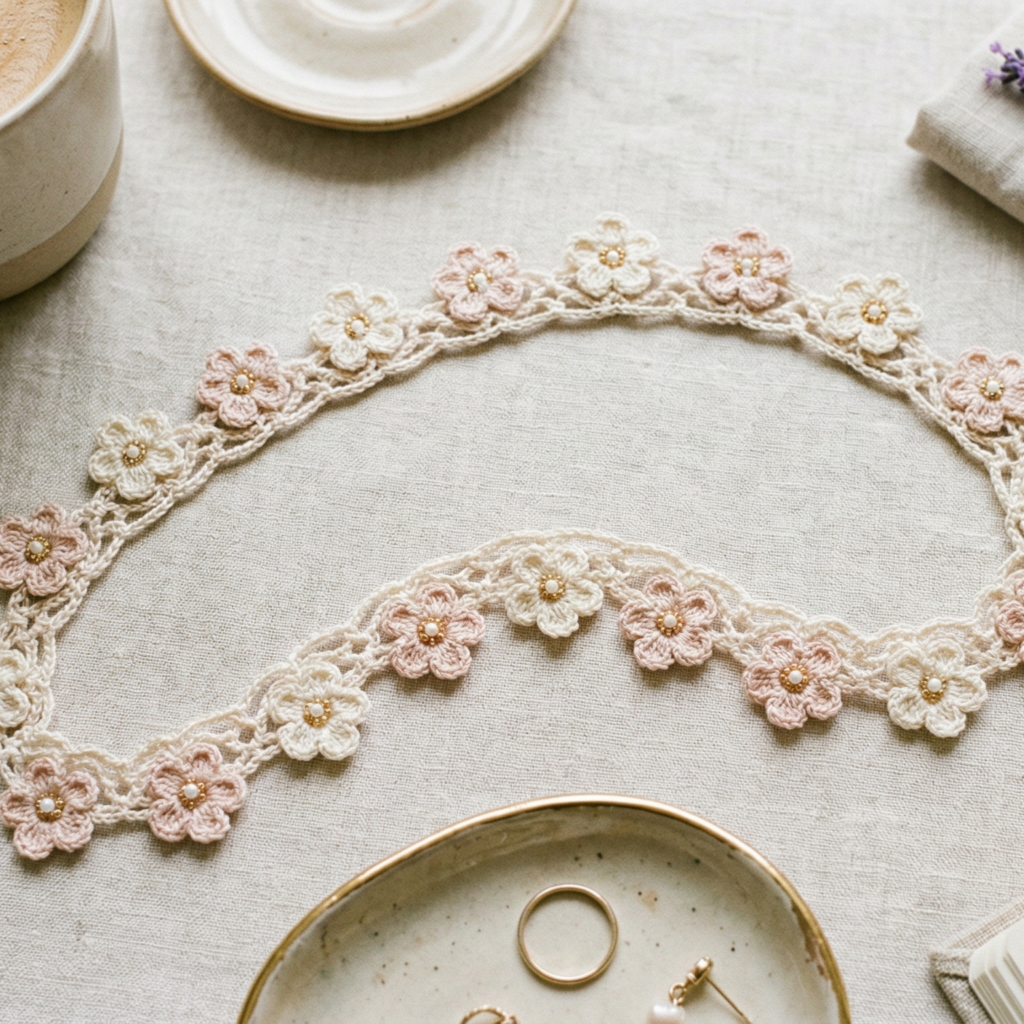
A floral lacy necklace is delicate, romantic, and timeless. It brings together soft flower motifs and open lacework for a design that feels pretty without being too heavy. This type of necklace is especially lovely if you want something feminine and light for everyday wear or special occasions.
Quick Notes
Skill level: Beginner to intermediate
Finished size: Typically 14 to 20 inches long with floral motifs
Style: Romantic, airy, delicate, feminine
Best colors: White, cream, blush, lavender, pale green, soft peach
Materials
- Fine cotton yarn or thread
- Small crochet hook
- Yarn needle
- Scissors
- Clasp, ribbon, or tie closure
- Optional beads or small pearls
Step-by-Step Guide
Step 1: Make the floral motifs
Start by crocheting tiny flowers. These can be simple five-petal flowers, small daisies, or soft layered blooms. Keep each flower small so the necklace remains lightweight and wearable. Make enough flowers for the design you want, whether that is a single focal bloom or a row of smaller blossoms.
The flowers are the heart of the necklace.
Step 2: Add lace connectors
Use chain loops, picots, or small open stitch sections to connect the flowers. The lace connectors help the necklace feel airy and graceful. They also keep the overall design flexible and light.
The lace links the flowers into a necklace shape.
Step 3: Arrange the floral pattern
Lay the flowers out before sewing them together so you can see how they look. You may want them in a line, a gentle curve, or a slightly centered cluster. A thoughtful arrangement makes the necklace feel more polished and balanced.
Placement has a big effect on the final look.
Step 4: Build the necklace strand
Crochet a slim strand or lace band that holds the floral motifs. Keep it narrow so the flowers remain the focus. The strand should blend into the flowers rather than overpower them.
A subtle base keeps the design elegant.
Step 5: Add bead or pearl accents
Tiny beads or pearl-like details can make the floral pattern feel even more refined. Add them sparingly so they enhance the lace rather than clutter it. A few small accents are enough to make the necklace feel finished and special.
Small details can elevate the whole piece.
Step 6: Attach the closure
Use a clasp, ribbon, or thin tie ends. A delicate closure works best with floral lace because it keeps the overall design soft and feminine. Make sure the closure matches the style of the necklace.
Step 7: Block and refine
Light blocking will help the lace open up and the flowers sit neatly. Once dry, check that the motif spacing looks balanced and that the necklace lies comfortably.
Helpful Tips
This necklace looks especially beautiful in white or blush, but it can also be lovely in lavender or pale green. For a vintage feel, use cream and tiny pearl accents. For a fresh spring look, choose soft pastel flowers with a simple lace chain.
5. Crochet Beaded Necklace Pattern
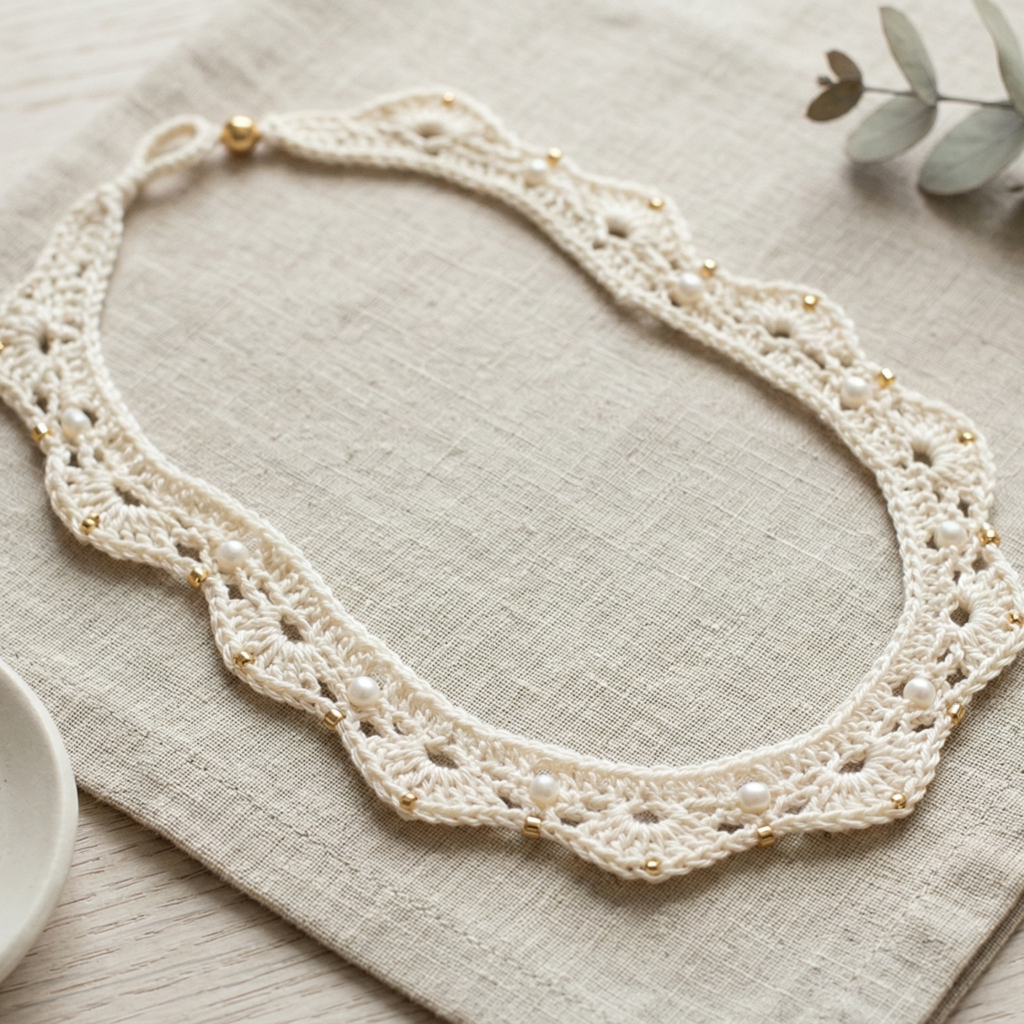
A beaded crochet necklace is elegant, lightweight, and easy to wear every day. Beads add just enough sparkle or texture to make the necklace feel special without becoming too bold. This makes it a perfect option if you want something simple, polished, and versatile.
Quick Notes
Skill level: Beginner to intermediate
Finished size: Usually 14 to 20 inches long
Style: Elegant, simple, refined, lightly decorative
Best colors: Neutral yarn with matching or contrasting beads, metallic accents, soft jewel tones
Materials
- Lightweight yarn or thread
- Small crochet hook
- Yarn needle
- Scissors
- Beads of your choice
- Clasp, ribbon, or tie closure
- Optional bead needle or fine thread for loading beads
Step-by-Step Guide
Step 1: Choose the bead style
Decide whether you want tiny glass beads, wooden beads, pearl-like beads, or metallic accents. The bead choice will set the mood of the necklace. Small lightweight beads are best so the necklace remains comfortable.
A thoughtful bead choice gives the necklace its personality.
Step 2: Plan the spacing
Before crocheting, decide how far apart you want the beads to be. You may want evenly spaced beads throughout the necklace or a clustered section near the center. Planning the spacing ahead of time helps the necklace look balanced.
Spacing matters a lot in beadwork.
Step 3: Crochet the base chain or strand
Create a slim necklace strand using chain stitches or a narrow crochet cord. Make it long enough to fit around the neck comfortably. If you want the beads to sit securely, use a strand that is strong and slightly firm.
A sturdy base keeps the beads in place.
Step 4: Add the beads as you work
Slip the beads onto the yarn before or during crocheting, depending on your method. Place them at regular intervals or in the pattern you planned. Keep the yarn tension even so the beads sit neatly and do not distort the strand.
The beads should feel integrated, not added on top.
Step 5: Keep the necklace lightweight
Do not overload the strand with too many beads, especially if you want it for everyday wear. A few well-placed beads are often more elegant than a heavy cluster. The necklace should remain comfortable against the skin.
Lightness is important for wearability.
Step 6: Add the closure
Finish with a clasp, tie, or small button loop. Make sure the closure matches the polished look of the beads. If you want a cleaner finish, use a hidden clasp or a neatly tied cord.
Step 7: Check the drape
Lay the necklace flat and try it on to check how it falls. If it twists too much or feels uneven, adjust the spacing or tension next time. A well-made beaded necklace should hang smoothly.
Helpful Tips
Beaded necklaces look beautiful in simple neutral yarns because the beads become the main detail. If you want a more elegant evening style, use pearls or metallic beads. If you want a softer everyday version, choose wooden beads or matte glass beads in gentle tones.
Conclusion
Crochet necklaces are a wonderful way to make something small feel meaningful and stylish. They are lightweight enough to wear comfortably, quick enough to finish in a short amount of time, and versatile enough to suit many different styles. That makes them a great project for using fine yarn, practicing decorative stitches, or creating one-of-a-kind gifts.
These five necklace patterns each bring something different to the table. The ocean breeze cotton necklace feels fresh and coastal. The prickly pear necklace is playful and botanical. The collar necklace is polished and structured. The floral lace necklace is romantic and delicate. The beaded necklace adds a refined touch of sparkle. Together, they show how much variety you can create with a small amount of yarn and a little creativity.
The best part about crochet necklaces is that they can be as simple or as detailed as you want while still staying lightweight and wearable. With the right yarn, careful shaping, and secure finishing, these little accessories can become favorites in your everyday wardrobe or thoughtful handmade gifts for someone special.