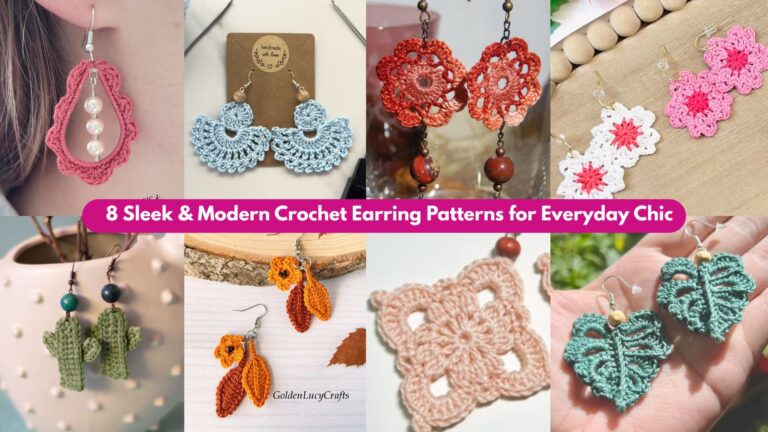
Crochet earrings are one of the sweetest ways to turn a little bit of yarn into something stylish, personal, and surprisingly wearable. They are lightweight, quick to make, and easy to customize, which makes them a perfect project for anyone who loves small handmade accessories. Unlike heavier statement jewelry, crochet earrings feel soft, airy, and comfortable enough for everyday wear, yet they still add that unique handmade touch that makes an outfit feel more thoughtful and complete.
What makes crochet earrings especially fun is how much variety you can create from such a small project. A mini mandala can feel delicate and balanced. An evil eye earring can look modern and meaningful. Feather earrings bring movement and boho charm. Lacy coral earrings feel soft and artistic. Lacy cross earrings add an elegant and meaningful accent. Each design has its own mood, but all of them are light enough to wear comfortably and small enough to finish without a huge time commitment.
In this post, you will find five lightweight crochet earring patterns with clear step-by-step guidance, practical notes, and helpful finishing tips. Each one is written to be easy to follow while still detailed enough to help you create earrings that look polished and feel comfortable. Whether you are making them for yourself, for gifts, or for your handmade shop, these earring ideas are a beautiful place to start.
Quick Notes
Project type: Lightweight crochet earrings
Best for: Everyday wear, gifts, handmade accessories, markets, and stash-busting
Skill level: Beginner to intermediate
Hook size: Usually 1.75 mm to 3.0 mm, depending on yarn weight
Yarn weight: Lace, fingering, thread, or lightweight cotton works best
Best yarn choice: Cotton thread or thin cotton yarn for crisp shape and low weight
Finished size: Usually 1 to 3 inches, depending on the design
Time to complete: About 15 to 60 minutes per pair
Helpful stitches: Chain, slip stitch, single crochet, half double crochet, double crochet, treble crochet, picot, magic ring, shell stitch, color change, surface crochet
Common Materials
Most crochet earrings can be made with the same basic supplies.
- Thin yarn or crochet thread
- Small crochet hook
- Yarn needle
- Scissors
- Earring hooks or posts
- Jump rings, if needed
- Jewelry pliers, optional
- Fabric stiffener or clear glue, optional
- Small beads, if desired
Because earrings need to be lightweight, the yarn choice matters a lot. Cotton thread or fine cotton yarn usually works best because it gives shape without making the earrings too heavy. If you want the earrings to hang neatly, you may also want to stiffen them slightly so they keep their form during wear.
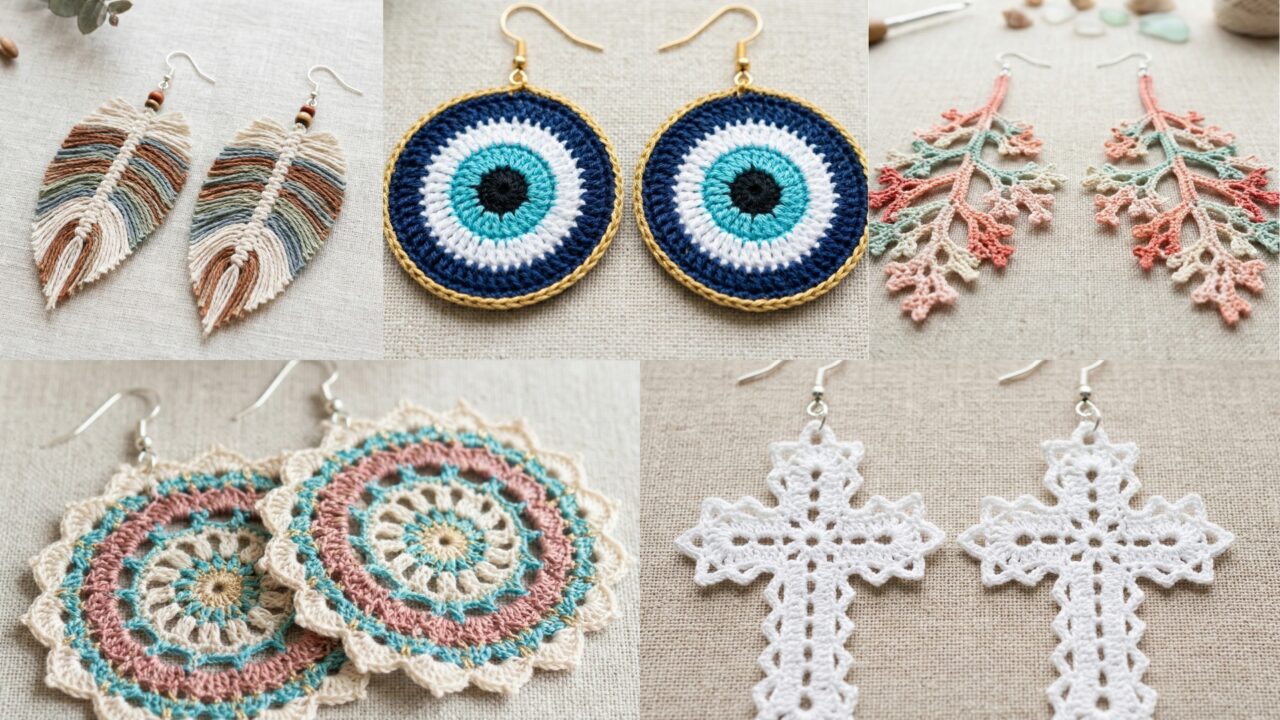
1. Crochet Mini Mandala Earrings Pattern
Mini mandala earrings are beautiful, balanced, and very easy to fall in love with. Their circular design makes them look delicate and symmetrical, while the layered stitches create a decorative center that feels artistic without being too heavy. They are the kind of earrings that work with everyday outfits but still feel a little special.
Quick Notes
Skill level: Beginner to intermediate
Finished size: About 1 to 2 inches across
Style: Delicate, symmetrical, artistic, lightweight
Best colors: White, cream, beige, dusty rose, turquoise, gold, or mixed tones
Materials
- Fine cotton thread or light yarn
- Small crochet hook
- Yarn needle
- Scissors
- Earring hooks
- Small jump rings, optional
- Fabric stiffener, optional
Step-by-Step Guide
Step 1: Start with a small center ring
A mini mandala usually begins with a magic ring or small chain loop. This forms the center of the design and keeps the work neat and compact. Since the earring needs to stay lightweight, the center should be small and tidy rather than bulky.
A tight center helps the whole mandala hold its shape.
Step 2: Build the first round
Work a small round of stitches into the center ring. This first round creates the base circle of the mandala. Keep the stitches even and close together enough that the earring looks full but not dense.
This round sets the symmetry for the rest of the design.
Step 3: Add decorative stitch layers
Continue with one or two more rounds using lace-like repeats, small clusters, or chain spaces. These layers create the mandala effect and give the earring its pretty circular texture. The design should remain open enough to stay light but structured enough to be visible.
The layered look is what gives mandalas their charm.
Step 4: Keep the shape flat
As you add rounds, check that the circle stays flat. If it starts to ripple, too many stitches may have been added. If it curls inward, you may need a few more increases. A flat shape is especially important for earrings because it helps them hang neatly.
A smooth flat circle looks more polished when worn.
Step 5: Add a finishing edge
Once the mandala reaches the desired size, work a clean border around the outside. A picot edge, single crochet border, or tiny shell edging can make the earring feel complete. This edge also helps define the circular shape.
A neat border gives the earring a finished, delicate look.
Step 6: Stiffen if needed
If the yarn is soft or the earring feels too floppy, lightly stiffen it with fabric stiffener or a diluted glue mixture. Shape it flat while it dries so it keeps its round mandala form.
This step is optional, but it often helps the earrings wear better.
Step 7: Attach the earring hook
Add a small loop at the top if needed, then connect the earring hook through a jump ring or directly through the crochet loop. Make sure the top attachment is centered so the mandala hangs evenly.
A centered hook keeps the earring balanced and comfortable.
Helpful Tips
Mini mandala earrings look especially beautiful in solid neutral shades or soft color gradients. If you want a more boho feel, use a warm earthy palette. If you want a fresh modern style, choose crisp white or natural cotton tones.
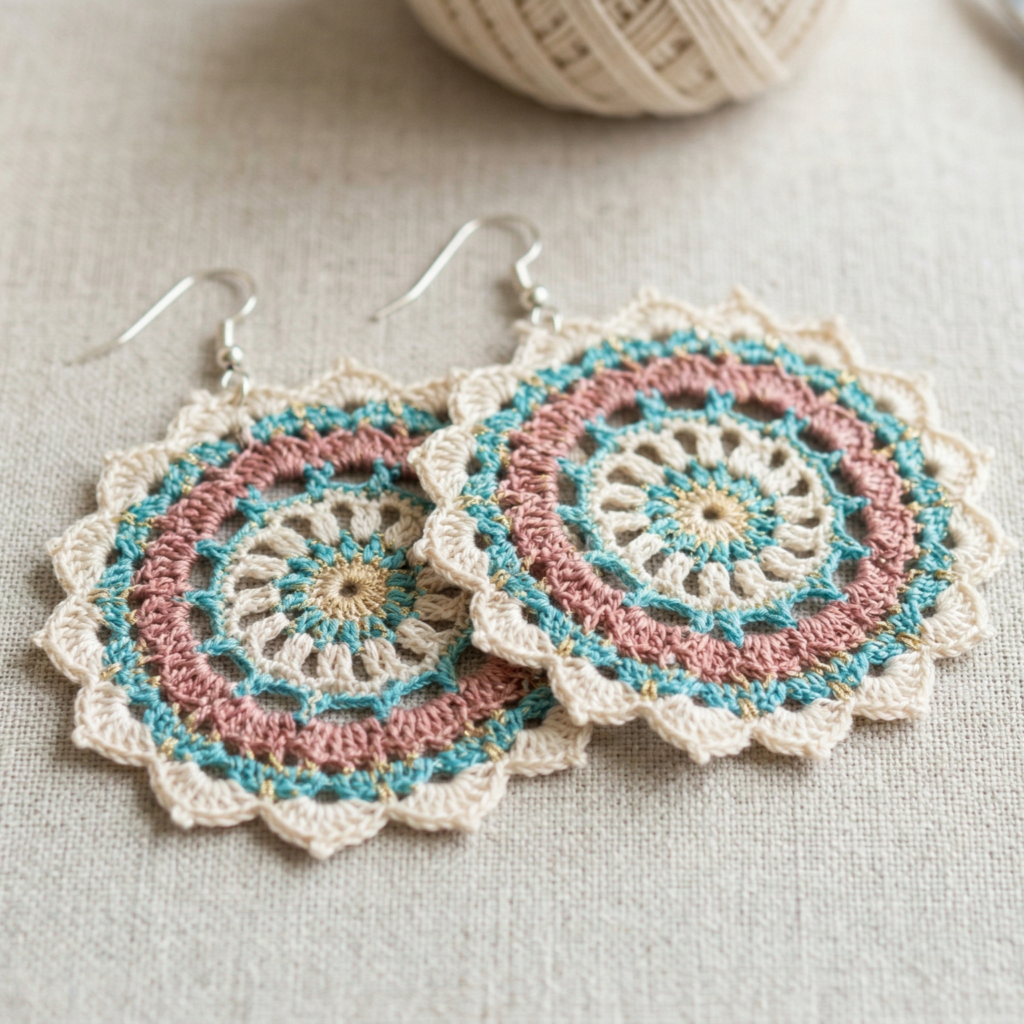
2. Crochet Evil Eye Earrings Pattern
Evil eye earrings are modern, meaningful, and easy to style with casual outfits. The circular shape works beautifully for crochet because the design can be built in small color layers that resemble the traditional eye motif. These earrings are eye-catching without being too large, which makes them perfect for everyday wear.
Quick Notes
Skill level: Beginner
Finished size: About 1 to 1.5 inches across
Style: Modern, symbolic, stylish, minimalist
Best colors: White, blue, black, navy, gold, or turquoise combinations
Materials
- Fine cotton thread or lightweight yarn
- Small crochet hook
- Yarn needle
- Scissors
- Earring hooks
- Optional small jump rings
- Optional stiffener
Step-by-Step Guide
Step 1: Create the base circle
Start with a magic ring and work a small flat circle. This will be the outer shape of the evil eye. Use a color that feels like the outer frame, such as white, navy, or blue.
The base should stay compact and smooth.
Step 2: Add the iris layer
Switch to a contrasting color for the middle circle. This could be a bright blue, turquoise, or another color you like. The middle layer represents the eye’s iris and gives the earring its recognizable look.
Keep the round even so the design stays neat.
Step 3: Add the center detail
Use a darker or lighter yarn for the small center dot. This should be tiny and clearly visible, but not bulky. The center dot is one of the most important parts of the evil eye design because it makes the motif feel complete.
A small center makes the earring read clearly at a glance.
Step 4: Keep the layers flat
As you work each color section, make sure the circle stays flat. Because the earring is small, any uneven tension will show quickly. Smooth, tidy stitches will make the design look more professional.
Flat layers also help the earring hang better.
Step 5: Finish the outer edge
Once the eye motif is complete, add a border if needed to define the outer circle. A single crochet border can keep the shape crisp and prevent the edges from looking soft or fuzzy.
The outer edge should frame the motif cleanly.
Step 6: Stiffen lightly
If the piece feels too soft, apply a little stiffener to help it hold shape. This is especially useful if you want the colors and layers to remain visible while the earring swings lightly when worn.
A little structure goes a long way with small motifs.
Step 7: Add the earring finding
Attach the earring hook to the top of the motif. If your earring has a top loop, use a jump ring for a more secure finish. Make sure both earrings are matched in size and placement so they hang evenly.
Helpful Tips
Evil eye earrings look especially stylish in blue and white, but you can also make them in softer palettes like cream and dusty blue or more modern tones like black and gold. They are a great accessory for both casual and dressed-up outfits.
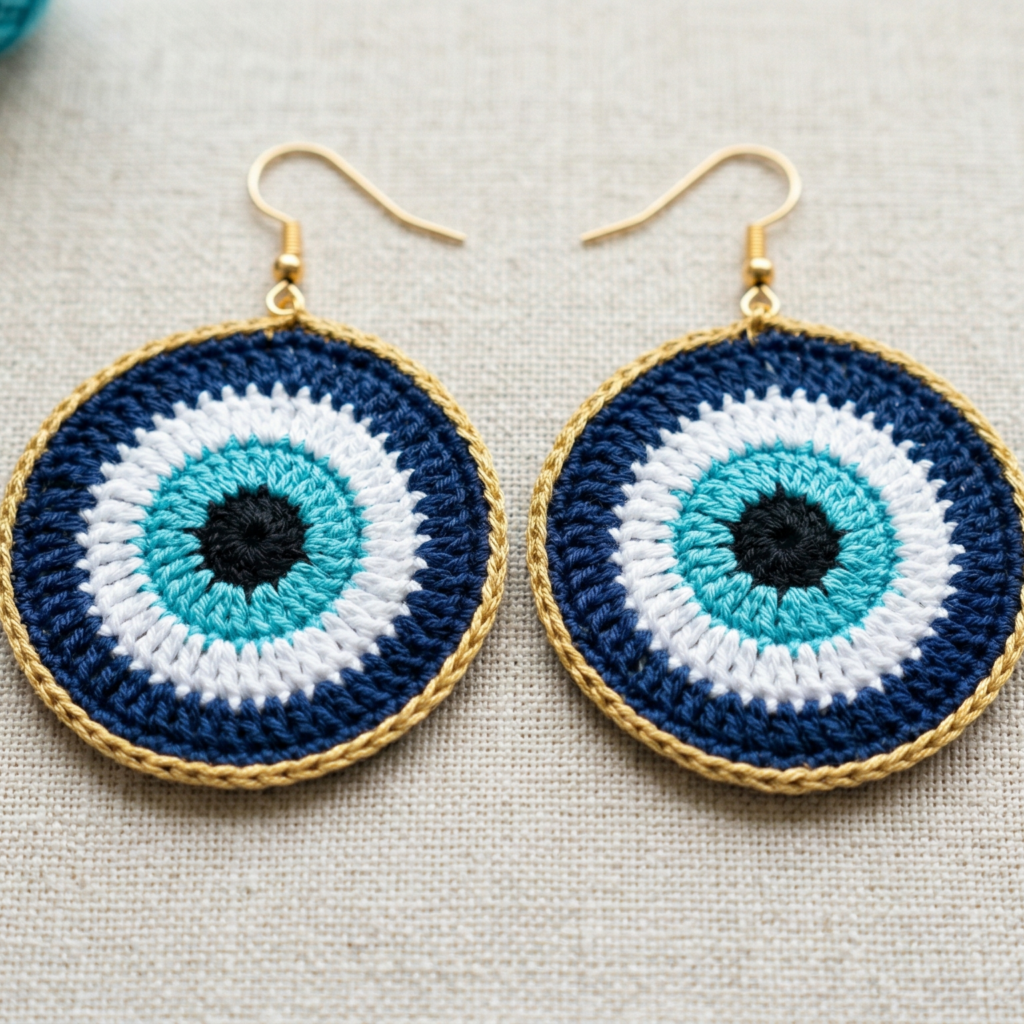
3. Crochet Feather Earrings Pattern
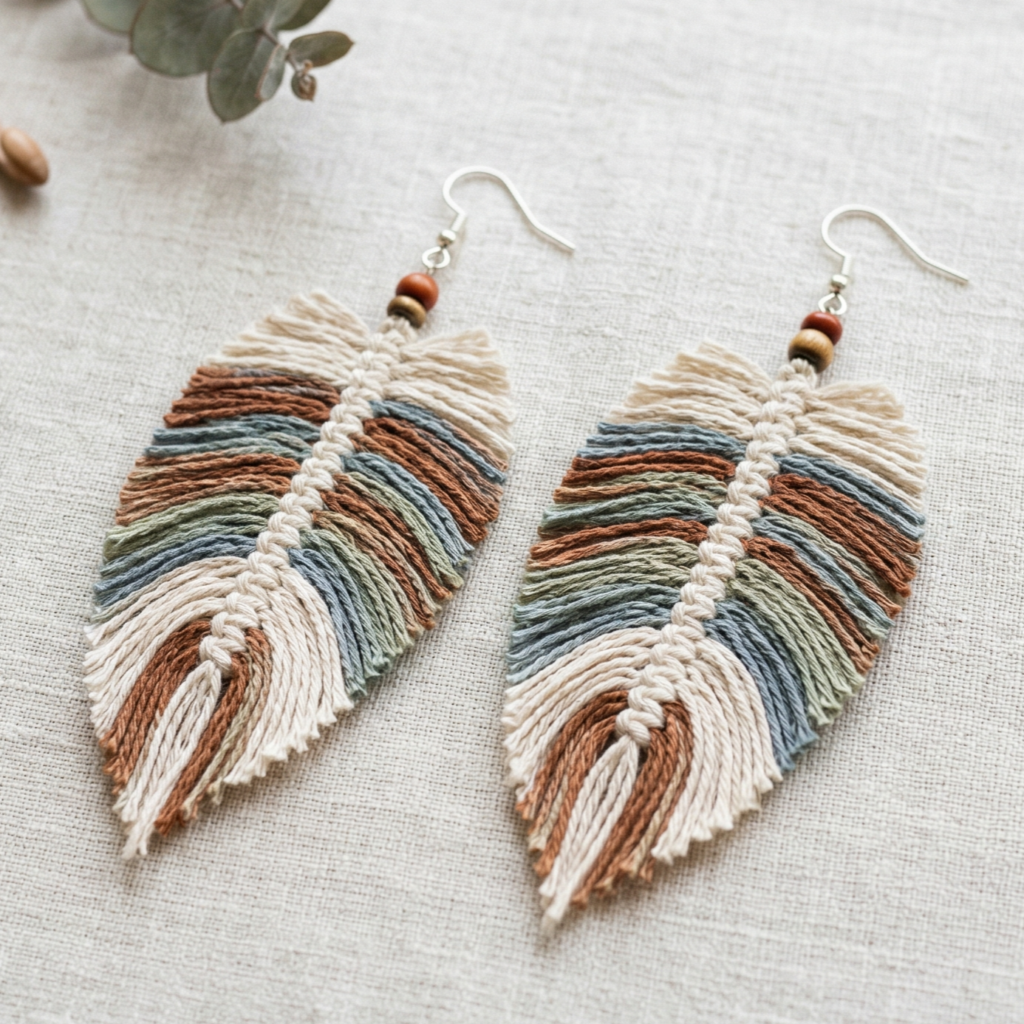
Feather earrings are light, graceful, and full of movement. They bring a soft boho feel to any outfit and are lovely for anyone who likes accessories that feel airy and artistic. Because feathers naturally have an elongated shape, they are perfect for crochet thread and make very lightweight earrings.
Quick Notes
Skill level: Beginner to intermediate
Finished size: About 2 to 3 inches long
Style: Boho, flowing, elegant, feminine
Best colors: White, cream, brown, rust, sage, dusty blue, multicolor blends
Materials
- Fine thread or lightweight yarn
- Small crochet hook
- Yarn needle
- Scissors
- Earring hooks
- Optional jump rings
- Optional stiffener
Step-by-Step Guide
Step 1: Make the feather spine
Start with a narrow chain or central line that will act as the feather’s spine. This should be thin and slightly elongated. The spine gives the feather its structure and helps the side stitches fan outward naturally.
A neat spine is the foundation of the feather shape.
Step 2: Add one side of the feather
Work small stitches, chain spaces, or tiny shells along one side of the spine. This creates the soft edge of the feather and gives it that airy, layered look. Keep the stitches varied enough to look organic but neat enough to stay balanced.
The feather shape should feel delicate rather than heavy.
Step 3: Add the opposite side
Repeat the shaping along the other side of the spine, making sure the feather remains tapered at the top and wider in the middle or lower section. The two sides do not have to be perfectly identical, since real feathers are slightly irregular.
A gentle asymmetry can actually make the feather look more natural.
Step 4: Shape the tip
The bottom of the feather should narrow into a soft point. You can achieve this by reducing stitches or simply tapering the outer edge as you work downward. The tip helps the feather feel realistic and elegant.
A pointed end gives the earring visual flow.
Step 5: Add light texture
If you want a more detailed feather, you can use surface crochet, extra loops, or small chain accents to suggest the tiny barbs of the feather. Do not overdo the detail, because the earrings should remain lightweight and easy to wear.
A little texture adds charm without making the earring bulky.
Step 6: Stiffen lightly
Feather earrings often benefit from a little stiffening so they hang nicely and keep their shape. Lay them flat and smooth them gently while drying. This keeps the edges crisp and helps the feather drape beautifully.
Step 7: Attach the hook
Add a small top loop and connect the feather to the earring hook. Make sure the feather hangs straight and that the pair is symmetrical in length and shape.
Helpful Tips
Feather earrings look lovely in earthy tones for a boho style, or in white and cream for a soft minimalist feel. You can also make them in a dip-dyed style with multiple colors for a more artistic result.
4. Crochet Lacy Coral Earrings Pattern
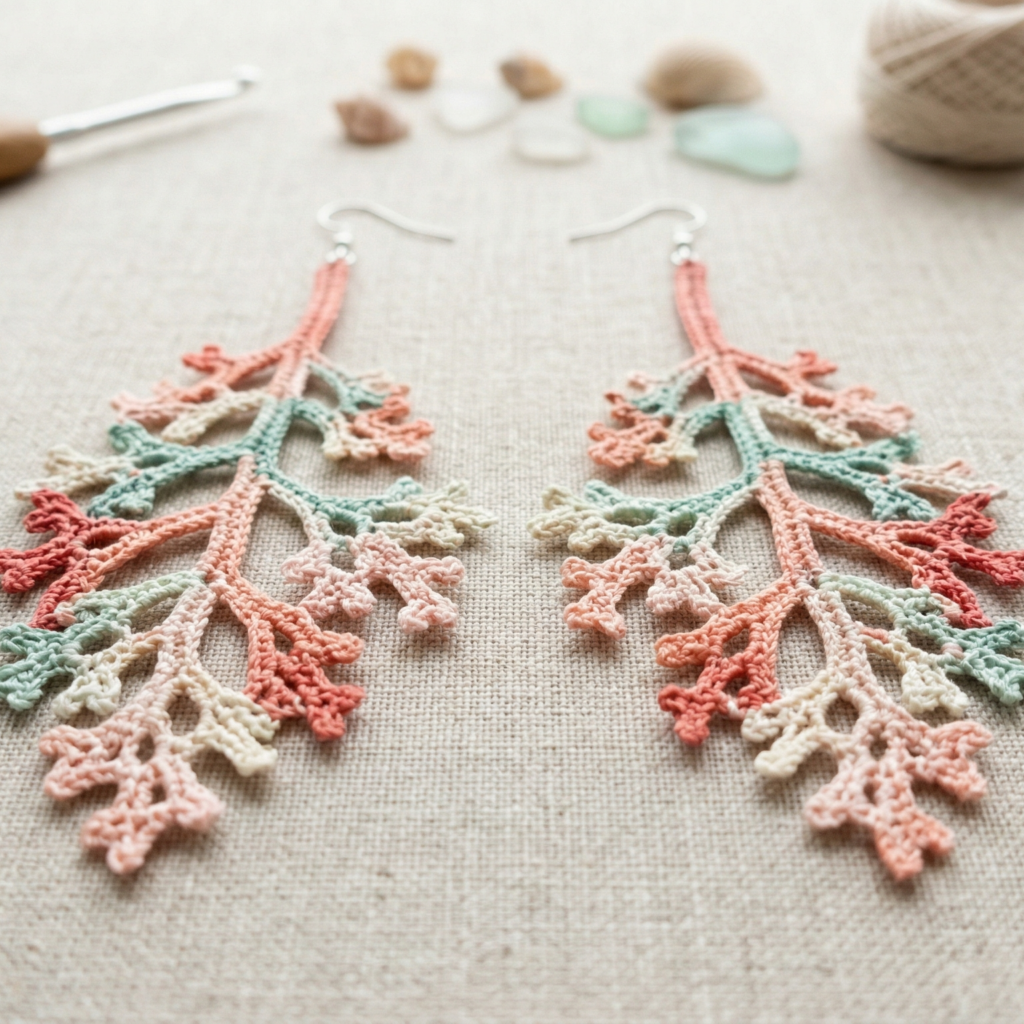
Lacy coral earrings have a soft, organic shape that feels elegant and artistic. The coral-inspired silhouette gives them a delicate branching look, while the lace structure keeps them light enough for everyday wear. They are ideal if you want earrings that feel unique but still easy to style.
Quick Notes
Skill level: Intermediate
Finished size: About 1.5 to 3 inches long
Style: Elegant, organic, delicate, artistic
Best colors: Coral, blush, ivory, sand, seafoam, or soft red tones
Materials
- Fine yarn or crochet thread
- Small crochet hook
- Yarn needle
- Scissors
- Earring hooks
- Optional jump rings
- Optional stiffener
Step-by-Step Guide
Step 1: Start with a central stem
Begin with a short chain or narrow stitch section to create the main stem of the coral shape. This vertical line gives the earring structure and acts as the base for the lace branches.
A slender stem keeps the design delicate.
Step 2: Build the branches
Add small chain loops or tiny stitch clusters branching outward from the stem. These branches can be short and irregular to mimic the natural shape of coral. The design should feel organic rather than rigid.
Natural variation makes the earring more interesting.
Step 3: Add lace openings
Use chain spaces between the branches to create an airy, lacy effect. The open structure keeps the earrings light while still letting the coral form show clearly. Keep the loops neat so the earring does not become tangled.
The open lace is what makes the design feel elegant.
Step 4: Shape the form
As you work, gently shape the branches so they angle outward and downward in a balanced way. The overall design should taper gracefully at the top and fan a little wider near the lower section.
A balanced silhouette keeps the earring wearable.
Step 5: Add any extra detail
If you want a fuller look, add a second small branch layer or a few extra chain loops in the lower section. Keep the changes minimal so the earring remains light and airy.
Subtle detail can make the coral shape more striking.
Step 6: Stiffen and flatten
Because coral shapes can flop if left too soft, lightly stiffen the piece and shape it flat. This will help the branches hold their form and make the earring easier to wear.
A little firmness keeps the design elegant.
Step 7: Attach the hook
Add a top loop and connect the earring hook securely. Make sure the two earrings mirror each other well so they hang evenly.
Helpful Tips
Lacy coral earrings look especially beautiful in soft coral, rose, or ivory. They are lovely for spring and summer and can also feel quite elegant in neutral tones. If you want a more dramatic version, use a richer coral red or dusty terracotta.
5. Crochet Lacy Cross Earrings Pattern
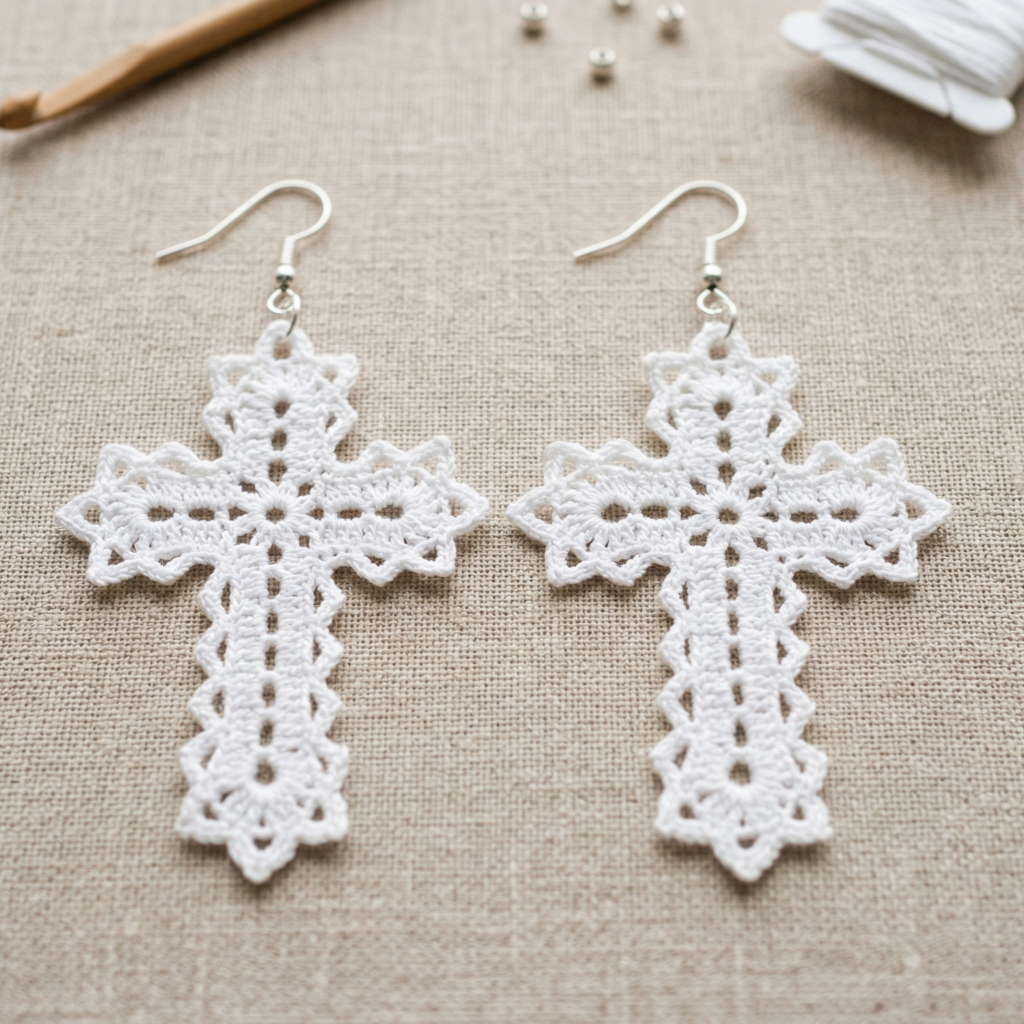
Lacy cross earrings are simple, meaningful, and elegant. The lace texture keeps the design light, while the cross shape gives it a clean and timeless look. These earrings are a lovely option if you want something understated yet beautiful, and they work well as gifts because they feel personal without being too heavy or complicated.
Quick Notes
Skill level: Beginner to intermediate
Finished size: About 1.5 to 2.5 inches long
Style: Elegant, meaningful, delicate, classic
Best colors: White, cream, gold, black, soft gray, or muted pastels
Materials
- Fine cotton thread or lightweight yarn
- Small crochet hook
- Yarn needle
- Scissors
- Earring hooks
- Optional jump rings
- Optional stiffener
Step-by-Step Guide
Step 1: Make the vertical bar
Start with a narrow chain or a small strip that will form the vertical line of the cross. Keep it slim and neat, since the lace effect works best when the shape remains clean and simple.
A straight center bar gives the cross its structure.
Step 2: Create the horizontal bar
At the center of the vertical piece, work a small horizontal section using chains or short stitch clusters. This creates the classic cross silhouette. The horizontal bar should be balanced and proportionate so the design does not feel top-heavy.
The center intersection is what defines the shape.
Step 3: Add lace details
To make the cross lacy rather than solid, use chain spaces, picot accents, or small open stitch clusters along the edges. This keeps the design airy and lightweight while still allowing the shape to stand out clearly.
The lace detailing gives the earrings their delicate style.
Step 4: Keep the proportions even
Check both sides as you crochet. A cross earring looks best when the arms are balanced and the vertical length feels slightly longer than the horizontal width. This keeps the shape elegant rather than bulky.
Symmetry is especially important in simple geometric earrings.
Step 5: Finish the edges neatly
A tiny border or final round of tight stitches can help the shape stay crisp. This makes the earring look more polished and helps it hang well on the ear.
Clean edges improve the overall finish.
Step 6: Stiffen lightly if needed
If the lace sections feel soft or collapse too easily, use a light stiffener. Shape the piece flat and allow it to dry completely. This helps preserve the cross shape and keeps the earrings looking neat.
Step 7: Attach the hook
Create a small loop at the top and attach the earring hook. Make sure the cross hangs straight and that both earrings are matched in size and shape.
Helpful Tips
Lacy cross earrings can feel very elegant in white or cream, but they also look beautiful in muted gold or soft gray. Keep the yarn thin so the design stays lightweight and wearable all day.
Conclusion
Crochet earrings are a wonderful way to make something small, beautiful, and truly wearable. They prove that handmade jewelry does not have to be heavy or complicated to make an impact. With just a bit of yarn and a small hook, you can create accessories that add personality, softness, and creativity to everyday outfits.
These five earring patterns each offer a different style. Mini mandalas feel balanced and artistic. Evil eye earrings are modern and meaningful. Feather earrings bring softness and movement. Lacy coral earrings feel organic and elegant. Lacy cross earrings are delicate and timeless. Each one is light enough for everyday wear while still being special enough to gift or sell.
The best part about crochet earrings is how quickly they come together. You can experiment with shape, color, and texture without committing to a large project, and that makes them perfect for trying new ideas or using up leftover thread. With neat finishing and the right weight of yarn, even the smallest pair can become a favorite accessory.