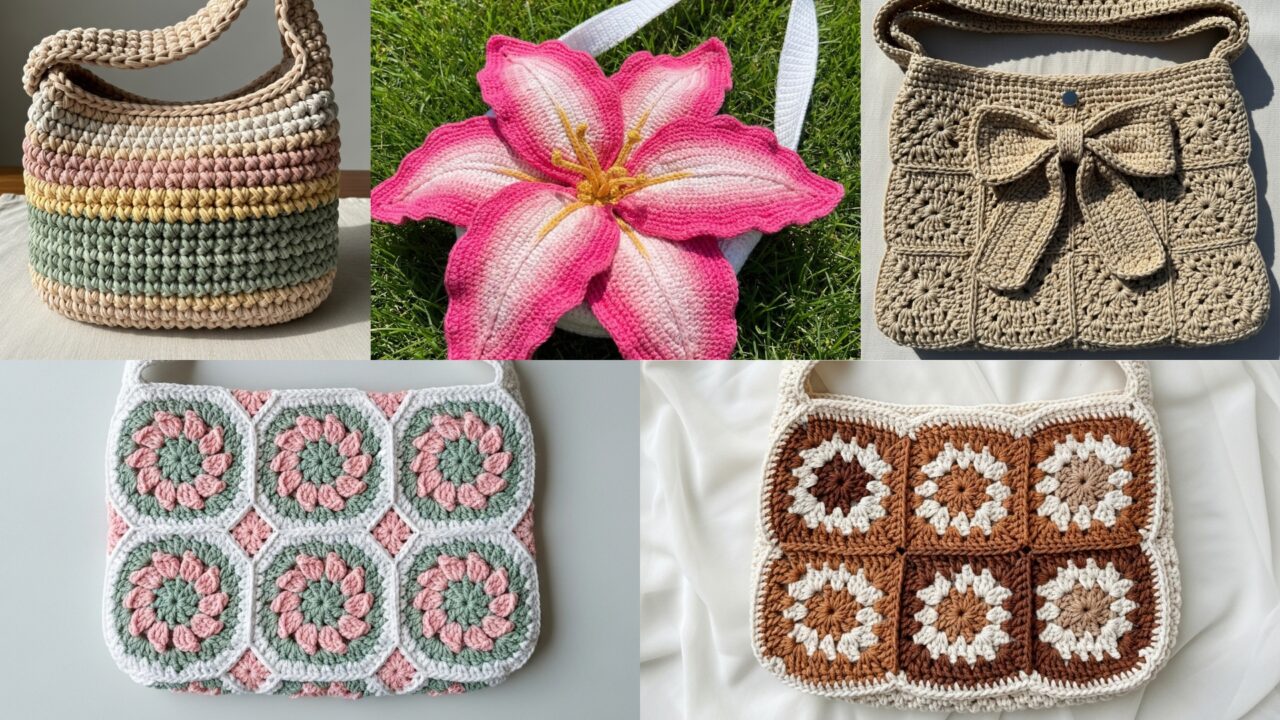
Crochet shoulder bags are the perfect intersection of style and utility — they let you show off stitch textures and colorwork while making something you’ll actually use every day. Whether you want a slouchy market tote made from t-shirt yarn, a polished granny-square carryall, or a floral statement bag, this collection covers five distinct directions with full build plans: materials, finished dimensions, and step-by-step construction plus variations and finishing tips.
Read the short primer first (materials, tools, construction choices). Then pick the design that matches your yarn stash and intended use — each pattern is written so you can scale it up or down easily.
Quick primer — materials, tools, and construction decisions
Yarn choices
- T-shirt / chunky cord: excellent for structured market and slouch bags. Use size 10–12 mm hooks. Durable, washable, quick to work.
- Worsted / DK cotton: ideal for tote bodies that need shape but still want nice stitch definition. Cotton holds structure and is washable.
- Acrylic blends or cotton-acrylic: lighter, more colors, easy care — good for everyday shoulder bags.
- Fingering or sport (held double): for dainty or lined bags (granny and floral bags can be made in finer yarn for a delicate bag).
Notions & hardware
- Sturdy shoulder strap hardware if you want detachable straps (D-rings, swivel clasps).
- Magnetic snap, zipper, or button closure for bag security.
- Bag interfacing or fabric lining (recommended for lightweight yarns and smaller items).
- Optional: small inner pockets (zippered) and key clip.
Hooks & tools
- Hooks sized to yarn (3.5–12 mm). Use slightly smaller hook than yarn label if you want a tighter, more durable fabric.
- Tapestry needle, stitch markers, measuring tape, sewing kit for lining.
Construction choices & tips
- Worked flat and seamed (best for precise shape and lining).
- Worked in rounds (no seams; easy for beginner-friendly market bags).
- Reinforce strap attachments: sew through multiple layers, add a small internal felt or fabric patch to distribute load.
- Lining: highly recommended for medium/fine yarn bags to protect shape and stop small items falling out. Attach lining by topstitching inside or slip-stitching edges to create a polished interior.
1. Crochet Cute T-Shirt Yarn Shoulder Bag Pattern
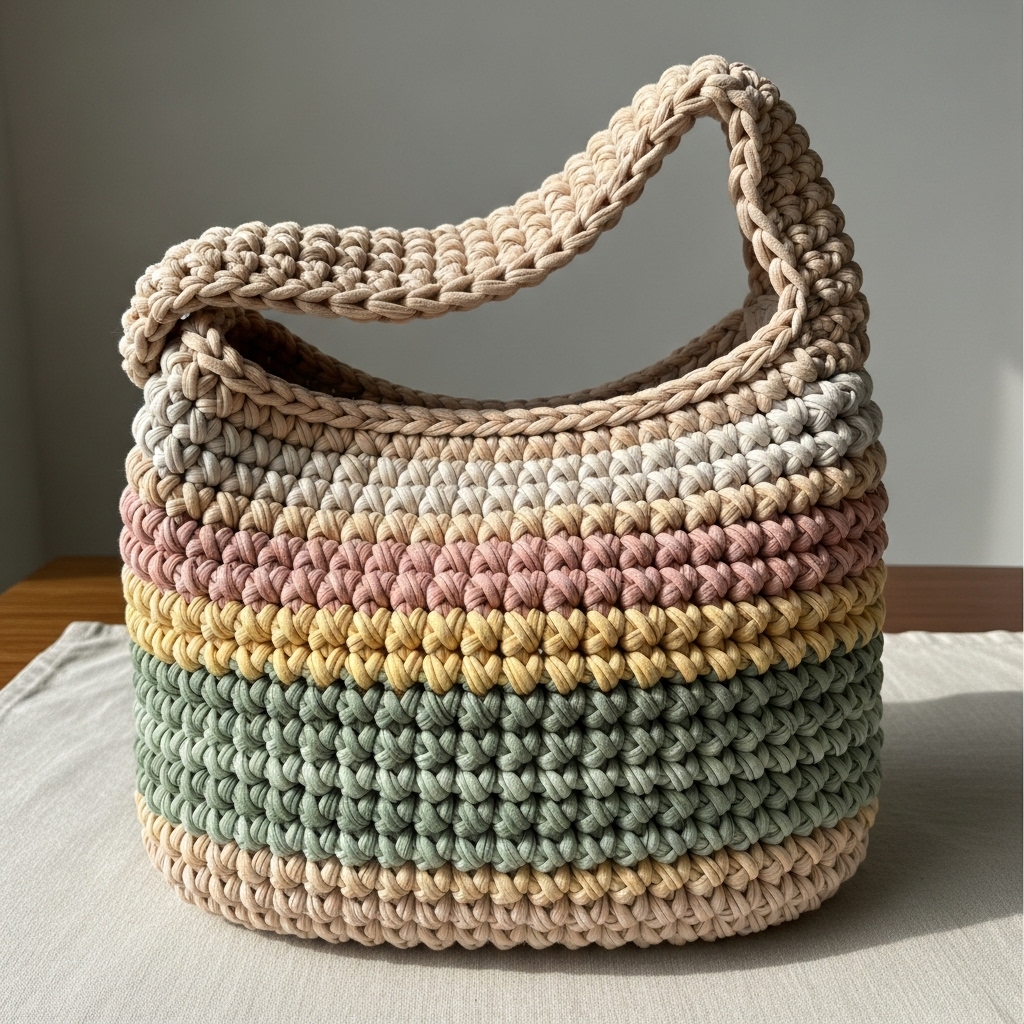
Style & use: Big, slouchy, casual market bag — great for groceries, beach days, or a roomy everyday tote.
Skill level: Confident beginner (repetitive stitches; large hook).
Yarn & tools
- T-shirt yarn or chunky cotton cord: ~200–350 g (depending on desired size).
- Hook: 10–12 mm (or size recommended for cord).
- Magnetic snap or button, tapestry needle, optional lining fabric.
Finished size (sample)
- Width ≈ 16–18 in (40–45 cm); Height ≈ 13–15 in (33–38 cm); strap drop ≈ 10–12 in (25–30 cm) — adjust by adding/subtracting rounds.
Construction (worked in rounds — quick, no seams)
- Base (oval or round)
- For an oval base start with foundation chain: ch 8. Work 3 sc in 2nd ch from hook, sc across one side, 3 sc in last ch, continue on opposite side of chain to make rounded ends (sc across, 3 sc in last ch); join to work in continuous rounds. Increase evenly on the short ends every round to grow base until base measures approx 10–11 in long (or half your target width). For a round base use MR and increase rounds until desired diameter.
- Example counts will vary by cord thickness; aim for a firm dense base.
- Body (single stitch or textured mesh)
- Option A (dense): Work rounds of sc (or hdc for a little height) around base until the bag height reaches ~10 in. This produces a sturdy wall.
- Option B (airier): Work alternating rounds of sc and V-stitch (dc, ch1, dc in same st) for texture and stretch. If you choose airy stitches, plan to line the bag.
- Handle integration
- For a continuous strap, when bag reaches desired height, work 6–8 rounds where you chain a number of stitches for strap opening (e.g., ch 50 for long shoulder strap) and skip same number of stitches on opposite side, then continue body rounds to connect the strap later. Or build two sturdy straps by crocheting a long strap separately and sewing ends to inside of bag.
- Reinforce strap bases by stitching a small rectangle of fabric inside and sewing strap through several times.
- Finish & closure
- Add a round of sc with a smaller hook to tidy the top edge.
- Install magnetic snap: mark center, attach snap halves to both lining and bag (or use sewn patch). Optionally add a small inside pocket by crocheting a rectangle and sewing it to the lining.
- Lining (optional but recommended)
- Cut cotton lining to bag shape leaving ½ in seam allowance. Hand stitch lining to top edge or slip stitch inside for a neat finish. Overlock/zigzag seam edges to prevent fray.
Variations
- Add stripes by switching cord color every few rounds.
- Add tassels at sides or a center pom-pom for boho look.
- Make a shoulder strap adjustable by adding D-rings and weaving a crocheted strap with buttonholes.
Care
- T-shirt yarn is usually machine washable on gentle; hang to dry to keep shape.
2. Crochet Granny Square Shoulder Bag Pattern
Style & use: Timeless, boho or retro — great as a day bag, can be lined for everyday use.
Skill level: Confident beginner (motifs + joining + lining).
Yarn & tools
- Worsted cotton or cotton blend: ~400–600 yd total (depends on number of squares & size).
- Hook: 4.0–4.5 mm.
- Lining fabric, magnetic snap or zipper, tapestry needle.
Finished sample size
- If you use 4” (10 cm) finished granny squares and assemble a 4×3 grid, final bag ≈ 12 × 16 in before seams — compact crossbody or shoulder bag.
Construction (motif joining + bag assembly)
- Make granny squares
- Classic granny rounds: MR, ch3 (counts as dc), 2 dc, ch2, 3 dc, ch2 ×3. Add rounds until square measures 4 in blocked. Make the required number (e.g., 12 for 4×3 layout). Keep border color consistent to make joining easier.
- Layout & join
- Arrange squares into your panel layout for front and back. Join squares as you go with slip stitch join or whipstitch for a clean seam. For a sturdier look, add a round of sc around joined panel to unify stitches.
- Form the bag body
- Join front and back panels along sides and bottom with slip stitch or mattress stitch, leaving the top open. For extra sturdiness, work a round of sc with a larger hook around the assembled tube.
- Strap options
- Option A: Crochet a long strap in sc (foundation chain to length, sc back), make it wide by working parallel strips and sewing together, then attach inside seam with reinforced stitching and small inside patch.
- Option B: Use a short chain strap and attach D-rings to both sides for detachable leather strap.
- Lining & closure
- Add fabric lining cut to panel size and hand sew inside at top edge. Install magnetic snap through the lining and into the bag front/back (rivet style or sewn). Alternatively add zipper across top for security.
Variations
- Use different color schemes: tonal, rainbow, seasonal palettes.
- Add a granny flap and single button for flap closure instead of lining and snap.
Finishing
- Block squares before joining for neat edges. Weave in ends and reinforce strap anchors on the inside with extra stitching and fabric patch.
Care
- Cotton washes well; hand or gentle machine wash, reshape while damp.
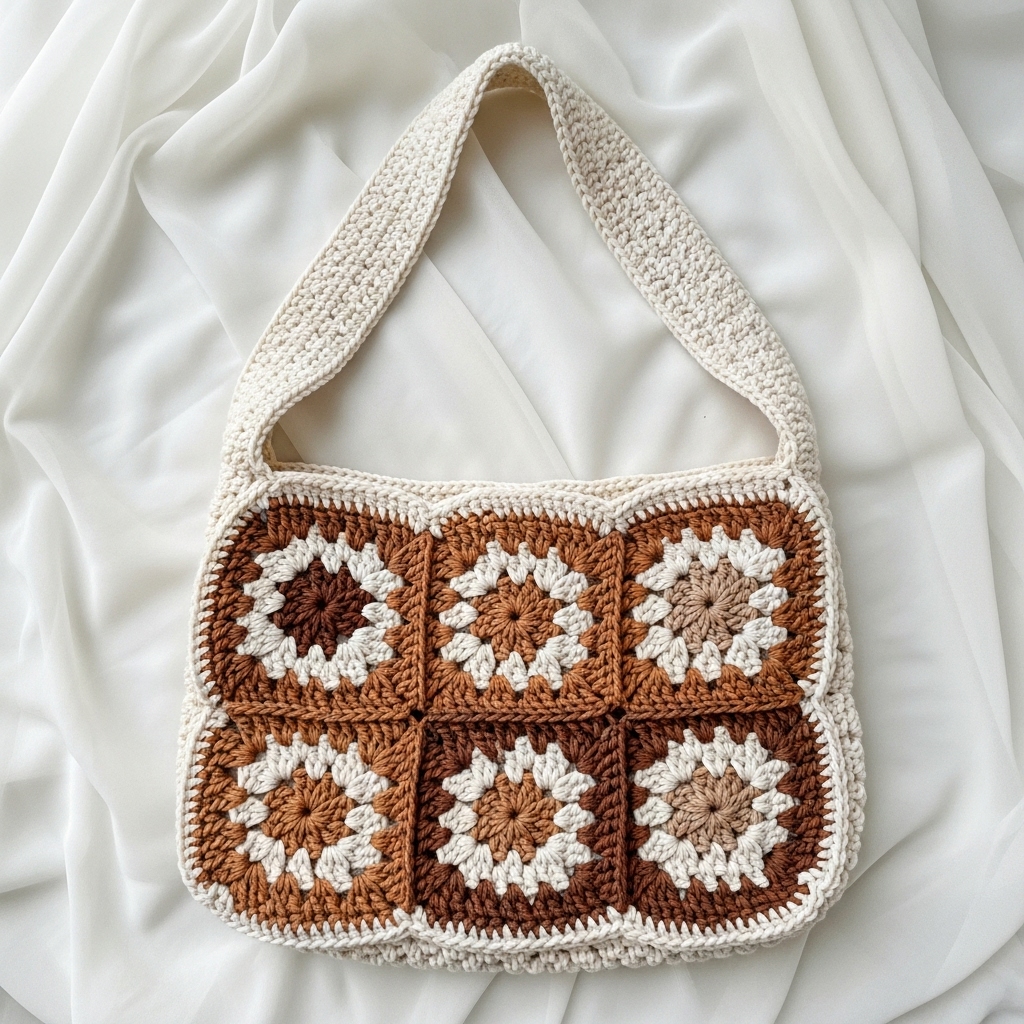
3. Crochet African Flowers Bag Shoulder Bag Pattern
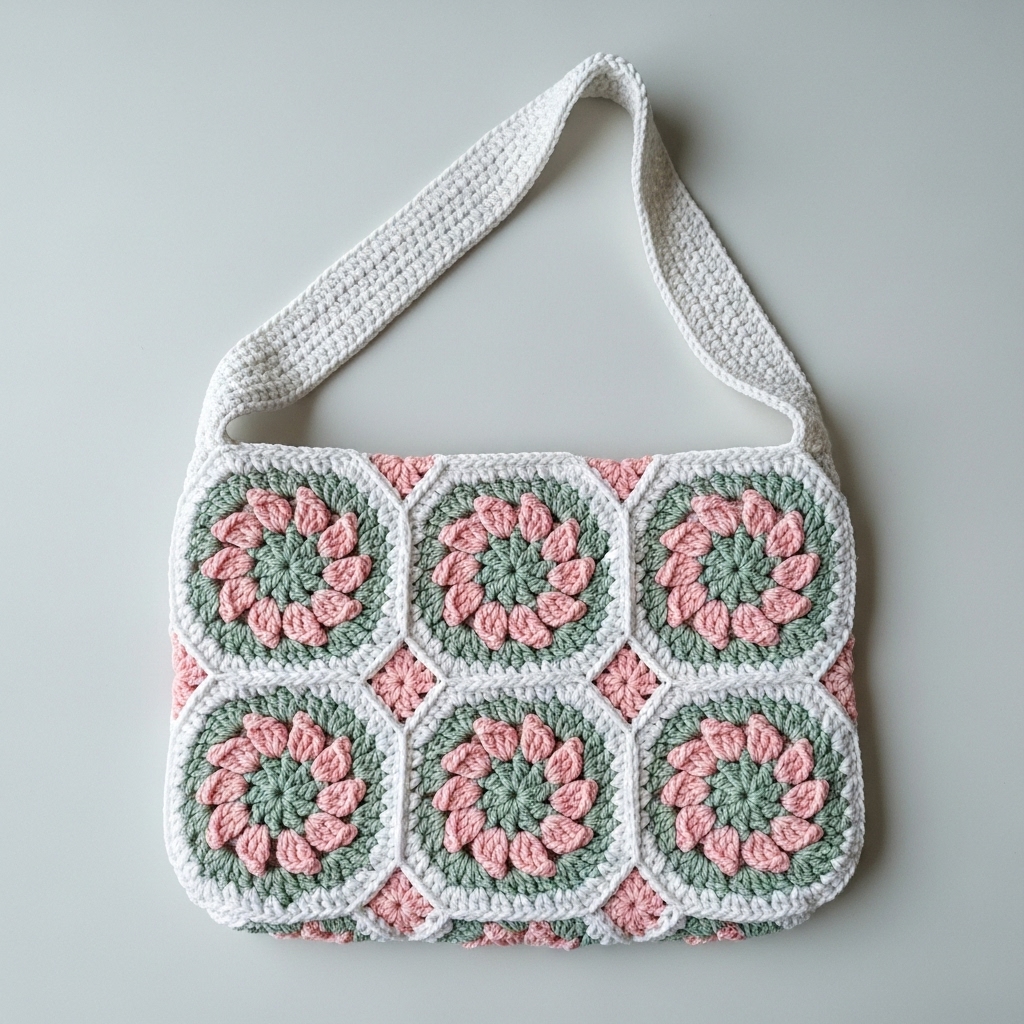
Style & use: Statement floral motifs arranged into a shoulder bag — decorative and eye-catching; best when lined.
Skill level: Intermediate (motif shaping and joining).
Yarn & tools
- DK cotton for motifs (multiple colors) and a neutral background yarn ~400–700 yd.
- Hook: 3.5–4.5 mm.
- Lining + interfacing recommended; magnetic snap or zipper.
Finished size
- With 3-flower rows × 3 rows and each motif ~4 in, bag ≈ 12 × 12 in (squares can be joined into rectangular shapes too).
Construction (floral motif assembly)
- Make African flower motifs
- Classic African Flower: MR, work 12 sc (or 12 dc depending on size) into MR, change color for petals: ch3, 3 dc in next st, ch3, sl st into next base — create 6 petals; back with rounds of dc clusters to enlarge into a hexagon. Each motif typically ends as a 6-sided hexagon that joins neatly.
- Border & filling
- Work two rounds of background color to turn motif into hexagon that measures ~4 in. Add an extra round if you need to standardize size across motifs.
- Layout & join
- Arrange motifs with alternating petal colors for a cohesive palette. Join with slip stitch or join-as-you-go in pattern to form front and back panels. Work a round of sc in background color around assembled panels to unify.
- Body & straps
- Seam sides and bottom, then add a band of background color around top (sc rounds). Attach a crocheted strap or use a leather strap. Because floral motifs can be decorative but less dense, line the bag with cotton and sew interfacing for structure.
- Closure & pockets
- Inside, add a zippered pocket sewn into lining for phone/keys. For closure, use magnetic snap or short zipper.
Variations
- Use gradient motifs so the bag reads as an ombre.
- Make a clutch sized by working fewer motifs and add wrist strap.
Finishing
- Press fabric lining and hand sew to top inner edge. Reinforce strap anchors heavily.
Care
- Wash according to yarn — cotton is forgiving; if colorfastness is uncertain test first.
4. Crochet Hot Pink Lily Flower Shoulder Bag Pattern
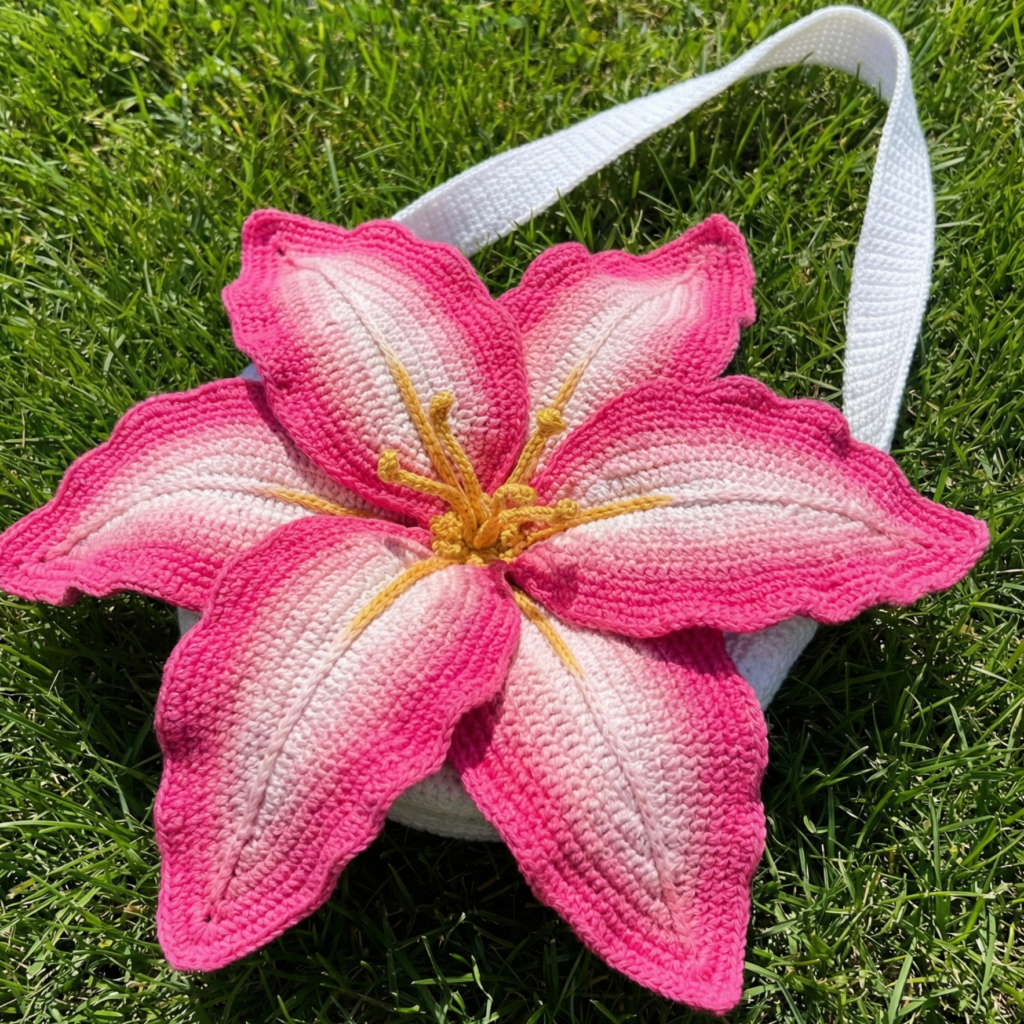
Style & use: Bold statement with large lily appliqués on a neutral background — great as a seasonal statement bag.
Skill level: Intermediate (large appliqué + shaping).
Yarn & tools
- Worsted cotton for body and lily petals in hot pink (approx 300–500 yd total depending on size).
- Hook: 4.0 mm.
- Stiff interfacing for petals if you want them more sculpted, lining recommended.
Finished size
- Sample: rectangular bag 14 × 10 in with 2–3 large lily appliqués across the front.
Construction (panel with appliqué)
- Make bag body panel
- Work a base rectangle in hdc or waffle stitch for texture: foundation ch for width (e.g., 40 ch for 14 in width at your gauge), work rows of hdc until desired height (approx 10 in). Make a second rectangle for back or fold one large rectangle and seam sides and bottom for single-piece construction.
- Lily appliqué (large petals)
- Petal pattern (make 3–5 per lily depending on style): ch 8; Row 1: sc in 2nd ch and across (7 sc). Row 2: ch2, hdc2, dc2, hdc2, ch2 — shape petal by increasing width and finishing with a picot at top for a stylized petal. Block petals over lightly steamed interfacing to set shape (optional). Sew petals in overlapping arrangement to form lily shape; add a small crocheted stamen (tiny chain with knotted ends) in center.
- Attach appliqués to front panel
- Place lilies and pin; sew through background with small hidden stitches to secure. If you prefer raised petals, add a small dot of fabric glue at the center only (not recommended for washability).
- Assembly & strap
- Seam sides using mattress stitch for neat seams. Add strap (crocheted wide strap for comfort) or attach store-bought leather strap to D-rings sewn into seams.
- Lining & closure
- Line with cotton and add top zipper or flap closure for security.
Variations
- Make all petals in bright contrast colors for a festival look.
- Use metallic thread or beads very sparingly in the petal centers for high-end detail (not advisable if bag will be laundered often).
Finishing
- Block petals to shape and allow to dry fully before attaching. Reinforce stitching at appliqué edges — lilies can snag if not sturdy.
Care
- Spot clean appliqué areas gently; wash lined bag inside a laundry bag on gentle cycle if necessary.
5. Crochet Beige Granny Square Bow Shoulder Bag Pattern
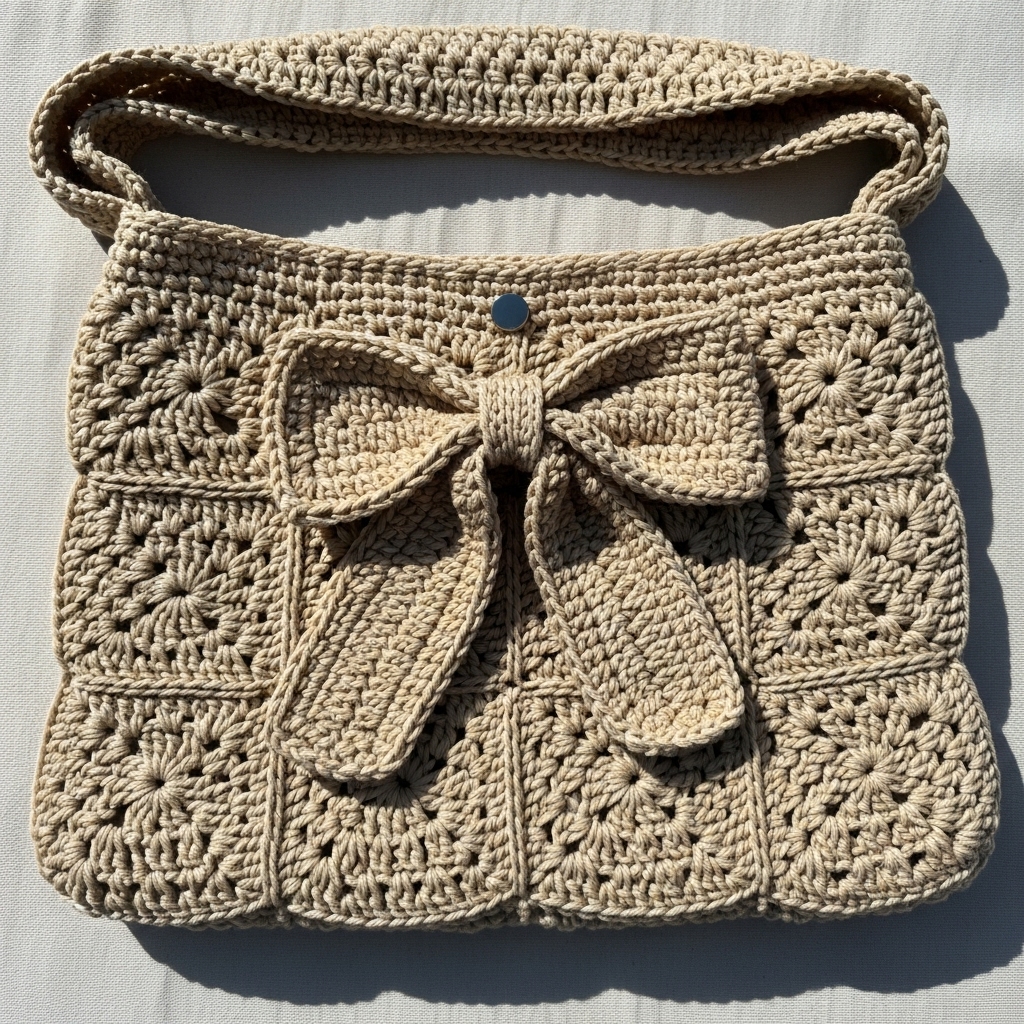
Style & use: Elegant, neutral bag with a decorative bow front — great as a casual-chic everyday bag.
Skill level: Confident beginner to intermediate.
Yarn & tools
- Worsted cotton in beige: ~450–650 yd.
- Hook: 4.0 mm.
- Lining fabric, magnetic snap for simple closure.
Finished size
- Bag approx 12 × 10 in with medium strap drop (9–11 in).
Construction (granny squares + bow detail)
- Granny squares
- Make 10–12 squares sized to achieve your front/back layout (e.g., 3 across × 4 down for front and same for back). Use a simple 3-round granny or extended rounds for larger squares. For a neutral look keep all squares same beige or add subtle contrast border.
- Join & form body
- Join squares into two panels and seam sides and bottom leaving top open. Work a round of hdc at top edge to even stitches and provide a place to attach lining and hardware.
- Bow
- Make a wide rectangle for bow: foundation chain to desired width (e.g., 20–24 sts), work sc rows for 6–8 rows; fold and stitch center to form bow. Make a narrow band long enough to wrap around bow center and sew to bag front at center point. Secure the bow base by sewing through bag fabric to avoid the bow pulling away.
- Strap & hardware
- Crochet a strong strap or attach a short chain for shoulder carry; reinforce with inside patch. A detachable strap with swivel snaps is a nice modern touch.
- Lining & closure
- Line the bag with fabric and add a magnetic snap behind the bow so it looks decorative and functional.
Variations
- Make bow removable via small sewn buttons so the bag can go from dressy to plain.
- Use a darker border on squares for definition.
Finishing
- Block panels before joining; press lining for crisp interior.
Care
- Machine wash on gentle or hand wash; reshape and dry flat.
Conclusion
You now have five full directions for crochet shoulder bags: a roomy t-shirt yarn market tote, a classic granny square carryall, a floral African motif bag, a statement lily appliqué bag, and a neutral granny-bow bag. A few final practical reminders to help you finish with confidence:
- Choose your yarn for function: for heavy use choose t-shirt yarn or worsted cotton; for delicate aesthetics choose finer cotton but plan to line and interface.
- Scale easily: change hook size or number of motifs/rounds to scale bags up or down. For motif bags, measure one motif and calculate how many you need to reach desired width/height.
- Reinforce straps and hardware: this is where most handmade bags fail first. Always stitch straps through multiple layers and add internal reinforcement patches. For detachable hardware use D-rings that are sewn into fabric loops and reinforced.
- Line for longevity and polish: even a quick machine-sewn lining elevates your bag — it protects seams, adds structure, secures hardware, and hides yarn floats.
- Finishing counts: weave ends neatly, block panels, and press fabric lining for professional results. Add discreet topstitching to hide the seam if needed.