Crochet bookmarks are one of those small projects that feel surprisingly rewarding from the very first stitch. They are quick to make, easy to personalize, and practical enough to be used every single day. Whether you are making them for a book lover, preparing a few items for a craft fair, or simply using up leftover yarn in a beautiful way, crochet bookmarks are a smart and charming project to keep in your repertoire.
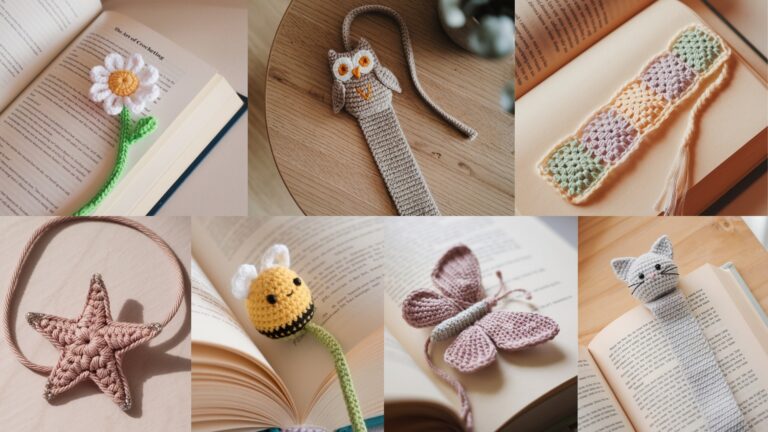
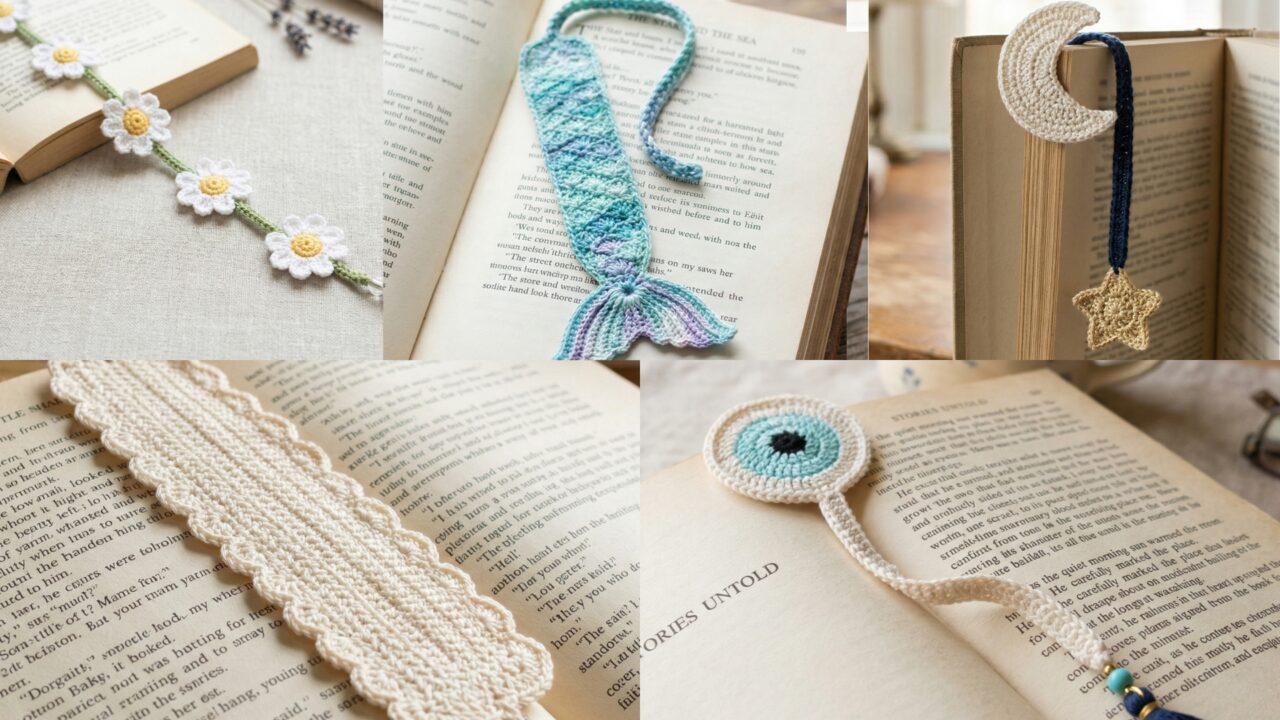
What makes crochet bookmarks especially appealing is that they are small enough to finish in a short amount of time, but creative enough to feel truly special. A simple strip can become a moon-and-star design, an eye-catching evil eye charm, a sweet daisy chain, a magical mermaid tail, or an elegant scallop-and-bead bookmark. Each one has its own personality, but all of them are lightweight, giftable, and easy to slip into a book or a card.
In this post, you will find five handmade crochet bookmark patterns with detailed step-by-step guidance, useful notes, and practical finishing tips. These designs are written to be easy to follow while still giving you enough detail to create bookmarks that look polished and professional. If you are looking for a small crochet project that is meaningful, useful, and perfect for gifts and craft fairs, these bookmark ideas are a wonderful place to begin.
Quick Notes
Project type: Crochet bookmarks
Best for: Gifts, craft fairs, book clubs, teacher gifts, stocking stuffers, and stash-busting
Skill level: Beginner to intermediate, depending on stitch detail and embellishment
Hook size: Usually 1.75 mm to 3.5 mm, depending on yarn weight and desired delicacy
Yarn weight: Lace, fingering, crochet thread, or lightweight cotton works best
Best yarn choice: Cotton thread or lightweight cotton yarn for crisp shape and durability
Finished size: Usually 5 to 9 inches long, depending on the design
Time to complete: About 15 to 60 minutes per bookmark
Helpful stitches: Chain, slip stitch, single crochet, half double crochet, double crochet, treble crochet, picot, shell stitch, surface crochet, simple appliqué, bead attachment
Common Materials
Most crochet bookmarks can be made with a very simple set of supplies.
- Lightweight yarn or crochet thread
- Small crochet hook
- Yarn needle
- Scissors
- Beads, charms, or ribbon, optional
- Stitch markers, optional
- Fabric stiffener, optional
- Small button or decorative piece, optional
For bookmarks, lightweight yarn is important because the piece needs to lie flat inside a book without adding bulk. Cotton thread is often the best choice because it gives a crisp finish and holds its shape nicely. If you plan to sell bookmarks at a fair or give them as gifts, neat edges and secure finishing will make a big difference.
1. Crochet Moon and Star Bookmark Pattern
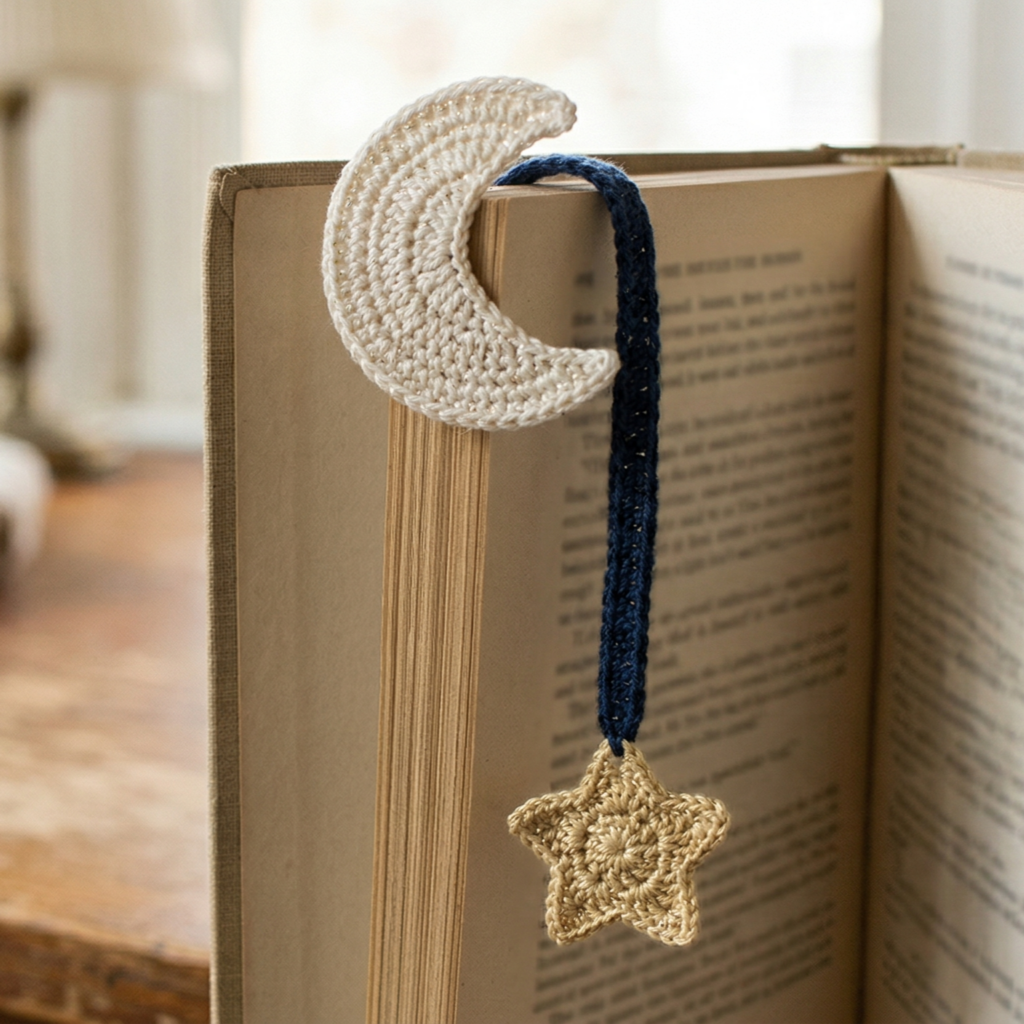
A moon and star bookmark is whimsical, dreamy, and perfect for anyone who loves celestial-inspired accessories. It feels magical without being too complicated, and it is a lovely choice for book lovers of all ages. Because the moon and star shapes are small, this pattern works up quickly while still looking detailed and thoughtful.
Quick Notes
Skill level: Beginner to intermediate
Finished size: About 6 to 8 inches long
Style: Celestial, dreamy, whimsical, lightweight
Best colors: Navy, cream, gold, silver, lavender, deep purple
Materials
- Fine cotton yarn or crochet thread
- Small crochet hook
- Yarn needle
- Scissors
- Optional star or moon charm
- Optional beads or tassel
- Optional fabric stiffener
Step-by-Step Guide
Step 1: Decide on the layout
Before you start, decide whether you want the moon and star to be joined as one continuous bookmark or attached as separate motifs along a slim strap. A joined design often looks neat and playful, while separate motifs give you more flexibility in placement.
The layout will determine the visual flow of the bookmark.
Step 2: Crochet the moon motif
Start by making a small crescent moon shape. You can do this by crocheting a rounded oval-like form and then shaping the inner curve with decreases or by using a simple appliqué-style motif. Keep the moon compact so it stays lightweight and easy to fit inside a book.
A small moon gives the bookmark its celestial focus.
Step 3: Crochet the star motif
Make a small star to match the moon. You can create a five-point star using simple chain and stitch combinations, or keep it slightly stylized and soft-edged if you prefer a more delicate look. The star should be small enough to complement the moon without overpowering it.
A balanced star shape makes the design feel cohesive.
Step 4: Create the bookmark stem or strap
Crochet a slim strap or chain-based strip that connects the moon and star or serves as the main bookmark body. Keep it narrow and flat so it can rest easily between book pages. A simple strip of single crochet or chain-and-stitch rows works well.
The strap should be elegant, not bulky.
Step 5: Attach the motifs
Sew the moon and star securely onto the strap or attach them near the top and bottom depending on your design. Make sure the shapes sit flat and do not twist. If you want a more decorative look, place a tiny bead or charm near the top.
The placement should feel balanced and intentional.
Step 6: Add optional finishing touches
A small tassel, a bead drop, or a tiny hanging thread can add extra charm. Keep the embellishments light because bookmarks need to remain slim and easy to use. A metallic thread can also give the piece a moonlit glow.
Step 7: Block and shape
If the shapes curl slightly, block them gently or press them under a light weight while drying. This helps the moon and star sit neatly and makes the bookmark easier to use.
Helpful Tips
This bookmark is especially beautiful in dark blue with gold or cream accents because it captures a night-sky feeling. If you want a softer version, try lavender and silver. A little sparkle thread can make the celestial theme even more magical.
2. Crochet Evil Eye Bookmark Pattern
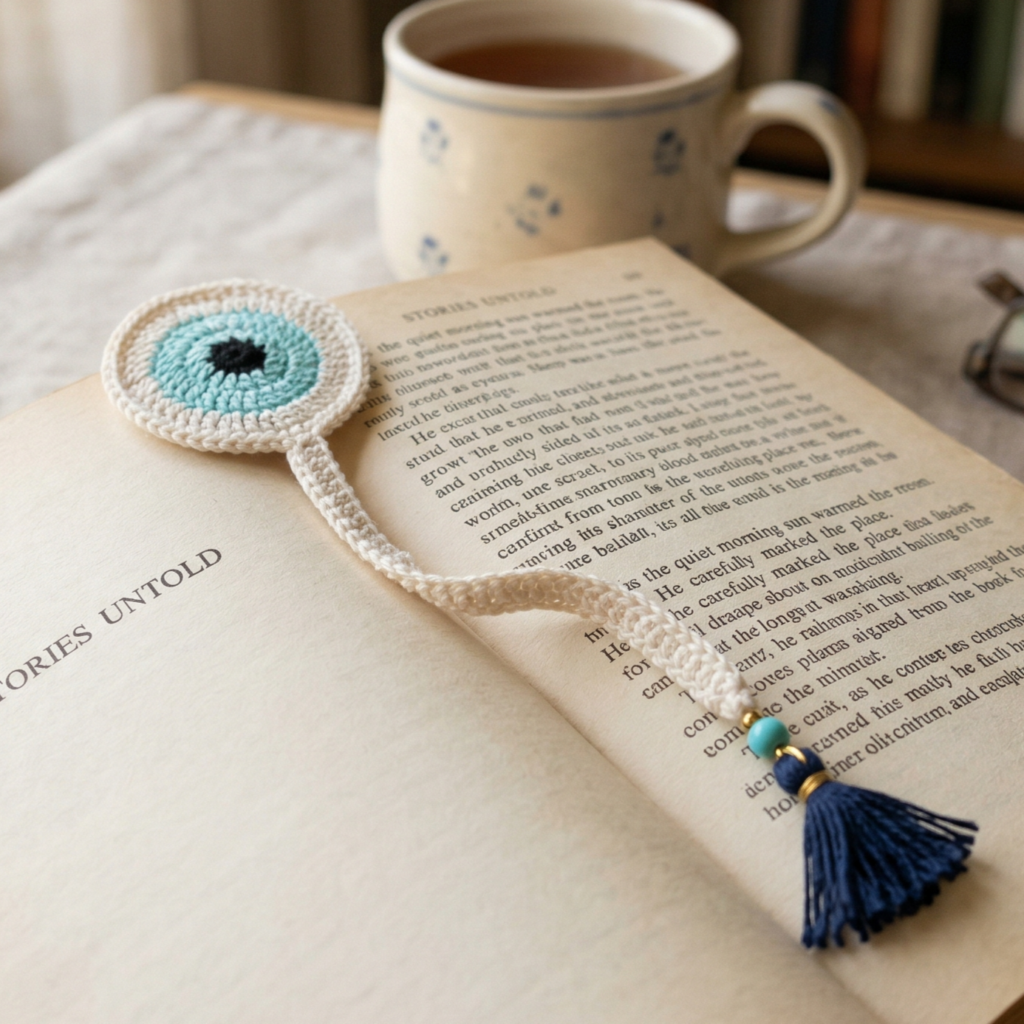
The evil eye bookmark is modern, symbolic, and visually striking. It is a wonderful project for readers who like meaningful accessories or for sellers who want something unique and memorable at craft fairs. The layered eye design works beautifully in crochet because you can build it with color contrast and clean circular shaping.
Quick Notes
Skill level: Beginner
Finished size: About 6 to 8 inches long
Style: Modern, symbolic, eye-catching, lightweight
Best colors: White, blue, navy, turquoise, black, gold
Materials
- Fine cotton yarn or crochet thread
- Small crochet hook
- Yarn needle
- Scissors
- Optional bead, charm, or tassel
- Optional stiffener
Step-by-Step Guide
Step 1: Crochet the eye motif
Start by making a small flat circle that will serve as the eye’s outer base. Use a color that feels like the main outline, such as white or navy. Keep the circle neat and flat because the motif is the focal point of the bookmark.
A clean circle gives the eye a strong shape.
Step 2: Add the iris layer
Switch to a contrasting color and work a smaller circle or round section inside the outer base. This creates the iris layer. Blue and turquoise are classic choices, but you can use any color palette you like as long as it contrasts enough to stand out.
The iris brings the motif to life.
Step 3: Add the center dot
Use a darker or brighter yarn to create the center pupil. This should be small and centered so the eye motif reads clearly. You do not need much detail here because the layered circles already give the design enough visual strength.
A tiny center dot makes the motif instantly recognizable.
Step 4: Make the bookmark strip
Crochet a slim strip or chain-based body that will extend from the eye motif. Keep it flat and narrow so it does not distort the shape. The strap can be plain, lightly textured, or slightly decorative depending on the style you want.
The strip should remain simple so the eye stays the main focus.
Step 5: Join the motif to the strip
Sew the eye motif onto the top portion of the strip or attach it at the center if you want it to float along the bookmark. Make sure the motif lies flat and is centered well. A neat join will help the bookmark feel polished.
Placement matters because it determines how the bookmark sits in the book.
Step 6: Add a border if desired
A thin outline around the outer edge of the eye can help define the shape and make the colors pop. Keep the border narrow and tidy so the bookmark stays light.
Step 7: Finish with a small accent
A bead, tiny tassel, or short yarn tail at the bottom can add a finishing touch without making the bookmark too bulky. Keep the embellishment subtle so the eye remains elegant and easy to use.
Helpful Tips
This bookmark looks especially crisp in blue and white, but it can also be stunning in black, turquoise, and cream. If you plan to sell it at a fair, use neat finishing and secure stitching so it feels durable and gift-ready.
3. Crochet Daisy Chain Bookmark Pattern
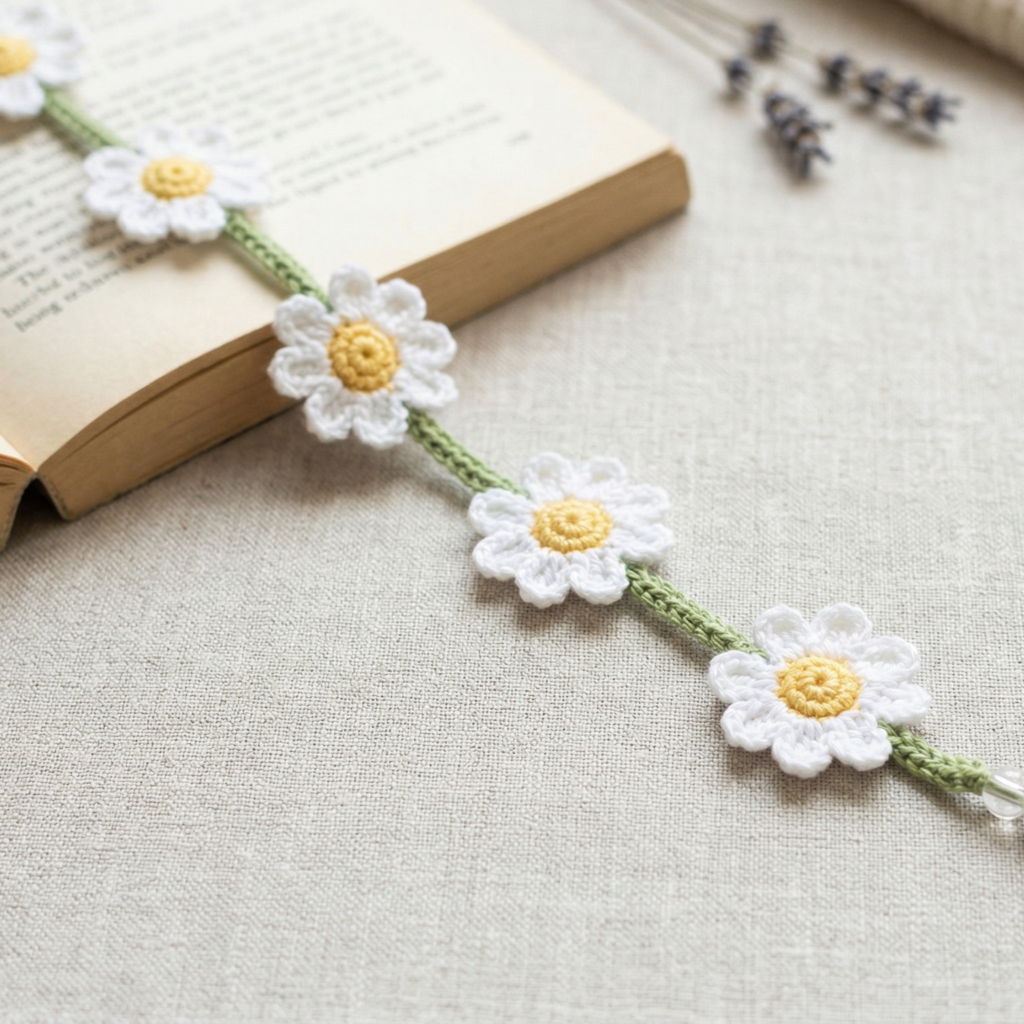
A daisy chain bookmark is cheerful, pretty, and timeless. It is a lovely option for spring or summer gifts, but it works beautifully all year round because daisies always feel fresh and friendly. The chain design gives you a soft, delicate look that is easy to personalize with different flower colors.
Quick Notes
Skill level: Beginner
Finished size: About 6 to 9 inches long
Style: Floral, sweet, fresh, feminine
Best colors: White, yellow, pink, cream, lavender, soft green
Materials
- Lightweight yarn or crochet thread
- Small crochet hook
- Yarn needle
- Scissors
- Optional seed beads or ribbon
- Optional fabric stiffener
Step-by-Step Guide
Step 1: Crochet the daisy center
Start with a small round center for the daisy. Use yellow or another bright center color to make the flower cheerful and visible. Keep the center small and compact so the petals have room to frame it nicely.
A neat center gives the daisy its charm.
Step 2: Add the petals
Work small petal loops or petal stitches around the center. The petals should be even and slightly rounded. A simple daisy shape is usually the prettiest because it feels delicate without being too busy.
The petals create the classic flower look.
Step 3: Make the chain stems
Once your daisy motif is complete, crochet a chain-based strip or a series of linked flower sections to form the bookmark length. You can make one large daisy at the top or several small daisies down the strip.
The chain links help the design feel light and graceful.
Step 4: Connect multiple flowers if desired
If you want a more decorative bookmark, repeat the daisy motif along the strip or connect smaller flowers in a chain. Keep the spacing even so the bookmark does not become too thick.
Repeated flowers make the design more eye-catching.
Step 5: Add a trailing end or tassel
A tiny tassel, fringe, or bead at the bottom can complete the bookmark beautifully. This gives it a little movement and makes it easier to spot between pages.
The end detail adds a polished finish.
Step 6: Secure all flower joins
If you made multiple flowers, sew them together securely so they stay aligned. Make sure the petals sit flat and do not curl too much. A light block can help the flowers open nicely.
Step 7: Finish the edges
Trim any stray ends and check that the bookmark is narrow enough to fit neatly inside a book. The finished piece should feel soft, pretty, and practical.
Helpful Tips
Daisy chain bookmarks are especially lovely for gifts because they feel bright and sweet without being too formal. White petals with a yellow center are classic, but pastel flowers can make the design feel softer and more modern.
4. Crochet Marine Themed Mermaid Tail Bookmark Pattern
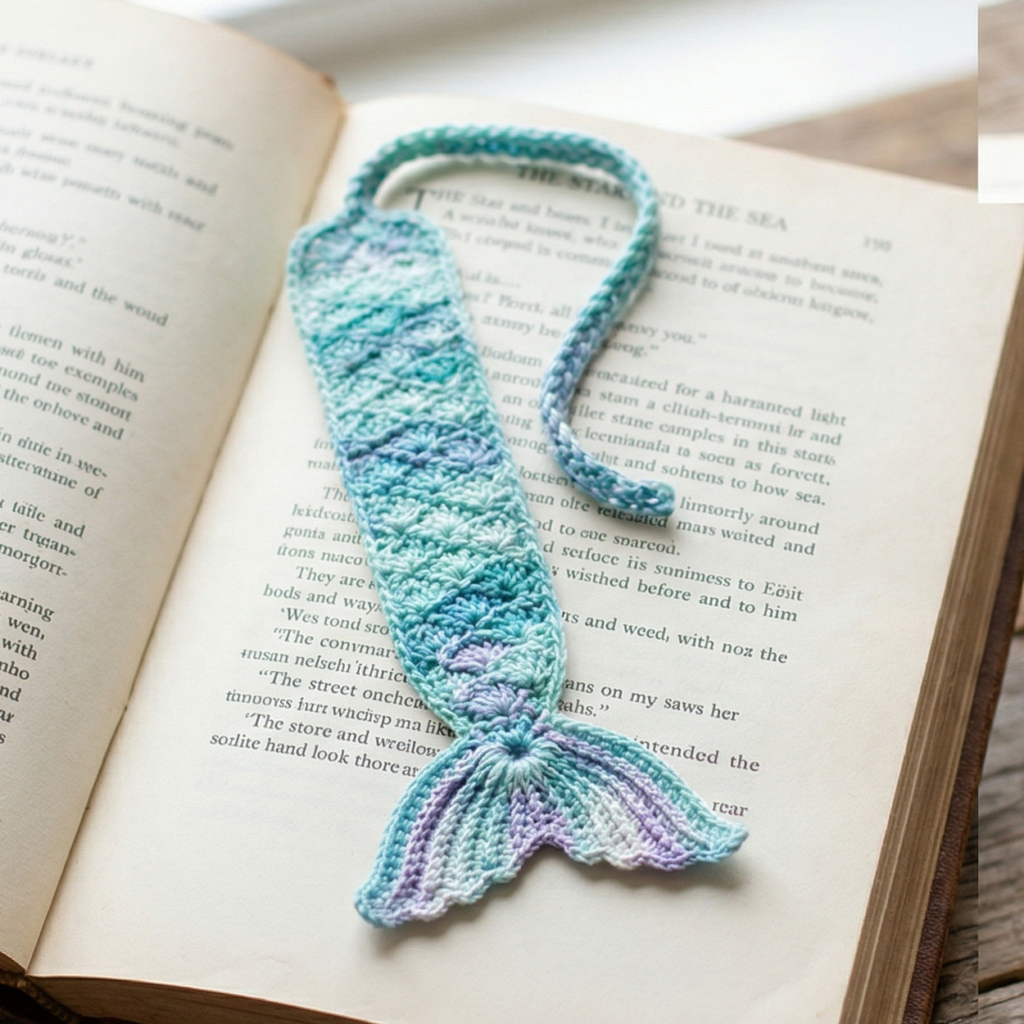
A mermaid tail bookmark is magical, playful, and full of ocean-inspired charm. It is a perfect project for anyone who loves fantasy, coastal themes, or colorful handmade gifts. The tail shape makes it especially fun because it adds a whimsical flair while still remaining slim enough to work as a bookmark.
Quick Notes
Skill level: Beginner to intermediate
Finished size: About 7 to 9 inches long
Style: Fantasy, ocean-inspired, playful, decorative
Best colors: Aqua, teal, blue, seafoam, lavender, pink, pearl
Materials
- Lightweight yarn or cotton thread
- Small crochet hook
- Yarn needle
- Scissors
- Optional bead, charm, or tassel
- Optional fabric stiffener
Step-by-Step Guide
Step 1: Make the tail body
Start by crocheting the long narrow part of the mermaid tail. This should be a slim strip or tapered shape that forms the base of the bookmark. Keep it flat and even so it can sit neatly in the book.
The narrow body gives the tail its bookmark shape.
Step 2: Shape the tail curve
At the bottom, begin increasing or shaping the stitches so the strip widens into a tail fin. The bottom should fan out slightly while still remaining slim enough to fit between pages. This is the part that gives the bookmark its mermaid identity.
The widening shape makes the design feel magical.
Step 3: Add fin details
Create the tail fin with small scalloped edges, pointed ends, or fan-like stitches. The fin does not need to be overly elaborate. Even a simple curved fan will make the tail instantly recognizable and easy to use.
The fin is the standout feature of the design.
Step 4: Add scale texture if desired
You can create a scale-like effect using shell stitches or small layered curves along the tail. This adds depth and makes the bookmark feel more ocean-inspired. Keep the texture light so the bookmark stays flat.
A little texture can make the tail look much richer.
Step 5: Add color changes
Use two or three colors to create a sea-inspired effect. Gradient-like color changes can make the tail feel more realistic and dreamy. Keep the transitions neat so the colors blend smoothly.
Soft color shifts give the bookmark a beautiful marine feel.
Step 6: Finish the top edge
The top of the bookmark should be smooth and narrow. A clean border or simple row of stitches will help it sit neatly in the book. You can also add a tiny loop or charm at the top if you want extra decoration.
Step 7: Block lightly
If the fin curls, gently block it flat so it keeps its shape. This will also make the edges look more refined.
Helpful Tips
A mermaid tail bookmark is especially lovely in layered aqua and teal shades. If you want a softer fantasy look, use pearl, seafoam, and lavender. This design is a great choice for gift sets and craft fairs because it feels unique and visually memorable.
5. Crochet Scallop Beaded Charm Bookmark Pattern
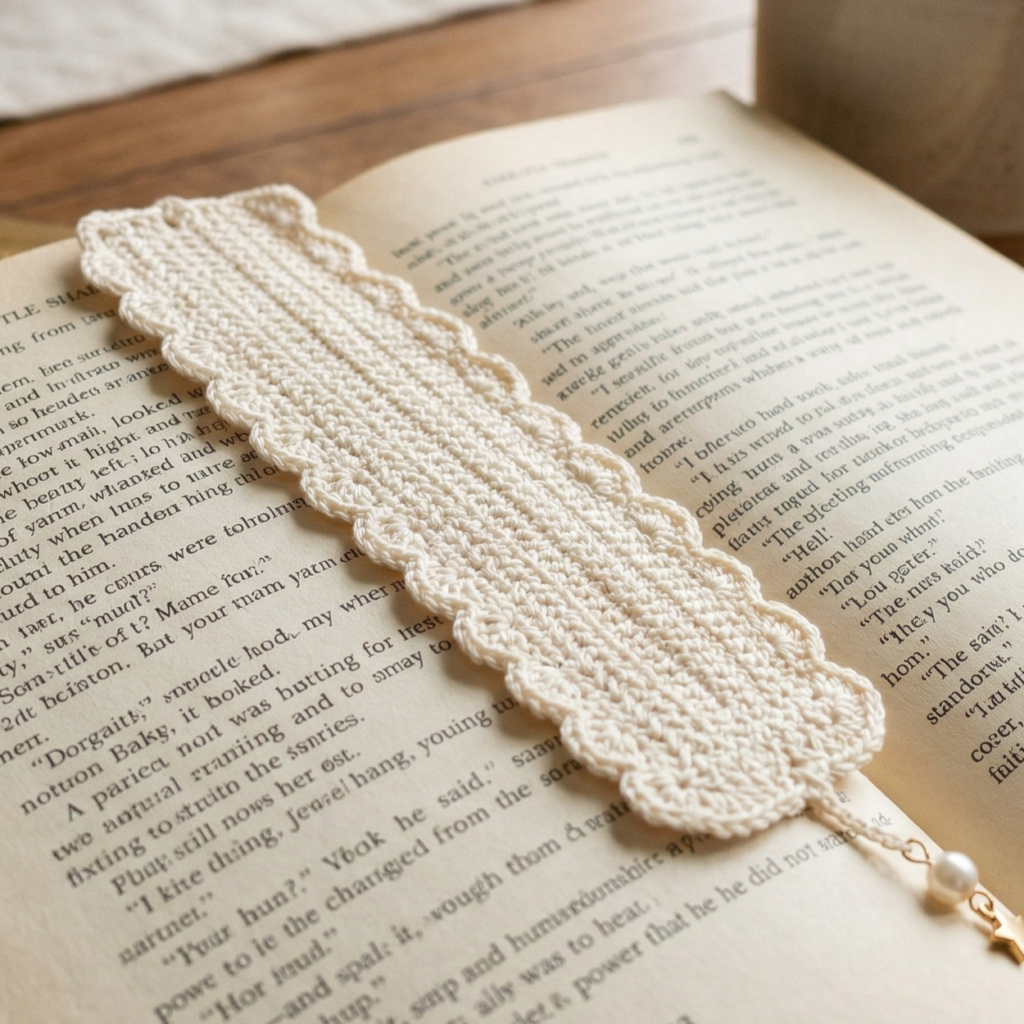
A scallop beaded charm bookmark feels elegant, delicate, and just a little glamorous. It is the kind of bookmark that works beautifully as a gift because it looks polished and thoughtful. The scallop edge creates a pretty decorative line, while the bead charm adds a refined finishing touch.
Quick Notes
Skill level: Beginner to intermediate
Finished size: About 6 to 8 inches long
Style: Elegant, feminine, delicate, decorative
Best colors: Cream, blush, ivory, gold, soft blue, dusty rose
Materials
- Fine cotton yarn or crochet thread
- Small crochet hook
- Yarn needle
- Scissors
- Small beads or bead charm
- Optional ribbon
- Optional stiffener
Step-by-Step Guide
Step 1: Crochet the bookmark base
Begin with a slim strip or narrow foundation that will form the bookmark body. Keep it clean and straight because the scallop detail will be added to the edges later. A simple base makes the finishing details look more elegant.
A neat base helps the scallops stand out.
Step 2: Add scallop edging
Work a scallop border along one or both sides of the bookmark. This can be done with shell stitches or small curved groups of stitches. The scallops should be evenly spaced and gentle in shape so they feel graceful rather than bulky.
The scalloped edge is the main decorative feature.
Step 3: Keep the strip flat
Because scallop stitches can sometimes curl, check the bookmark as you go. Make sure the strip stays flat enough to lie inside a book. If the edge is too wavy, reduce the number of stitches in the scallop or tighten your tension slightly.
A flat bookmark is much more functional.
Step 4: Add the charm or bead accent
Attach a bead, charm, or tiny decorative drop to one end of the bookmark. This adds a little weight and elegance, and it makes the bookmark feel more complete. The charm should be small enough not to damage the pages.
A simple accent can make the bookmark feel very special.
Step 5: Consider a tassel or ribbon
If you want extra softness, add a thin tassel or ribbon at the bottom. This can complement the bead charm and give the bookmark a more gift-like appearance. Keep it lightweight and narrow.
The accent should enhance the design, not overwhelm it.
Step 6: Secure all joins carefully
Make sure the bead, charm, or ribbon is attached very securely. Since bookmarks are handled often, strong finishing is essential. Use extra knots or stitches if needed.
Step 7: Block and shape
Light blocking can help the scallops settle into a neat line. This gives the bookmark a more polished and professional finish.
Helpful Tips
This bookmark looks especially beautiful in soft neutrals or gentle pastel shades. It is a perfect choice for gift boxes, teacher gifts, wedding favors, or fair table displays because it feels elegant and easy to pair with a card or small wrap.
Conclusion
Crochet bookmarks are one of the most charming small projects you can make. They are quick, practical, and full of personality, which makes them ideal for gifting, selling at craft fairs, or making just for the joy of creating. Even though they are small, they offer plenty of room for creativity through color, texture, shape, and embellishment.
These five bookmark patterns each bring something different to the table. The moon and star bookmark feels dreamy and celestial. The evil eye bookmark is modern and symbolic. The daisy chain bookmark is fresh and floral. The mermaid tail bookmark is whimsical and magical. The scallop beaded charm bookmark is elegant and refined. Together, they show how a tiny handmade piece can still feel thoughtful, useful, and beautiful.
The best part is that bookmarks are practical enough to use every day, but special enough to feel like a true handmade gift. With lightweight yarn, neat finishing, and a little creative detail, you can turn a simple strip of crochet into a keepsake that readers will love.