If you have a growing pile of leftover yarn, you are not alone. Most crocheters end up with small scraps from finished projects, test swatches, color changes, and half-used skeins that are too pretty to throw away. The good news is that scrap yarn is not waste at all. In the right project, even the tiniest leftover bits can become something useful, cute, and completely handmade.
Scrap yarn projects are especially satisfying because they let you experiment without worrying about using full skeins. They are budget-friendly, eco-friendly, and perfect for trying new color combinations. A small amount of yarn can turn into a granny square, a mini bag, a cozy cowl, a scrunchie, or even a tiny amigurumi piece. That means every leftover piece has the chance to become something practical and charming.
In this guide, you will find five clever crochet scrap yarn project ideas that help reduce waste while giving you beautiful results. Each pattern is written in a clear, easy-to-follow format with useful notes on skill level, materials, stitches, step-by-step instructions, finishing, and helpful tips. Whether you want quick projects or creative stash-busting ideas, these patterns are a great place to start.
Quick Notes
- Scrap yarn works best when grouped by similar weight and fiber type.
- Try to keep your tension even so mixed colors still look neat.
- Projects with stripes, motifs, or textured sections are ideal for leftover yarn.
- If your scraps are very small, use them for details, edging, stuffing, or color accents.
- A small hook often helps scraps look more polished and keeps stitches tidy.
- Do a quick color layout first so your finished piece looks balanced.
Common Materials
- Leftover yarn scraps in matching or contrasting colors
- Crochet hook matched to the yarn weight
- Tapestry needle
- Scissors
- Stitch marker
- Optional: stuffing, buttons, beads, or lining fabric depending on the project
1. Crochet Scrap Yarn Granny Square Pattern
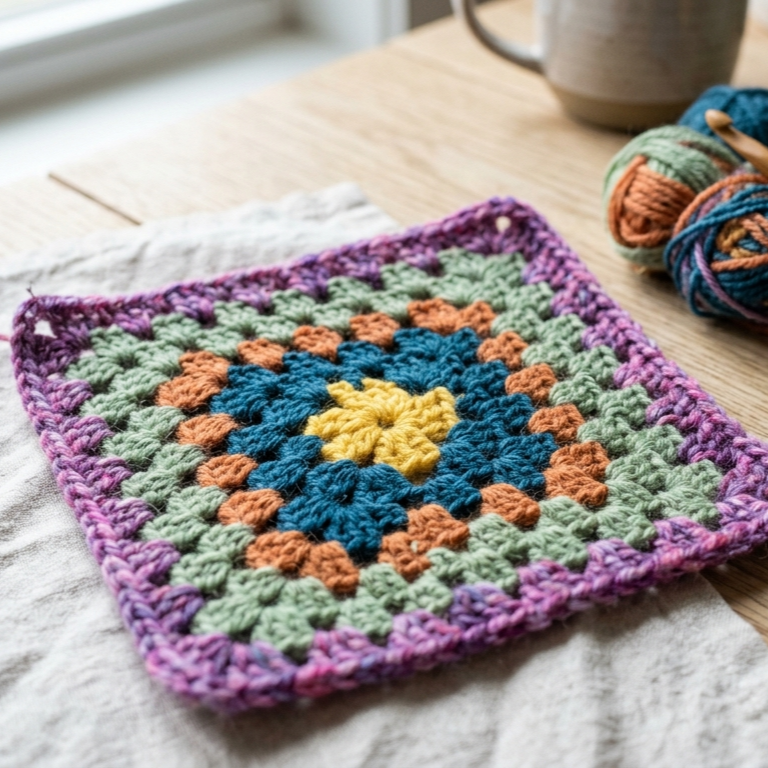
The crochet scrap yarn granny square is one of the most useful stash-busting projects you can make. It is simple, flexible, and perfect for using small amounts of different colors. Granny squares can be turned into blankets, bags, cushion covers, garments, coasters, and so much more. Because each round can use a different scrap, this project is one of the best ways to reduce waste creatively.
Skill Level
Beginner
Materials
- Scrap yarn in several colors
- Crochet hook suitable for the yarn weight
- Tapestry needle
- Scissors
Stitches Used
- Magic ring or chain ring
- Chain (ch)
- Double crochet (dc)
- Slip stitch (sl st)
Step-by-Step Guide
Step 1: Start with the center
Begin with a magic ring or a chain ring. This will form the center of your granny square. Use one of your smallest scraps for this first round so you can save larger pieces for later.
The center should be tight enough to hold its shape but not so tight that it curls.
Step 2: Work the first cluster
Crochet your first granny cluster into the ring. A classic granny cluster is usually made with groups of double crochet stitches separated by chain spaces. These clusters create the square structure.
Make sure the first round is even so the rest of the square grows neatly.
Step 3: Form the corners
At each corner, add chain spaces so the square can turn properly. The corners are what make the piece square instead of round, so this step is very important.
Keep your corner spacing consistent throughout the pattern.
Step 4: Add scrap yarn rounds
After each round, switch to a new scrap color if you want a more colorful look. This is where the project becomes fun because every round can look different.
You can use random color order or plan the colors for a more coordinated palette.
Step 5: Continue building the square
Repeat the same cluster-and-corner structure until the square reaches the size you want. You can make many small squares or larger ones depending on your project.
Each round should keep the edges straight and the corners visible.
Step 6: Finish the square
Once the square is complete, cut the yarn and weave in the ends carefully. Since scrap yarn often means many color changes, take your time securing each tail neatly.
Finishing
- Weave in all ends securely
- Block the square if needed
- Check that all corners are even
- Trim any loose tails carefully
Pro Tips
- Use similar yarn weights for the cleanest result.
- Mix bright scraps for a playful look or soft tones for a calmer design.
- Make several squares and join them later for larger scrap yarn projects.
- Blocking helps the square look more polished.
2. Crochet Scrap Yarn Mini Bag Pattern
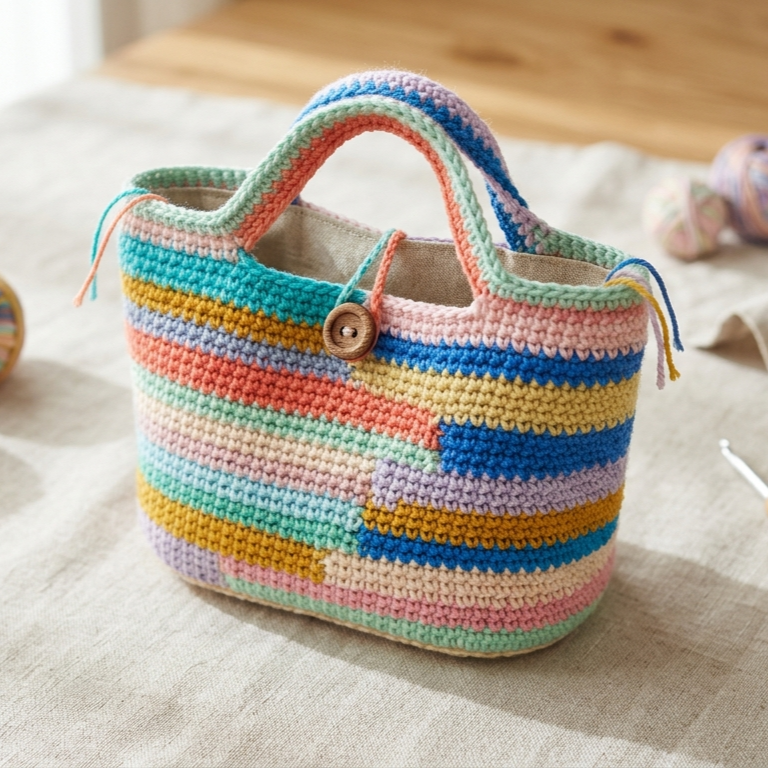
The crochet scrap yarn mini bag is both practical and stylish. It is a great project for using leftover yarn in different colors while creating something you can actually use. Mini bags are ideal for small essentials, gift packaging, makeup items, or decorative storage. They are also fun to make because they allow you to mix textures and colors freely.
Skill Level
Beginner to Intermediate
Materials
- Scrap yarn in coordinating or contrasting colors
- Crochet hook suitable for yarn weight
- Tapestry needle
- Scissors
- Optional: lining fabric, button, or drawstring cord
- Optional: stitch marker
Stitches Used
- Chain (ch)
- Single crochet (sc)
- Half double crochet (hdc)
- Double crochet (dc)
- Slip stitch (sl st)
Step-by-Step Guide
Step 1: Make the base
Start by crocheting a small oval or rectangular base, depending on the style of mini bag you want. A sturdy base helps the bag keep its shape.
Use your stronger scraps for the base so it has better structure.
Step 2: Build the sides
Once the base is done, continue crocheting upward without increasing. This forms the body of the bag.
You can switch colors every few rows to create stripes or use up scraps in a patchwork-style pattern.
Step 3: Add texture or stripes
This is the perfect place to mix yarn leftovers. Use each scrap for a different row or section, creating a colorful recycled yarn look. Keep the transitions neat so the bag looks intentional rather than random.
The color changes make this project a great stash-buster.
Step 4: Shape the opening
When the bag reaches the height you want, work a final row or two around the opening to make it neat. You can use a tighter stitch here if you want the edge to feel firmer.
A clean opening makes the bag look more polished.
Step 5: Make the handles or strap
Crochet short handles or a small crossbody strap depending on how you want to use the bag. You can also add a drawstring if you want a pouch-style mini bag.
This step gives the project its final function.
Step 6: Finish and reinforce
If desired, line the bag with fabric for extra strength. This is especially useful if the bag will hold small items or be used often.
Finishing
- Weave in all yarn ends carefully
- Reinforce the handles
- Add lining if needed
- Shape the bag gently by hand
Pro Tips
- Use thicker scraps for a sturdier bag.
- Alternate colors every row for a cheerful scrap look.
- Keep the base flat and even so the bag stands better.
- Add a button or clasp for a more finished feel.
3. Crochet Scrap Yarn Granny Stripes Cowl Pattern
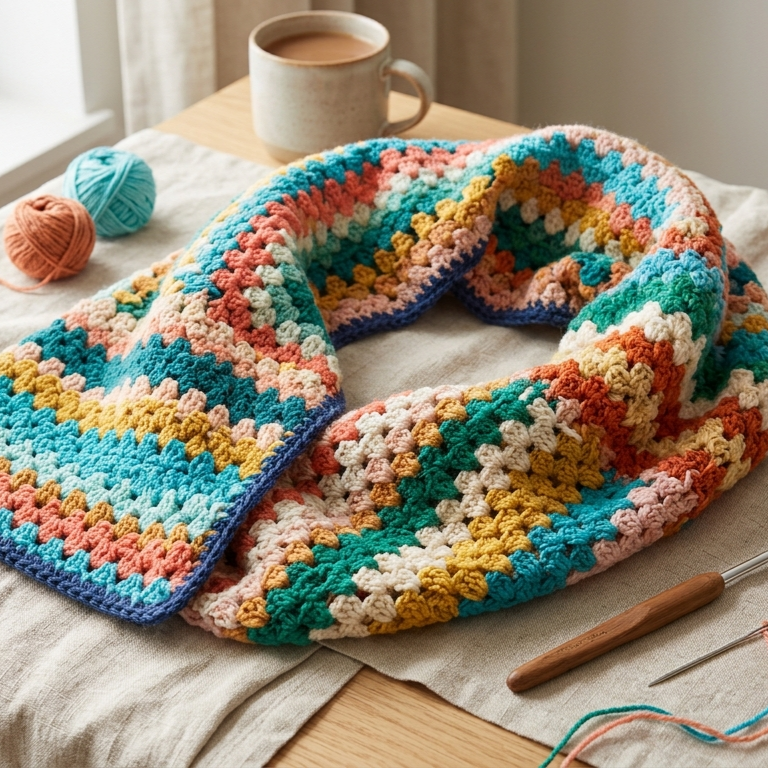
The crochet scrap yarn granny stripes cowl is a cozy and creative project that works beautifully with leftover yarn. Granny stripes are easy to repeat and look great in mixed colors, which makes them ideal for using scraps of different lengths. A cowl is also practical because it is wearable, warm, and quick to finish.
Skill Level
Beginner to Intermediate
Materials
- Scrap yarn in similar weights
- Crochet hook suitable for yarn weight
- Tapestry needle
- Scissors
Stitches Used
- Chain (ch)
- Double crochet (dc)
- Slip stitch (sl st)
- Chain spaces
Step-by-Step Guide
Step 1: Create the foundation chain
Start with a chain long enough to wrap comfortably around the neck. Make sure the chain is not too tight, because the cowl needs a little drape.
This foundation determines the overall fit of the cowl.
Step 2: Begin the granny stripe repeat
Work rows of granny-style clusters across the chain. The classic granny stripe uses groups of double crochets separated by chain spaces, which create a textured, open design.
This is a perfect structure for scrap yarn because the rows can easily change color.
Step 3: Switch colors often
Use a new scrap yarn color whenever you run out of a previous one or want a fresh look. Because the stitches repeat in a simple pattern, the color changes become the main visual feature.
You can make the stripes random or planned.
Step 4: Keep the rows even
Continue the granny stripe repeat until the cowl is the desired height. Make sure each row is straight so the finished piece lies nicely when worn.
A neat shape helps the colors stand out better.
Step 5: Join the ends
Once the rectangle is complete, join the short ends together to form a loop. Use slip stitch, whip stitch, or mattress stitch for a clean seam.
Make sure the seam is secure and not bulky.
Step 6: Finish the edges
If you want, add a simple border around the top and bottom edges to make the cowl more polished. A single crochet edge works well for this.
Finishing
- Weave in all ends thoroughly
- Seam the cowl neatly
- Shape the fabric flat if needed
- Check the neck opening for comfort
Pro Tips
- Use lightweight scraps for a softer drape.
- Try a repeating color sequence for a more organized look.
- This is a great project for using medium-length leftovers.
- Block the cowl lightly to help the rows settle evenly.
4. Crochet Scrap Yarn Scrunchie Pattern
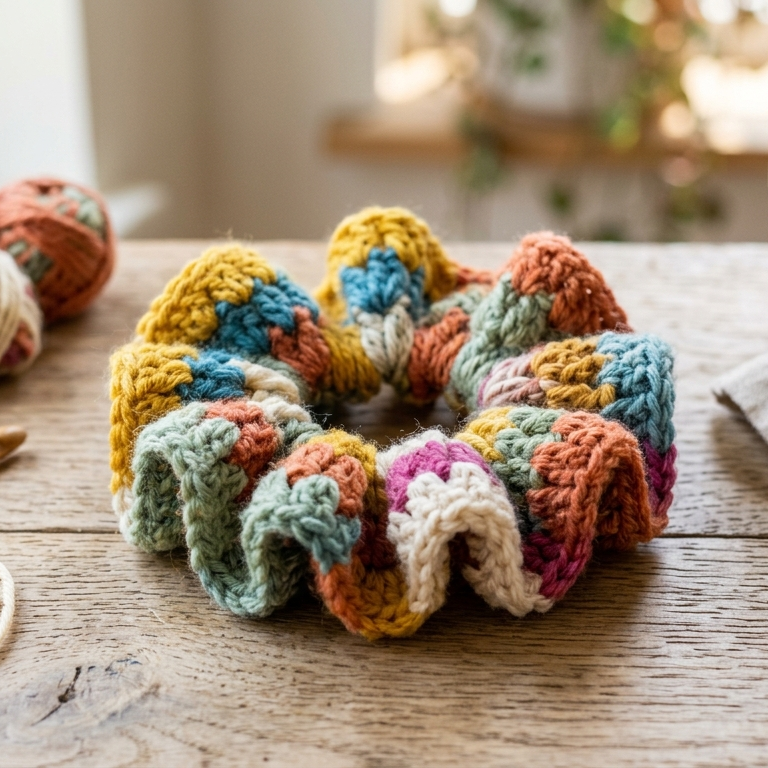
The crochet scrap yarn scrunchie is one of the easiest and fastest ways to use up leftovers. It requires only a small amount of yarn, and each scrunchie can be made in a different color combination. This makes it a perfect beginner project, gift item, or quick craft to finish in one sitting.
Skill Level
Beginner
Materials
- Scrap yarn in soft, flexible fibers
- Elastic hair tie
- Crochet hook matched to yarn weight
- Tapestry needle
- Scissors
Stitches Used
- Chain (ch)
- Single crochet (sc)
- Double crochet (dc)
- Slip stitch (sl st)
Step-by-Step Guide
Step 1: Attach the yarn to the elastic
Tie the yarn onto the hair tie securely. Leave a short tail for weaving in later.
The base elastic should be fully covered before moving on.
Step 2: Cover the elastic
Work stitches around the hair tie until it is completely wrapped. Single crochet gives a tighter look, while double crochet creates a fuller, fluffier scrunchie.
Keep the stitches even so the elastic is hidden well.
Step 3: Add the ruffle
Once the elastic is covered, continue crocheting around the outer edge to create the scrunchie ruffle. This is where you can use different scrap yarn colors if you want a striped or mixed look.
The more even the ruffle, the prettier the scrunchie will appear.
Step 4: Adjust the fullness
Check whether the scrunchie looks too flat or too bulky. Add a few more stitches if needed to create the right amount of volume.
Scrunchies should feel soft and stretchy, not stiff.
Step 5: Finish the join
Join the round neatly and secure the yarn end. Make sure the scrunchie still stretches comfortably and that the ruffle sits evenly around the elastic.
Step 6: Weave in the ends
Carefully hide all yarn tails inside the stitches. This keeps the scrunchie neat and durable.
Finishing
- Weave in all ends securely
- Fluff the ruffle evenly
- Check that the elastic still stretches
- Trim any loose fibers
Pro Tips
- Use soft yarn so the scrunchie feels comfortable in the hair.
- Mix small scraps to create colorful, playful scrunchies.
- Make several at once for gifts or market bundles.
- Cotton blends and acrylics work especially well for everyday use.
5. Crochet Tiny Scrap Yarn Roundish Octopus Pattern
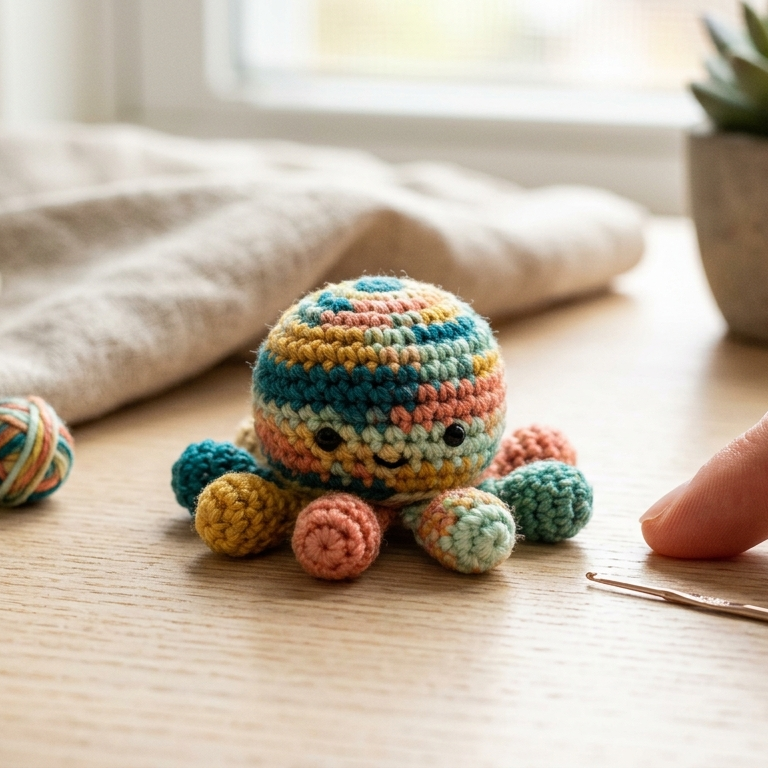
The tiny scrap yarn roundish octopus is a playful little amigurumi project that is perfect for using tiny leftover yarn pieces. Because the body is small and the tentacles are quick to make, this pattern works well when you want to use scraps that are too short for larger projects. It is cute, fun, and ideal as a desk buddy, keychain, gift topper, or decorative toy.
Skill Level
Beginner to Intermediate
Materials
- Scrap yarn in any colors
- Small crochet hook, usually 2 mm to 3 mm
- Fiberfill stuffing
- Tapestry needle
- Scissors
- Safety eyes or embroidery thread
- Stitch marker
- Optional: key ring or clip
Stitches Used
- Magic ring
- Chain (ch)
- Single crochet (sc)
- Increase
- Decrease
- Slip stitch (sl st)
Step-by-Step Guide
Step 1: Crochet the body
Begin with a magic ring and work in the round to form a small rounded body. The shape should be slightly domed and soft, not too tall.
Keep the rounds even so the octopus looks smooth and cute.
Step 2: Add the shaping
Continue increasing until the body reaches the right width, then work a few rounds straight. This helps create the roundish form that gives the octopus its charm.
A compact body makes the tiny design more adorable.
Step 3: Stuff lightly
Add a small amount of fiberfill before closing the body. The stuffing should be gentle and even so the shape stays round without becoming too firm.
A soft body makes the octopus look more plush.
Step 4: Close the top
Decrease gradually until the opening closes. Use a tapestry needle to secure the final seam neatly.
Make sure the top is smooth and balanced.
Step 5: Make the tentacles
Create several short tentacles by chaining and working back down the chain with stitches. You can make them curly, straight, or slightly spiral-shaped depending on the style you like.
Tentacles are a great place to use very small scrap leftovers.
Step 6: Attach the tentacles
Sew the tentacles to the bottom of the body evenly around the base. Try to space them symmetrically so the octopus hangs properly and looks balanced from all sides.
Step 7: Add the face
Add tiny safety eyes or embroider simple eyes and a smile. A small face gives the octopus a friendly and playful expression.
This step really brings the tiny project to life.
Finishing
- Weave in all ends securely
- Shape the tentacles gently
- Check that the body is evenly stuffed
- Add a loop or clip if desired
Pro Tips
- Use bright scraps for a fun, whimsical look.
- Pastel colors make the octopus look soft and sweet.
- This pattern is excellent for using up tiny yarn bits.
- Make a few in different colors for a cute collection.
Conclusion
Scrap yarn projects are a wonderful reminder that small leftovers can still become something beautiful and useful. Instead of letting yarn bits sit in a basket unused, you can turn them into items that are colorful, practical, and completely handmade. That makes scrap yarn crochet both creative and sustainable.
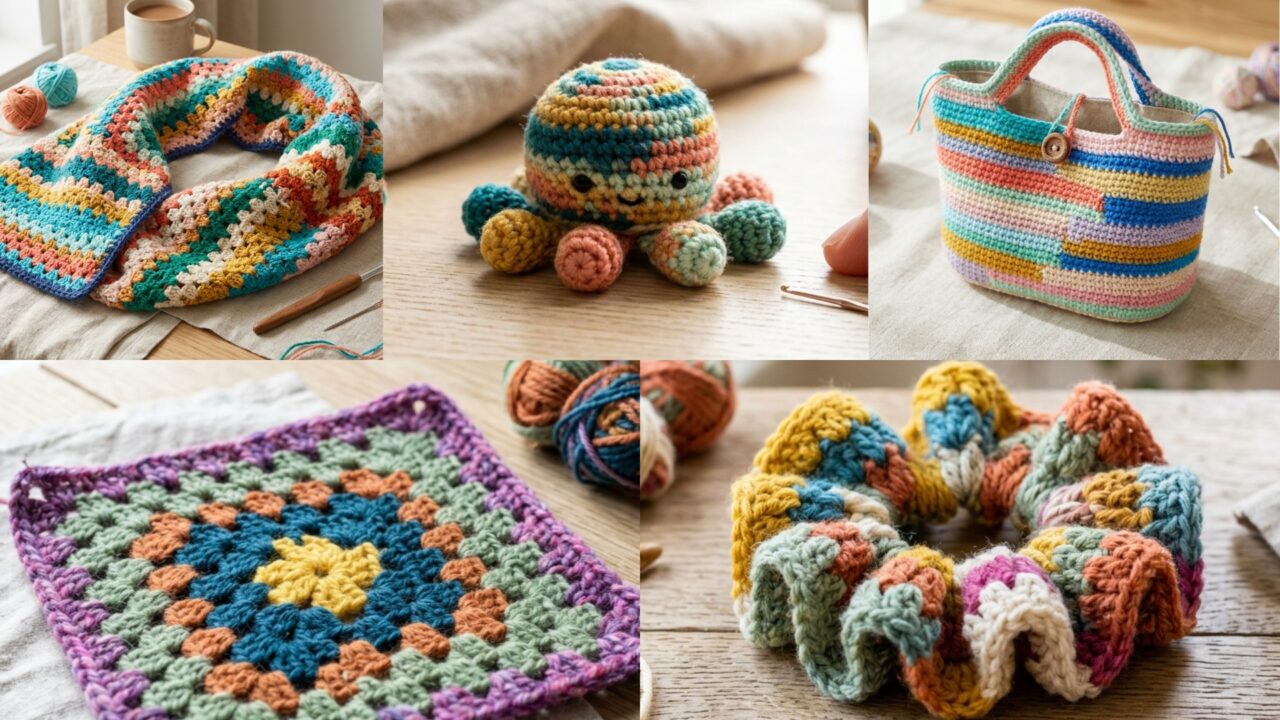
The granny square is endlessly versatile, the mini bag is useful and stylish, the granny stripes cowl is cozy and wearable, the scrunchie is quick and fun, and the tiny roundish octopus is playful and charming. Each project offers a different way to use your leftovers while keeping waste to a minimum.
The best part about scrap yarn crochet is that there is no need to be perfect. Mixed colors, small yarn lengths, and unexpected combinations often create the most interesting results. With a little planning and a good pattern, even the smallest scraps can become something worth keeping or gifting.