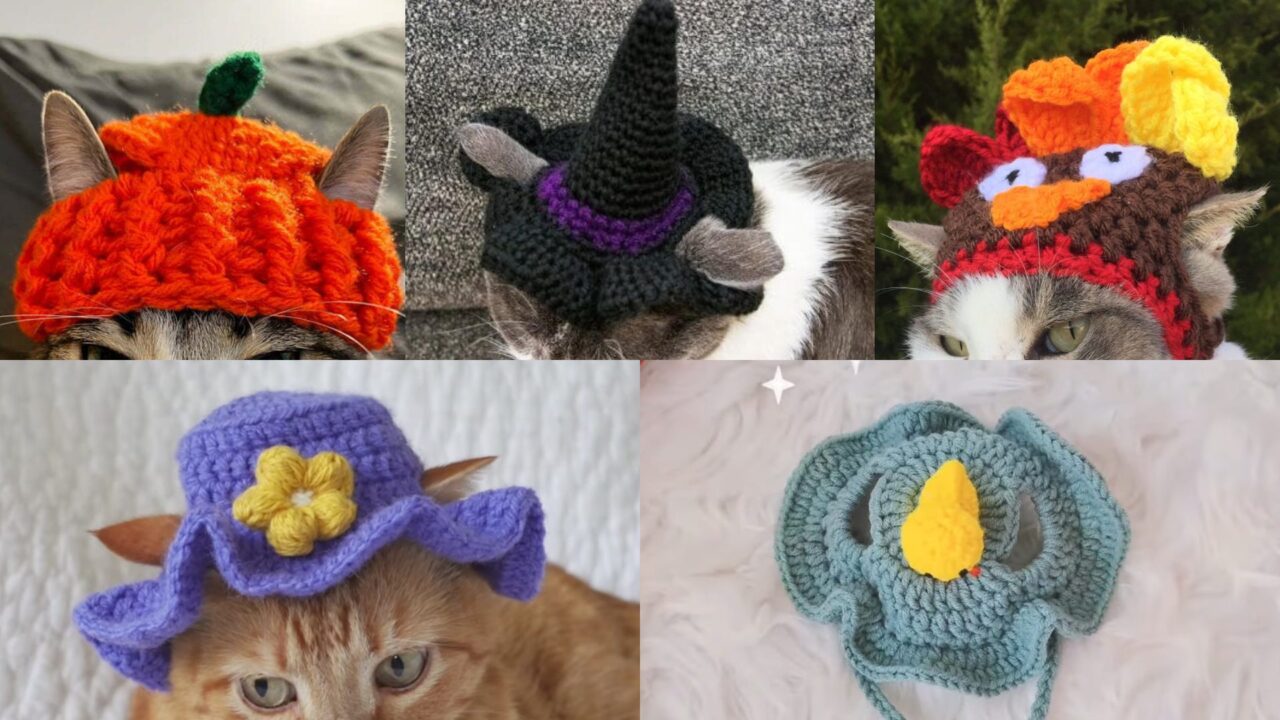
Dressing up your cat can be adorable — but it must always be safe, short, and comfortable for your pet. These five crochet cat hat patterns give you a range of looks (from spooky witch to tiny turkey), plus clear, step-by-step instructions, measurements you can check as you go, and safety tips so every photo session stays stress-free. I’ve written each pattern in US crochet terms and included skill level, materials, exact stitch sequences you can follow, finishing/attachment ideas, and variations.
Safety first: Always introduce hats slowly, try hats for only a minute or two at first, never leave a cat unattended while wearing any hat or strap, remove immediately if your cat seems distressed, and avoid anything that could tangle or choke (long ties, beads, bells that can be swallowed). Use soft, lightweight yarn and secure attachments (Velcro or short elastic) rather than rigid fastenings.
Common abbreviations & quick notes
ch = chain
sl st = slip stitch
sc = single crochet
hdc = half double crochet
dc = double crochet
inc = 2 stitches in same stitch
st(s) = stitch(es)
BLO = back loop only
FLO = front loop only
RS = right side
Gauge and sizing: cats vary a lot. Below are typical head circumference targets — measure your cat’s head where the hat band will sit (just above the ears):
- Small / kitten: 8–9 in (20–23 cm)
- Medium / average cat: 10–12 in (25–30 cm)
- Large / big cat: 13–15 in (33–38 cm)
Most hat crowns are worked as a flat circle that becomes a dome. I’ll give a standard increasing formula you can repeat until the flat circle measures the diameter you want — then work up the sides and shape the brim/details.
1. Cat Crochet Witch Hat Pattern
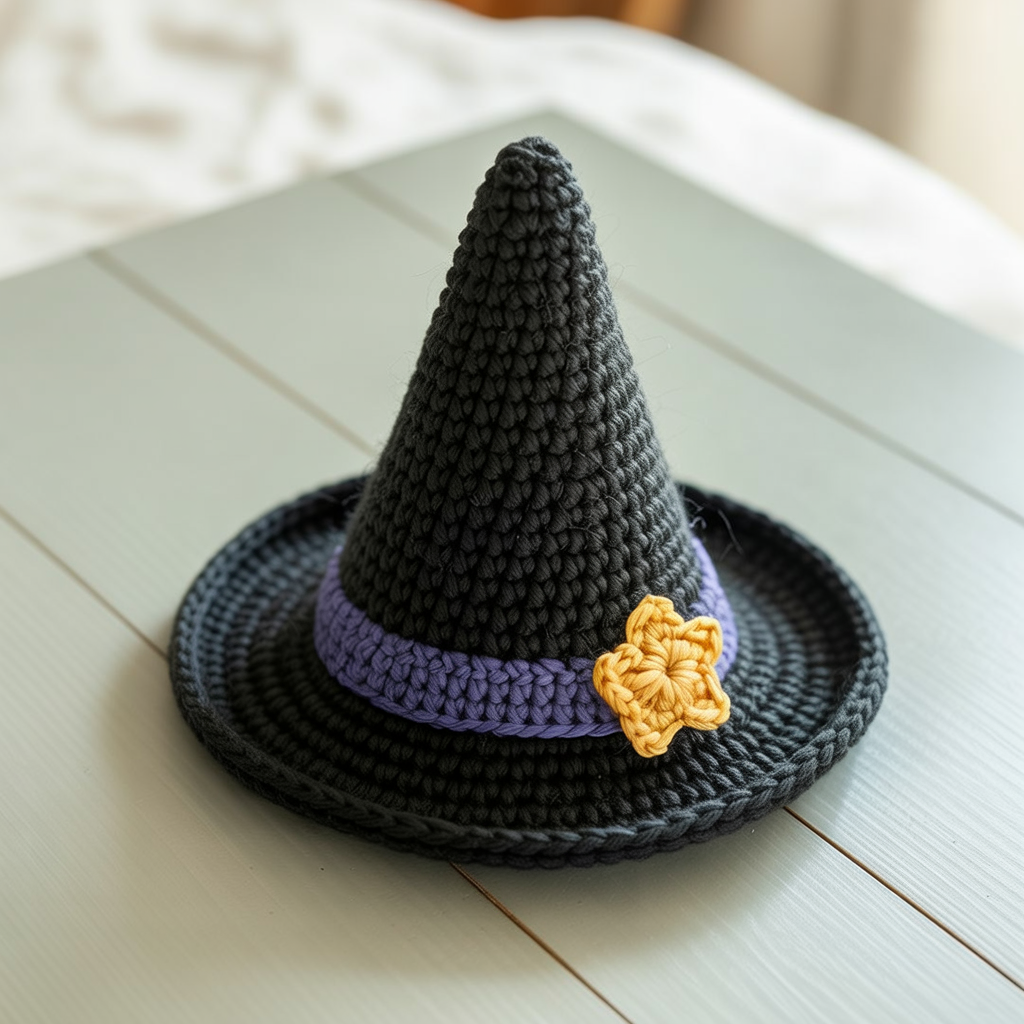
Skill level: Intermediate — simple shaping, brim increases, optional star trim.
Style: Classic pointed witch hat with a flared brim — perfect for Halloween photos.
Materials
- Sport/DK or worsted (#3 or #4) lightweight yarn — small amount (25–40 yds)
- Hook: 4.0 mm (G) for body; optional 4.5–5.0 mm for floppier brim
- Yarn needle, stitch marker, small amount of contrasting yarn for band/star
- Short elastic loop or ¾” wide soft Velcro strip for chin strap (optional)
Build overview
- Work a flat magic circle for the crown, increasing evenly until the flat diameter fits your cat’s head measurement (see guide below).
- Work straight rounds to build the tall cone.
- Create a flared brim with increase rounds (use larger hook optional).
- Add band/decoration and attachments.
Step-by-step
A. Crown (flat circle → measure)
- Magic ring, ch 1, 6 sc into ring. Pull tight. (6 sc)
- Round 2: inc in each st — 12 sc.
- Round 3: (sc, inc) repeat around — 18 sc.
- Round 4: (2 sc, inc) repeat around — 24 sc.
- Round 5: (3 sc, inc) repeat around — 30 sc.
- Continue rounds increasing by one extra sc between incs each round: Round n pattern is (n-2 sc, inc) repeat around. After each round lay the circle flat and measure across (diameter). Stop increasing when the flat circle’s diameter is about:
- Small: 3.25–3.75 in (8–9.5 cm)
- Medium: 4.25–4.75 in (11–12 cm)
- Large: 5.25–5.75 in (13.5–14.5 cm)
These diameters produce a dome that, when you work a few side rounds, will cover a typical cat crown without pulling ears too flat. Adjust if your cat has a very round or flat head.
B. Cone (build the point)
7. After you’ve reached desired flat circle size, stop increasing and work 6–10 rounds of sc in each stitch around to build height (for a short cone, 6 rounds; for taller witch hat, 10+ rounds). This creates a small dome; if you want a more tapered point, switch to dc and dec occasionally: work 2–3 rounds of sc, then one round of (sc2tog, sc x N) to gently decrease and encourage a peak — or simply taper by decreasing every 4–6 stitches per round across a couple rounds until the top narrows slightly. Fasten off and weave ends.
C. Brim (flared)
8. Join yarn at base of cone with RS facing. Switch to a hook one size larger if you want a softer, floppy brim. Round 1 brim: ch 1, sc in each st around. Join.
9. Round 2 brim: (3 sc in next st, sc in next 3 sts) repeat around — this adds gentle flare. Adjust spacing so the brim lies flat — you may need to change numbers depending on your stitch count.
10. Round 3 brim (optional for extra flair): (inc in next st, sc in next 4 sts) or add a decorative picot edge: sc, ch 3, sl st in 3rd ch every 4–6 sts.
D. Band & decoration
11. Add a contrasting band: ch long enough to wrap around base of cone, slip-stitch edges together to create a band, position and tack to hat. Sew a small crocheted star (magic ring → 5 small sc petals) or attach a tiny fabric buckle.
E. Attachment
12. For a safe, removable chin strap: use a short length of soft elastic (measure under chin, not tight) and sew each end to opposite sides inside the hat. Or attach a ¾” Velcro strip inside and a small matching strip under the chin to hold briefly. Always supervise.
Finishing & variations
- Make the hat in black for classic witch, deep purple for whimsical, or neon green for pop photos.
- For kitten versions, reduce crown increases and keep brim narrow.
- Add a tiny bell only if it’s safety-locked and supervised; otherwise avoid small detachable parts.
Tips
- If brim ripples, add a round with fewer increases to flatten (reduce flare). If brim curls up, add another increase round.
- Use a slightly slipperier yarn (acrylic) if planning short photo sessions so the hat slides on/off easily.
2. DIY Small Bucket Cat Hat with a Daisy Tutorial
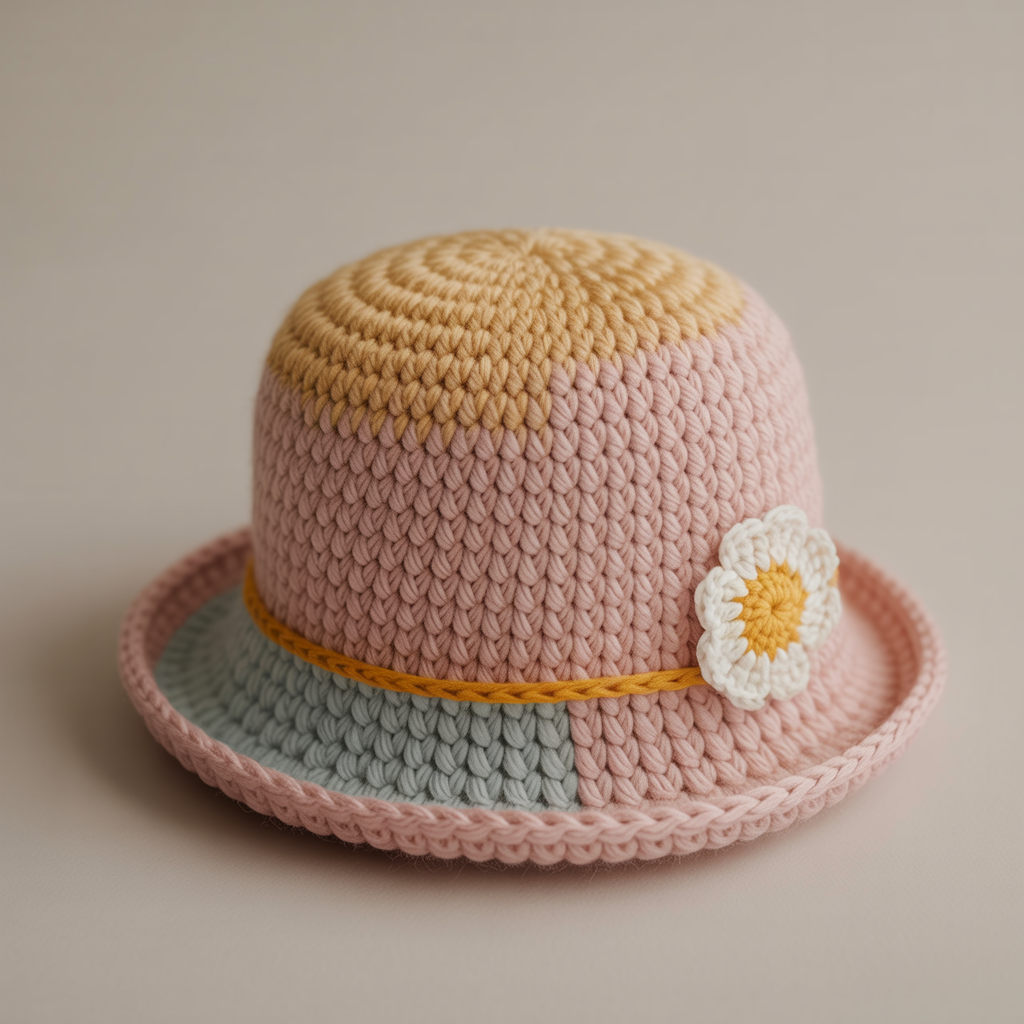
Skill level: Beginner–intermediate — easy circular crown + simple sides + daisy applique.
Style: Cute bucket hat with little daisy on the side — an everyday adorable look.
Materials
- Worsted or DK yarn — main color + small scrap of yellow and white for daisy
- Hook: 4.0 mm (G)
- Yarn needle, scissors, optional felt circle for inside lining
Build overview
- Flat crown with standard increases.
- Work sides in BLO to create bucket slope.
- Make daisy applique and sew on.
Step-by-step
A. Crown (flat circle)
- Magic ring, ch 1, 6 sc into ring. (6)
- Round 2: inc each st (12)
- Round 3: (sc, inc) x6 (18)
- Round 4: (2 sc, inc) x6 (24)
- Round 5: (3 sc, inc) x6 (30)
- Continue until flat circle diameter measures approx:
- Small: 3–3.5 in (7.5–9 cm) for kittens
- Medium: 3.75–4.25 in (9.5–11 cm) for average cats
B. Sides (create bucket depth)
7. From next round onward, stop increasing. Work BLO sc for 6–10 rounds (6 rounds = shallow bucket; 10 rounds = deeper bucket). BLO gives a subtle rim and a nice shape. Check against your cat’s head height — the sides should rise just to the crown top, not cover ears.
C. Brim (small roll brim)
8. For a small brim, change hook to one size larger: Round 1 brim: sc in each st around. Round 2 brim: (sc in next 2 sts, 2 sc in next st) repeat around to give a gentle flare. Round 3 (optional): sc across or add a decorative scallop: (sc, skip 1 st, 5 dc in next, skip 1 st) etc.
D. Daisy applique
Center (yellow): magic ring, ch 1, 6 sc, sl st, fasten off leaving tail for sewing.
Petals (white): join white to any stitch around center ring: (ch 3, sl st in same st) repeat 6 times — or make small puff petals: (ch 1, 5-loop puff, sl st). Sew daisy to side of hat, secure tightly.
E. Lining (optional)
9. For extra comfort, stitch a soft felt circle inside the crown (no adhesive near cat’s fur) to smooth seams.
Finishing & variations
- Make a trio of tiny daisies or use a different flower (crochet rose).
- For a summer look use cotton yarn; for cozy winter photos use acrylic or wool blend.
Tips
- Keep daisy lightweight so it doesn’t flop the hat.
- Use soft Velcro for chin fasten if needed — always keep it loose-fitting.
3. Crochet Pumpkin Hat for Cats Pattern
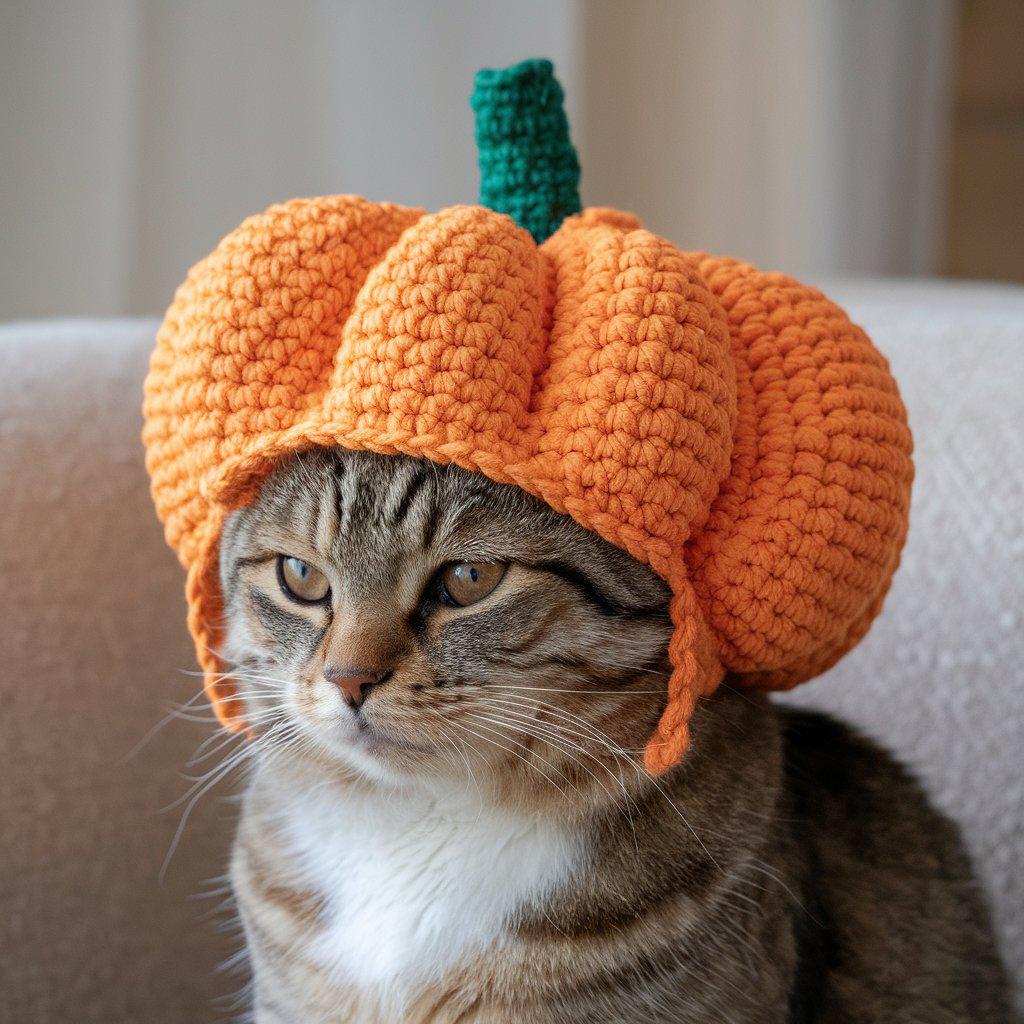
Skill level: Intermediate — color changes and pumpkin ribbing.
Style: Round pumpkin crown with vertical “ribs” and a green stem on top — perfect for fall photos.
Materials
- Worsted weight yarn: orange main, green for stem, brown for optional vine
- Hook: 4.0 mm (G)
- Yarn needle, small amount of polyfill for stem (optional)
Build overview
- Make a round orange crown.
- Use surface slip stitch or post stitches to create vertical pumpkin ribs.
- Make a small stuffed stem and sew on top.
Step-by-step
A. Crown (pumpkin body)
- Magic ring, ch 1, 6 sc — Round 2 inc to 12 — Round 3 (sc, inc) to 18 — Round 4 (2 sc, inc) to 24 — Round 5 (3 sc, inc) to 30. Continue until flat circle diameter is about 4–5 in (10–13 cm) depending on cat size (pumpkins look best slightly rounder than the standard hat crown). Stop increasing.
- Work 4–8 rounds of sc (or hdc for squishier fabric) to build height.
B. Pumpkin ribs (two options)
Option 1 — Surface slip stitch ribs (clean, flat):
3. Using contrasting orange held double (or same color for subtle ribs), with RS facing, start at top center and bring yarn down to brim via surface slip stitch: insert hook from top to bottom, pull up loop, sl st back to start along a line. Make 6–8 evenly spaced ribs from top to brim. This yields stitched lines like pumpkin segments.
Option 2 — Front-post ribbing (textured):
3. Switch to post stitches: mark 8 evenly spaced points around the crown. Work a round of fpdc at the brim level up toward the crown top, then bpdc back to create vertical ridges. This creates three-dimensional ribs.
C. Stem
4. With green yarn: ch 6, join to form ring, work 6 sc in ring (or 8 sc if you prefer). Work 4–6 rounds increasing as needed to make a little stump. Lightly stuff with polyfill and close by decreasing rounds then sewing the base to the crown top. For a vine, chain 20 and attach to side, twist into a curl.
D. Finishing
5. Add an optional brown felt leaf behind the stem or embroider a few freckles with brown yarn to resemble pumpkin dimples.
Tips & safety
- Keep the stem small and soft — nothing rigid that can poke the cat.
- If you use a surface slip-stitch rib, it’s lightweight and less likely to catch.
4. Crochet Cat Hat with a Bird on Top Tutorial
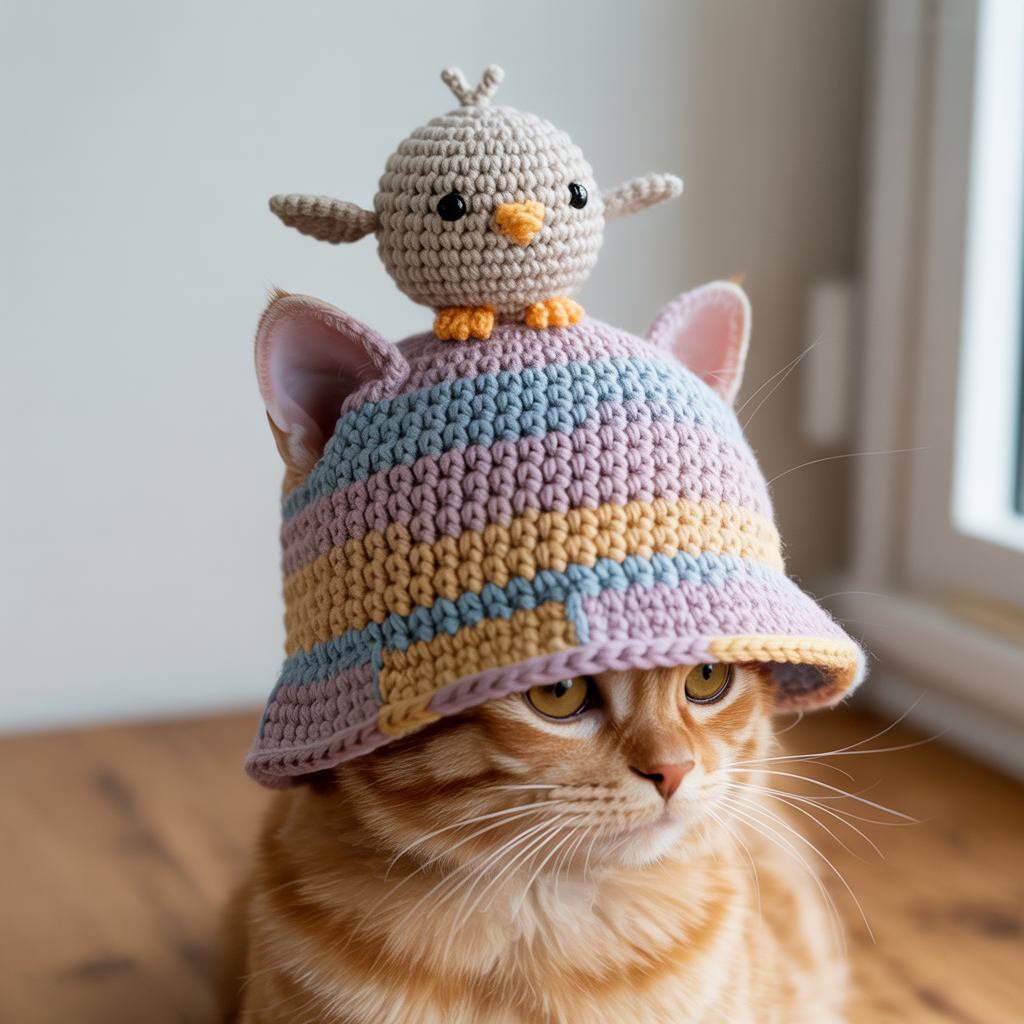
Skill level: Intermediate — hat + small amigurumi bird.
Style: Sweet novelty hat with a little bird (or chick) perched on top — playful and cute.
Materials
- Main hat yarn (DK/worsted), small amounts for bird (body color, beak color, wing color)
- Hooks: 4.0 mm for hat, 3.0–3.5 mm for bird (tighter gauge)
- Yarn needle, small piece of fiberfill, black embroidery thread or safety eyes (avoid if cat might chew), stitch marker
Build overview
- Work a simple bucket hat (see Pattern 2) or small crown.
- Crochet a tiny bird amigurumi (round body, tiny beak, wings) and sew securely to the hat top.
Step-by-step
A. Hat (simple crown + shallow sides)
- Use crown pattern from Pattern 2 but keep the diameter smaller so hat looks proportionate (3.5–4.25 in depending on cat size). Work 6 rounds of sides in sc, then a small brim of 1–2 rounds sc.
B. Tiny bird (amigurumi)
Body:
- With smaller hook and bird color, magic ring, 6 sc. (6)
- R2: inc each st — 12
- R3: (sc, inc) x6 — 18
- R4–R6: sc around (3 rounds) — 18 (makes a squat body)
- R7: (sc, dec) x6 — 12
- Stuff lightly. R8: dec around to close. Fasten off and weave end inside.
Beak:
- Yellow or orange scrap: ch 3, sc in 2nd ch from hook and next ch, sl st to finish (a tiny triangle). Sew to front of bird and embroider two tiny eyes with a small stitch of black embroidery thread. Do not use loose safety eyes if you’ll let the cat wear the hat unsupervised.
Wings (make 2):
- With wing color: ch 5, sc in 2nd ch from hook, hdc in next, dc in next, sc in last — fasten and sew to sides.
C. Attach bird to hat
2. Sew bird to the top center of the hat with several secure stitches through the bird base and hat top. For extra security, also tack the bird lightly to the underside of the hat’s crown (so the attachment passes through the fabric twice). Use small, tight stitches and weave in ends thoroughly.
D. Optional accessories
- Make the bird a tiny hat (crochet a picot mini hat) or attach a small felt leaf. Keep embellishments stitched firmly.
Tips & safety
- Stuff the bird lightly and keep it small — a very large bird can unbalance the hat and annoy your cat.
- Use embroidery for eyes instead of plastic pieces if you’ll be letting the hat be handled by the cat.
5. Crochet Cat Turkey Hat Pattern
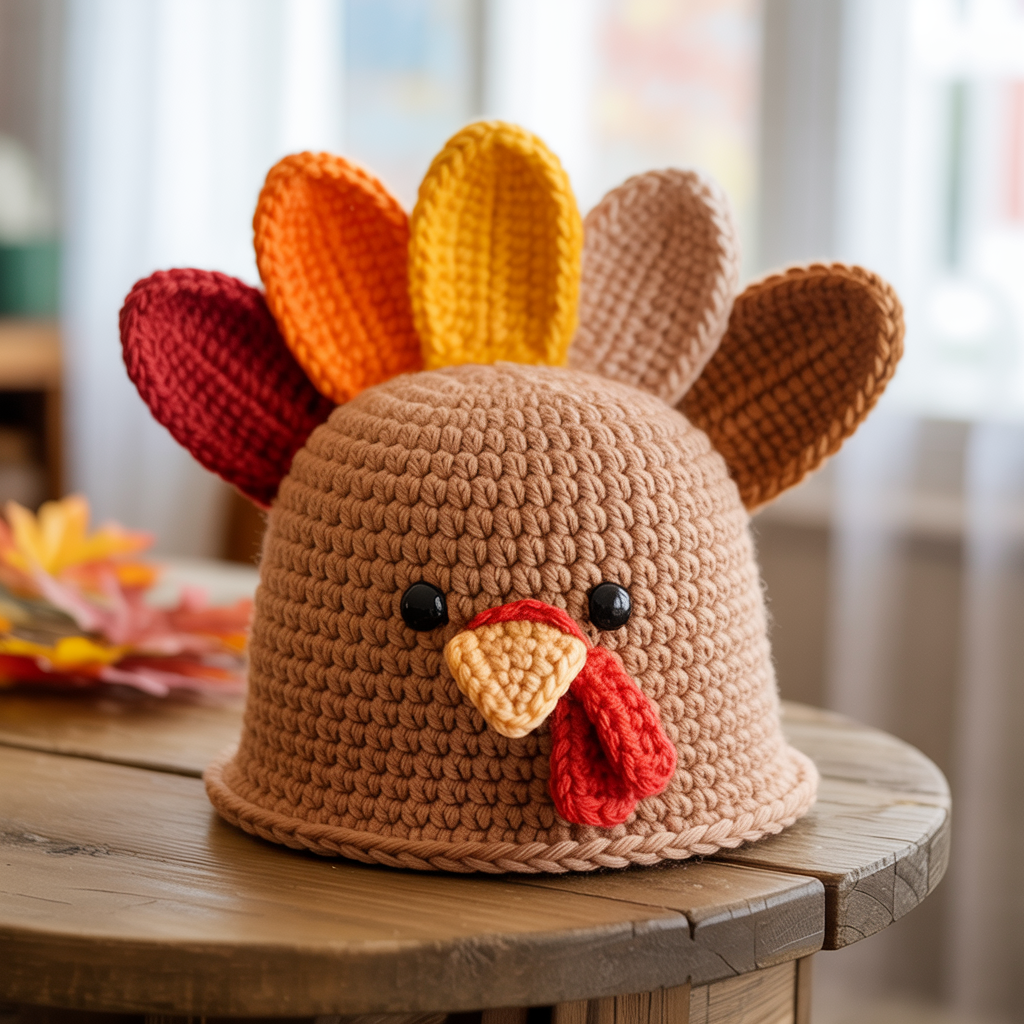
Skill level: Intermediate — multi-part: hat + turkey head + fan of feathers.
Style: Festive turkey hat with a fan of feathers at the back and a tiny turkey face up front — great for Thanksgiving snapshots.
Materials
- Worsted yarn: brown (body), crimson/orange/yellow for feathers, red for wattle, beige or cream for beak
- Hook: 4.0 mm (G) for hat; 3.0–3.5 mm for small turkey features if desired
- Yarn needle, polyfill for turkey head if you make it 3-D
Build overview
- Make a basic hat (bucket shape) that fits securely above the ears.
- Crochet a lightweight fan of feathers (flat fans of dc clusters) and sew to back.
- Make a tiny turkey head or just a felt/bead beak and wattle for front.
Step-by-step
A. Hat (base)
- Use the bucket hat pattern (Pattern 2) sized for your cat. Keep crown diameter moderate (3.5–4.25 in for most cats) and sides 6–8 rounds.
B. Feathers (fan, make 5–7 feathers)
Make each feather as a flat fan that you can sew together into a semi-circle:
Feather pattern (flat fan)
- Ch 8. Row 1: sc in 2nd ch from hook and across (7 sc). Turn.
- Row 2: ch 2, hdc in first, dc in next 3, hdc in next, sc in last. Turn.
- Row 3 (optional height): ch 2, (dc, ch 1, dc) across center for a lacy effect, finish with sc. Fasten off leaving tail for sewing.
Make 5–7 feathers in assorted colors (red, orange, yellow, gold, brown). Overlap and sew securely into a fan shape on a small semicircular felt base or a sturdy crocheted half-circle.
C. Turkey head or face
Option 1 — simple: cut a small triangle of felt for beak and a small loop of red felt for wattle; stitch to front center (super lightweight).
Option 2 — tiny stuffed turkey head: Make a small amigurumi sphere (similar method to bird body but smaller), embroider eyes and sew a felt beak and red wattle to it, then sew the head to the hat front. Keep it small and soft.
D. Attach feathers to hat
- Sew the feather fan to the back center of the hat. If you worry about snagging, sew it to a felt semicircle and then stitch the felt platform to the hat — this spreads the stress and reduces direct pulling on stitches.
Finishing & variations
- Add embroidered details on feathers (veins) with a running stitch.
- For a flatter look, make the feathers one round granny fan and sew it down.
Tips & safety
- Keep feathers soft and flat — stiff, glued embellishments can become dangerous.
- Fasten all pieces securely; test with gentle tugs before letting the cat wear it.
Final tips — fit, comfort & photo etiquette
- Measure twice: Before you cut yarn ends, measure the crown on your cat. Add ½ inch (1–1.5 cm) of ease so the hat isn’t tight.
- Test fit: Try the hat on for only 10–15 seconds initially, then shorter if the cat resists. Reward with treats. Remove immediately if ears flatten, tail thrashes, or the cat tries to bite the hat.
- Fastening: Prefer short elastic loops or soft Velcro patches. Never use long ties that can tangle.
- Materials: Use washable, soft yarns (acrylic or cotton blends) that won’t irritate fur and are easy to clean. Avoid anything scratchy (some wools) or heavy (thick novelty yarn).
- Supervise: Hats are for photos and gentle handling only — do not leave a hat on a cat unattended.
- Removability: Design hats to slip on/off easily. Avoid tight seams or internal wires.
- Practice patience: Some cats never tolerate hats; respect their limits and choose props like collars or blankets instead.
Conclusion
These five crochet cat hats — the Witch Hat, Bucket Hat with Daisy, Pumpkin Hat, Bird-Topped Hat, and Turkey Hat — give you a playful notebook of styles you can adapt and remix. Each pattern is intentionally flexible: start with the flat crown increases I shared, then shape sides, brims, and motifs to match your cat’s size and temperament. Keep safety and comfort front and center, use soft yarns and secure attachments, and make every photo session short and positive


