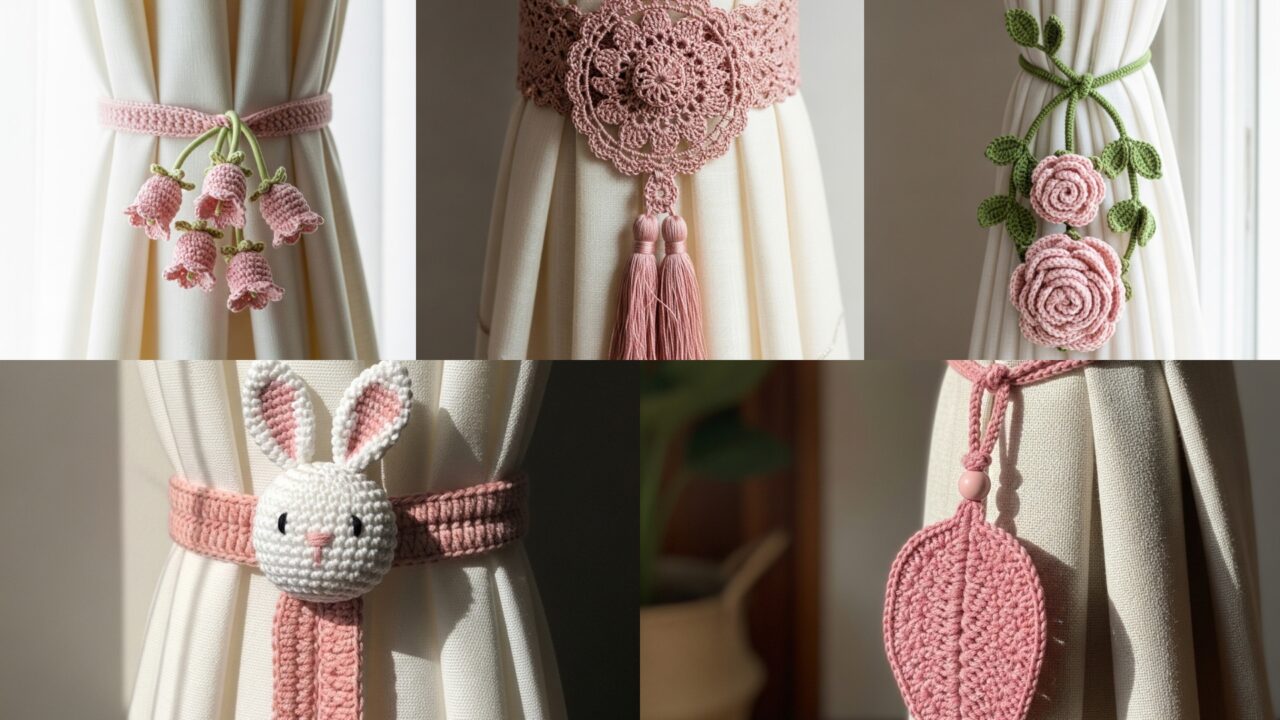
Curtain tiebacks are one of those tiny home details that quietly lift a room — they’re functional, decorative, and a lovely place to show off small crochet motifs (flowers, leaves, animals). Below you’ll find a friendly, detailed introduction (materials, measurements, hardware, safety and mounting options) and five full tieback patterns with materials, stitch notes, step-by-step construction, assembly/attachment options, finishing and styling ideas: Rose, Vintage, Bell Flower, Bohemian Leaf, and Adorable Bunny. Each pattern includes a sample size and clear instructions so you can customize to your curtain thickness and style.
Quick essentials — materials, measurements, hooks, hardware & safety
Yarn & fiber choices
- Cotton / cotton-blend — best all-round choice: crisp stitch definition, washable, and holds shape for decorative tiebacks. Use sport/DK for delicate tiebacks, worsted for chunkier looks.
- Linen / linen-blend — elegant, slightly stiff, perfect for vintage or bohemian textures.
- Acrylic / acrylic blends — easy care and inexpensive; fine for kids’ rooms or more playful designs.
- Velvet / chenille — luxurious for plush motifs but heavy; avoid for very large curtains.
Hooks & notions
- Hook sizes depend on yarn; common range 2.5–5.5 mm. Use a slightly smaller hook than the yarn label suggests if you want dense, structured motifs.
- Notions: tapestry needle, stitch markers, small scissors, blocking pins/mat (for lace motifs), small pliers for hardware.
Hardware and mounting options
- Button + loop — sew a sturdy button onto one curtain-edge and make a crocheted loop on the tieback; classic and secure.
- Snap (sew-in) — sew a sew-on snap onto curtain and loop the tieback around; very tidy.
- Magnetic clasp / magnetic closure — sew or wrap the tieback around and hold with magnets — easy on/off, great for delicate fabrics (choose strong decorative magnets with felt backing).
- Tassel + ring — attach a split ring or O-ring to wall hook and slide tassel through; decorative but needs a small hook at wall.
- Wrap-around style — tieback is long enough to wrap around curtain and tie into bow; no hardware needed.
Measuring for fit (quick method)
- Decide where you want the tieback to sit — commonly mid-height or two-thirds up from the floor.
- Measure around the curtain when pulled back to that point. That’s your wrap circumference. Example: if it measures 18 in around the curtain, your finished tieback loop/stretched length should be approx 18 in (or a bit shorter if you intend to fasten with a button and want snug negative ease).
- Compute foundation stitches using your gauge: if your stitch density is 4 sc = 1 in, then for 18 in you need 4 × 18 = 72 sc (see arithmetic: 4 × 18 → 4×10 = 40, 4×8 = 32 → 40 + 32 = 72). Always swatch.
Safety & care points
- If children or pets are present, avoid small detachable beads or loosely sewn charms. Magnetic closures should be kept away from small children.
- For curtains that will be washed, choose washable yarn (cotton or machine-washable acrylic) and detachable hardware (so you can remove tiebacks before washing).
Abbreviations used (US)
- ch = chain
- sc = single crochet
- hdc = half double crochet
- dc = double crochet
- tr = treble crochet
- sl st = slip stitch
- MR = magic ring
- inc = increase (2 sc in same st)
- dec = decrease (single crochet decrease)
- fpdc / bpdc = front-post / back-post double crochet
- rep = repeat
- BLO / FLO = back loop only / front loop only
1. Crochet Rose Curtain Tieback Pattern
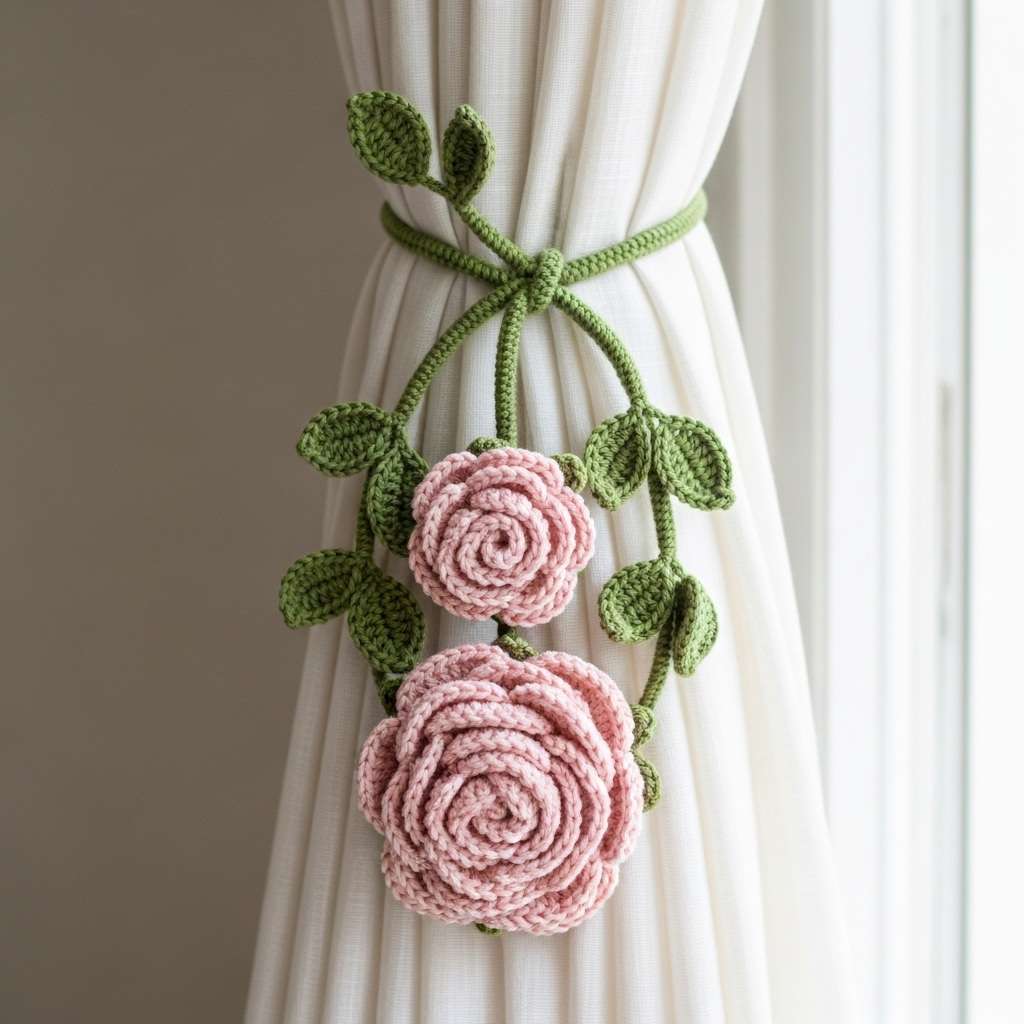
A romantic, classic rose motif on a neat wrapped band. Fastens with a button or magnetic clasp.
Vibe: feminine, classic
Skill level: intermediate (3D flower assembly + band)
Sample finished size: band length ~18 in for medium curtain; rose motif ~3 in diameter
Materials
- Sport/DK cotton in soft pink (rose), green (leaf/stem): ~100–150 yd total.
- Hook: 3.5 mm.
- Button (decorative, ¾ in) or small magnetic clasp; tapestry needle; small amount of stuffing (optional for center).
Stitches & motifs
- Rose built as a rolled rosette from a crocheted strip (spiral) or layered petals for more structure. Leaves are small flat motifs.
Step-by-step
A — Make the band (wrap)
- Gauge example: 5 sc = 1 in. For an 18 in wrap: 5 × 18 = 90 sc. (Calculation: 5×10=50, 5×8=40 → 50+40=90.) Chain 90 (or foundation sc 90) and join carefully to avoid twist, or work a flat strip and seam.
- Rounds 1–6: sc in each st around (6 rounds ≈ 1 in tall) — you can adjust height; a narrow band is elegant, a wider band is bolder. For more elasticity, work 2–3 rounds BLO sc to create a foldable cuff.
B — Rose (rosette) — rolled method
- Chain 60 (adjust for desired rose size). Row 1: dc in 4th ch from hook and each ch across — this creates a long strip of dc. Row 2: sc across to tidy edge. Fasten off leaving long tail.
- Starting at one end, roll strip tightly to form a rose. As you roll, stitch the base of the spiral with the long tail through the strip and the band to anchor the rose — sewing into the band as you go makes assembly neat. For a fuller rose, make a second strip and roll inside first then sew.
Alt rose — layered petals
- MR, ch1, 6 sc in MR (6). R2: ch 3, sl st in next st × 6 to make loops. For each loop: (sc, hdc, 3 dc, hdc, sc) to form petals. Make 2–3 petal rounds and sew them centered.
C — Leaves (make 2–3)
- Ch 8, sc in 2nd ch from hook, hdc, dc, hdc, sc across; ch 1; sl st to base to create a small leaf. Sew leaves beneath rose on band.
D — Fastening
- Option 1 (button): At one end of band, leave a loop of ch 6 (or make an adjustable loop) and at other end sew the button through the band or to a small felt backing and sew to band. When wrapped, slip loop over button.
- Option 2 (magnet): Sew small sew-in magnet disc into the band ends (one magnet on each end, with felt backing sewn between magnet and yarn to protect fabric). Test hold strength to ensure it secures the curtain.
E — Finishing
- Weave ends, block rose lightly (pin petals open and mist). Sew felt backing behind rose if you want a tidy underside.
Variations
- Make rose in gradient pinks for ombré effect.
- Add a short tail of pearls or beads sewn under rose for vintage glamour (avoid if young kids present).
2. Crochet Vintage Curtain Tieback Pattern
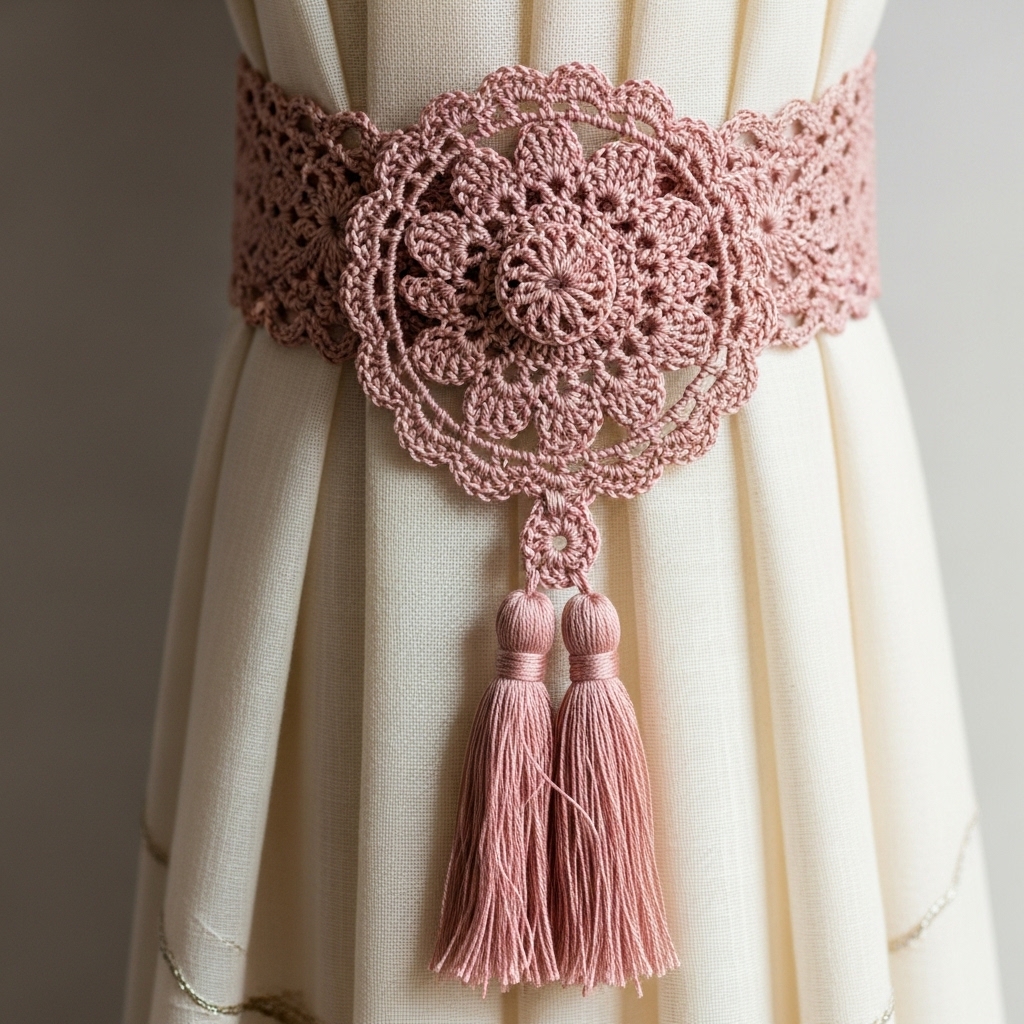
Lacy, Victorian-inspired tieback with a central medallion and delicate tassels. Uses lace stitches and a button loop closure.
Vibe: antique, lacy, elegant
Skill level: intermediate → advanced (lace + tassel work)
Sample finished size: medallion ~4 in diameter; band length ~18–22 in depending on curtain thickness
Materials
- Mercerized crochet thread #10 or fingering cotton (soft antique rose or dusty pink) — ~150–250 yd.
- Hook: 1.75–2.5 mm (thread) or 2.5–3.5 mm (fingering).
- Small decorative button; lightweight tassel cap or make crocheted tassels.
Stitches used
- Picots, shells, chains, small clusters, sc for foundation.
Step-by-step
A — Central medallion (classic lace round)
- MR, ch3 (counts as dc), work 11 dc in MR — join (12 dc). R1 done.
- R2: ch 3, skip 1, dc in next around to form airy ring (adjust to pattern). R3: Into each ch-3 space, work a small shell: (sc, hdc, 3 dc, hdc, sc). Continue for 4–5 rounds increasing gently to reach ~4 in diameter. Block heavily to open lace.
B — Attach band
- From medallion edge, pick up stitches (or work a chain extension) to create two bands: at opposite sides of the medallion pick up about 45–60 sc worth for each band (compute with your gauge). Example: if band should be 18 in and gauge 6 sc = 1 in → 6×18 = 108 sc foundation. You can chain 108 and work sc rounds to create a sturdy strap, or crochet a thin cord (i-cord) and then widen into a flat strap by picking up stitches. For thread work, a double strand cord may be preferable.
C — Tassels
- Make 2 small tassels in matching pink: wrap thread around a small card (size sets tassel length), tie top with thread, fold and trim bottom, wrap neck with thread to neaten. Attach tassels to medallion bottom or band ends.
D — Closure
- Sew a small vintage button on one band end and make a picot loop on other end: ch 8, join to create a loop and sc around to secure. The picot loop slips over button.
E — Finishing
- Block as needed, sew felt behind medallion for stability, and secure button to felt.
Variations
- Add a tiny cameo or vintage button to medallion center for extra authenticity.
- Use metallic thread for a faint gilded edge.
3. Crochet Bell Flower Curtain Tieback Pattern
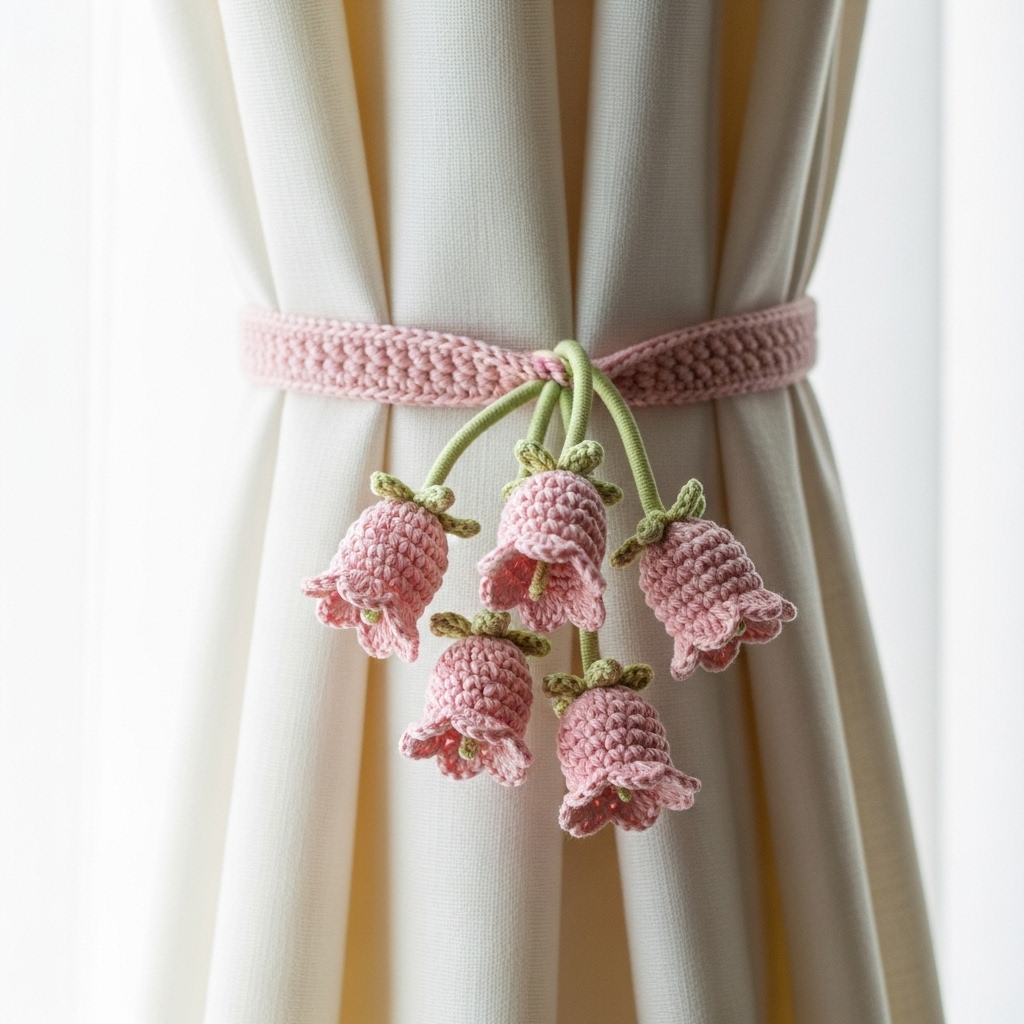
A charming cluster of bell flowers (campanula) on a wrapped band — airy and botanical.
Vibe: springy, organic
Skill level: confident beginner → intermediate
Sample finished size: each bell ~1.25–1.5 in long; cluster of 3–5 bells; band length ~16–20 in
Materials
- Sport/DK cotton in blush pink and pale green for stems — ~100–150 yd.
- Hook: 3.0–3.5 mm.
- Small jump ring or button closure (or make wrap style).
- Tapestry needle.
Stitches & motifs
- Bell made with small cone shape (worked in rounds increasing then decreasing), tiny French knot pollen (embroidery) optional.
Step-by-step
A — Band base
- Make a narrow band as in Pattern 1: compute required stitches (example: gauge 5 sc = 1 in; for 18 in → 90 sc). Chain 90 and join. Work 6–8 rounds sc for sturdy base. Optionally work in spiral for smooth join.
B — Bell flower (make 3–5)
- MR, ch1, 6 sc in MR. R2: inc around → 12. R3: sc1, inc → 18. R4: sc2, inc → 24 (this forms a small cup). R5: sc around 24 to build side height. R6: sc2, dec around → 18. R7: sc1, dec around → 12. R8: dec around → 6; stuff very lightly or leave hollow (bell blossoms are often open). Fasten off leaving tail for sewing. Turn bell upside down and sew small picots or a decorative scallop to bell edge: sc in each st, ch3, sl st in same st to form a frilly edge.
- For a tapered bell, on R5 add a round of dc in each st before beginning decreases for a flared lip.
C — Stem & assembly
- Cut a short length of green yarn and sew through bell top to create a short stem. Attach bell stems to band in a small cluster (3 bells grouped, 2 trailing) sewing the base of stems securely through the band into multiple passes. Arrange cluster to sit nicely when curtain is tied.
D — Fastening
- Make the tieback long enough to overlap and tie in a loose bow — no hardware required. For a cleaner look, finish with a small snap or button.
E — Finishing
- Slightly block bells by pinching rims open and misting lightly if using cotton.
Variations
- Make bell cluster asymmetric for a natural look (one long trailing bell + two short).
- Add tiny embroidered leaves with stem stitch along band.
4. Crochet Bohemian Leaf Curtain Tieback Pattern
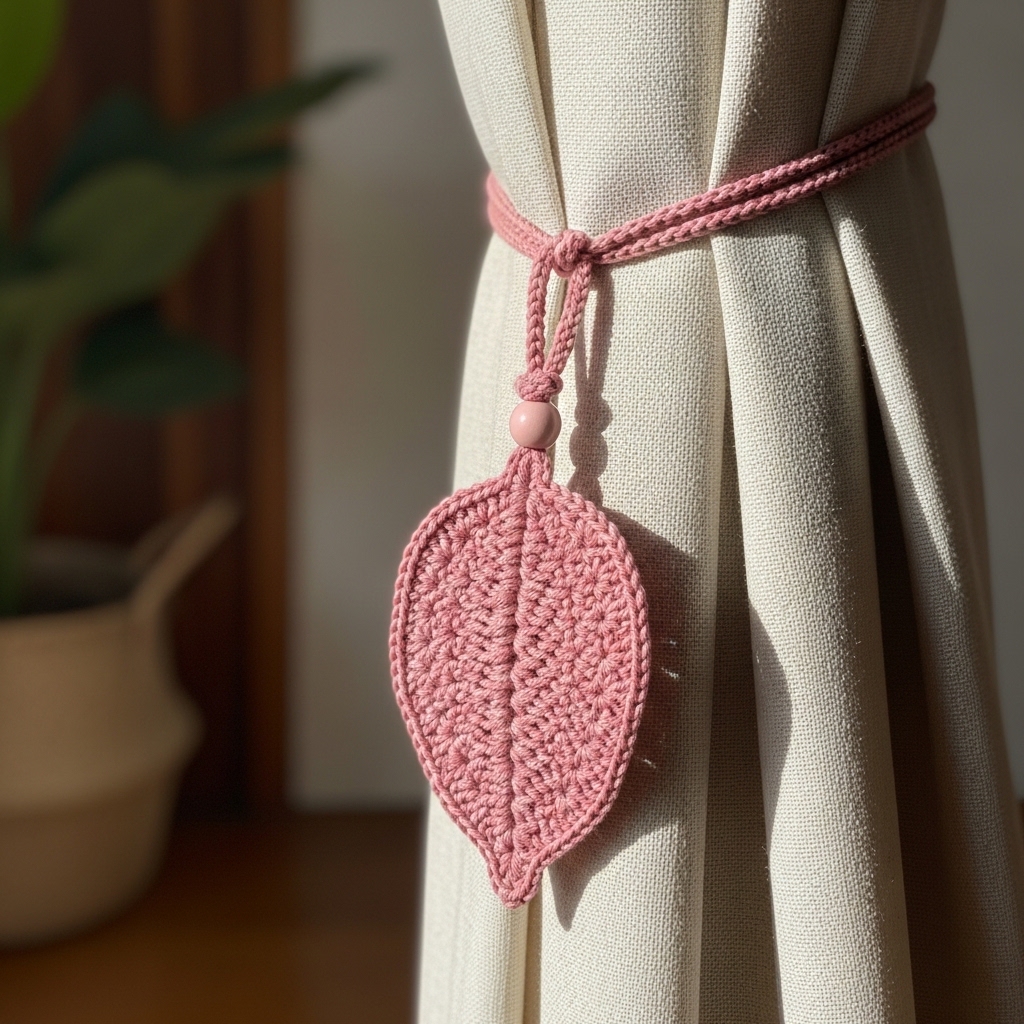
An organic, boho strand of layered leaves and beaded accents — great for natural, earthy rooms.
Vibe: boho, textured, earthy pinks
Skill level: confident beginner → intermediate
Sample finished size: leaves ~2–3 in long each; strand length variable (18–30 in)
Materials
- DK cotton in dusty rose, and a lighter/darker pink for leaf accents — ~150–250 yd.
- Hook: 3.5–4.5 mm.
- Small wooden or pink beads (optional).
- Leather cord or crocheted cord for sturdier wrap (optional).
Stitches & motifs
- Leaf shaped by chains and shaped rows; openwork leaf uses chain spaces and decreases for tapered tips.
Step-by-step
A — Base cord (wrap)
- Option 1 (crocheted cord): make an i-cord / chain and sc back method: ch 80 (for 20 in), sc across 5–10 rounds until cord is about 0.5–0.75 in wide. Option 2: use leather cord covered with surface crochet (pick up loops and sc over). Secure ends.
B — Leaves (make 8–12)
- Leaf pattern (flat): ch 16. Row 1: sc in 2nd ch from hook, hdc, dc, tr, dc, hdc, sc across — turn. Row 2: dec at tip to taper: sc in first few sts then dec across center and work decreasing rows back to create tapered tip. Alternatively use short-row shaping: build one side of leaf then mirror on other side by working along foundation chain back. Block leaves to shape.
- Slightly vary sizes by changing starting chain length (e.g., ch 12 for small leaf, ch 20 for large).
C — Assembly
- Arrange leaves along cord and stitch bases to cord securely; optionally add small wooden or pink beads between leaves threaded onto cord before sewing. For more boho effect, tie leaf clusters to cord using small loops (wrap with thinner yarn).
D — Finishing & mounting
- For a wrap style, make cord length long enough to tie a loose bow or knot. For magnetic/button closure, add small loops or a magic knot detail at ends to hook onto pin/button.
E — Styling
- Drape tieback loosely for a boho look or tie into a decorative knot. Leaves can hang on both sides for a cascading effect.
5. Crochet Adorable Bunny Curtain Tieback Pattern
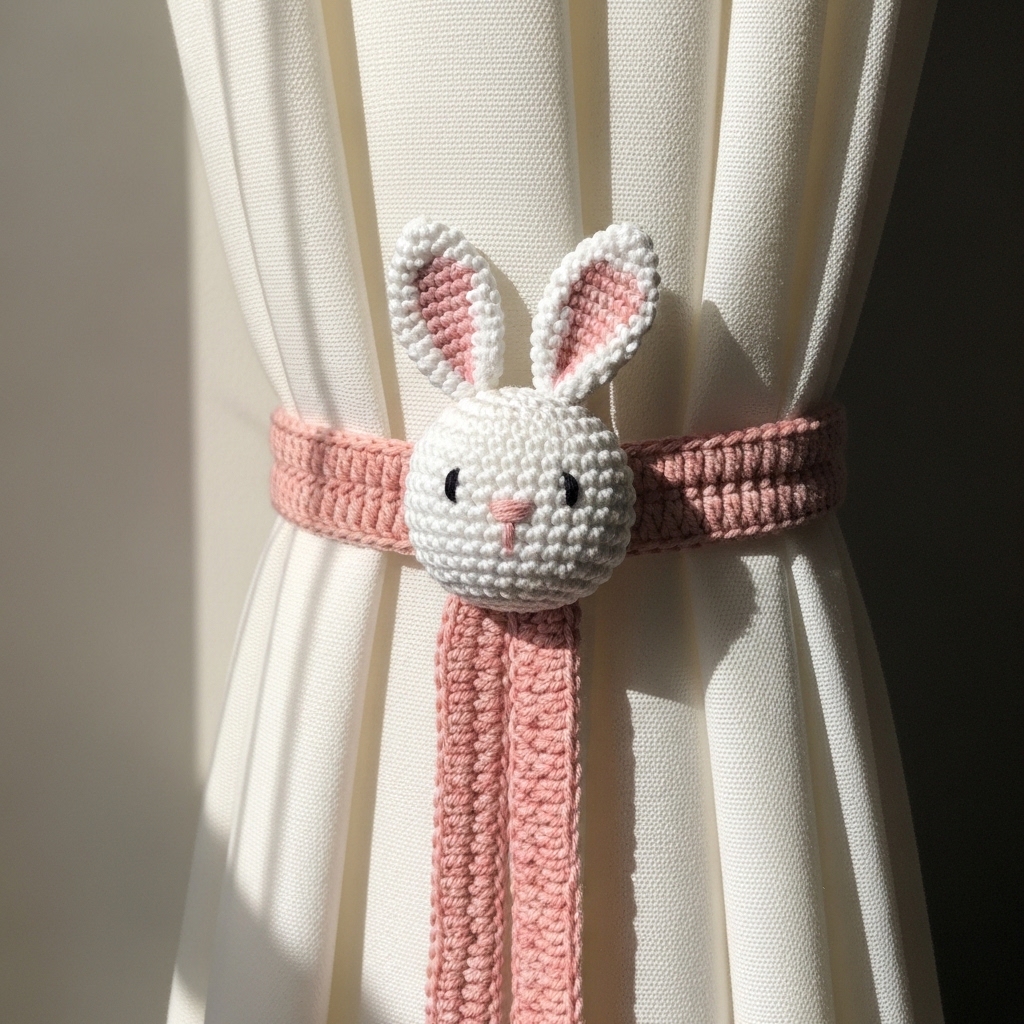
Sweet bunny motif perched on a practical band — perfect for nurseries or playful rooms.
Vibe: whimsical, kid-friendly (avoid small beads for safety)
Skill level: intermediate (small amigurumi + band)
Sample finished size: bunny head ~2.5 in tall (ears up); band length ~16–20 in
Materials
- Sport/DK cotton yarn in blush pink for band, white/cream and pink for bunny — ~150 yd total.
- Hook: 2.75–3.5 mm for amigurumi detail; 3.5–4.0 mm for band.
- Safety: For kid’s rooms, use embroidered eyes (no safety eyes) and avoid small beads. Use sew-in snap or button closure for adults.
Stitches & parts
- Bunny head (amigurumi sphere), ears (flat or cone), tiny embroidered face, optional body or paw.
Step-by-step
A — Band
- Make sturdy band as previous: compute wrap circumference and chain accordingly. Work 6–8 rounds of BLO hdc for a stretchy cuff; approx 16–20 rounds will make a 1–1.5 in tall band.
B — Bunny head
- MR, ch1, 6 sc in MR (6). R2: inc around → 12. R3: sc1, inc → 18. R4: sc2, inc → 24. R5–R8: sc around 24 (build height). R9: sc2, dec → 18. R10: sc1, dec → 12. Stuff lightly and close with dec. Fasten off leaving tail.
C — Ears (make 2)
- Small cone ear: MR, 6 sc; R2: inc around → 12; R3: sc around 12; R4: sc around 12 then flatten base and sew onto head. For floppy ears, make a flat oval and sew along base allowing ear to fold.
D — Face & expression
- Embroider a tiny “v” nose and simple smile with pink embroidery floss. French knots or tiny stitches create safe eyes for children. Add tiny blush with fabric-safe pastel or embroider small circles.
E — Attachment
- Sew bunny head to center of band (top center). Reinforce with several passes of yarn through head base and band to secure. For safety, sew felt circle behind as backing and tack pin or snap through felt.
F — Finishing
- If using for a child’s room, make tieback slack (no small detachable parts) and secure with a sewn loop/button closure so it cannot detach into small pieces.
Variations
- Make a full little bunny with paws that wrap around curtain for a hugging effect.
- Make matching bunny tassels or tiny carrot appliqués on band.
Final tips
- Attachment durability: sew closures and motif bases with multiple passes and knot securely. If using snaps or magnets, sew felt backing to protect fabric and keep hardware from abrading curtain.
- Mounting to wall: if you want the tieback anchored to the wall (rather than around curtain), install small decorative hooks (cup hooks) and loop the tieback around the curtain to the hook. Ensure hook is rated for the curtain weight.
- Laundering: remove tiebacks or use detachable hardware for washing. Cotton and acrylic tiebacks are usually machine-washable on gentle; block back to shape. For thread/lace pieces use hand-wash and pin/block. Velvet/plush should be spot-cleaned or hand-washed.
- Child safety: avoid small glued beads or detachable charms for children’s rooms. Use embroidered details instead.
conclusion
These five tieback patterns give you a range of looks — from the romantic Rose, through lacy Vintage, whimsical Bell Flower and Bunny, to the relaxed Bohemian Leaf. All are easy to adapt: change the yarn weight for a chunkier or more delicate look, add or remove motifs to taste, and choose a closure (button, magnet, snap, tie) that suits your curtains and lifestyle.