Handmade crochet necklaces are small, fast projects with big style payoff. They’re perfect for using scraps of yarn, practicing neat finishing, and experimenting with texture, color and hardware. Below are five beginner-friendly designs — Flower Necklace, Bead Necklace, Amira Lariat, Loopy Worsted Necklace, and Bow Tassel Necklace — each with full materials lists, sizing/customization guidance, clear step-by-step instructions for the body + strap + closure, finishing notes, and styling variations. All patterns use US crochet terms.
Read the general notes first (tools, safety, and terminology), then pick a design and make one today.
Quick general notes (read this first)
Tools & notions
- Hooks: 1.75–8.0 mm depending on yarn and design.
- Notions: tapestry needle, small pliers (for jewelry hardware), jump rings, lobster clasps or magnetic clasps, small beads, scissors, stitch marker.
- Optional reinforcement: thin jewelry cord, fishing line, or fabric glue for securing knots.
Yarn & materials
- Delicate necklaces — crochet thread #10 or lace/fingering yarn with small hook (1.75–2.5 mm).
- Everyday necklaces — DK/worsted yarn (3–4) with 3.5–5.5 mm hook.
- Statement/loopy — worsted or bulky yarn with large hook (6.0–8.0 mm).
- Cotton gives structure; rayon/silk drapes; acrylic is durable and washable.
Safety
- Avoid small beads or detachable hardware for children’s jewelry.
- Secure knots and add a drop of clear jewelry glue on knots that hold hardware.
- If giving to a child, embroider details and avoid metal parts.
Abbreviations (US)
- ch = chain
- sc = single crochet
- hdc = half double crochet
- dc = double crochet
- tr = treble (triple) crochet
- sl st = slip stitch
- st(s) = stitch(es)
- MR = magic ring
- inc = increase (2 sc in same st)
- dec = decrease (sc2tog)
Gauge
- Not critical for necklaces; focus on look. Tighter stitches = rigid cord; looser = drapey cord.
1. Crochet Flower Necklace Pattern
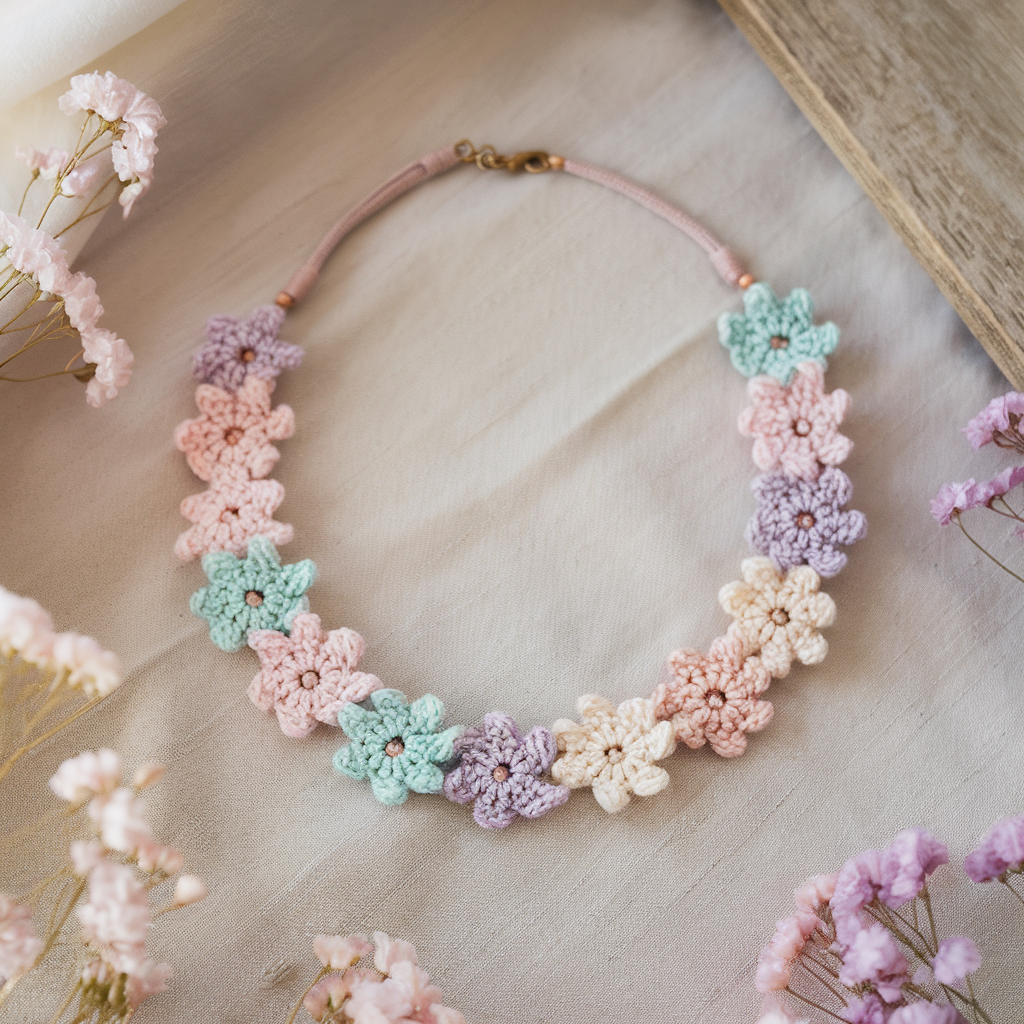
A delicate string of little flowers joined into a necklace. Make it as long or short as you like.
Materials
- Crochet thread #10 or lightweight yarn (or fingering) — ~50–100 yds total
- Hook: 1.75–2.5 mm for thread, 3.0–3.5 mm for lightweight yarn
- Small beads for centers (optional) — 6–12 beads (4–6 mm)
- 1 lobster clasp + 2 jump rings (or cord ends)
- Tapestry needle, scissors, clear-drying craft glue (optional)
Finished size guide
- Flower diameter (thread): ~¾–1″
- Standard necklace lengths: choker 14–16″, princess 16–18″, matinee 20–24″. Plan number of flowers by dividing target length by flower width and allowing small joining gaps (e.g., 18″ / 0.9″ ≈ 20 flowers).
Stitches used
MR, ch, sc, hdc, dc, sl st, picot (optional)
Flower motif (one flower)
- MR, ch 1, work 6 sc into MR. Pull ring tight (6).
- ch 2, sl st into next sc — repeat around to form 3 little loops (alternatively ch 1 for 6 loops if you want more petals). (If you used 6 loops, you’ll get 6 petals.)
- In each loop: (dc, hdc, dc) (or 5 dc for fuller petals). Sl st to base and fasten off leaving a 10–12″ tail for joining.
Optional center bead: sew a bead through the center by passing the tapestry needle up from the back, through bead, and back down; secure with a few stitches.
Join method (edge-to-edge)
- Make required number of flowers. Lay them in order. Using tails, sew adjacent petals together with small whipstitches through petal bases so flowers are connected edge-to-edge. Keep stitches small and hidden behind petals.
- Alternative: join with a tiny chain link between flowers — attach a 3-ch loop at joining point and sl st to next flower center so there is a small chain between flowers for movement.
Strap & Closure
Option A — Built-in short cord
- Attach a short chain of 6–10 ch at each end of the flower string (worked with thread/yarn through last flower). Fold chain into last flower and sew securely; attach a jump ring to chain end, then clasp.
Option B — Reinforced cord
- Make a thin crocheted tube (sc in continuous rounds over 6–8 ch and slip-stitched into tube) long enough for necklace ends. Sew each tube end inside terminal flower and use jump rings/clasps.
Finishing
- Weave ends into petals or inside cord. Add a drop of clear glue at joining knots. Block lightly to smooth petals: pin flat on towel and mist.
Styling variations
- Single large center flower as pendant + smaller flowers as side accents.
- Two-tone flowers: petal color + contrasting center bead.
- Add a gold chain extender for adjustable length.
2. Crochet Bead Necklace Pattern
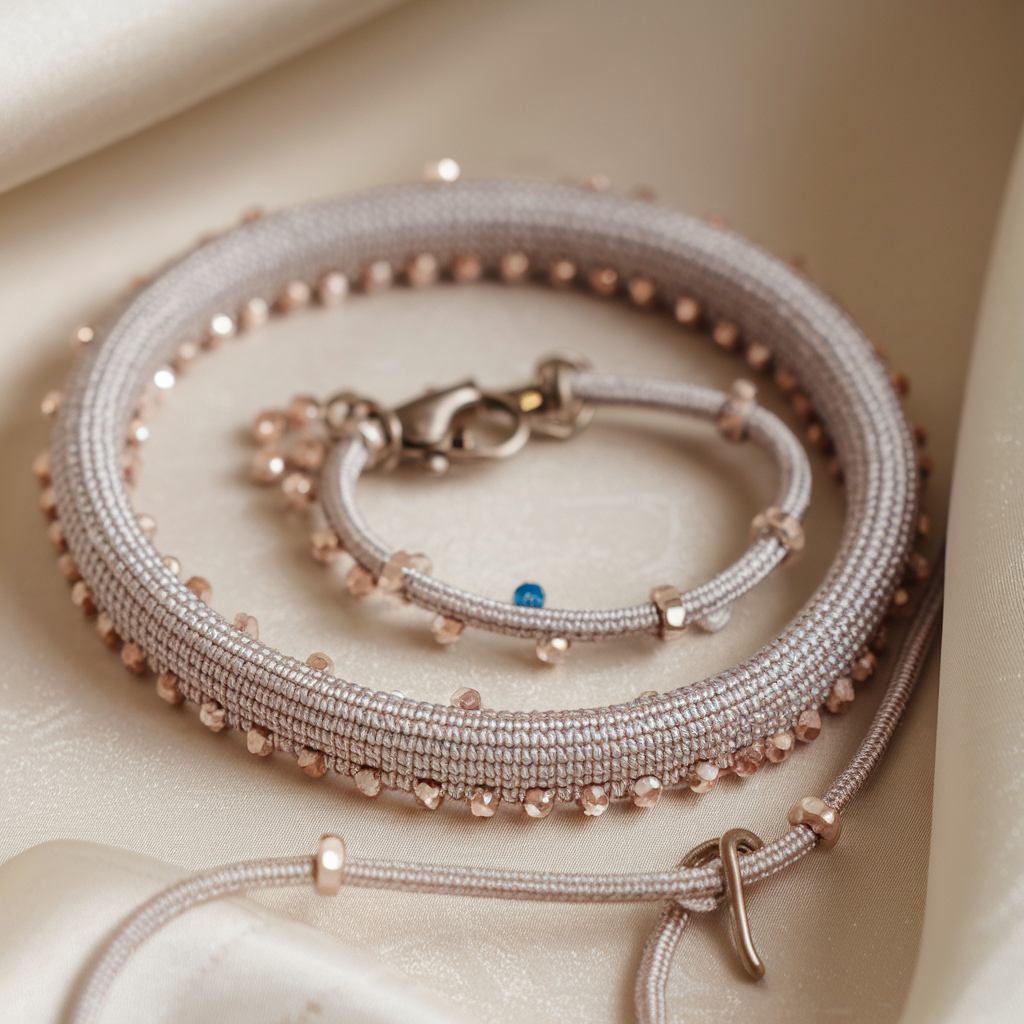
This pattern integrates beads into the crochet cord so beads appear embedded in the fabric.
Materials
- Fine yarn/cord or crochet thread #10; beads pre-strung on the yarn (or with a bead that slides over yarn) — about 30–40 beads depending on design
- Hook appropriate for yarn (1.75–3.5 mm)
- Lobster clasp + jump rings
- Tapestry needle
Size guide
- For an 18″ beaded strand, plan bead spacing (e.g., bead every 3–4 stitches). Pre-calc bead count by dividing length by spacing plus bead width.
Technique overview
- Pre-string beads onto the yarn before crocheting. Slide beads into position and work the stitch so bead gets trapped in the stitch.
Step-by-step (simple single-strand with beads)
- Pre-string beads: thread chosen beads onto yarn before starting.
- Chain foundation to desired length minus allowances for clasp (e.g., chain 120 for a fairly dense chain — adjust by testing).
- Row 1: sc in 2nd ch from hook across to create a base round (this makes a cord-like strip). If you want a tube, work sc in continuous rounds into the same small number of chains to build a tube.
- To place a bead at a stitch: slide bead up close to hook, insert hook into target stitch, yarn over and pull loop through so the bead sits snug against the fabric, then complete the sc (or dc) as normal — bead is now anchored in that stitch. Continue placing beads at the intervals you already planned.
- When done, finish ends with a little loop of chain (3–4 ch) or a small crocheted tab, sew a jump ring into that tab, and attach the lobster clasp.
Tube method (bead crochet rope)
- Work a circular cord: ch 6, join into ring (no twist), sc in each chain around; continue sc around in spiral (do not join) building length; slide bead up before working the stitch to expose bead on external side of rope. This creates a richly beaded rope.
Reinforcement
- For heavy beads, thread a thin jewelry cord through center of the crocheted tube before adding beads — this prevents the cord from sagging and protects yarn from abrasion.
Finishing & tips
- Use a small crimp bead or knot inside a metal cord end to attach jump rings if you want a polished finish.
- Use matte wooden beads + cotton cord for a boho look; glass pearls + silk-blend yarn for a dressy look.
3. Crochet Amira Necklace Pattern
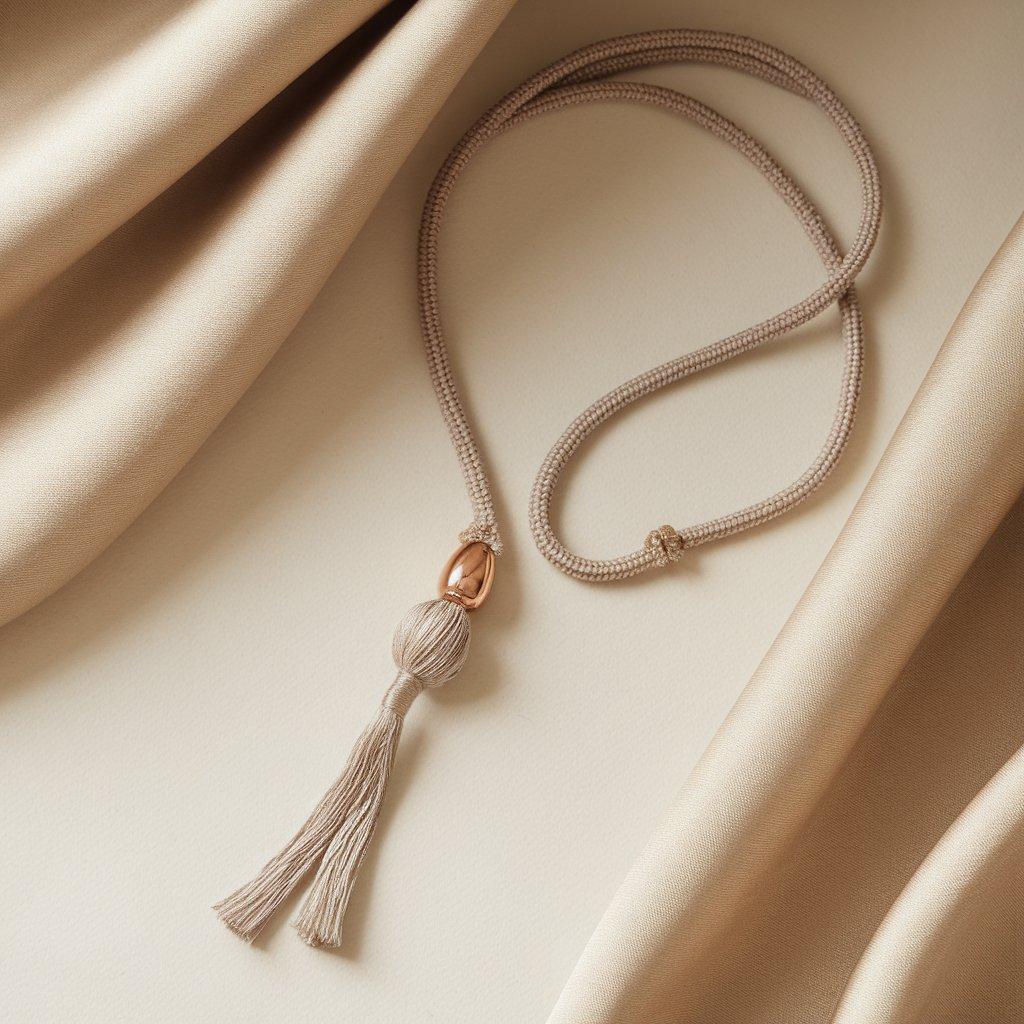
A long, simple lariat (Amira) that slips through a ring or bead to adjust the drop. Minimalist and elegant.
Materials
- Smooth DK, sport, or silk-blend yarn; or narrow cord — ~100–150 yds (long cord)
- Hook: 3.5–4.5 mm (or appropriate for yarn)
- Large-holed bead, ring, or stone bead with big hole for the slider (20–30 mm)
- Small tassel or decorative bead for ends (optional)
- Tapestry needle, scissors
Finished size
- Typical lariat length: 36–48″ (total cord length before folding/looping). Plan according to desired wrap options.
Cord methods (choose one)
Method A — Crochet tube (round cord) — more polished
- Ch 6. Join into ring (no twist).
- Rnd 1: sc in each ch around (6 sc). Place marker at start and work in spiral.
- Rnds 2–end: sc in each st around until cord reaches desired length. Keep tension firm for a neat tube.
- Fasten off and weave in tail inside the tube; make opposite end identical.
Method B — Flat sewn strip — quicker
- Ch chain to desired length (longer with ch because it stretches).
- Work 2–4 rows of sc back and forth and then fold strip and whipstitch along the long edge to make a flat cord.
Slider & finishing
- Slide the large-holed bead / ring onto the cord before you secure ends (or choose a ring that opens/closes).
- Optionally add a tassel or decorative bead to one or both ends: make a tassel and secure with yarn, or thread a bead and tie a knot below it.
- Wear by passing one end of the lariat through the ring and adjusting the drop.
Styling options
- Add small spacer beads along cord for accent.
- Make a double-wrap lariat by shortening cord to 24–30″ and looping twice with a longer drop.
Tips
- If cord is slippery, a glued knot under the bead helps prevent accidental slipping.
- For a more finished look, use metal crimps and a short chain at ends to attach a lobster clasp optionally.
4. Crochet Loopy Worsted Necklace Pattern
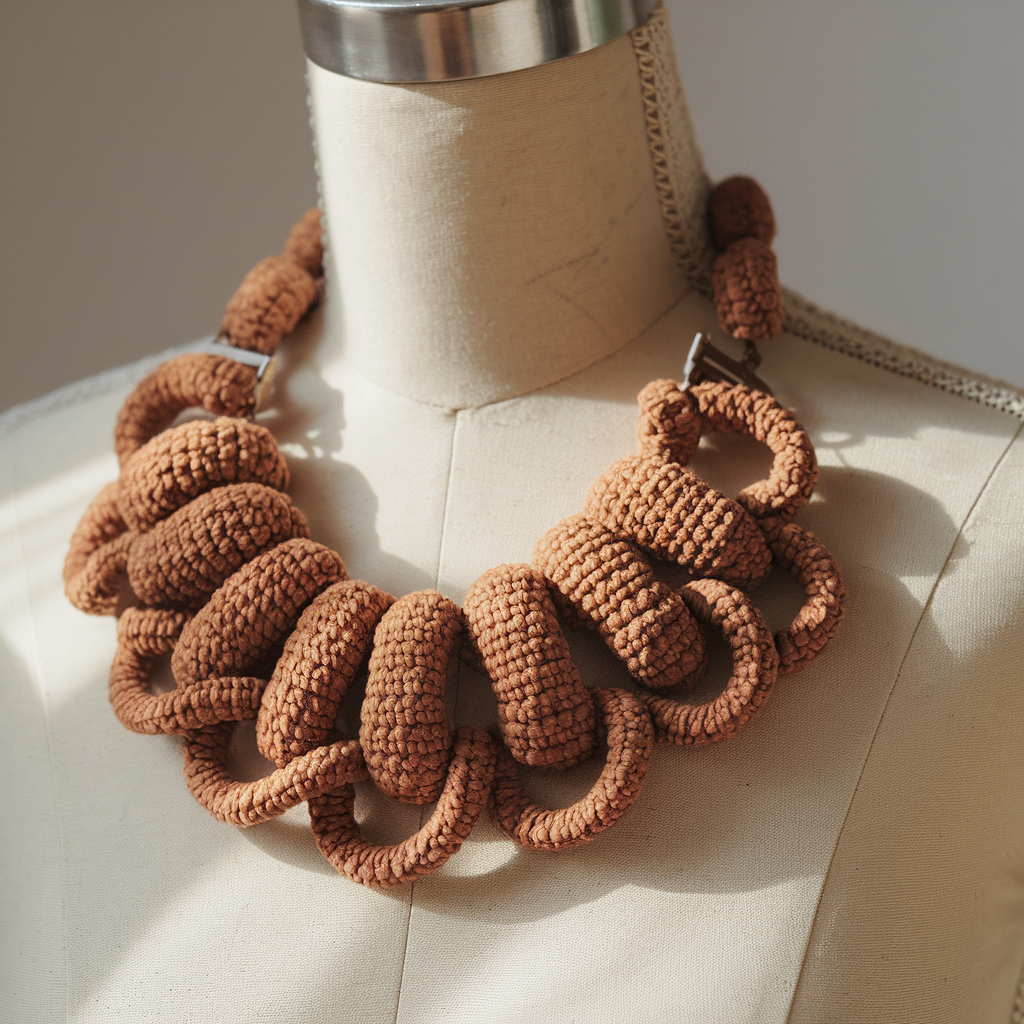
Big loops made with alternative loop stitch give big visual texture — very quick to make.
Materials
- Worsted or bulky yarn (cotton or acrylic) — 150–250 yds depending on width and length
- Large hook: 6.0–8.0 mm (for big decorative loops)
- Lobster clasp + jump rings or toggle clasp
- Tapestry needle
Finished size
- Collar length: 16–20″ (for a single-strand collar). Make it longer for multiple loops or a multi-strand look.
Stitches used
ch, sc, loop stitch (loopy stitch), sl st
Loop stitch technique (long loop variety):
- Insert hook into target stitch, yarn over and pull up a long loop (measure loop length with finger for consistency), keep loop on hook, complete sc in same stitch — long loop remains on right side. The next round secures the bases of loops.
Step-by-step
- Chain foundation for length plus allowances (e.g., ch 40–48 for a collar depending on gauge). Join into a loop or work flat and seam.
- Round 1: sc in each chain across/around to make a sturdy base.
- Round 2 (loop round): insert hook into next st, pull up long loop (~1–1.5″ or your chosen length), hold loop on front of work, complete sc in same st — repeat across. Maintain consistent loop lengths by wrapping yarn around a small ruler or finger.
- Round 3: sc across to lock loop bases (work sc into the stitch where you created the loop and around loop base). Optionally, add a second loop round and repeat again to create puffier texture.
- Last round: sc tidy edge; make small tabs (3–5 sc) at each end to attach jump rings.
Closure
- Sew a small loop or chain at one end and attach a jump ring; sew opposite end into small leather or crochet tab to attach lobster clasp. For a clean finish, insert a short length of thin cord inside the last loop and crimp with a metal end cap.
Variations
- Make two or three short loop ropes and join as multi-strand necklace with spacer beads between strands.
- Use hand-dyed bulky yarn for painterly color effects.
5. Crochet Bow Tassel Necklace Pattern
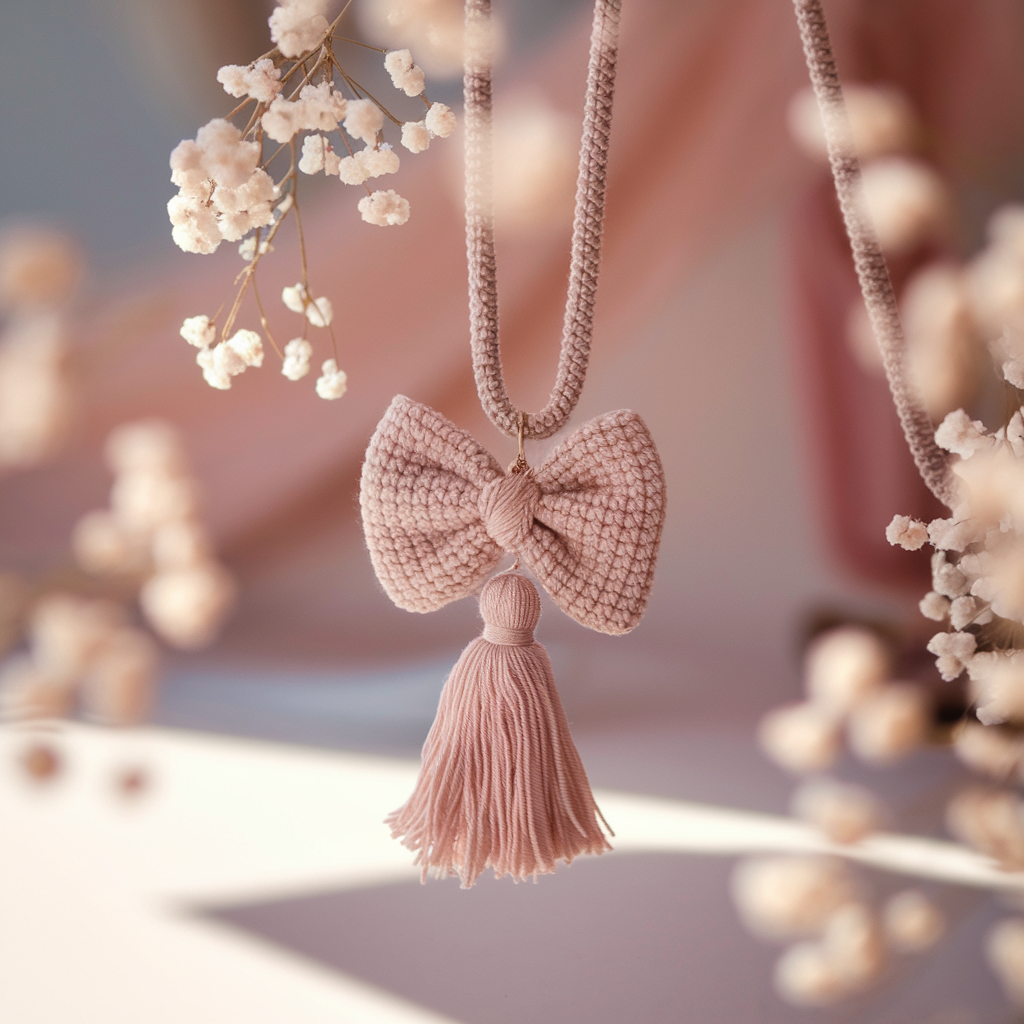
A central crocheted bow with a tassel drop — casual and sweet.
Materials
- DK or light worsted yarn for bow and tassel — ~100 yds total
- Hook: 3.5–4.5 mm
- Small metal jump rings, clasp, optional tassel cap
- Tapestry needle, cardboard for tassel winding
Finished size
- Bow width: 2–3″ (adjust by changing number of starting chains or yarn weight)
- Necklace length: 16–20″ with 2–4″ tassel drop
Components
- Neck cord (crocheted cord or chain)
- Bow applique
- Tassel
Neck cord (tube or chain)
Option A — crocheted tube (recommended for polished look)
- Ch 6, join into ring, sc in each ch and around for desired length; keep tension firm. Finish and weave tail inside cord.
Option B — chain + sc reinforcement
- Ch long cord to length, sc back along it to thicken.
Add jump rings/clasp to ends.
Bow (center piece)
- Ch 16 (or more for a wider bow). Row 1: sc in 2nd ch from hook and across (15 sc). Row 2–4: sc across (15 sc) — create a small rectangle.
- Fasten off leaving long tail. Fold rectangle into bow shape by wrapping center tightly with the long tail (wrap 8–12 times), then thread tail to back and secure with stitches. Catch tails inside bow to attach.
Cover band: ch 6, sc for 3 rows to make a small band to slide over bow center if you prefer a cleaner finish. Slide over center and sew ends behind.
Tassel
- Wind yarn around a 2–3″ cardboard 20–30 times (for fullness), slide off and tie top with scrap yarn. Cut bottom loops to make tassel fringe. Trim evenly.
- Sew or attach tassel to bottom center of bow using long tail; secure with a few tight stitches and a dab of glue. Optionally place a small tassel cap for metal shine.
Assembly
- Center the bow on the cord and sew the bow underside to the cord with small stitches; hide knot inside cover band if used. Add tiny reinforcing stitches and glue if desired.
Variations
- Make bow from delicate linen or silk blend for evening wear.
- Replace tassel with a metal charm for a mixed-media look.
- Attach bow as a removable pendant on multiple cords for outfit versatility.
Finishing & practical tips (applies to all necklaces)
Hardware attachment
- Crochet a small tab: ch 6, join, sc around 2–3 rounds, fold and sew to the end of the cord; insert jump ring and close. This hides the ring and prevents yarn from slipping.
- For heavy beads/metal, add thin jewelry wire or cord inside crocheted tube and secure at ends.
Knot & tail security
- Weave yarn tails into the inside of tubes or through multiple stitches; finish with a tiny drop of clear glue at hidden knots for long-term security.
Blocking & shaping
- Block delicate thread pieces lightly on a towel using pins and misting to set shape. Avoid heat if material is acrylic.
Care
- Most yarn necklaces are spot clean only. Use gentle wash and dry flat if needed. Avoid long soaking with metal parts.
Presentation
- For gifting, include a tiny care tag that recommends “spot clean, do not tumble dry” and any yarn fiber notes.
Conclusion
These five patterns give you quick wins and different styles to try:
- Soft romantic: Flower Necklace
- Minimal modern: Bead Necklace
- Chic & adjustable: Amira Lariat
- Bold statement: Loopy Worsted Necklace
- Cute & playful: Bow Tassel Necklace