Crochet keychains are one of the most satisfying small projects you can make because they are quick, fun, and instantly rewarding. Unlike larger crochet items that take days or weeks to complete, keychains can often be finished in a single sitting. This makes them perfect for beginners who want to practice stitches, try new shapes, or simply enjoy the joy of completing a full project without a long time commitment.
What makes crochet keychains especially exciting is how creative they can be. Even with simple stitches, you can turn yarn into adorable mini objects like desserts, animals, and everyday items. They are also perfect for gifting, selling at craft fairs, or decorating bags, backpacks, and zippers. Small doesn’t mean simple in personality—these tiny designs are full of charm.
In this guide, you’ll learn five beginner-friendly crochet keychain patterns that are easy to follow but still incredibly cute and stylish. Each one includes step-by-step instructions, helpful tips, and finishing guidance so your keychains look neat, sturdy, and gift-ready.
Quick Notes
Project type: Crochet keychains
Best for: Beginners, gifts, craft fairs, bag accessories, small decorative items
Skill level: Beginner
Hook size: 2.0 mm – 4.0 mm depending on yarn
Yarn weight: Lightweight cotton or acrylic yarn
Best yarn choice: Cotton yarn for neat stitches and durability
Finished size: 3–10 cm depending on design
Time to complete: 30 minutes to 2 hours per keychain
Helpful stitches: Magic ring, single crochet, increase, decrease, slip stitch, half double crochet, color changes, embroidery details, stuffing (for 3D designs)
Common Materials
- Cotton or acrylic yarn in multiple colors
- Crochet hook (small size for tight stitches)
- Polyester fiberfill (for stuffed designs)
- Keychain ring or lobster clasp
- Yarn needle
- Stitch markers
- Scissors
- Small safety eyes (optional for some designs)
For keychains, tight stitches are very important. You want the stuffing (if used) to stay hidden and the shape to stay firm over time. That’s why smaller hooks and cotton yarn are usually preferred.
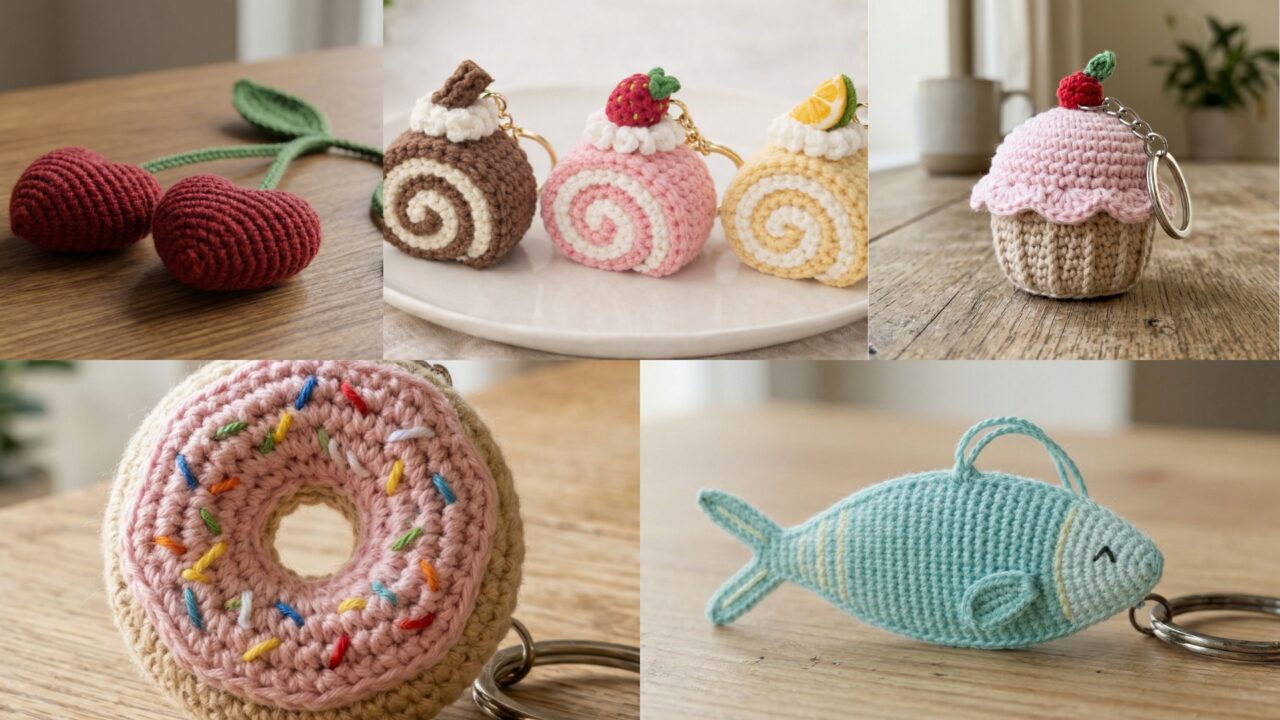
1. Crochet Cute Swiss Roll Keychain Pattern
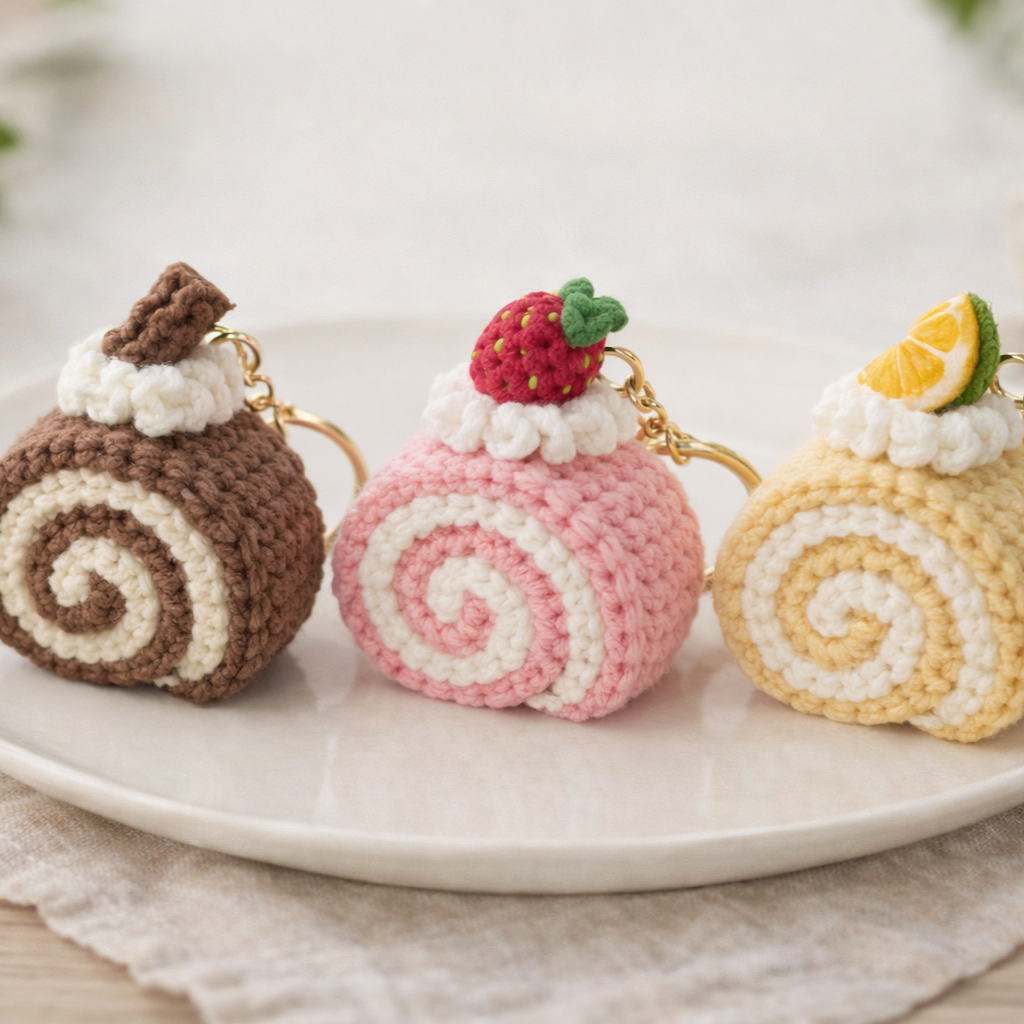
A Swiss roll keychain is a sweet, playful dessert-inspired design that looks like a tiny rolled cake. It’s beginner-friendly and perfect for practicing spiral shaping and simple color changes.
Step-by-step guide
Step 1: Choose dessert colors
Pick two or three colors that resemble a Swiss roll—cream, brown, pink, or strawberry tones work beautifully. The contrast between “cake” and “filling” makes the design more realistic.
Colors set the dessert theme.
Step 2: Start the cake base
Begin with a small rectangle using single crochet stitches. This will become the sponge layer of the Swiss roll. Keep stitches tight and even so the piece holds shape when rolled.
A flat base is essential for rolling.
Step 3: Add filling color
Switch to your filling color and continue crocheting a second layer or stripe section. This creates the swirl effect when rolled up.
The filling gives the illusion of cake layers.
Step 4: Roll the shape
Carefully roll the crocheted rectangle into a tight spiral, forming the Swiss roll shape. Adjust tension so it holds naturally without gaps.
Rolling creates the signature look.
Step 5: Secure the roll
Use a yarn needle to stitch through layers and secure the roll so it doesn’t unravel. Make sure it feels firm and stable.
Stability is important for keychains.
Step 6: Add decorative cream details
Optional: add whipped cream-like edges using small scallop stitches or embroidery on the top.
Step 7: Attach keychain ring
Securely attach the top of the Swiss roll to a keychain ring using strong yarn or thread.
Step 8: Final shaping
Fluff and adjust the swirl so it looks neat and evenly rolled.
Helpful tips
Make mini variations in different flavors—chocolate, strawberry, or vanilla—for a fun collectible set.
2. Crochet Cupcake Keychain Pattern
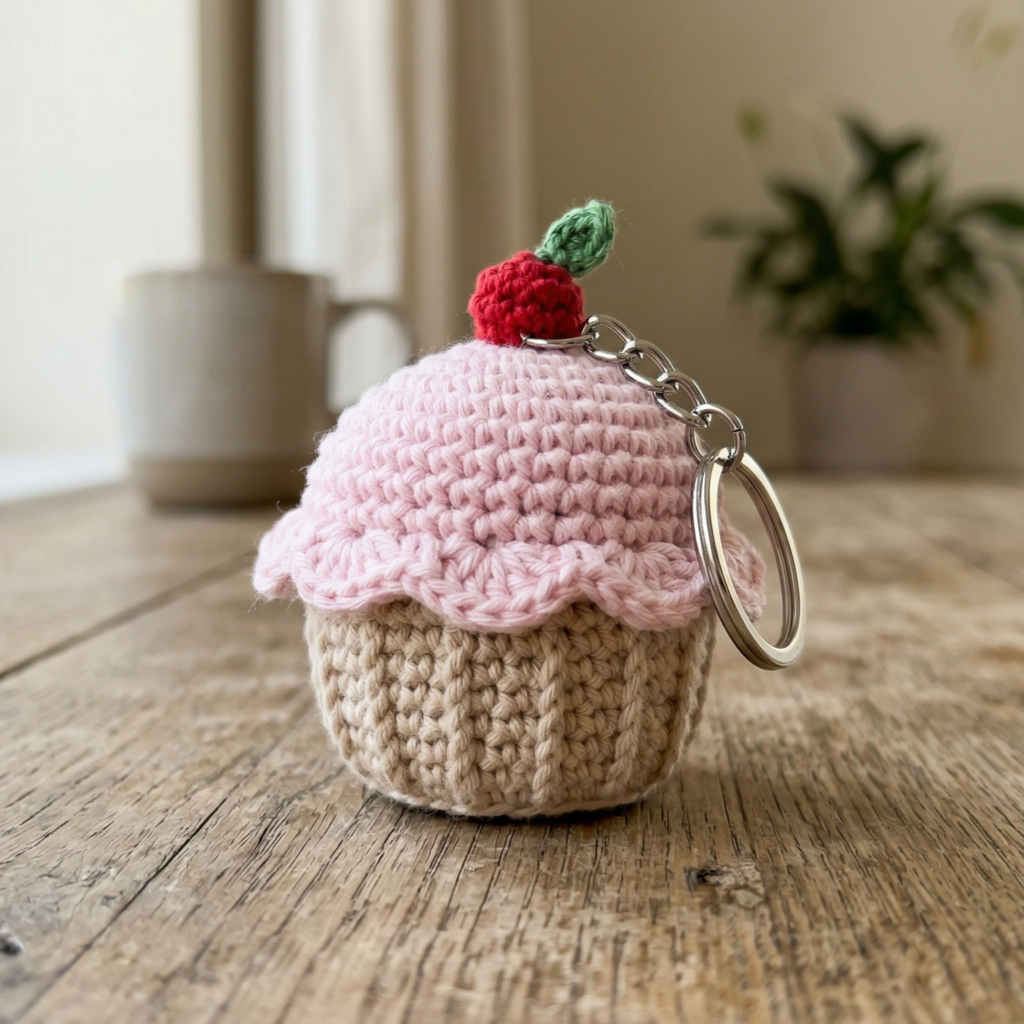
The crochet cupcake keychain is a classic beginner project that is cute, customizable, and easy to decorate. It combines a simple base with a textured “frosting” top.
Step-by-step guide
Step 1: Crochet the cupcake base
Start with a small round or oval shape using single crochet in the round. Increase evenly until you form a small dome or cup shape.
This forms the cupcake wrapper.
Step 2: Add ridged texture
To make it look like a cupcake liner, work vertical ridges or post stitches around the base.
Texture makes it more realistic.
Step 3: Create frosting top
Switch yarn color and crochet a ruffled or shell stitch dome to form frosting. Keep it slightly larger than the base so it overhangs naturally.
The frosting gives personality.
Step 4: Add stuffing (optional)
Lightly stuff the base and frosting if you want a 3D plush keychain.
Stuffing gives shape and softness.
Step 5: Decorate the top
Add tiny cherries, sprinkles, or beads for decoration. You can embroider details or sew small appliqués.
Decorations make it fun and unique.
Step 6: Join top and base
Sew the frosting onto the base securely.
Step 7: Attach keychain ring
Fix a strong loop at the top for durability.
Step 8: Shape and finish
Adjust frosting curls so they sit neatly.
Helpful tips
Try pastel frosting colors for a kawaii look or bold colors for a playful vibe.
3. Crochet Heart Cherry Keychain Pattern
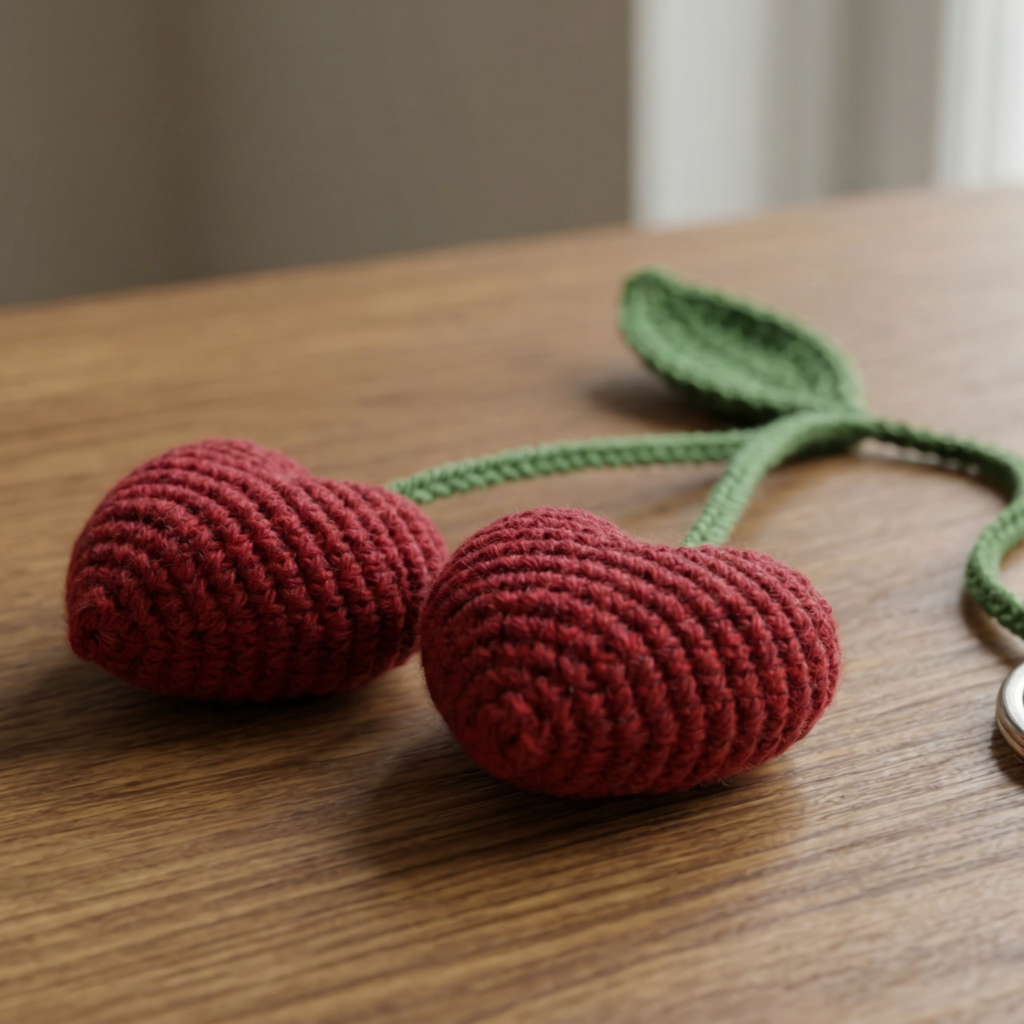
The heart cherry keychain is a sweet and romantic design featuring two small hearts or cherries connected by a stem. It is simple yet visually charming.
Step-by-step guide
Step 1: Make two small hearts
Crochet two identical small hearts using a basic heart pattern. Keep stitches tight so they hold shape.
The hearts are the cherries.
Step 2: Shape hearts evenly
Make sure both hearts are symmetrical for a balanced look.
Step 3: Crochet the stem
Use a thin chain of green yarn to form the cherry stem.
The stem connects the design.
Step 4: Add leaf detail
Crochet a tiny leaf shape or use embroidery to create a leaf near the top.
Step 5: Attach hearts together
Sew both hearts to the top of the stem so they look like cherries.
Step 6: Secure structure
Make sure all pieces are tightly sewn so they don’t loosen with use.
Step 7: Add keychain ring
Attach a loop at the top of the stem.
Step 8: Final adjustment
Shape hearts so they sit naturally side by side.
Helpful tips
Red yarn gives a classic cherry look, but pink or pastel versions feel extra cute.
4. Crochet Fish Keychain Pattern
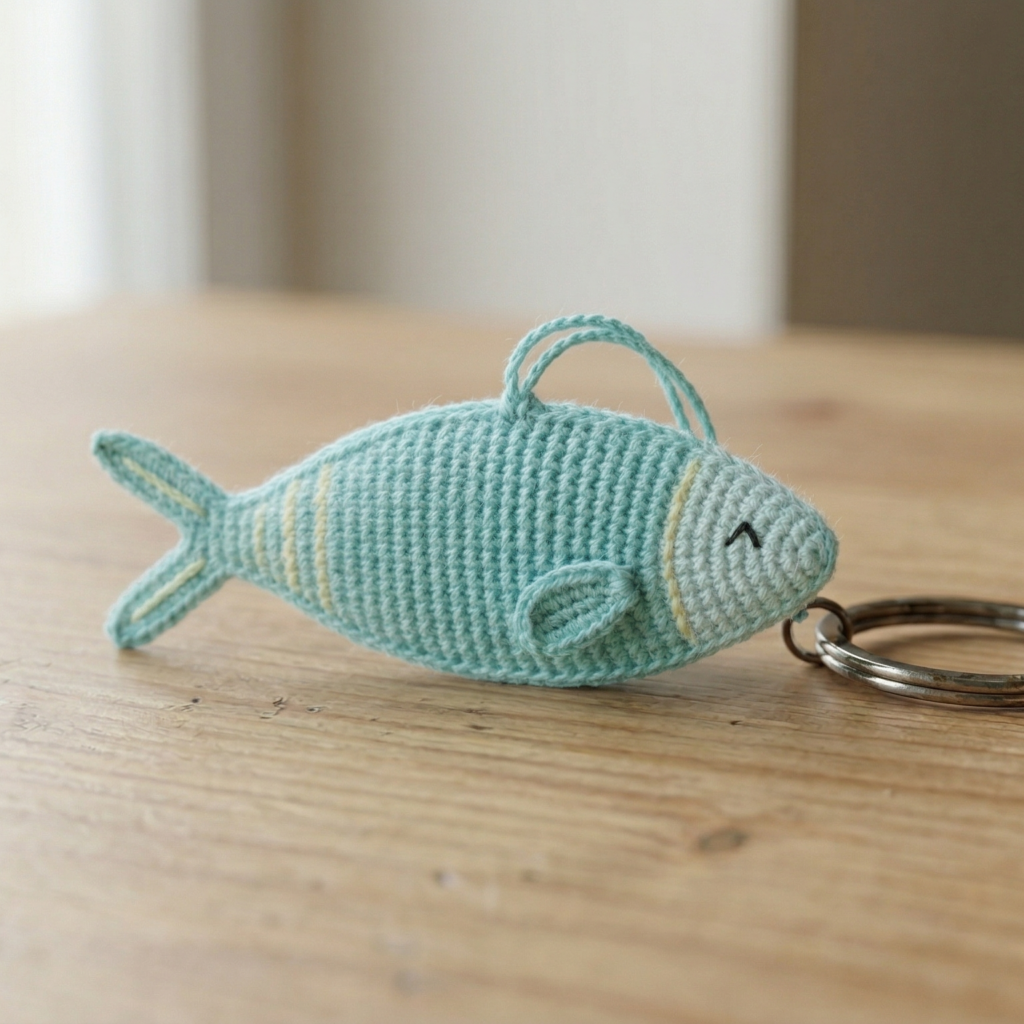
A crochet fish keychain is playful, simple, and great for beginners who want to practice shaping and color changes.
Step-by-step guide
Step 1: Start fish body
Begin with an oval shape using single crochet in the round. Increase until you reach the desired body size.
This forms the fish base.
Step 2: Shape head and tail
Slightly decrease one end for the head and create a tapered tail section.
Shaping gives character.
Step 3: Add fins
Crochet small triangular or fan-shaped fins and sew them onto the body.
Fins bring the fish to life.
Step 4: Add eye detail
Use embroidery or safety eyes to create a face.
Step 5: Add stripes or patterns
Use color changes or embroidery for decorative fish patterns.
Step 6: Light stuffing
Add a small amount of stuffing for structure.
Step 7: Attach keychain loop
Secure a loop at the top.
Step 8: Final shaping
Smooth edges and adjust fins.
Helpful tips
Bright colors make the fish keychain extra fun and eye-catching.
5. Crochet Donut Keychain Pattern
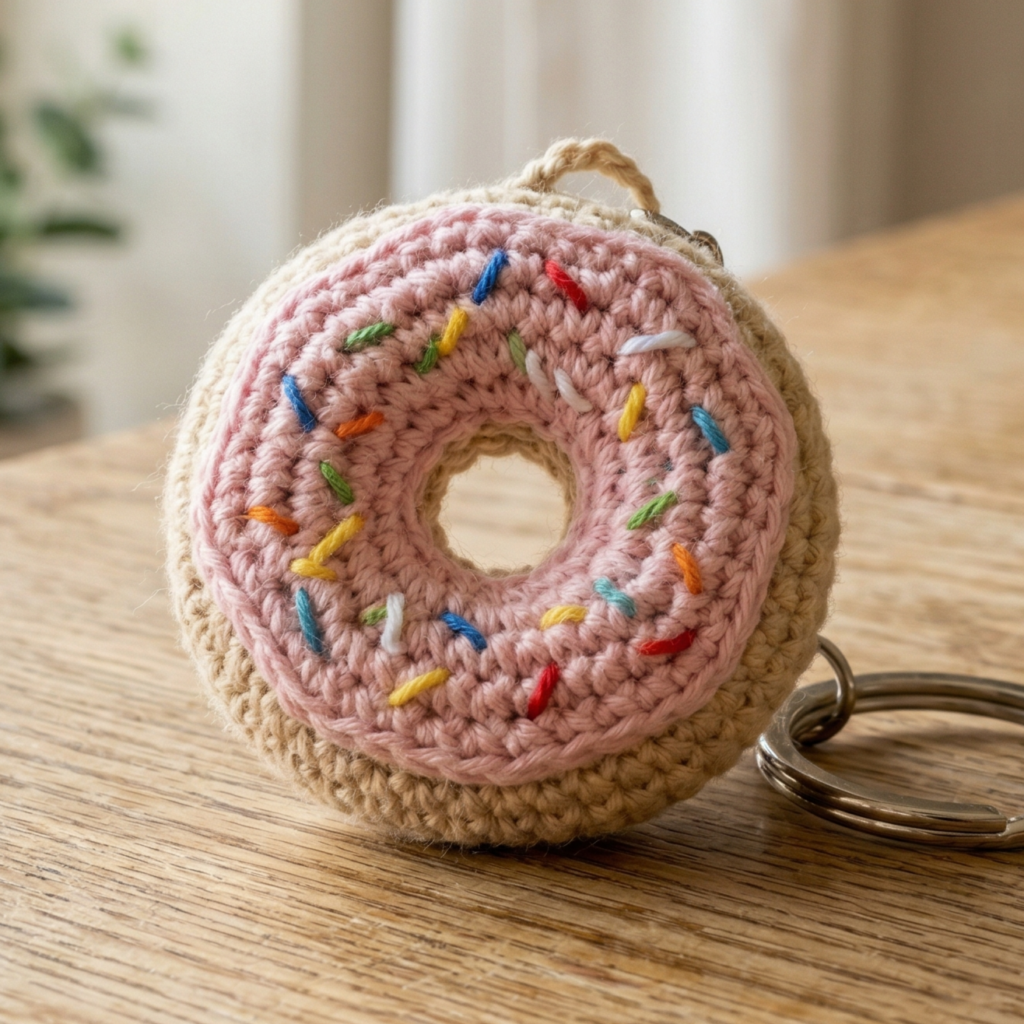
The donut keychain is one of the most popular crochet food designs because it is easy, round, and fun to decorate with “sprinkles.”
Step-by-step guide
Step 1: Crochet donut base
Create two circular rings using single crochet. Leave a hole in the center to form the donut shape.
This forms the donut body.
Step 2: Join circles
Sew both circles together, leaving space for stuffing.
Step 3: Add stuffing
Lightly stuff the donut to give it a soft shape.
Step 4: Close donut shape
Finish stitching and close the ring securely.
Step 5: Add icing layer
Crochet a flat or slightly ruffled circle in a contrasting color and attach it on top.
The icing defines the donut look.
Step 6: Add sprinkles
Use embroidery stitches or small yarn pieces to create sprinkles.
Sprinkles make it playful.
Step 7: Attach keychain ring
Secure a loop at the top.
Step 8: Final adjustment
Shape icing so it sits evenly.
Helpful tips
Chocolate, strawberry, and vanilla frosting colors all work beautifully for different donut styles.
Conclusion
Crochet keychains are the perfect small projects for beginners because they are fast, creative, and endlessly customizable. Each one gives you a chance to practice shaping, color changes, and simple assembly without feeling overwhelming.
These five designs—Swiss roll, cupcake, heart cherry, fish, and donut—show just how fun tiny crochet projects can be. They are perfect for gifts, craft fairs, or personal accessories that add charm to everyday items like bags and keys.
Once you start making crochet keychains, it’s hard to stop because every small idea can turn into something adorable. With just a little yarn and creativity, you can create a whole collection of tiny handmade treasures that people will love.