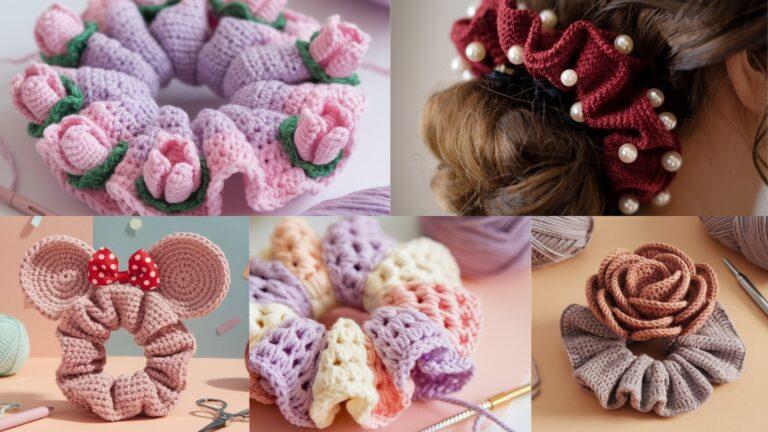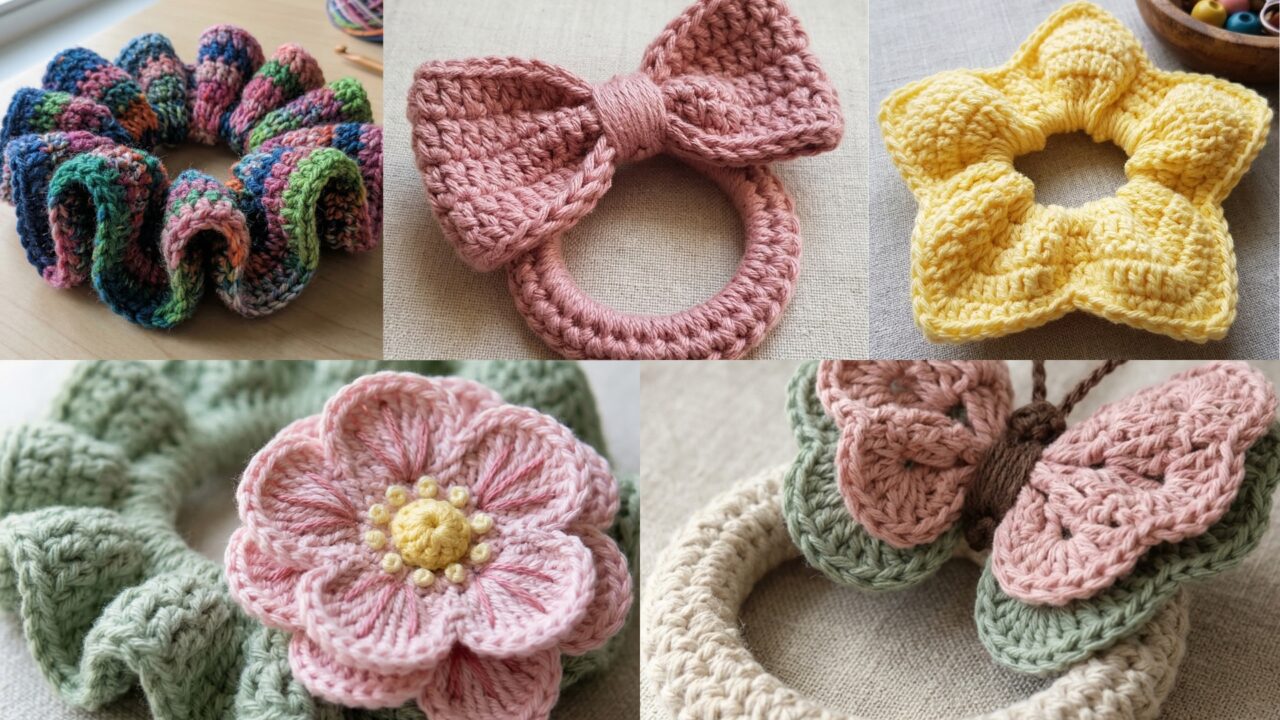
Hair ties are the perfect tiny, satisfying crochet project: quick, useful, and great for using scraps. This post gives five beginner-friendly designs — Star Shaped, Bow, Scrap Sock Yarn, Flower Embroidered, and Ruffles Butterfly — each with a clear skill level, finished size, exact materials, stitches/abbreviations, full step-by-step pattern, assembly/attachment options, finishing tips, and quick variations so your readers can jump right in.
Before you begin: choose yarn and a hook that suit the result — cotton/blend or acrylic for durability, or soft bamboo/fine wool for a gentle scrunchie. Always keep the elastic hair tie (the core) inside the crocheted wrap rather than sewing through it, unless you want a permanent tie. Use a slightly smaller hook than the yarn label suggests for a tighter fabric that won’t snag hair.
Abbreviations (US terms)
- ch = chain
- sc = single crochet
- hdc = half double crochet
- dc = double crochet
- tr = treble crochet
- sl st = slip stitch
- st(s) = stitch(es)
- inc = increase (2 sc in same st)
- dec = decrease (sc2tog)
- MR = magic ring
- RS = right side, WS = wrong side
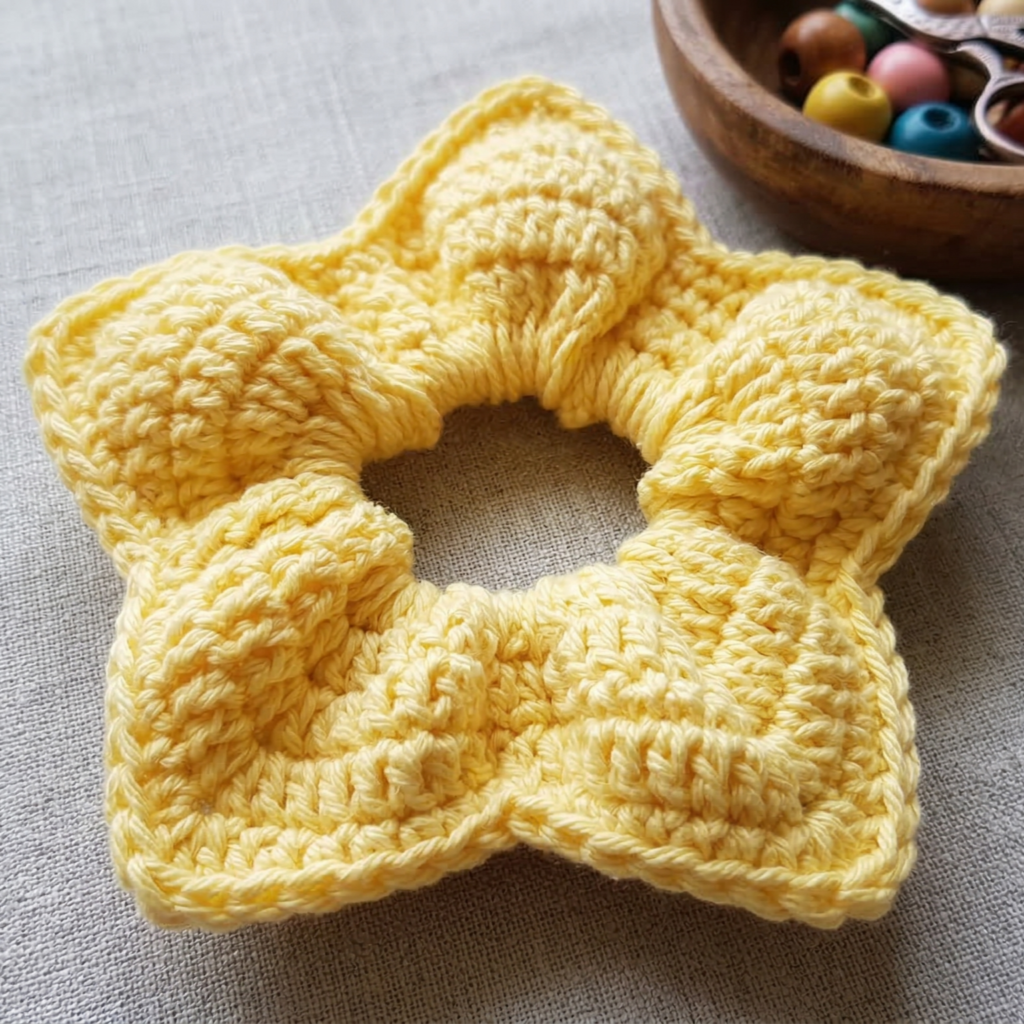
1. Crochet Star Shaped Hair Tie Pattern
Skill level: Beginner (basic rounds + simple shaping)
Finished size: star diameter ~2.5–3″ (6–7.5 cm); fits standard 3″ hair tie.
Why make it? Cute, compact, great for kids and gifting — tiny star on a tie adds instant charm.
Materials
- Fingering or sport weight cotton or cotton-blend yarn — tiny amount (~5–10 g)
- Crochet hook: 2.5–3.5 mm depending on yarn
- Elastic hair tie (standard 2.5–3″ loop)
- Tapestry needle, scissors
- Optional: small bead or button for center (sew-on), fabric glue
Stitches & notes
This is a small 5-point star worked flat in rounds then seamed to form a little disk with pronounced points. Anchor the star to the hair elastic by sewing a small sturdy loop of yarn through the elastic.
Pattern — star motif (make 1)
Center ring
- MR, ch1, 10 sc into ring. Pull tight. Join with sl st to first sc. (10 sc)
Petal loops & star points
- ch4, sl st into next sc — repeat around to make 10 ch-4 loops (space anchors). Join.
- Point (work into every other loop to make 5 points): In loop: (sc, hdc, dc, tr, dc, hdc, sc). Sl st to join. Repeat into every other loop to produce 5 points. Fasten off and weave ends. Gently shape points with your fingers.
(If you prefer a fuller star, add a second round of shorter points between the existing points: into remaining loops do (sc, hdc, dc, hdc, sc) and finish.)
Attachment to hair tie
- Make a small yarn loop: fold a short length (~3–4″) of yarn into a loop and sew the loop to the back center of the star with several passes so it’s anchored; slip the elastic through the loop and knot the yarn ends securely on the inside of the star, then hide ends inside with tapestry needle.
- Alternatively, sew the star directly onto an elastic hair tie using a sewing needle and strong thread: go through elastic several times to make a durable join (but this makes the star permanent on that elastic).
Finishing tips
- Starch lightly for crisp points (spritz with diluted starch and shape).
- Personalize with embroidery or attach a teeny bead in the center (sew it on, not glue).
Variations
- Make mini sets: 3 matching stars in different colors on 3 elastics for a gift set.
- Use metallic or sparkly thread for party hair ties.
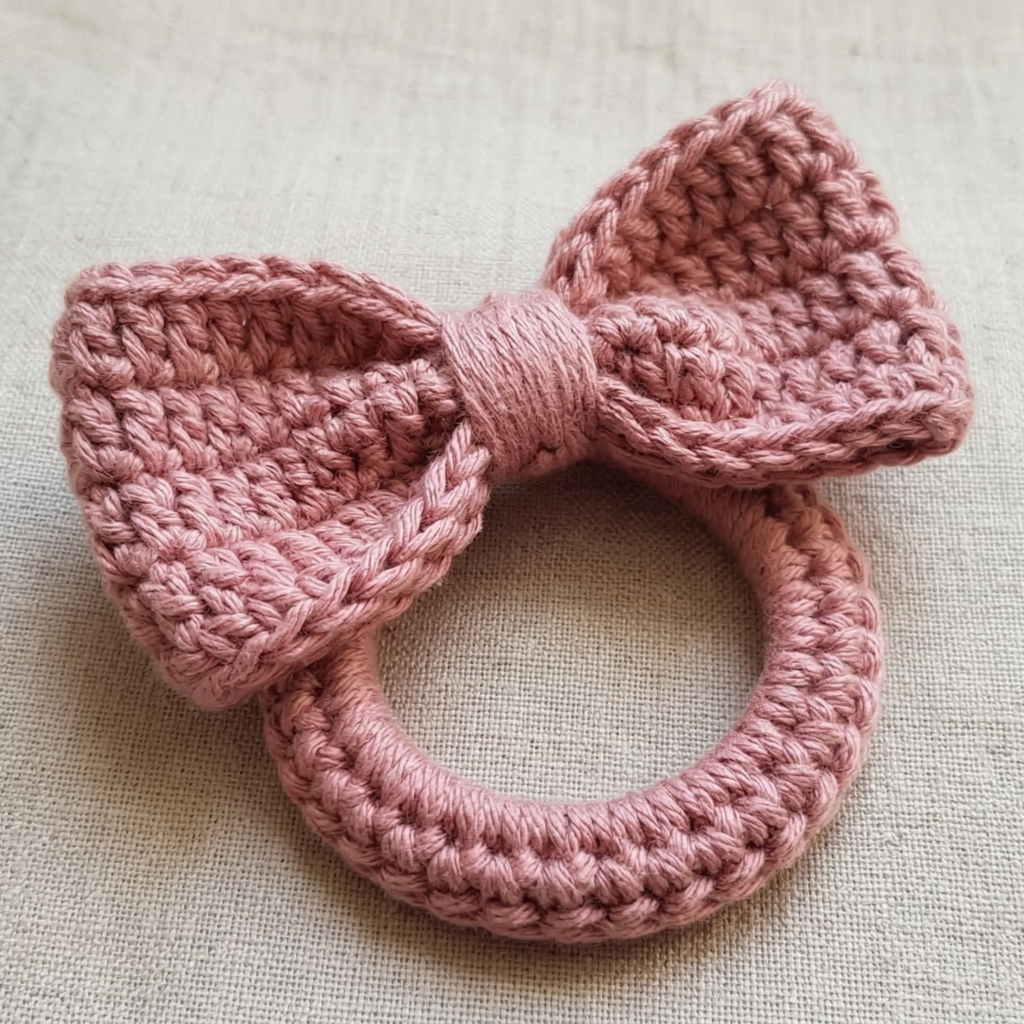
2. Crochet Bow Hair Tie Pattern
Skill level: Beginner (rectangle + small wrap)
Finished size: bow width ~2.5–3.5″ (6–9 cm), height ~1″–1.5″ depending on yarn.
Why make it? Classic, quick, elegant — bows suit every age and style.
Materials
- Fingering to DK yarn (cotton, acrylic, or bamboo) — 5–12 g per bow
- Hook: 2.5–4.0 mm (match yarn)
- Standard elastic hair tie
- Tapestry needle, optional small piece of felt for backing
Stitches & notes
Bow is a small rectangle folded and cinched with a center wrap. Optionally back with felt to make sewing easier and prevent stretch.
Pattern — bow body (flat)
Rectangle
- Ch 24 (adjust for desired width). Turn.
- Row 1: sc in 2nd ch from hook and across. (23 sc) Turn.
- Rows 2–6 (or as tall as you like): ch1, sc across. (5 rows gives a slim bow; 7–8 for a fuller bow). Fasten off leaving a long tail for cinch/wrapping.
Forming the bow
- Fold rectangle in half lengthwise to find center; with the long tail, wrap tightly around the center several times to cinch—wrap 6–10 times depending on thickness. Thread the yarn tail through the underside and knot securely. Weave end inside bow.
Attachment
- To attach to elastic: tuck the elastic into the back center (loop through the cinched yarn wraps or behind the felt) and stitch several times through the wrap and elastic with strong thread so the bow is held on the elastic but can still rotate slightly.
- Alternatively, stitch felt circle to the underside to hide stitches and anchor elastic by sewing felt to both bow and elastic.
Finishing & tips
- For a neater look, cover the back with a small felt oval glued/sewn to hide stitches.
- Make a double-layer bow using a smaller rectangle in contrast color placed on top for a layered look.
Variations
- Create a looped bow (two loops on each side) by making a longer rectangle and folding into loops rather than a flat band.
- Add a decorative center: tiny crochet rose, button, or bead.
3. Crochet Scrap Sock Yarn Hair Tie Pattern
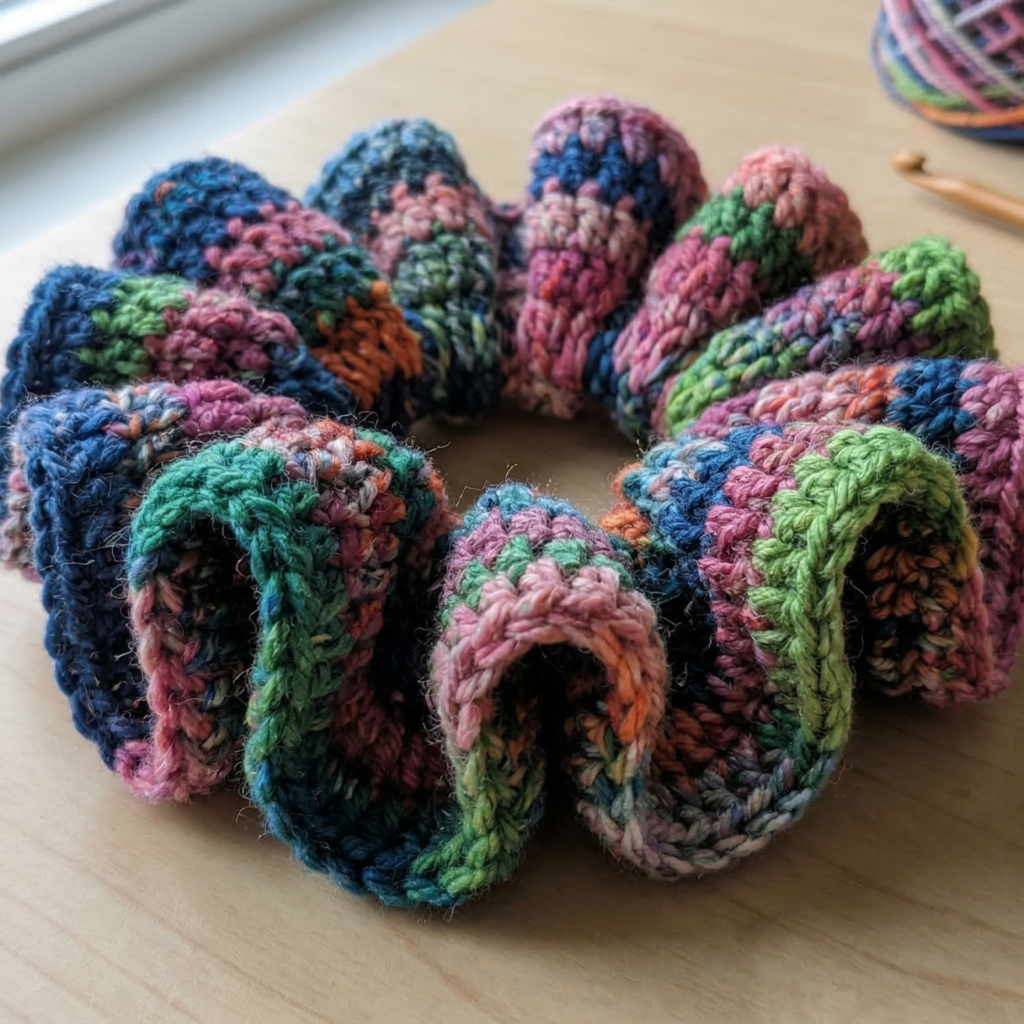
Skill level: Beginner (chunky scrunchie-style tie)
Finished size: scrunchie loop ~3–4″ inside diameter when relaxed; ruffle thickness depends on yarn.
Why make it? Perfect scrap-buster! Use sock yarn or leftover sock-knit yarn for a textured, squishy scrunchie.
Materials
- Scrap sock yarn (fingering/sock weight) — about 20–40 g (many scraps equal good ruffle)
- Elastic hair tie (wide elastic is great for scrunchies) or a split-ring scrunchie core
- Hook: 3.0–4.0 mm (small for fingering, gives dense ruffle)
- Tapestry needle, scissors
Stitches & technique
Work a long strip around the elastic using sc or a quick ruffle stitch. Optionally do doubled yarn to make a plush scrunchie.
Method A — wrap-and-stitch scrunchie (fastest)
- With elastic loop folded, join yarn to elastic with a sl st. Work sc around the elastic through the elastic itself (if elastic has holes) or stitch through the yarn loop around elastic (if using a plain hair tie, you can crochet a chain around and join). Work until elastic is fully covered and fabric is thick—about 2–3 rounds of sc.
- For ruffle: in next round, 2 dc in each sc (this increases quickly and produces a ruffle). Repeat for one or two rounds for a generous ruffle. Fasten off and weave ends.
Method B — long strip scrunchie (recommended for neatness)
- Make a long crocheted strip: ch 80 (or to fit around elastic comfortably; measure by wrapping strip around elastic).
- Row 1: sc in 2nd ch and across. Turn.
- Row 2–4: ch1, sc across (more rows = thicker scrunch). Fasten off leaving long tail.
- Wrap the strip around elastic and whipstitch closed, or join ends by sewing the strip into a tube around elastic so edges meet invisibly. Pull seams tight and hide tails.
Finishing & tips
- To secure elastic strongly, sew through elastic with strong thread multiple times from inside the crochets.
- For extra stretch, use a thicker elastic or two elastics together for armed hold.
Variations
- Add a tiny stitched bow or a crochet flower to the scrunchie front.
- Make a set from a single skein by changing strip widths and textures.
4. Crochet Flower Embroidered Hair Tie Pattern
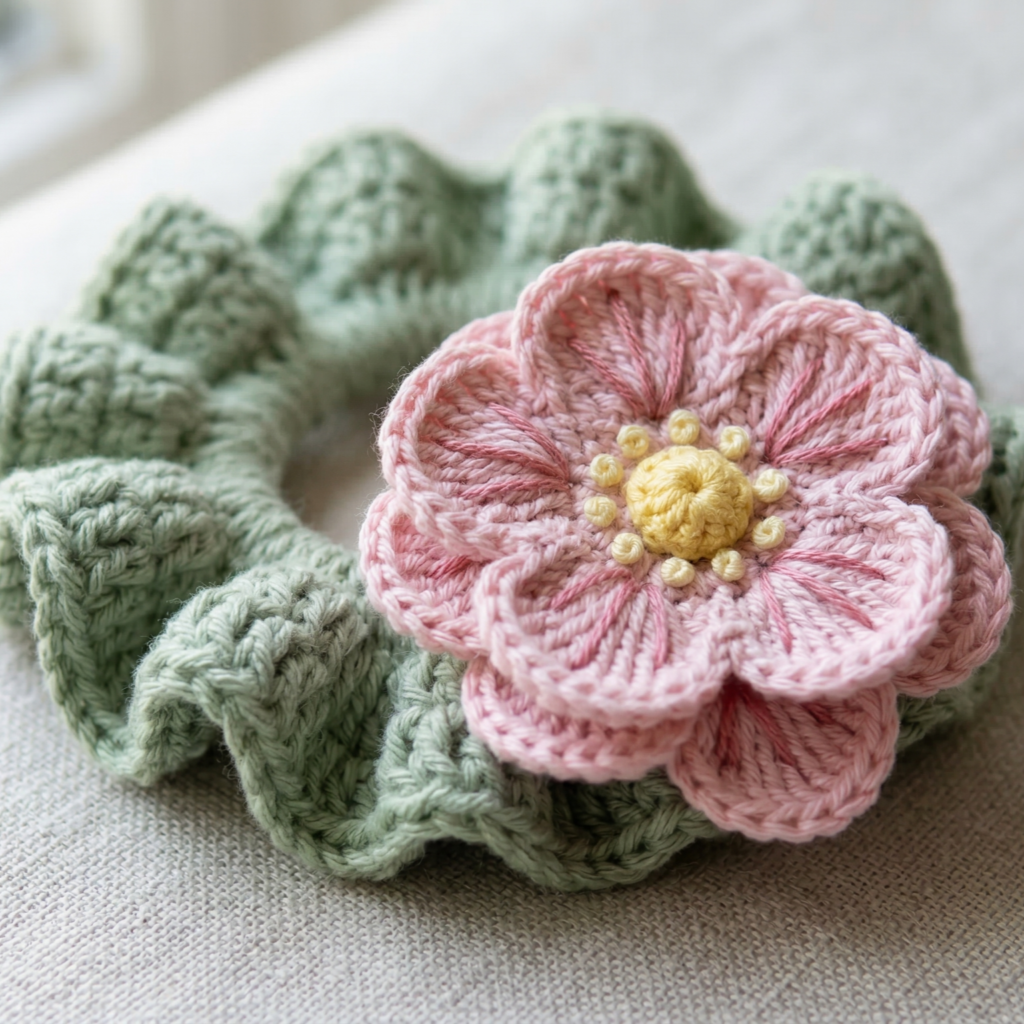
Skill level: Beginner–Intermediate (small motif + surface embroidery)
Finished size: flower diameter ~2–3″ (5–7.5 cm) depending on yarn.
Why make it? Delicate, romantic — embroidered details make it look handmade and special.
Materials
- Sport or DK cotton yarn for flower, contrast embroidery thread (DMC or similar) for embroidery details — tiny amounts
- Hook: 2.5–3.5 mm (match yarn)
- Elastic hair tie, tapestry needle, small embroidery needle, scissors
- Optional: small button/bead for flower center
Pattern — small layered flower (make 1)
Petal base (round 1)
- MR, ch1, 6 sc into MR. Pull tight. (6) Join with sl st.
Petal round (round 2)
- Ch4, sl st in next sc — repeat around to create 6 loops (petal anchors). Join.
Petals (round 3)
- In each ch4 loop work (sc, hdc, dc, hdc, sc) — finish round, join, fasten off leaving a tail for sewing.
Layer 2 (optional smaller inner petals)
- Join contrasting yarn at center and make a smaller set of 6 tiny petals with ch3 loops and (sc, hdc, dc, hdc, sc) into each loop; offset to sit between outer petals. Fasten off.
Embroidery details
- Using embroidery floss and a small needle, stitch veins on each petal with a few straight stitches radiating from center.
- Add French knots or a small bead at the flower center: pull three short wraps of thread to make a French knot and secure underneath.
Attachment to hair tie
- Sew a small yarn loop to the back center of the flower and slip elastic through; secure by stitching around loop several times and weave ends inside.
- Optionally glue a small felt circle to the back and stitch through felt into elastic for tidy finish.
Finishing & care
- Embroidery is delicate — hand wash and air dry to preserve stitches and color.
- For kids, avoid tiny beads that could be choking hazards — use embroidered centers instead.
Variations
- Make daisies, roses (work spiral of petals), and sunflower styles using same base and varying rounds.
- Use metallic embroidery thread for sparkle.
5. Crochet Ruffles Butterfly Hair Tie Pattern

Skill level: Beginner–Intermediate (ruffles + simple shaping into butterfly wings)
Finished size: wingspan ~3–4″ (7.5–10 cm) depending on ruffle size.
Why make it? Playful, dimensional — ruffles create a full butterfly silhouette that looks great on ponytails.
Materials
- Sport / DK yarn (two colors recommended: body + wing contrast) — small amounts ~10–15 g
- Hook: 2.5–3.5 mm (match yarn)
- Elastic hair tie, tapestry needle, small length of pipe cleaner or thin craft wire (optional) for shaping wings
- Optional: tiny bead for butterfly “head”
Stitches & notes
Butterfly made from two ruffle strips sewn together and cinched at center to create wings. If you want wings to hold shape, insert a short wire into the center seam or behind the wings.
Pattern — ruffle strips (make 2 for wings)
Strip
- Ch 30 (or longer for larger wings). Turn.
- Row 1: sc in 2nd ch from hook and across. (29 sc) Turn.
- Row 2 (ruffle base): ch1, sc across. Turn.
- Row 3 (ruffle): 3 dc in each sc across (this produces a strong ruffle; for even frill use 5 dc in each sc for more dramatic ruffle). Fasten off leaving a long tail for sewing.
Make two identical ruffle strips.
Assembly into butterfly
- Place two ruffle strips flat, one on top of the other, with outer ruffle edges aligned. Fold gently down the center to find the middle. Wrap a short length of yarn tightly around the center several times to cinch into butterfly shape (like a bow). Knot securely and weave ends into the underside.
- Make a small body: chain 6, sc across to make a tiny tube and stuff slightly, then sew it across the center (over the wrapping yarn) to hide wraps. Add a tiny bead at top for head (optional) and secure.
Attachment to hair tie
- Sew the back of the butterfly body to the hair elastic: pass needle through elastic and through butterfly body several times; secure with strong thread so butterfly stays attached.
- If you used craft wire inside, ensure wire ends are safely tucked in and covered with yarn to avoid sharp points.
Finishing & shaping
- Fan wings out; if wire used, gently pose wings to desired angle.
- Trim ruffle edges if uneven.
Care & variations
- For a more delicate butterfly use lace-weight yarn and a smaller hook; for dramatic, chunky wings use bulky yarn and a larger hook.
- Make multi-layer wings: stack a smaller ruffle strip on top of a larger one in a different color for contrast.
Universal Finishing & Practical Tips
- Elastic strength: For long-lasting hair ties use good-quality elastic — cheap elastics break quickly when stitched through too much. Consider inserting elastic into a crocheted tube rather than sewing through it directly to preserve elasticity.
- Sewing through elastic: If you sew through elastic with a needle, don’t over-stitch through the elastic repeatedly; this weakens it. Instead, stitch through the surrounding crochet fabric and loop around elastic several times.
- Hide tails: Always weave yarn tails into the back center and, if possible, bury them inside a small felt backing so they don’t snag hair.
- Gift sets: Put together 3–6 matching hair ties (mix styles) and present in a small box or on a card — great for sellable items or gifts.
- Care: Hand wash or gentle machine wash in a mesh bag; reshape and air dry. Avoid heat on elastic (no tumble dry).
- Safety for kids: Don’t add small beads or buttons to hair ties for toddlers — embroidery is safer.
Quick Project Planner (for busy beginners)
- Star hair tie: 15–30 minutes
- Bow hair tie: 10–20 minutes
- Scrap sock yarn scrunchie: 20–40 minutes (depending on thickness)
- Flower embroidered tie: 30–45 minutes
- Ruffles butterfly: 30–60 minutes
Conclusion
These five beginner-friendly hair tie patterns cover cute (star), classic (bow), eco-friendly (scrap sock yarn scrunchie), delicate (flower embroidered), and playful (ruffles butterfly) styles — perfect for making quick gifts, using yarn scraps, or creating a mini collection to sell. They’re small, portable, and great for practicing basic crochet skills.