

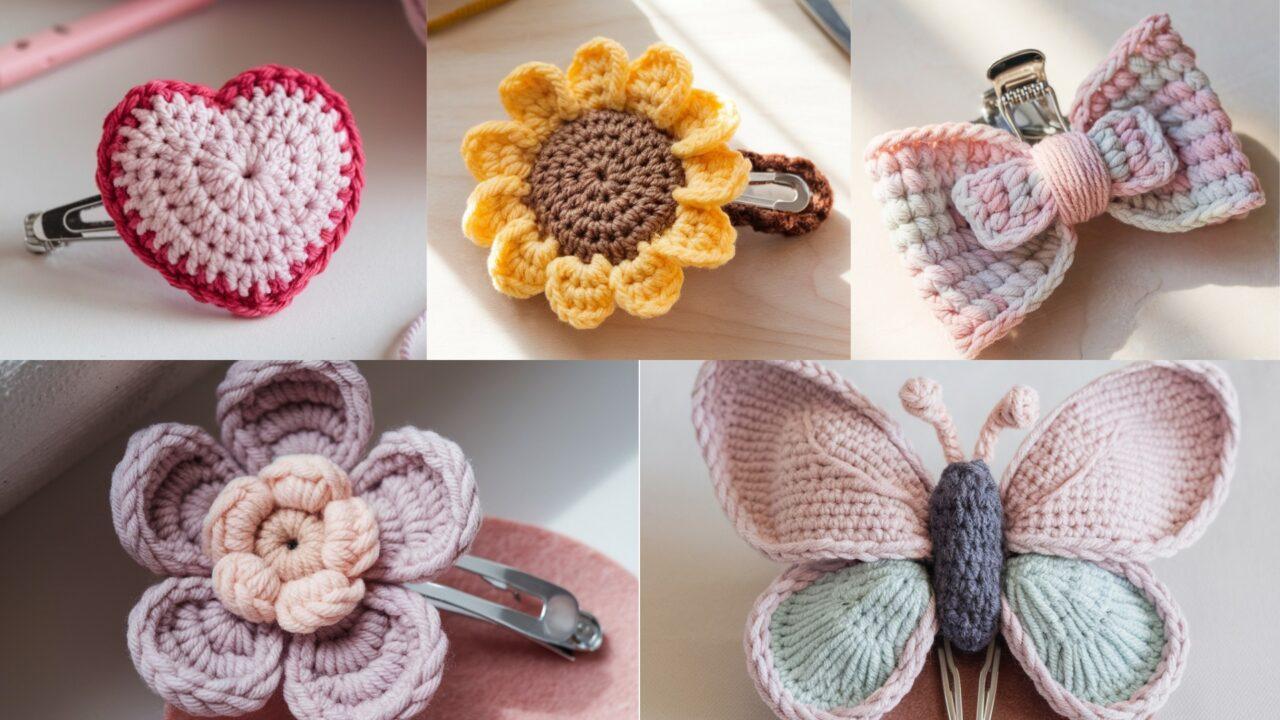
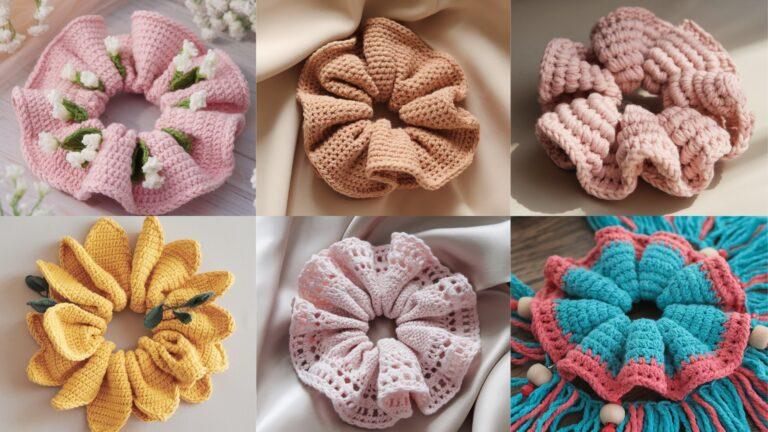
Hair clips are one of the fastest, most satisfying crochet projects you can make: they’re small, quick to finish, use tiny amounts of yarn, and make wonderful gifts, party favors, or shop inventory. This post collects five beginner-friendly crochet hair-clip patterns — sunflower, bow, simple flower, butterfly, and heart — each with full, step-by-step instructions plus materials, finished sizes, assembly notes, finishing tips, and care instructions.
Everything below uses US abbreviations: ch = chain, sl st = slip stitch, sc = single crochet, hdc = half double crochet, dc = double crochet, tr = treble, st(s) = stitch(es), RS = right side, WS = wrong side. Where I give stitch counts I assume worsted (#4) yarn and a 3.5–4.0 mm hook for small motifs; I also offer quick notes for thread/fine yarn or bulky yarn adjustments.
Let’s make some fast, charming hair clips!
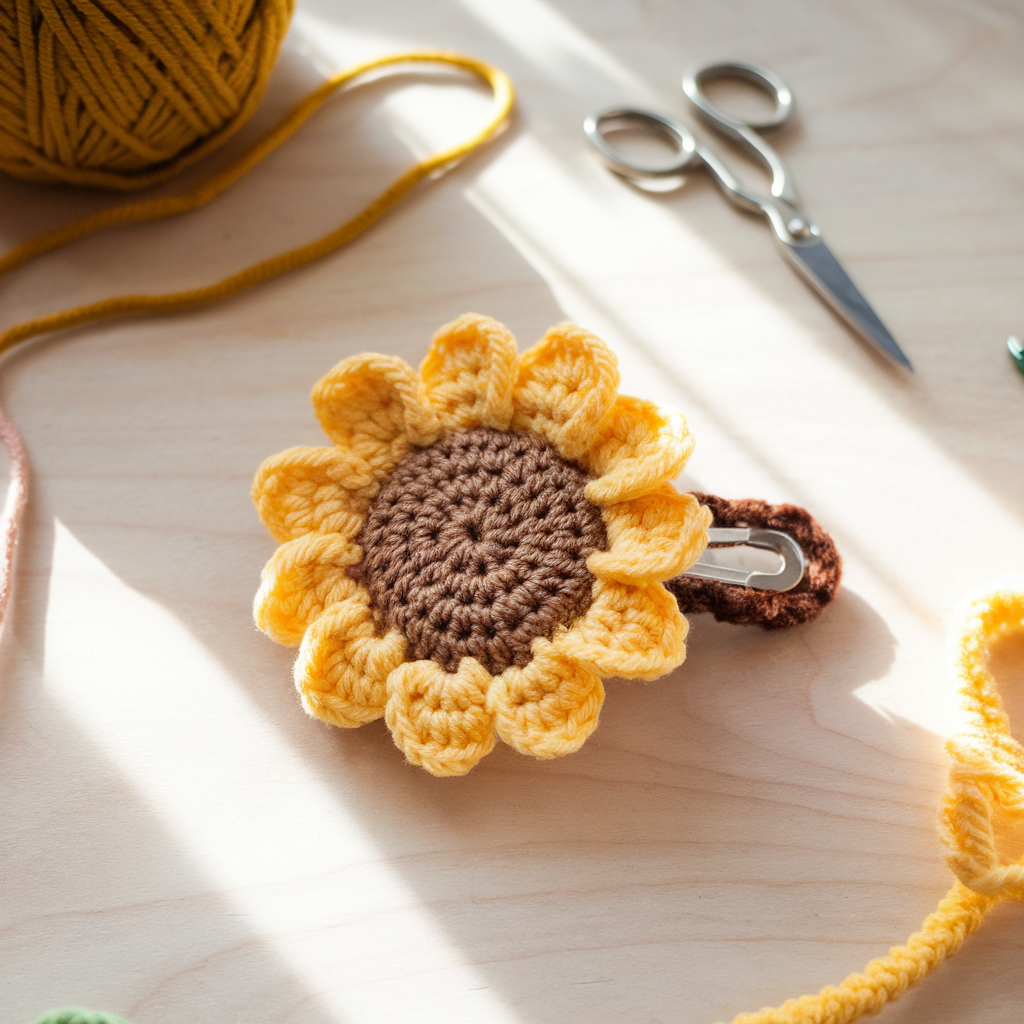
1. Crochet Sunflower Hair Clip Pattern
Skill level
Beginner → Easy (working in the round, color changes, simple sewing)
Finished size
Sunflower diameter: ~2.0–2.5 in (5–6.5 cm). With metal alligator clip attached: total length ~3.5 in (9 cm).
Materials
- Worsted weight cotton or cotton-blend yarn: Yellow (A) for petals, Brown (B) for center. Small amounts — ~10–15 yds of each color.
- 3.5–4.0 mm hook (adjust for your yarn)
- Small alligator hair clip or barrette (approx 2.5–3 in)
- Tapestry needle, scissors, optional hot glue gun or fabric glue, small piece of felt for backing
Abbreviations & notes
- Magic ring: creates neat center.
- If you prefer a sturdier clip that doesn’t flop, use a metal clip and glue a felt backing between crochet and clip.
Step-by-step instructions
Center (Brown B)
- Make a magic ring. Ch 1, work 8 sc into ring. Pull tight and join with sl st to first sc. (8 sc)
- Round 2: Ch 1, 2 sc in each st around. (16 sc)
- Round 3: Ch 1, sc in next st, 2 sc in next — repeat around. (24 sc) — fasten off B and weave tail to inside but leave a long tail to sew flower to clip.
Petals (Yellow A)
4. Join A in any st on Round 3. Ch 2, (sc, hdc, 3 dc, hdc, sc) in same st, sl st in next st — repeat … around. You’ll create a petal every other stitch; adjust so petals sit evenly — you should get 12 petals if worked into 24 sts. Fasten off and weave ends.
Finish & attach clip
5. Use yarn tail from center (B) to stitch the sunflower securely to a small felt circle (cut felt ~1.5 in diameter) — this hides the back and gives a flat surface.
6. Glue or sew the felt-backed sunflower to the flat side of the alligator clip. If you sew, use small tight stitches through felt and the metal clip’s holes (if available) or around the clip — also add a dab of glue for security.
7. Trim loose threads and check that the flower is centered.
Tips & variations
- Make double-layer petal rounds for a fuller sunflower: after Round 4, add another petal round offset between the existing petals.
- For a smaller sunflower, use DK yarn and a 3.0 mm hook or use crochet thread and a 1.75–2.5 mm hook for tiny barrettes.
- Add a small felt leaf behind one side of the sunflower for a finished look.
Care
- Hand wash gently and reshape; cotton withstands gentle machine wash but I recommend spot-cleaning clipped accessories glued to metal.
2. Crochet Hair Bow Clip Pattern

Skill level
Beginner — simple rectangle & wrapping technique
Finished size
Bow width: ~3.5–4.5 in (9–11.5 cm); bow height ~1.5–2 in (4–5 cm). Total clip length depends on clip used (2–3 in common).
Materials
- Worsted weight yarn (acrylic/cotton) — ~15–25 yds
- 3.5–4.0 mm hook
- Alligator clip or French barrette (2–3 in)
- Tapestry needle, optional small rectangle of felt for backing, hot glue or needle & thread
Step-by-step instructions
Bow rectangle
- Ch 16 (adjust chain for wider/narrower bow). Row 1: sc in 2nd ch from hook and across. (15 sc) Turn.
- Rows 2–8: ch 1, sc across. (Work until rectangle is bow height ~1.5–2 in) Fasten off leaving a long tail for finishing.
Forming the bow
3. Fold the rectangle lengthwise and pinch together in the center like a bow shape. Wrap the center with the long tail: wind the tail tightly several times around the middle to cinch and then thread the tail through the back and secure with a few stitches. Optionally crochet a small band: ch 6, sc in 2nd ch and across 2–3 rows, wrap around and sew ends together for a neat band.
Attach to clip
4. If using felt: glue a small felt rectangle to the flat side of the clip. Sew or glue the bow onto the felt and add the wrap band over the clip to hide stitches. If sewing, stitch the bow’s center band to the felt and tack the felt to clip carefully. Use glue as reinforcement.
Tips & variations
- Make the bow double-thickness by folding and sewing the rectangle into a tube before wrapping — that gives a plumper bow.
- Use ribbed stitch (BLO sc) for a knit-like texture.
- Create mini bows by chaining fewer stitches and making a smaller rectangle — cute for baby clips.
Care
- Spot clean glued items; sewn attachments fare better in gentle machine wash if removed from clip first.
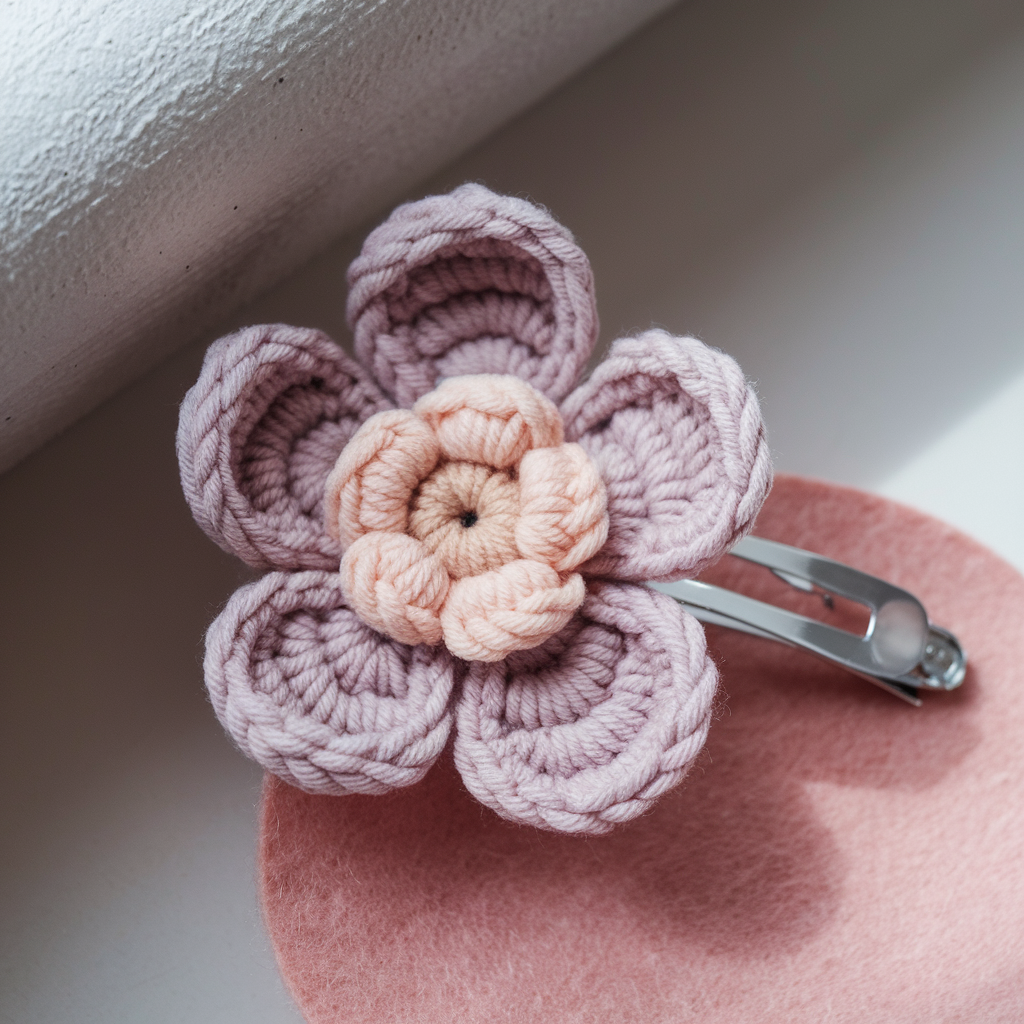
3. Crochet Flower Hair Clip Pattern (Classic Five-Petal)
Skill level
Beginner — small motifs, sewn to clip
Finished size
Flower diameter: ~1.5–2.5 in depending on yarn/hook. Great as single or cluster.
Materials
- Worsted yarn in your chosen color(s), ~10–15 yds per flower
- 3.5–4.0 mm hook
- Alligator clip or snap clip, felt circle for backing, tapestry needle, glue or thread
Step-by-step instructions
5-petal flower motif
- Magic ring; ch 1. Into ring: sc, ch 3, (3 dc, ch 3, sc) — repeat … five times to make five petals. Pull ring tight and join. (You can scale petals by changing the number of dc per petal: 3 dc gives small petals; 5–7 dc gives larger petals.)
- Fasten off leaving tail for sewing. Use tail to stitch center to felt backing.
Optional center embellishment
3. Sew a contrasting color tiny circle over center (magic ring, 6 sc, fasten off) or glue on a small button or bead for a finished look.
Attach to clip
4. Attach flower to felt circle, then glue or sew felt to clip. If you use a snap clip (a hair snap), sew directly through felt and around snap holes for a secure attachment.
Tips & variations
- Make layered flowers: sew a smaller 5-petal flower on top of a larger one for depth.
- Add leaves: crochet small leaf shapes and tack under the flower for a natural look.
- Use variegated yarn for subtle color shifts.
Care
- Hand wash recommended if beads/buttons are used; otherwise gentle machine wash inside laundry bag if you detach clip first.
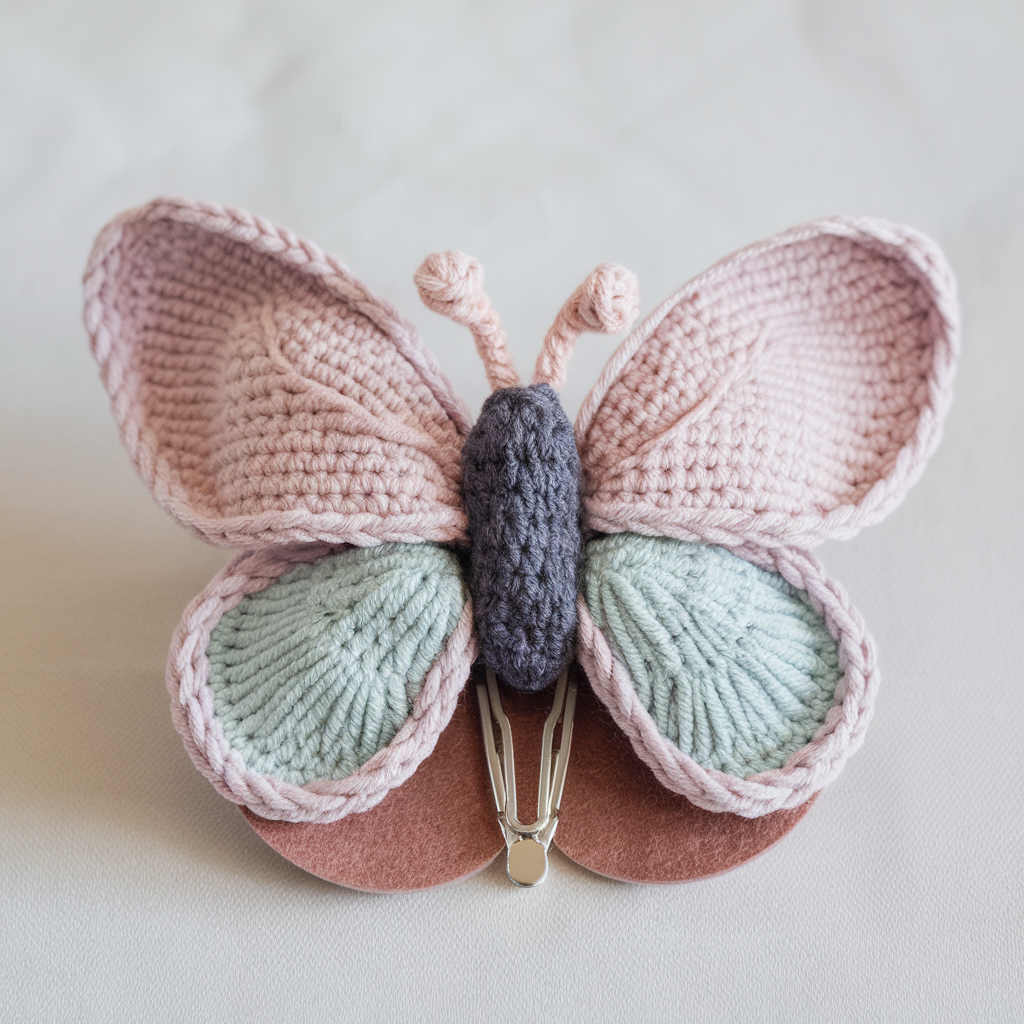
4. Crochet Butterfly Hair Clip Pattern
Skill level
Beginner–Easy — working small wing shapes & body wrap
Finished size
Butterfly wingspan: ~2.5–3.5 in (6.5–9 cm); height ~1.5–2 in (4–5 cm).
Materials
- Small amounts of worsted or DK yarn in 2 colors (wings & body), ~15–20 yds total
- 3.5 mm hook (or 3.0 mm for DK)
- Alligator clip or snap clip, tapestry needle, felt backing optional, glue or thread
Step-by-step instructions
Wing pattern (make 2 mirror sets or 4 individual wings)
- For each upper wing: ch 7. Row 1: sc in 2nd ch from hook and across (6 sc). Turn. Row 2: ch 1, (sc, hdc, dc, hdc, sc) across to shape a gentle bulge. Fasten off. This creates a small upper wing.
- For lower wing (slightly smaller): ch 6. Row 1: sc in 2nd ch across (5 sc). Row 2: ch 1, (sc, hdc, dc, sc) — fasten off.
- Make two upper wings and two lower wings.
Body & assembly
4. Lay wings in butterfly shape (two uppers above, two lowers below). Using contrasting yarn for body, wind yarn tightly around the center where wings meet several times to hold wings in place and create the butterfly body. Secure with a few stitches. Leave a small tail to sew around and secure.
5. Add tiny antennae by making two short chains (ch 6) and attaching one to each side of the head with a small bead at tip if desired.
Attach to clip
6. Sew or glue the assembled butterfly onto felt backing, then attach to clip. For extra security, stitch through felt and clip holes or wrap yarn under clip and tie off inside felt.
Tips & variations
- Use lace-weight yarn and small hook for delicate butterflies; or use thick yarn for chunky whimsical shapes.
- Decorate wings with surface embroidery (French knots, straight stitches) or beads to mimic wing patterns.
- Make a mini cluster of 2–3 tiny butterflies on a single clip for a statement piece.
Care
- Hand wash recommended if beads are used; otherwise spot clean glued areas.
5. Crochet Heart Hair Clip Pattern

Skill level
Beginner — classic small motif and simple finishing
Finished size
Heart width: ~1.25–2 in (3–5 cm). Works great as single center on baby clips or multiple on a longer clip.
Materials
- Worsted weight yarn — small amount ~5–10 yds (can make many hearts from a single skein)
- 3.5 mm hook
- Alligator clip or snap clip, tapestry needle, felt backing optional, glue/thread
Step-by-step instructions
Small heart motif (compact)
- Magic ring, ch 1. Into ring work: 3 sc, 3 hdc, 1 dc, 3 hdc, 3 sc. Pull ring tight and join. (This forms a small heart shape; adjust counts to change size.)
- Fasten off leaving tail for sewing. Flatten heart by pressing gently with fingers; you may block lightly if desired.
Alternate heart (flat worked row method)
- Ch 6. Row 1: sc in 2nd ch from hook and across (5 sc). Turn. Row 2: ch 1, (sc in next 2, hdc in next, dc in last) along half to make hump, then mirror for second hump as you work back across — sew ends together and shape into heart by stitching center notch.
Attach to clip
3. Sew the heart onto a small felt circle, then glue/sew felt onto clip. Or stitch heart directly to the clip if the clip has holes to pass needle through.
Tips & variations
- Use contrast color pips (tiny French knots) on heart for a confetti look.
- Make a chain of tiny hearts attached to a longer barrette for a romantic statement piece.
- Create a heart button by stiffening a small heart with fabric stiffener and sealing for a long-lasting accessory.
Care
- Cotton hearts are machine-washable if removed from metal clip first; glued items are best spot-cleaned.
Finishing & professional assembly tips (applies to all patterns)
- Felt backing — cut small circles or ovals of felt to cover the back of the crochet motif. This hides stitches, prevents snagging, and gives a neat surface to glue or sew onto clips. Felt also protects scalp from any rough edges.
- Glue vs. sew — sewing is more durable. Use hot glue for quick assembly but reinforce later with a few hand stitches if the item will be laundered or sold. For craft-fair stock, sew then glue for immediate security.
- Clip choice — alligator clips are easy and grip hair well; French barrettes are sturdier for larger motifs; snap clips are cute for babies. Choose clip size proportional to motif.
- Secure hardware — wherever the clip is attached, consider adding small canvas patches or extra stitches to distribute stress points so motifs don’t rip free.
- Quality control — tug-test the motif once assembled, and examine both sides (front/back) so customers see a clean finish.
Care & labeling suggestions for selling/gifting
- Add a small tag with fiber content (e.g., “100% cotton — gentle wash, reshape damp”) and a short care callout (e.g., “Spot clean or hand wash. Remove clip before machine washing.”)
- If you used beads or glued embellishments, advise hand washing only.
- For natural fibers (wool, linen), recommend hand-wash and lay flat to dry to preserve shape.
Conclusion
These five crochet hair-clip patterns are intentionally chosen for speed and beginner friendliness while still offering variety: the bold sunflower, classic bow, easy flower, whimsical butterfly, and sweet heart let you craft a whole collection in an afternoon. They’re perfect for last-minute gifts, party favors, craft-fair inventory, or practice pieces for learning small motifs, color changes, and finishing techniques.

Lay wings in butterfly shape (two uppers above, two lowers below). Using contrasting yarn for body, wind yarn tightly around the center where wings meet several times to hold wings in place and create the butterfly body. Secure with a few stitches IICRC WRT Dumps. Leave a small tail to sew around and secure.
5. Add tiny antennae by making two short chains (ch 6) and attaching one to each side of the head with a small bead at tip if desired.
Thanks for a marvelous posting! I actually enjoyed reading it, you happen to be a great author.I will ensure that I bookmark your blog and may come back down the road. I want to encourage continue your great writing, have a nice morning!