Crochet makes it easy to create handmade accessories that are fun, practical, and full of personality. Whether you are making something for yourself, for a friend, or for your small shop, crochet projects let you turn simple yarn into something charming and useful. One of the best things about small crochet accessories is that they are quick to finish, beginner-friendly in many cases, and easy to customize with color, texture, and embellishments.
This collection brings together five adorable crochet pattern ideas that are cute, creative, and enjoyable to make at home. Each design is written in a clear and easy-to-follow format so you can work comfortably at your own pace. You will find helpful materials lists, skill levels, step-by-step instructions, finishing notes, and tips for making your pieces look neat and professional.
Quick Notes
- Use a smaller hook than you would for larger projects to keep the stitches neat.
- Keep your tension even so the finished piece looks polished.
- Stuff small amigurumi-style pieces lightly so they hold shape without becoming bulky.
- Add key rings, clasps, or hanging loops only after the piece is fully finished.
- Weave in ends securely, especially for small items that will be handled often.
- You can easily change colors to make each design more playful and personal.
Common Materials
- Fine cotton yarn or acrylic yarn
- Crochet hook suitable for your yarn, usually 2 mm to 3.5 mm
- Polyester fiberfill, if stuffing is needed
- Tapestry needle
- Scissors
- Stitch marker
- Safety eyes or beads, if appropriate
- Key rings, lobster clasps, or hanging loops
- Optional: felt, embroidery thread, beads, or small accessories for decoration
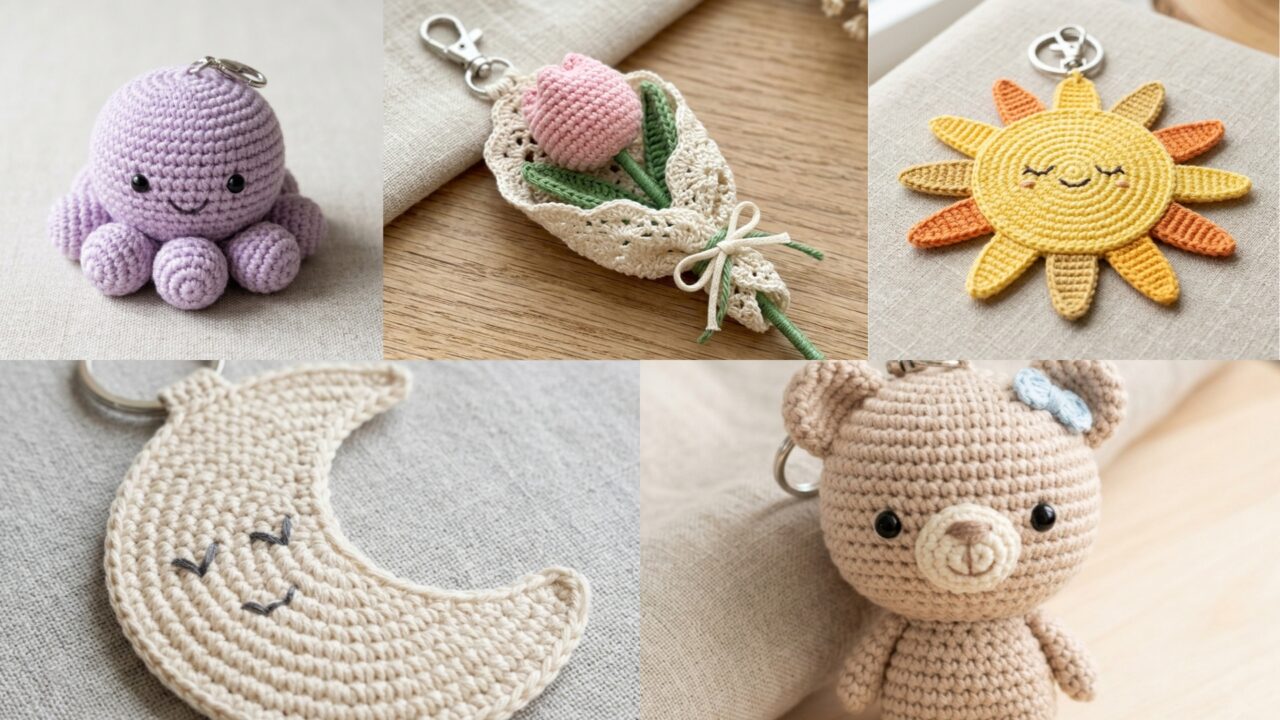
1. Crochet Mini Octopus Keychain Pattern
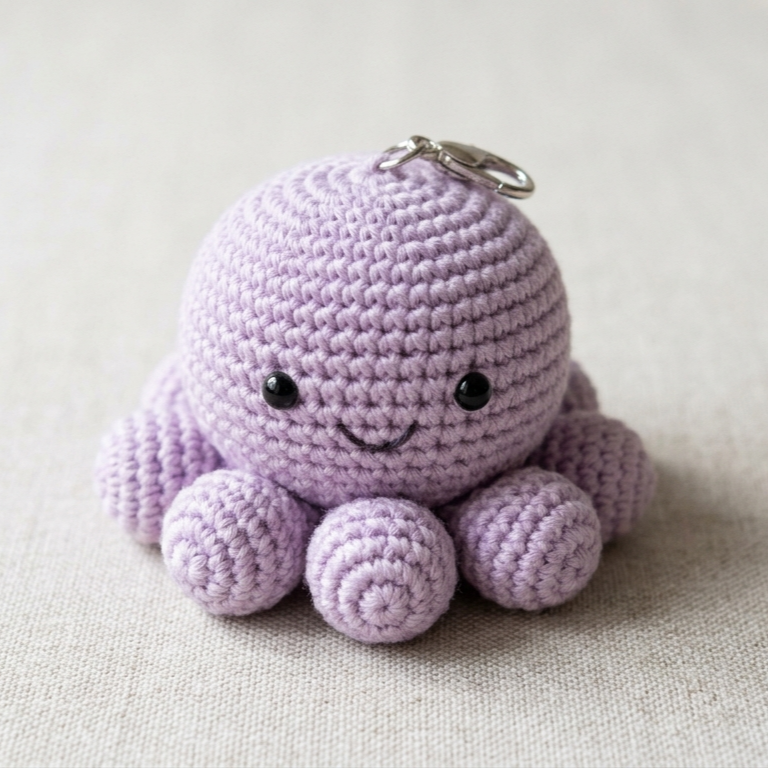
The mini octopus keychain is a cute and cheerful project that is perfect for quick crochet sessions. Its tiny rounded body and playful tentacles make it a favorite for anyone who enjoys small amigurumi-style projects. This design is especially fun because it works well in bright colors, pastel shades, or even sea-inspired tones.
Skill Level
Beginner to Intermediate
Materials
- Fine cotton yarn or light acrylic yarn
- 2 mm to 3 mm crochet hook
- Polyester fiberfill
- Tapestry needle
- Scissors
- Stitch marker
- Key ring or lobster clasp
- Safety eyes or embroidered eyes, optional
Stitches Used
- Magic ring
- Chain (ch)
- Single crochet (sc)
- Increase
- Decrease
- Slip stitch (sl st)
Step-by-Step Guide
Step 1: Crochet the body
Start with a magic ring and work single crochets into the ring to form the top of the octopus head. Continue increasing in the next rounds to create a small dome shape.
The body should stay round and slightly firm, so do not overstuff it later.
Step 2: Shape the head
Continue working rounds with increases until the head reaches the width you want. After that, work several rounds without increases to build the height of the body.
This creates the soft, rounded shape that gives the octopus its cute appearance.
Step 3: Add stuffing
Before closing the head, add a small amount of fiberfill. Stuff lightly so the body stays smooth but not overly firm.
A small amount of stuffing is enough to give the keychain shape without making it too bulky.
Step 4: Close the body
Decrease gradually until the opening closes. Use your tapestry needle to pull the remaining hole tight and secure it neatly.
Make sure the top looks smooth and even.
Step 5: Make the tentacles
The tentacles can be created by chaining and working several stitches back into each chain, or by using spiral-style crochet strands. Make enough tentacles so they hang naturally from the bottom of the body.
Keep the tentacles soft and flexible so they move nicely.
Step 6: Attach the tentacles
Sew the tentacles securely to the underside of the octopus head. Arrange them evenly so the keychain looks balanced from all angles.
This step makes the piece look finished and recognizable.
Step 7: Add the face
Use safety eyes or embroider the eyes with thread. A tiny smile can make the octopus look extra sweet and friendly.
A simple face works best for small accessories.
Step 8: Attach the key ring
Use a small loop or direct attachment to connect the top of the octopus to the key ring or clasp. Make sure it is secure enough for daily use.
Finishing
- Weave in all loose ends
- Shape the body gently with your fingers
- Check that the tentacles are evenly attached
- Secure the key ring firmly
Pro Tips
- Pastel colors make the octopus look soft and cute.
- Bright colors create a playful, market-friendly design.
- Keep the eyes centered for the best expression.
- Light stuffing gives the best shape for a mini keychain.
2. Crochet Tulip Flower Bouquet Keychain Pattern

The tulip flower bouquet keychain is a lovely handmade project that feels fresh, cheerful, and delicate. It combines the beauty of small tulip flowers with the charm of a tiny bouquet, making it a perfect gift item or decorative accessory. This pattern is ideal if you enjoy floral designs and want something that looks elegant but still easy to carry.
Skill Level
Beginner to Intermediate
Materials
- Fine cotton yarn in floral colors
- Crochet hook, usually 2 mm to 3 mm
- Tapestry needle
- Scissors
- Small amount of stuffing, optional
- Floral wire or thin craft stems, optional
- Key ring or clasp
- Green yarn for stems and leaves
Stitches Used
- Magic ring
- Chain (ch)
- Single crochet (sc)
- Half double crochet (hdc)
- Double crochet (dc)
- Slip stitch (sl st)
Step-by-Step Guide
Step 1: Make the tulip petals
Start by crocheting the tulip flower heads. Each tulip usually has a rounded, cup-like shape, which can be made using short rows or a small cylindrical crochet structure.
Keep the petals slightly curved so they resemble real tulip blooms.
Step 2: Shape the flower
Work the top edge carefully so the flower opening looks natural. Tulips should not look too flat, so a little shaping goes a long way.
If needed, lightly stuff the bloom or leave it hollow depending on the pattern style.
Step 3: Crochet the stem
Use green yarn to make a small stem. This can be crocheted as a narrow tube or worked around floral wire for added stability.
A firm stem helps the bouquet hang neatly as a keychain.
Step 4: Make the leaves
Crochet one or two leaves using green yarn. Tulip leaves are long and simple, so a narrow leaf shape works very well.
Attach the leaves near the bottom of the flower for a more realistic bouquet look.
Step 5: Make multiple tulips
For a bouquet style, create two or more small tulips in different colors. This gives the keychain a fuller and more decorative appearance.
You can mix red, pink, yellow, purple, or white tulips for variety.
Step 6: Assemble the bouquet
Gather the flowers together and sew or tie them neatly into a small bouquet shape. Make sure the stems align nicely and the blooms sit at slightly different heights.
This creates a pretty layered effect.
Step 7: Attach the key ring
Use a secure loop or clasp to connect the bouquet to the key ring. Make sure the flowers hang evenly and do not twist too much.
Finishing
- Weave in all ends carefully
- Adjust the petals so they face outward neatly
- Secure the bouquet shape with stitching
- Attach the clasp or ring firmly
Pro Tips
- Soft pink and cream tones create a romantic look.
- Bright tulip colors make the design cheerful and fun.
- Keep the bouquet small so it stays lightweight.
- This pattern makes a beautiful handmade gift.
3. Crochet Small Bear Keychain Pattern
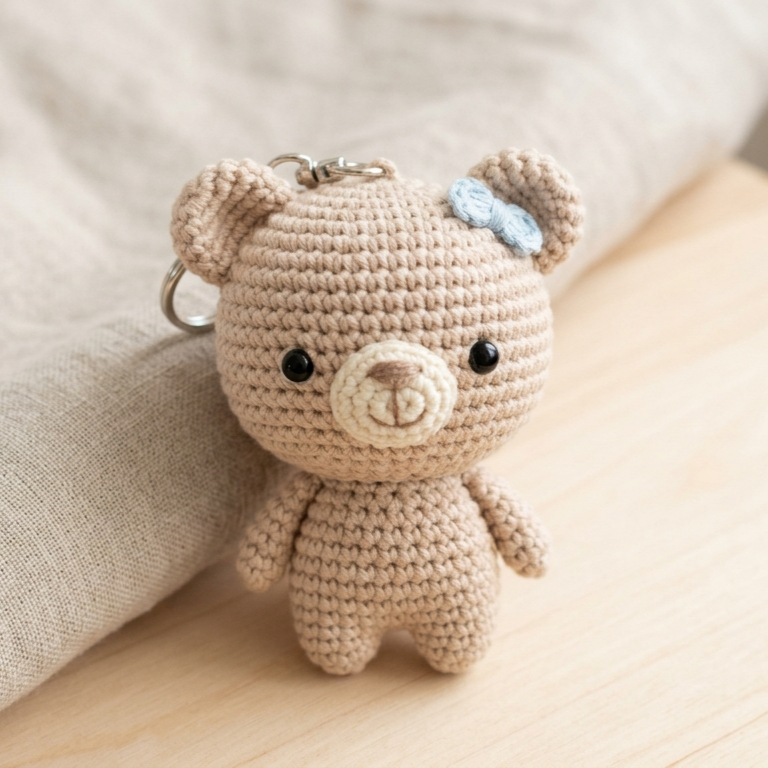
The small bear keychain is a classic crochet favorite because it is cute, simple, and endlessly customizable. A tiny bear can be made in many styles, from soft pastel teddy bears to modern minimalist bears. This pattern is ideal for makers who enjoy adorable character-based projects.
Skill Level
Beginner to Intermediate
Materials
- Fine or light worsted yarn
- Crochet hook suitable for yarn size
- Polyester fiberfill
- Tapestry needle
- Scissors
- Stitch marker
- Safety eyes or embroidery thread
- Key ring or clasp
Stitches Used
- Magic ring
- Chain (ch)
- Single crochet (sc)
- Increase
- Decrease
- Slip stitch (sl st)
Step-by-Step Guide
Step 1: Crochet the head
Start with a magic ring and build a round head using increases. The head should be small and rounded, with a smooth surface.
Keep the stitches even so the face looks neat.
Step 2: Add the ears
Crochet two tiny rounded ears separately. These can be made with a few stitches in a magic ring, then sewn onto the top sides of the head.
Bear ears should be small but visible.
Step 3: Make the body
Crochet a small oval or round body to match the head. Depending on the pattern style, you can keep the body simple and compact.
If you want a more classic teddy look, make the body slightly shorter and rounder.
Step 4: Stuff the pieces lightly
Add a small amount of fiberfill to the head and body so they keep their shape. Do not overstuff, because small pieces can lose definition when filled too tightly.
Light stuffing makes the bear look soft and tidy.
Step 5: Assemble the bear
Sew the head and body together securely. Attach the ears and make sure they are even on both sides.
This step is important because symmetry gives the bear a polished appearance.
Step 6: Add the face
Use safety eyes or embroider the eyes and nose. A tiny embroidered nose with a small smile gives the bear a sweet expression.
You can also add blush with embroidery thread or tiny felt details.
Step 7: Attach the key ring
Add the ring or clasp at the top of the head so the bear hangs properly. Check that the attachment is secure and centered.
Finishing
- Weave in all loose ends
- Shape the ears and face gently
- Make sure the bear hangs straight
- Secure the keychain attachment firmly
Pro Tips
- Brown, cream, beige, and pastel colors work beautifully.
- Add a tiny bow for an extra cute finish.
- Keep facial features small to preserve the bear’s softness.
- This is a great pattern for gift sets and handmade markets.
4. Crochet Moon Keychain Pattern
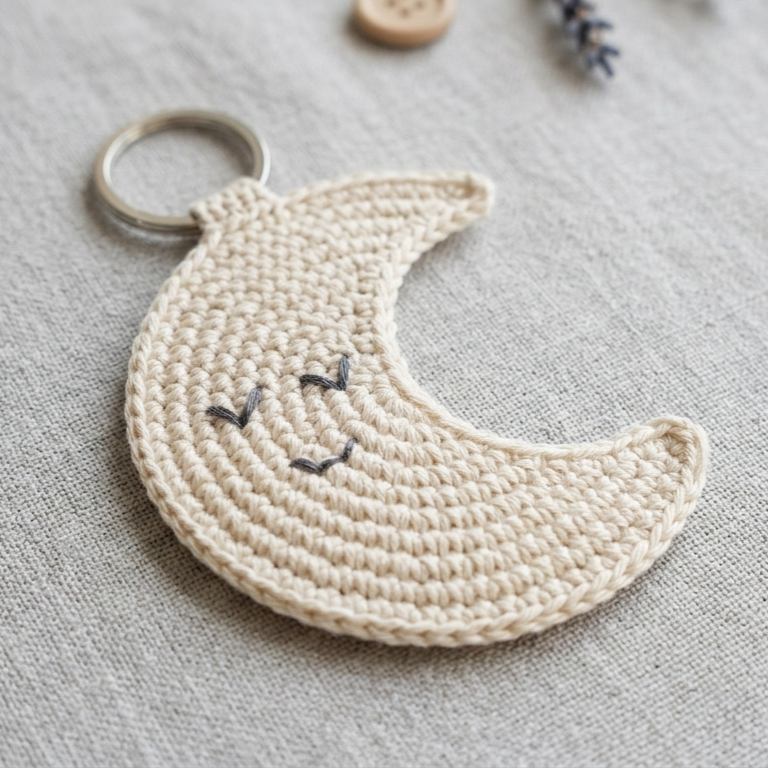
The crochet moon keychain is simple, elegant, and slightly dreamy. Its curved shape gives it a soft, whimsical feel, making it perfect for anyone who likes celestial-themed accessories. This design is especially lovely in gold, silver, cream, or deep midnight colors.
Skill Level
Beginner
Materials
- Fine cotton yarn or acrylic yarn
- Crochet hook suitable for yarn size
- Tapestry needle
- Scissors
- Stuffing, optional
- Key ring or clasp
- Optional: tiny beads or embroidery thread for detail
Stitches Used
- Magic ring
- Chain (ch)
- Single crochet (sc)
- Increase
- Decrease
- Slip stitch (sl st)
Step-by-Step Guide
Step 1: Create the first curve
Begin by crocheting a small round or oval shape. This forms the base of the moon. You want the shape to be slightly fuller on one side so the crescent effect can be created later.
The moon should feel soft and rounded, not flat.
Step 2: Shape the crescent
Using decreases and shaping techniques, carve out the inner curve of the moon. This gives the piece its classic crescent shape.
Take your time here so the curve looks smooth and even.
Step 3: Make the moon slightly thick
If you want a plush look, work a second layer or create a small stuffed body. This gives the keychain more presence without making it too large.
A small amount of stuffing can help the moon keep its form.
Step 4: Refine the edges
Use single crochet or slip stitches around the edge to make the crescent outline neat and smooth. Clean edges are especially important for simple shapes like this one.
This step helps the moon look polished.
Step 5: Add optional facial detail
You can add tiny embroidered eyes and a smile for a sleepy moon look. Another option is to keep it plain for a modern, minimalist style.
Both versions can look beautiful depending on the color choice.
Step 6: Attach the key ring
Secure a loop or clasp at the top of the moon so it can hang properly. Make sure the top placement feels balanced with the crescent curve.
Finishing
- Weave in ends neatly
- Shape the crescent with your hands
- Add stuffing only if needed
- Attach the key ring firmly
Pro Tips
- Metallic yarn can make the moon look magical.
- A sleepy face adds personality, but a plain moon looks elegant too.
- Keep the crescent shape smooth for the best result.
- This is a great beginner project because the shape is simple and stylish.
5. Crochet Sun Keychain Pattern
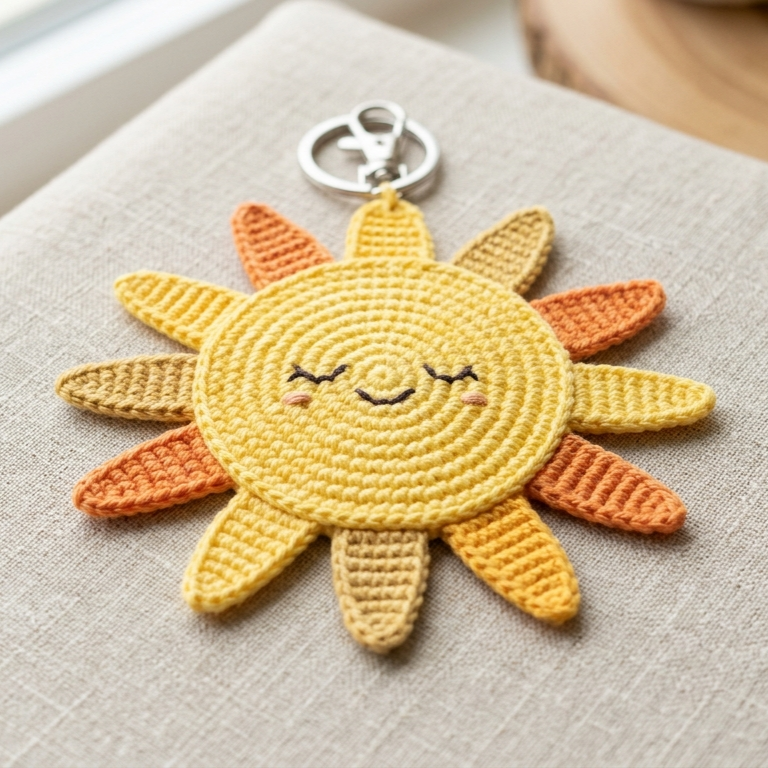
The crochet sun keychain is bright, cheerful, and full of positive energy. It is a joyful design that works beautifully in yellow, orange, gold, or warm gradient tones. This is a perfect project if you want something uplifting, decorative, and easy to personalize.
Skill Level
Beginner to Intermediate
Materials
- Fine cotton yarn or light acrylic yarn in yellow, gold, orange, or warm tones
- Crochet hook suitable for yarn size
- Tapestry needle
- Scissors
- Stuffing, optional
- Key ring or clasp
- Optional: embroidery thread for face details
Stitches Used
- Magic ring
- Chain (ch)
- Single crochet (sc)
- Double crochet (dc)
- Increase
- Slip stitch (sl st)
Step-by-Step Guide
Step 1: Crochet the center circle
Start with a magic ring and work several single crochets into it to form the round center of the sun. This center should be firm and neat.
The circle will serve as the base for the rays.
Step 2: Build the sun shape
Increase evenly around the circle until the center is the size you want. This gives the sun a round, balanced core.
Keep the shape smooth so the rays can stand out clearly.
Step 3: Make the rays
Create rays by chaining outward from the circle and working stitches back into the base. Repeat this around the outer edge so the sun has a full, radiant look.
The rays should be spaced evenly for a balanced design.
Step 4: Add texture to the rays
You can make the rays straight, wavy, or pointed depending on the style you want. Small adjustments in stitch height can create different effects.
A playful ray shape makes the keychain feel lively.
Step 5: Add facial detail, optional
A tiny smiling face can make the sun look extra cheerful. Embroider the eyes and mouth carefully so the features stay small and neat.
If you prefer, leave the sun plain for a more decorative look.
Step 6: Attach the key ring
Add a secure loop or clasp at the top of the sun. Make sure the keychain attachment does not pull the design out of shape.
Finishing
- Weave in all ends securely
- Shape the rays evenly
- Add stuffing only if desired
- Attach the ring firmly
Pro Tips
- Yellow and gold shades create a classic sun look.
- Orange accents can add warmth and dimension.
- Keep the rays evenly spaced for a balanced finish.
- This design makes a lovely gift or cheerful bag charm.
Conclusion
Small crochet projects are some of the most satisfying to make because they are quick, practical, and full of creative possibilities. Even a tiny item can feel special when you choose the right colors, shape, and finishing details. These keychain-style patterns are a wonderful example of how crochet can be both playful and useful at the same time.
The mini octopus brings a fun ocean-inspired feel, the tulip bouquet adds floral charm, the small bear offers classic cuteness, the moon gives a soft celestial look, and the sun brings bright, happy energy. Each one has its own personality, which makes them ideal for gifts, market items, or personal accessories.
The most important part of any small crochet project is careful finishing. When you weave in ends neatly, shape the piece well, and attach the hardware securely, your handmade work instantly looks more polished. That is what turns a simple crochet idea into a finished piece people will love to keep, wear, or gift.