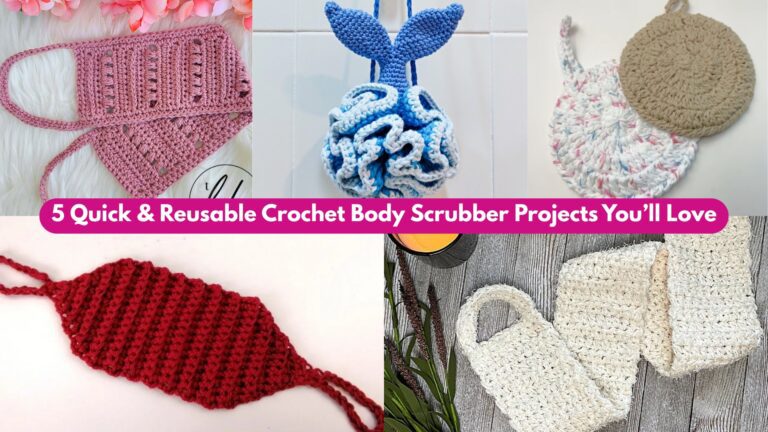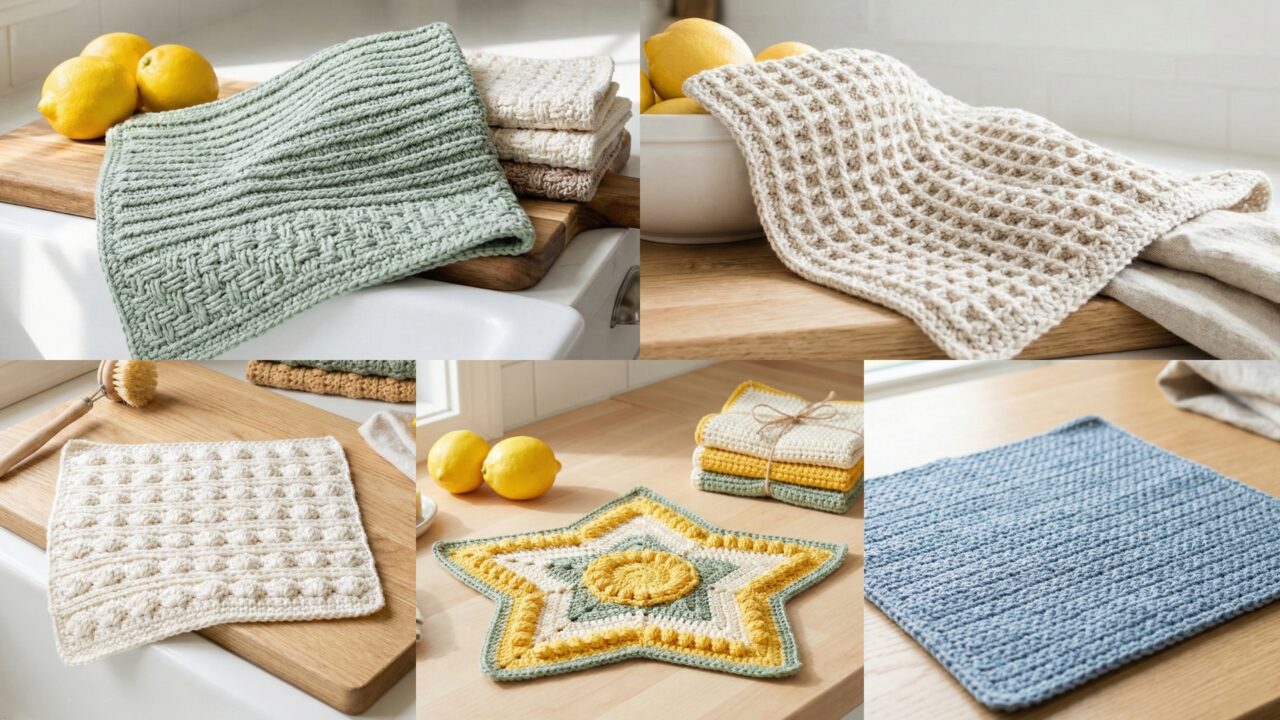
Dishcloths are the perfect beginner project: small, quick, functional, and a great way to learn new stitches. Below you’ll find a friendly introduction (tools, yarn, sizing, gauge, care) followed by five full, detailed patterns — Silt Stitch, Textured, Star, Waffle Stitch, and Farmhouse dishcloths. Each pattern includes skill level, materials, a worked example (with stitch counts), a step-by-step guide, helpful tips, and variations. The instructions are written so you can follow them and adapt sizes easily.
Quick essentials — tools, yarn, sizing, gauge & abbreviations
- Best yarn: 100% cotton (worsted weight) is ideal — absorbent, heat tolerant, and durable. Bamboo/cotton blends work too but may be slipperier. Avoid acrylic for dishcloths that will touch hot dishes.
- Hook: 4.0 mm (G) or 4.5 mm (7) is typical for worsted cotton; use whatever hook gives a firm but not rock-hard fabric.
- Notions: tapestry needle for weaving ends, scissors, measuring tape, stitch marker (optional).
- Finished size: typical dishcloths are 8–10 in (20–25 cm) square. You can scale up for a scrubby or down for a coaster.
- Gauge (example): with worsted cotton and a 4.5 mm hook you might get about 5 sc = 1 in (this is only an example — always swatch).
- How to compute stitches:
stitches per inch × desired width (in inches) = foundation chain count- Example digit-by-digit: if your swatch shows 5 sc per 1 in and you want a 9 in wide cloth: 5 × 9 = 45 stitches → foundation = 45 (adjust for stitch multiples required by pattern).
- Care: machine wash warm, tumble low or air dry. Block lightly if you want crisp edges.
- Abbreviations (US): ch, sl st, sc, hdc, dc, tr, sk, st(s), rep, BLO (back loop only), FLO (front loop only), RS/WS.
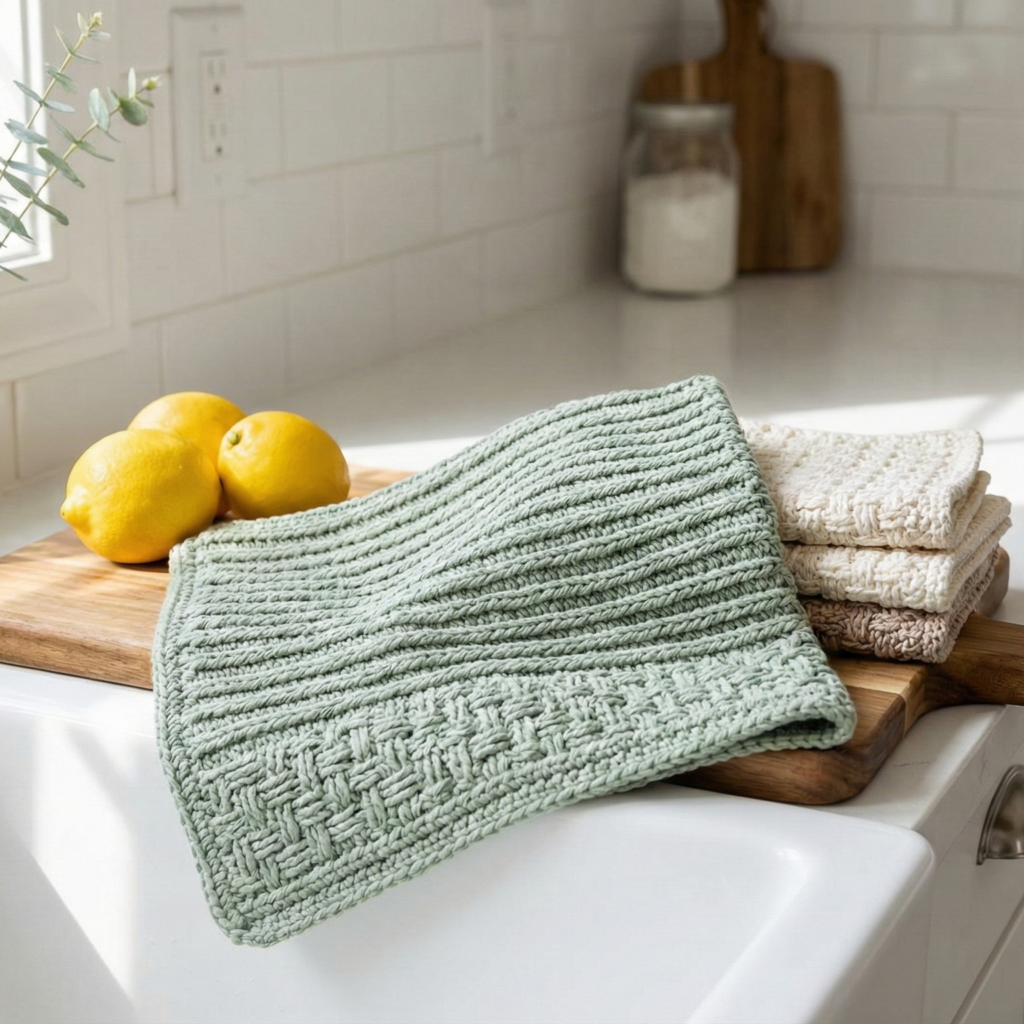
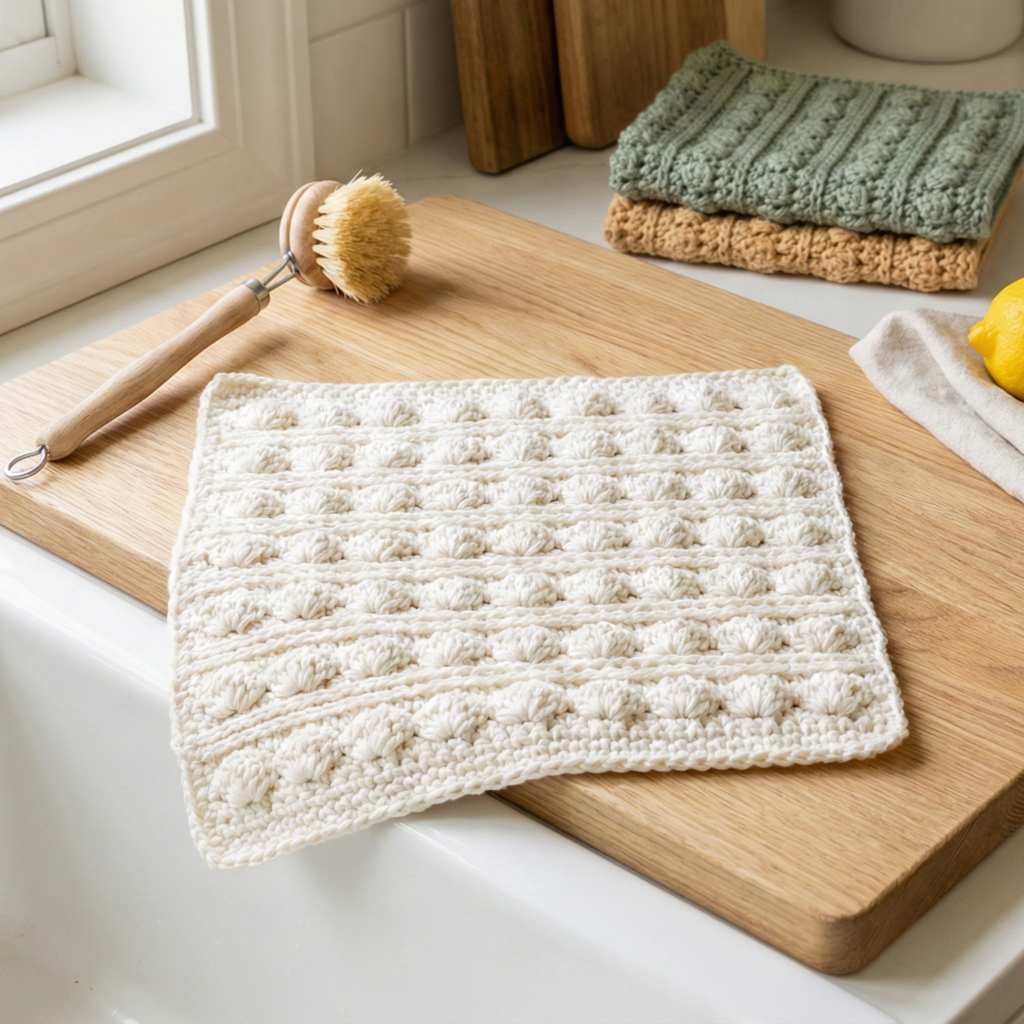
1. Crochet Silt Stitch Dishcloth Pattern
(delicate woven-like texture; beginner → confident beginner)
Why this stitch? The Silt Stitch produces a tidy, slightly woven texture that’s dense enough for scrubbing but soft in the hand. It’s easy to memorize and works up fast.
Materials (example cloth ~9 in square)
- Worsted cotton ~100 yd.
- Hook: 4.5 mm.
- Gauge example: 5 sc = 1 in (use your swatch to calculate).
Worked example (math shown)
- Desired width: 9 in. Gauge: 5 sc/in → 5 × 9 = 45 → foundation chain = 45 (plus 1 turning ch if working rows).
Stitch concept (Silt Stitch)
A simple repeating two-row pattern: one row of sc anchors the fabric; the next row is a short-row textured step that looks woven. You’ll work in the back loop on one row to give that subtle ridge.
Step-by-step
- Swatch & compute — make 20–30 sc and measure. Confirm stitches per inch then compute foundation chain count:
st/in × width = chain. For our example: 5 × 9 = 45. - Foundation — ch 45 + 1 turning ch. (If you prefer working in the round to avoid seams, join and work in rounds using a multiple compatible with pattern — see note below.)
- Row 1 (RS): sc in 2nd ch from hook and across (45 sc). Turn.
- Row 2 (WS — textured row): ch 1, sc in BLO of next 2 sc, ch 1, sk next sc; repeat across, finish with sc in last st. Turn.
- This creates small short loops that form a woven effect when worked together with the next sc row.
- Row 3: ch 1, sc across working into both loops (not BLO) — this anchors the ch-1 spaces and creates the weave. Turn.
- Repeat Rows 2–3 until piece is square (measure height until ~9 in using gauge). For our example, if gauge in rows: say 6 rows = 1 in (measure your swatch), then for 9 in height: 6 × 9 = 54 rows. Work until height matches.
- Border (optional tidy finish): Once square, do 1 round sc evenly around all four edges (work 3 sc in each corner) or work a round of hdc for a firmer rim.
- Weave ends & block: Trim and weave ends. Pin to square and lightly steam or wet block to set shape.
Tips & variations
- Make a larger cloth by increasing chain length in multiples of the stitch repeat (for Silt Stitch, any count works since stitch is worked per st).
- For extra scrub, hold a strand of nylon scrubbing yarn with cotton for the same stitch.
- Work in variegated cotton for a subtle color effect.
2. Crochet Textured Dishcloth Pattern
(great for beginners who want a bit more bite from the cloth)
Why this stitch? Alternating post stitches or waffle-like puffs give raised bumps that scrub dishes nicely.
Materials (example ~8.5 in square)
- Worsted cotton ~100 yd.
- Hook: 4.5 mm.
- Gauge example: 5 sc = 1 in.
Concepts used: alternating rows of hdc and dc clusters or simple front-post/ back-post combinations to create texture.
Step-by-step—simple textured pattern (rib + bumps)
- Compute foundation — for a target width of 8.5 in at 5 sc/in: 5 × 8.5 = 42.5 → round to 43 ch (or choose 44 to make a multiple). For this pattern use an odd or even count as you like; we’ll use 44 ch + 1.
- Row 1 (base): ch 44 + 1, hdc in 2nd ch from hook and across (44 hdc). Turn.
- Row 2 (rib): ch 2, hdc BLO across (44). Turn. This creates a neat rib on one face.
- Row 3 (bumps): ch 3 (counts as dc), skip 1, 5 dc in next st (shell), skip 1, dc in next across — shells spaced to make bump clusters. Turn.
- Row 4: ch 2, hdc across to anchor the shells. Turn.
- Repeat Rows 3–4 until cloth is square. The hdc rows stabilize; the shell rows create texture.
- Edge: Round of sc around finished cloth to tidy and stabilize. Make sure to work 3 sc in each corner to keep a square.
- Finishing: Weave in ends. Block while damp to set shape.
Tips & variations
- For denser scrub, make the shell row with 7 dc instead of 5.
- For a more uniform texture, swap shells for clusters: (dc3tog) clusters.
- Use a cotton/linen blend for a firmer cloth that dries quickly.
3. Crochet Star Dishcloth Pattern
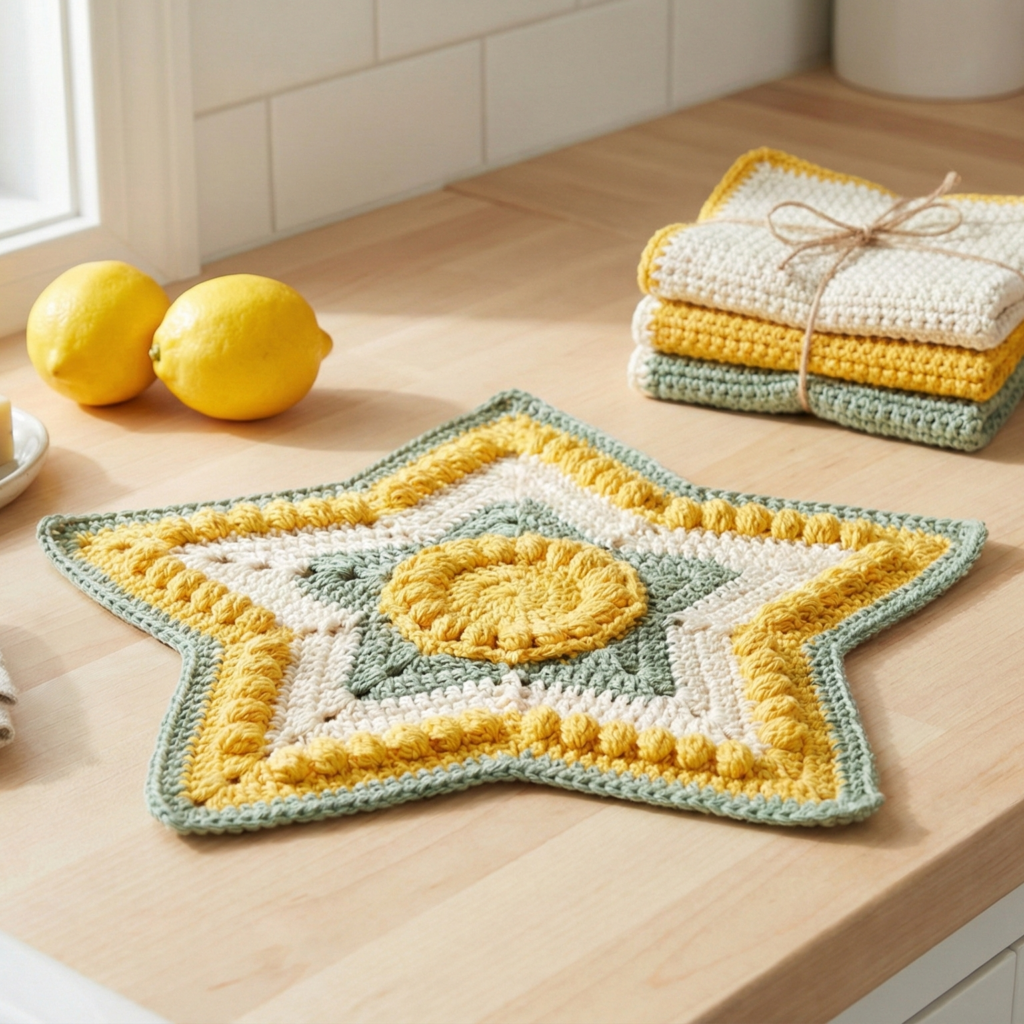
(a striking centerpiece; great as a gift)
Why this stitch? The star motif in the center adds visual interest — a nice decorative cloth that still works for dishes.
Materials (example ~9 in square)
- Worsted cotton for 2 colors (star contrast + background) ~120 yd total.
- Hook: 4.5 mm.
Construction concept: Work a square in rounds; start with a center star motif built as a small medallion, then continue outward in rounds to form a square.
Step-by-step — centered star medallion in a square
- Star center (small medallion): With contrast color:
- MR, ch 1, 8 sc in MR; sl st.
- R2: ch 3, sl st in next st repeat 8 times — this makes 8 tiny points. Tighten ring and weave tail.
- Join background and expand: Switch to background color and work rounds of sc to expand the medallion into a larger circle:
- R1 (background): ch 1, sc 2 in each sc around → 16 sc.
- R2: sc 1, inc → 24 sc.
- Continue increasing until medallion is about 4–4.5 in across.
- Square formation: To make a square, after you have a large circle, start working corner rounds using 3 sc in a corner space to form four corners:
- Example technique: after reaching approx 24–30 sc per round, switch to the square-in-round method: in the round do
*(sc in next 6 sts, (sc, ch2, sc) in next st)*— place the (sc, ch2, sc) at four quarter points to form corners. Each subsequent round increase evenly between corners (add one sc on each side per round) until square measures ~9 in.
- Example technique: after reaching approx 24–30 sc per round, switch to the square-in-round method: in the round do
- Body rounds: Work even rounds of sc to reach the desired height, continuing to increase evenly along each side to keep the square flat.
- Border: Work a round of sc or crab stitch (reverse sc) for a neat edge.
- Finishing: Weave ends and block into a square.
Tips & variations
- Use a three-color palette: star, inner ring, and background for a bold look.
- The star can be made larger if you increase the initial medallion rounds before moving into square shaping.
4. Crochet Waffle Stitch Dishcloth Pattern
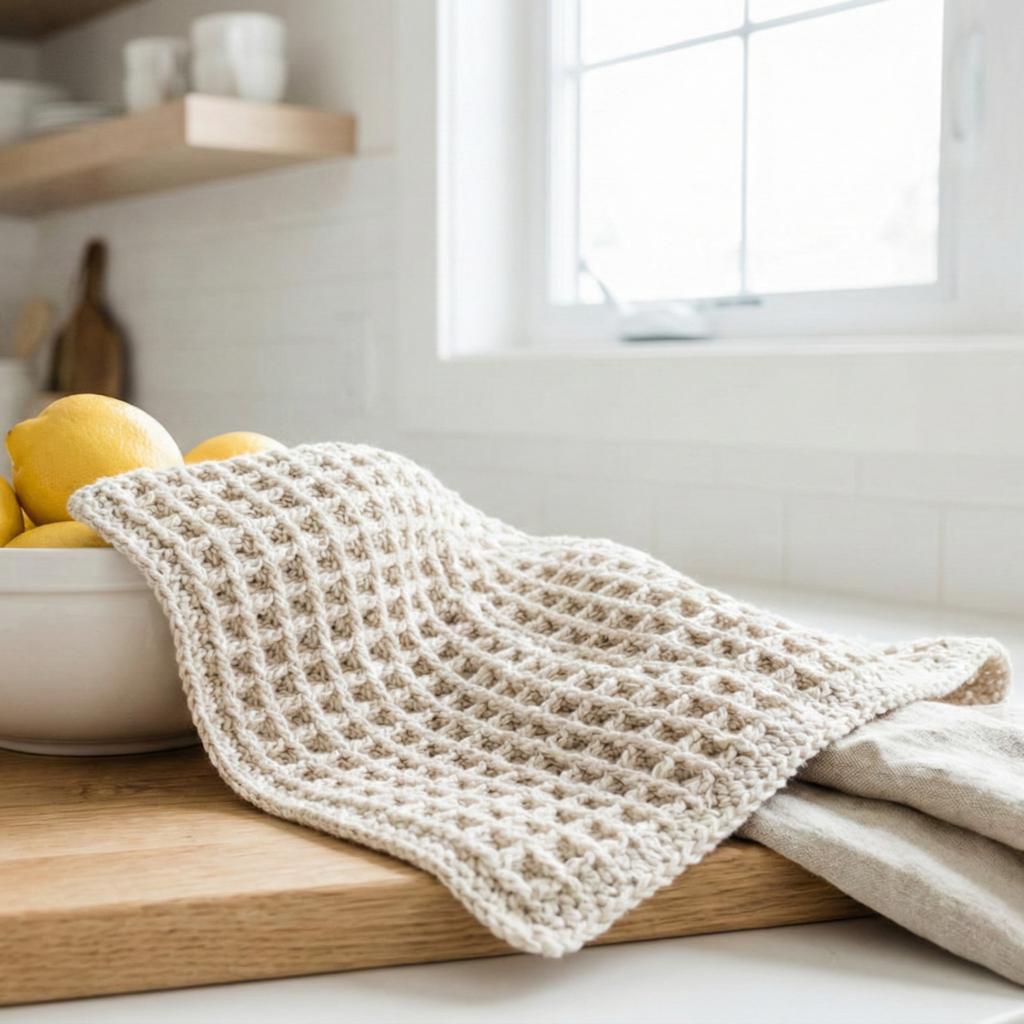
(the classic scrubby; excellent for absorbing and scrubbing)
Why the waffle stitch? It’s thick, springy, and offers excellent texture for washing. The technique creates small pockets that improve absorption.
Materials (example ~9 in square)
- Worsted cotton ~120 yd.
- Hook: 4.5 mm.
Waffle stitch basics: Alternating post-stitch rows (fpdc and dc) build a grid of waffle pockets.
Step-by-step — waffle cloth
- Compute foundation: For 9 in at 5 sc/in → 5 × 9 = 45 ch. Waffle stitch is usually worked over multiples of 3 + 1; 45 is divisible by 3, so use 46 ch + 1 turning ch if needed. For clarity use 46 ch then adjust.
- Row 1 (foundation): ch 46 + 1, dc in 4th ch from hook and across (counts as dc row) — or use sc base if you want a tighter edge.
- Row 2 (waffle start): ch 2 (counts as hdc), fpdc around the next dc, hdc in next dc repeat across. Turn.
- fpdc = front post double crochet: yarn over, insert hook around post of indicated stitch from front to back to front, complete dc.
- Row 3: ch 2, dc across in normal stitches (work into top of each stitch, not the post) to lock posts in place. Turn.
- Repeat Rows 2–3 until piece is square. Each pair of rows increases waffle depth.
- Border: 1–2 rounds of sc around edges to tidy.
- Finishing: Weave ends and block flat. Waffle cloth will puff slightly — block to desired thickness.
Tips & variations
- Work fewer waffle rows for a thinner cloth; more rows = puffier cloth.
- For extra firmness, use a smaller hook for the border rounds so the edges don’t curl.
5. Crochet Farmhouse Dishcloth Pattern
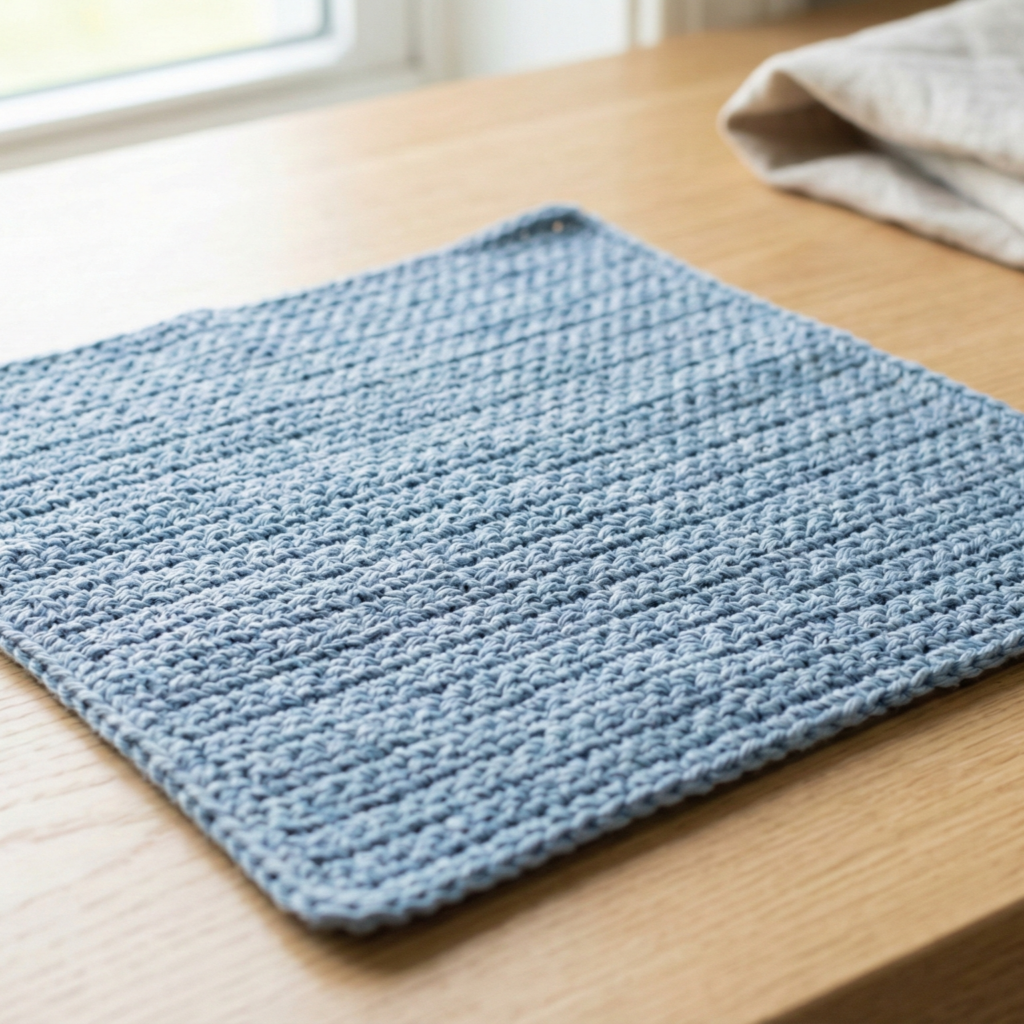
(classic, simple, and charming — a great beginner project)
Why this design? The Farmhouse cloth uses linen/moss stitch or a simple basketweave to mimic homey woven textures — stylish and functional.
Materials (example ~9 in square)
- Worsted cotton ~100 yd.
- Hook: 4.5 mm.
Two easy stitch options: (A) Linen/Moss stitch — dense and flat; (B) Basketweave — looks like woven fabric.
Option A — Linen/Moss Stitch dishcloth (dense, flat)
- Compute foundation: 5 sc/in × 9 in = 45 ch + 1 turning ch.
- Row 1: ch 45 + 1, sc in 2nd ch from hook across (45 sc). Turn.
- Row 2: ch 2, sk next st, sc in next st, ch 1, sk next st, sc in next st — this creates the woven linen texture. Turn.
- Row 3: ch 1, sc in each ch-1 space and sc space across (work sc into each ch-1 space and sc from previous row) — this locks the linen look. Turn.
- Repeat Rows 2–3 until square.
- Finish: Round of sc for tidy edge.
Option B — Mini Basketweave (post stitch)
- Compute foundation: choose multiple of 6 + 1 for balanced blocks; for 9 in at 5 sc/in → 45 sc is fine for blocks of 3 and 2 but choose 49 ch if you want exact multiples; however a cloth doesn’t need perfect multiples — we’ll use 45 as workable.
- Row 1: sc across 45 sts.
- Row 2: fpdc 3, bpdc 3 repeat across (front and back post double crochets). This makes vertical ridges. Turn.
- Row 3: Reverse the order: bpdc 3, fpdc 3 so the ridges interlock. Repeat until square — this forms a basket effect.
- Edge: sc round to tidy.
Tips & farmhouse styling
- Use natural neutrals (cream, ecru, grey) or a two-color stripe along one edge.
- Sew on a small hanging loop in a corner (ch 10, join inside) for easy storage.
Conclusion
Dishcloths are one of the most satisfying beginner crochet projects: quick to make, endlessly adaptable, and genuinely useful in the kitchen. The five patterns above give you variety — from the neat woven look of the Silt Stitch, through rugged Textured and Waffle scrubbiness, to the decorative Star and cozy Farmhouse styles.
A few final practical tips:
- Swatch once. It takes five minutes and saves frustration — confirm your stitches per inch and compute exact foundation chains.
- Use 100% cotton for durability and heat tolerance.
- Make a set. A trio of dishcloths in different textures (smooth, textured, waffle) covers most kitchen tasks.
- Care: machine wash warm; reshape while damp; air dry for longest life.
Happy crocheting — pick one pattern, make a swatch, and enjoy a satisfying 1–2-hour make that’s useful every day.