Crochet bandanas are one of the most enjoyable beginner-friendly accessories you can make because they are small, stylish, and easy to customize. They work up faster than larger garments, use only a modest amount of yarn, and instantly add a handmade touch to any outfit. Whether you wear them in your hair, around your neck, or as a stylish accent for sunny days and cool evenings, a crochet bandana brings personality to your look in a way that feels simple and effortless.
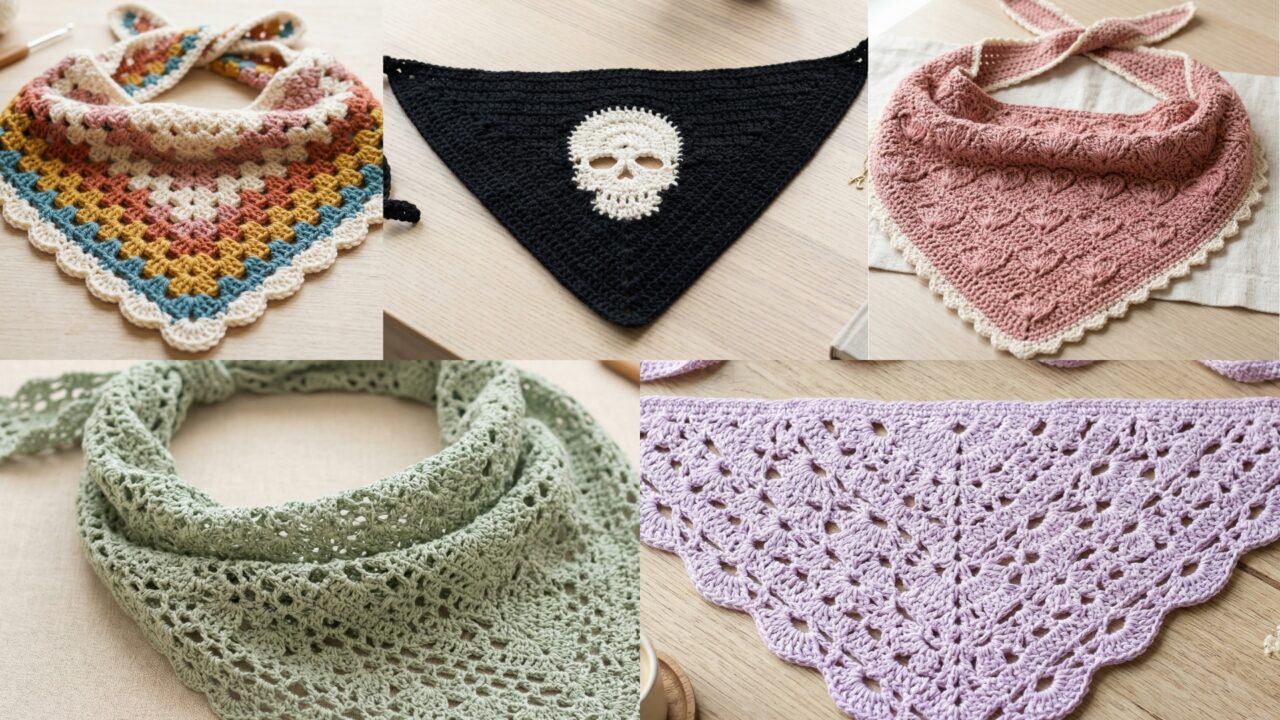
What makes crochet bandanas especially appealing is their versatility. A soft lace bandana can feel delicate and airy. A granny triangle bandana can bring a classic vintage touch. A sweetheart design adds a romantic detail. A skull motif bandana gives off a bold, edgy vibe. A floral bandana feels fresh and feminine. Even though each one has a different look, all of them can be made with basic stitches and simple shaping, which makes them perfect for beginners who want a project that feels fun without being overwhelming.
In this post, you will find five easy crochet bandana patterns with detailed step-by-step guidance, helpful notes, and practical finishing tips. Each section is written to be clear and approachable, so you can follow along even if you are still building confidence with crochet. If you want a small project that is useful, giftable, and stylish, these bandana ideas are a wonderful place to start.
Quick Notes
Project type: Crochet bandanas and headscarves
Best for: Hair accessories, neck scarves, summer outfits, gifts, and stash-busting
Skill level: Beginner to easy intermediate
Hook size: Usually 2.5 mm to 4.5 mm, depending on yarn and drape
Yarn weight: Lace, fingering, sport, or lightweight cotton works best
Best yarn choice: Cotton or cotton blends for structure, comfort, and breathability
Finished size: Usually triangle bandanas from small to medium size, adjustable by chain length
Time to complete: About 30 minutes to a few hours per bandana
Helpful stitches: Chain, slip stitch, single crochet, half double crochet, double crochet, treble crochet, increases, shell stitch, granny clusters, picot, simple lace repeats
Common Materials
Most crochet bandanas can be made with the same basic supplies.
- Yarn in your chosen color or colors
- Crochet hook suited to the yarn weight
- Yarn needle
- Scissors
- Measuring tape
- Optional stitch marker
- Optional beads, buttons, or decorative edging
Cotton yarn is often the best choice for bandanas because it is breathable, easy to wear, and holds its shape well. If you want a more delicate or drapey finish, thinner yarn or crochet thread can also work beautifully. Because bandanas sit close to the body, soft yarn with a comfortable feel is especially important.
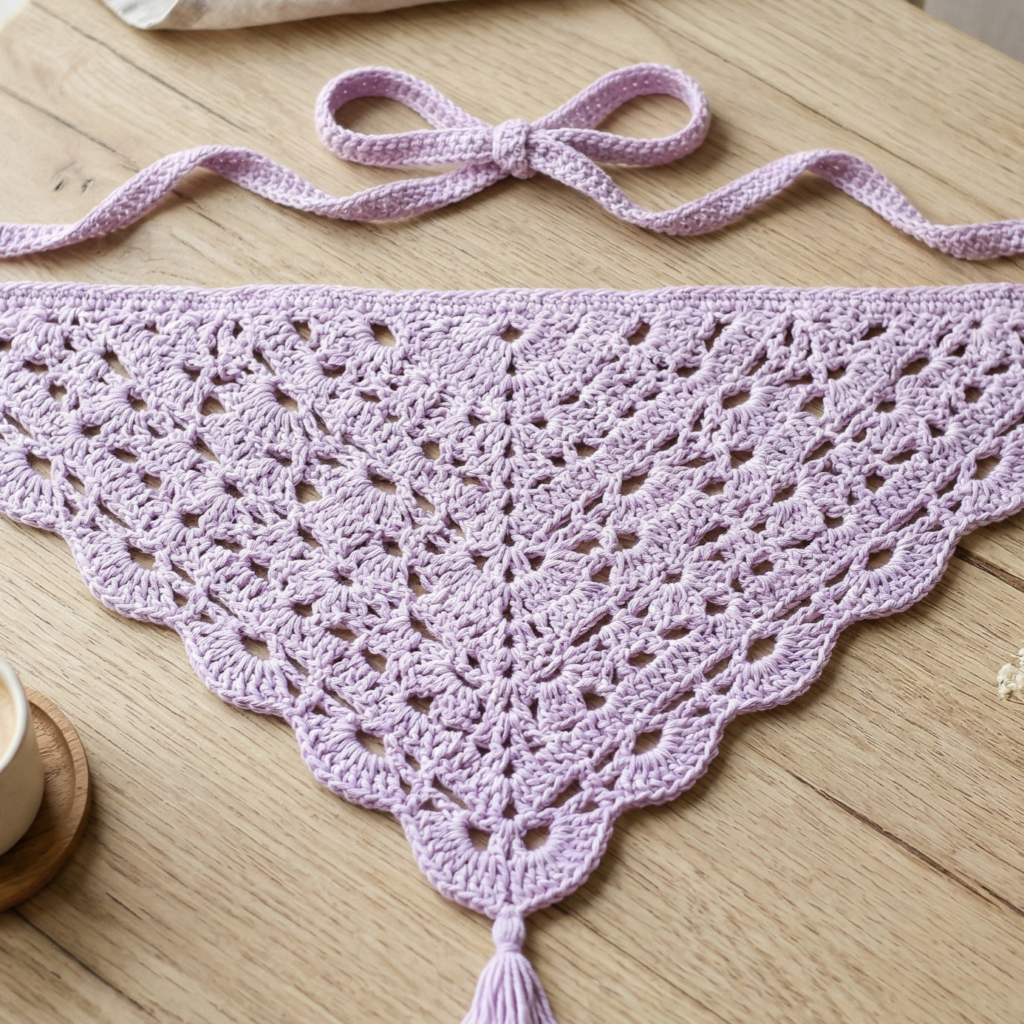
1. Crochet Soft Lace Bandana Pattern
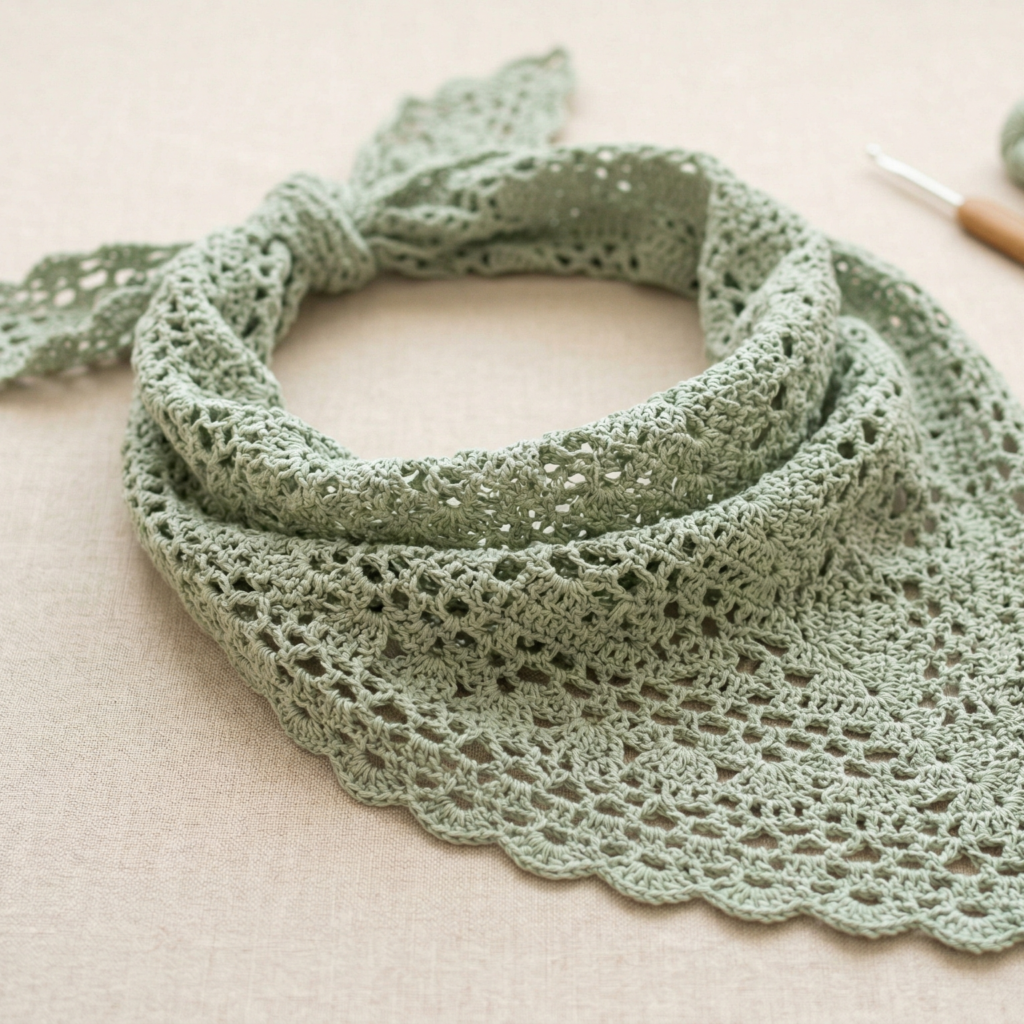
A soft lace bandana is light, delicate, and easy to wear with almost anything. It has an airy texture that feels feminine without being too fussy, making it a lovely option for beginners who want something pretty but simple. The lace pattern gives the bandana movement and charm while keeping the overall design easy to make.
Quick Notes
Skill level: Beginner
Finished size: Small to medium triangle bandana
Style: Airy, delicate, soft, casual
Best colors: White, cream, blush, pale blue, lavender, sage
Materials
- Lightweight cotton yarn
- 3.0 mm to 4.0 mm crochet hook
- Yarn needle
- Scissors
- Measuring tape
Step-by-Step Guide
Step 1: Start with a foundation chain
Begin with a chain that will form the top edge of the triangle. This chain should be long enough to sit comfortably across the head or around the neck, depending on how you plan to wear the bandana. Keep the chain loose enough so it does not become too tight at the top edge.
A smooth foundation helps the bandana fit comfortably.
Step 2: Build the first row of the triangle
Work your first row into the chain using a simple lace repeat. This could be chains and double crochets, or a light shell pattern. The goal is to create a gentle triangle shape without making the fabric too dense.
The first row sets the tone for the bandana’s drape.
Step 3: Increase evenly at the center
As you continue, add increases at the center point of the triangle. This is what allows the bandana to widen evenly as it grows downward. Keep the increases consistent so the triangle stays balanced on both sides.
Even shaping makes the bandana look neat and polished.
Step 4: Continue the lace repeat
Repeat the lace pattern row by row until the bandana reaches the size you want. Because the design is open and delicate, it works up quickly. The lacy spaces add a light, breathable look that feels perfect for spring and summer.
The open texture is what makes this style feel soft and elegant.
Step 5: Check the triangle shape
Lay the bandana flat now and then to make sure the sides are staying even. If one side starts growing faster than the other, adjust your stitch count before continuing. A symmetrical triangle will tie and drape more nicely.
Step 6: Finish the edges
Add a neat border around the outside if desired. A simple single crochet edge or tiny picot detail can make the bandana look more finished without taking away from the lace pattern. This step also helps clean up the sides.
Step 7: Weave in ends and block lightly
Weave in all ends securely, then lightly block the bandana if needed. Blocking helps the lace open up and makes the triangle shape more defined. This is especially helpful if your yarn is soft or slightly curled.
Helpful Tips
A lace bandana looks especially beautiful in light colors because the stitches show up clearly. If you want a softer everyday look, use neutral cotton yarn. If you want a more romantic style, go with pastel shades or a slightly vintage white.
2. Crochet Scallop Granny Triangle Bandana Pattern
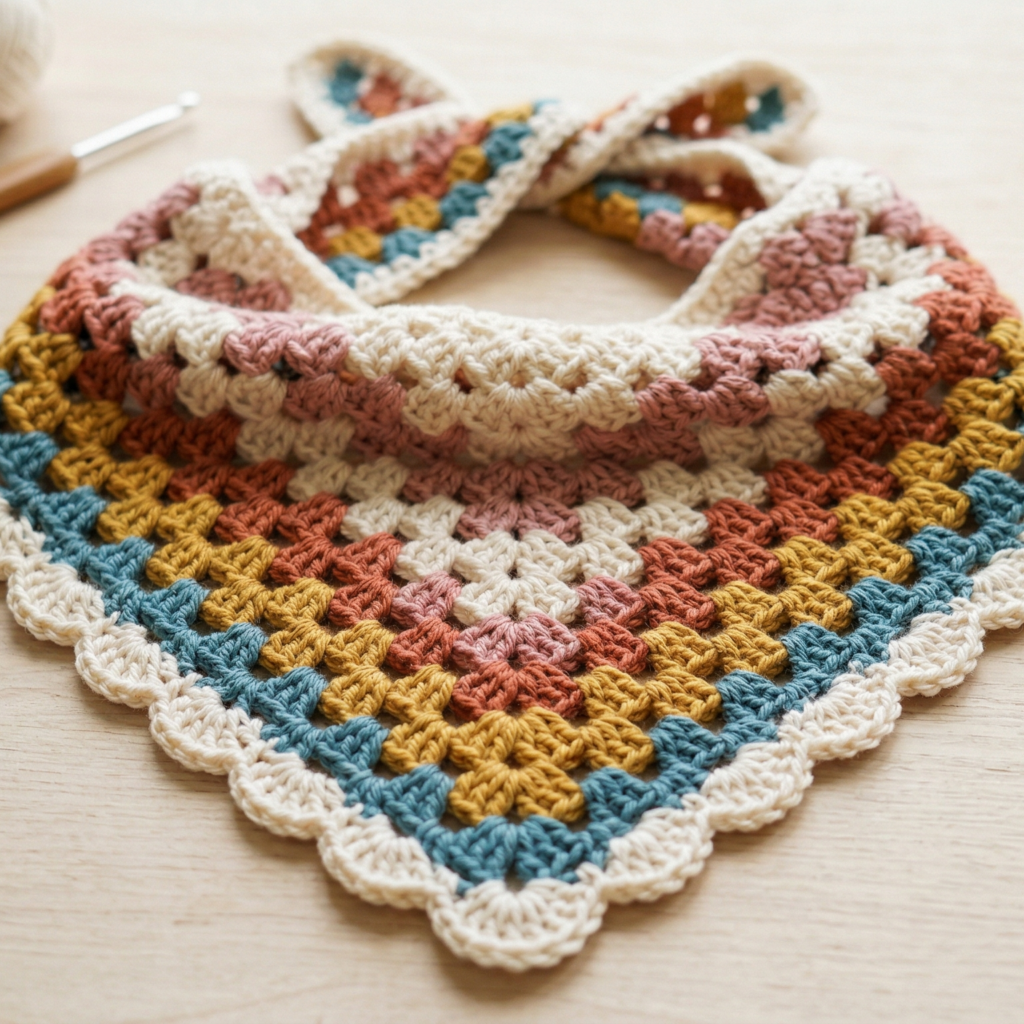
A scallop granny triangle bandana blends classic granny stitch texture with a gentle scalloped edge. It has a nostalgic handmade feel that is easy to love because it looks charming without needing advanced skills. This is a great beginner project if you want a pattern that feels playful and familiar.
Quick Notes
Skill level: Beginner
Finished size: Triangle bandana with a medium drape
Style: Retro, cozy, charming, handmade
Best colors: Cream, mustard, dusty rose, teal, terracotta, multicolor
Materials
- Cotton or cotton blend yarn
- 3.5 mm to 4.5 mm crochet hook
- Yarn needle
- Scissors
- Measuring tape
Step-by-Step Guide
Step 1: Make the starting chain
Start with a chain long enough to create the top of the triangle. Keep the chain loose and even so the bandana sits comfortably. Since this design uses granny stitch, the first row can be a little more open than a tightly stitched bandana.
A relaxed chain gives the triangle room to grow.
Step 2: Create the granny stitch base
Work the first row using granny clusters or a granny-style stitch repeat. This gives the bandana its classic textured look. The clusters should be evenly spaced so the triangle grows in a balanced way.
This texture makes the bandana feel cozy and vintage-inspired.
Step 3: Increase at the center point
At the center of each row, add your increase so the triangle widens as you go. This is the key to forming the triangle shape. If you keep your increases consistent, the bandana will stay symmetrical and easy to wear.
A neat center point makes the shape look much cleaner.
Step 4: Continue the granny rows
Keep adding rows of granny clusters until the triangle reaches the size you want. Granny stitch is very beginner-friendly because the repeat is simple, and it works up quickly. The open spaces also make the bandana feel light rather than heavy.
The rhythm of the stitch is part of its charm.
Step 5: Add the scalloped border
Once the triangle is finished, add a scalloped edge around the outer sides. This can be made with shell stitches or a simple fan-shaped border. The scallops soften the edges and give the bandana a sweet, decorative finish.
The border is what gives this pattern its signature look.
Step 6: Finish the ties or corners
If you want tie ends, continue the top corners into small chains or crochet short straps. Make sure they are long enough to tie comfortably at the back of the head or under the chin if you prefer a neck scarf style.
Step 7: Block the bandana
Light blocking will help the granny stitch and scallops settle into a neat triangle. This also opens the texture and gives the finished bandana a polished handmade look.
Helpful Tips
This design is especially nice if you want to use leftover yarn. You can make it with one solid color for a simple look, or use different colors for each row to create a fun retro style. The scalloped edge adds enough detail that even a plain color looks beautiful.
3. Crochet Sweetheart Bandana Pattern
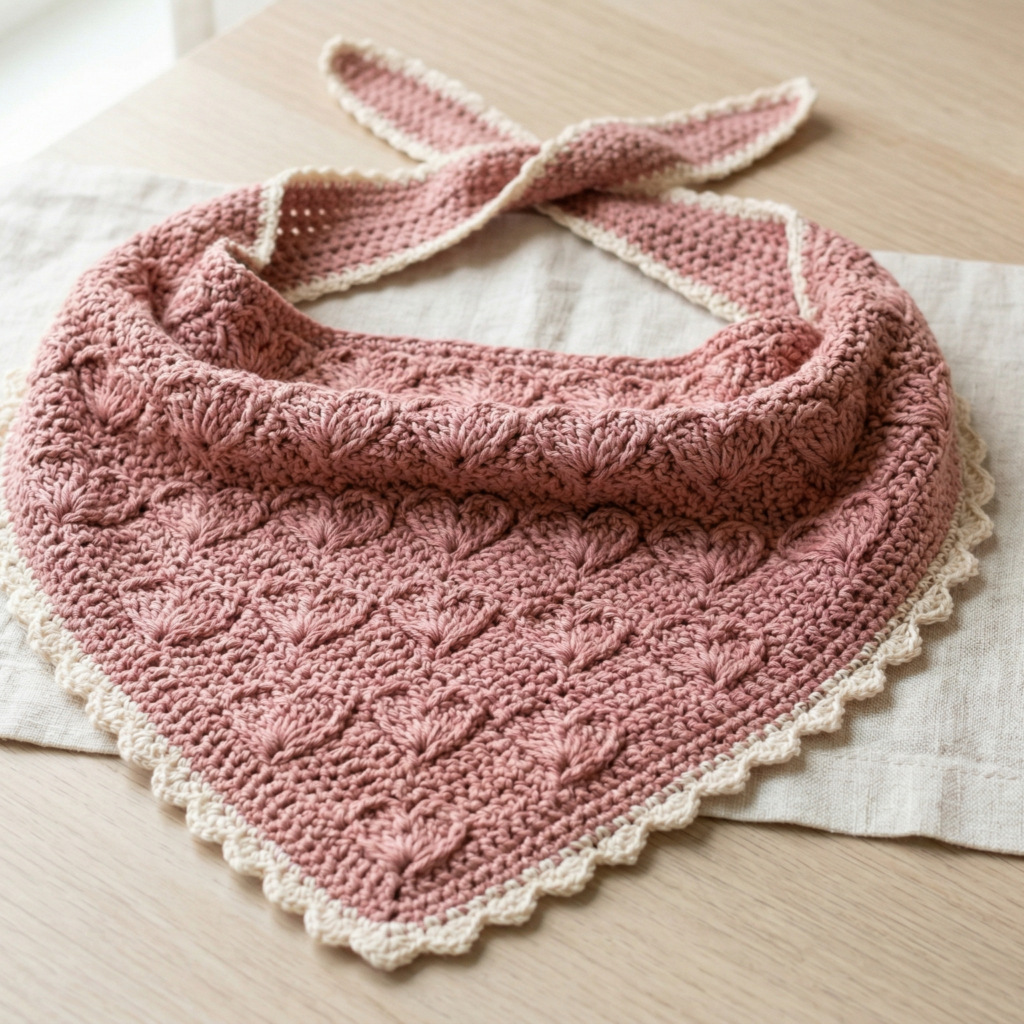
A sweetheart bandana is soft, romantic, and full of charm. It adds a subtle heart-inspired touch without feeling too bold or complicated, which makes it perfect for beginners who want something cute and wearable. This pattern works well as a hair accessory or a small neck scarf.
Quick Notes
Skill level: Beginner to easy intermediate
Finished size: Small to medium triangle bandana
Style: Romantic, sweet, feminine, playful
Best colors: Pink, red, cream, lavender, peach, soft rose
Materials
- Lightweight cotton yarn
- 3.0 mm to 4.0 mm crochet hook
- Yarn needle
- Scissors
- Measuring tape
Step-by-Step Guide
Step 1: Begin with a soft triangle base
Start the bandana the same way you would for a simple triangle shape. The triangle should be balanced and evenly shaped so the sweetheart detail sits nicely at the center or border later on.
A clean triangle base makes the heart theme more noticeable.
Step 2: Shape the center point carefully
As you work down the rows, keep your center increases even so the shape remains symmetrical. The center point is important because it helps the bandana drape neatly and gives the sweetheart motif room to stand out.
A smooth triangle makes the design feel polished.
Step 3: Add heart-like texture
To create the sweetheart look, use a stitch pattern that forms little heart-inspired spaces, soft bumps, or gentle shell-like curves. You can do this with a lace repeat, small clusters, or a decorative center motif. The exact method can vary, but the goal is a sweet, romantic effect.
The design does not need to be literal to feel heart-themed.
Step 4: Continue the body rows
Keep working the rows until the bandana reaches the desired size. If you are adding a heart motif in the center, make sure it stays centered as the triangle grows. This keeps the theme clear and balanced.
Step 5: Add a decorative edge
A shell edge, picot border, or tiny scallop border works beautifully here. This soft finish complements the romantic theme and gives the bandana a delicate look.
The edge helps the sweetness of the design shine.
Step 6: Add ties if desired
You can finish the top corners with chains or short strap sections for tying. If you want the bandana to feel more like a hair accessory, make the ties soft and flexible.
Step 7: Block and shape
Light blocking will help the triangle lie flat and bring out the heart-inspired pattern. This is especially useful if the stitches feel a little curled at the edges.
Helpful Tips
This is a lovely pattern for Valentine-inspired styling, but it also works well as an everyday sweet accessory. Soft shades usually look best, but a bold red version can make a beautiful statement piece.
4. Crochet Skull Motif Bandana Pattern
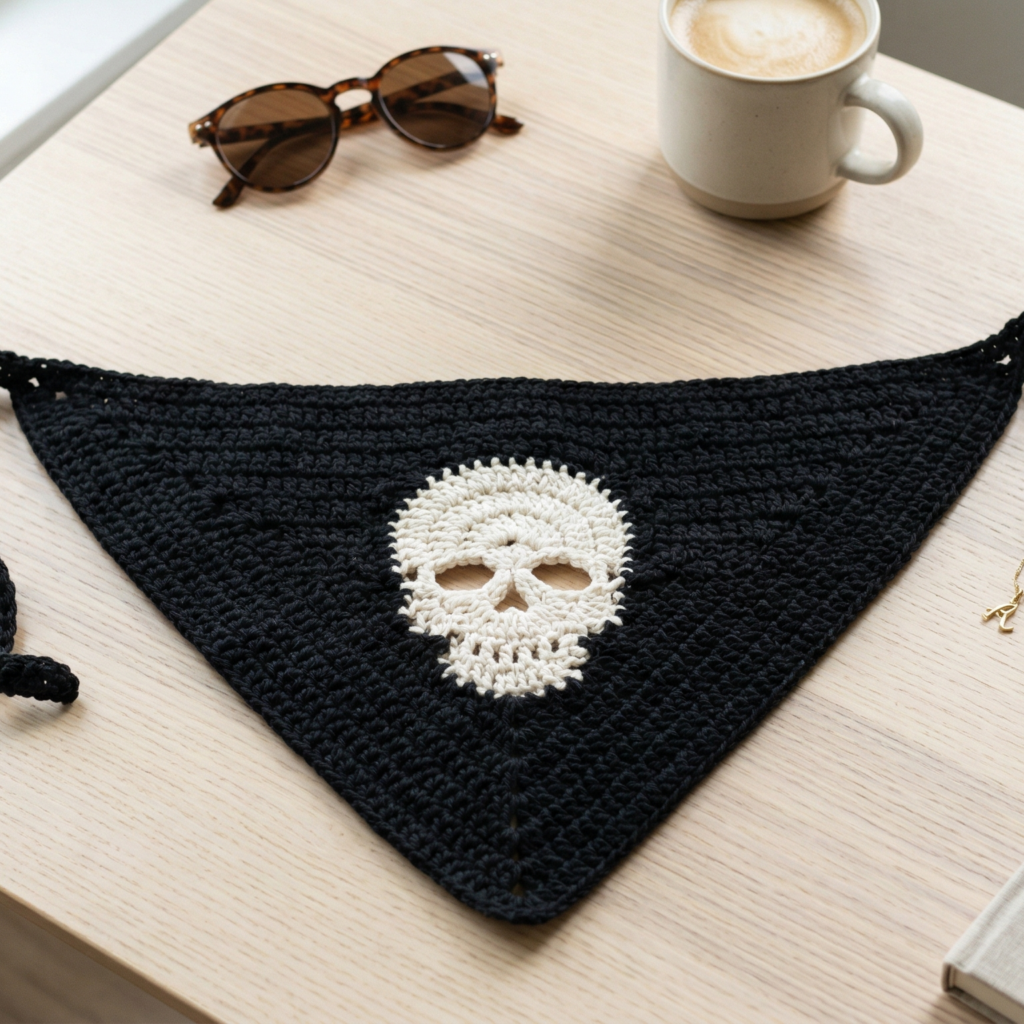
A skull motif bandana is bold, edgy, and full of personality. It is a great choice if you want a beginner-friendly project that feels a little more daring and unique. The skull detail can be made in a simple motif or repeated along the bandana for a more striking effect.
Quick Notes
Skill level: Beginner to intermediate
Finished size: Triangle bandana, small to medium size
Style: Edgy, playful, bold, statement-making
Best colors: Black, white, gray, red, cream, or high-contrast combinations
Materials
- Cotton yarn in one or more colors
- Crochet hook suited to the yarn
- Yarn needle
- Scissors
- Measuring tape
Step-by-Step Guide
Step 1: Choose the skull placement
Decide whether you want one large skull motif in the center or a small repeated skull pattern across the bandana. For beginners, one central motif is often easiest because it keeps the project manageable.
The placement determines how bold the finished piece feels.
Step 2: Create the triangle base
Start with a simple triangle bandana shape. The base should be smooth and even so the skull motif can sit clearly in the middle. You can work the triangle in plain stitches or in a light texture that does not distract from the motif.
A simple base helps the design stand out more.
Step 3: Crochet or apply the skull motif
You can make the skull as a crochet appliqué, a colorwork motif, or a surface-crocheted detail. If you want the easiest option, create the skull separately and sew it onto the bandana later. That keeps the process beginner-friendly and gives you more control over the shape.
The skull should be readable without being overly detailed.
Step 4: Add the rest of the rows
Once the motif is in place, continue working the triangle around it or under it until the bandana is complete. If the skull is being added as an appliqué, make sure the background remains flat and balanced.
Step 5: Use strong contrast
Skull motifs look best when the colors contrast clearly. A white skull on black, or black on cream, makes the design easy to see and more visually striking. If the colors are too similar, the motif may lose its impact.
Contrast is especially important in graphic designs.
Step 6: Finish the edges
A simple border usually works best so the skull remains the main focus. If you want a little extra edge, a tiny ribbed border or plain single crochet edge will keep the look neat and wearable.
Step 7: Secure and block
Weave in all ends carefully and block lightly if needed. If you used an appliqué skull, make sure it is sewn down securely so it stays in place after washing or wearing.
Helpful Tips
This bandana is perfect for adding a little attitude to a casual outfit. Black and white is the most classic combination, but you can also make it in unexpected colors for a softer or more playful twist.
5. Crochet Floral Bandana Pattern
A floral bandana feels fresh, pretty, and full of handmade charm. It is a beginner-friendly project that can be as simple or decorative as you like. Flowers can be added as part of the stitch pattern, embroidered on top, or made as small appliqués, which gives you lots of freedom to customize the look.
Quick Notes
Skill level: Beginner
Finished size: Small to medium triangle bandana
Style: Feminine, fresh, cheerful, botanical
Best colors: Cream, green, pink, lavender, yellow, sky blue, soft neutrals
Materials
- Cotton yarn in your chosen colors
- Crochet hook suited to the yarn
- Yarn needle
- Scissors
- Measuring tape
- Optional extra yarn for flower appliqués
Step-by-Step Guide
Step 1: Start the triangle base
Make a simple triangle bandana as your foundation. A clean and even triangle works best because the floral elements will stand out more clearly. You can keep the base plain or add subtle texture if you want a little more depth.
A neat triangle gives the flowers a good backdrop.
Step 2: Decide how you want to add the flowers
You can crochet flowers separately and sew them on, work flower motifs directly into the rows, or embroider simple floral shapes on the finished bandana. For beginners, separate appliqués are usually the easiest option because they are easier to shape and place.
This choice lets you control how bold the floral detail feels.
Step 3: Crochet the flower motifs
Make small flowers using basic petal shapes, simple loops, or tiny clusters. Keep them flat and compact so they do not add too much bulk. A few small flowers are often more elegant than a large crowded design.
Small motifs look especially pretty on wearable accessories.
Step 4: Attach the flowers
Sew the flowers onto the triangle in a balanced layout. You can place them near the bottom point, along one side, or scattered lightly across the bandana. Make sure they are securely attached and lie flat against the fabric.
The placement can make the bandana feel either playful or refined.
Step 5: Add leaf details if desired
Tiny green leaves can make the floral theme feel more complete. You do not need many, just a few small accents to support the flower shapes. This gives the bandana a more botanical, garden-inspired look.
A little greenery adds balance and freshness.
Step 6: Finish the outer edge
A gentle border, such as a simple shell or picot edge, can help the bandana feel polished. Keep the border subtle so it does not compete with the flowers. The goal is to frame the floral details nicely.
Step 7: Block and check placement
After everything is attached, lightly block the bandana and check that the flowers sit evenly. Blocking can help the triangle lie flat and make the floral decorations look more intentional.
Helpful Tips
A floral bandana is one of the easiest ways to make a simple accessory feel special. If you want a soft cottagecore look, choose pastels and tiny blossoms. If you want a brighter spring style, use cheerful colors and a few bold flowers instead.
Conclusion
Crochet bandanas are a wonderful project for beginners because they are small, useful, and easy to personalize. They let you practice shaping, stitch repeats, and finishing techniques without taking on a large or complicated garment. At the same time, they are stylish enough to wear in everyday life, which makes them even more rewarding to make.
These five bandana patterns each bring a different mood. The soft lace bandana feels light and delicate. The scallop granny triangle bandana has that classic handmade charm. The sweetheart design adds a romantic touch. The skull motif bandana gives your outfit an edgy twist. The floral bandana feels fresh, pretty, and timeless. Together, they show just how versatile a simple triangle accessory can be.
The best part is that you do not need advanced skills to create something beautiful. With a few basic stitches, a little attention to shape, and the right yarn, you can make bandanas that are comfortable, wearable, and full of personality. Whether you are making them for yourself, as gifts, or for your handmade shop, these patterns are a great way to enjoy a quick project with stylish results.