Crochet dishcloths are one of the most practical and satisfying projects you can make. They are small enough to finish quickly, useful enough to reach for every single day, and sturdy enough to become a staple in any kitchen. Unlike decorative crochet pieces that sit on a shelf, dishcloths get to be used often, which makes them especially rewarding. Every stitch has a purpose, and every finished cloth adds a little handmade comfort to daily chores.
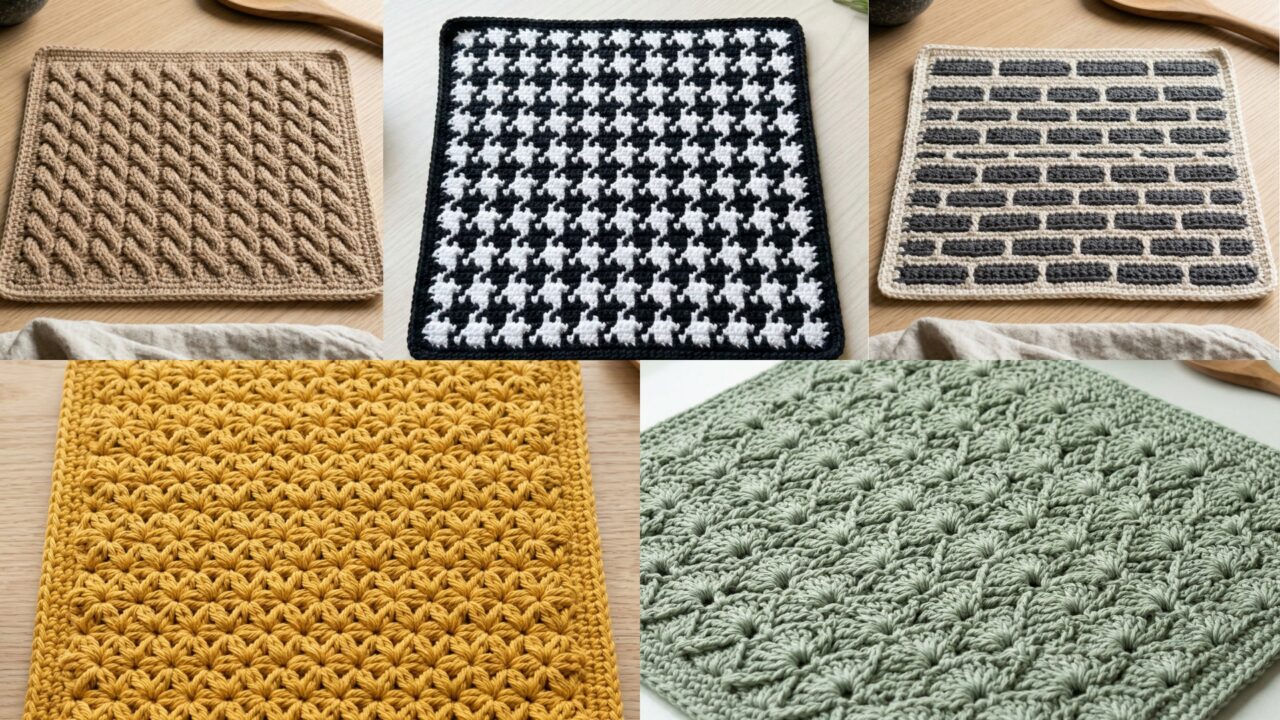
What makes crochet dishcloths especially appealing is how much variety you can create with simple shapes and durable stitches. A houndstooth stitch dishcloth feels classic and bold. A star stitch dishcloth adds thick texture and absorbency. A twisted textured dishcloth gives you a rich, tactile surface. An interlocking shell stitch dishcloth feels pretty and functional. A brick stitch dishcloth offers a neat, structured look that is easy to love. Each pattern has its own personality, but all of them are made to work hard and last.
In this post, you will find five durable crochet dishcloth patterns with detailed step-by-step guidance, practical notes, and helpful finishing tips. Each one is written to be easy to follow, even if you are still learning, while still giving you enough detail to make a cloth that is strong, useful, and beautiful. If you want a project that is quick, practical, and perfect for everyday cleaning, these dishcloth ideas are a great place to begin.
Quick Notes
Project type: Crochet dishcloths
Best for: Everyday kitchen cleaning, bath use, gifts, housewarming sets, and stash-busting
Skill level: Beginner to intermediate, depending on stitch texture
Hook size: Usually 3.5 mm to 5.0 mm, depending on yarn weight and firmness needed
Yarn weight: Cotton yarn is best for absorbency and durability
Best yarn choice: 100% cotton or cotton blends for cleaning and washing
Finished size: Usually 7 to 10 inches square, but customizable
Time to complete: A few hours or less per dishcloth
Helpful stitches: Chain, single crochet, half double crochet, double crochet, post stitches, shell stitch, star stitch, textured stitch repeats, color changes, border finishes
Common Materials
Most dishcloths can be made with a simple set of supplies.
- Cotton yarn in your chosen colors
- Crochet hook suited to the yarn
- Yarn needle
- Scissors
- Stitch marker, if needed
- Measuring tape
- Optional blocking tools
For dishcloths, yarn choice matters a lot. Cotton is usually the best option because it absorbs well, washes easily, and holds up to repeated use. A tighter stitch also helps the cloth last longer and keeps it from stretching too much over time. If you want a more decorative cloth, you can still choose textured stitches, but the base yarn should stay practical.
1. Crochet Houndstooth Stitch Dishcloth Pattern
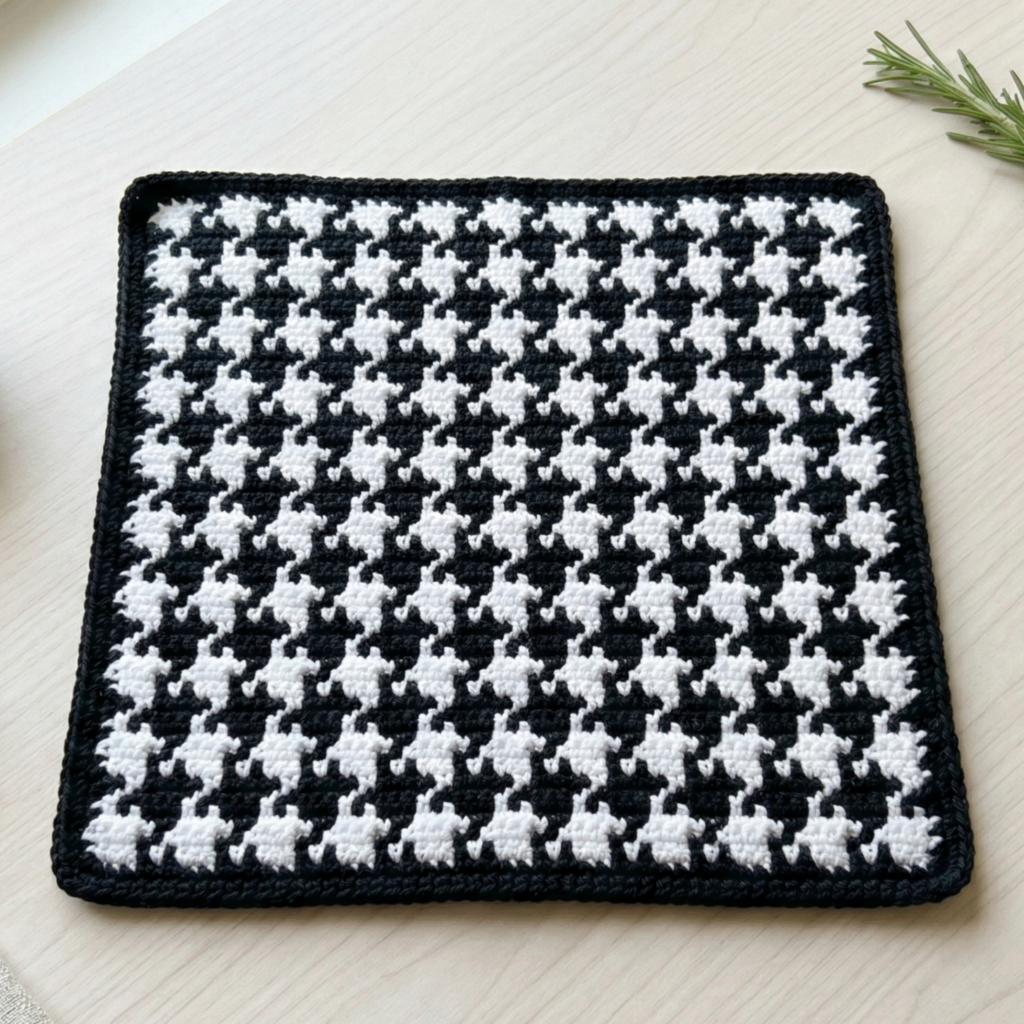
A houndstooth stitch dishcloth is bold, classic, and very practical. The repeated contrast pattern gives the cloth a structured look that feels clean and timeless. It is a great choice if you want a dishcloth that looks a little more stylish than a plain square, while still being very durable for everyday cleaning.
Step-by-step guide
Step 1: Choose your two colors
Houndstooth works best with two colors that contrast clearly. Classic black and white is timeless, but you can also choose navy and cream, gray and white, or any combination that stands out well. The contrast is what makes the pattern visually strong.
A clear color difference will help the stitch design show up well.
Step 2: Start with a foundation chain
Chain the width you want for the dishcloth. Because dishcloths are often square or nearly square, a medium-sized foundation works well. Keep the chain smooth and not too tight so the cloth lays flat from the beginning.
A balanced foundation helps the texture stay even.
Step 3: Work the first texture row
Begin the houndstooth pattern using the stitch repeat that creates the small broken-check effect. This usually involves alternating stitches in a way that shifts the color or texture as the rows progress. Keep your stitch count consistent so the design stays neat.
The first row sets the rhythm of the pattern.
Step 4: Repeat the stitch pattern
Continue the houndstooth repeat row by row. Watch the pattern closely as it develops, since this stitch relies on regular changes to create its classic look. Keep your tension even so the cloth does not curl or become too stiff.
Consistency is what gives houndstooth its clean appearance.
Step 5: Keep the edges straight
Because the pattern has a lot of visual structure, the edges should stay straight and tidy. If the sides begin to curve, check your stitch count before going further. Straight edges will make the dishcloth much easier to finish and use.
Step 6: Continue until the cloth is square
Work until the dishcloth reaches the size you want. Many dishcloths work well at about 8 inches square, but you can make yours larger or smaller depending on your preference. Try to keep the height and width equal for the most balanced result.
Step 7: Finish with a simple border
Add a border in one of the colors to frame the pattern and make the edges neat. A simple single crochet border works very well here. It helps the dishcloth look finished and makes the corners feel stronger.
Helpful Tips
Houndstooth dishcloths look especially nice in strong contrast combinations. If you want a classic kitchen accessory, black and white is hard to beat. If you want something softer, try cream and taupe or gray and white. Cotton yarn with good stitch definition will make the pattern look crisp and polished.
2. Crochet Star Stitch Dishcloth Pattern
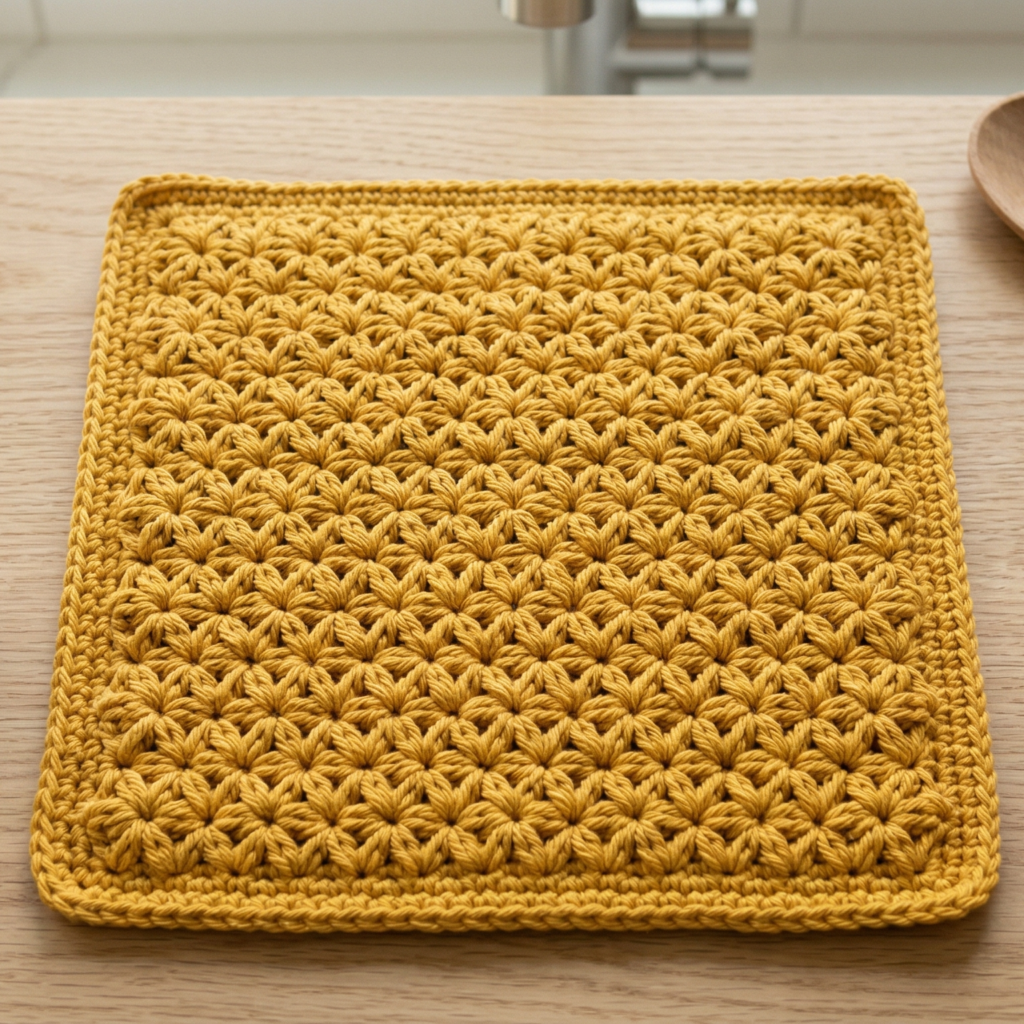
A star stitch dishcloth is thick, textured, and wonderfully absorbent. The star stitch creates a rich surface that feels soft in the hand while still being sturdy enough for everyday cleaning. It is a beautiful option if you want a dishcloth that feels a little more special than a simple flat square.
Step-by-step guide
Step 1: Learn the star stitch rhythm
Before making the full dishcloth, it helps to practice the star stitch on a small swatch. This stitch is created by drawing up loops and closing them in a star-like repeat. Once you understand the motion, it becomes very satisfying to work.
A small practice swatch can make the main project easier.
Step 2: Chain your starting row
Make a foundation chain that fits the size you want. Since star stitch can be dense, keep the chain relaxed enough to avoid a tight edge. A good foundation helps the cloth stay flat and feel comfortable in use.
A smooth start leads to a neater cloth.
Step 3: Work the star stitch rows
Begin the star stitch pattern row by row. The texture should form little star-like clusters across the surface. Keep your loops even and your tension steady so the pattern stays balanced and the cloth remains flexible.
The star texture is the main feature of the dishcloth.
Step 4: Watch the height and width
Star stitch can make a fabric that is thicker than a basic stitch, so check the size as you go. The cloth should remain square and not become too narrow or too tall. If needed, adjust your tension or use a slightly larger hook.
Balance is especially important with dense texture.
Step 5: Continue until the dishcloth reaches the right size
Work until the cloth is large enough for your daily kitchen needs. A good dishcloth size usually sits comfortably in the hand without feeling bulky. The star stitch gives it a soft, cushioned feel that makes it lovely to use.
Step 6: Add a neat border
Finish with a simple border to clean up the edges. A round of single crochet can help frame the stars and keep the cloth looking polished. You want the border to support the texture, not distract from it.
Step 7: Block lightly if needed
If the cloth curls slightly at the edges, give it a light block or press it gently into shape. This helps the star stitch settle and makes the finished dishcloth look more even.
Helpful Tips
Star stitch dishcloths are especially nice in solid cotton colors because the texture stands out clearly. If you want a kitchen set, make a few in coordinating shades. They are also lovely as part of a handmade gift bundle.
3. Crochet Twisted Textured Dishcloth Pattern

A twisted textured dishcloth feels rich, tactile, and highly functional. The twist-like surface gives it a cozy handmade look while still remaining practical for cleaning. This pattern is ideal if you want something with a little more texture than a plain cloth but without complicated shaping.
Step-by-step guide
Step 1: Choose a sturdy cotton yarn
Since the texture will be doing a lot of the visual work, use a yarn that holds stitch definition well. Cotton yarn is especially good for this because it stays firm and showcases the twists clearly.
Good yarn choice makes the texture stand out.
Step 2: Chain the foundation
Make a chain that matches the width of the dishcloth. Keep it even and relaxed so the first row does not pull inward. A smooth start will make the rest of the cloth easier to shape.
Step 3: Work the first textured row
Begin the twisted pattern using the stitch repeat that creates the raised, rope-like or crossed look. This might involve front post stitches, crossed stitches, or a simple twist-style repeat. Take your time at first so the texture forms cleanly.
The twist effect is the main focus of the cloth.
Step 4: Keep tension steady
Twisted textures can sometimes tighten the fabric, so keep your stitches even and not too tight. The dishcloth should still feel flexible enough for washing and scrubbing. If it starts feeling too rigid, go up a hook size next time.
Step 5: Repeat the pattern
Continue the texture rows until the cloth reaches the size you want. Keep the twist pattern consistent so the entire cloth has the same feel. That regularity is what makes the finished piece look polished.
Step 6: Shape the square
Make sure the dishcloth stays square as you work. If the sides start to curve or the bottom edge pulls, check your stitch count. A square shape makes the cloth much easier to use and store.
Step 7: Finish with a simple border
A clean border can help the textured center stand out and give the cloth a strong edge. A single crochet border is often enough. You can also leave it plain if the twisted texture already feels complete.
Helpful Tips
This dishcloth looks especially nice in earthy or neutral colors because the texture becomes the star. If you want a kitchen set with a rustic feel, try cream, beige, olive, or soft gray. The twisted design is also a great gift choice because it feels handmade and durable.
4. Crochet Interlocking Shell Stitch Dishcloth Pattern
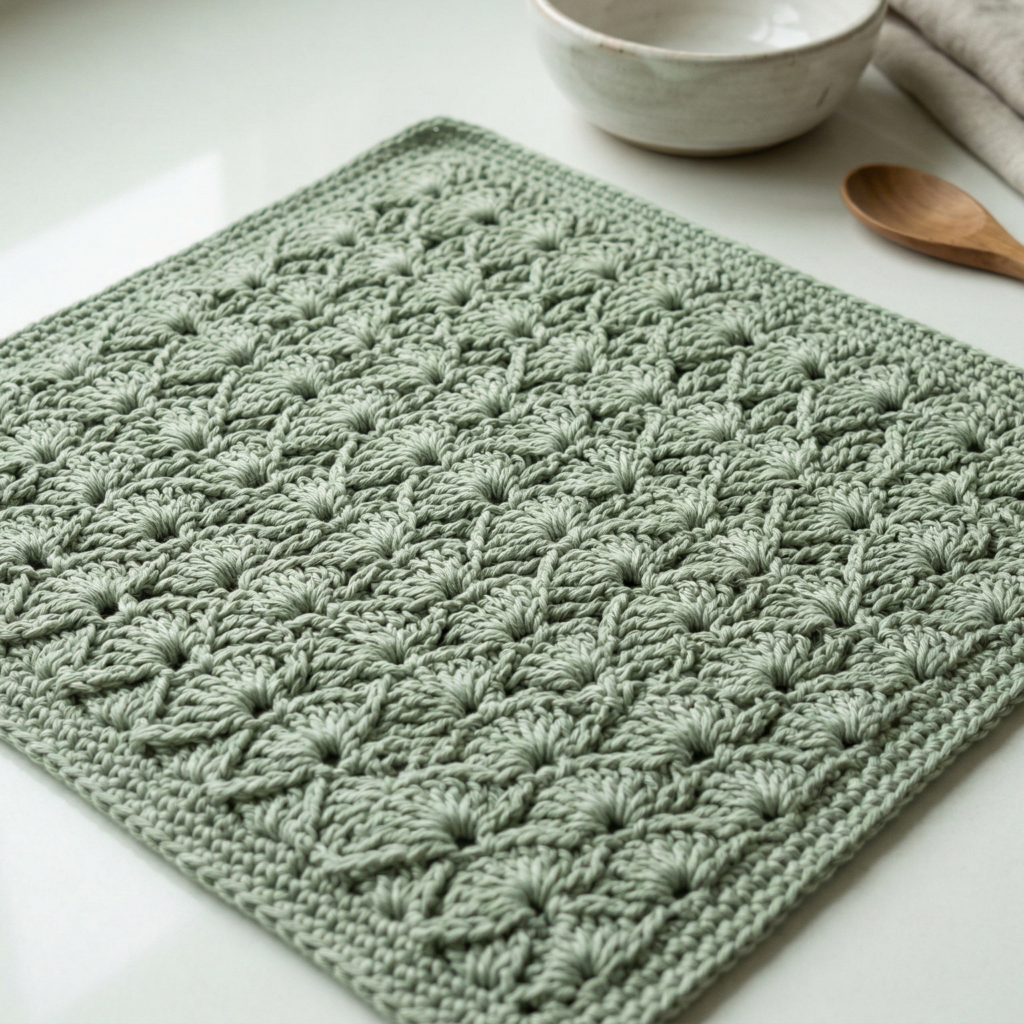
An interlocking shell stitch dishcloth is soft, decorative, and wonderfully practical. The shell texture gives the cloth a pretty layered look that feels a little fancy while still being fully functional. It is a great option if you want a dishcloth that looks beautiful enough for gifting but works hard in the kitchen.
Step-by-step guide
Step 1: Start with a foundation chain
Chain the width you want for the dishcloth. Keep the chain relaxed and even so the shell pattern begins neatly. The shell repeat will create the decorative texture, so a smooth start is important.
A good foundation supports the shell structure.
Step 2: Work the first shell row
Begin the interlocking shell stitch pattern. Shell stitches usually involve multiple stitches worked into the same place to create a fan-like shape. Keep the spacing even so the shells begin to lock together beautifully.
The shell shape is what gives the cloth its softness.
Step 3: Interlock the shells carefully
As you continue, let the shells overlap or nest into each other according to the stitch repeat. This interlocking effect creates the rich textured surface. Make sure each shell sits evenly so the pattern stays clean and readable.
The interlocking part is the heart of this design.
Step 4: Maintain even stitch height
Because shell stitches can create a slightly open fabric, keep an eye on the height of each row. You want the cloth to feel decorative but still dense enough for everyday use. Use steady tension to keep the shape balanced.
Step 5: Repeat until the cloth is the right size
Continue the shell repeat until the dishcloth is large enough. As you work, check that the edges remain straight and the texture stays even. The shell rows should stack neatly without becoming floppy.
Step 6: Add a border if needed
A simple border can give the shell stitch a more polished finish. If the edges already look tidy, you can leave the cloth as it is. If you want a more framed appearance, a round of single crochet works very well.
Step 7: Block lightly
Shell stitch often benefits from a gentle block because it helps the layers open and sit neatly. Shape the cloth flat and allow it to dry so the design looks crisp and finished.
Helpful Tips
This dishcloth looks especially lovely in soft cotton colors like cream, pale blue, blush, or sage. If you want a more traditional kitchen look, white or off-white works beautifully. The interlocking shells make it feel elegant without sacrificing usefulness.
5. Crochet Brick Stitch Dishcloth Pattern
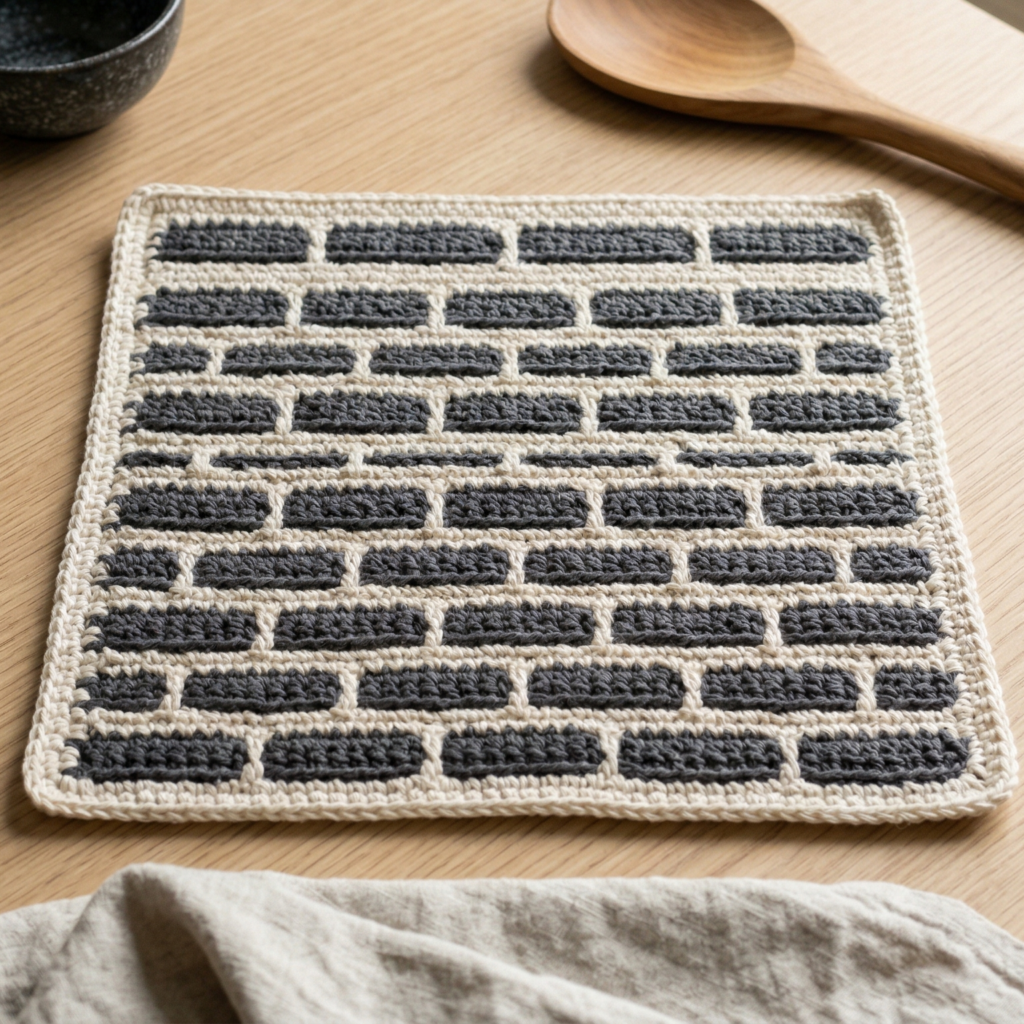
A brick stitch dishcloth is simple, modern, and easy to love. The brick-like layout creates a neat structured pattern that feels sturdy and balanced. It is a very beginner-friendly option if you want something that looks clean and works well for daily cleaning.
Step-by-step guide
Step 1: Plan the brick layout
Before starting, understand how the brick stitch pattern will repeat. The staggered layout creates the appearance of little stacked bricks. This is what gives the dishcloth its clean, modern look.
A clear repeat makes the pattern easy to follow.
Step 2: Start the foundation row
Chain the width of the dishcloth and begin the first row with a simple stitch. Keep the foundation flat and even so the brick pattern can build properly on top of it. A smooth start is especially important for this structured design.
Step 3: Work the brick pattern rows
Begin crocheting the brick stitch repeat. The rows should alternate in a way that shifts the placement and creates the staggered appearance. Keep your rows even so the brick shapes stay consistent.
The staggered layout is the heart of the design.
Step 4: Watch the edges
Brick patterns can sometimes cause the edges to lean if the stitch count changes. Keep an eye on the sides as you work and make sure they stay straight. Straight edges will make the dishcloth much more functional and neat.
Step 5: Continue until the cloth is square
Keep repeating the brick stitch until the cloth reaches the right size. Because this pattern is simple, it is easy to make it as large or small as you want. A square shape usually looks best for dishcloths.
Step 6: Finish with a simple border
A clean border helps the brick pattern feel complete. You can use the same color or a contrast color depending on the look you want. A border also helps the cloth stay neat after repeated use and washing.
Step 7: Shape and use
If needed, give the cloth a light block to help the stitches settle. Once dry, it should feel firm, balanced, and ready for everyday kitchen use.
Helpful Tips
Brick stitch dishcloths are great for beginners because the repeat is easy to understand and the finished result looks tidy. If you want a matching set, use one color for each cloth or vary the shades slightly for a coordinated handmade collection.
Conclusion
Crochet dishcloths are one of the best beginner projects because they are quick, useful, and easy to customize. They let you practice stitch texture and pattern repeats while making something you will actually use every day. That makes them satisfying in a way that many small projects are not, because you can enjoy both the process and the finished result.
These five dishcloth patterns each bring a different style. The houndstooth stitch dishcloth feels classic and bold. The star stitch dishcloth adds rich texture. The twisted textured dishcloth feels cozy and tactile. The interlocking shell stitch dishcloth is soft and decorative. The brick stitch dishcloth is neat and modern. Together, they show just how much variety you can create with a simple square and a good stitch idea.
A handmade dishcloth can make everyday cleaning feel a little more special. It is practical, washable, and thoughtful, which also makes it a lovely gift or market item. With cotton yarn, a durable stitch pattern, and a neat finish, these dishcloths can become go-to kitchen staples that are both beautiful and hardworking.