Small, sparkly, and endlessly personal — beaded phone charms are an easy way to upgrade your phone (or case) with a piece that feels custom-made. They’re also fast, satisfying projects: most of these can be finished in 20–60 minutes, use inexpensive materials, and make excellent gifts or little items to sell. Below you’ll find five full patterns with materials, tools, clear step-by-step construction, assembly notes, plus variations and finishing/care tips so your charms feel polished and durable.
Quick materials & tools
- Beads: seed beads, Czech glass, acrylic, wooden, pearls, letter beads, charm beads.
- Stringing cord: nylon beading thread, 0.5–0.8 mm waxed cotton, jewelry cord, or thin elastic (for stretchy designs).
- Findings: split rings, gold/silver jump rings, lobster clasps (optional), lobster-to-phone straps (or a simple phone-lanyard connector). Many modern phone cases use a small gasket-style connector or strap loop; some charms attach to the case’s headphone jack adapter or slide into the case’s lanyard hole.
- Hardware: eye pins/head pins, crimp tubes (optional), crimping pliers, round-nose pliers, flush cutters, needle (beading/embroiderers’ needle).
- Extras: small charms (butterflies, stars), spacer beads, bead stoppers, glue (clear jewelry glue), lighter (for melting knots on nylon cord).
Safety note: small beads are choking hazards — keep out of reach of children.
1. Beaded Phone Charm Strap Pattern
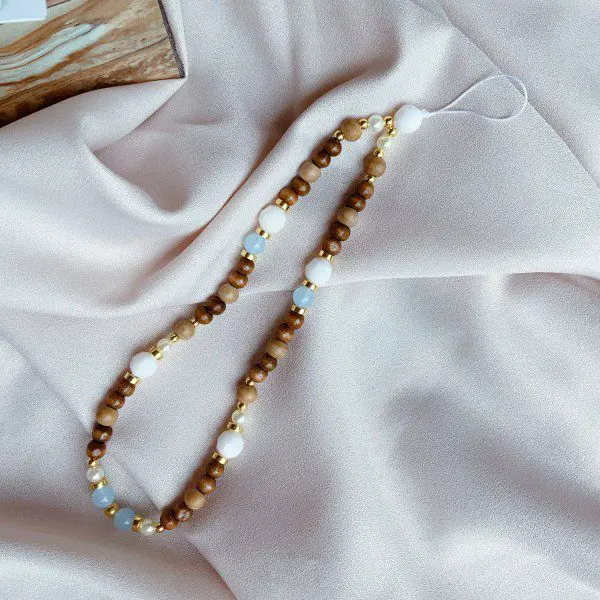
A sleek, classic strap-style charm that looks professionally made — great with glass beads or pearls.
Skill level: Beginner → Time: 20–30 minutes
Finished size: 12–18 cm strap (adjust to taste)
Materials
- 1.0 mm waxed cotton cord or nylon beading cord (two lengths of ~30 cm each)
- 20–30 beads (mix of 4–8 mm glass or faux pearls and small spacers)
- 2 jump rings, 1 small lobster clasp or split ring for attachment (optional)
- Bead stopper or tape, scissors, lighter, pliers
Step-by-step
- Prepare cord: Cut two lengths of cord at ~30 cm. Fold both in half so you have four working ends (folded gives a loop at the top for the phone strap). Thread the folded ends through the phone’s strap connector or through a small jump ring and pull cords through the loop to secure (lark’s head). If your case has a built-in strap hole, thread cords through it and tie a temporary knot to hold.
- Secure working cords: Use a bead stopper or small piece of tape near the folded end to prevent beads from slipping.
- String beads: On each pair (outer and inner strands), alternate large beads with small spacer beads for a balanced look. Example sequence per side: 6 mm pearl — spacer — 6 mm glass — spacer — 8 mm focal bead — spacer — 6 mm glass. Mirror the pattern on the other side so both halves look symmetrical.
- Finish the bottom: Bring all four cord ends together and tie a secure overhand knot just below the last beads (tight). For extra security, add a drop of clear jewelry glue on the knot. Trim ends to ~3–4 mm and carefully melt (if using nylon) to fuse; if using cotton, tuck ends into the knot or whip them with thread.
- Attach hardware (optional): If you want a removable charm, use a split ring or small lobster clasp at the top loop so you can clip it to a keyring or bag.
Variations
- Make a single-strand minimalist strap with only one row of beads for a sleeker look.
- Add a small letter bead or enamel charm at the center to personalize.
- Use metallic spacer beads for a luxe, store-bought feel.
Finishing & Care
- Secure knots with a dab of clear glue for longevity.
- Wipe beads with a soft cloth; avoid soaking if you used wooden beads or glued knots.
2. Fairy Garden Beaded Phone Charm Tutorial
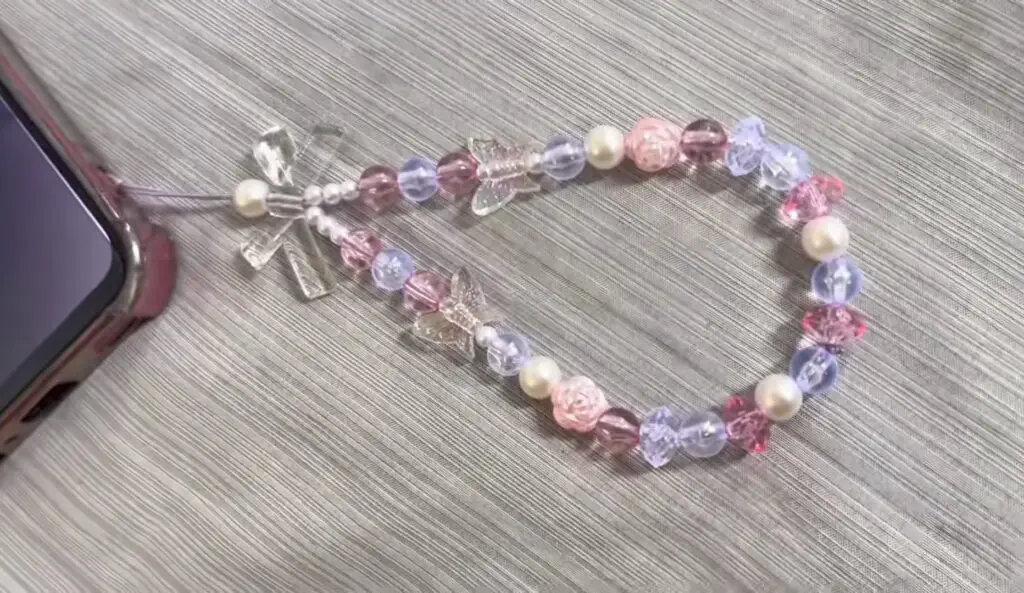
A layered, whimsical charm with tiny flower and leaf beads — excellent for a feminine, fairy-core vibe.
Skill level: Intermediate → Time: 30–50 minutes
Finished size: ~14–20 cm with dangling elements
Materials
- Thin nylon beading thread or fine chain (1.0 mm)
- Small flower beads (4–6 mm), leaf charms, 2–3 glass seed beads, and a small focal charm (mushroom/flower)
- 3 small eye pins or headpins, round nose pliers, wire cutters
- Jump rings (2–4), split ring, small lobster clasp (optional)
Step-by-step
- Make the attachment loop: Cut ~30–35 cm beading thread. Fold in half and make a lark’s head loop through the phone strap / jump ring as in Pattern 1. Secure with a temporary bead stopper.
- Create dangly charms on pins: Thread a small flower bead onto an eye pin, add a seed bead above it, then form a small loop with round-nose pliers and trim excess wire (make 2–3 pins of varied lengths). If using headpins, thread bead(s) then create a wrapped or simple loop with pliers.
- Assemble the main strand: String 6–8 small seed beads, then add a small flower bead, then 8–10 seed beads, then the next flower — repeat until you have 10–12 cm of beadwork. Keep the spacing airy so it reads delicate.
- Attach dangles: Open small jump rings and attach the eye-pin dangles and a leaf charm at spaced positions along the main strand’s lower half. Use pliers to close jump rings tightly.
- Finish top and bottom: Bring ends of thread together beneath the top loop and tie a strong surgeon’s knot or use a crimp tube to secure; trim neat. At the bottom, if you want added weight and polish, cap the end with a small metal bead and knot (or crimp) behind it.
- Final attachment: Add a small split ring or lobster clasp to the top loop if desired.
Variations
- Use iridescent flower beads and pastel seed beads for a dreamy look.
- Replace flower dangles with tiny bell charms for a slight jingle.
Finishing & Care
- Crimp tubes are tidy and professional-looking; cover visible crimp with a small bead if you like.
- Keep away from heavy contact — delicate beads can chip if dropped.
3. Smiley Pearl Phone Charm Pattern
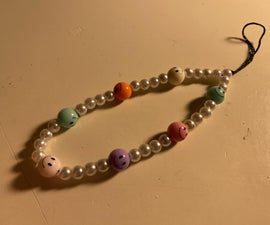
Cute and ultra-trendy: a smiley-face focal bead and pearls give off high-quality, store-bought energy.
Skill level: Beginner → Time: 20–30 minutes
Finished size: ~10–14 cm (shorter strap looks minimal and modern)
Materials
- 0.6–0.8 mm elastic cord (clear stretch) or waxed cord for non-stretch
- 6–8 small faux pearls (4–6 mm)
- 1 enamel smiley bead or hand-painted wooden bead (8–10 mm)
- 2 crimp beads (for non-elastic cord) or secure knots (elastic)
- Scissors, lighter (if elastic nylon cord), small drop of glue (optional)
Step-by-step (elastic version)
- Measure & cut: Cut a 30–35 cm length of elastic. If you prefer shorter, reduce length; elastic makes the charm stretchable and forgiving when slipping around a phone.
- Start stringing: Thread a pearl, then a small spacer bead or tiny seed bead, repeat twice, then center the smiley bead, and mirror the bead pattern on the other side. Adjust spacing so the smiley is central.
- Finish: Tie a surgeon’s knot (double or triple) to join the ends so the bracelet-like loop is continuous. For security, add a tiny dab of clear glue on the knot, let dry, then trim excess and melt slightly if using nylon-style elastic (careful — test first).
- Attach to phone: Thread the elastic loop through the phone’s lanyard hole or slide over a small split ring and attach that to a case strap. Elastic loops can also slip over the phone corner for a snug fit.
Variations
- Use gold-tone spacer beads and pearl-like glass for an upscale look.
- Make it a double-loop charm by creating two beaded strands joined at the bottom with a crimp.
Finishing & Care
- Elastic holds well but check knots periodically; replace if stretched.
- Avoid soaking pearls — wipe with damp cloth.
4. Green Butterfly Beaded Phone Charm Tutorial
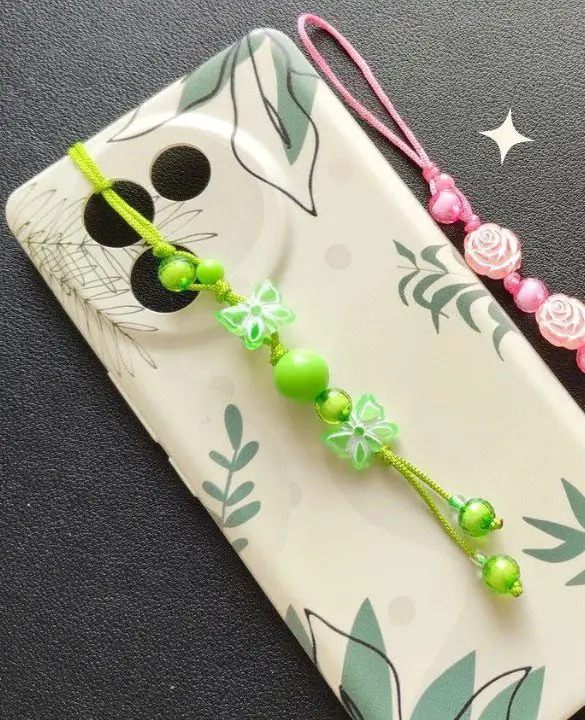
A nature-inspired charm with a beaded butterfly focal and dangling beads — bold yet refined.
Skill level: Intermediate → Time: 35–60 minutes
Finished size: ~15–22 cm with dangles
Materials
- 0.5–0.8 mm nylon beading thread or fine jewelry chain
- Butterfly focal bead (carved stone, glass, or enamel) ~12–20 mm
- Assorted green beads: faceted glass, Czech beads, seed beads
- 3–5 headpins/eye pins for drop beads, jump rings, split ring, pliers, wire cutters
- Crimp beads & crimping pliers (if using thread/cord)
Step-by-step
- Prepare the top loop: Slide a jump ring through the butterfly’s top hole (if it has one). If not, thread the bead as part of the strand and use a wire-wrapped loop to secure it. Create the attachment loop using the method from earlier patterns.
- Make butterfly focal on strand: Slide a selection of green beads on the main strand, center the butterfly bead, and continue with mirrored beads on the other side. This creates a symmetrical central motif.
- Create beaded dangles: Thread beads onto headpins, make simple loops with round-nose pliers, trim, and attach them to the bottom of the butterfly with jump rings so they dangle. Vary lengths for movement.
- Secure the strand: If you’re using thread, pass the thread through a crimp, through the top split ring, back through the crimp and crimp it; cover crimp with a small bead if desired. Seal ends with a tiny glue dot for extra hold.
- Polish and finalize: Check jump rings are closed tightly and that the butterfly sits centered.
Variations
- Make the butterfly from polymer clay and drill a small hole for a handcrafted touch.
- Use ombré green beads (pale to deep) to evoke a real-wing gradient.
Finishing & Care
- Metal findings can tarnish — use plated brass or stainless steel for durability.
- Keep beads away from perfumes and lotions to avoid film buildup.
5. Colorful Beaded Phone Charm Pattern
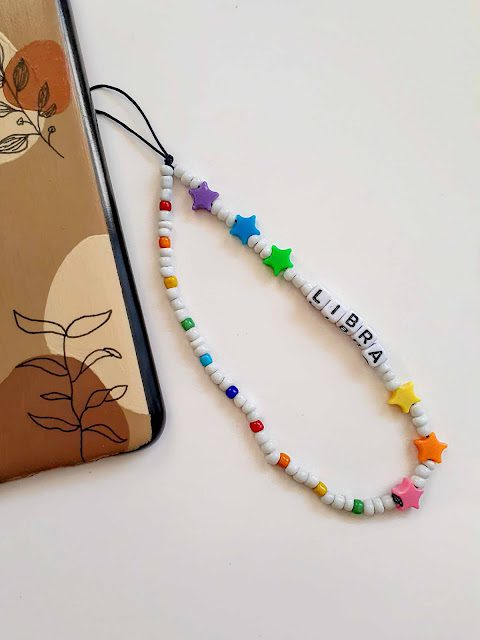
A rainbow, show-stopping charm built from stacked beads and a tassel — great for everyday color.
Skill level: Beginner → Time: 25–40 minutes
Finished size: ~12–18 cm (tassel length optional)
Materials
- Waxed cotton cord or nylon cord ~30–40 cm
- Colorful assortment: seed beads, 4–6 mm round beads, 1–2 larger focal beads, tiny metal spacer beads
- Small ready-made tassel or make your own with embroidery floss
- Jump rings, split ring, pliers, crimp bead (optional)
Step-by-step
- Make top loop: As with other patterns, create the attachment loop at the top through your case connector or a split ring.
- String color blocks: Pick a rainbow order — red, orange, yellow, green, blue, indigo, violet. String a block of seed beads (10–20) for each color separated by a metal spacer or a slightly larger bead. Alternate sizes for texture. Center a larger focal bead (e.g., a painted ceramic or a letter bead) if you like.
- Add tassel: Either tie a small ready-made tassel to the bottom using a jump ring, or make one: wrap embroidery floss around a small card, tie at the top, cut the loop at the bottom, and attach the head with a thin jump ring. Attach tassel at the bottom of the beaded strand.
- Finish & secure: Use a crimp bead or tightly tied knot to secure cords. Trim and seal ends. Optionally attach a metal charm on a jump ring near the top for added shine.
Variations
- Make monochrome gradients (all blues) for a more subtle look.
- Use matte beads for an understated aesthetic or glossy beads for pop.
Finishing & Care
- Tassels can fray — to neaten, bind the top tightly with thin thread and add a dab of glue under the wrap.
- If using cotton cords, occasional gentle hand-wash and air dry keeps colors fresh.
Final finishing tips
- Secure knots/crimps: Use a dab of clear jewelry glue on major knots/crimps and allow to cure before trimming.
- Close jump rings properly: Use two-step plier technique (twist, don’t pull apart) to close jump rings flush.
- Weight balance: Keep charms lightweight so they don’t strain a delicate phone case loop or pull off easily.
- Attachment options: If your phone case has no lanyard hole, use a small split ring that can clip to a case loop or to a phone-wallet strap. Avoid forcing charms into ports.
Conclusion
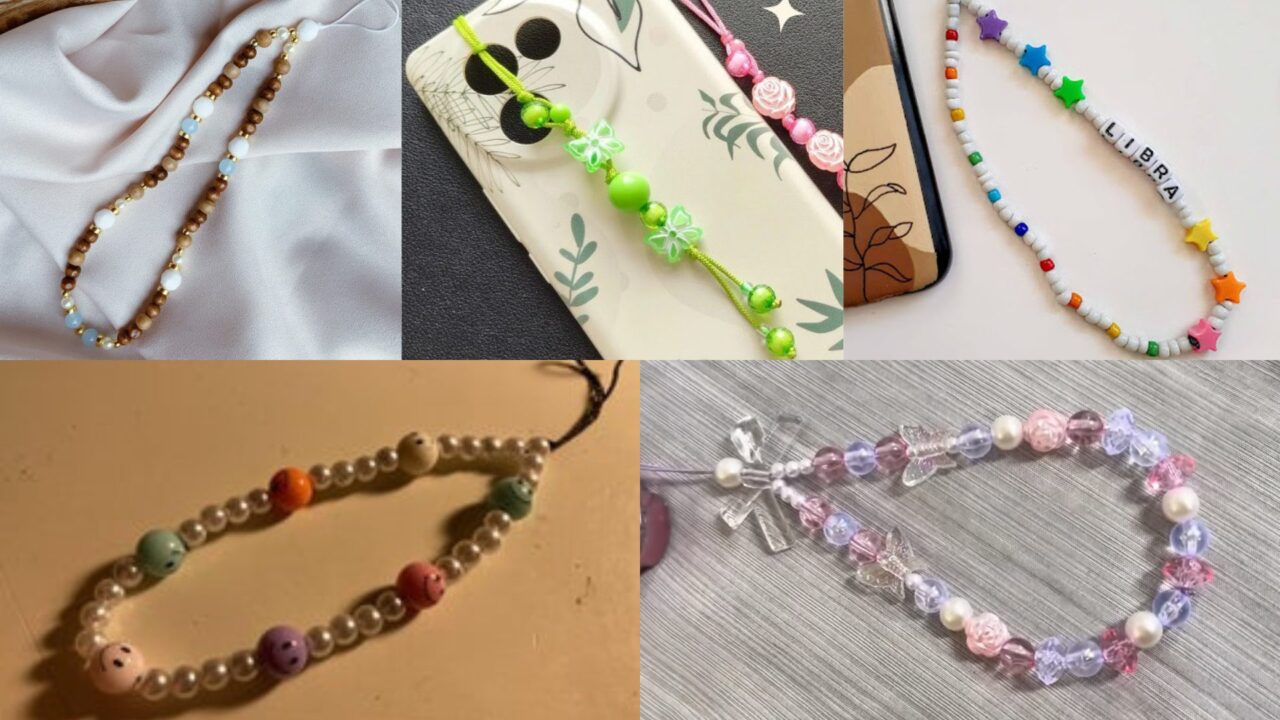
Beaded phone charms are one of the fastest, most satisfying ways to add personality to everyday tech. Each of these five designs — from the classic strap and pearl smiley to the fairy-garden danglers and colorful tassel charms — gives you a polished, store-bought look with handmade heart. Mix materials, experiment with length and texture, and make a few variations to match different moods or outfits. With little investment in beads and tools, you can build a small collection that’s fun to swap and wear.
Happy beading — enjoy turning tiny beads into big style.




slot365 được thành lập vào năm 2017, với mục tiêu tạo ra một nền tảng cá cược trực tuyến đáng tin cậy cho người chơi tại Việt Nam và trên toàn cầu.
slot365 được thành lập vào năm 2017, với mục tiêu tạo ra một nền tảng cá cược trực tuyến đáng tin cậy cho người chơi tại Việt Nam và trên toàn cầu.