Tiny, handmade amigurumi have a way of stealing hearts — fast. Mini animals are adorable, portable, and wildly addictive to make: they take very little yarn, require only basic stitches, and finish quickly enough to satisfy the “I want to make something now” impulse. Whether you’re a complete beginner who’s never worked a magic ring, a maker looking for quick craft-fair stock, or someone who wants sweet, handmade gifts for friends and family, these five mini amigurumi animal patterns are built to be approachable and fun.
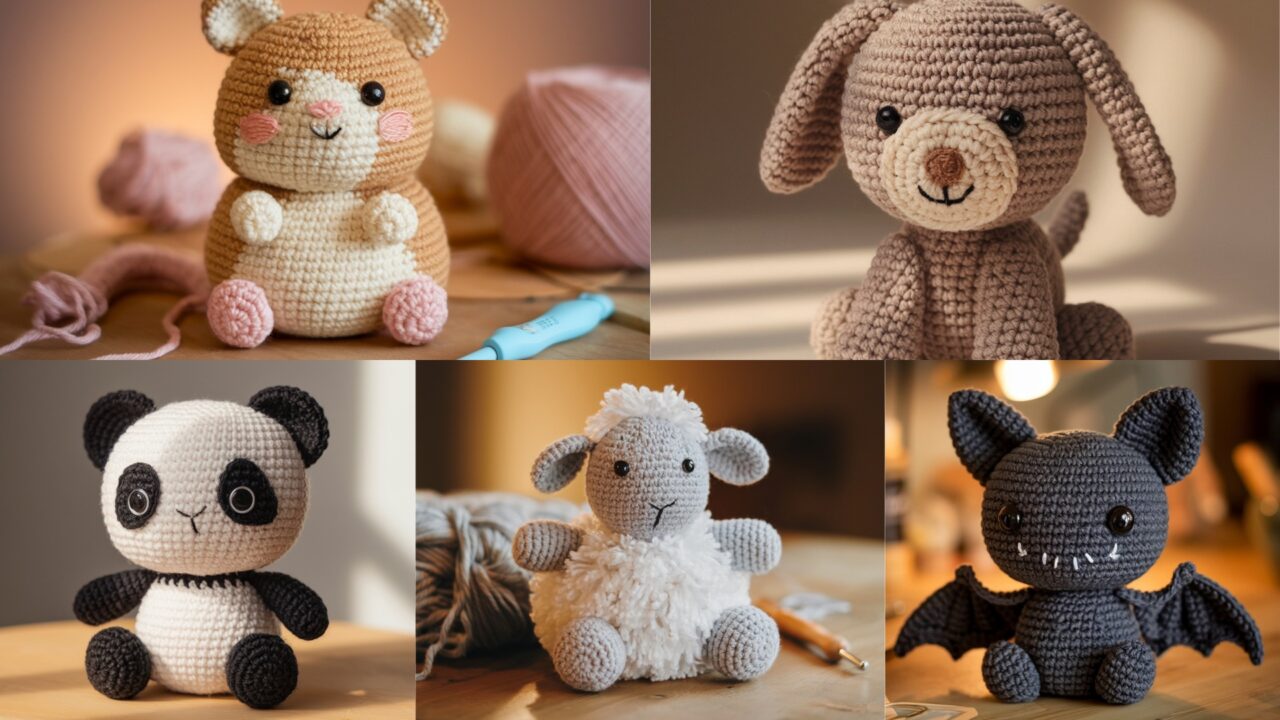
This collection walks you through everything step-by-step: clear materials lists, stitch abbreviations, tight-gauge tips for stuffing-free seams, and safe finishing ideas for toys that might be handled by little ones. Expect to finish most minis in about 30–90 minutes depending on your speed — perfect for an evening project or a weekend making binge. Each pattern includes assembly and finishing notes so your little hamster, sheep, puppy, bat, or panda looks polished and durable.
No fuss, no fluff — just cozy, practical guidance so you can start crocheting immediately. Ready your hook and a small ball of yarn: by the end of this post you’ll have five tiny companions and the confidence to customize them into keychains, gift toppers, or a cheerful shelf of miniature critters.
Quick notes (applies to all patterns)
- Yarn & hook: Use sport/DK or light-worsted (category 3–4) yarn and a smaller hook than the yarn label suggests (2.5–3.5 mm) to keep stitches tight so stuffing doesn’t show. Typical pairing: worsted weight with a 2.75–3.0 mm hook for minis.
- Stuffing: Polyester fiberfill; stuff firmly but not rock-hard. Add small amounts gradually.
- Safety eyes vs. embroidery: For minis handled by small children, do not use safety eyes — embroider faces instead. For collectors or display toys, 6 mm safety eyes are common.
- Tools: Tapestry needle, small scissors, stitch markers (very helpful to mark round starts), optional stuffing tool or blunt pencil.
- Tension: Tight gauge = fewer visible holes. If stuffing shows, switch to a smaller hook.
- Finishing: Weave in ends securely; double-knot where needed. If selling, include safety and fiber-content info.
Abbreviations (US terms)
- ch = chain
- sl st = slip stitch
- sc = single crochet
- hdc = half double crochet
- dc = double crochet
- inc = increase (2 sc in same stitch)
- dec or invdec = decrease (invisible sc2tog)
- MR = magic ring / magic circle
- rnd = round(s)
- st(s) = stitch(es)
- BLO / FLO = back/front loop only
- F/O = fasten off
Finished sizes (approximate)
- Mini Hamster: ~2.5–3″ tall
- Mini Sheep: ~3″ tall (fluff adds perceived size)
- Mini Puppy: ~3–3.5″ tall
- Mini Bat: ~2.5–3″ tall (closed wingspan ~3–4″)
- Mini Panda: ~2.5–3″ tall
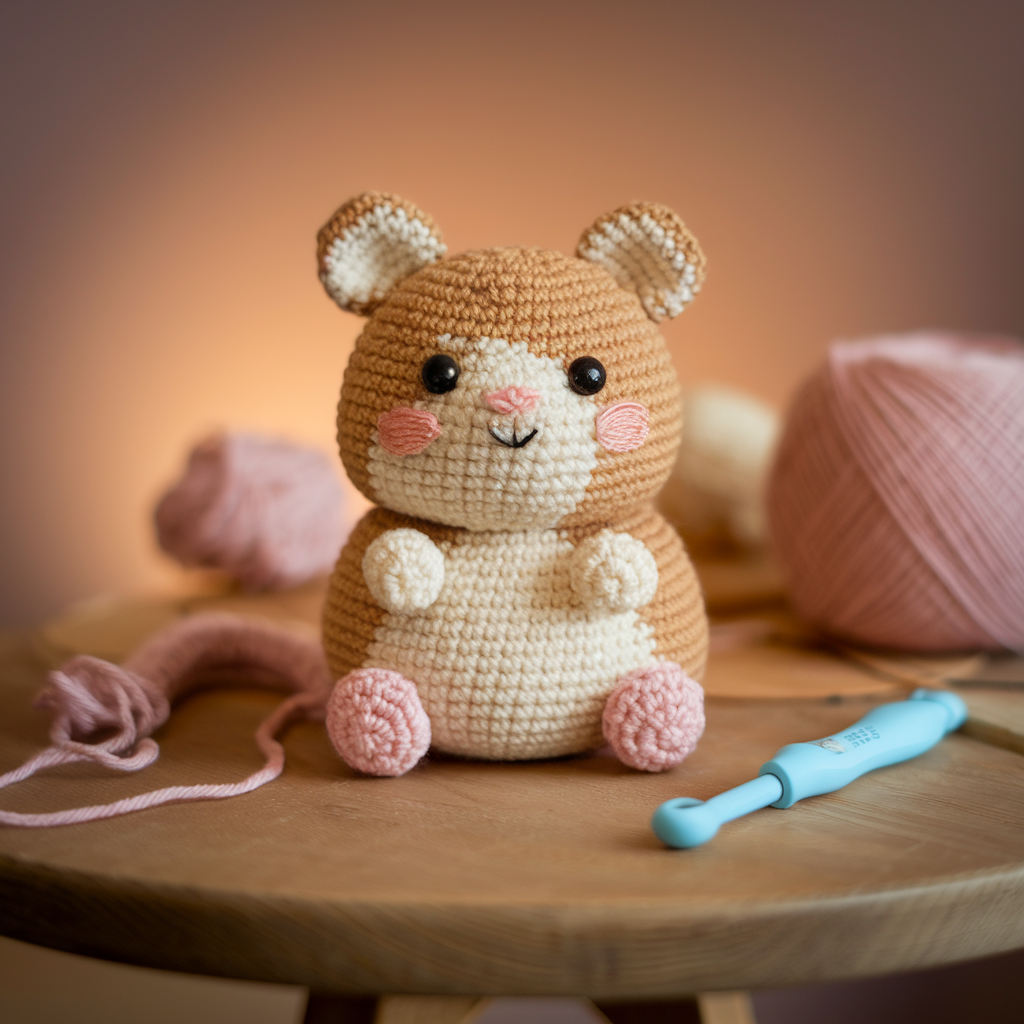
1. Crochet Cute Amigurumi Hamster Pattern
Materials
- DK / light-worsted yarn in main color (tan/cream) and accent (white/pink).
- Hook: 2.75–3.0 mm.
- Safety eyes 6 mm (optional) or embroidery thread.
- Polyester stuffing, yarn needle, stitch marker.
- Optional: small blush pastel for cheeks.
Body & head (worked as one piece)
- MR, 6 sc into ring. (6)
- Inc around. (12)
- Sc, inc around. (18)
- 2 sc, inc around. (24)
- 3 sc, inc around. (30)
6–10. Sc around for 5 rnds. (30) — adjust number of rounds to shape head height. - 3 sc, dec around. (24)
- 2 sc, dec around. (18)
- Insert eyes between rnds 6–8 spaced ~6–7 sts apart; embroider if needed.
- Sc, dec around. (12) — start stuffing firmly.
- Dec around until closed (6). F/O and weave tail through remaining sts to close fully.
Ears (make 2)
- MR, 6 sc into ring. (6)
- Inc around. (12)
- Sc, inc around. (18)
- F/O leaving tail for sewing. Flatten and sew to head sides.
Feet (make 4)
- MR, 5 sc into ring. (5)
2–3. Sc around 2 rnds. F/O leaving tail for sewing. Sew two at front base and two at back.
Tail
- Ch 6–8, sc back along chain, F/O and sew as a tiny nub.
Face finishing
- Embroider triangular nose centered between eyes; two small blush spots on cheeks with pastel or embroidery.
Assembly tips
- Sew ears symmetrically with pins to confirm placement. Weave all tails inside body. For toys for kids, use embroidered eyes.
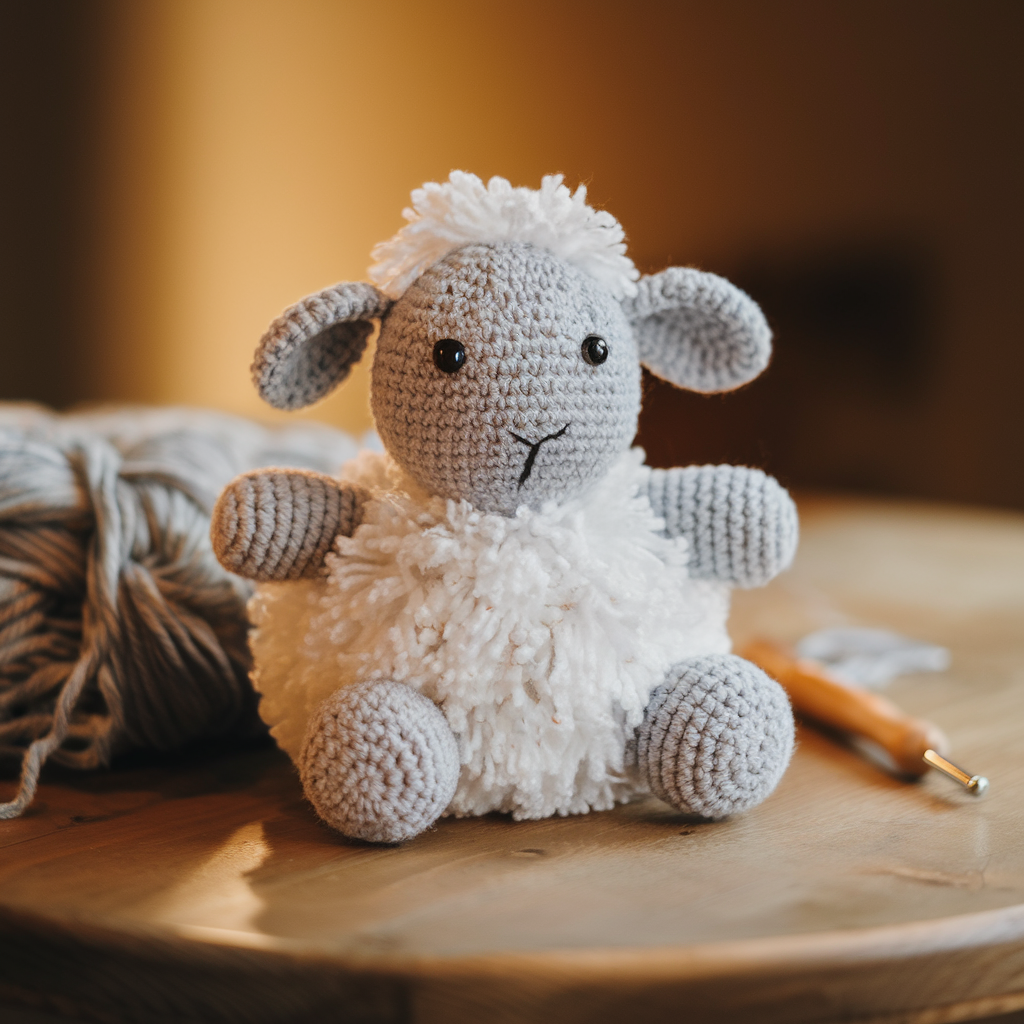
2. Crochet Amigurumi Sheep Pattern
Materials
- Eyelash or boucle (fuzzy) yarn for fleece.
- Smooth DK yarn for face/legs (gray/black).
- Hook: 3.0 mm (adjust to tension; smaller if holes show).
- Embroidery thread or safety eyes 6 mm (embroider for small kids).
- Stuffing, needle, stitch marker.
Core base (head & body, smooth yarn)
- MR, 6 sc. (6)
- Inc around. (12)
- Sc, inc around. (18)
- 2 sc, inc around. (24)
5–8. Sc around 4 rnds. (24) - 2 sc, dec around. (18)
- Sc, dec around. (12) — insert eyes between rnds 6–7, stuff firmly.
- Dec around to close; leave tail.
Fleece options
- Option A — Sewn loops: Thread fuzzy yarn onto a large-eye tapestry needle and sew short loops all over the smooth base in a staggered pattern; knot and hide tails inside.
- Option B — Loop stitch: With fuzzy yarn, work loop stitches (pull loop through stitch and secure) across the body to create a faux-fleece texture. Keep loops consistent in length.
Face / muzzle
- MR, 5 sc into ring, sc around 2 rnds — light stuffing; sew centered to front lower face. Embroider small inverted Y for nose/mouth.
Ears (2)
- MR, 6 sc, sc 1–2 rounds elongated if you want floppy ears. Sew near top sides.
Legs (4)
- MR, 6 sc; sc around 2–3 rnds; F/O leaving tail. Sew legs to underside.
Finish & safety notes
- Eyelash yarn can shed; avoid using for toys for very young children unless secured. Use embroidered faces for child-safe toys.
3. Crochet Amigurumi Puppy Pattern
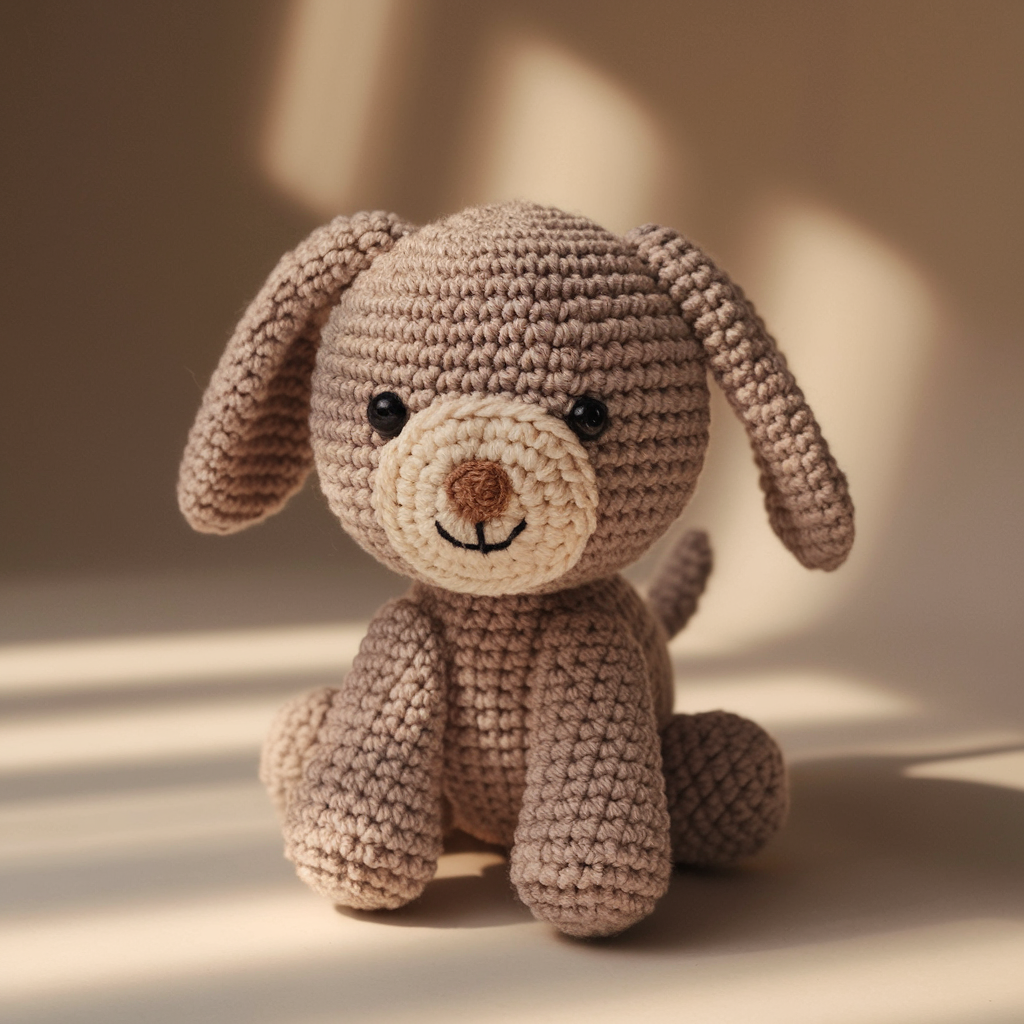
Materials
- DK yarn in main color + contrasting inner ear color.
- Hook: 2.75–3.0 mm.
- Embroidery thread for eyes/mouth or safety eyes 6 mm.
- Stuffing, needle, stitch marker.
Head/body (single piece)
- MR, 6 sc. (6)
- Inc around. (12)
- Sc, inc around. (18)
- 2 sc, inc around. (24)
- 3 sc, inc around. (30)
6–9. Sc around 4 rnds. (30) - 3 sc, dec around. (24)
- 2 sc, dec around. (18) — insert eyes between rnds 7–8 and stuff head.
- Sc, dec around. (12)
- Dec around until closed; F/O.
Ears (2 floppy)
- Option: Ch 2 then MR 6 sc into ring. Work sc, inc to make slightly longer ear: repeat a few rounds to lengthen, F/O, attach to head so they flop.
Snout
- MR, 6 sc. (6)
- Sc, inc around. (9)
3–4. Sc around 2 rnds; stuff lightly; sew to front lower face; embroider nose and mouth.
Legs (4)
- MR, 6 sc; sc for 3–4 rnds; F/O leaving tail to sew. Attach under body (two front, two back).
Tail
- Ch 6–8, sc back, F/O and attach.
Assembly
- Sew muzzle first, embroider nose and mouth. Position ears and legs carefully. Add a tiny collar (ch 16, sl st to join) if you want.
4. Crochet Amigurumi Bat Pattern
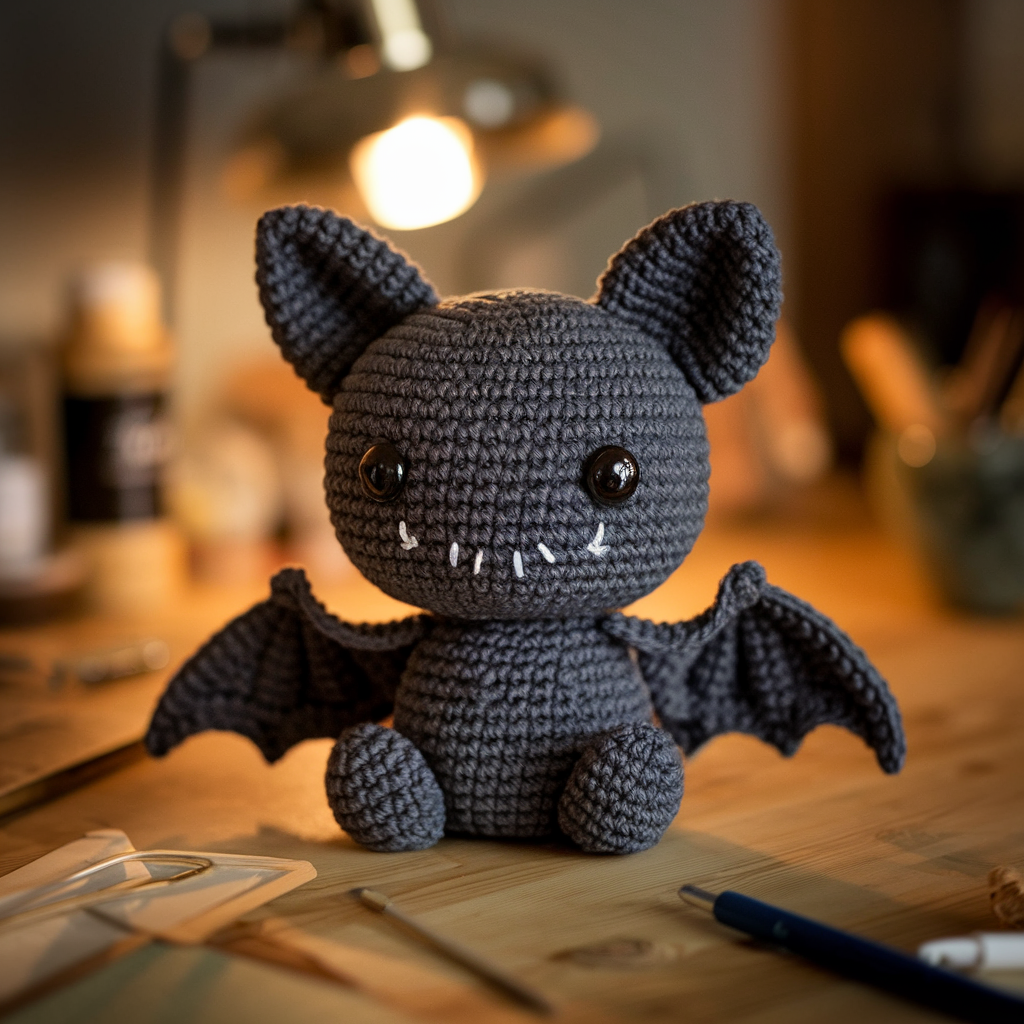
Materials
- DK yarn in dark gray or black.
- Hook: 2.75–3.0 mm.
- Embroidery thread for face; optional light yarn for inner ears.
- Stuffing, needle.
Body
- MR, 6 sc. (6)
- Inc around. (12)
- Sc, inc around. (18)
- 2 sc, inc around. (24)
5–7. Sc around 3 rnds. (24) - 2 sc, dec around. (18) — place small safety eyes or embroider eyes between rnds 5–6; stuff head.
- Sc, dec around. (12)
- Dec around and close; F/O.
Wings (2, worked flat) — simple shaped wing
- Ch 16. Sc in 2nd ch from hook and across (15 sc). Turn.
- Ch1, sc across. Turn. Repeat this row 2–3 times until you have a small rectangle.
- Start shaping scalloped edge: decrease at one side every other row by sc2tog at start of row and work sc across — repeat until wing tapers. For scallops, finish outer edge with sc, ch2, sl st to make a curved edge or single crochet shells (5 dc in one st) to create scallops. F/O leaving tail to sew.
Ears
- Ch 4, sc in 2nd ch from hook and across (3 sc), ch1, sc across 1–2 rnds, F/O and sew to top.
Assembly
- Sew wings to the body sides (about 1/3 from the top). Sew ears to top centre. Embroider mouth and tiny fangs if desired. For poseable wings, add a small internal seam line to create a fold.
5. Crochet Amigurumi Mini Panda Pattern
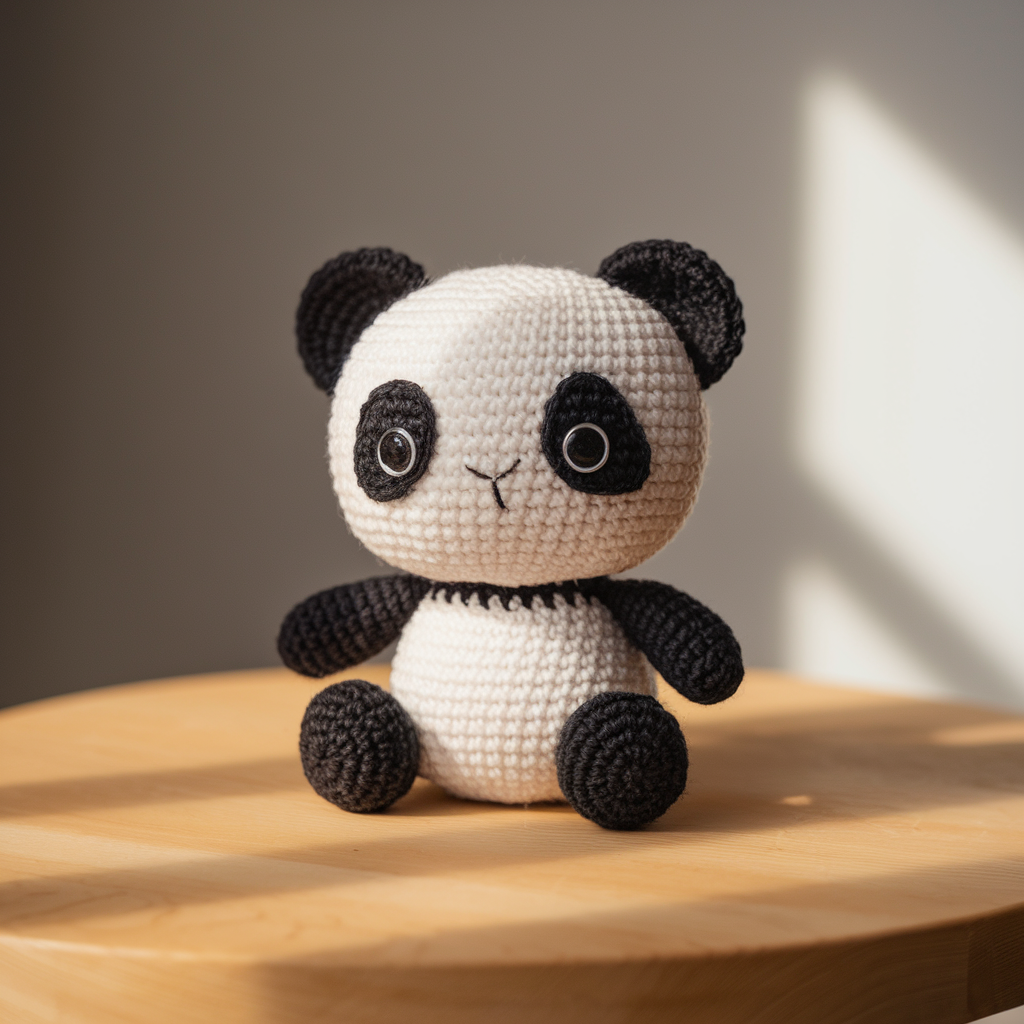
Materials
- White DK yarn for body; black DK for eye patches, ears, arms, legs.
- Hook: 2.75–3.0 mm.
- 6 mm safety eyes (optional) or embroidery thread.
- Stuffing, needle.
Head/body (one sphere)
- MR, 6 sc. (6)
- Inc around. (12)
- Sc, inc around. (18)
- 2 sc, inc around. (24)
- 3 sc, inc around. (30)
6–9. Sc around 4 rnds. (30) - 3 sc, dec around. (24)
- Insert safety eyes between rnds 6–7, then 2 sc, dec around. (18)
- Sc, dec around. (12)
- Dec around and close. F/O.
Eye patches (2)
- With black yarn: MR, 6 sc. (6)
- Inc around. (12)
- Sc, inc around. (18)
- F/O leaving tail to sew around eyes so patch sits flat.
Ears (2)
- MR, 6 sc. (6)
- Inc around. (12)
- Sc 1 rnd, F/O leaving tail to sew.
Arms/legs (4)
- MR, 6 sc. (6)
2–4. Sc around 3 rnds (or longer). F/O leaving tail. Attach as limbs black for panda look.
Snout
- White MR, 5 sc. Sc around 2 rnds, stuff lightly, sew under eyes and embroider nose/mouth.
Assembly
- Sew eye patches, insert eyes if using safety eyes, sew ears and limbs. Embroider small smile.
Assembly & Finishing Tips (All Patterns)
- Stuff gradually: Add a bit of stuffing, shape, then more until firm. Overstuffing stretches stitches; understuffing gives floppy results.
- Sew parts securely: Use small stitches and reinforce critical attachments (ears, legs). Hide thread tails inside body.
- Face placement: Pin safety eyes and parts in place before sewing to ensure symmetry. Mark with pins, photograph from front to confirm.
- Weave ends well: Thread tail through inside several stitches and knot if needed, then bury tail to prevent unraveling.
- Blocking / shaping: Very light steam (if yarn allows) or gentle shaping with fingers can improve look. Avoid heat on acrylic if unsure.
- Safety for kids: Embroidered faces only for toys for small children; avoid small detachable parts.
Troubleshooting (Common Beginner Issues)
- Stuffing shows through holes: Use a smaller hook for tighter stitches; reduce stuffing or use denser yarn.
- Asymmetrical features: Unpick and re-stitch; always pin before sewing permanently.
- Loose limbs / parts coming off: Reinforce with additional stitches and knot securely; for commercial toys consider safety joints.
- Too floppy: Increase stuffing, use a denser yarn, or work a denser stitch for the base.
Care & Safety
- Hand-wash in cool water and reshape; air-dry flat. Check yarn label for machine wash compatibility.
- For toys for small children: avoid small beads, plastic eyes, or loose embellishments. Use embroidered features and secure seams. Include a safety warning label when selling.
- Keep away from pets that may chew small toys.
Quick Project Checklist (for each mini)
- Yarn (main + accents) ✓
- Small hook 2.75–3.5 mm ✓
- Polyester stuffing ✓
- Tapestry needle, scissors, stitch marker ✓
- Safety eyes (optional) or embroidery thread ✓
Conclusion
You now have five complete mini amigurumi patterns that are beginner-friendly and quick to finish: hamster, sheep, puppy, bat, and panda. These small projects are ideal for practicing amigurumi basics (magic ring, invisible decrease, shaping) and make wonderful gifts, keychains, craft-fair stock, or tiny decor. Start with the hamster or puppy for fastest results, try the sheep to master fuzzy yarn techniques, make a batch of bats for seasonal displays, and create pandas for classic charm.