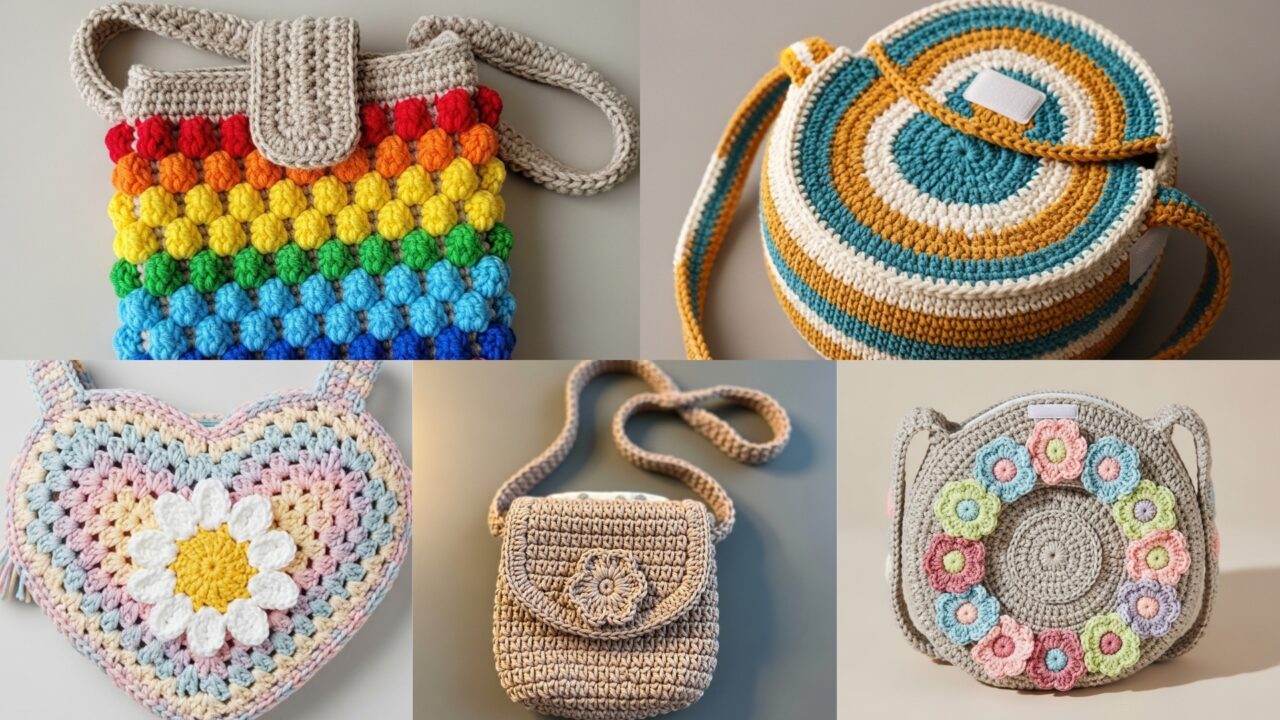
Small crossbody bags are one of the most delightful little projects you can make for toddlers — they’re quick, highly customizable, and instantly treasured. A handmade toddler bag becomes a trusted little companion for snacks, small toys, or a favorite sock-puppet. In this post you’ll find five kid-friendly crossbody bag patterns with modern, playful designs: Flower Boho Bitty Bag, Retro Circle Bag, Rainbow Bobble Bag, Daisy Heart Granny Purse, and Ring of Flowers Bag. Each pattern section includes a short overview, skill level, recommended materials, finished-size guidance, a step-by-step construction guide (with stitch counts you can adapt), plus variations, safety notes, finishing tips, and styling ideas. All bags are crossbody style with crocheted straps (no hardware required), and they’re sized and finished with toddlers in mind.
Quick notes before you start
- US crochet terms used (ch, sc, hdc, dc, tr, sl st, inc = 2 sc in same st, dec = sc2tog).
- Yarn choice: use soft, washable worsted/DK cotton or cotton-blend — cotton is durable, washable, and comfortable against skin. Acrylic blends can work but may pill. Avoid scratchy wool for toddlers.
- Hook sizes suggested are starting points; check gauge to reach stated widths. Tighter gauge = firmer bag that holds shape.
- Safety: avoid small removable parts (buttons, beads) that can be choking hazards. If you add buttons or charms, make them decorative-only and sew them on extremely securely for older kids; for toddlers, prefer embroidered faces and sewn-on crochet appliqués.
- Straps: all straps here are crocheted, adjustable by lengthening or shortening chains and rounds. For toddlers, aim for crossbody strap length ~30–38 in (76–97 cm) depending on child size — see each pattern for recommended lengths.
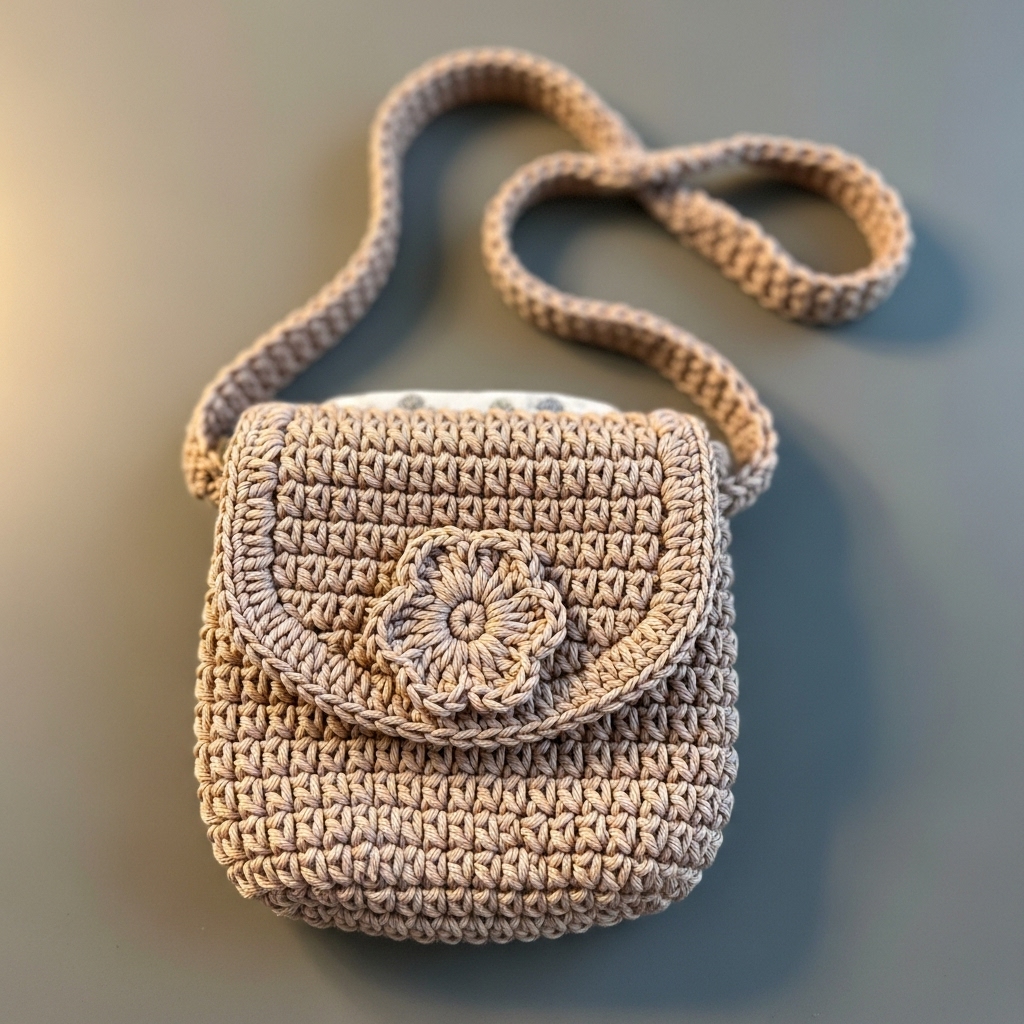
1. Crochet Flower Boho Bitty Bag Pattern
Overview
A tiny boho-inspired saddle bag with a textured flower applique on the flap and a soft, crocheted strap. Simple, sweet, and perfect for toddlers who like to carry small treasures.
Skill level: Confident beginner → intermediate (basic shaping and an applique)
Materials
- DK or light worsted cotton yarn — Main color (MC) for body ~50 g, Contrast color (CC) for flower ~15 g.
- 3.5 mm (E/4) hook (adjust to yarn).
- Yarn needle, scissors.
- Small piece of lightweight cotton fabric for lining (optional — recommended).
- Velcro sew-on dot (soft side inside flap) OR crochet a small loop closure (preferred for toddlers: no small button).
Finished size (approx.)
- Bag body: 5 in (13 cm) wide × 4.5 in (11.5 cm) tall (not including flap).
- Strap: adjustable crossbody length 30–36 in (76–92 cm) for toddlers (see notes to adjust).
Construction — step-by-step
A. Base rectangle (body) — worked flat then seamed
- Chain 28 (this gives ~5 in width with DK; change chain number for your gauge). Join with sl st to work in rounds or work flat and seam — below assumes working flat then seaming to make a pouch.
- Row 1: sc in 2nd ch from hook and across (27 sc). Turn.
- Rows 2–10: ch1, sc across (27 sc) — adjust rows for desired height (~4.5 in). For a firmer fabric use hdc in rows instead of sc.
- Fold rectangle with wrong sides together; seam the sides with mattress stitch or whipstitch leaving top open. If you prefer a flat bottom, seam bottom partially, leave a small gap for a boxed base and create a rounded bottom by decreasing at fold ends — optional for slightly more capacity.
B. Flap
- With MC, attach at top front center of body: ch1, sc 12 across to form half-width flap (work in rows).
- Row 1–4: sc across to form flap height ~1.5–2 in.
- Row 5: create slight curve by dec at each end once: sc2tog, sc across until last 2 sts, sc2tog. Fasten off and weave tails. Shape flap to sit neatly over front opening.
C. Flower applique (centerpiece)
- With CC (flower color): MR; R1: ch1, 8 sc in MR → sl st to join.
- R2 (petals): ch4, sl st into next st repeat around to make 8 loops.
- R3: Into each loop work (sc, hdc, dc, hdc, sc) to make full petals. Fasten off leaving tail to sew flower centered on flap. For more dimension, make a small puff round center with a contrasting mini circle of 6 sc.
D. Strap — crocheted, adjustable
Option 1 — Simple chain strap (lightweight)
- Ch 120 (for 30 in length at typical gauge), or adjust to desired length. Attach ends to side seams of the bag with 10–12 rows of reinforced sc around each attachment point (work sc in a circle around join point). Weave a long tail through last sc rows for extra reinforcement and knot inside seam.
Option 2 — Strap with small tube (stronger) - Make a slip-stitch tube by chaining desired length (e.g., ch 120), then work sc back across each chain holding the chain edges together to form a flat strip; seam ends or join into a tube by sewing edges. Attach as above. This looks neat and is comfortable for toddlers.
E. Lining (optional but recommended)
- Cut a cotton lining slightly smaller than bag interior. Hand sew inside the bag to hide seams and protect lenses or precious items. Lining also prevents snagging small items.
F. Closure
- Sew one side of a sew-on Velcro inside flap and corresponding mate on bag body to ensure easy open/close that toddlers can manage. Alternatively, create a small crochet loop and a large covered button (avoid hard small buttons for toddlers).
Variations
- Make petals in contrasting colors for a multicolor flower.
- Add two small side tassels (yarn-only) for boho flair — keep tassel lengths short for safety (≤ 3 in).
Finishing & safety
- Weave in ends securely and hide knots in lining if used. If you add tassels, sew them in place firmly and test with a gentle tug. Velcro closure is recommended for toddlers instead of buttons or snaps.
Styling idea
- Pair with a matching little beanie or a tiny CC-colored scarf for a complete toddler outfit.
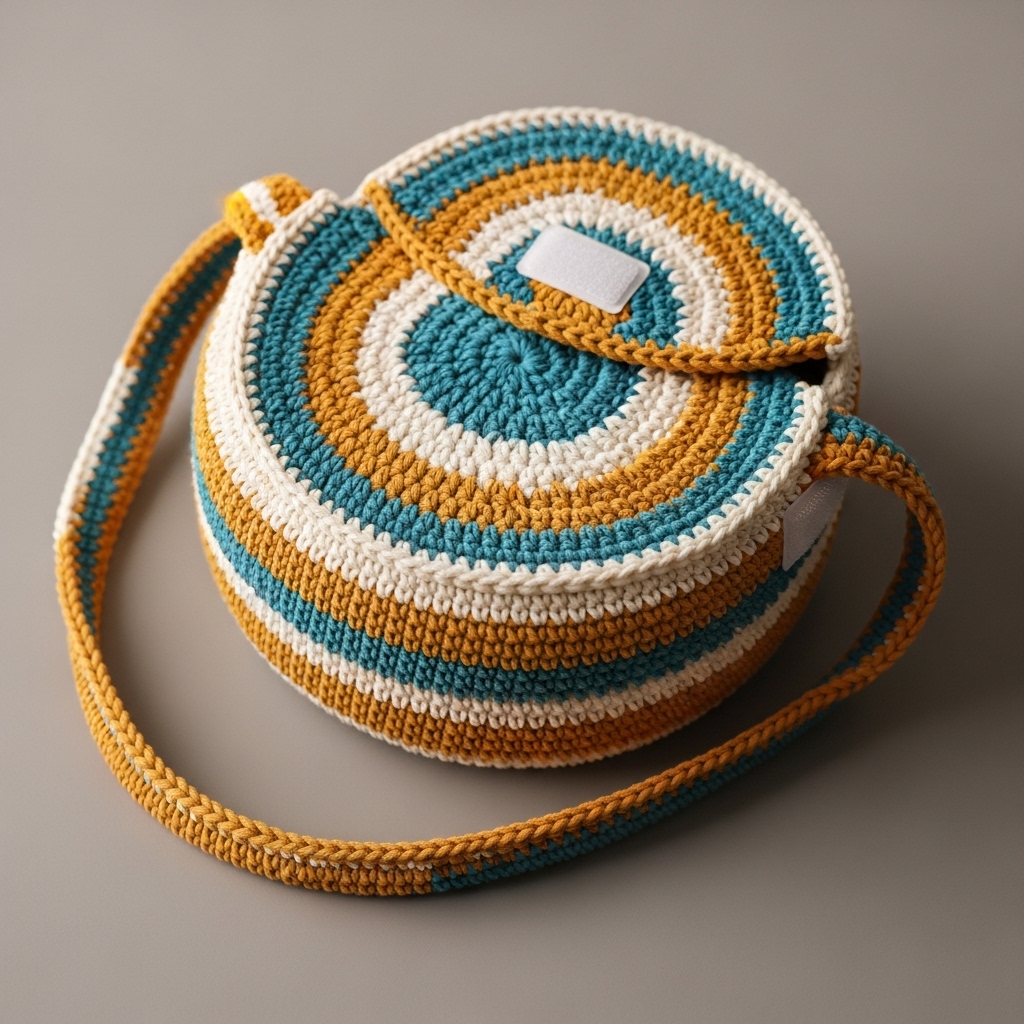
2. Crochet Retro Circle Bag Pattern
Overview
A cheerful retro round crossbody inspired by vintage 60s/70s silhouettes — bold stripes, a rounded shape, and a snug crocheted strap. The circle silhouette is roomy, stable, and visually fun.
Skill level: Confident beginner → intermediate (working in rounds and shaping)
Materials
- DK cotton in 2–3 contrasting colors (MC + 1–2 stripes). ~75 g MC + small amounts of accents.
- 3.5–4.0 mm hook.
- Yarn needle, scissors.
- Soft cotton lining optional (recommended).
Finished size (approx.)
- Diameter: 6–7 in (15–18 cm) — toddler-friendly size that holds small toys or snacks.
- Strap length: 30–36 in (76–92 cm).
Construction — step-by-step
A. Circular base (worked in continuous rounds)
- MR; R1: 6 sc in MR (6).
- R2: inc in each st (12).
- R3: sc 1, inc around (18).
- R4: sc 2, inc around (24).
- R5: sc 3, inc around (30).
- Continue increasing evenly until the circle reaches target diameter minus ~1 in (to allow for side walls). For a 6 in circle in DK, you might stop around 8–10 rounds depending on gauge.
B. Side wall (work even to build depth)
- Once base diameter is reached, work even rounds of sc (no increases) to build side height — aim for 4–5 rounds for ~1.5–2 in bag depth. For more depth, work additional rounds. If you want a slightly tapered bag, increase 3–4 times evenly across the first 2 rounds of side wall.
C. Top rim & opening
- Finish with 1–2 rounds of hdc or sc to make a neat rim.
- If you want a flap, crochet a half circle flap separately by working a semicircle (chain to half circumference and work rounds that decrease to form a curved flap). Attach to back rim and sew a Velcro dot for closure.
D. Strap — crocheted tubular strap for comfort
- Make a comfortable strap by making a narrow tube: ch 100–130 (adjust to desired length). Join ends, then sc in each chain around to form a tube. Alternatively, crochet an i-cord tube by chaining 4 then working 3–4 rounds of sc in the round, stitching edges together to form a tube.
- Attach strap securely to opposite sides of bag interior using reinforced sc tabs: pick up 8–10 stitches at left and right seam and work 6–8 rounds creating a sturdy base to sew strap.
E. Lining
- Cut a circular lining and side wall with seam allowance, sew a small lining bag, and sew into the interior for a neat finish and extra protection.
Variations
- Work bold color stripes by switching color every 2 rounds as you work the side wall — retro color combinations (mustard + teal + cream) are charming.
- Add a small crocheted flower or appliqué to front for extra kid appeal.
Finishing & safety
- For toddlers, use Velcro closure or no closure. If you use a flap with button, use large secured buttons and sew through lining for extra safety.
Styling idea
- Great for dress-up play — make matching coin purse or pretend sunglasses case to go with it.
3. Crochet Rainbow Bobble Bag Pattern
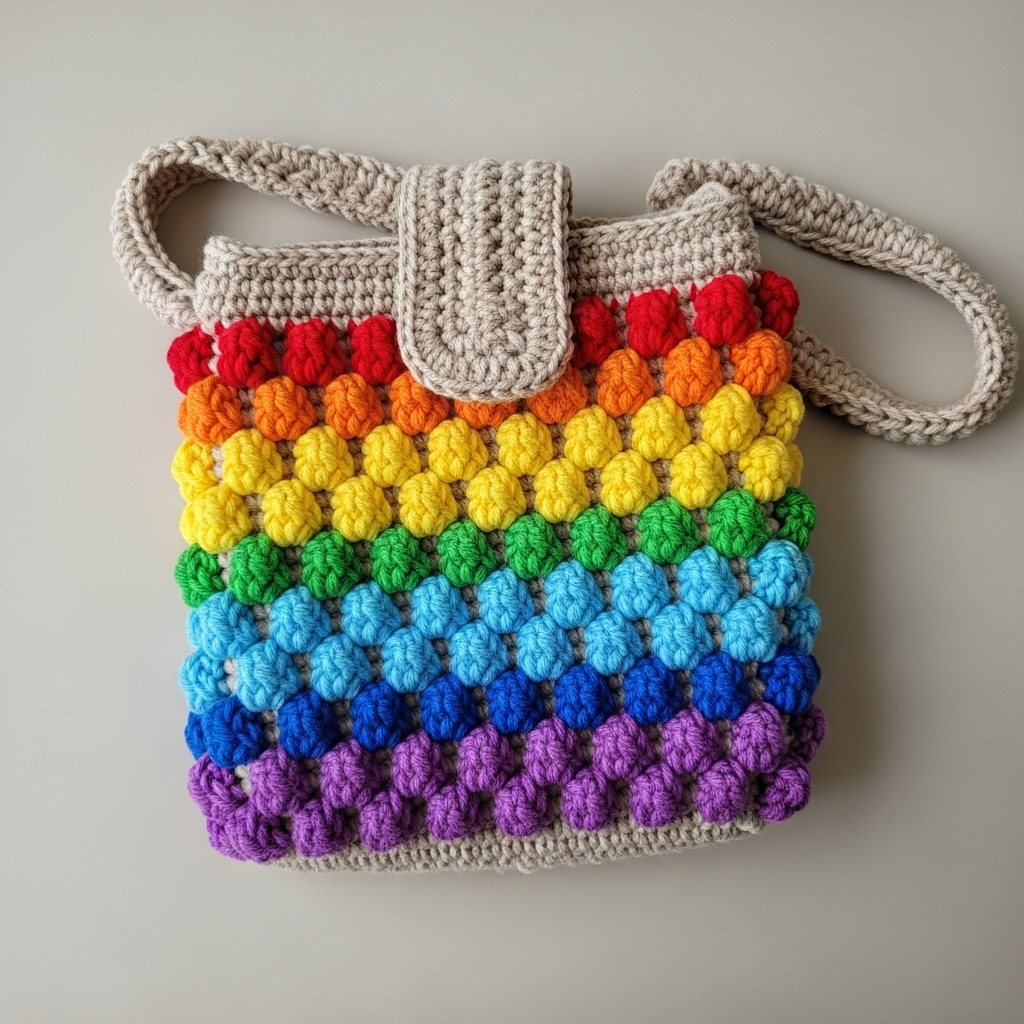
Overview
Fun, textural, and brightly colored: this bag features rows of bobbles in rainbow colors on a neutral background. The bobble texture is tactile and engaging for little hands.
Skill level: Intermediate (bobble stitches and color changes)
Materials
- DK cotton in 7 small skeins or scraps for rainbow stripes + 1 skein neutral background.
- 3.5 mm hook.
- Yarn needle, scissors.
- Soft lining recommended.
Finished size (approx.)
- Body width 5.5 in (14 cm) × height 5 in (13 cm) (without flap).
- Strap 32–36 in (81–92 cm).
Construction — step-by-step
A. Panel method (worked flat then seamed)
- Chain 36 (adjust for gauge) — this forms the width. Work rows of sc for a firm fabric. Row counts depend on desired height; for a 5 in height aim for ~22–26 rows (gauge dependent).
B. Bobble rows (rainbow)
- To make bobble texture, work rows like: Row X: sc across (base row). Row X+1: sc 2, bobble repeat where bobble = make bobble stitch (yo, insert, pull up loop in same st 4 times, yo and pull through all loops) then sl st to secure — exact bobble method may vary; use the standard bobble instruction appropriate to your pattern library. After making a bobble, secure next 2 sc.
- Work one row of bobbles per color and then 1–2 rows of neutral sc between color bobble rows to let each stripe stand out. Repeat rainbow order across the panel.
C. Seaming into bag & lining
- Fold panel in half widthwise and seam sides using whipstitch, creating pocket. Add lining to interior.
D. Flap (optional)
- Make a small flap by chaining half the bag width, then working sc rows to create curved or straight flap. Sew to backside of bag.
E. Strap
- Make a wide strap for comfort: chain length desired and work 6–8 rows of hdc or sc to create a strap width ~0.75–1 in. For stronger straps, crochet two strips and seam together or hold two strands of yarn together while working.
- Sew each strap end onto the bag sides with multiple passes of whipstitch for strength.
Variations
- Create single-color bobbles for a textured neutral bag.
- Use bobble rows only on front and keep the back smooth to save yarn.
Finishing & safety
- Ensure bobbles are tight with no loose tails. Test bobbles for durability—pull gently to ensure they won’t unravel. Sew lining securely to hide interior bobble tails.
Styling idea
- Toddlers love color — use rainbow order for learning color names while playing “what’s in my bag?”
4. Crochet Daisy Heart Granny Purse Bag Pattern
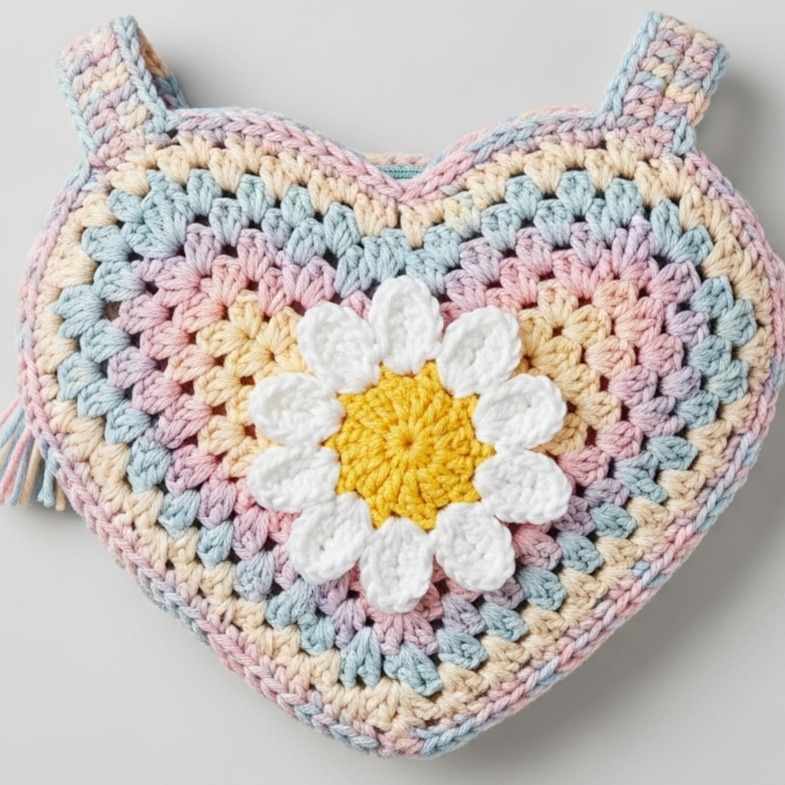
Overview
A tiny granny-style purse built from heart-centered granny motifs with small daisy centers — classic meets playful. The granny pieces are joined to form the front and back, producing an attractive patchwork effect.
Skill level: Intermediate (motifs + join-as-you-go or join sewing)
Materials
- DK cotton in 3 colors: Petal color (PC), Center color (CC), Background (BG).
- 3.5 mm hook.
- Yarn needle, scissors.
- Optional lightweight cotton lining.
Finished size (approx.)
- Width 5.5–6 in (14–15 cm), height 4.5–5 in (11.5–13 cm).
- Strap 30–36 in (76–92 cm).
Construction — step-by-step
A. Granny heart-daisy motif (make 8 total for front/back)
- Center (daisy): MR with CC. Ch1; 8 sc in ring → sl st join. R2: ch 2, 3 dc cluster, ch2, sl st in each stitch to form petals (or use puff stitch) — create 8 tiny petals. Fasten off.
- Surround (heart/granny frame): Join BG around the daisy forming a square/rounded heart shape — use classic granny clusters (3 dc cluster separated by ch spaces) or shape into hearts by modifying cluster counts. Make 8 motifs total (4 for front, 4 for back) — layout a 2×2 grid to form each side.
B. Join motifs
- Use join-as-you-go method or whipstitch motifs together to form front panel (2×2) and back panel (2×2). Make sure joins are tight and edges line up. For extra strength, sew an extra row of sc across joins on the wrong side.
C. Form bag
- With right sides facing, seam the front and back panels around three edges leaving top open. Add a neat round of sc all around top edge to finishe and reinforce.
D. Strap
- Crochet a strap by chaining desired length and working a band of sc/hdc 4–8 rows wide for comfortable crossbody wear. Attach ends securely to top corners inside seam.
E. Lining
- Lining is recommended: stitch a cotton lining to shape and hand sew it into the interior to hide motif join ends and protect small items.
Variations
- Make motifs in tonal pinks for a soft, romantic look.
- Add a small granny tassel or heart charm knitted from yarn (sewn on) — for toddlers keep charms small and sewn flat.
Finishing & safety
- Use sew-in Velcro under flap or top edge for toddler-friendly closure. No small buttons.
Styling idea
- A retro-cute bag that pairs perfectly with a floral dress or playtime tea parties.
5. Crochet Ring of Flowers Bag Pattern
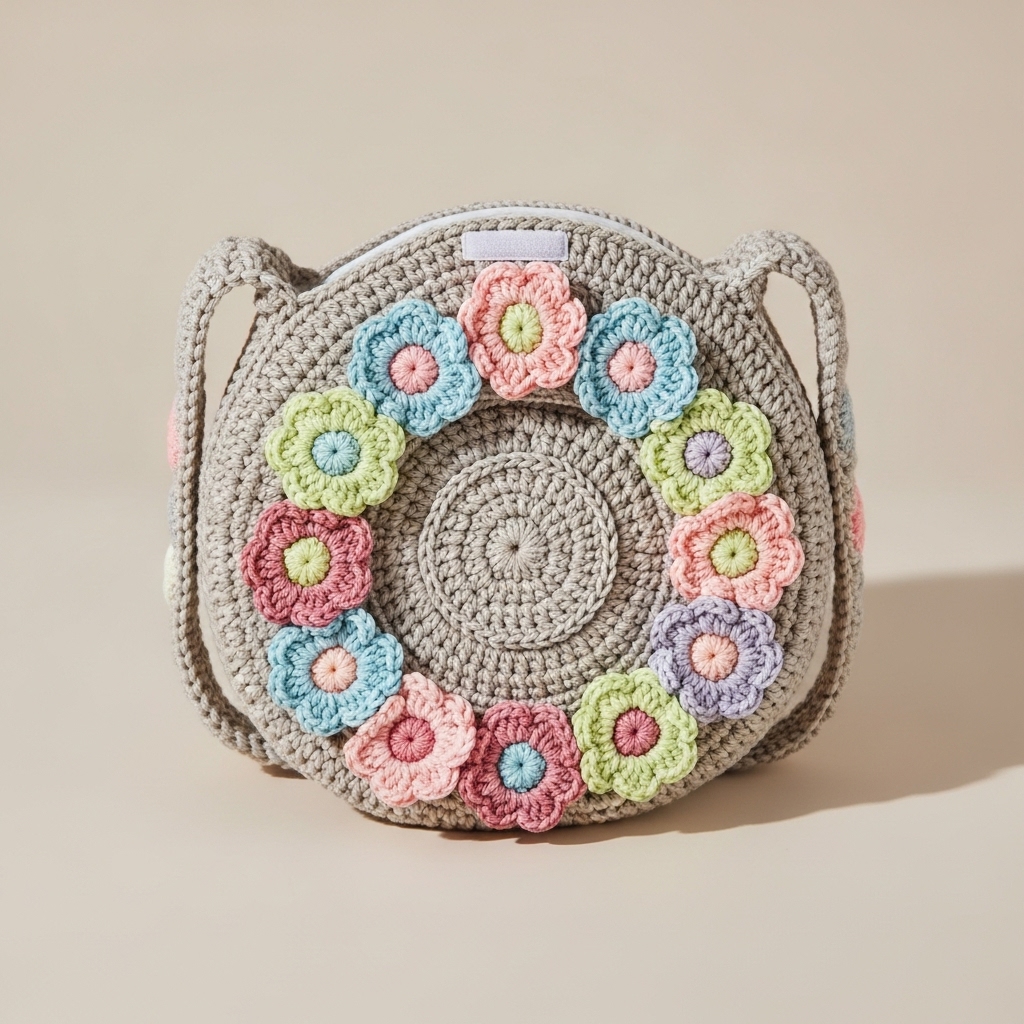
Overview
A sweet circular bag whose front is decorated with a ring of small crocheted flowers surrounding a central medallion. The strap is crocheted and anchored into the side seams. This design is picture-perfect for little ones.
Skill level: Intermediate (many small appliqués + seaming)
Materials
- DK cotton in MC for body, 1–3 colors for flowers, small contrasting center color for each flower.
- 3.5 mm hook.
- Yarn needle, scissors, small lining piece recommended.
Finished size (approx.)
- Circular panel ~6 in diameter; depth ~1.5–2 in. Strap length 30–36 in.
Construction — step-by-step
A. Circular bag body
- MR; R1: 8 sc. R2: inc around (16). R3: sc1, inc (24). R4: sc2, inc (30). Continue until diameter ~6 in. Work side wall: sc rounds even for 4–5 rounds for depth.
B. Flower appliqués (make 8–10)
- Small flower: MR; Ch1; 6 sc in MR; sl st join. Petal round: ch 4, sl st in next st repeat around for loops, then fill loops with (sc, hdc, dc, hdc, sc) to make petals. Fasten off and block slightly to open petals. Sew flower evenly spaced around front perimeter forming a ring.
C. Central medallion
- Small contrasting disc (MR 8 sc → add two rounds if needed) sewed to center for visual focus.
D. Finishing
- Ensure flowers are sewn with many small passes so they’ll hold up to toddler play. Add lining inside to conceal tails and give a smooth interior.
E. Strap
- For a strong strap, crochet two narrow panels and seam them together to make a thicker strap. Attach ends to interior seams and whipstitch through lining and crochet body for reinforcement.
F. Closure
- Add a flap that tucks under the flower ring or use a large Velcro dot inside — keep external surface free of hard closure hardware.
Variations
- Use pastel rainbow flowers for a springtime theme.
- Use small puff-stitch centers for more tactile appeal.
Finishing & safety
- Avoid large glued embellishments. Make sure flower centers are embroidered or crocheted and sewn flat. Test all attachments before gifting to a toddler.
Styling idea
- Create a matching little flower headband or wrist scrunchie for a coordinated set.
Final finishing, durability & safety tips (applies to all patterns)
- Seams & straps: Reinforce strap attachment points with extra passes of stitching and, if you line the bag, sew strap ends through the lining and bag fabric for double security. Tug-test attachments before gifting.
- Linings: I strongly recommend lining toddler bags with a soft cotton to conceal tails, prevent snagging of small items, and provide extra structure. Use tiny hand stitches to sew lining in place for a neat finish.
- Closures: Use wide sew-on Velcro dots (soft side on flap) rather than buttons or snaps for toddler projects. If you choose a button, make it large and sew through the lining plus fabric with several passes. For under-2s, consider leaving bag open or using Velcro only.
- Washing: Use machine-washable cotton yarns and recommend washing on gentle cycle; reshape and dry flat. Remove any metal additions before washing.
- Choking hazard prevention: Avoid beads, plastic buttons, or glued items that could loosen. Always sew appliqués down with multiple secure passes and weave in tails.
Conclusion
These five crossbody toddler bags — Flower Boho Bitty Bag, Retro Circle Bag, Rainbow Bobble Bag, Daisy Heart Granny Purse, and Ring of Flowers Bag — offer a wonderful mix of styles for playtime, outings, and gift giving. They’re small enough to finish quickly, customizable to your yarn stash and color preferences, and practical enough to become a toddler’s favorite accessory. Because each strap is crocheted, every bag stays soft and comfy against little bodies.