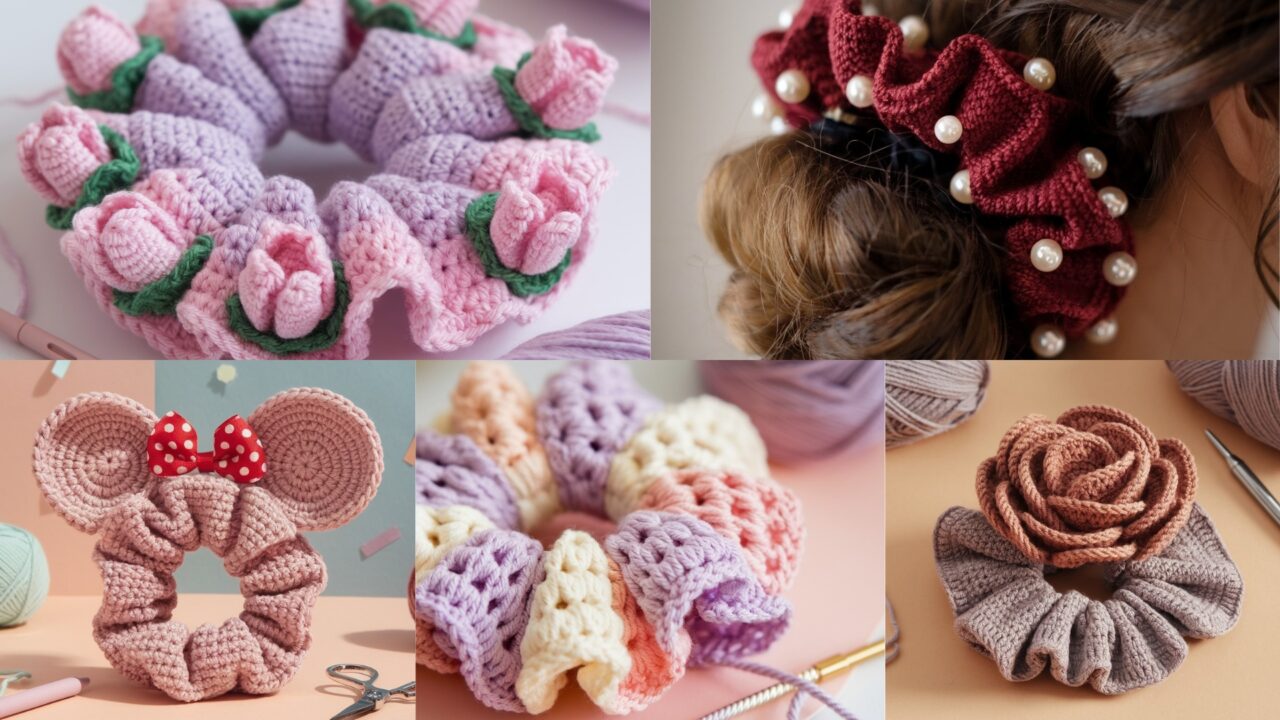
Looking to stock your craft-fair table with irresistible, quick-to-make accessories that customers actually want to buy? Crochet scrunchies are perfect: low materials cost, fast to produce, and endlessly customizable. Below are five original, approachable scrunchie patterns — each includes a clear materials list, stitch abbreviations, a very detailed step-by-step guide, finishing tips, and ideas to vary the look for different audiences. These patterns use standard US crochet terms.
Quick notes (applies to all patterns)
- Skill levels: I mark each pattern as Beginner / Easy / Intermediate.
- Elastic: Most scrunchies use 6–8″ (15–20 cm) hair elastics. If you prefer very tight scrunchies, use 5–6″ elastics; for loose, satin-style scrunchies, use 8–10″.
- Yarn choices: For craft-fair appeal, cotton and cotton blends photograph well and wash easily; acrylic is cheapest and very forgiving. Sport/DK to worsted weight yarns are common. Thicker yarns make chunkier scrunchies that sell well in colder months.
- Hook sizes below are suggestions — always match the look and tension you want.
- Finishing: Weave in ends neatly; knots should be secure. Consider glue dots inside the knot (hot glue) for extra security on items you’ll sell — but disclose if non-washable adhesive is used.
- Abbreviations: ch = chain, sl st = slip stitch, sc = single crochet, hdc = half double crochet, dc = double crochet, tr = treble (UK = treble in US?), BLO = back loop only, F/O = fasten off.
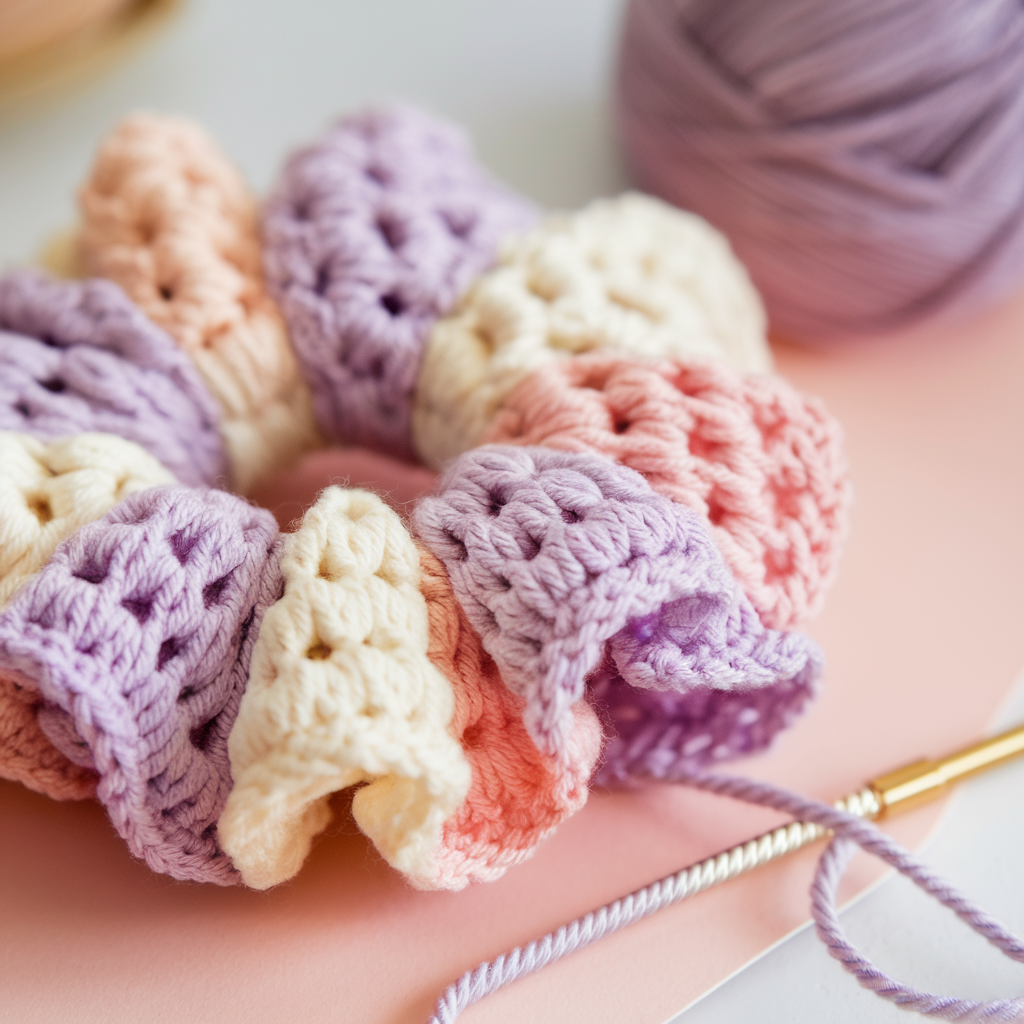
1. Crochet Granny Stitch Scrunchie Pattern
Skill level: Beginner / Easy
Style: Classic granny texture wrapped around an elastic; great for scrap yarn and color-block sets.
Materials
- Small amount worsted weight yarn (approx. 15–25 yards per scrunchie) — cotton or acrylic.
- Crochet hook: H/8 (5.0 mm) or G/6 (4.0 mm) depending on yarn.
- 6–8″ hair elastic (covered elastic optional).
- Yarn needle, scissors.
Why this sells
Granny-stitch scrunchies evoke nostalgic charm, photograph beautifully in color sets, and are easy to produce in batches.
Stitch overview (granny cluster)
- Granny cluster: (ch 2, 3 dc) in same space (the ch-2 corner of a typical granny). For scrunchie we’ll make mini clusters.
Step-by-step (one scrunchie)
- Start with the elastic: Loop the elastic and tie a secure knot (or use a joined elastic). If you prefer, cover the elastic by wrapping yarn once around it and securing with a sl st so you have a tidy starting point. Leave the knot on the inside/back of the finished piece.
- Round 1 — base round (create foundation around elastic): With hook and yarn, sl st into the knot of the elastic or onto the elastic itself (you can slip-stitch through elastic gently). Ch 1 (does not count), work 8–12 sc evenly spaced around the elastic. Weave these sc into/around elastic so they sit snug. Join with sl st to first sc. (You want a tight start so the fabric gathers nicely.)
- Tip: If stitching into elastic feels fiddly, crochet a short chain (ch 6), join into a ring with sl st, and work sc into the ring, then position the ring over elastic; once you join final rounds it will fit.
- Round 2 — granny clusters: Change color if desired. Ch 3 (counts as first dc). In next sc, work (2 dc, ch 2, 3 dc) into same sc (mini corner). Skip next sc. Work (3 dc, ch 2, 3 dc) into next sc — you’re making tiny granny clusters spaced around. Repeat until you reach the start, then join with sl st to top of ch-3. If you have too few stitches, increase starting sc count.
- Round 3 — expand and texture (optional): Ch 1, sc in each ch-2 space and in the top of cluster to fill gaps, or repeat another round of mini granny clusters to make a puffier scrunchie. Most scrunchies look best with 2–3 rounds total.
- Finish: F/O, leaving a 6″ tail. Weave the tail through adjacent stitches and pull tight to hide the knot inside the elastic loop. Weave in ends on the underside. Trim.
Variations & ideas
- Use two contrasting colors: one for the base round, one for clusters.
- Make a small matching set for craft fairs (3 in a pack) — great sellers.
- Add a tiny bow by making a short chain bow tied and sewn onto side.
2. Crochet Tulip Scrunchie Pattern

Skill level: Easy / Intermediate
Style: Decorative tulip petals that sit on the outside edge — very feminine and popular for floral booths.
Materials
- DK or sport-weight yarn (10–20 yards), or worsted for chunkier petals.
- Hook: G/6 (4.0 mm) for DK; H/8 (5.0 mm) for worsted.
- 6–8″ elastic, yarn needle, optional small button or bead for center.
Stitches used
- ch, sc, hdc, dc, sl st
Step-by-step (tulip edge)
- Foundation around elastic: As with Granny Scrunchie, either sl st around elastic and work 10–14 sc, or make a small ring of ch 6 and join, then work sc into ring and fit over elastic. Join with sl st. Aim for 10–14 base stitches (one petal per repeat).
- Petal base row: Ch 2 (counts as small height), sc in next st across — this evens the base for petals. Join.
- Petal round (repeat across): For each petal, ch 1, [sc, hdc, dc, dc, hdc, sc] all in the next st, sl st into next st to anchor and start next petal. This creates rounded tulip petals. Repeat around — you’ll have as many petals as base stitches.
- Shaping & depth: If you want taller petals, substitute the inner dc with tr stitches for a more dramatic look: sc, hdc, dc, tr, dc, hdc, sc.
- Optional center detail: Sew a small bead or button into the center of each petal cluster or every other petal for sparkle. For craft-fair safety, choose beads that are sewn tightly and inform that item contains small parts.
- Finish: F/O, weave ends into the base around the elastic. Tuck knots inside elastic.
Selling tips
- Tulip scrunchies work well in pastel color palettes or bridal/party packs (e.g., 3 for bridesmaids).
- Offer a version with a small faux pearl or rhinestone sewn at each petal base for a premium option.
3. Crochet Scrunchie with White Pearl Beads Pattern
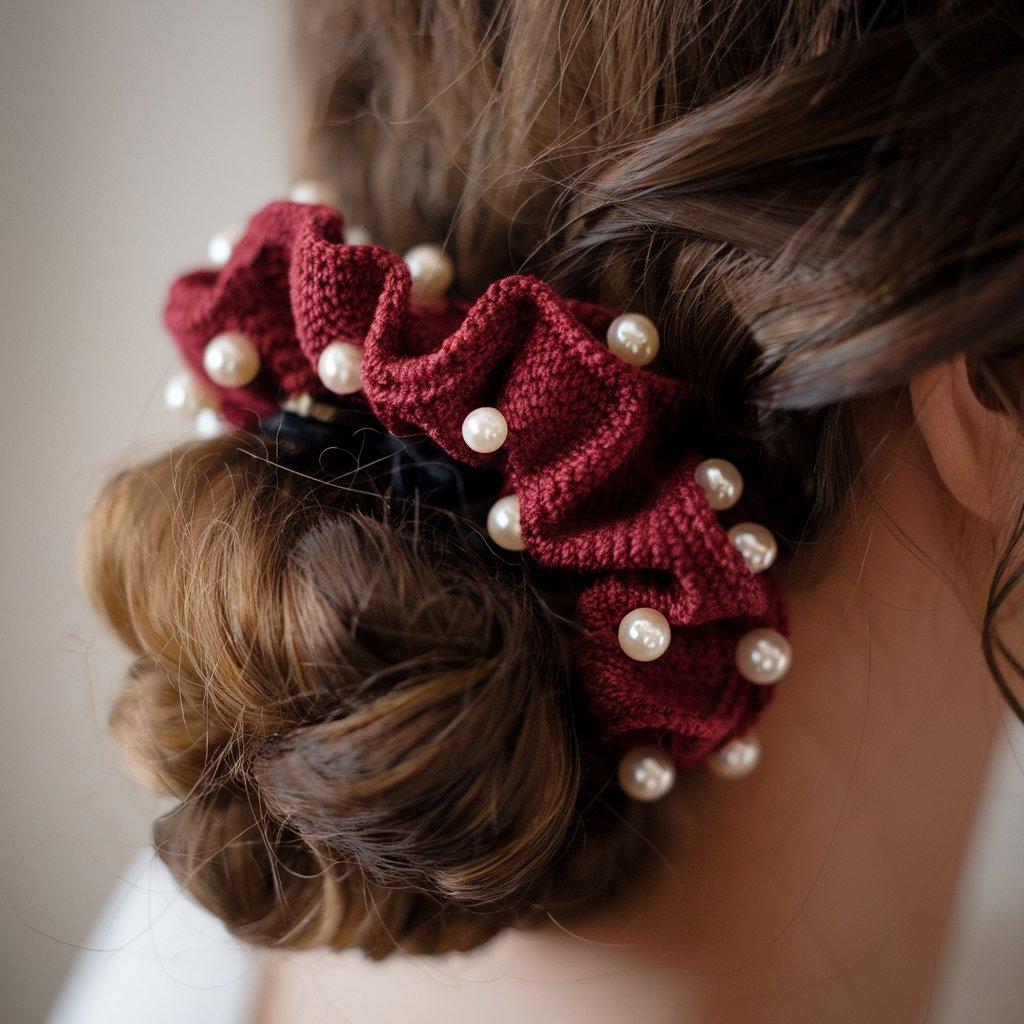
Skill level: Intermediate (beadwork)
Style: Elegant, wedding-market-ready scrunchies with evenly spaced faux pearls.
Materials
- DK or fingering weight yarn if threading beads directly onto yarn; worsted if sewing beads afterwards.
- Small white faux pearls (4–6 mm), quantity 6–10 per scrunchie depending on spacing.
- Beading needle or small regular sewing needle (if threading pearls onto yarn).
- Crochet hook: G/6 (4.0 mm) recommended.
- 6–8″ hair elastic, scissors, clear-drying fabric glue (optional for bead security).
Two methods to add pearls
- Pre-string beads onto yarn (neat & durable).
- Sew beads on after crocheting (easier if yarn is thick).
Method A — Pre-stringed pearls (recommended for neatness)
- Pre-string: Before starting, thread the required number of pearls onto your working yarn using a beading needle. Slide them out of the way along the yarn.
- Base round: Create foundation ring over elastic with 10–14 sc as previous patterns.
- Placement plan: Decide your bead spacing — e.g., place a bead every 4th sc. You’ll slide one bead into place when you reach that stitch.
- Beaded stitch: When you reach a stitch designated for a bead, slide one pearl along the yarn down to the hook and position it directly before making your stitch. Work a sc (or hdc) so the bead sits snugly against the stitch. Continue across, sliding beads on as needed.
- Optional texture: Work a second round of sc or hdc in BLO to create a raised ridge; beads will sit on top nicely.
- Finish: F/O and weave ends. For extra security, apply a tiny drop of clear-drying glue behind each bead on the inside of the scrunchie (not visible) — allow to dry before packaging.
Method B — Sew-on pearls (if yarn is thick)
- Crochet scrunchie fully (use the Granny or Waffle base) leaving a 6–8″ tail.
- Thread bead on a sewing needle and stitch through the yarn on the scrunchie exterior in desired locations. Tie and knot securely on the inside; secure with a drop of glue if desired. Weave ends.
Safety & presentation
- For children’s scrunchies, avoid detachable small beads. Consider plastic pearl-look buttons embroidered flat so they won’t detach.
- Offer a bridesmaid/bridal bundle and mark as “not recommended for children under 3.”
4. Crochet Flower Scrunchie Pattern
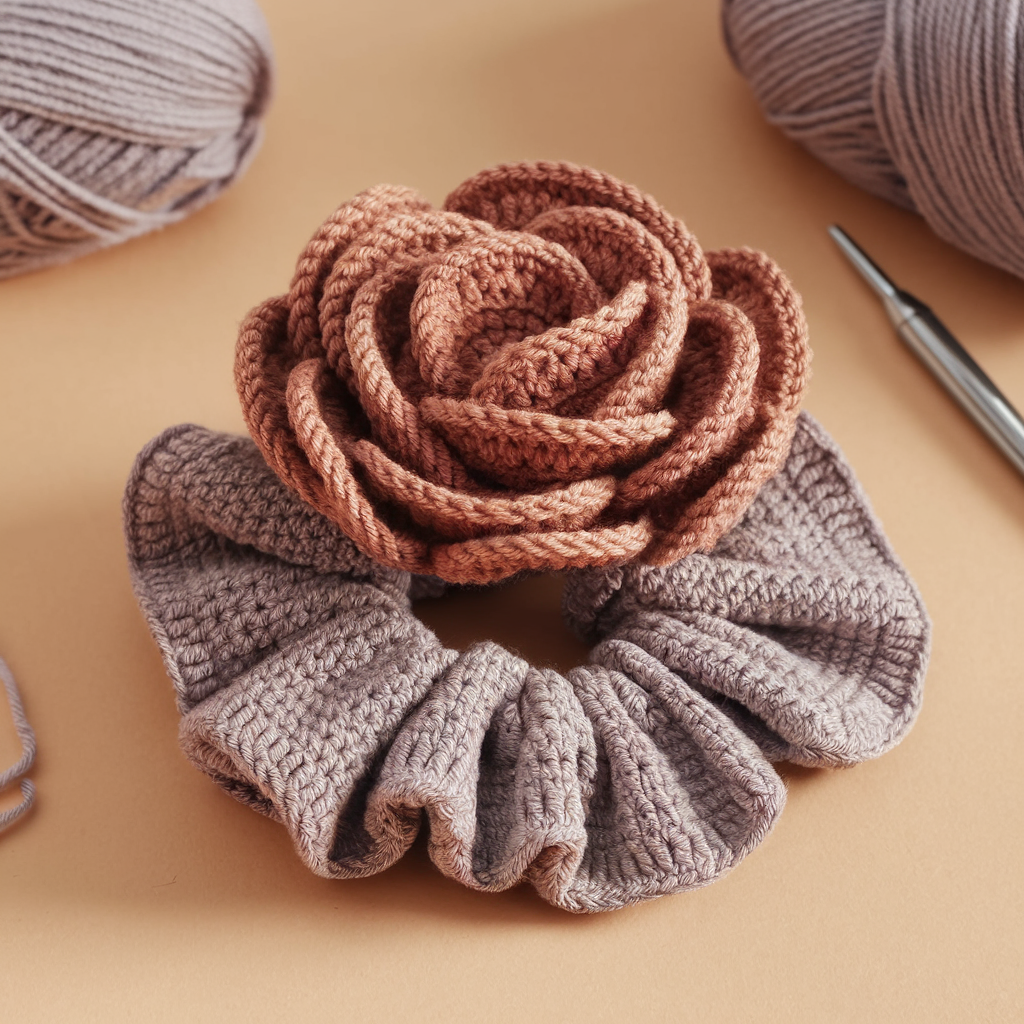
Skill level: Easy
Style: Big standalone flower on top of a scrunchie. Great as statement pieces for craft-fair display.
Materials
- Worst ed or DK yarn for the scrunchie base; smaller weight for delicate flowers.
- Hook: H/8 (5.0 mm) for base; smaller hook for flower if you want delicate petals.
- 6–8″ elastic, yarn needle.
Flower motif (classic layered flower)
- Make scrunchie base: Crochet a standard base of sc around elastic (10–14 sc) and work 2 rounds of sc for a sturdy center. Join and leave live loop for flower attachment OR make scrunchie fully and sew flower on later.
- Flower round 1 (center): With contrast yarn, ch 4, join to make ring, ch 3 (counts as dc), work 11 dc into ring, join to top of ch-3 (12 dc total). F/O.
- Flower round 2 (petal base): Join new color in any dc, ch 2, (sc, hdc, dc, hdc, sc) in next dc, sl st into next dc — this makes full rounded petals. Repeat around for 6 petals or as many as your dc count allows. F/O.
- Optional Layer: For a layered flower, make a smaller flower (using fewer dc in center) and sew it to the center of the larger one for dimension.
- Attach: Sew the flower to the top of the scrunchie base using yarn needle. Make sure stitches go through the inner center to catch elastic beneath to keep flower secured. Tie off and weave in ends.
- Optional bead/button center: Sew a small pearl, button, or bead into the flower center for polish.
Variations
- Make daisies (slim petals using ch 6 loops worked into base).
- Use boucle or eyelash yarn for funky textural flowers. These photograph well and attract attention at fairs.
5. Crochet Mini Mouse Scrunchie Pattern
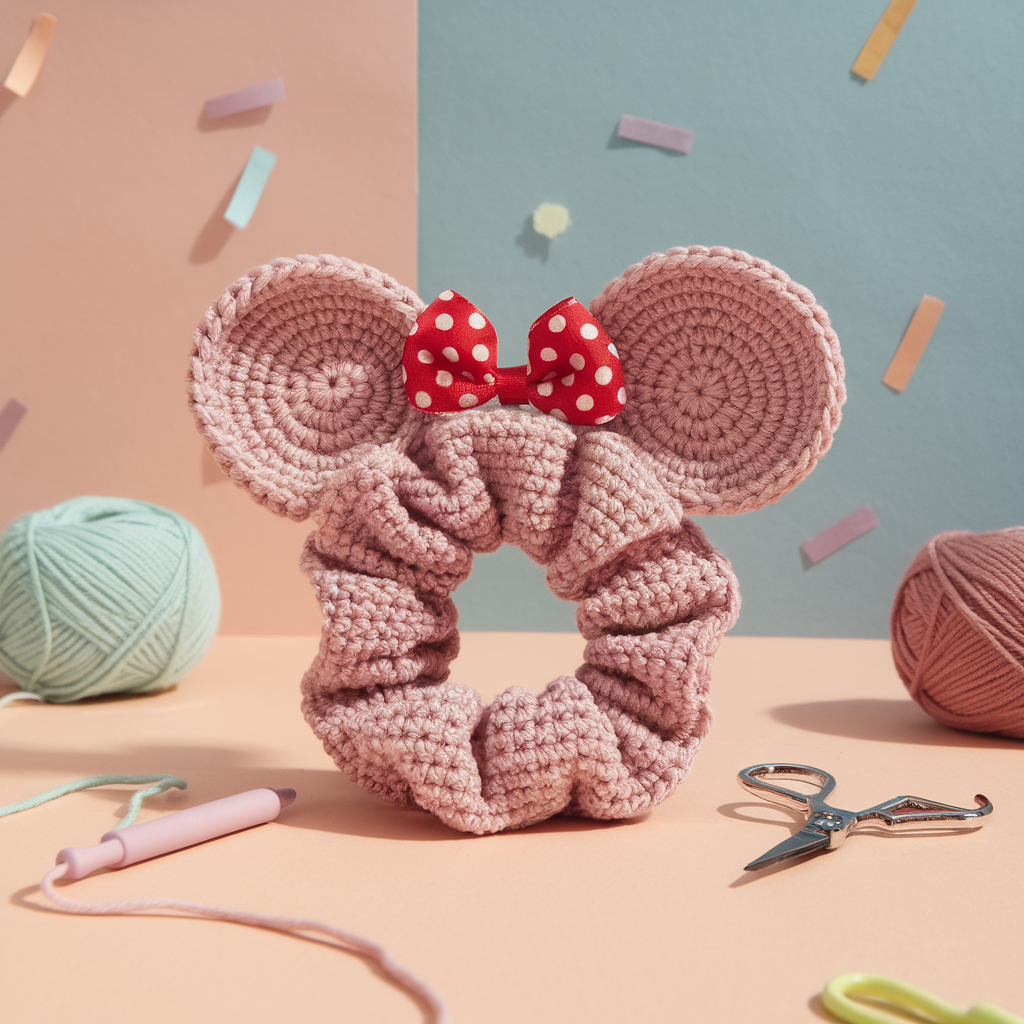
Skill level: Easy / Playful
Style: Mini “mouse ears” on a tiny scrunchie — adorable for kids’ booths or themed markets.
Materials
- Worsted/DK yarn in two colors (main and ear color).
- Hook: G/6 (4.0 mm) or H/8 (5.0 mm).
- 6–8″ elastic (smaller elastics can give a tighter, smaller scrunch).
- Optional tiny bow, bead, or stitch-embroidery for face (but avoid small detachable parts if for small children).
Steps
- Base scrunchie: Make a single-round base: ch 6, join to ring, ch 1, work 12 sc into ring. Fit over elastic or work a second round of sc if you like it fuller. Join and fasten off leaving tail.
- Mouse ears (make 2): With ear color, ch 3, in ring work 6 sc (or sl st, ch 3, 6 sc depending on desired ear size). F/O leaving tail for sewing. For slightly rounded ears, make 7 sc. Make two identical ears.
- Attach ears: Sew each ear to the scrunchie top, spacing them about 1/2″–1″ apart (depending on scrunchie size) so they look like mouse ears. Use tight stitches.
- Optional bow: Make a small bow (ch 12, sc in 2nd ch and across, wrap center with yarn) and sew between ears.
- Finish: Weave in all ends. If selling for children, embroider rather than attach beads for eyes to avoid small part hazards.
Market ideas
- Make themed sets (e.g., holiday mice with small felt accessories).
- Offer matching kids’ headbands and small coin purses for cross-sales.
Conclusion
You now have five distinct scrunchie designs you can produce quickly and style to your brand: granny textures for nostalgia, tulip petals and flower scrunchies for feminine shoppers, pearl embellishments for weddings/formal markets, and playful mini-mouse scrunchies for kids. A few practical tips to turn these patterns into profitable craft-fair products:
Production and batching
- Make scrunchies in batches of 10–20 of the same pattern to speed up production and reduce context switching.
- Keep yarn colorways consistent in sets — customers love matching bundles (3 for $10, 5 for $15, etc., depending on your market).
Packaging & display
- Use recycled kraft cards with a small label and care instructions (wash cold, lay flat to dry).
- Display scrunchies on a pegboard, small hand mirrors, or tiered cake stands for easy browsing. Group by color palette and price point.
Pricing guidelines
- Consider materials + labor (time) + overhead + profit. Example simple formula: (cost of materials per scrunchie × 3) + labor per minute × time + small packaging cost = retail. On craft-fair day, round to a clean price point ($4, $6, $10) that matches perceived value. Premiums: add $2–$5 for pearls/hand-sewn beads or layered flowers.
Care & labeling
- Include a small tag: “Handwash cold, reshape, lay flat to dry” — especially if using delicate fibers or glued beads.
- If beads/buttons are used, add a safety note: “Contains small parts — not for children under 3.”
Presentation & marketing
- Offer combos: “Bridal Set” (pearl scrunchie + tulip in white), “Kids Pack” (2 mini mouse + 1 flower).
- Use a small sign with price-per-pack and story: “Handmade • Ethically sourced yarn • Local small-batch.”
Final creative nudges
- Photograph your best scrunchies on natural light, on-model photos (hair shots) help shoppers imagine usage.
- Consider seasonal colorways — pastels for spring, jewel tones for autumn, metallic-thread for holidays.