Handmade pillows are one of the fastest ways to refresh a room. They add texture, color and personality while being forgiving, portable projects that make fantastic gifts. In this post you’ll get one practical introduction (materials, gauge, pillow sizing, construction and finishing tips) followed by five full pillow patterns — each written with clear, step-by-step instructions, sample stitch counts for a 16″ pillow (with notes to scale up or down), helpful variations, finishing/assembly instructions and care tips.
Read the intro first — it will save you time while you plan yarn and measurements — then jump to whichever pillow you want to make. Let’s make your home cozier.
materials, sizing, gauge and construction basics
Yarn, hooks & fabric choice
- Yarn: For pillows, cotton, cotton blends, linen blends and worsted-weight acrylics are common. Cotton holds shape and blocks flat; acrylic is soft and forgiving; wool gives loft but requires more care. For a structured textured pillow choose worsted (category 4); for delicate lace or dainty floral pillows use DK or sport.
- Hook: Match your yarn label but consider going ½–1 size smaller for dense pillows (prevents stuffing from showing) or one size larger for a softer drape.
- Notions: tapestry needle, stitch markers, measuring tape, pillow insert (or fiberfill), sewing thread or yarn for seaming, optional zipper or buttons.
Pillow insert sizes & fit
- Common insert sizes: 12″, 14″, 16″, 18″, 20″. A good fit: crochet the cover slightly smaller (about 0.5–1″ less) so the insert gives a plump, finished look — e.g., for a 16″ insert make a 15–15.25″ finished cover.
- For a super plump “pillow-shop” look choose the insert 1–2″ larger than cover size.
Gauge and scaling
Always make a small swatch (4″ square) in the stitch pattern to measure stitches per inch (spi) and rows per inch (rpi). Use this digit-by-digit math:
- Desired finished width (FW) × spi = number of stitches across.
- If your stitch pattern requires a multiple (for example a multiple of 6 + 2), round to the nearest valid number and adjust hook if needed.
Construction approaches
- Panel method: crochet front and back panels (same size), seam them and stuff. Easiest for beginners.
- Envelope/back method: crochet a full front panel and two overlapping back panels; insert slides in through the back overlap (no zipper needed).
- Zip closure: add a zipper for a clean, removable cover.
- Motif join: make motifs (granny squares, flowers) and join to create a front panel, then add a backing.
Finishing essentials
- Blocking: Especially important for lace, daisy/flower shapes, and granny motifs. Block panels to measurement before joining.
- Seaming: Mattress stitch with yarn or a neat whipstitch is invisible and strong. For heavy pillows consider lining the interior with cotton fabric for extra durability.
- Edges: A tidy round of single crochet, crab stitch (reverse single crochet) or picot can finish edges and prevent stretching.
Abbreviations (US)
- ch = chain
- sc = single crochet
- hdc = half double crochet
- dc = double crochet
- tr = treble crochet
- sl st = slip stitch
- st(s) = stitch(es)
- inc = increase (2 sc in same st)
- dec = decrease (sc2tog)
- MR = magic ring
- RS = right side, WS = wrong side
Pattern templates (how I present counts)
For each pattern I’ll provide:
- Skill level
- Materials (example for one 16″ pillow)
- Gauge example & sample stitch multiple
- Finished size & how to scale
- Detailed step-by-step for the front, back and assembly
- Variations & finishing notes
- Care
If you want any of these converted into printable PDFs or multiple sizes, tell me which pattern and I’ll expand that one into a full-size graded pattern.
1. Crochet Ladder Pillow Pattern
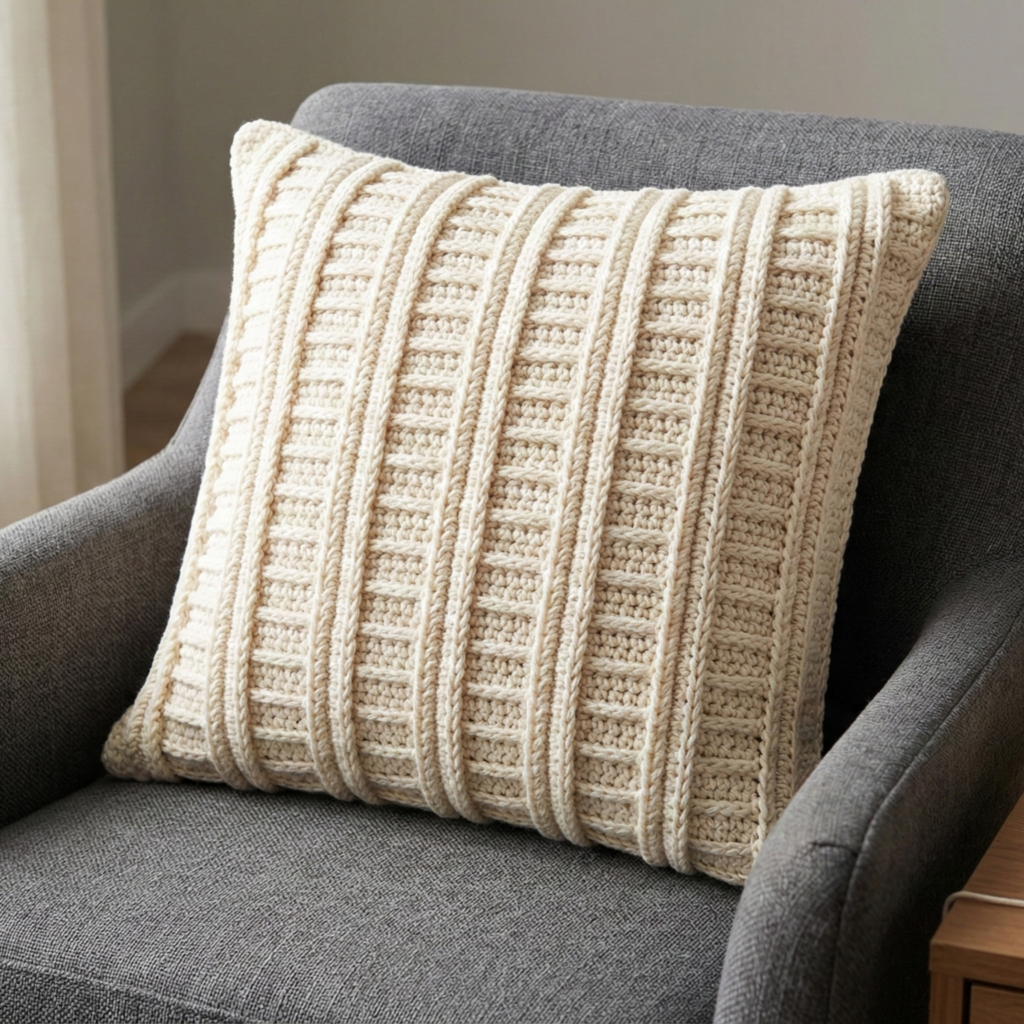
Vibe: modern textured vertical ribs that read like a ladder — crisp and contemporary. Works well in neutral yarns or simple two-color palettes.
Skill level: Confident beginner (post stitches + basic seaming)
Materials (sample for a 16″ square pillow)
- Worsted weight cotton or cotton blend — ~300 yd total (main color).
- 4.0 mm (G) hook.
- 16″ square pillow insert (or fiberfill).
- Tapestry needle, blocking tools.
Gauge (example)
- In hdc used for base: ~4 hdc = 1″. Make a 4″ swatch in the ladder repeat to verify.
Finished size
- Designed for a 16″ insert. Make front/back panels 15–15.25″ square for a snug finish.
Stitch multiple
- Multiple: even number of stitches; pattern uses pairs for ladder columns. For sample, foundation = 64 sts across (gives ~16″ width at 4 sts per inch). Adjust with your gauge.
Step-by-step — Front panel (textured ladder)
Foundation
- Chain 65 (or foundation chain that gives desired width + 1 turning ch). Join carefully if you work in the round; more commonly work back-and-forth rows.
Base row
2. Row 1 (RS): hdc in 2nd ch from hook and each ch across. Turn.
Set-up rows
3. Rows 2–3: ch1, hdc across. Turn. These rows make a sturdy base.
Ladder repeat (creates ribbed “rungs”)
4. Row 4 (RS): ch2, fpdc around next st, bpdc around next st repeat across; end with hdc in top of turning ch. Turn.
- fpdc = front-post double crochet; bpdc = back-post double crochet.
- Row 5 (WS): ch1, sc across in the tops of posts and stitches (work sc into the tops of the fpdc/bpdc). This flattens the ladder rungs and defines vertical gap.
- Row 6: ch2, bpdc around previous fpdc and fpdc around previous bpdc — this shifts the posts so rungs alternate each repeat (gives ladder depth). Turn.
- Row 7: ch1, sc across.
- Repeat Rows 4–7 until panel measures ~15–15.25″ from the starting edge.
Note: You can vary the number of sc rows between post rows to make wider or narrower rungs.
Back panel (envelope method)
Option A – simple solid back
- Chain same starting count (65). Work hdc across for the same number of rows as the front until it equals the front height.
- Finish with one tidy round of sc across for a neat edge.
Option B – envelope back (no zipper)
- Make two rectangles: each about 2/3 the height of the front (so when overlapped they cover the insert). For a 16″ pillow: top flap 10″, bottom flap 10″ — overlap ≈ 4″.
- Sew sides and bottom as described in Assembly.
Assembly
- Block both panels flat to measurement.
- Place the front panel RS up. Place one back flap RS down, align edges; place the second flap on top the same way, overlapping.
- Use mattress stitch or whips to seam edges together on three sides (leave the top or one side as the envelope opening).
- Insert pillow and close final gap (if not envelope) by seaming or by sewing a zipper before assembling.
Finishing
- Add one round of sc around the completed pillow for a uniform edge or add a decorative crab stitch for detail.
Variations & styling
- Two-color ladder: Alternate colors every 6–8 rows for subtle bands.
- Chunky rungs: Use a larger hook or bulky yarn to make rungs more pronounced.
- Framed look: Add a 1″ sc border in contrasting color.
Care
- Cotton: machine wash gentle, reshape and air dry. If you used a wool blend, hand wash cold.
2. Crochet Pocket Pillow Pattern

Vibe: playful and functional — pockets on the front that hold remotes, phones, pens or a reading book. Great for family rooms and kids’ corners.
Skill level: Confident beginner
Materials (16″ sample)
- Worsted yarn ~350 yd (main color), contrast color for pockets optional.
- 4.0 mm hook.
- 16″ insert, tapestry needle, optional small buttons or appliqué.
Gauge & multiple
- Base pattern: sc or hdc rows. For neat pockets use a firm stitch (sc or hdc) to support weight. Gauge: ~5 sc = 1″.
Step-by-step — Front panel with pockets
Foundation & base panel
- Chain foundation for width (example: chain 80 for a 16″ pillow at 5 sc/in). Row 1: sc across.
- Work sc rows until panel height reaches about 10″ (this leaves top flap area for pockets placement).
Pocket construction (make 2 or 3 pockets)
- Decide pocket layout: two pockets side-by-side or three narrow pockets.
- For two equal pockets, measure width and plan 2 pockets × 40 sts each (for 80-st foundation).
- Attach yarn at pocket start position (use stitch markers to map pockets).
- Row 1 (pocket base): sc across the pocket width for desired depth (5–6 rows for phone pocket, 8–10 rows for deeper storage). Optional: work in rounds if you want fully lined pocket box.
- For pocket elasticity, on the last pocket row work a row of hdc in BLO to create a stretching top.
- Leave top edge unsewn; repeat for second pocket.
Top flap (optional)
- Crochet an optional flap to fold over pockets: pick up stitches above pockets and make 6–8 rows of sc or decorative shells. Add buttons or a simple loop to secure.
Upper panel
- Continue sc rows for the remaining height until entire front equals ~15–15.25″.
Back panel
- Make a solid sc/hdc panel same height.
Assembly
- Block panels.
- Position pockets on front panel as desired and sew across base and sides — sew pocket sides only to create open top.
- Place back panel on top (RS facing) if using envelope, or seam three sides leaving opening for the insert.
- Insert pillow and finish.
Finishing touches
- Add labels, small appliqués, or embroidered icons to pockets for personalization.
Variations & ideas
- Book pocket: one large pocket across bottom for paperback books.
- Removable pocket pouches: make pocket panels on small rectangles that snap on with sew-in snaps so you can wash separately.
- Kid-friendly: brightly colored yarn and multiple small pockets to hold toys.
Care
- Machine wash gentle; empty pockets before washing. Reinforce pockets’ bottom seams if heavy objects are used frequently.
3. Crochet Daisy Pillow Pattern

Vibe: whimsical, shaped like a large daisy — perfect as a cheerful accent on a child’s bed or a sunny living room.
Skill level: Intermediate (shaping, appliqué petals, seamed assembly)
Materials (16″ cushion diameter, daisy shape about 18–20″ across including petals)
- DK or worsted cotton for crisp petals (white), worsted yellow for center, green for optional leaves.
- Hooks: 3.5–4.5 mm depending on yarn.
- Fiberfill for center or a 10–12″ round pillow form for a shaped look.
- Tapestry needle, scissors, stitch markers.
Concept & finished size
- The daisy is made as a circular center and multiple petal motifs joined around the circle to create a shaped pillow. For a full 16″ pillow use a 6–8″ center disk plus 12–16 petals depending on petal width.
Stitch multiple & gauge
- Petals are worked in shell or layered dc petal shapes; gauge depends on petal size. Make a petal swatch to match proportion.
Step-by-step — Center disk
Center (yellow)
- MR; R1: 8 sc in MR (8). R2: inc around (16). R3: sc, inc around (24). Continue increasing with sc x2, inc etc. until center disk diameter is about 6–7″ (this will be the daisy’s middle).
- Work 2–3 rounds of sc to make center slightly raised (or work 1–2 rounds of hdc for more height).
- Optionally, make the center as two layers: a front disk and a back disk sewn together with stuffing between (makes a puffy center).
Petals (make 12–16)
Petal pattern (example large petal)
- Attach white at a marker on the center edge. Ch 3, 2 dc, tr, 2 dc all into the same stitch to form a large petal cluster; sl st to base to secure. (Adjust number of stitches to adjust petal width.)
- For fuller petals: work 2 rows: Row 1 petal base as above; Row 2: working into petal stitches (not the center), sc around and then 5 dc in the top of the petal for a ruffled edge.
- Repeat around, spacing petals evenly. Use stitch markers or count center stitches to space petals precisely. For 12 petals on a 72-st center, place a petal every 6 stitches.
Joining petals and back panel
- After completing petals around the center, weave in ends but do not fully close.
- Make a backing disk: either a round disk in white or a solid square/back panel in green or another color that will serve as the backing and closure.
- For a round backing: work the same diameter center disk but without petals.
- Place backing disk RS down and front daisy RS up, align edges and seam around with hidden mattress stitch, leaving a small opening for stuffing.
- Stuff with fiberfill or insert a round pillow form; close opening with neat invisible stitches.
Variations & styling
- Kawaii daisy: embroider a small smile on the center with black floss.
- Layered petals: add a second row of smaller petals beneath larger ones for fullness.
- Two-tone petals: use a pastel gradient for petals (soft pinks or yellows).
Care
- Cotton daisy: gentle machine wash recommended inside a laundry bag; reshape by hand and dry flat. If the pillow contains glued or delicate embellishments, spot clean only.
4. Crochet Dahlia Floral Pillow Pattern
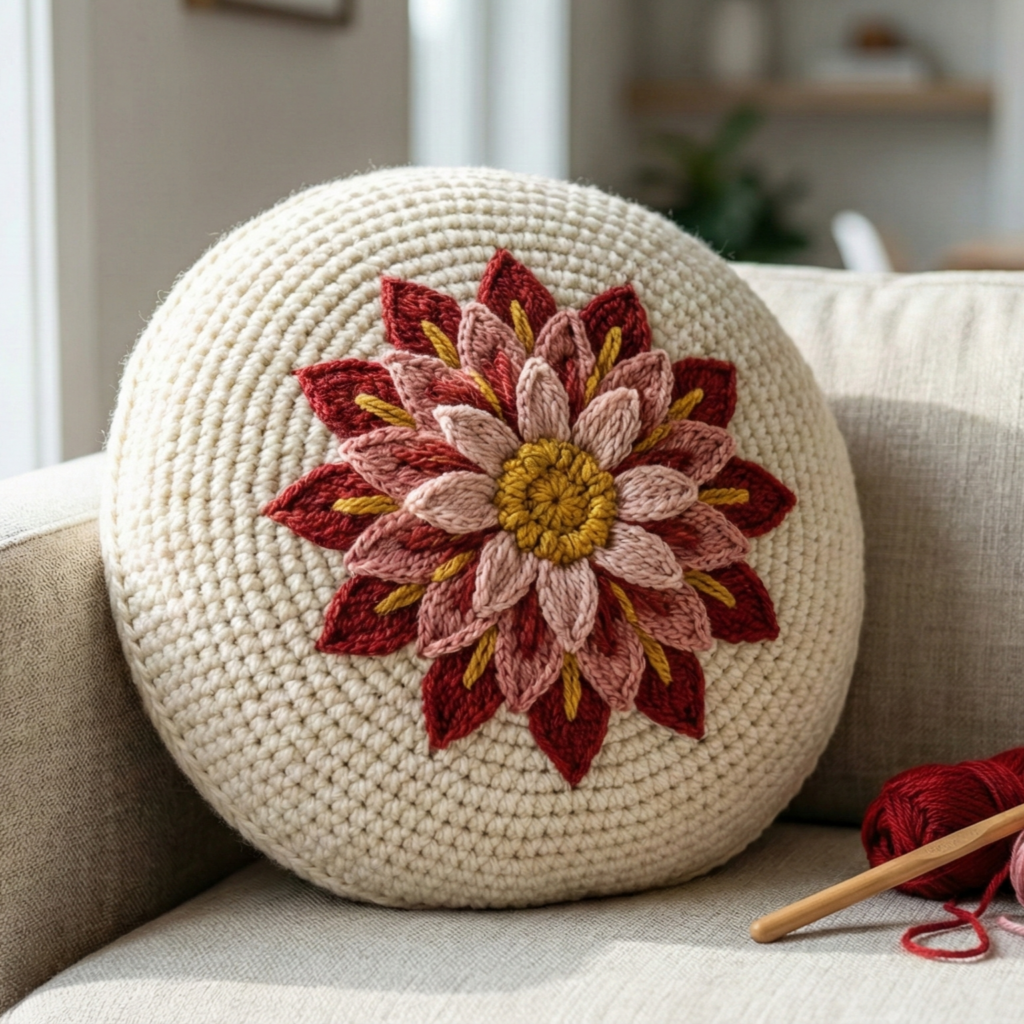
Vibe: sculptural, layered dahlia petals that create plush 3D texture — a decorative focal pillow.
Skill level: Intermediate to advanced (many petal repeats and 3D shaping)
Materials (approx for 16″ pillow)
- Worsted yarn in chosen dahlia color (1–2 skeins depending on density).
- Hook: 4.0–5.0 mm.
- 16″ round pillow form or fiberfill.
- Tapestry needle, stitch markers.
Concept & finished size
- Dahlia is built from concentric rounds of petals increasing in size from center to outer edge. Make petals densely packed so the finished pillow looks like a sculpted dahlia blossom around a small center.
Step-by-step — base disk and petals
Center bud
- MR; R1: 6 sc in MR (6). R2: inc around (12). R3: sc around. Make this bud slightly raised by working hdc rounds.
Small inner petals (rounds 1–2)
- Join yarn at one of the outer stitches of the bud. Petal stitch example: ch3, (3 dc, ch1, 3 dc) all in same st, sl st to base. This forms a puff/cluster petal.
- Work a petal in each stitch around the bud, placing petals closely so they overlap.
Increase petal size by round
- For each outer round, make petals longer by increasing dc clusters (e.g., next round: ch3, 5 dc, ch2, 5 dc in same base stitch).
- Continue making successive rounds of petals, each round slightly larger in height and width, until petals extend to desired diameter (~16″ including overlap).
- Stagger petals (so new round covers gaps of the previous) by placing petals into spaces between base stitches rather than directly on previous petal centers.
Backing & assembly
- Make a solid back panel (round disk same diameter) in sc or hdc to provide support.
- Place backing RS down and the dahlia RS up; seam edges with mattress stitch leaving a small gap.
- Insert pillow form or stuff; sew closed.
Tips for realism & finishing
- Curl the petals slightly: after finishing a petal round use blocking by pinning petal edges slightly up to create a cupped look. For synthetic yarn, steaming lightly shapes petals.
- Mix two yarn weights: use DK for inner petals and worsted for outer petals to give a tapered effect.
- Reinforce the base: because petals are dense and heavy, consider a cotton fabric lining sewn into the back panel before stuffing.
Variations
- Dahlia color gradation: work center in darker shade and gradually switch to lighter tones outwards.
- Smaller cushions: make a 12″ diameter cushion with fewer petal rounds for accent chairs.
Care
- Hand wash cool and reshape, or gentle machine wash inside a mesh bag; dry flat. Avoid tumble drying to protect petal shape.
5. Crochet Single Granny Square Pillow Pattern
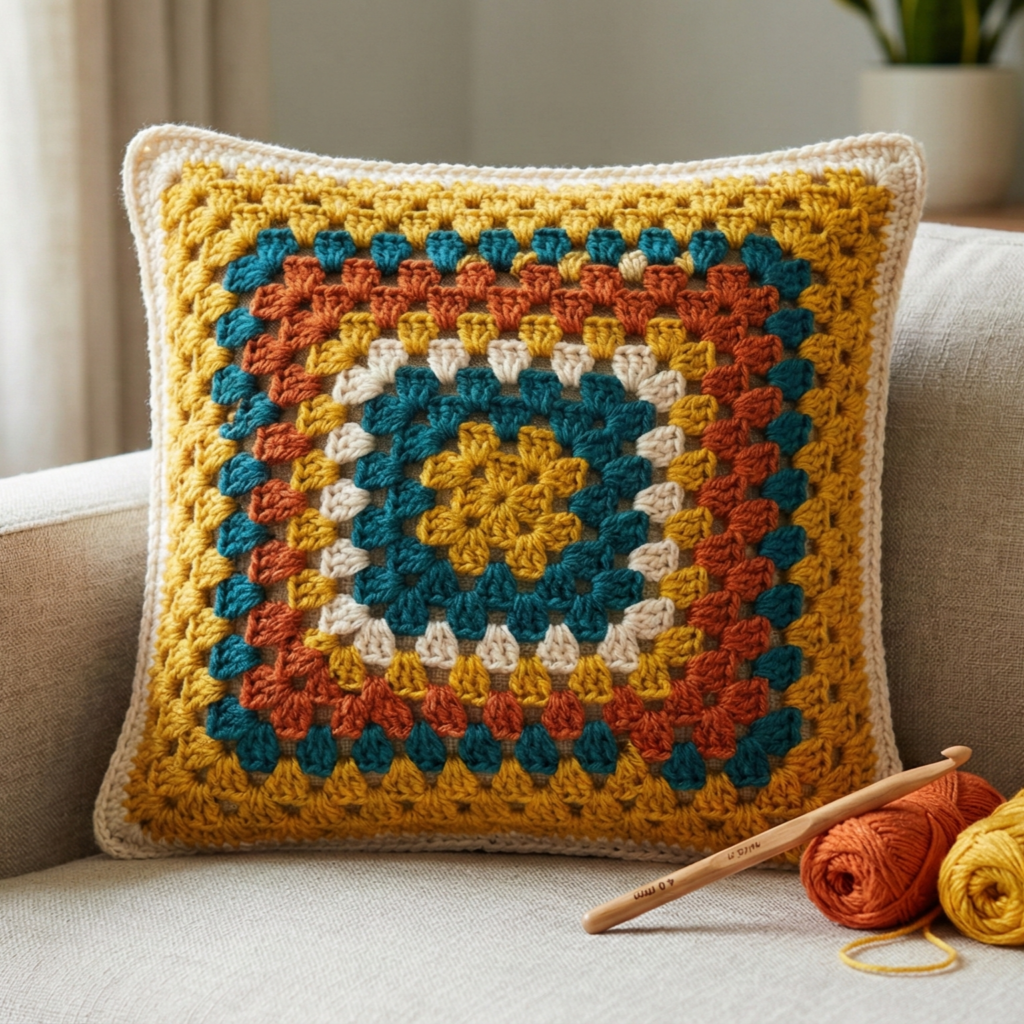
Vibe: classic, cozy granny-square used as a single front motif — timeless, customizable and beginner-friendly.
Skill level: Beginner
Materials (16″ square pillow)
- Worsted weight yarn for granny square (main & contrasting colors) ~300–400 yd.
- 4.0 mm hook.
- 16″ square insert, tapestry needle.
Concept & finished size
- Use one large granny square as the pillow front. Make the square slightly smaller than insert (15–15.25″) for plump look. Back panel can be a simple square, envelope, or an arrangement of 4 smaller granny squares.
Step-by-step — classic large granny square
Center
- MR; ch3 (counts as dc), work 2 dc into ring, ch2 (corner), 3 dc, ch2 ×3. Join to turning chain — you’ve created a four-corner motif.
Round 2
2. Join new color at any ch-2 corner. Work (3 dc, ch2, 3 dc) in corner, ch1, 3 dc in next corner ch-2 space, ch2, 3 dc in same corner — standard granny round structure — continue around and join. The ch1 spacing between clusters keeps the square from puckering.
Round 3 and beyond
3. Continue rounds, increasing with 3-dc groups in side spaces and 3-dc, ch2, 3-dc in corners. Keep adding rounds until square measures ~15″.
Edging
4. Finish with 2 rounds of sc for a neat frame or work a picot edge for a delicate finish.
Backing & assembly
- Option 1 – simple back: crochet a solid square in hdc/sc to same dimensions and seam around.
- Option 2 – envelope back: two rectangles/strips that overlap.
- Option 3 – zipper: add zipper on one side by sewing zipper to inside edges and slipstitching to secure.
Seaming
- Block both squares. Place RS together and seam with mattress stitch or invisible whipstitch. Insert pillow and close.
Variations & styling
- Colorways: make a tonal granny (one color family) or bold multicolor retro palette.
- Texture: use puff stitch rounds in the center for extra texture.
- Multiple squares: use four medium granny squares joined for a patchwork pillow.
Care
- Cotton/ acrylic: machine wash gentle and dry flat. If using hand-dyed yarn, test for colorfastness on a scrap.
Conclusion
You now have five full pillow projects that span modern minimal texture (Ladder Pillow), functional fun (Pocket Pillow), whimsical florals (Daisy and Dahlia), and classic charm (Single Granny Square). A few final tips to make them look professional:
- Block before assembly. This makes edges even and motifs meet cleanly when you seam.
- Choose a good insert. The insert quality affects the finish — use a dense insert for sculptural pillows (dahlia) and a softer one for casual pillows.
- Line heavy pillows. For heavily textured or heavily used pillows, sew a cotton lining inside the cover to protect from wear and stuffing migration.
- Add removable closures. Zippers or envelope backs allow washing the cover without risking shrinkage of the insert.
- Photography & styling: photograph pillows on neutral linen or wood, include mood props (a mug, a book) and shoot detail close-ups to show texture — this works great on blog posts and social media.