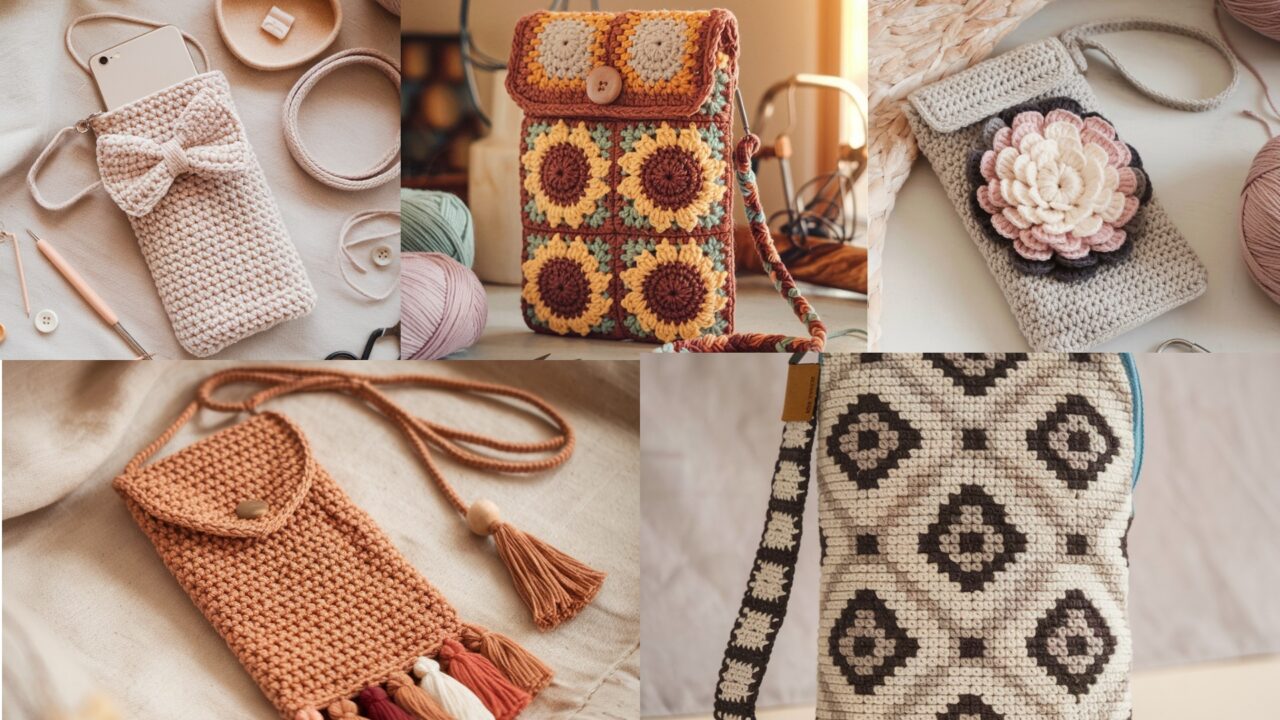
Make stylish, protective phone pouches you’ll actually use — five wearable ideas (bow, boho, sunflower granny, 3-D bloom, and mosaic) with clear, beginner-friendly step-by-step patterns, strap options, closures, and finishing tips. All use simple stitches and small supplies — perfect weekend projects or quick gifts.
I write everything in US crochet terms. Each pattern includes: materials, sizes and how to customize to your phone, a full step-by-step guide for the body + strap + closure, finishing tips (lining, hardware), and styling variations. If you want a printable one-page version of any single pattern, tell me which one and I’ll format it.
Quick notes (gauge, sizing, materials)
Yarn & hook suggestions (general)
- For structure and protection choose cotton or cotton-blend: DK/sport (#3) or worsted (#4). Acrylic works too but can stretch; use a denser stitch or add lining if you use acrylic.
- Hook sizes: 3.5–4.5 mm (E–7 to G-6) depending on yarn and desired fabric density. Use a smaller hook for tighter fabric if you want extra protection.
How to size your pouch (measure your actual phone + case)
- Measure phone width (side-to-side) and height (top-to-bottom) including your case.
- Make a swatch in single crochet (sc) using chosen yarn/hook; count stitches per inch (spi) and rows per inch (rpi).
- Calculate width stitches: width (in) × spi = number of stitches (round up to pattern multiple if needed).
- Calculate height rows: height (in) × rpi = number of rows. Add ½”–1″ if you want overlap/flap.
- Example approximate counts (based on ~4.5 spi): small phone width ≈3″ → ~14 sts; medium ≈3.5″ → ~16 sts; large ≈4″ → ~18 sts.
Protection & finishing recommendations
- Lining (recommended): cotton or fleece to protect phone and stabilize stitches.
- Reinforcement: felt or interfacing patch where strap hardware attaches.
- Hardware: D-rings, lobster clasps, swivel clips, magnetic snaps, or small buttons. Use heavy thread or sewing through lining to secure.
1. Bow Phone Pouch Pattern
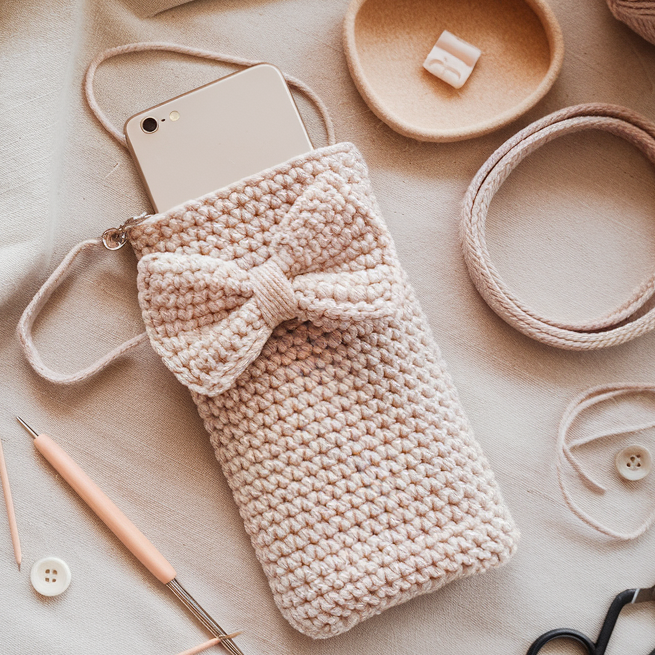
Style: snug sc tube with a decorative bow and slim strap — fast and giftable.
Materials (medium example)
- Worsted (#4) cotton or cotton-blend — ~120–150 yds
- Hook: 4.0 mm
- Small button or magnetic snap (optional)
- Leather cord or crocheted strap
- Tapestry needle, scissors, small lining rectangle (cotton)
Size guideline (medium)
- Foundation chain for width: 16 sts (adjust by spi).
- Height target: measured phone height plus ~¾” for flap (if adding).
Stitches used
ch, sc, sl st, sc2tog (dec), BLO (back loop only)
Body — seamless tube (worked in the round)
- Ch calculated number (e.g., 16). Join with sl st into loop (don’t twist). Place marker.
- Rnd 1: sc in each st around. Join or work spiral.
- Rnds 2–N: sc around until pouch interior height ≈ phone height minus ~⅛” if you plan a flap. Try as you go.
Flap (optional)
- After desired height, fold top or pick up front stitches and work 8–12 rows sc back and forth to create a flap. Add a ch-loop or buttonhole on row 3 (ch2, skip 2 sts) if using button closure.
Bow appliqué
- Ch 12. Row 1: sc in 2nd ch from hook and across (11 sc). Rows 2–4: sc across. Fasten off leaving long tail.
- Wrap center tightly with scrap yarn to cinch into a bow. Sew in place on flap.
Strap options
- Crocheted chain strap: ch enough for desired length (e.g., 80 ch for a crossbody depending on gauge), sc back across chain or sc 3 rows for width and strength. Attach ends to small reinforced tabs sewn to side seams.
- Leather cord / chain: stitch small folded sc tab at sides (6 sc × 4 rows), insert D-ring/cord, sew closed through fabric + lining.
Closure & lining
- Sew a small button and make a ch-loop for closure, or install a magnetic snap under the flap.
- Lining: cut cotton slightly smaller than interior, fold and sew three sides, slip into pouch, tack into top edge.
Styling variations
- Make bow in contrast color; add tiny bead at bow center.
- Use super-bulky yarn + big hook for a chunky, modern phone pouch.
2. Bohemian Phone Pouch Pattern
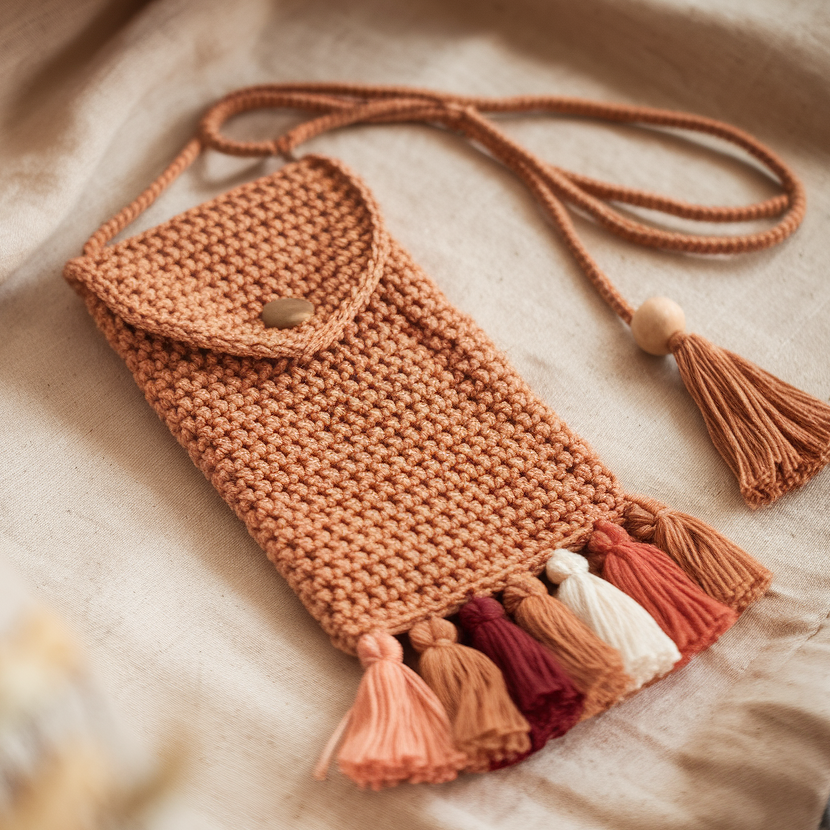
Style: puff stitch bands, fringe/tassels, sliding bead strap — cozy festival vibe.
Materials (medium)
- DK/worsted cotton — ~150–200 yds
- Hook: 3.5–4.0 mm
- Wooden bead for strap slider (optional)
- Yarn for fringe/tassels, tapestry needle, lining (optional)
Stitches used
ch, sc, hdc, dc, puff stitch (3-loop), sl st
Panel method (flat; fold to form pouch)
- Ch width (e.g., 16 + 1 turning). Row 1: sc across. Turn.
- Rows 2–4: hdc across (sturdy base).
- Row 5 (puff row): ch1, sk1, puff in next st, ch1, sc in next st across. Puff = (yo, insert, pull up loop) ×3, yo pull through all loops.
- Alternate bands (hdc, dc, puff) until panel height ≈ phone height + ~1″ for overlap.
Add fringe/tassels
- Attach tassels along bottom edge: fold strands (~14″ length), use lark’s head knot through bottom edge spacing every 6–8 sts. Trim evenly.
Form pouch
- Fold panel in half, RS together, seam side edges with sl st or whipstitch leaving top open (or create two back flaps for envelope closure).
Strap — adjustable with slider
- Make a long braided cord or crocheted cord (~60–80″ depending on desired length). Thread wooden bead through both cords and knot ends to secure. Sliding the bead shortens/lengthens strap.
- Attach strap to side tabs: make small sc tab (6–8 sts × 4 rows), fold over D-ring or pass cord through and sew down strongly.
Closure & lining
- Use a wooden button + elastic loop or a magnetic snap under flap. For puff fabric, lining is recommended to protect phone from snagging.
Styling
- Neutral boho: ecru base + natural tassels. Festival pop: bright tassel colors and beads.
3. Sunflower Granny Square Phone Pouch Pattern
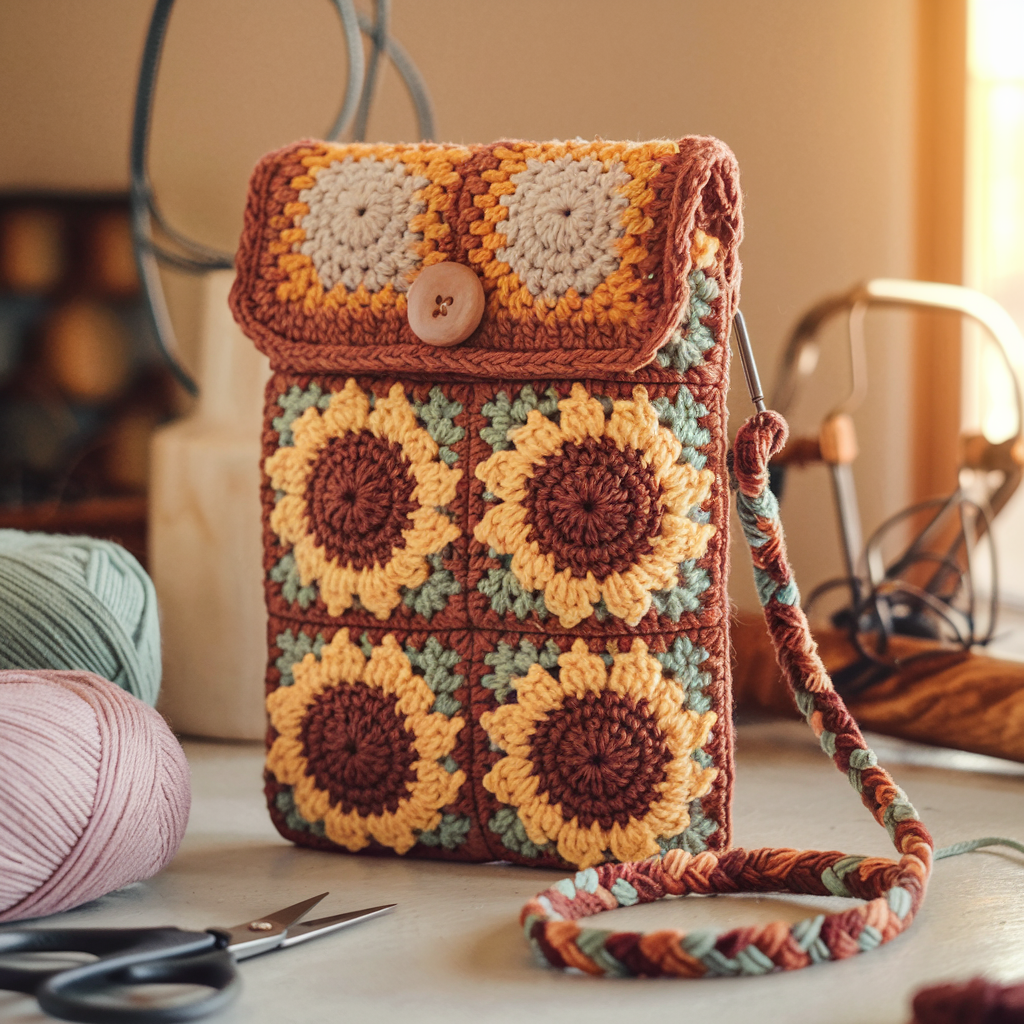
Style: granny sunflower motif(s) joined into pouch; highly customizable colorwise.
Materials
- Worsted cotton in four colors (yellow, orange, brown, background) — ~200–250 yds
- Hook: 4.0–4.5 mm
- Tapestry needle, small button or snap, lining fabric
Stitches used
MR (magic ring), ch, sc, dc, granny cluster, sl st
Sunflower granny (one square)
- Round 1 (center, yellow): MR, ch 2, 12 dc in ring; sl st to join. Fasten off.
- Round 2 (petals, orange): Join in spaces to make petal groups: (ch 3, 3 dc) in petal spot, ch1, sl st repeat to form 6 petals (or use small clusters for more petals). Fasten off.
- Round 3 (seed ring, brown): Join brown and work sc around the center to form a seed ring. Sl st to join.
- Round 4 (square frame, background): Join background color and work granny rounds into corners: 3 dc, ch2, 3 dc in corners; 3-dc clusters on sides until square measures ~4.5–5″ depending on gauge.
Make 4 squares for front + back or one front sunflower + patchwork back.
Assembly
- Align squares and join three sides with whipstitch or single crochet join leaving top open. Turn RS out.
- Flap: pick up across front top and work a sc flap 2.5–3″ long; add scalloped edge if desired.
Strap & closure
- Strap: crocheted sc strap or braided yarn, attach via reinforced tabs.
- Closure: sew a decorative button in center of sunflower and create a loop on flap, or use snap.
Lining
- Add lined fabric because granny stitches are open. Sew lining inside and tack to top seam so it won’t shift.
Variations
- Make multiple small sunflowers for a patchwork tote, or center a single large sunflower on front for bold look.
4. Bloom Phone Pouch Pattern
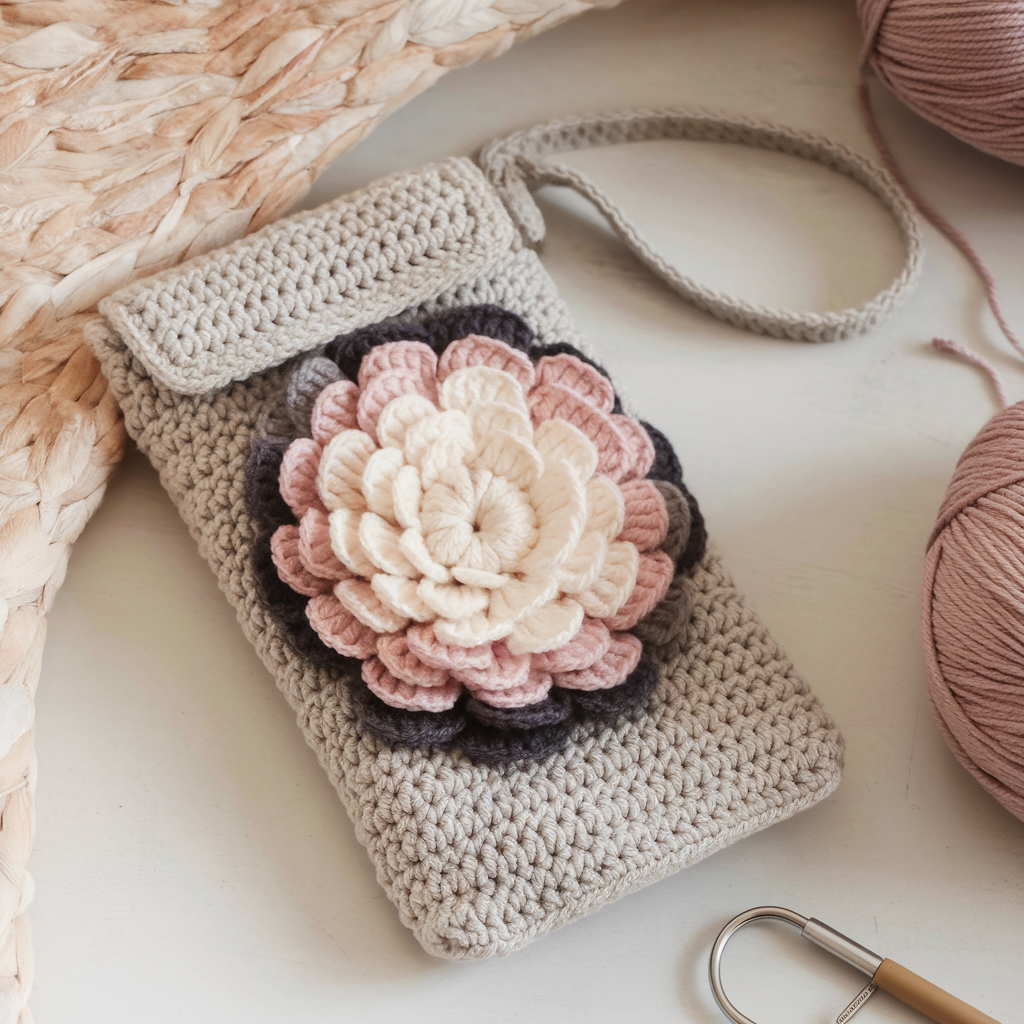
Style: luxe, textured pouch with layered 3-D petals sewn on — statement piece.
Materials
- DK or worsted cotton for body + small amounts for petal shades — ~150–200 yds total
- Hook: 3.5–4.0 mm
- Tapestry needle, snap closure, lining fabric
Stitches used
ch, sc, hdc, dc, tr, sl st
Body — base tube
- Ch width (e.g., 16), join to form loop. Rnd 1: sc in each st around; Rnds 2–N: sc around until height ≈ phone height minus ~1″ for flap (if using flap).
Petal templates (make several of each)
- Large petal: ch 8, sc in 2nd ch, hdc, dc, dc, tr, sl st in base. Make 4–6.
- Medium petal: ch 6, sc, hdc, dc, sl st. Make 8–10.
- Small petal: ch 4, sc, hdc, sl st. Make 12–18.
Attach petals (layered bloom)
- Mark center of front panel. Sew large petals in circular inner ring, stitch at petal bases only so tips lift.
- Add medium petals offset between large petals.
- Add small petals as an outer ring. Secure center with pompom, bead, or tight French-knot style yarn grouping. Optionally back petals with a small felt circle to stabilize.
Flap, strap & lining
- Flap: add sc flap 2–3″ long; for heavy bloom use a snap under the flap.
- Strap: crocheted sc strap or I-cord style; reinforce attachments with felt backing through lining.
- Lining: recommended to avoid snagging and to hide petal seam stitches.
Styling tips
- Use ombré shades for petals for depth. Fuzzy yarn makes a playful fuzzy bloom.
5. Mosaic Phone Pouch Pattern
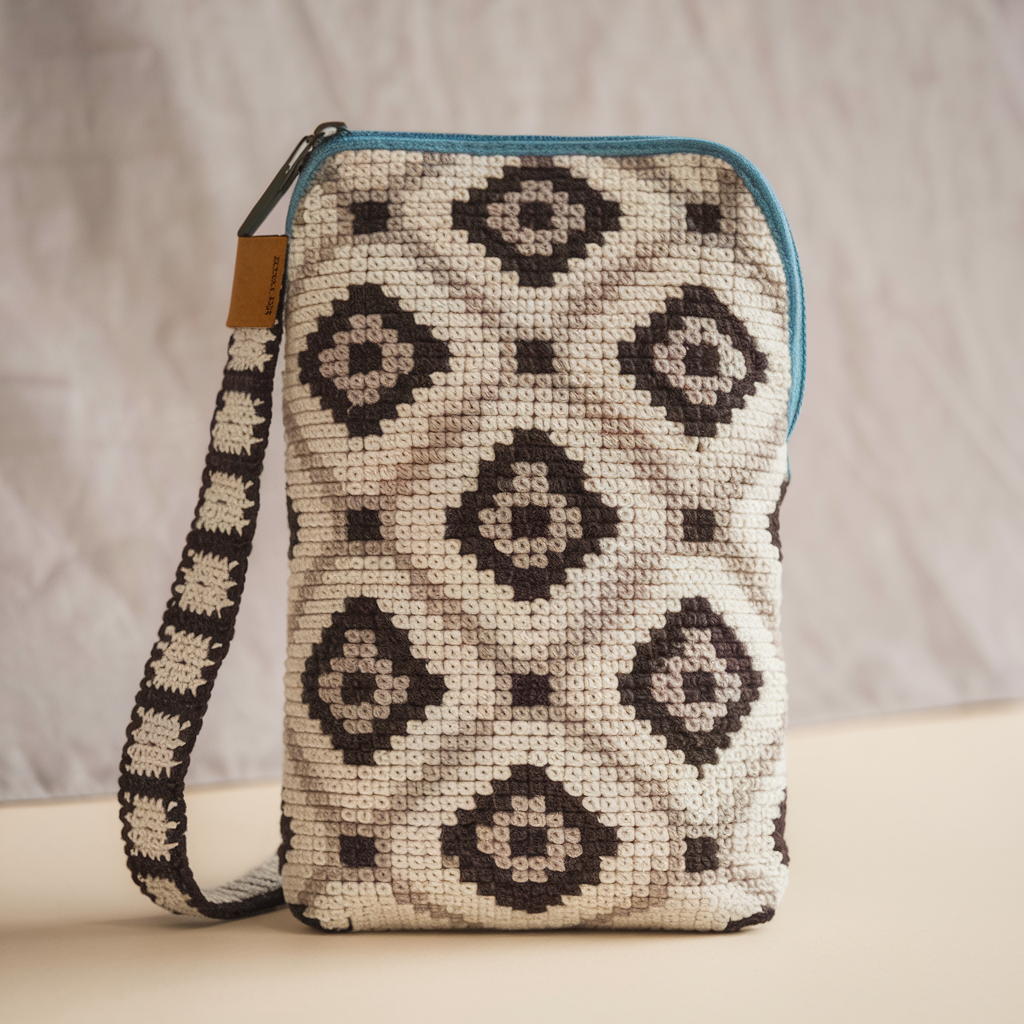
Style: crisp mosaic crochet (slip-stitch colorwork) — modern, dense, and polished; work one color per row.
Materials
- Two contrasting colors (A = background, B = motif), DK or worsted — ~150–200 yds total
- Hook: 3.5–4.0 mm
- Tapestry needle, optional zipper or flap + snap, lining fabric
Mosaic basics
- Mosaic uses sc and slipped stitches: you work one color per row and slip stitches from previous rows to form motifs. Choose or sketch a simple chart (diamonds, chevrons, Greek key).
Panel method
- Ch desired width (e.g., 40 + 1). Row 1 (Color A): sc across.
- Row 2 (Color B): ch1, sc in first st, sl st next st, sc next st following chart; turn.
- Row 3 (Color A): ch1, sc across again using chart instructions to slip motif/background stitches appropriately. Continue alternating color rows per chart to build diamonds or chevrons. Mosaic is easier than stranded because you never carry two colors in one row.
Form pouch
- When panel height equals phone height, fold and seam sides or make two panels (front motif + back motif) and join. Mosaic produces a sturdy fabric; lining optional but recommended for polish.
Strap & closure
- Because mosaic fabric is firm, attach strap via small crocheted tabs reinforced with felt. Zipper insertion gives a clean modern finish; otherwise add a flap and hidden magnetic snap.
Finishing
- Weave ends from color changes carefully. Block gently to square motif before sewing lining.
Lining, hardware & finishing tips (applies to all patterns)
- Lining — cut fabric slightly smaller than shell (about 1/8″ allowance per side). Fold raw edges and sew three sides to make a pocket; slip into pouch and hand-stitch to top edge. Lining protects phone and hides raw crochet joins. Fleece adds padding; cotton keeps shape stable.
- Reinforcement — for strap anchor points sew a small felt patch inside where hardware will attach; stitch through both crochet and lining multiple times to secure.
- Hardware — use D-rings and lobster clasps for interchangeable straps; use magnetic snaps for invisible closures (pad magnet with thin felt so metal doesn’t touch phone). For buttons, back with a felt circle to distribute stress.
- Zipper option — pick up a round of sc across top, make a neat sc border, then sew zipper inside the border and cover with lining for a clean finish.
- Care — cotton pouches are often machine-washable on gentle cycle; remove metal hardware or place pouch in laundry bag. Dry flat to preserve shape. For delicate 3-D petals, handwash.
Quick remix ideas & practical add-ons
- Add an interior card pocket sewn into the lining for IDs or cards.
- Include a small internal key loop or swivel clip for keys/earbuds.
- Use lobster clasps to make the strap removable — convert pouch between wristlet and crossbody.
- Seasonal embellishments: holiday pompom, embroidered initials, beadwork on tassels.
- For a unisex/minimal look use leather cord + neutral cotton and keep designs geometric (mosaic).
Conclusion
You now have five fully detailed, beginner-friendly phone pouch patterns to choose from: Bow, Bohemian, Sunflower Granny, 3-D Bloom, and Mosaic. The critical steps across all patterns are: measure your phone, swatch for stitches per inch, make a dense fabric or add lining, and reinforce strap attachment points. Choose the aesthetic that fits your wardrobe, follow the sizing calculation for your phone, and customize strap length and closure to how you’ll use the pouch.