

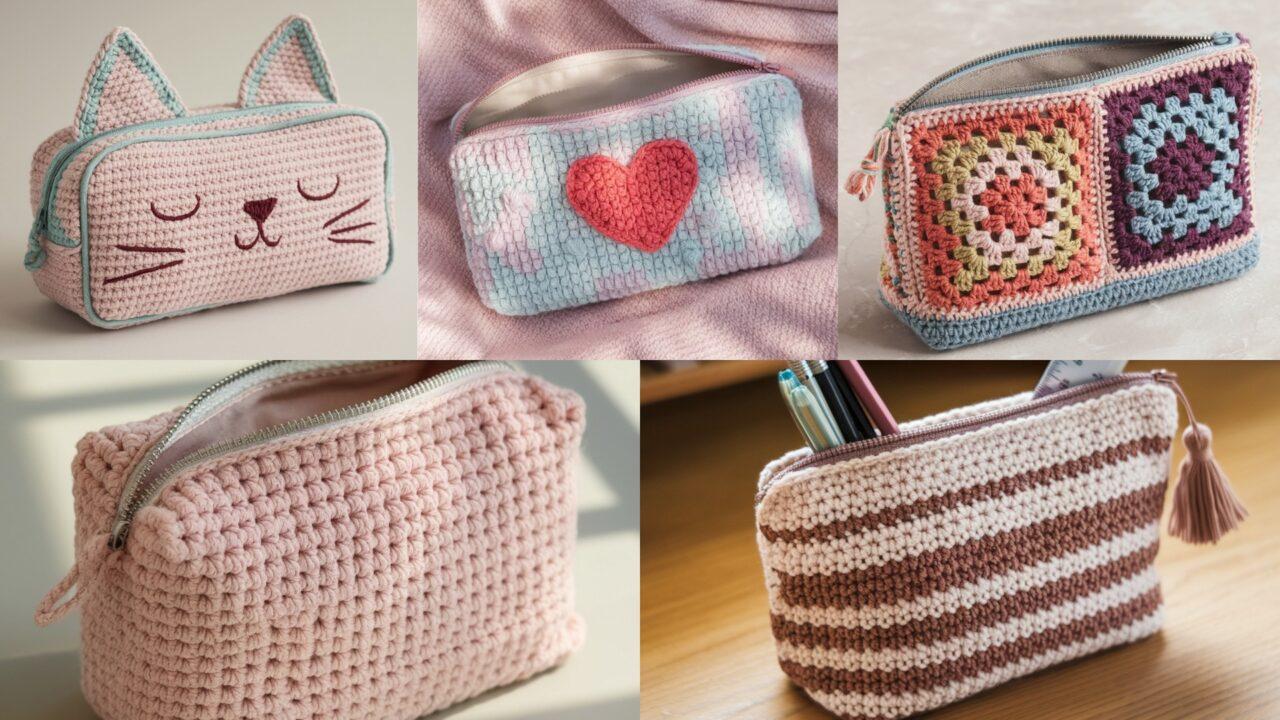
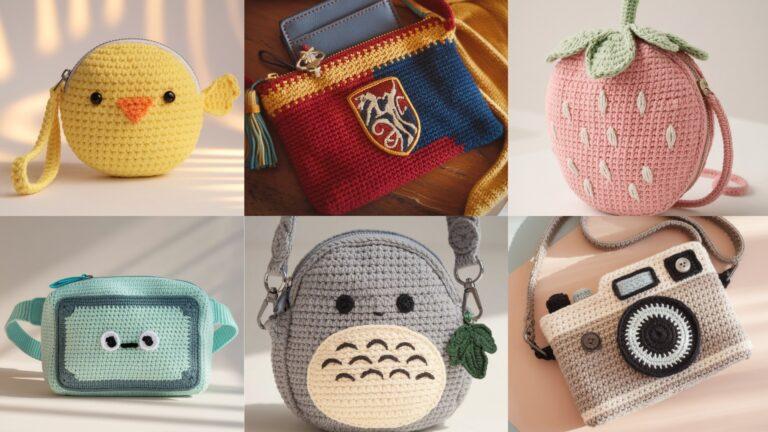
Small projects = big satisfaction. Crochet pencil pouches are fast to stitch, perfect for using scrap yarn, and make thoughtful gifts for students, artists, or coworkers. In this post you’ll find five approachable designs — from a faux-knit textured pouch to a whimsical cat bag and a zipper-ready granny square pouch. Each pattern includes exact materials, finished sizes, and step-by-step instructions so you can create them one after another. Many of these work up in an evening.
Quick notes before you start:
- Abbreviations are US terms: ch = chain, sc = single crochet, hdc = half double crochet, dc = double crochet, sl st = slip stitch, BLO = back loop only, FLO = front loop only, RS = right side.
- I give one typical size. Want a larger/smaller pouch? Increase/decrease foundation chain in multiples shown and add/subtract rows.
- For pouches that will hold pencils/pens, use cotton or cotton blend yarn for stability. Always consider lining for pens with ink leaks.
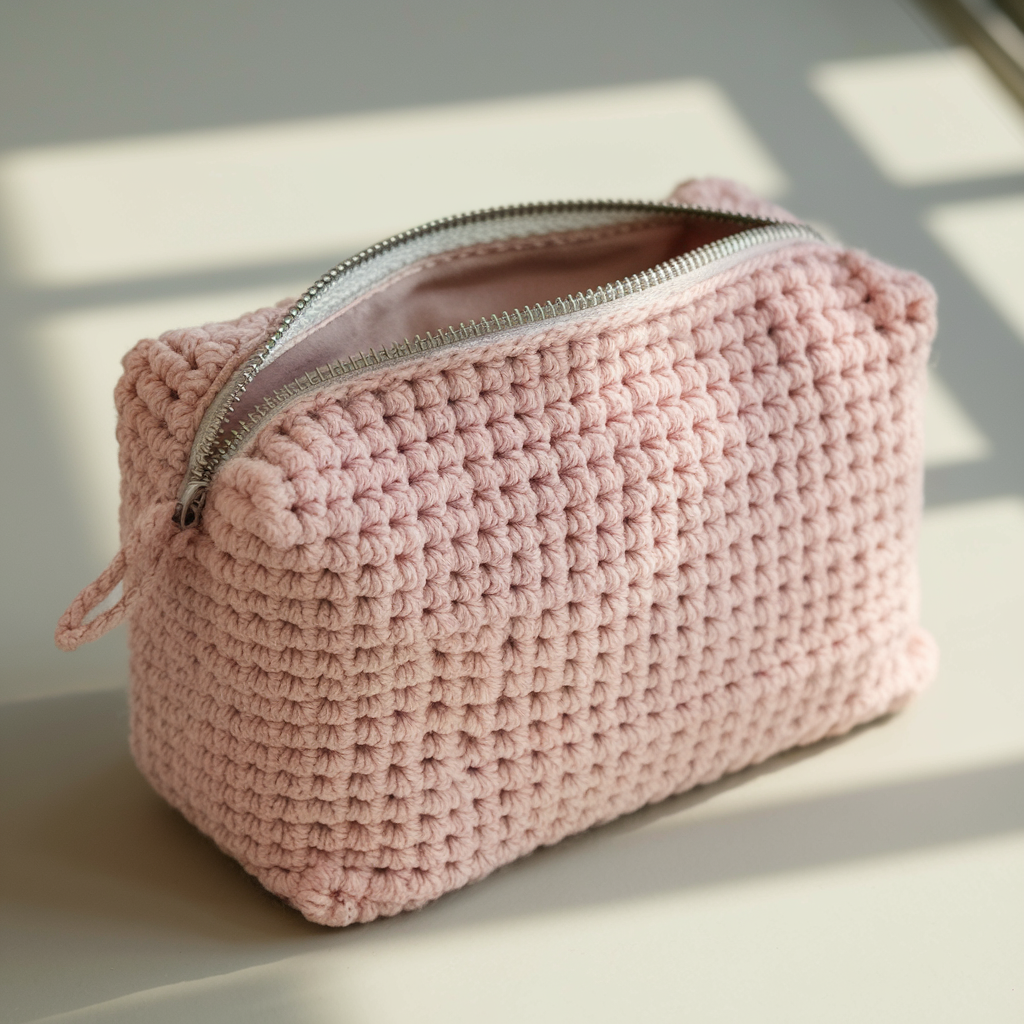
1. Faux Knit Crochet Pencil Pouch Pattern
Skill level: Easy → Beginner comfortable with hdc and BLO
Finished size: Approx 8.5″ wide × 5″ tall (fits pencils, pens, small rulers)
Materials
- Worsted weight cotton or cotton/acrylic blend (#4) — ~120–150 yards
- 5.0 mm (H) crochet hook
- 8″ zipper (matching color)
- Tapestry needle, fabric for lining (cotton) ~10″ × 6″, scissors, pins
- Optional: interfacing for lining
Why “faux knit”?
Working half-double crochet in the back-loop only (BLO hdc) produces a ridged texture that resembles stockinette knit — soft, stretchy, and elegant.
Step-by-step instructions (single panel, top zipper)
- Foundation chain: Ch 30. (This creates ~8.5″ width; adjust by 2 ch = ~0.5″.)
- Row 1 (RS): Hdc in 2nd ch from hook and in each ch across. Turn. (29 hdc)
- Row 2: Ch 2 (counts as hdc), hdc in BLO of each stitch across. Turn.
- Rows 3–12: Repeat Row 2 until rectangle measures ~10.5″ tall (this includes seam allowance for zipper — final pouch ~5″ tall). For a taller pouch make more rows.
- Finish panel: Fasten off leaving tail for assembly.
Assembly & zipper insertion
- Fold: With RS together, fold rectangle so the short ends meet; you should have a tube shape with edges aligned. Mark center top edges to center the zipper later.
- Insert zipper (method A — machine/seam style):
- Open zipper. Pin zipper to top raw edge of one long side with zipper teeth facing fabric and RS of pouch. Hand-stitch or machine-stitch zipper to crochet edge (if using machine, baste lining first). Repeat for the other side so zipper is sandwiched between pouch edges.
- If sewing by hand: use backstitches through zipper tape and a few running stitches through crochet top loop — go slowly to keep zipper straight.
- Lining (recommended): Cut lining fabric to 9.5″ × 5.5″. Fold and sew side seams (1/4″ seam). Slip lining inside pouch before finishing zipper stitching and topstitching to hide raw edges. Optionally add fusible interfacing to lining for stiffer pouch.
- Close bottom seam: Use whipstitch or mattress stitch to close bottom seam neatly; for durability, sew twice.
Tips & variations
- Use tighter hook (one size smaller) for firmer pouch if using light yarn.
- Add a leather zipper pull or tassel for flair.
- For a no-sew option: use a top flap closure with button and loop instead of zipper.
Care
- Cotton: machine wash gentle, reshape and air dry. Zipper closures: zip before washing.
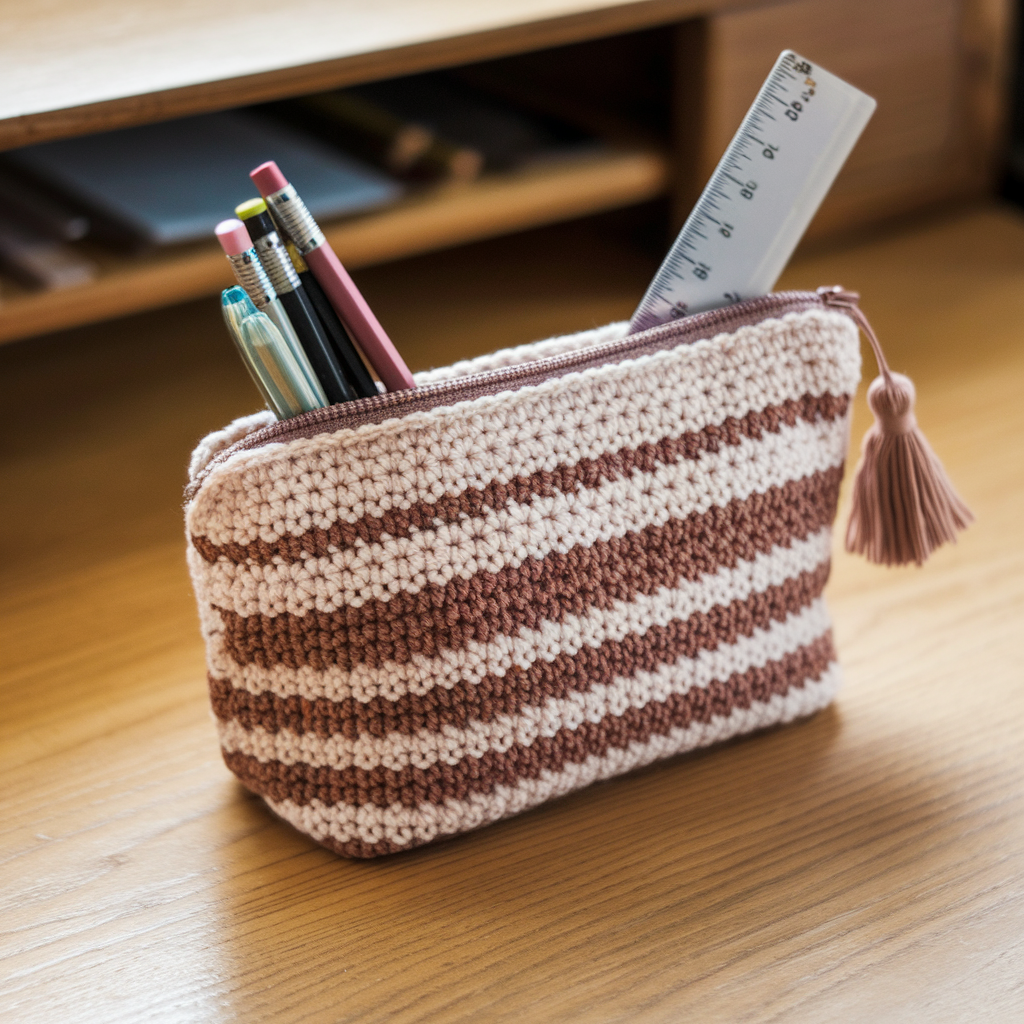
2. Basic Crochet Pencil Bag Pattern
Skill level: Beginner — uses sc or hdc worked in the round
Finished size: Approx 9″ wide × 3.5″ tall × 2.5″ deep (a shallow box pouch for many pens)
Materials
- Worsted weight yarn — ~140–180 yards
- 4.5 mm hook
- 9″ zipper, tapestry needle, optional lining fabric piece 10″ × 7″
- Optional: plastic canvas base 7.5″ × 2″ for reinforcement
Construction overview
Worked bottom-up with a simple rectangular base, then joined to work in rounds for the sides (box base gives depth).
Step-by-step instructions
A. Box base (make a rectangle)
- Ch 28. Row 1: sc in 2nd ch and across (27 sc). Turn.
- Rows 2–6: ch 1, sc across. Fasten off. You have a rectangle approx 9″ × 2.5″.
B. Join & build sides
3. Align short ends and seam with sl st to form loop OR pick up stitches around base edge (recommended for neater join): Starting in corner, work sc evenly around base edge placing 3 sc in each corner. Count total around — approx 88 sc depending on tension. Place marker at first st.
4. Work sc in the round (no turning) for 10–12 rounds until side height ≈ 3.5″. If you want a taller bag, add rounds.
C. Top edge & zipper
5. For a neat top edge: work 1 round of hdc or 1 round sc in BLO.
6. Insert zipper as in Pattern 1 — sandwich method with lining for a professional finish.
D. Optional base support
7. Cut plastic canvas to 8.5″ × 2″, cover with fabric or felt, insert into bottom inside the pouch to keep it flat and stable.
Tips & variations
- For faster speed, use hdc rounds instead of sc.
- To make a slimmer pencil case, reduce foundation chain to 24 ch and adjust rows.
Care
- Machine wash gentle if lining and zipper allow; remove base insert before washing.
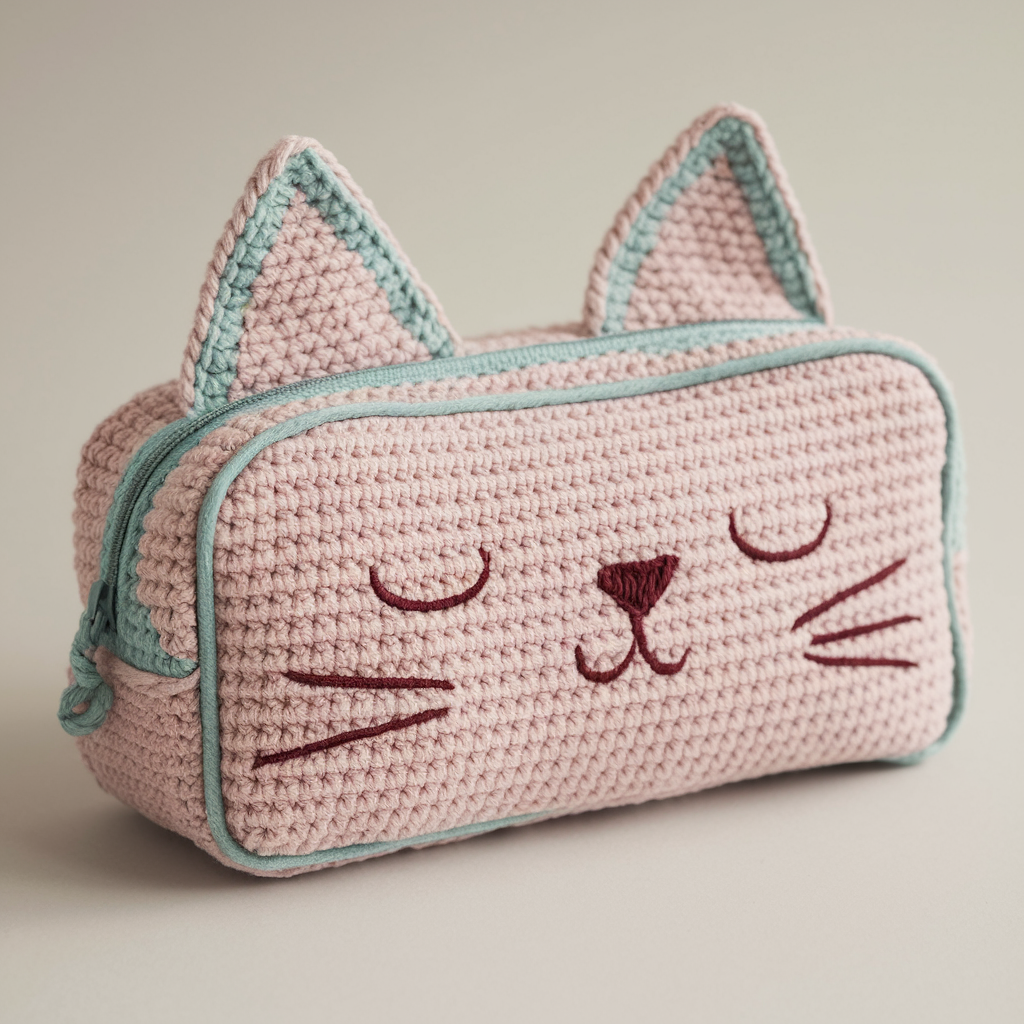
3. Crochet Cat Pencil Bag Pattern
Skill level: Easy–Intermediate — simple shaping + embroidered details
Finished size: Approx 8.5″ wide × 4.5″ tall (cat ear top finish)
Materials
- Worsted weight yarn in main color + contrasting for inner ears and nose — ~150 yd total
- 4.5 mm hook
- 8″ zipper, tapestry needle, small bit of felt for eyes (or small safety eyes), stuffing for ear tips if you want dimension, lining fabric 10″ × 6″
Stitch & motif overview
You’ll make a rectangular panel, add triangular ears by working short triangles on the top edge, then fold and insert zipper. Face details are embroidered.
Step-by-step instructions
A. Body panel
- Ch 32. Row 1: sc in 2nd ch from hook and across (31 sc). Turn.
- Rows 2–12: ch 1, sc across (11 rows) — stop when height ≈ 4.5″ excluding ears.
B. Cat ears (make 2, attached to top edge)
- From RS, turn to the top center or desired ear placement. Make ear triangle separately: ch 6. Row 1: sc in 2nd ch and across (5 sc). Row 2: ch 1, sc 3, turn. Row 3: ch 1, sc 1, turn. Row 4: ch 1, sl st into next st and fasten off — triangle completed (5→3→1). Sew triangle on RS top edge, repeat for second ear leaving ~2–3″ between ears. Alternatively, pick up stitches from top edge and decrease to form ear without sewing.
C. Face detail
- Embroider nose (small triangle) and whiskers with contrasting yarn. Sew or glue small felt circles or safety eyes above nose, or embroider sleepy eyes.
D. Assembly
- Fold panel RS together leaving ears pointing out. Insert zipper as in previous patterns. Add lining for neat inside finish and to protect embroidered face.
Tips & variations
- Make inner ear in a contrasting color by sewing a small triangle of felt or crocheting a smaller triangle and stitching it inside ear.
- Add a little collar by crocheting a small chain and sewing across lower front — add a bell.
Care
- Hand wash recommended to protect embroidery and any glued bits.
4. Crochet Heart Motif Pencil Pouch Pattern
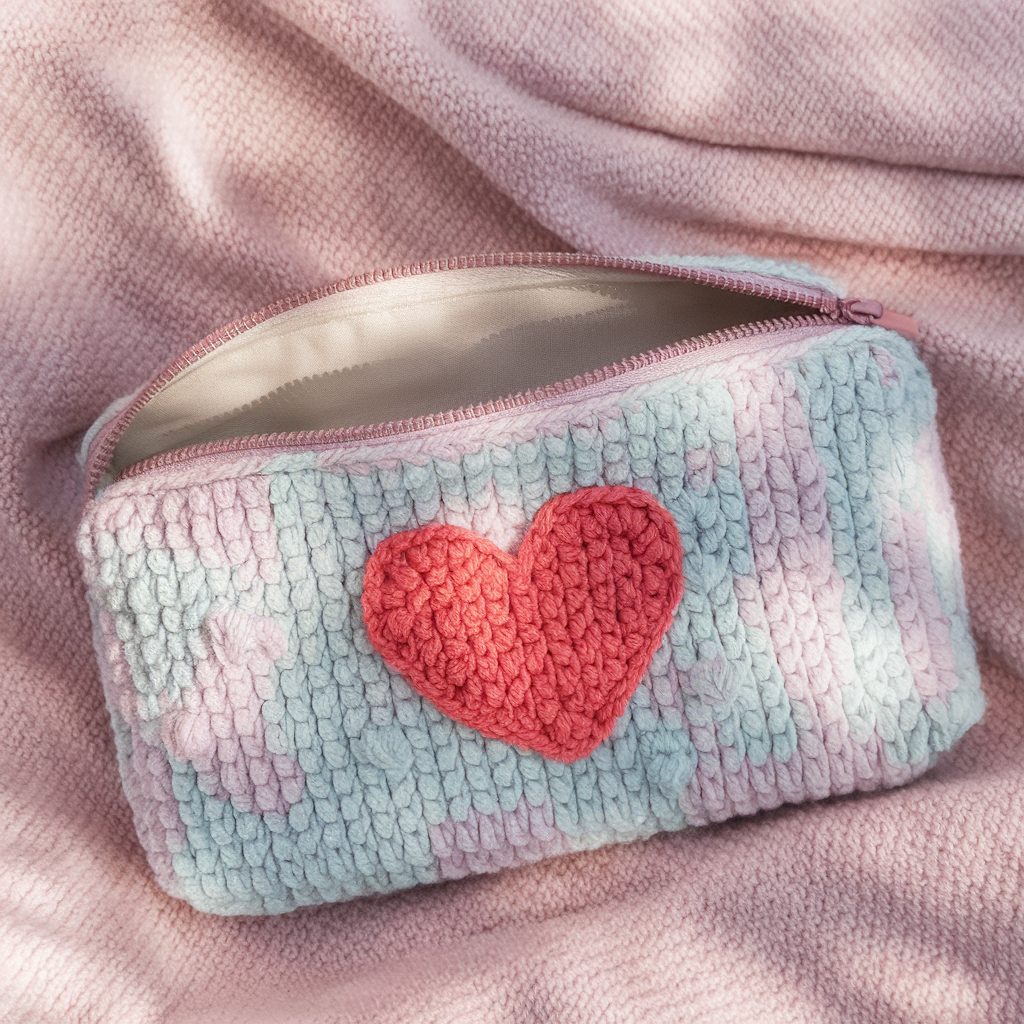
Skill level: Beginner → Intermediate (small motifs, joined to pannelling)
Finished size: Approx 8″ × 4.5″ (one central heart panel)
Materials
- Worsted weight yarn in background color + contrasting heart color — ~120–140 yd
- 4.0–4.5 mm hook
- 8″ zipper, tapestry needle, lining fabric 9″ × 6″
Pattern concept
Make a heart motif panel (heart worked on top of background via surface slip stitch or as an appliqué) or create heart using colorwork. Here I give a simple appliqué heart sewn onto a finished pouch.
Step-by-step instructions
A. Make base rectangle
- Ch 30. Row 1: sc in 2nd ch and across (29 sc). Turn.
- Rows 2–10: ch 1, sc across until piece measures ~9″ tall (giving room for zipper seam). Fasten off.
B. Heart appliqué
- Magic ring. Ch 3, work (2 dc, ch 2, 2 dc) into ring — this is one lobe. Sl st slightly to right, repeat for second lobe. Then ch 4 and work sc chains across to form point — common 6–8 st pattern yields a small heart. Alternative: small pattern:
- Start magic ring: ch1, (dc, 2dc, tr, dc, 2dc) in ring for one side then mirror for other. Shape and flatten into heart. (You can find many 8-st heart motifs; adjust size by using thicker yarn or adding an extra round of sc to make heart bigger.)
- Fasten off leaving long tail for sewing. Block flat.
C. Attach heart
- Position heart center on front panel about 1.5″ from top. Sew heart securely with whipstitch around edge, hiding tail on wrong side.
D. Assembly
- Fold panel and seam sides. Insert zipper and lining as previously described. For a decorative finish, scallop the top edge before inserting zipper.
Tips & variations
- Make three tiny hearts in a row for a repeated pattern.
- Use a small metallic yarn for heart to make it pop.
Care
- Machine wash gentle if appliqué is securely sewn; hand wash for delicate yarns.
5. Crochet Granny Square Pencil Pouch Pattern
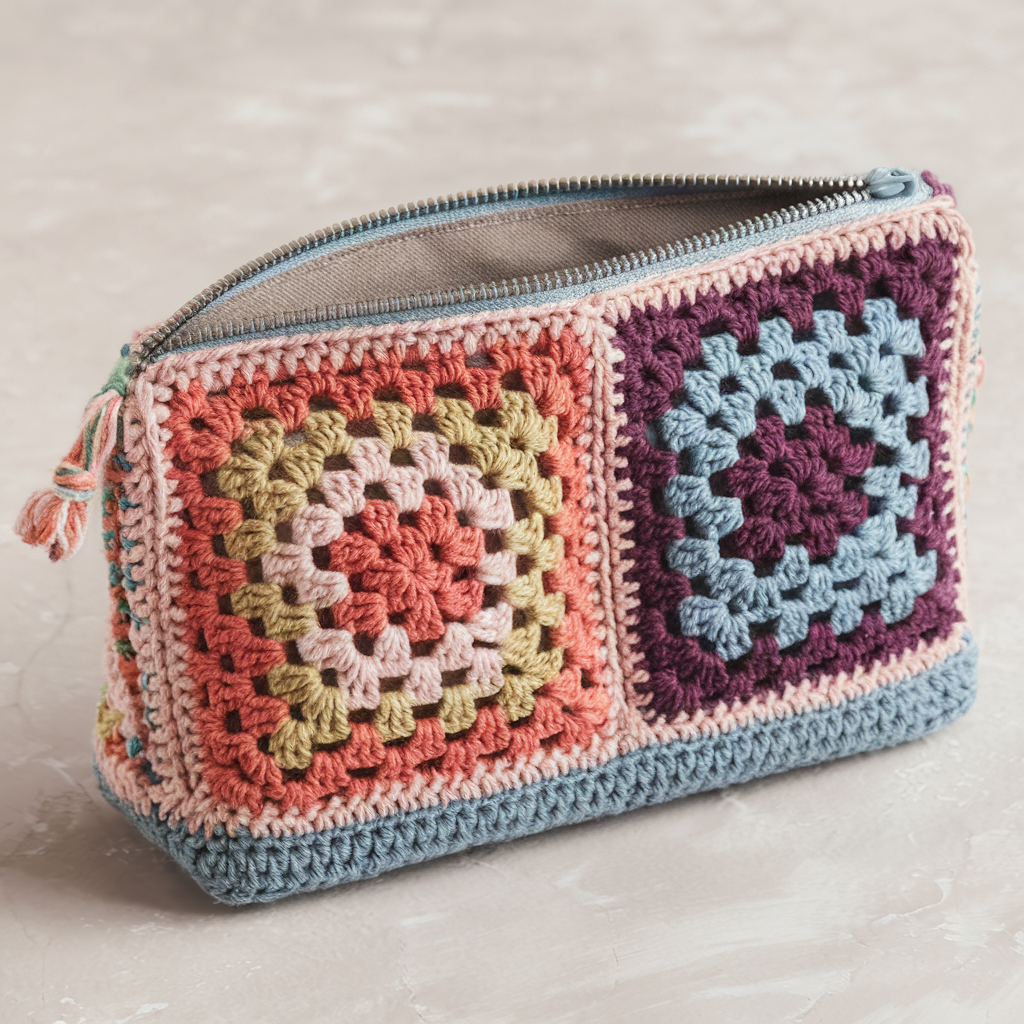
Skill level: Easy–Intermediate — classic granny squares + joining + zipper/lining
Finished size: Approx 8″ wide × 5″ tall (constructed from 2 granny squares front + 2 back + base or single rectangular panel made from joined squares)
Materials
- DK or worsted cotton in 2–4 colors — ~150–200 yd (scrap-friendly)
- 4.0 mm hook
- 8″ zipper, lining fabric approx 10″ × 8″, tapestry needle
Pattern idea
Use 2 or 4 medium granny squares (approx 4″–5″ each) joined into front and back panels and a bottom strip for depth, or arrange micro-grannies to make the entire rectangle — either way works.
Step-by-step instructions (4-square construction)
A. Make granny squares (4 total)
- Classic granny (3 rounds): Magic ring, ch 3 (counts as dc), work 2 dc, ch2, (3 dc, ch2) × 3 to create 4 corner clusters. Round 2: in each corner ch-2 space work (3 dc, ch2, 3 dc). Round 3: continue outer round to make square approx 4.5–5″. Make 4 squares for front (2) and back (2) or 6 squares to make base integrated.
B. Join into panels
2. Join two squares side by side to create front panel and two for back panel (seams: whip stitch for neater line or slip-stitch join on RS for decorative seam). Alternatively, join all squares into one long rectangle and fold into bag.
C. Base & sides
3. For boxed bottom: crochet a strip in sc that matches the length of the bottom edge wide enough to create depth (e.g., ch 22, sc rows to create 2.5″ depth), and seam this to base between front and back panels.
D. Assembly & zipper
4. Fold, seam sides using mattress stitch, attach zipper and lining as described earlier. If your granny join has many holes, lining is highly recommended.
Tips & variations
- Use contrasting join color to make the grid pop.
- For a softer pouch, use only two squares and add a slim base panel.
- Add a small granny button or a yarn tassel zipper pull.
Care
- Cotton wash gentle; unlined granny might stretch — line for heavy use.
Conclusion
Small, fast, and adorable — crochet pencil pouches are perfect quick gifts, market items, or stash-busting projects. Each pattern above gives you a different finish and personality:
- The Faux Knit pouch is elegant and minimalist, great for grown-up desks.
- The Basic Bag is utilitarian and easy to scale.
- The Cat Bag brings joy and personality — endlessly customizable.
- The Heart Motif pouch is perfect for gifting or Valentine’s treats.
- The Granny Square pouch is ideal for using scraps and showing colorwork.
Final practical tips
- Lining is your friend: it protects pens from snagging and contains leaks. Use a matching zipper and sew the lining to the zipper for a clean finish.
- Reinforce stress points: where zipper ends and where you attach a strap or patch, add a small rectangle of canvas inside the lining.
- Finishing matters: tidy ends, consistent joining, and a centered zipper make the difference between “cute” and “professional.”
- Scale easily: to make a larger pouch (make-up case), increase foundation chain by 4–6 ch per additional inch and add rows for height.


Thông qua hệ thống tường lửa WAF 5 lớp và công nghệ mã xác thực 2AF, xn88 game ẩn danh tuyệt đối mọi tài khoản người chơi đồng thời, mã hóa toàn bộ hoạt động khi hội viên truy cập, sử dụng dịch vụ, sản phẩm. Vì thế, bạn hoàn toàn có thể yên tâm khi cá cược tại đây. TONY12-11A