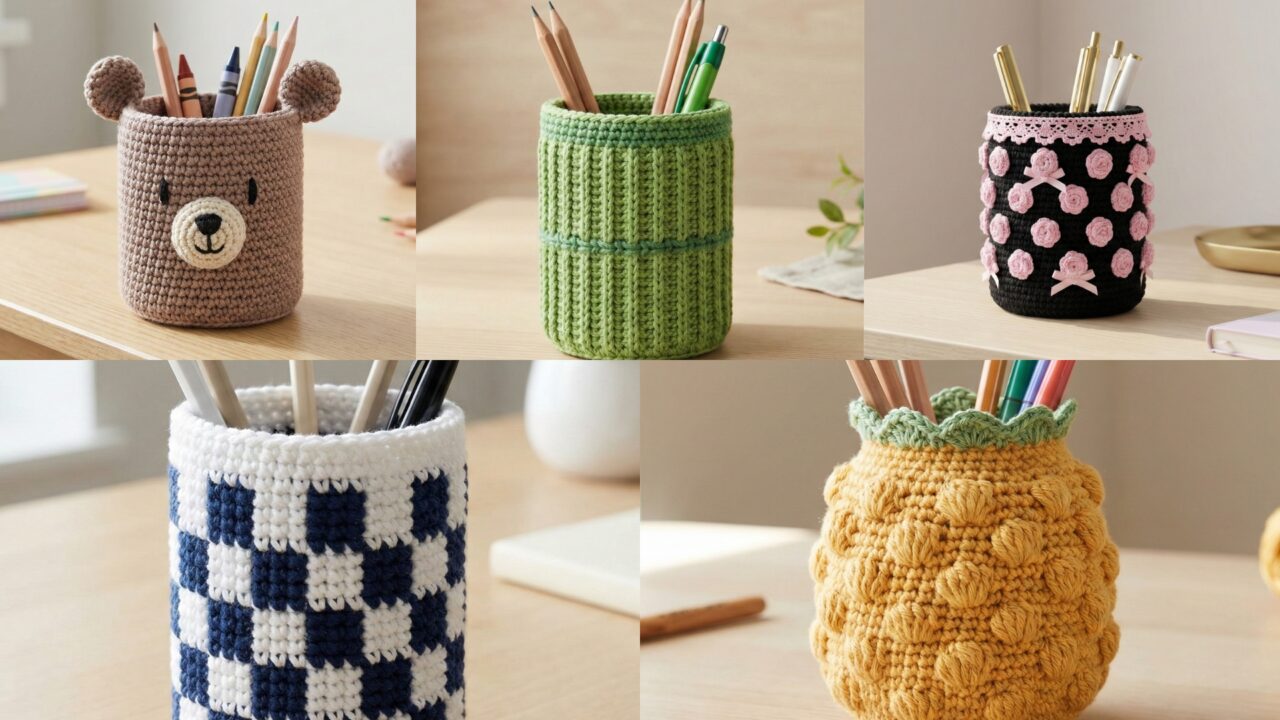
A handcrafted pencil holder is a tiny, satisfying project that brings personality to your desk — and it’s a perfect way to practice shaping, texture, and small-scale finishing. Below you’ll find a friendly introduction (materials, dimensions, tools, tips, and general construction techniques), followed by five full pencil holder patterns with clear materials lists, step-by-step instructions, finishing and lining guidance, and styling/variation ideas: Pineapple Bobble, Bamboo, Rosette Coquette, Gingham, and Bear Inspired. Each pattern is written so you can follow it start-to-finish and customize easily.
Quick intro — yarn, hooks, dimensions, tools & overall tips
Typical pencil holder size
- Standard desk cup: 3–3.5 in (7.5–9 cm) diameter and 4–5 in (10–13 cm) tall.
- These sizes hold pencils, pens, markers, and small ruler — adjust width/height easily by changing foundation stitches and rounds.
Yarn choices
- DK / worsted cotton or cotton-blend — best all-around: holds shape, machine-washable, tidy stitch definition.
- T-shirt yarn / rope — yields very sturdy, structured holders that stand up without a lining.
- Acrylic — soft, colorful, and inexpensive; add a felt or plastic base to stabilize.
- Chenille / plush — soft look but may slip; use an internal insert or lining.
Hooks & tension
- Hook depends on yarn: for worsted use 4.0–5.5 mm; for DK use 3.5–4.5 mm; for t-shirt/rope use 6.5–12 mm.
- Use a slightly smaller hook than the yarn label suggests if you want dense fabric that won’t sag.
Notions & extras
- Tapestry needle, stitch markers, measuring tape, scissors.
- Optional: heavy cardboard or plastic for base insert, felt circles (to hide base), hot glue (sparingly) or fabric glue, small snaps or buttons for removable liners.
- Lining fabric (cotton or canvas) for a polished interior and extra stability; a small round of thin plastic canvas or craft foam makes a sturdy base.
Basic construction approaches
- Worked in the round from the base up — easiest: start with a magic ring or chain-join base, increase to diameter, then work even rounds up for height. Good for circular holders.
- Worked flat and seamed — choose when you want a decorative seam or rectangular pattern.
- Motif-assembled — join granny squares or hexagons for a patchwork holder (stylish but more assembly).
Gauge & sizing quick math
- Make a small swatch in single crochet (sc) in the round and measure stitches per inch (spi). Example: if gauge = 4 sc = 1 in and you want a 3.25 in diameter base, compute: 4 × 3.25 = 13 stitches across diameter. For round bases you’ll instead increase rounds until the flat circle measures the target diameter (pattern gives increases).
Finish & care
- If you use cotton or acrylic you can hand wash or machine-wash gentle; reshape while damp.
- For structural pieces (t-shirt yarn or rope) wipe clean and spot clean lining if present.
- Lined holders survive more washing and look neater.
Abbreviations (US)
- ch — chain
- sc — single crochet
- hdc — half double crochet
- dc — double crochet
- tr — treble crochet
- sl st — slip stitch
- MR — magic ring
- st(s) — stitch(es)
- inc — increase (2 sc in same st)
- dec — decrease (sc2tog)
- BLO / FLO — back loop only / front loop only
- rep — repeat
1. Crochet Pineapple-Themed Bobble Stitch Pencil Holder Pattern
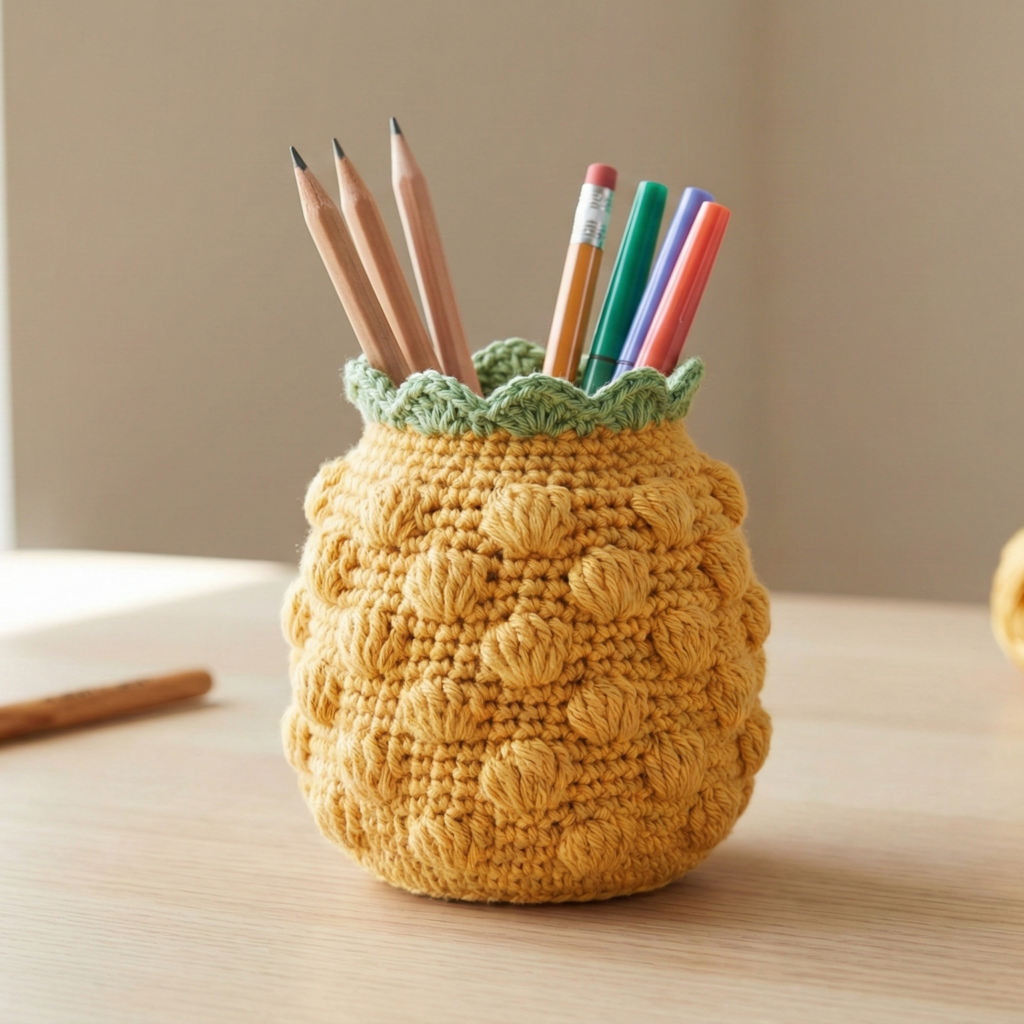
A textured holder that uses bobbles to create a “pineapple” bobble field — cheerful and tactile.
Skill level: intermediate (bobble stitches and shaping)
Finished example size: diameter ~3.25 in (8.5 cm); height ~4.5 in (11.5 cm)
Materials
- DK cotton in two colors (main color + accent for pineapple tips) — ~120–150 yd
- Hook: 4.0 mm
- Tapestry needle, stitch marker, felt base circle (3.25 in), optional thin cardboard base
Stitch notes
- Bobble stitch (example): [yo, insert, pull up loop] × 5, yo and pull through all loops, ch1 to close (counts as bobble). Adjust loop count for taller/shorter bobbles.
Construction — base → bobble body → rim
A — Base (worked as flat circle)
- MR, ch1. R1: 8 sc in MR. (8)
- R2: inc around → 16.
- R3: sc 1, inc rep around → 24.
- R4: sc 2, inc rep around → 32.
- Continue increasing evenly (sc 3, inc, etc.) until the flat circle measures your desired diameter (about 3.25 in). Count and adjust — the number of rounds depends on your gauge.
B — Transition & measurement
6. When base measures target diameter, work one round of sc in BLO to create a neat edge and prepare for the vertical sides.
C — Bobble body (texture band)
7. Row 1 (join color A for body): sc around in both loops for 3–4 rounds to make a short cuff.
8. Row 2 (start bobbles): sc 2, bobble in next st repeat around (adjust spacing so bobbles sit evenly — use stitch marker to mark repeats). On subsequent rounds, work sc in the sc between bobbles, and in the round where you want bobble height to rise, place more bobbles staggered above previous row so texture becomes pineapple-like. You may do 3 rounds of bobble rows alternating with 2 rounds of plain sc to let them “pop”.
D — Accent tips & rim
9. For the “pineapple tip” accent you can switch to a contrasting color and do a final round where you place a dc or elongated stitch on top of bobble to make it stand out. Alternatively, embroider small star stitches into bobble centers with accent color.
E — Height
10. Continue rounds (sc or pattern rows) until holder height ~4.5 in. Finish with 2 rounds of sc in BLO for a tidy rim.
F — Lining & base insert
11. Cut a felt circle to match inside base; glue or whipstitch it in. For extra stability, cut a circle of thin craft foam or cardboard and slip it under the felt. Sew felt into place for durability.
G — Finishing
12. Weave in ends. Lightly block if needed.
Variations & styling
- Make a matching pencil pouch in same bobble stitch.
- Use warm yellow and green for true pineapple vibes; make a tiny embroidered leaf sewn to the rim.
2. Crochet Cute Little Bamboo Pencil Holder Pattern
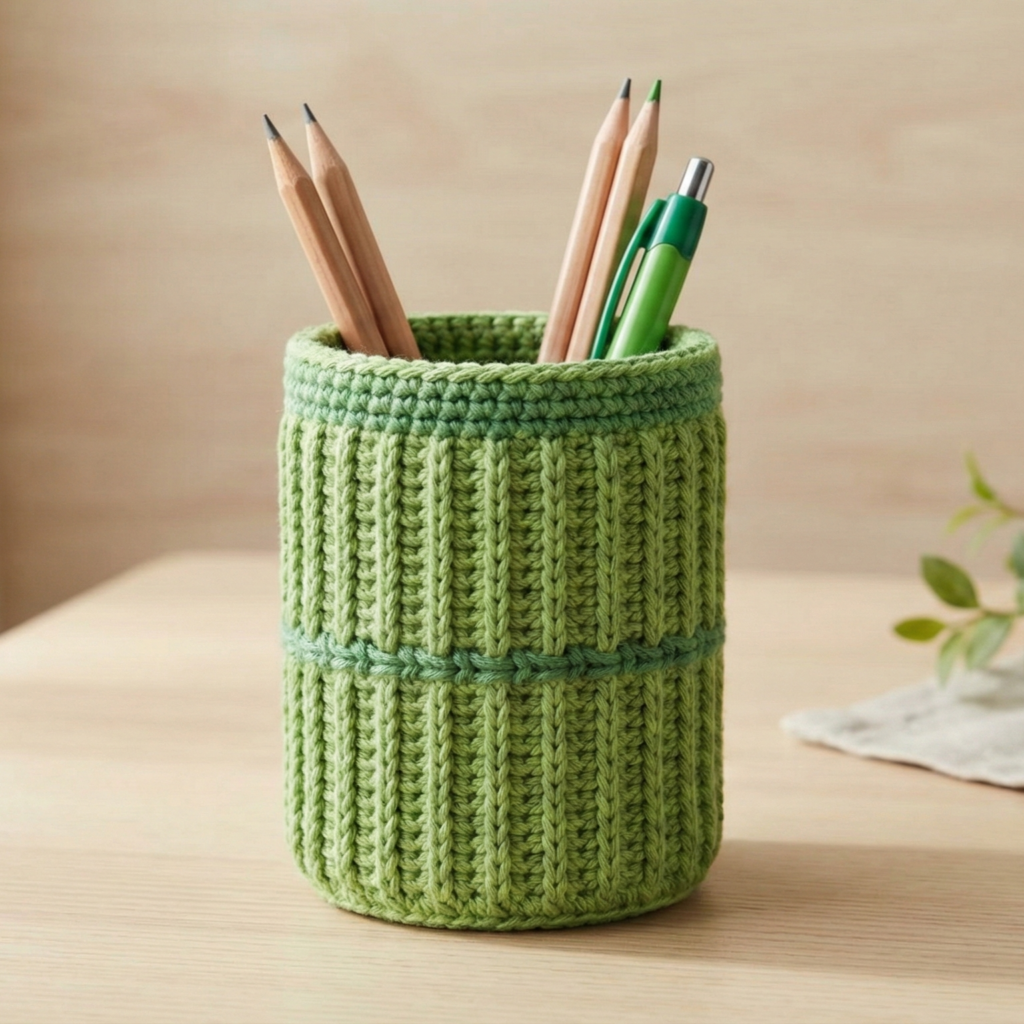
A slim cylindrical holder with vertical ribbing that echoes bamboo slats — neat and modern.
Skill level: confident beginner → intermediate
Finished example size: diameter ~3 in (7.5 cm); height ~4.25 in (11 cm)
Materials
- Worsted or DK cotton in bamboo-beige or green — ~120 yd
- Hook: 4.0–4.5 mm
- Tapestry needle, felt base, optional inserted plastic canvas for rigidity
Stitch notes
- Use front post dc (fpdc) / back post dc (bpdc) alternating rows to mimic vertical slats. You can also use BLO/BFO hdc rows for a subtle rib.
Construction — circular base, ribbed sides, tidy rim
A — Base
- MR, ch1. R1: 6 sc in MR. (6)
- R2: inc around → 12.
- R3: sc 1, inc → 18.
- R4: sc 2, inc → 24. Continue until base measures desired diameter (~3 in). Finish with one round sc.
B — Ribbed sides using post stitches
5. Round 1 (setup): ch2 (counts as hdc), hdc in each st around. Join.
6. Round 2 (rib row A): ch2, fpdc around next st, hdc in next 2 sts repeat across. Join.
7. Round 3 (rib row B): ch2, bpdc around next st, hdc in next 2 repeat. This alternating sequence of fpdc/bpdc every other round creates vertical ribs. Continue alternating rows until height ~4 in.
C — Top rim & finishing
8. Work 2 rounds of sc in both loops for a neat, stable rim. Optionally work a round of crab stitch (reverse sc) for a rope finish.
D — Base insert & lining
9. Cut a round of thin plastic canvas or heavy cardboard to fit; cover it with felt and sew it into the base interior. This prevents tipping. Sew a cotton lining if desired.
E — Variation
- For a textured bamboo look, use two shades (light beige + deeper tan) in 2-row stripes; the ribs will read like bamboo nodes.
3. Crochet Rosette Coquette Pencil Holder Pattern
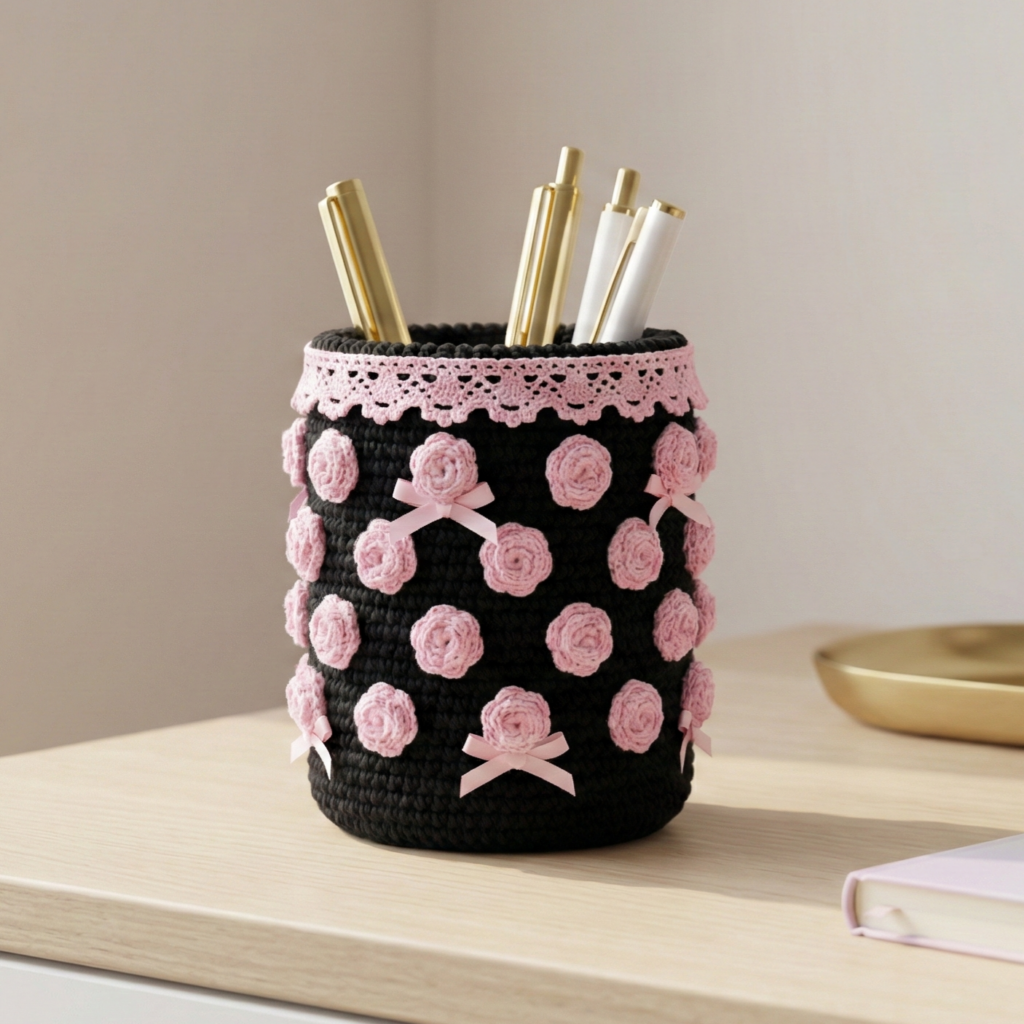
A feminine, frilly holder covered with small rosettes — decorative and perfect for a vanity desk.
Skill level: intermediate (many small motifs and assembly)
Finished example size: diameter 3.25 in; height 4.5–5 in depending on rosette size
Materials
- DK or sport cotton for fine rosettes (one main color) plus a neutral for base — ~200 yd total
- Hook: 3.5–4.0 mm for tight rosettes; 4.0 mm for base
- Tapestry needle, felt base, optional hot glue for quick placement (sew is preferred)
Components & motif
- Tiny rosettes: worked as short ruffled strips rolled into flowers OR worked in rounds as layered petals (~1 in diameter each).
A — Make the base cylinder
- Work a plain cylinder in sc as in previous patterns: start with base circle (MR → increase rounds to desired diameter).
- Join into sides and work sc rounds until height is about 3 in — leave extra for rosette coverage (rosettes will add height).
B — Rosette motif (rolled strip method)
- Chain 30 (adjust for rosette diameter). Row 1: dc across (29 dc). Row 2: 2 dc in each ch across to create ruffles (or sc across for tighter rosette). Fasten off leaving long tail.
- Roll strip from one end, stitching through the base as you roll to secure petals in place. Make many rosettes (approx 18–30 depending on size and coverage).
C — Attach rosettes
3. Lay rosettes on the base cylinder in rows from bottom to top, stitch each rosette to the base along unraveled edge so the rosette top remains free. Overlap slightly for full coverage. Sew through several points along rosette base to secure. Optionally use a dab hot glue to anchor, but hand-stitch for durability (especially if holder may be washed).
D — Lining & base
4. Add felt circle and optional cardboard base as before. Sew lining if you want a neat interior.
E — Finish
5. Continue attaching rosettes until top edge is covered. Tuck in and stitch the final rosette row so top remains tidy.
Styling & variations
- Make tiny pearl centers for rosettes (sewn securely) for a “coquette” bridal desk set.
- Use ombré yarn or two-tone rosettes for depth.
4. Crochet Gingham Pencil Holder Pattern
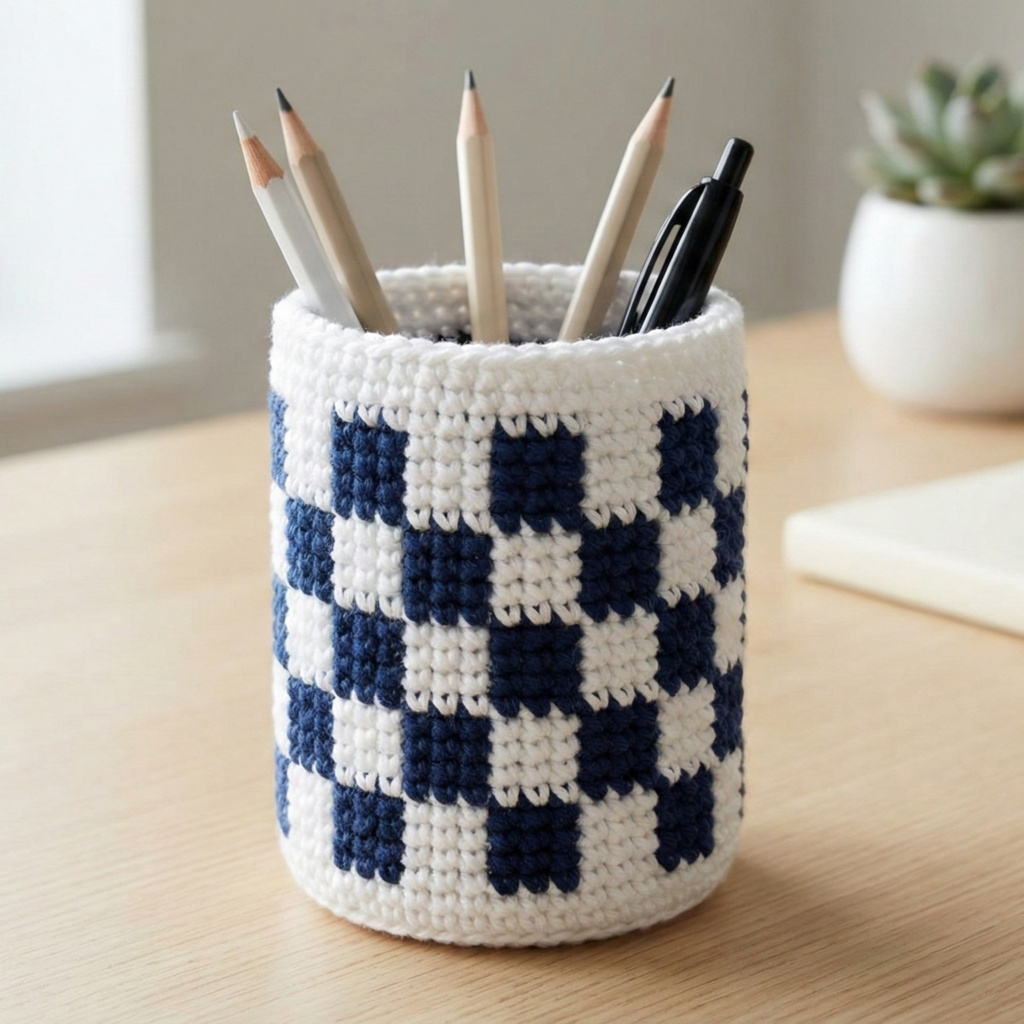
Gingham (checker) pattern in crochet is graphic and contemporary — a great desk accent in kitchen-y or minimalist spaces.
Skill level: intermediate (colorwork/tapestry technique)
Finished example size: diameter ~3 in; height ~4.25 in
Materials
- DK cotton in 2 contrast colors (e.g., white + navy) — ~150 yd total
- Hook: 3.5–4.0 mm
- Tapestry needle, felt base, optional lining
Stitch notes
- Use tapestry crochet (carry unused color along the top of previous row) or work with joined color changes each stitch. Use sc for clean blocks.
Construction — tapestry base & sides
A — Base
- Work circular base entirely in one color using increases until desired diameter. If you want gingham on the base too, you can change colors within the increase rounds — but many prefer a solid base and patterned sides.
B — Sides with gingham checker
2. Pick up stitches around base and work sc in rounds. Plan a checkerboard chart: a checker repeat might be 6 sts × 6 rows per square for visible checks (adjust depending on gauge). For example, for a 3 in diameter at gauge 4 sc = 1 in, 12 sts across circumference → small checks; you’ll want larger repeats to see pattern, so adjust base size or stitch counts.
- Row structure: use tapestry method to carry the nonactive color inside loops. Work sc around changing colors according to chart for each round. Maintain even tension.
C — Height & top finish
4. Work rounds until height ~4.25 in. Finish with 2 rounds sc in main color for neat rim.
D — Lining & base
5. Add felt/plastic base & optional fabric lining for a polished interior.
Tips
- Use a stitch marker at color boundaries to keep count.
- Keep floats (carried yarn) short or secure them at intervals to avoid snagging and to keep interior tidy.
5. Crochet Bear Inspired Pencil Holder Pattern
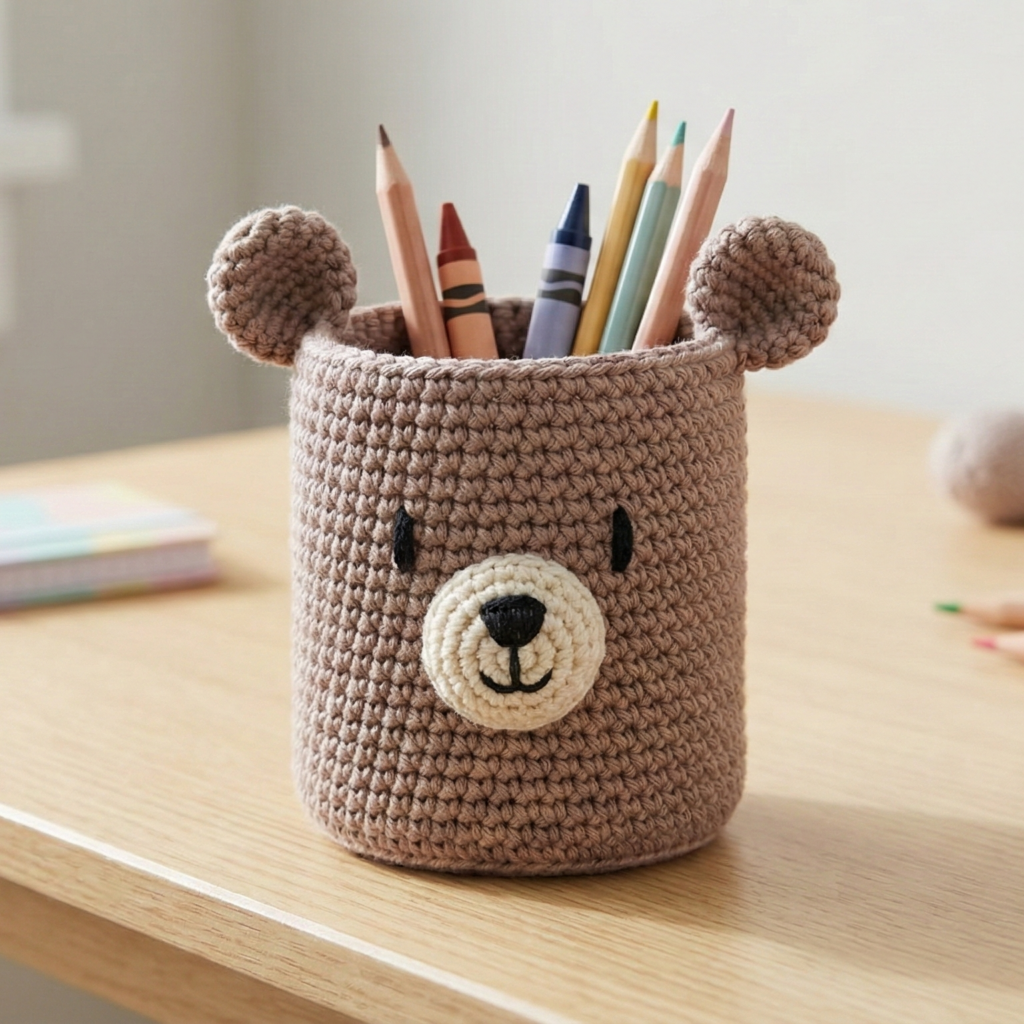
Playful holder shaped like a cute bear — with ears sewn on and a little embroidered face. Great for kids’ desks or playful spaces.
Skill level: confident beginner → intermediate (simple shaping & appliqué)
Finished example size: diameter ~3.25 in; height ~4.5 in (ears add a little height)
Materials
- Worsted cotton in main bear color (taupe/brown) and accent (cream for muzzle) — ~150–200 yd
- Hook: 4.0–4.5 mm
- Tapestry needle, felt base, safety eyes/bead eyes optional (if for kids, embroider eyes instead), stuffing for ears (tiny), small amount of black embroidery floss for nose/mouth
Construction — base cylinder + ears + face
A — Cylinder base
- Work circular base with increases as previous patterns until diameter ~3.25 in. Pick up for sides and sc around until height ~4 in.
B — Bear ears (make 2)
2. Ear pattern (small semi-circle): MR, ch1, 6 sc in MR (6). R2: inc around → 12. R3: sc around and then decrease at inner base to form a curved shell: sc 3, dec, sc 3, dec (example). Fasten off leaving tail. Lightly stuff ears and sew to top rim on opposite sides.
C — Muzzle & face
3. Small round muzzle: MR, 6 sc, R2: inc around to 12, fasten off leaving tail. Sew muzzle to front center and stuff lightly. Embroider nose and mouth with black floss. For eyes, embroider small vertical stitches or attach tiny safety eyes (for adult-use only) – for children embroider.
D — Top rim & finishing
4. Work 2 rounds sc around rim for neat finish. Add felt base and optional lining.
E — Variation — removable ear warmers
- Sew ears on with snaps into small felt tabs so you can reposition or remove them for washing.
Styling & gift ideas
- Make a set: bear holder + matching coaster + notepad cover. Personalize with initial embroidery.
Final finishing tips & bonus ideas
- Removable liners: If you plan to wash the holder regularly (for markers leaking, etc.), make a removable cotton lining with a small snap at the top so lining can be pulled out and washed.
- Waterproofing: Place a small plastic insert at the bottom (a jar lid or plastic coaster) under the felt to catch any ink spills.
- Gluing vs sewing: Hand-sewing is always more durable than hot glue for pieces that may be washed. Use glue only for craft gifts that won’t be washed often.
- Personalization: Add embroidered name/initial or small pockets sewn to the inside for erasers, clips, etc.
- Set idea: Make coordinating desk sets — pencil holder + pen cozy + small coaster for mugs in matching stitch patterns.
conclusion
These five pencil holder patterns give you a range of styles — from the textured and tropical Pineapple Bobble and the clean, vertical Bamboo ribbed holder to the romantic Rosette Coquette, graphic Gingham, and playful Bear holder. Each pattern is designed to be finished quickly and to look polished with a felt base and optional lining. Pick a pattern that matches your desk style, adjust size easily by adding foundation stitches or rounds, and consider making a small matching set for gifts.