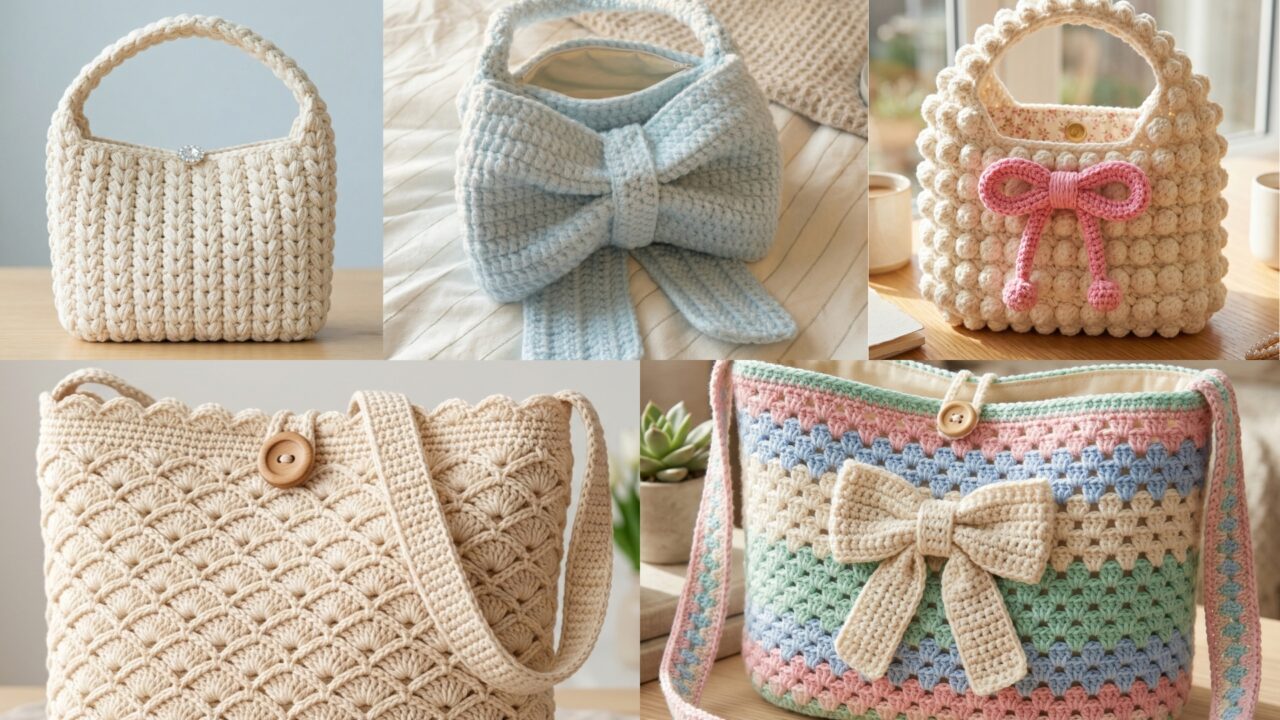
Crochet handbags are one of the most rewarding accessories to make because they are stylish, useful, and personal all at once. A handmade handbag can be soft and charming, bold and playful, or sweet and romantic depending on the stitch pattern and color palette. They also make wonderful gifts because they feel thoughtful and one-of-a-kind, especially when finished with a lining, a neat closure, and a pretty handle.
The five patterns below are designed to be eye-catching and gift-worthy while still staying practical enough for everyday use. Each one includes a clear construction plan, helpful size notes, materials, step-by-step instructions, and finishing tips so the bag turns out polished and durable. These handbags can be customized in different yarn weights and colors, but cotton or cotton-blend yarn is usually the best choice for structure and long-lasting wear.
Before starting, it helps to keep a few things in mind. A handbag needs firmer stitches than a garment or scarf, so a slightly smaller hook often gives better results. A lining is highly recommended if the bag will carry keys, coins, makeup, or other small items. And because straps take the most stress, they should always be stitched on securely and reinforced well.
1. Crochet Scalloped Stitch Handbag Pattern
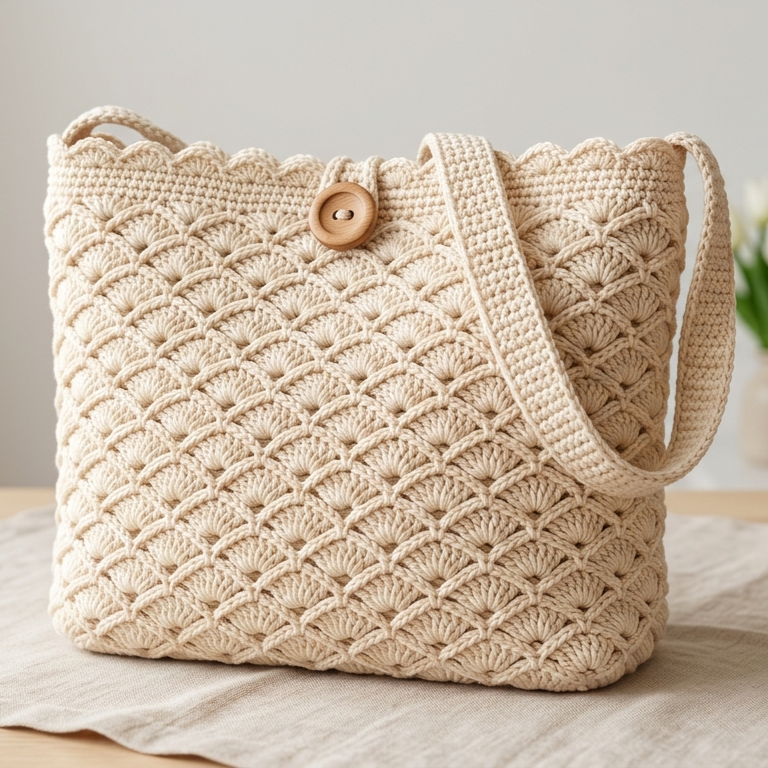
The scalloped stitch handbag has a soft, feminine look that makes it perfect for gift giving. The shell-like texture creates a beautiful surface without being too complicated, and it works especially well in pastel shades, cream tones, or classic neutrals.
Skill level: Beginner to intermediate
Finished size: about 10 to 12 inches wide and 8 to 10 inches tall
Best for: Everyday use, casual outfits, spring and summer gifts
Materials
- Cotton or cotton-blend yarn
- Crochet hook, usually 3.5 mm to 4.5 mm
- Tapestry needle
- Scissors
- Bag lining fabric
- Button or magnetic snap for closure
- Strap material or yarn for crocheted handles
Step-by-step guide
Step 1: Make the base panel
- Chain the width you want for the bag.
- Work rows of single crochet or half double crochet to create a firm rectangle.
- Continue until the panel reaches the height you want for the front of the bag.
- Make a second rectangle the same size for the back panel.
Step 2: Create the scalloped stitch texture
- On the front panel, work a row of shell stitches or scallops across the surface.
- A simple shell can be made by placing several double crochet stitches into the same stitch or space.
- Repeat the scallop rows with a plain row in between to create a pretty textured pattern.
- Continue until the panel looks full and balanced.
Step 3: Shape the sides and bottom
- If making a flat handbag, join the front and back panels directly.
- If making a deeper bag, crochet side panels and a bottom panel.
- Sew or crochet the edges together carefully using a tapestry needle or slip stitch join.
- Keep the seams tight so the bag holds its shape.
Step 4: Add the lining
- Cut lining fabric to match the bag shape.
- Sew the lining pieces together first.
- Insert the lining into the crochet shell.
- Hand stitch the lining to the top edge for a neat finish.
Step 5: Add the closure
- Sew on a magnetic snap or button.
- Make sure the closure is centered.
- Reinforce the area with a small patch of fabric or extra stitches.
Step 6: Add the handle
- Crochet a strap using tight single crochet or half double crochet.
- Make it long enough for a shoulder or hand carry style.
- Sew the strap ends securely to the top corners of the handbag.
Finishing tips
- Use light, solid colors to show off the scalloped texture.
- A scalloped border around the top edge makes the bag look elegant.
- Block the panels lightly before assembly if the stitches need evening out.
Style ideas
This handbag looks especially lovely in cream, rose, sage, lavender, or soft beige.
2. Crochet Heart Stitch Simple Handbag Pattern
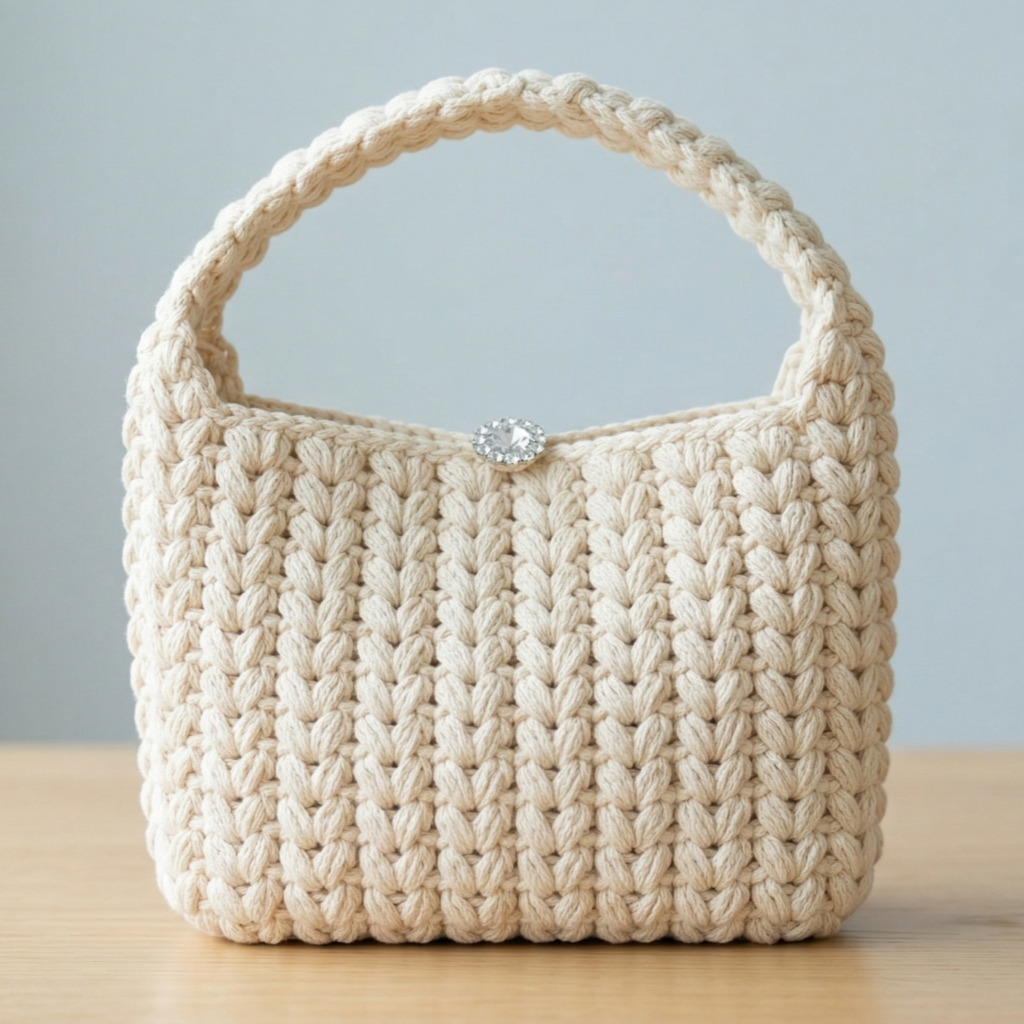
This heart stitch handbag is sweet, simple, and easy to personalize. The texture gives the bag a romantic handmade look without needing complicated shaping. It is a lovely gift for birthdays, Valentine’s Day, or anyone who likes soft, feminine accessories.
Skill level: Beginner to intermediate
Finished size: about 9 to 11 inches wide and 8 to 9 inches tall
Best for: Gift bags, everyday small handbags, and romantic styles
Materials
- Cotton or cotton-blend yarn
- Crochet hook, 3.5 mm to 4.5 mm
- Tapestry needle
- Scissors
- Lining fabric
- Snap closure or zipper
- Strap yarn or premade handle
Step-by-step guide
Step 1: Crochet the base panel
- Chain the width you want.
- Work rows of single crochet or half double crochet to create a sturdy base.
- Repeat until the panel is tall enough for the front of the bag.
- Make a matching back panel.
Step 2: Create the heart stitch texture
- Work a heart-like stitch pattern using clustered stitches or repeated V-shapes.
- A simple version can be created by placing two double crochet stitches around a center chain space.
- Repeat the heart motif across the row.
- Alternate with a stabilizing row of single crochet or half double crochet.
Step 3: Continue the pattern
- Repeat the heart rows until the panel reaches the desired length.
- Keep the tension even so the hearts stay clear and neat.
- Finish with a clean top row.
Step 4: Join the bag
- Place the front and back panels together.
- Sew or crochet the side seams and bottom seam.
- If you want a boxier bag, add side gussets before closing.
Step 5: Add the lining
- Sew a fabric lining to fit the shape.
- Place the lining inside the bag.
- Hand stitch it into the upper edge so the inside looks tidy and strong.
Step 6: Add closure and strap
- Sew on a zipper, snap, or button closure.
- Attach a crocheted strap or a ready-made handle.
- Reinforce the handle ends with extra stitching.
Finishing tips
- Pink, cream, red, and lilac are especially pretty for this design.
- A small heart charm or flower accent can make the bag feel extra special.
- Keep the heart pattern simple if you want a cleaner everyday style.
Style ideas
This handbag is beautiful in dusty pink with cream details or in soft neutral tones for a more subtle look.
3. Crochet Granny Stitch Stripes Bow Handbag Pattern
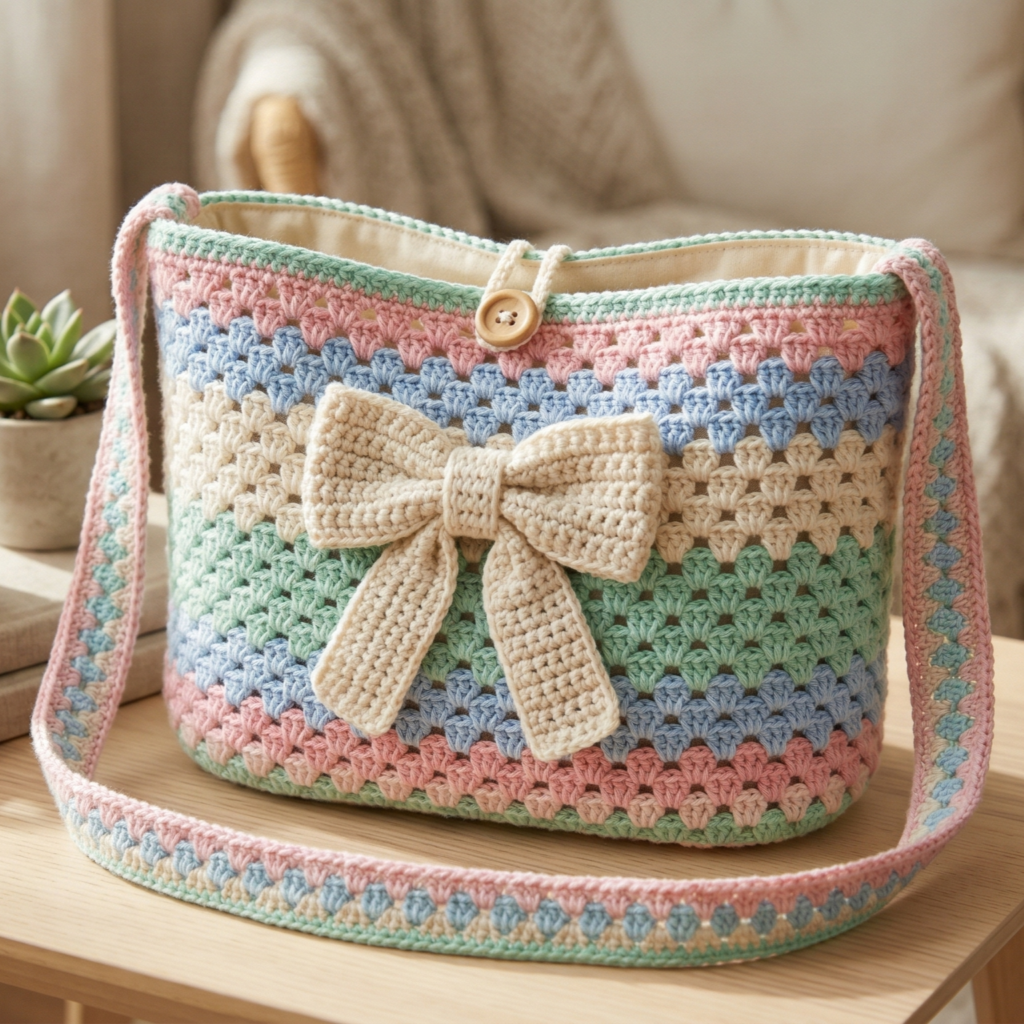
This design combines classic granny stitch stripes with a sweet bow detail for a cheerful, youthful handbag. It has a playful handmade look that works well for gifts and everyday wear.
Skill level: Beginner to intermediate
Finished size: about 11 to 13 inches wide and 9 to 10 inches tall
Best for: School bags, casual outings, and playful gift sets
Materials
- Cotton or cotton-blend yarn in 2 to 4 colors
- Crochet hook, 3.5 mm to 4.5 mm
- Tapestry needle
- Scissors
- Lining fabric
- Magnetic snap, button, or zipper closure
Step-by-step guide
Step 1: Make the stripe panel
- Chain the width you want for the bag.
- Work the first few rows in single crochet to create a sturdy base.
- Begin the granny stitch by making clusters of three double crochet stitches.
- Alternate colors every few rows to create bold stripes.
Step 2: Continue the striped pattern
- Keep the granny stitch rows even and neat.
- Carry or cut colors depending on the yarn and your preference.
- Repeat until the panel reaches the height needed for the bag.
- Make a second matching panel.
Step 3: Shape and join
- Sew or crochet the side seams and the bottom.
- If you want a bit of structure, add a base panel.
- Check that the stripe pattern lines up on both sides.
Step 4: Make the bow
- Crochet a small rectangle for the bow body.
- Fold it in the center.
- Wrap yarn around the middle several times to create the bow shape.
- Sew the bow firmly to the front center of the bag.
Step 5: Add lining and closure
- Sew the lining to fit the bag shape.
- Insert it neatly inside.
- Attach a snap, zipper, or button closure at the top.
Step 6: Add the strap
- Crochet a long strap in a matching or contrasting color.
- Make it sturdy by working tightly.
- Sew it securely to the bag sides.
Finishing tips
- Use three soft colors for a charming striped look.
- A larger bow makes the bag feel playful, while a smaller bow looks more elegant.
- Keep the strap firm so it does not stretch too much with use.
Style ideas
Try pastel stripes for a sweet handmade gift or brighter shades for a cheerful statement bag.
4. Crochet Fluffy Popcorn with Pink Bow Handbag Pattern
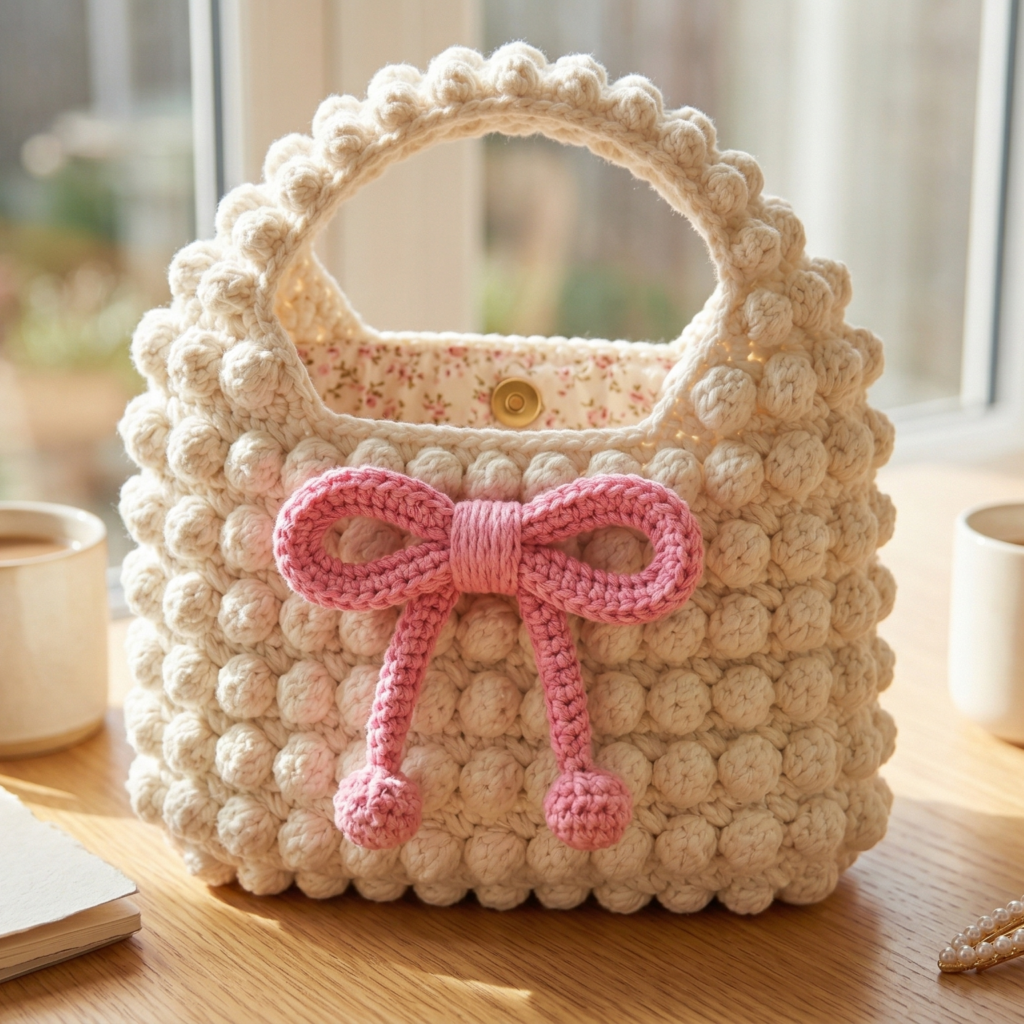
This handbag is soft, textured, and full of personality. The popcorn stitch gives it a fluffy surface that feels playful and cozy, while the pink bow adds a sweet finish.
Skill level: Intermediate
Finished size: about 10 to 12 inches wide and 8 to 10 inches tall
Best for: Cute fashion gifts, statement bags, and special occasion accessories
Materials
- Cotton or cotton-blend yarn for the bag
- Pink yarn for the bow
- Crochet hook, 4.0 mm to 5.0 mm
- Tapestry needle
- Scissors
- Lining fabric
- Closure of choice
- Handle yarn or premade handles
Step-by-step guide
Step 1: Make the base panel
- Chain the width needed for the bag.
- Work rows of single crochet to build a firm foundation.
- Continue until the panel reaches the right height.
- Make a second panel if you want a front and back design.
Step 2: Add the popcorn stitch texture
- Work popcorn stitches across the front panel.
- A popcorn stitch is made by working several double crochet stitches into the same stitch and then closing them together.
- Repeat the popcorn rows across the panel.
- Add plain rows between popcorn rows to keep the shape balanced.
Step 3: Build the bag shape
- Join the front and back panels at the sides and bottom.
- Keep the seams firm and even.
- If desired, add a flat base for more structure.
Step 4: Make the pink bow
- Crochet a small rectangle in pink yarn.
- Fold it into a bow shape.
- Wrap yarn around the center tightly.
- Sew it securely to the front of the handbag.
Step 5: Add lining and closure
- Sew a fabric lining for durability.
- Place it inside the bag and hand stitch the top edge.
- Add a zipper or snap closure.
Step 6: Attach the handle
- Crochet two short handles or one long strap.
- Use tight stitches so the handles stay strong.
- Reinforce the join points with extra stitching.
Finishing tips
- Popcorn stitches work best in solid colors so the texture shows clearly.
- Pink, white, or cream bows look especially cute on this design.
- Keep the stuffing or structure subtle so the bag remains comfortable to carry.
Style ideas
This handbag looks adorable in soft blush, ivory, or pastel blue with a bright pink bow.
5. Crochet Blue Bow Shaped Handbag Pattern
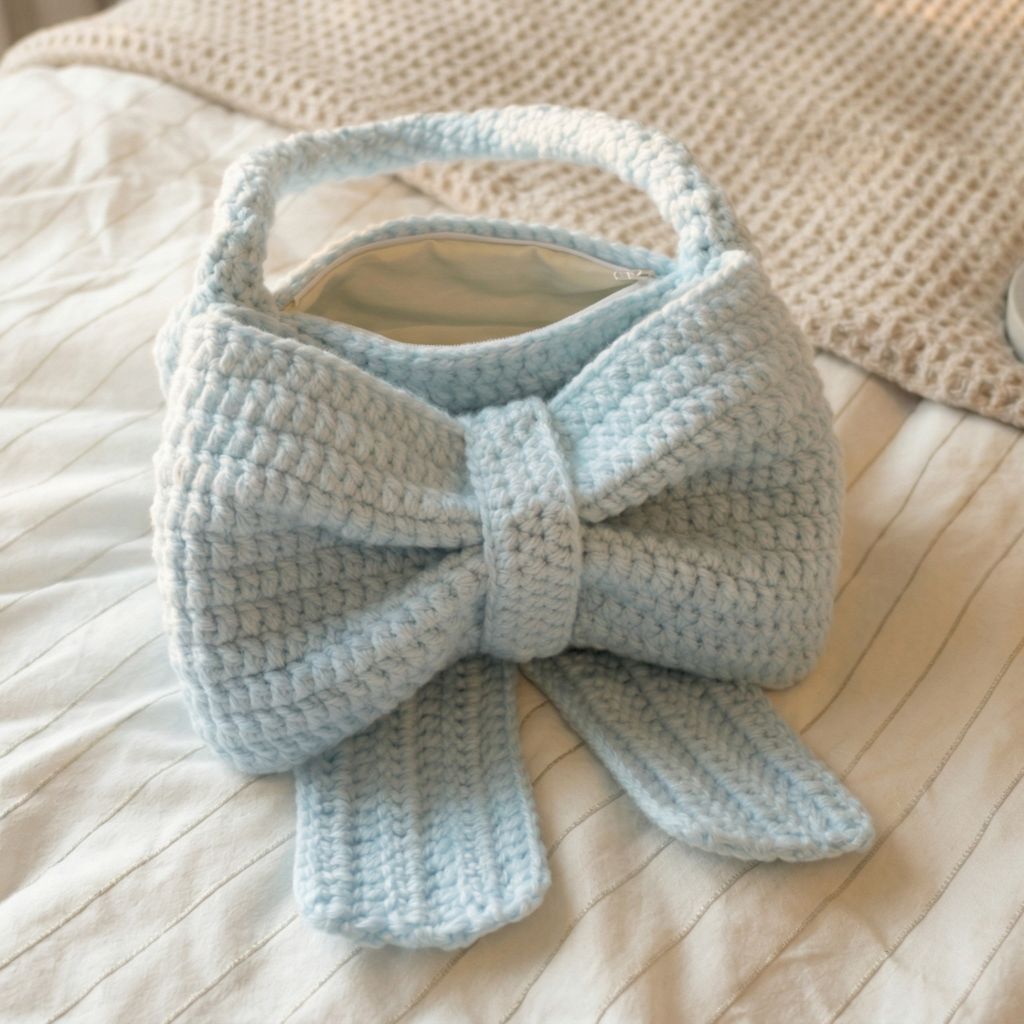
This handbag is shaped like a bow itself, which makes it a fun and standout project. It is playful, stylish, and perfect for someone who loves a more whimsical accessory.
Skill level: Intermediate
Finished size: about 11 to 13 inches wide, depending on bow proportions
Best for: Gifts, statement bags, and special outfits
Materials
- Blue cotton or cotton-blend yarn
- Crochet hook, 3.5 mm to 4.5 mm
- Tapestry needle
- Scissors
- Lining fabric
- Closure material
- Strap yarn
Step-by-step guide
Step 1: Make the center body of the bag
- Crochet a rectangular base panel for the center section.
- Use single crochet or half double crochet for structure.
- Make the rectangle tall enough to hold the bag contents.
Step 2: Create the bow loops
- Crochet two large oval or folded rectangular pieces.
- These will become the bow loops on either side of the center.
- Make them the same size so the bag stays balanced.
Step 3: Shape the bow
- Fold each loop section into a bow shape.
- Sew the loops securely around the center rectangle.
- Add a narrow middle band to complete the bow look.
Step 4: Build the full bag
- Use the bow-shaped front as the main design.
- Make a plain back panel to match.
- Join the front and back together along the sides and bottom.
Step 5: Add the lining
- Sew a lining to match the bag shape.
- Insert it carefully inside the crochet shell.
- Stitch the lining to the top edge so it stays in place.
Step 6: Add closure and handle
- Add a snap, button, or zipper to close the bag.
- Attach a strap or chain handle securely.
- Reinforce every join point to support regular use.
Finishing tips
- A soft blue yarn gives the bag a dreamy, sweet look.
- Use a tighter stitch for the center so the bow shape stays crisp.
- Add a small decorative charm to the zipper or closure if desired.
Style ideas
This bag looks especially lovely in baby blue, sky blue, or cornflower blue with a white lining.
Conclusion
Crochet handbags are a wonderful way to combine fashion and handmade creativity. Each of these five designs offers something different: the soft elegance of scalloped stitch, the romantic look of heart stitch, the playful charm of granny stripes and bows, the cozy texture of popcorn stitch, and the bold personality of a bow-shaped bag. They are all beautiful gift ideas, but they are also practical pieces that can be carried and enjoyed every day.
The best results come from using sturdy yarn, keeping your stitches even, and adding a lining for strength. A handbag is one of those projects that benefits from careful finishing because the details really matter. Once the shape is complete, a good strap, a neat closure, and a smooth lining can turn a simple crochet piece into something that looks polished and professional.
If you’re making these bags for gifts, choose colors that match the person’s style. Soft pastels create a sweet and feminine feel, while deeper tones or neutrals make the bag more classic and versatile. No matter which pattern is chosen, a handmade handbag always feels special because it carries time, care, and personality in every stitch.