Gift cards are tiny treasures — and a handmade holder makes them memorable. Below are five clear, step-by-step crochet patterns you can use to make sweet, reusable gift-card holders for holidays, birthdays, and little surprises. Each pattern uses US crochet terms, includes skill level, materials, exact round/row instructions, finishing and assembly, and several variations/tips so you can adapt size, yarn, and decoration.
Quick abbreviations (US terms)
ch = chain | sl st = slip stitch | sc = single crochet | hdc = half double crochet | dc = double crochet | tr = treble | inc = increase (2 sts in same st) | dec = decrease | st(s) = stitch(es) | RS = right side | BLO / FLO = back/front loop only
1. Crochet Christmas Tree Gift Card Holder Pattern
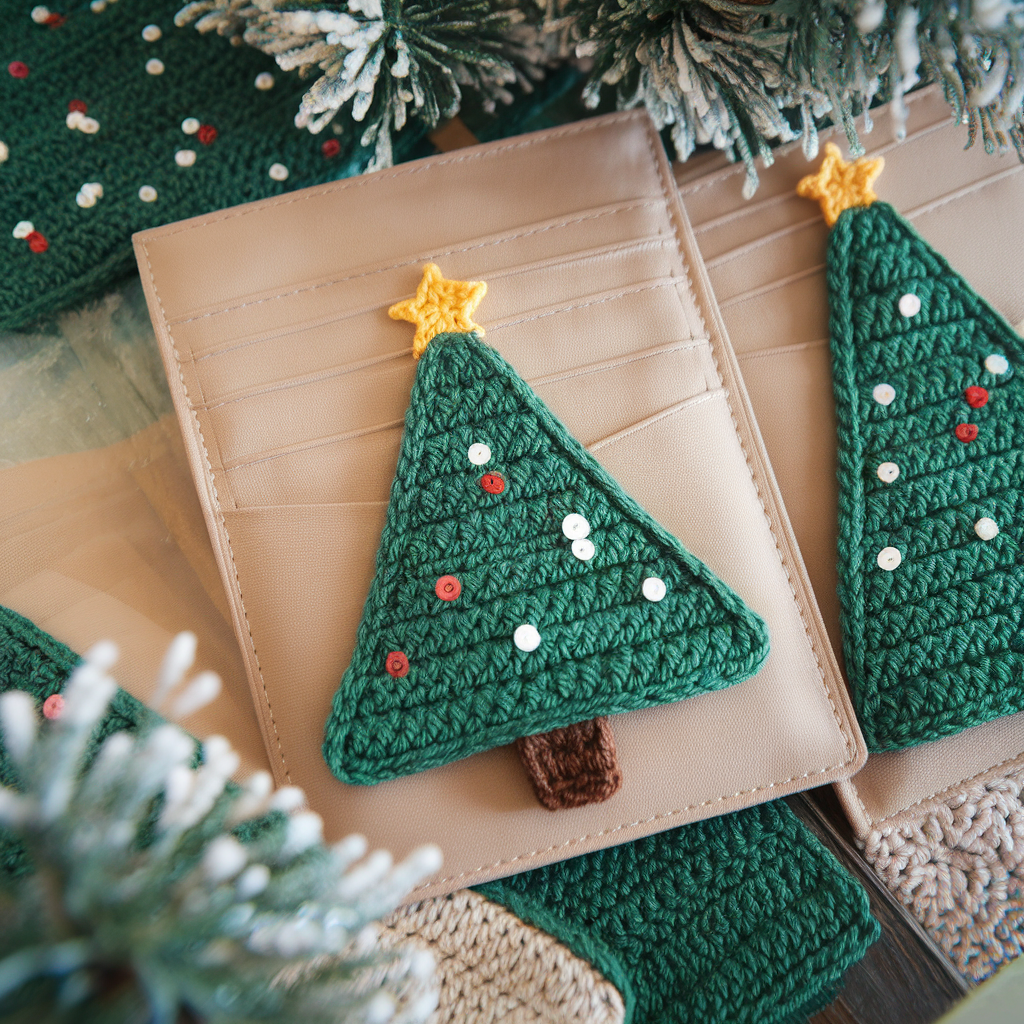
Skill level: Beginner–intermediate (simple shaping + finishing)
Finished size: About 3.5″ wide × 5.5″ tall (fits most standard gift cards vertically); adjust by changing hook/yarn.
Materials
- Worsted weight (#4) yarn: green (main), brown (trunk), small scrap of red/yellow/white for ornaments/star
- Crochet hook: 4.0 mm (G)
- Yarn needle, scissors, optional small button or snap for closure
- (Optional) small sequin beads or contrasting yarn for ornaments
Notes: The holder is worked flat as a triangle front and back, seamed on two sides leaving a pocket for the card. Optionally work a flap for secure closure.
Instructions — Tree front (make 2 identical panels)
- Start: With green, ch 4, join with sl st to form a ring.
- Round/Row 1: Ch 2 (counts as hdc), work 3 hdc into ring — 4 hdc total. Do not join; treat as short rows increasing at edges.
- Row 2: Ch 2, turn. Work across the first row placing (hdc, ch 1, hdc) into the first stitch to begin the triangular increase, then work hdc across to the last stitch and end with (hdc, ch 1, hdc) in the last stitch. This creates two corner increases.
- Row 3+: Repeat Row 2, adding one extra hdc between the corner increases each row so the triangle grows evenly. Continue until your triangle measures about 5.5″ tall (or desired length). Count stitches at the base — you’ll have a neat triangular panel.
- If you prefer a textured look, alternate rows with dc or work every third row as a dc row.
- Fasten off leaving a 12″ tail for sewing.
Tip: Keep the tension even—triangles can skew if increases are missed. Mark center stitch of base if you want perfectly symmetrical ornament placement later.
Trunk (optional)
- With brown, ch 6, Row 1: sc in 2nd ch from hook across (5 sc).
- Rows 2–4: ch 1, turn, sc across. Fasten off leaving tail. Trim to about 0.5–1″ tall (proportion to tree).
Make second panel
Repeat triangle for the back panel exactly the same size.
Assembly — form the pocket
- Place the two triangle panels RS together (right sides facing). Align edges carefully.
- Using tapestry needle and matching yarn, whip stitch or slip-stitch the two long sides (the sides that make the triangle edges), leaving the top (base of triangle) open so the gift card can slide in from the top. If you want the card to insert from the bottom, seam differently — but top insertion is easiest.
- Sew the brown trunk to the bottom tip on the front panel (stitch through front panel only if you want trunk visible).
- Make a small flap: fold the base (wide end) of the front panel down about 1″ toward the front and stitch a line across the sides to form a tiny flap that tucks over the top of the card — or instead add a small button and loop or snap for a secure close.
Ornament & star decoration
- Embroider small french-knots or attach tiny sequins as ornaments.
- For a star: with yellow, make a tiny 5-point star (magic ring: ch 2, sc 3 in ring, ch 3, sl st in ring repeat 5) and sew to the top.
- You can also crochet small pom-poms or bobbles and sew them on.
Variations & finishing
- Make a layered tree: work three staggered triangular panels slightly overlapped and stitch only at the back to create a 3D layered look.
- Make a pocket size that opens on the side (seam bottom only) for horizontal cards.
- Add a hanging loop to turn it into a tiny ornament that doubles as a card holder.
2. Crochet Stocking Gift Card Holder Tutorial
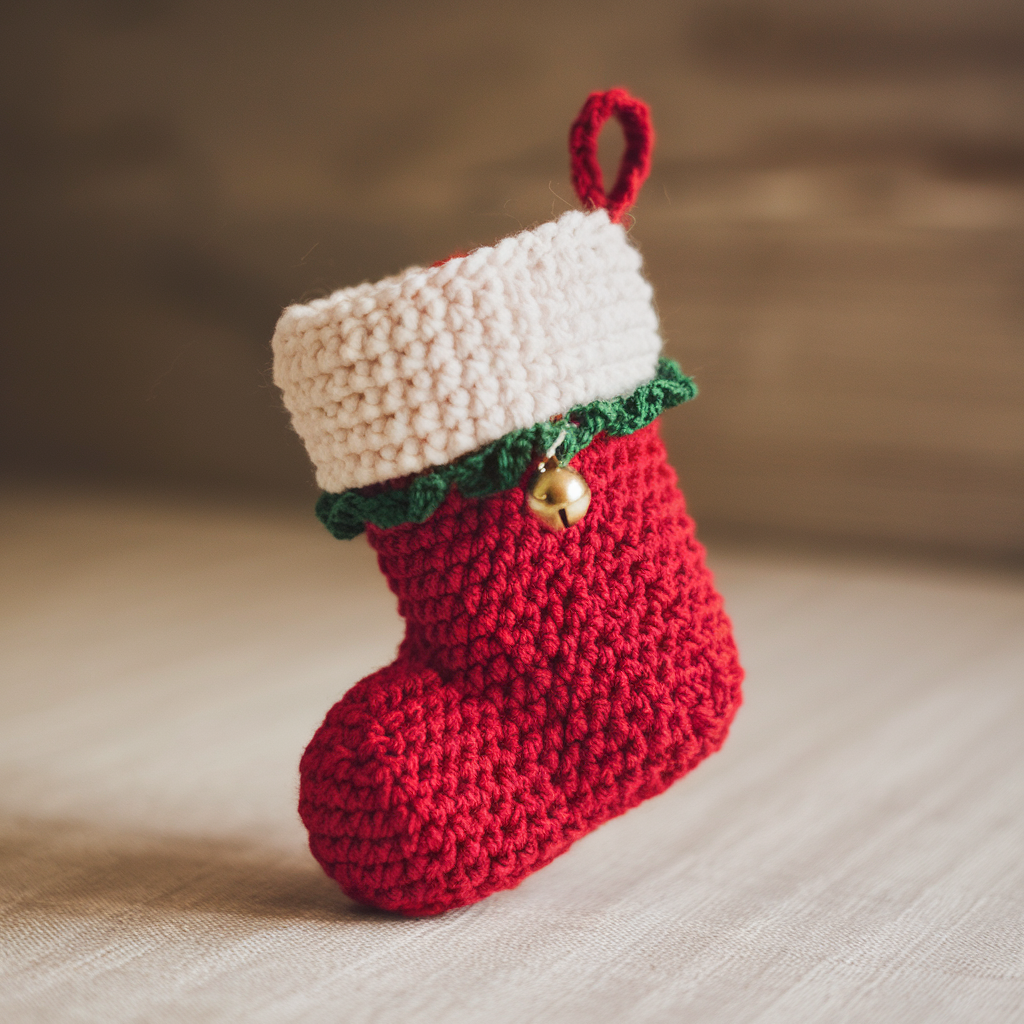
Skill level: Beginner (classic shape)
Finished size: About 3.5″ wide × 5–6″ tall (standard card fits inside with a little tuck)
Materials
- Worsted weight yarn: red (main), white (cuff), optional green for trim
- Hook: 4.0 mm (G)
- Yarn needle, scissors, optional small jingle bell or patch
Abbreviations specific: inc = increase (2 sc in st), sc2tog = single crochet 2 together (decrease)
Instructions — Stocking body (worked flat)
- Sole foundation: Ch 9. Row 1: sc in 2nd ch from hook and across (8 sc).
- Row 2: ch 1, turn, sc across.
- Row 3 (shape toe): ch 1, sc in next 3, inc, sc in next 3 — (9 sc).
- Row 4: ch 1, sc across.
- Row 5 (shape toe more): ch 1, sc in next 3, inc twice across next 3 sts evenly (distribute increases to round the toe), sc in last 3. Continue increasing on every other row until toe reaches desired width (about 4–5 sts wider than original sole).
Heel and ankle
6. After toe shaping, work even rows of sc for 6–8 rows (this builds the foot/top) until the piece measures about 3.5″ from the starting chain to the top (or the length you need).
7. To create the cuff area, fold the piece in half lengthwise with RS together (making a stocking shape). Slip-stitch from bottom toe up one side for about 2/3 of the ankle, leave the top open for the card. Fasten off.
Cuff
- With white yarn, join at the top opening and work 6–8 rows of sc, or for a fluffy cuff do sc in BLO to create a rolled effect. For a folded cuff, work 2× the desired cuff height, fold down, and tack in place.
- Add a small loop: ch 6, sl st to top of cuff for hanging.
Finishing & decoration
- Embroider festive words (JOY) or sew a tiny jingle bell to the cuff (ensure secure attachment if the holder will be handled by kids).
- For closure, add a small button and loop on the cuff to secure card inside, or stitch a small pocket tab.
Variations & tips
- Make mini stockings in different colors for advent-style gift card countdowns.
- Use chunky yarn and a larger hook for a quick, plush holder; adjust counts to keep proportions.
3. Crochet Gift Card Holder Envelope Pattern
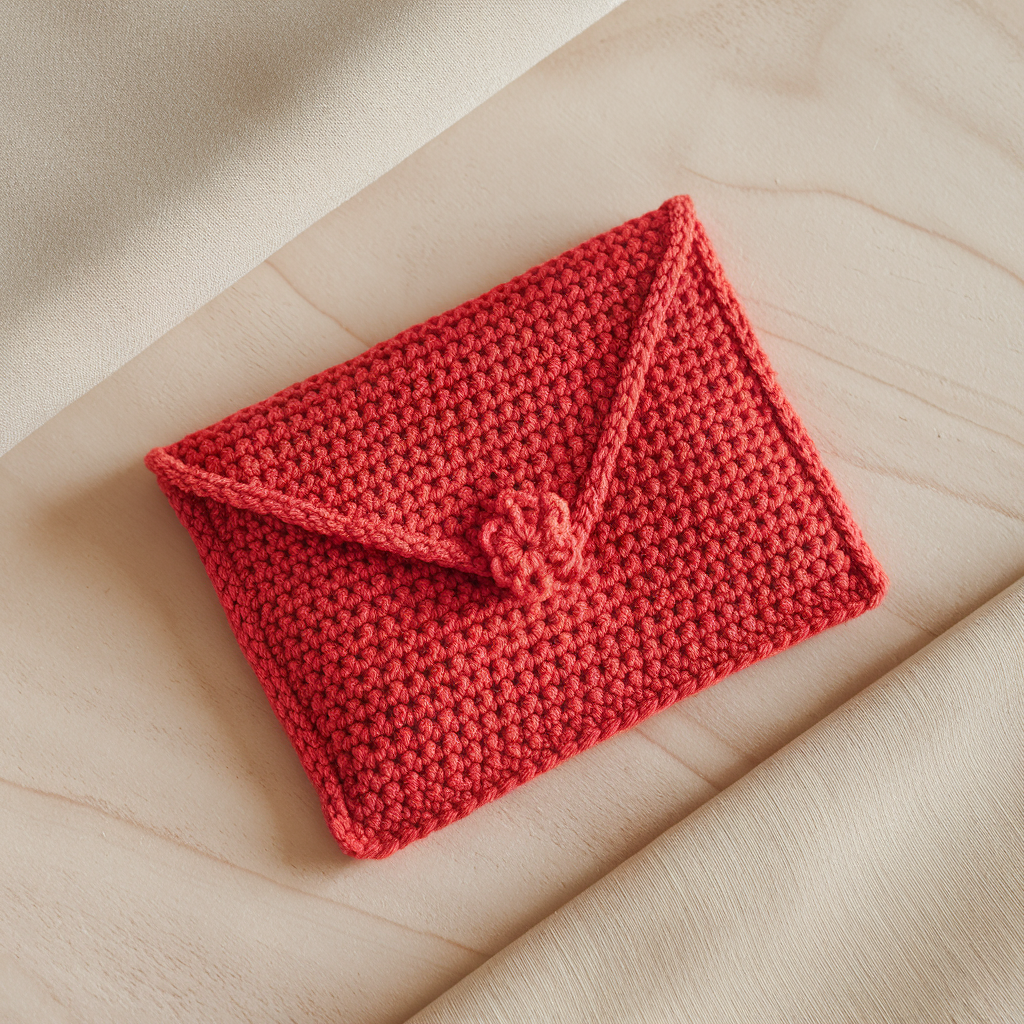
Skill level: Beginner (simple rectangular envelope with flap)
Finished size: About 3.75″ × 2.25″ inside pocket for standard card; larger if you want room for tag + card.
Materials
- DK or worsted weight yarn (one or two colors), hook 3.5–4.5 mm depending on yarn
- Yarn needle, small button or snap (optional)
Instructions — Envelope pocket (worked flat)
- Base panel: Ch 28 (or ch to desired width + 4). Row 1: sc in 2nd ch from hook and across. Turn. (27 sc)
- Rows 2–10: ch 1, sc across (adjust number of rows so the height equals about 60–70% of card height; leave room for flap). For a snug fit, make the pocket height 60–65% of card height; for a looser envelope make it taller.
- Seaming: Fold the bottom up to create a pocket — fold so that the top edge aligns to form a flap about 1/3 of total length. With RS together, sew or slip-stitch both sides from the bottom to the fold line, leaving the flap free.
Flap shaping
- To make a pointed envelope flap: pick up stitches across the flap edge and work decreases centered to form a triangle point: Row 1 pick up and sc across flap edge, Row 2 dec at both ends by sc2tog, sc across, repeat until you have a nice pointed tip; fasten off and weave ends.
- Alternatively keep a straight flap and add a decorative picot edging: (sc, ch 3, sl st in 3rd ch) across.
Closure
- Add a button to the front pocket and a loop on the flap (ch 8, sl st to create loop).
- Or sew a small snap for a hidden closure.
Decoration ideas
- Crochet a tiny flower, heart, or initial and sew to the flap center.
- Use colorwork stripes for a modern look, or a lacy shell flap for elegant cards.
Variations & tips
- To fit gift cards with folded note inside, add gusset by folding and sewing a small triangle at the bottom sides to increase depth.
- For sturdier envelope use two layers: make a lining panel and slip it inside before seaming.
4. Crochet Mushroom Gift Card Holder Tutorial
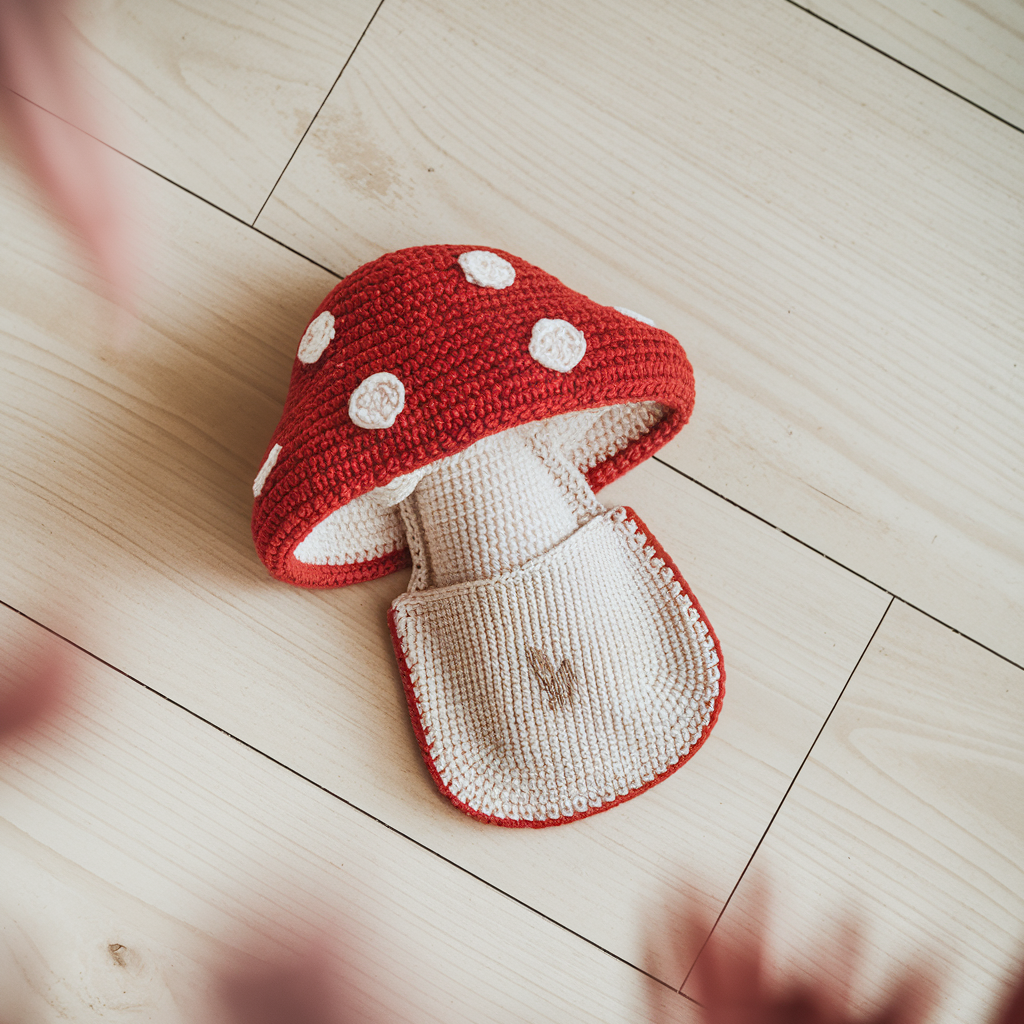
Skill level: Intermediate (shape + applique)
Finished size: About 3.75″ across (cap) × 4.5″ tall
Materials
- Worsted weight yarn: red (cap), white (spots and stalk), beige or tan for pocket inside if desired
- Hooks: 4.0 mm main, 3.5 mm for tighter details
- Yarn needle, scissors, optional felt for backing
Concept & construction
This holder is made as a mushroom cap front and a flat back panel that together form a pocket. The cap is slightly rounded with spots appliquéd or embroidered.
Instructions — Cap (front panel)
- Magic ring: With red, make magic ring, ch 2, 12 hdc into ring (12). Pull tight.
- Round 2: (hdc, inc) repeat around — 18 hdc.
- Round 3: (2 hdc, inc) repeat around — 24 hdc.
- Round 4: (3 hdc, inc) repeat around — 30 hdc. This creates a rounded cap. Continue one more increase round if you want a fuller cap (e.g., 4 hdc, inc → 36).
- Round 5–6: Work even rounds of hdc as needed to build cap depth (1–2 rounds). Fasten off leaving a long tail for assembly.
Back panel (flat pocket)
- With white or beige, ch 28, Row 1 sc across (27 sc), Rows 2–10 sc across to reach desired height (about 4–4.5″). Adjust for card size. Fasten off leaving tail.
Appliqué spots
- Make small white circles: magic ring, ch 1, 6 sc in ring, sl st, fasten off leaving tail. Make 3–6 spots. Sew spots to red cap randomly.
Assembly
- Place cap RS up and back panel RS down so edges align at the top (cap will overlap the front of the pocket a little). Sew sides together with invisible stitch leaving a small opening at the top center or choose to leave the cap as a flap that tucks in.
- Optionally sew a small felt backing inside the cap to keep the shape smooth and reduce stretch.
Stalk/tuck (optional)
- Crochet a short tube for the stalk (ch 6, join, sc around for 6 rounds) and sew to top center inside to make a tiny 3D stalk — purely decorative. Avoid making bulky pieces that make inserting cards difficult.
Variations & finishing
- Make a toadstool series in red/white, brown/cream, or rainbow for party themes.
- Use embroidery around spots for whimsical faces.
5. Snowman Gift Card Holder Crochet Pattern
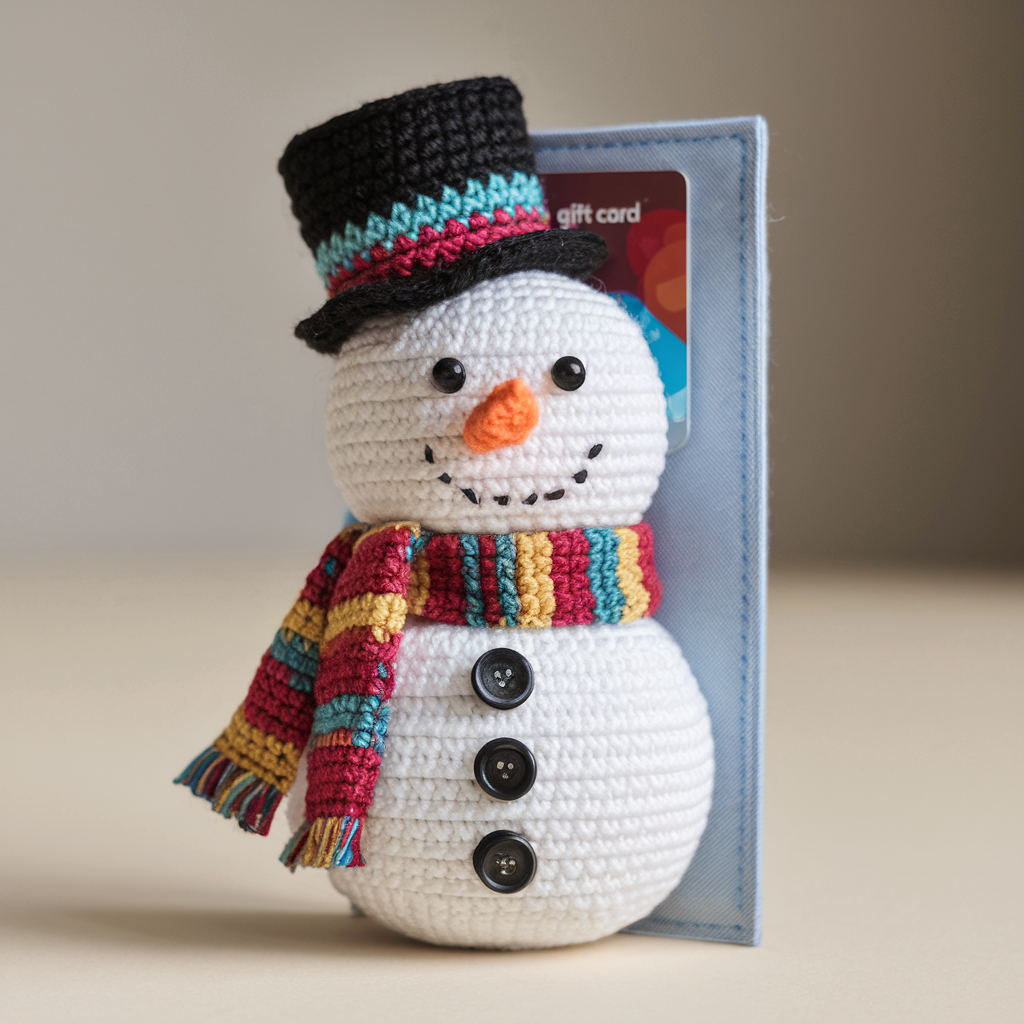
Skill level: Intermediate (shaping + small amigurumi features)
Finished size: About 3.5–4″ wide × 5.5–6″ tall (vertical pocket)
Materials
- Worsted yarn: white (body), black (hat/buttons/eyes), orange (nose), scarf color of choice
- Hook: 4.0 mm (G) for body; 3.5 mm for tight features
- Yarn needle, small bit of stuffing for nose if desired, embroidery thread for smile
Structure
Work two stacked round circles (snowman head + body) for the front panel and a flat rectangular back as the pocket; seam sides to create a pocket. Add a small crocheted hat and scarf as adornments.
Front panel — snowman (make 1)
Head (top circle)
- Magic ring, ch 1, 6 sc into ring (6). R2 inc each st → 12. R3 (sc, inc) → 18. R4 (2 sc, inc) → 24. Fasten off leaving tail.
Body (larger circle)
- Magic ring, ch 1, 6 sc. R2 inc → 12. R3 (sc, inc) →18. R4 (2 sc, inc) →24. R5 (3 sc, inc) →30. Work 1–2 even rounds of sc to give a slight depth. Fasten off.
Join head + body
- With RS facing, sew head to body so they overlap slightly, creating a stacked snowman front. Keep stitches neat.
Back pocket panel
- Ch 28, Row 1 sc across (27). Rows 2–12 sc across (height approx matches combined head+body height minus an inch for flap). Fasten off.
Assembly
- Place snowman front over the back panel so the snowman covers the front pocket and leaves about 0.5″ of pocket opening at top. Sew sides neatly with matching yarn leaving the top open for the card.
- Optionally add a flap: pick up stitches along the top of the back panel and crochet a triangular flap (or straight flap) to fold over the top and button closed.
Features & accessories
- Eyes & buttons: Sew tiny black yarn knots or embroider small French knots for eyes and buttons.
- Nose: Crochet a tiny cone: with orange, ch 3, sc into 2nd ch and next, then sc around two rounds decreasing to make a tiny carrot shape. Sew in center of head. Stuff lightly if you want a bit of dimension.
- Mouth: Use backstitch with black embroidery thread to create a small smile.
- Scarf: Ch 30, attach loosely around neck and tack ends to the sides of the pocket. Add fringe if desired.
- Hat: Crochet a tiny beanie: magic ring, work increases to 10–12 sts, then 3–4 rounds sc, add a brim by working FLO sc around last round and fold.
Variations & tips
- Make the snowman flat (no 3D nose) if you prefer a slim pocket.
- Use felt backing for the front sewn inside to keep the snowman sturdier if the card will be handled frequently.
Conclusion
These five crochet gift card holders — Christmas Tree, Stocking, Envelope, Mushroom, and Snowman — give you a mix of simple and playful projects you can make in an hour or two each. Small design choices (yarn weight, hook size, and number of rows) let you scale these to any gift-card format or transform them into ornaments, tags, or little keepsakes.
Quick checklist before gifting:
- Try a test card to make sure it slides in/out easily.
- Secure any small decorations so they won’t come loose during handling.
- If the holder might be used by kids, avoid tiny detachable beads unless stitched and reinforced.


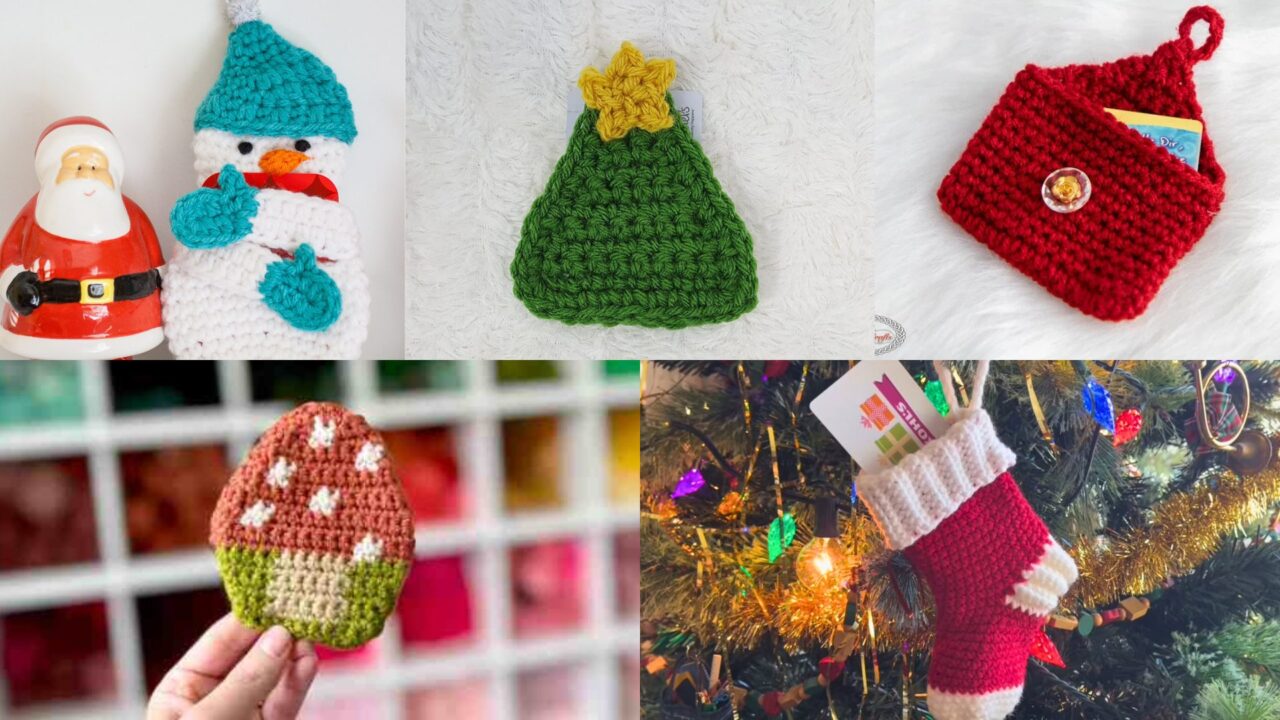



The mushroom pattern does not seem to match the mushroom image. I’m really disappointed. I clicked on the video and it seems to show an entirely different pattern.