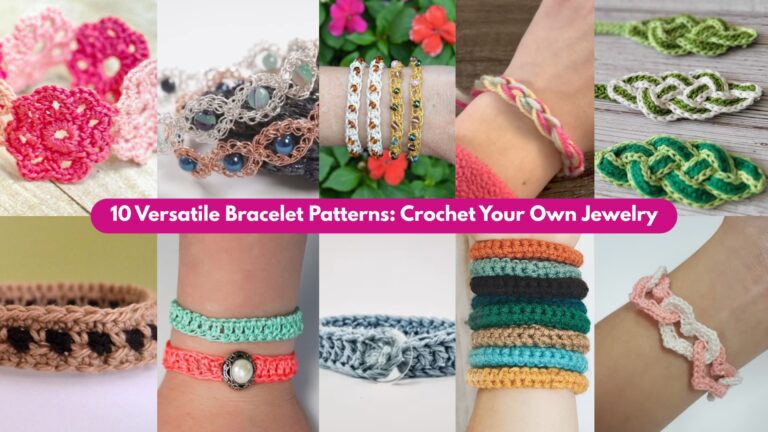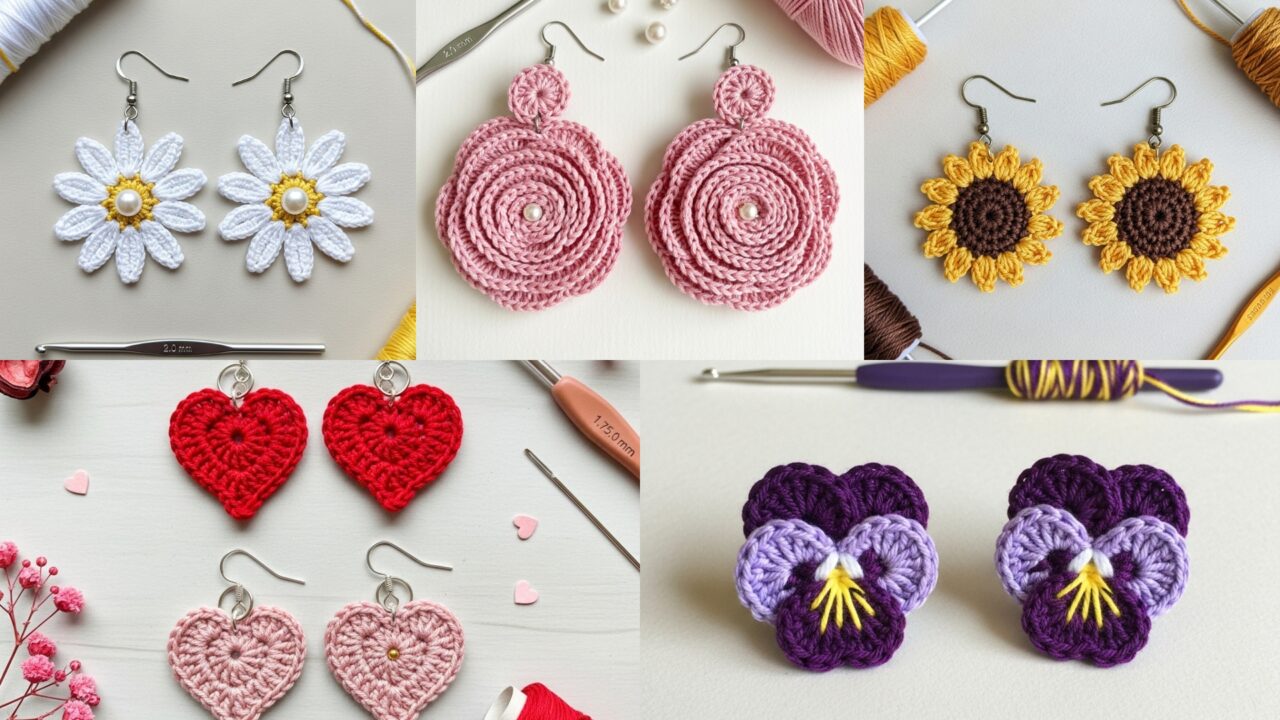
Delicate crochet earrings are fast, inexpensive to make, and endlessly customizable — perfect for gift-giving, craft markets, or upgrading an outfit. Below you’ll find a single practical introduction (materials, tools, sizing, safety, abbreviations) followed by five complete, step-by-step earring patterns: Valentine’s Heart, Rose Flower, Daisy with Pearl Center, Micro Sunflower, and Pansy. Each pattern includes skill level, exact materials, finished size guidance, a clear stitch-by-stitch method, variations, finishing instructions and care notes. The tone is practical and human — ready to paste into a blog post.
Quick introduction — materials, tools, sizing, safety & abbreviations
Best materials & findings
- Thread / yarn: For lightweight earrings use crochet thread size 10 or fingering-weight yarn held single. Thread yields crisp, small motifs; fingering gives a slightly puffier look. Cotton (merc. cotton) is recommended for stitch definition.
- Hook: 1.5–2.5 mm for thread; 2.5–3.5 mm for fingering yarn. Use the hook that gives a dense, neat fabric for small motifs.
- Beads & pearls: Small seed beads (size 8/0 or 11/0) or 3–6 mm pearls. If adding a center pearl, string it onto the thread before you start crocheting or sew it on after — sewing is safer and more secure.
- Earring findings: small jump rings (4–5 mm), ear wires (hypoallergenic — e.g., sterling silver, niobium, titanium), or small hoops. Use pliers to open/close jump rings.
- Backing & stability: thin felt circles (6–8 mm) or fabric glue can be used to back the motif to protect the wearer’s ear and hide stitches. For added stiffness use diluted PVA or fabric stiffener if you want the earrings to hold shape.
- Tools: tapestry needle, small sharp scissors, round nose pliers, flat nose pliers, needle for threading beads, blocking mat & pins (optional).
Sizing & weight
- Aim to keep motifs small and light: finished earring diameter around 1.0–2.0 in (2.5–5 cm) is an ideal wearable range. Lightweight thread + minimal beads keeps earrings comfortable.
- If you prefer large statement pieces, use thicker yarn and larger motifs, but be mindful of weight (larger = heavier).
Safety & wearability
- Use hypoallergenic ear wires for people with sensitivities. If selling, state metal content.
- Sew beads on securely rather than gluing; glued beads can loosen with time.
- Don’t add long dangly cords or little loose pieces for young children — these are adult accessories, not toys. Include a safety note: “Not recommended for children under 3.”
Finishing & durability
- Securely weave in ends and stitch any appliqués. If you back motifs with felt, stitch felt to the motif with small stitches rather than glue for better long-term durability.
- Optionally, apply a very light coat of fabric stiffener for motifs that need rigidity — test on a scrap first.
Abbreviations (US)
- ch — chain
- sc — single crochet
- hdc — half double crochet
- dc — double crochet
- tr — treble crochet
- sl st — slip stitch
- st(s) — stitch(es)
- inc — increase (2 sc in same st)
- dec — decrease (sc2tog)
- MR — magic ring
- BLO / FLO — back/front loop only
- RS / WS — right side / wrong side
1. Crochet Valentine’s Heart Earrings Pattern
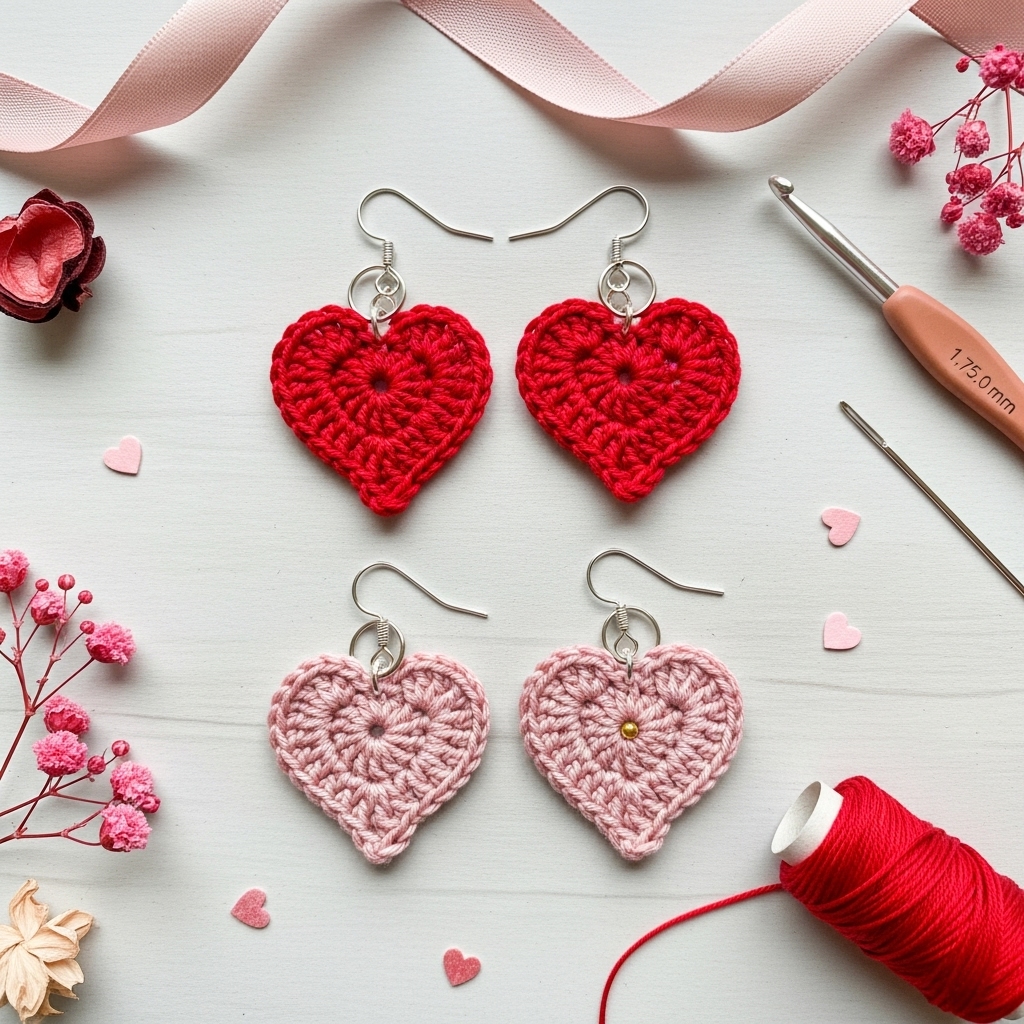
Skill level: Beginner — simple small motif, perfect for quick pairs.
Materials (pair)
- Size 10 crochet thread (or fingering yarn) — small amount of main color (red, pink).
- Hook: 1.75–2.25 mm (thread) or 2.5–3.0 mm (yarn).
- 2 small jump rings (4 mm), 2 hypoallergenic ear wires, pliers.
- Tapestry needle. Optional: tiny gold seed bead for sparkle.
Finished size
- Approx 1.0–1.25 in (2.5–3.2 cm) tall when worked in thread; larger with yarn.
Step-by-step — small flat heart (worked in one piece)
This is a compact heart with a gentle curve — easy to repeat for a matching pair.
- MR; R1: ch1, 6 sc into MR. Pull ring closed. (6 sc)
- R2: (3 sc, ch2, 3 sc) in next st — work this shell into one stitch to create the first lobe; sl st to next st, then (3 sc, ch2, 3 sc) in next st to make second lobe. You’ll form two lobes separated by a center. Fasten off yarn leaving tail for sewing. (This creates two rounded lobes sitting on a tiny base of stitches.)
- If the two lobes are too big, reduce to 2 sc per lobe instead of 3 sc for a smaller heart.
- To form bottom point: With RS facing, fold the base under into a V and sew a few overlapping stitches with the tail to shape a defined point. Weave tail through backside to secure.
- Attach findings: With small jump ring, sew a tiny loop of thread to the top center between the lobes (or pick up the point where the two lobes meet), close the jump ring through the loop (or through an open stitch), then attach the ear wire and close jump ring with pliers.
Optional bead: Sew a gold seed bead at the depression between lobes for sparkle — stitch through bead multiple times.
Variations
- Larger hearts: add an extra round of sc around the lobes before folding to make hearts ~1.5–2 in tall.
- Picot edge: work sc, ch3, sl st into sc around edges to add a delicate picot.
- Stacked heart: make two hearts (same or different color) and stack with a tiny spacer bead between for dimensional earring.
Finishing & care
- Block gently on a flat surface pinned to shape if using thread.
- For durability, stitch a 6–8 mm felt circle to the back hiding the sewing and protecting the ear. Trim felt tiny so it isn’t visible from front.
- Hand wash in mild soap if needed; reshape and dry flat.
2. Crochet Rose Flower Earrings Pattern
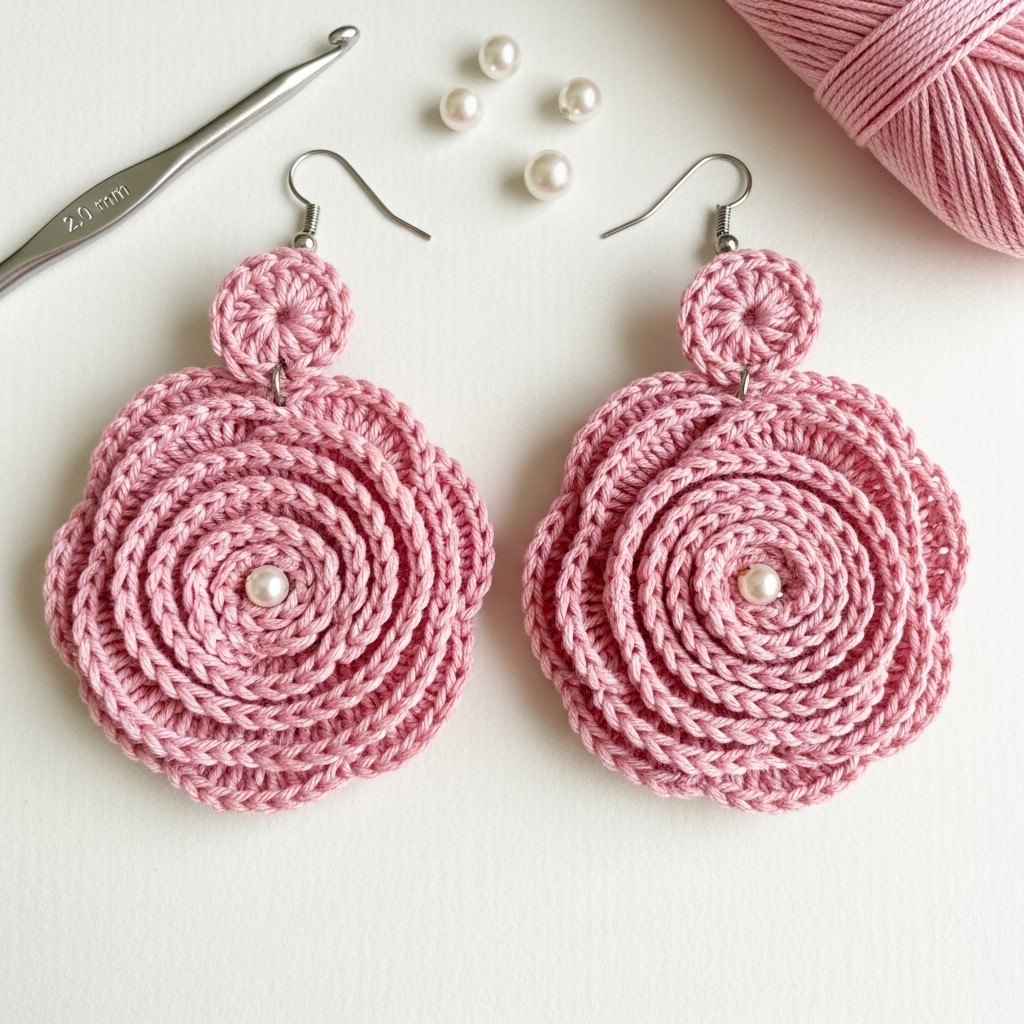
Skill level: Intermediate — small layered petals assembled into a rosette.
Materials (pair)
- Size 10 thread or fingering cotton yarn (rose color) + small amount green for leaf accent (optional).
- Hook: 1.75–2.5 mm (thread) or 2.5–3.5 mm (yarn).
- 2 small jump rings, 2 ear wires, small pearls (3–4 mm) optional.
- Tapestry needle, small circle of felt for back.
Finished size
- About 1.25–1.5 in (3–4 cm) diameter when worked in thread.
Step-by-step — layered spiral rose
This rose uses a spiral center with successive petal rounds.
- Center spiral: ch 20 (or chain 12 for a smaller rose). Row 1: sc in 2nd ch from hook and across. Fasten off and leave a long tail OR work a continuous spiral: an alternate method is MR; 6 sc + spiral increases to create a central disk — but the chain-spiral method gives layered petals nicely.
- Roll into rose: Roll the finished chain strip into a spiral from one end to the other so it resembles a rolled rose. Secure every 2–3 mm with small whip stitches through the base so the spiral holds its shape. This creates a lovely 3D rose without complicated petal rounds. (If you prefer a crocheted petal-round rose, see variation below.)
- Green calyx (optional): Ch 6, sc 5 across to make a small leaf strip; sew to back near base to mimic leaves.
- Assembly: Glue or sew the rose onto a tiny felt circle (6–10 mm) for stability. Using the felt as a base, sew through rose and felt several times to secure.
- Attach findings: Stitch a small thread loop at the top of the rose (through felt backing) or attach a 4–5 mm jump ring by piercing through the felt with a needle and closing the ring around it. Attach ear wire.
Alternative — crocheted petal rounds (explicit crochet variant)
- MR; R1: ch1, 6 sc into MR; sl st to join. R2: ch3, (3 dc) in next st, ch3, sl st in next st repeat 3 times to form 3 large petals. R3: Work smaller petals in the spaces between large petals: into each ch3 space sc, hdc, 3 dc, hdc, sc; repeat around to create layered petals. Finish and sew to felt as above.
Variations
- Bead center: Sew a 3–4 mm pearl to the center for a bridal look.
- Stacked layers: Make two smaller roses and stack them slightly offset for a fuller bloom.
Finishing & care
- Because roses are three-dimensional, add a felt back and sew findings through felt rather than through yarn only — this prevents the ring or ear wire from pulling out. Hand wash and reshape as needed.
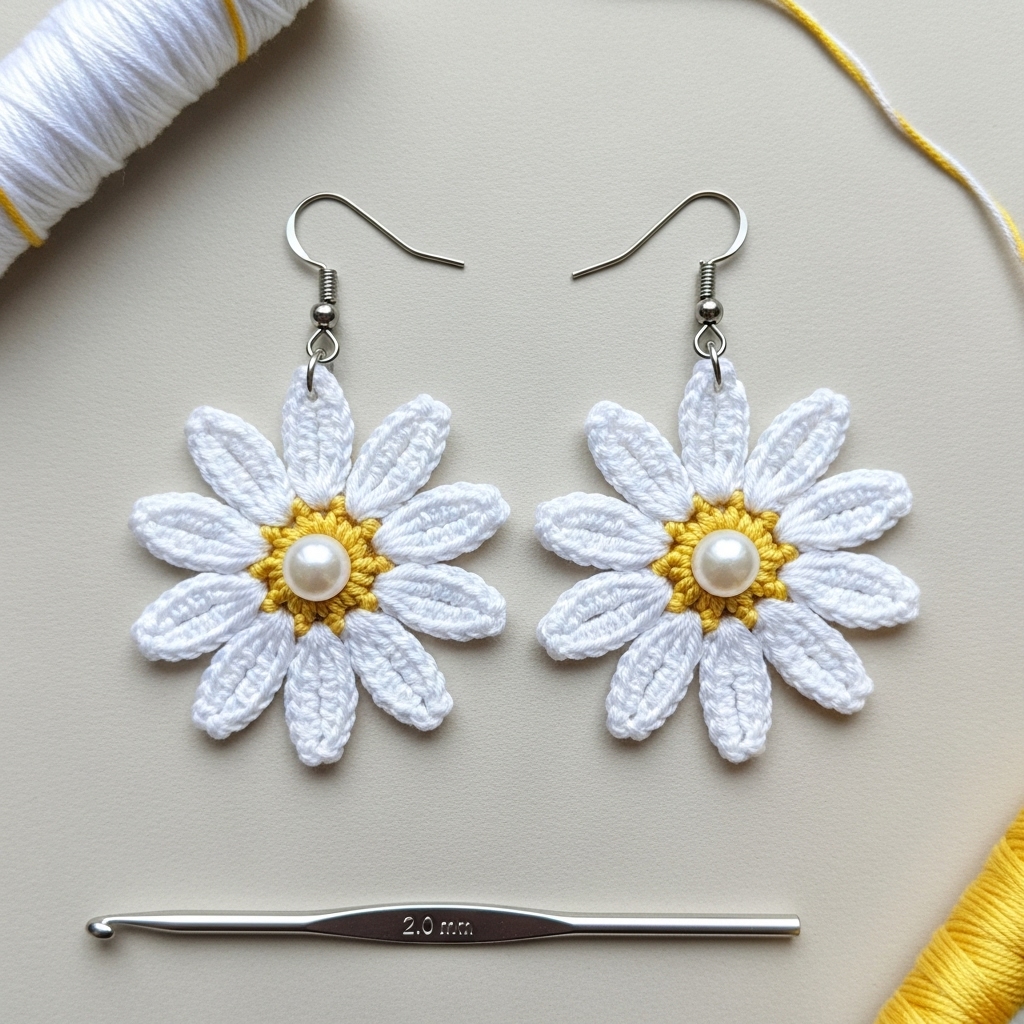
3. Crochet Daisy Floral Pearl Earrings Pattern
Skill level: Beginner–Intermediate — simple petal formation; includes bead (pearl) center technique.
Materials (pair)
- Size 10 thread (white or cream for petals) and yellow or contrasting color for center, or fingering yarn.
- Small pearls (3–4 mm) for center, or use a crocheted bead center.
- Hook: 1.75–2.25 mm (thread) or 2.5–3.0 mm (yarn).
- 2 jump rings, 2 ear wires, tapestry needle, small felt circles.
Finished size
- Approximately 1.0–1.5 in (2.5–4 cm) diameter.
Step-by-step — beaded-centered daisy (string bead first method)
Tip: easiest to sew pearl after crocheting — avoids dealing with bead-on-thread during tiny stitches.
- MR; R1: ch1, 6 sc into MR; join (6 sc). This small disc is the base for petals.
- Petal round: ch5, sl st into next st around to make arches for petals (make 6–8 petals depending on spacing). You should get 6 small arches over the 6 sc base.
- Form petals: Into each ch5 arch work sc, hdc, 3 dc, hdc, sc then sl st to base to finish the petal. Repeat for each arch to make uniform petals.
- Attach pearl: With needle and strong thread, stitch pearl into the center. Sew through pearl at least 3 times and knot securely on backside. Add a few small reinforcement stitches through the motif center to hold bead firmly.
- Backing & findings: Cut a tiny felt circle and sew to the back to hide knots. Sew a small thread loop or stitch a tiny jump ring through the top of the felt to attach an ear wire.
Alternative — bead strung on thread method
- If you prefer to incorporate the bead while crocheting, thread the pearl on the working thread before beginning. When you reach the center (after R1), slide bead into place and crochet around it (this is fiddly on tiny thread and usually not necessary for small pearls).
Variations
- Double petal daisy: repeat the petal round with a slightly offset round to make denser daisies.
- Seed bead accents: sew tiny seed beads at the tip of each petal for sparkle.
Finishing & care
- Block gently if needed. Hand wash only if pearls are secured well; avoid soaking pearls — wipe clean with damp cloth.
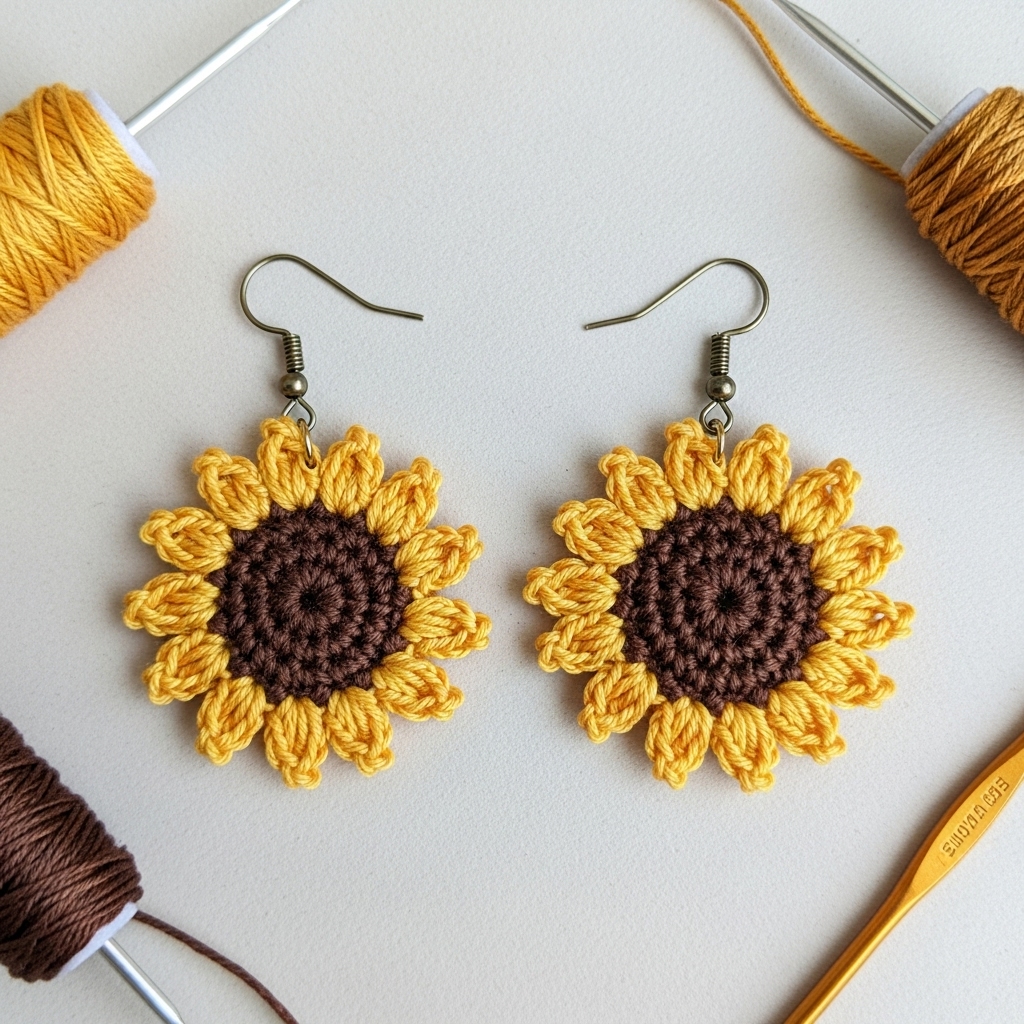
4. Crochet Micro Sunflower Earrings Pattern
Skill level: Intermediate — small colorwork and short petals, needs neat tension.
Materials (pair)
- Size 10 thread or fingering yarn in brown (center) and golden yellow (petals).
- Hook: 1.75–2.5 mm (thread) or 2.5–3.5 mm (yarn).
- Tiny seed beads (optional) for the center texture.
- 2 jump rings, 2 ear wires, small felt circles.
Finished size
- Roughly 1–1.5 in (2.5–4 cm) diameter.
Step-by-step — layered sunflower
- Center (brown): MR; R1: ch1, 6 sc into MR; sl st to join (6). R2: inc around (12). R3: sc 1, inc around (18). This forms a small dense disk for the sunflower center.
- Add seed texture (optional): With a contrasting darker brown, sew a few seed beads randomly into the center, or use french knots if using embroidery thread.
- Petal round (yellow): Join yellow in any st on R3. In next st: ch6, sl st into same st or the next st to form a petal loop — repeat for each stitch around to form multiple loops. For 18 sts you’d make 9–12 petals depending on desired petal width (space them every 1–2 stitches).
- Form petals: Into each ch6 loop work sc, hdc, 3 dc, hdc, sc (or smaller: sc, 3 dc, sc) to make compact petals. Repeat for all loops.
- Finish: Round of sc around petal bases to tidy. Mount on felt circle, sew through felt and motif to secure. Attach jump ring and ear wire.
Variations
- Make a slightly larger sunflower by increasing the center to 24 sts and spacing petals accordingly.
- Add a tiny green leaf or short drop bead for a vine effect.
Finishing & care
- Because sunflower petals can be slightly protruding, block petals with gentle shaping and use a light mist of spray starch if you want them crisp — or leave soft for a natural look. Hand wash.
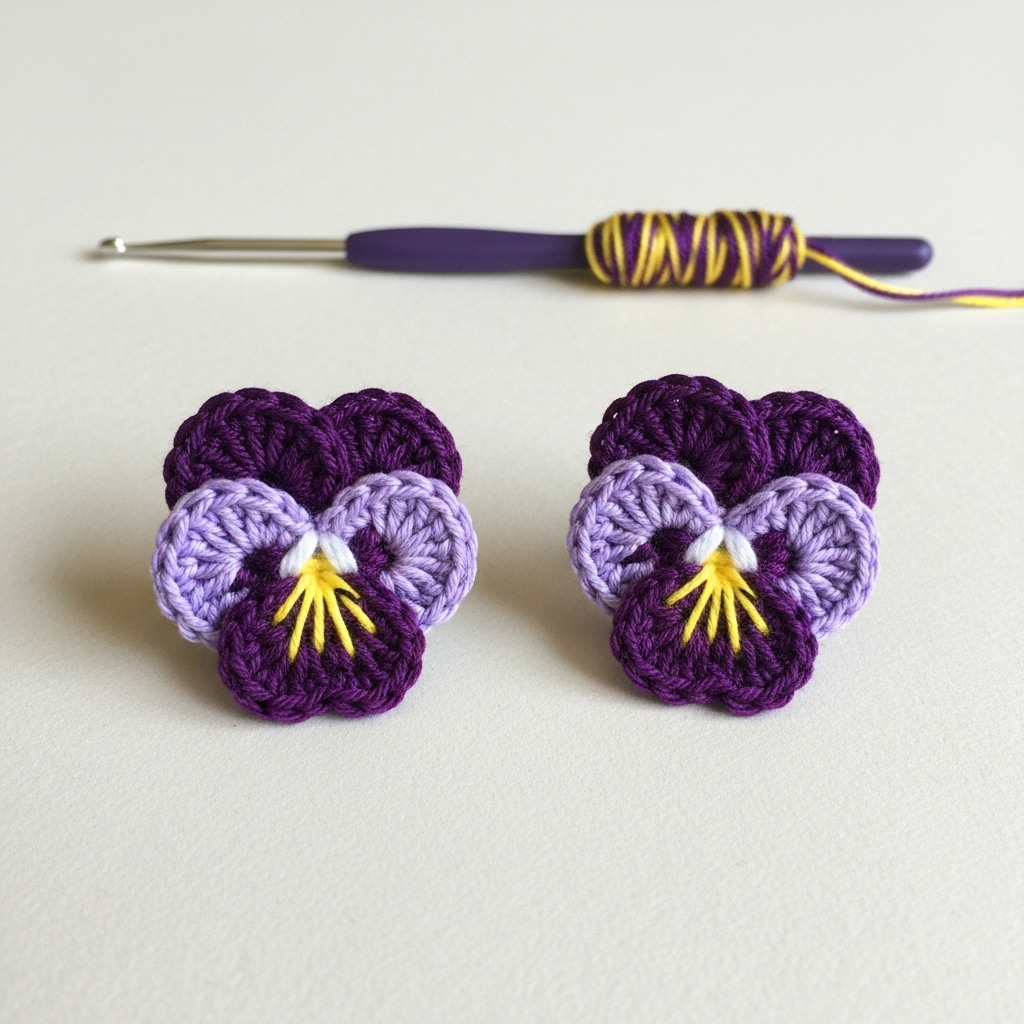
5. Crochet Pansy Earrings Pattern
Skill level: Intermediate — pansy has overlapping petals and a two- or three-color finish for depth.
Materials (pair)
- Size 10 thread or fingering yarn in three shades: deep purple, light purple, yellow (center).
- Hook: 1.75–2.5 mm or 2.5–3.5 mm for yarn.
- 2 ear wires, 2 small jump rings, small felt circles and tapestry needle.
Finished size
- About 1.25–1.75 in (3–4.5 cm) across.
Step-by-step — layered pansy motif
- Foundation (tiny disk): MR; R1: ch1, 6 sc into MR; join (6).
- Base petals (dark purple): R2: ch3, dc in same st, ch1, skip 1 st, (dc3) in next st, ch1 repeat around to create 3 rounded lobes (position for the pansy’s 3-lobed lower half). Join.
- Upper petals (light purple): Attach light purple in a chain-2 space between lower lobes. Work sc, hdc, 5 dc, hdc, sc to make larger upper petals (two petals opposite the lower single lobe). These two prominent upper petals create the pansy silhouette.
- Yellow throat & vein: With yellow embroidery thread, stitch a small star-shaped center (sew a tiny knot or stitch through center) and add a few stitched veins down the middle petal with long running threads (3–4 stitches) to mimic pansy markings.
- Edge there: Work a tidy sc round in dark purple under the petals to tidy and balance.
- Backing & findings: Attach to felt, sew through several times for solidity. Add jump ring through felt and attach ear wire.
Variations
- Use variegated thread for naturalistic color transitions.
- Add a little sequin behind the yellow center for a subtle sparkle.
Finishing & care
- Block gently to keep delicate petal shapes. Hand wash recommended; reshape when damp.
conclusion
Final finishing checklist (applies to all patterns)
- Weave ends securely: Use tapestry needle and bury tails through multiple plies or stitch lines before trimming.
- Back with felt: For comfort and durability, stitch a small felt circle to the back of each motif and sew the jump ring/loop through felt and the crochet fabric, not through fiber alone. This prevents pull-out.
- Secure beads: Sew pearls and beads with strong thread, multiple passes, and tie/finish on the felt side, not on the visible side.
- Use hypoallergenic findings: If you or your audience has metal sensitivities, use sterling silver, titanium, niobium, or gold-plated ear wires and state the metal in your listing.
Stiffening & shaping (optional)
- To keep motifs flat and crisp, you can lightly stiffen with diluted PVA (white craft glue) or a commercial fabric stiffener. Test on a scrap first: dilute 1 part PVA to 1–2 parts water, brush lightly, pin to shape and let dry. For delicate beads or pearls, avoid thorough soaking — use minimal application on the back only.
Care instructions to include with gifts / listings
- “Spot clean or hand wash gently in cool water with mild soap; reshape while damp and dry flat. Avoid heavy rubbing on metallic findings. For backed pieces with felt: hand wash only.”
- If you used certain metals: “Ear wires: sterling silver (92.5% Ag) — may tarnish; wipe with soft cloth. For sensitive ears consider Niobium or Titanium.”
Photography & presentation tips
- Show scale: include a photo of one earring next to a quarter or a ruler and one worn (on an ear or earring stand) to show size and drape.
- Close-ups: shoot macro close-ups of the stitch texture and bead detail. Natural, diffused light and neutral backgrounds show color and detail best.
- Bundles and themed sets: present pairs in small kraft boxes with a care tag and a little cotton bag. For a Valentine’s set, pair Heart + Rose; for summer sets, Daisy + Sunflower.
Selling & gifting advice
- Offer option to swap findings so buyers can choose hypoallergenic metals.
- Provide a short “Materials & Care” card in each package listing fiber, hook, and care recommendations.
- Price mindfully: factor in time for blocking, backing, bead sewing, and secure finishing.