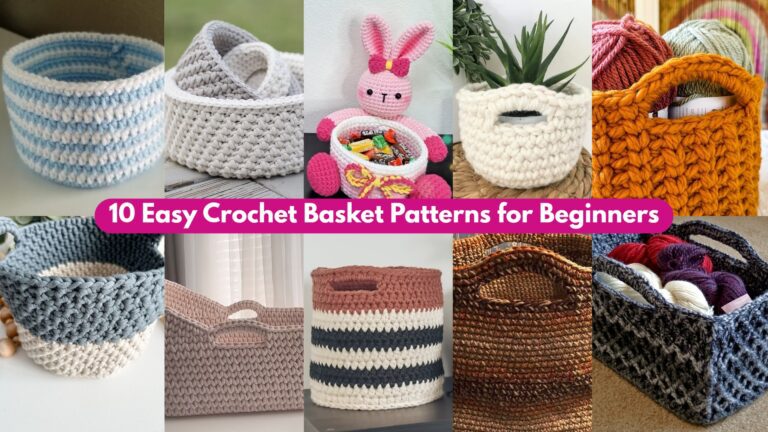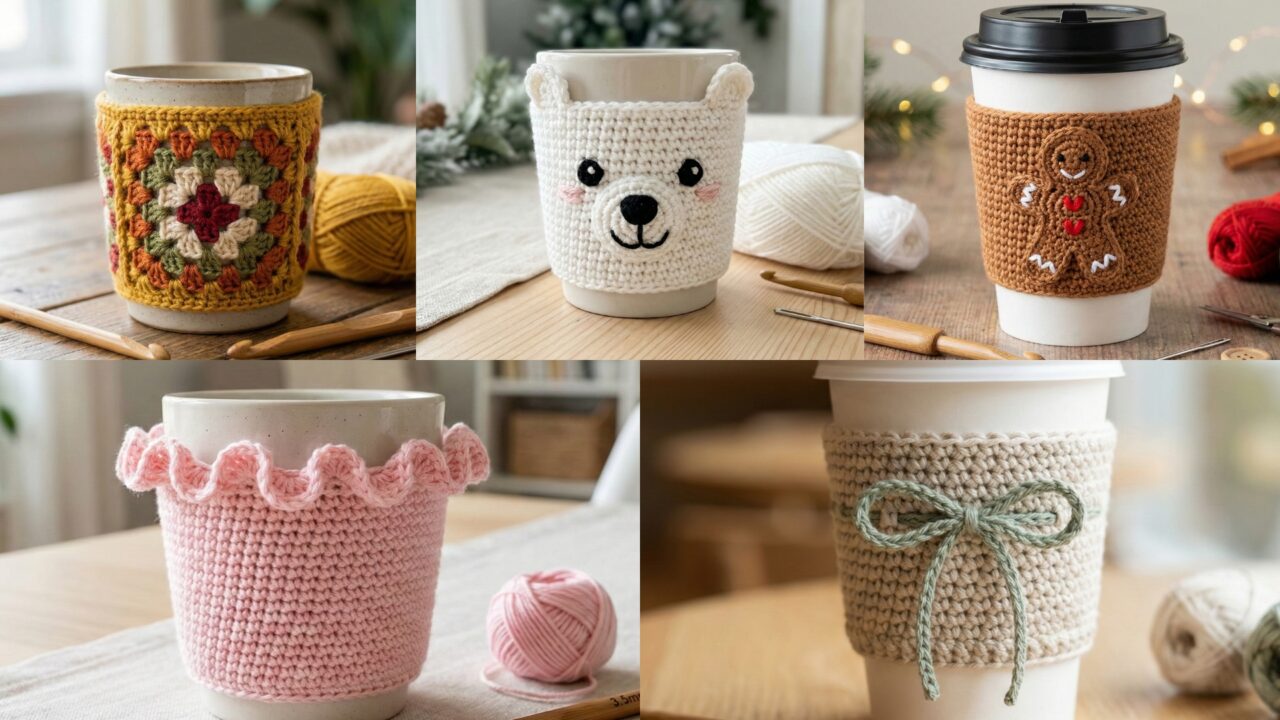
Cup sleeves (cozy sleeves, cup cozies) are fast, functional, and a perfect way to add personality to your warm drinks. They keep hands comfortable, protect surfaces from heat or condensation, and make excellent small gifts or shop items. Below you’ll find a single practical introduction (materials, sizing, closures, safety, abbreviations), then five full patterns with long, step-by-step instructions: Bow, Gingerbread Man, Granny Square, Polar Bear, and Ruffle Border cup sleeves. Each pattern includes suggested yarn/hook, finished size guidance, detailed construction steps, variations, finishing and care notes, plus quick tips for photographing or selling your finished cozies.
Read the introduction first — it saves time — then jump into each pattern.
yarn, hooks, sizes, construction options, safety & abbreviations
Basic materials & tools
- Yarn weights:
- Fingering / sport / DK (recommended) — gives a neat, flexible fabric that fits cups well. DK is a safe middle ground.
- Worsted — faster to work and warmer/thicker; best for cold drinks or insulated travel cups with thicker walls.
- Cotton / cotton blends — excellent for drink sleeves because cotton resists heat and it’s machine washable; mercerized cotton has a crisp finish.
- Wool / wool blends — very warm and snug; choose superwash if you want machine care.
- Hooks: 3.0–4.5 mm is typical depending on yarn weight. Use a slightly smaller hook than recommended if you want denser fabric with less stretch.
- Notions: tapestry needle, stitch marker, small amount of interfacing/felt (optional for lining), button or snap for closures (optional), sewing thread, scissors, measuring tape, stitch holder or scrap yarn.
Typical cup sizes & finished dimensions
- Standard paper cup (hot coffee): 12–16 oz; cup diameter near top ≈ 3.25 in (8.3 cm) and height ≈ 4–5 in.
- Travel tumbler / insulated mug: heights vary widely; many are 6–8 in tall and narrower at base.
- Common cozy dimensions: Width (circumference) — 8.5–10 in for most cups; Height — 2.5–4 in depending on how much coverage you want.
How to measure a cup
- Measure the cup circumference at the widest point you want the cozy to sit (usually the middle).
- Subtract about 0.25–0.5 in for snug fit if using yarn with little elasticity; add 0.25–0.5 in for looser fit or stretchy yarn.
- To compute stitches: make a 2–4 in swatch in your chosen stitch and hook, count stitches per inch (spi) and multiply by desired circumference (digit-by-digit if needed).
Construction approaches (choose one)
- Worked in the round (tube): fast, seam-free, ideal for snug fit. Work single/double crochet in joined rounds or spiral rounds.
- Worked flat & seamed: work a rectangular panel and seam ends — good for motif placement and lining.
- Motif-based: join granny squares or appliqués into a sleeve — decorative and great for scrap yarn.
- Wrap style with closure: a short rectangular cozy with a button or snap so it’s removable and adjustable (works well for thicker cups and gifting).
Closures & hardware
- Button + loop: classic and simple; button either crochet (tiny) or a small wood/acrylic button.
- Snap or magnetic clasp: secure and low-profile — use tiny sew-on snaps or small magnetic closures (ensure magnets are encased and safe for gift recipients).
- Elastic loop / toggle: practical and conforming.
Safety notes
- If you line a cozy with felt or interfacing, do not use melted glue that could transfer to a hot cup. Stitch lining in place.
- If you attach any hard embellishment (buttons, beads), be mindful when the cozy will be used by children — avoid small parts for toddlers.
- Avoid materials that shed fibers onto drink rims (keep the top edge tidy and short where it meets the cup rim).
Abbreviations (US)
- ch — chain
- sc — single crochet
- hdc — half double crochet
- dc — double crochet
- tr — treble crochet
- sl st — slip stitch
- st(s) — stitch(es)
- sk — skip
- inc — increase (2 sc in same st)
- dec — decrease (sc2tog)
- BLO / FLO — back loop only / front loop only
- MR — magic ring
1. Crochet Bow Cup Sleeve Pattern
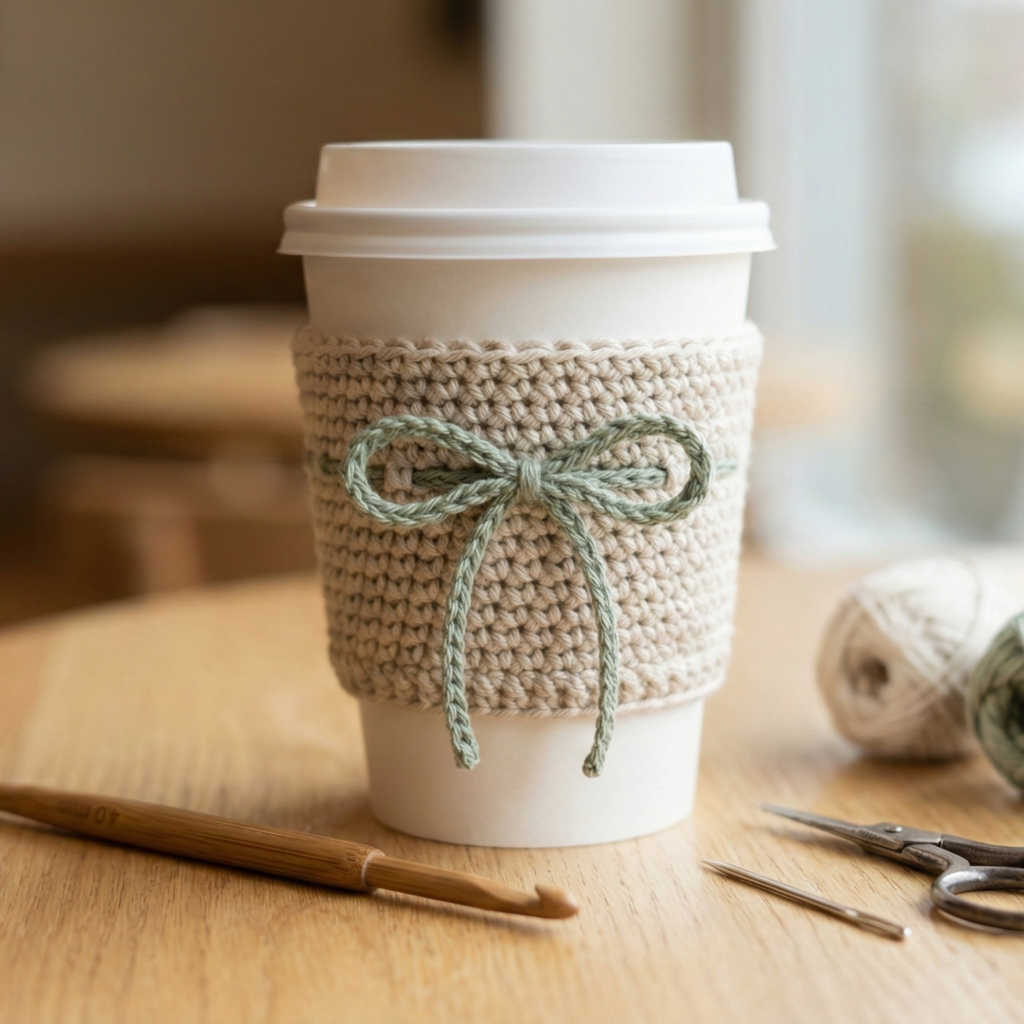
Style: Elegant, feminine sleeve with a removable bow accent. The bow adds charm and can be made in contrasting color for a pop.
Skill level: Confident beginner
Materials
- DK yarn: main color (sleeve) ~30–50 yd; contrast color for bow ~10–15 yd. Cotton or cotton-blend recommended.
- Hook: 3.5–4.0 mm.
- Small button or snap (optional) for bow fastening.
- Tapestry needle, scissors, small felt piece (optional for inside finish).
Finished size example (fits 12–16 oz cup)
- Circumference (unstretched): ~9.25 in → adjust per your swatch.
- Height: 3 in (covers most paper coffee cups’ grip area).
Gauge example
- Example swatch: 4 sc = 1 in (adjust).
Step-by-step
A. Measure & foundation
- Swatch in sc to determine stitches per inch. Suppose you get 4 sc/in and you want a finished circumference of 9.25 in → 9.25 × 4 = 37 stitches. Choose 36 or 38 as an even number if your pattern requires multiples — 38 is fine for even coverage. For this pattern use a multiple of 2.
B. Work the sleeve (tube method)
2. Chain 38, join with sl st to form a ring being careful not to twist. Place a stitch marker at the first stitch.
3. Round 1: ch1 (does not count as st), sc in each ch around. Join with sl st to first sc. (38 sc)
4. Round 2–8 (or until desired height minus 1/2 in): sc around, join each round. Keep tension even. If you prefer spiral rounds, omit joins and use marker moving up 1 st each round.
5. Optional texture: For a subtle rib, work 3 rounds of sc in BLO — this gives a neat inner rib that grips the cup.
C. Make the bow (removable)
6. Bow base: With contrast yarn, ch 22 (or adjust to bow width desired). Row 1: sc across (21 sc). Row 2–4: sc across. Fasten off and leave long tail for wrapping.
7. Bow center band: ch 6, sl st to the first chain to make a small loop, sc around the small loop 2 rounds to make a band, fasten off leaving tail.
8. Assembly of bow: Fold the long rectangle accordion-style so it forms a bow shape; pinch middle and wrap with the center band (wrap center band around both bow and sleeve to position; stitch the ends of the band together on the backside). For a removable bow use a small snap on the band ends or a tiny button and loop. To be permanently attached, stitch the center band ends under the bow onto the sleeve front with a few passes.
D. Optional lining
9. For a very neat interior or to protect yarn from stink/coffee drips, cut a felt oval slightly smaller than the sleeve’s inner area and stitch it to the inside bottom; this is optional.
E. Finishing
10. Weave in ends, trim visible tails, and block lightly if using cotton to shape.
Variations & tips
- Make the bow larger by increasing the foundation chain for a statement look.
- Make the bow in matching yarn held double for a chunkier accent.
- Add a small embroidered monogram to sleeve before attaching the bow.
Care
- Cotton DK: machine wash gentle; reshape and air dry. Remove bow before washing if it’s attached with a snap.
2. Crochet Gingerbread Man Cup Sleeve Pattern
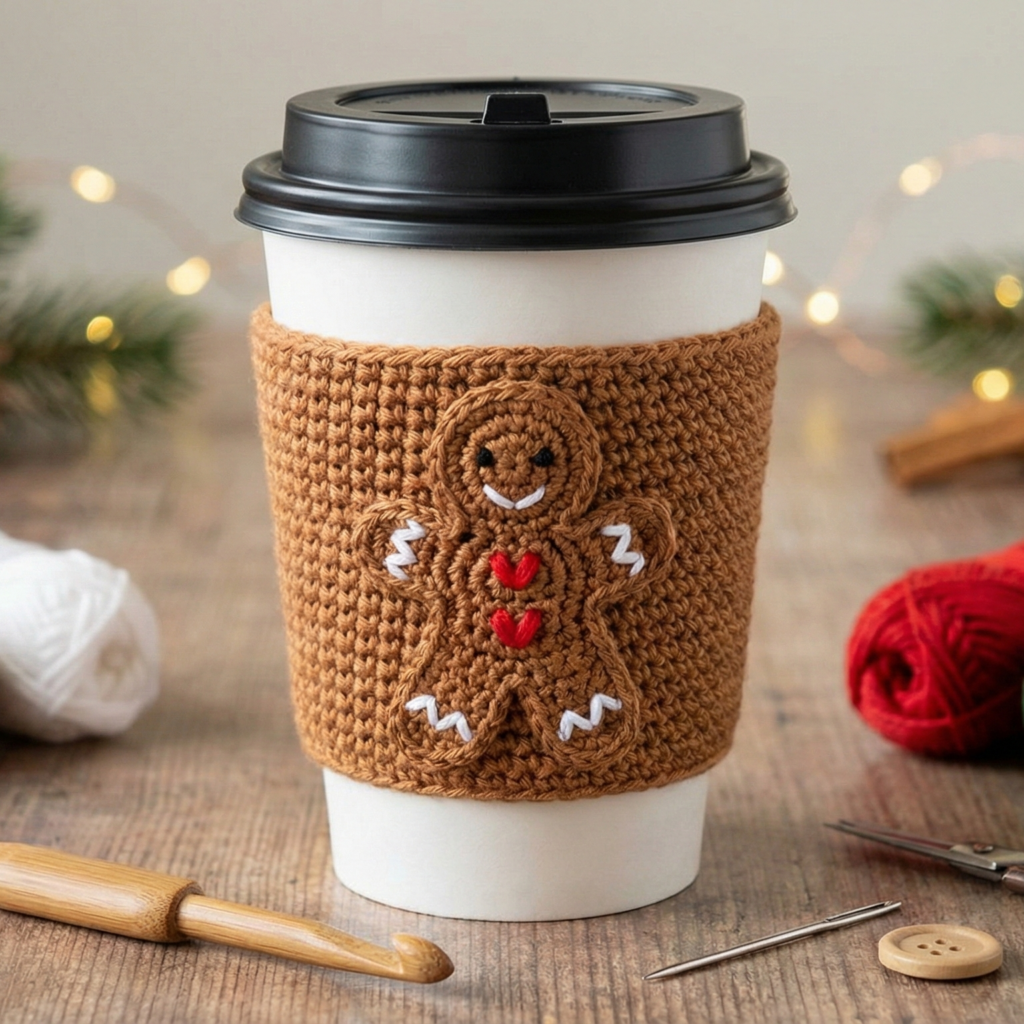
Style: Playful holiday cozy with a little gingerbread man appliqué sewn to the front. Great for seasonal markets and gifts.
Skill level: Intermediate (small amigurumi applique and secure sewing)
Materials
- DK yarn: main sleeve color (e.g., warm brown) ~40–60 yd, small amounts of white, red, green for icing and accents. Cotton or acrylic works well.
- Hook: 3.5–4.0 mm.
- Small felt pieces for eyes (optional) or embroidery floss for facial details.
- Tapestry needle, stitch marker, small snap or button for closure (optional).
Finished size example
- Circumference: ~9.25 in; Height: 3 in. Appliqué gingerbread man approx 2.0–2.5 in tall.
Step-by-step
A. Make the sleeve (worked flat & seamed for easier applique placement)
- Swatch and compute stitch count as in Pattern 1. Suppose 38 sc is your count. Chain 38 + 1 for turning.
- Row 1: sc in 2nd ch from hook across (38 sc). Turn.
- Row 2–9: sc across (or work hdc rows for thicker sleeve) until piece height reaches approx 3 in. Fasten off leaving long tail.
- Fold the rectangle with RS facing out and seam short edges together with mattress stitch or whipstitch to make a tube.
B. Gingerbread man appliqué
(Simplified flat gingerbread applique — small and worked flat)
5. With brown yarn, ch 7. Row1: sc in 2nd ch from hook and across (6 sc). Row2: ch1, hdc across, Row3: sc across. Shape the head: Row4: dec at both ends across until you have 4 sts left, then fasten off leaving tail. Make two small arms: ch 6, sc across, fasten off. Make two legs the same. Assemble the gingerbread shape by sewing arms and legs to the body base; stitch the head narrowed piece on top. Alternatively, make a tiny amigurumi gingerbread man worked in rounds for a slightly raised applique: MR; 6 sc etc., shaping head and body.
- Embellish with white icing lines (surface embroidery or tiny sc decorative lines along arms, legs). Sew two small French knots for eyes with black floss or attach tiny felt dots. Add a small red or green heart button (sewn through) on the chest — secure well if the cozy will be used by children.
C. Attachment
7. Position the gingerbread applique on the sleeve front (center it while the sleeve is flat). Use pins to hold in place. Sew through the applique base and into the sleeve fabric with multiple passes to secure. Reinforce with a small felt backing on the inside if needed to distribute stress.
D. Closure (optional)
8. If you made the tube by seaming, you can leave as-is. If you want the cozy to be adjustable, instead seam only part of the length and add a button and loop closure to the overlapped ends.
E. Finishing
9. Weave in ends and trim. Block very lightly to set shape.
Variations & tips
- Make a set in different holiday colors and swap appliqués (tree, snowflake, candy cane).
- For durability, embroider facial features and avoid small glued beads for children’s versions.
Care
- Machine wash gentle for acrylic/cotton blends; hand wash for wools. Remove appliqué or flatten before laundering if it’s delicate.
3. Crochet Granny Square Cup Sleeve Pattern
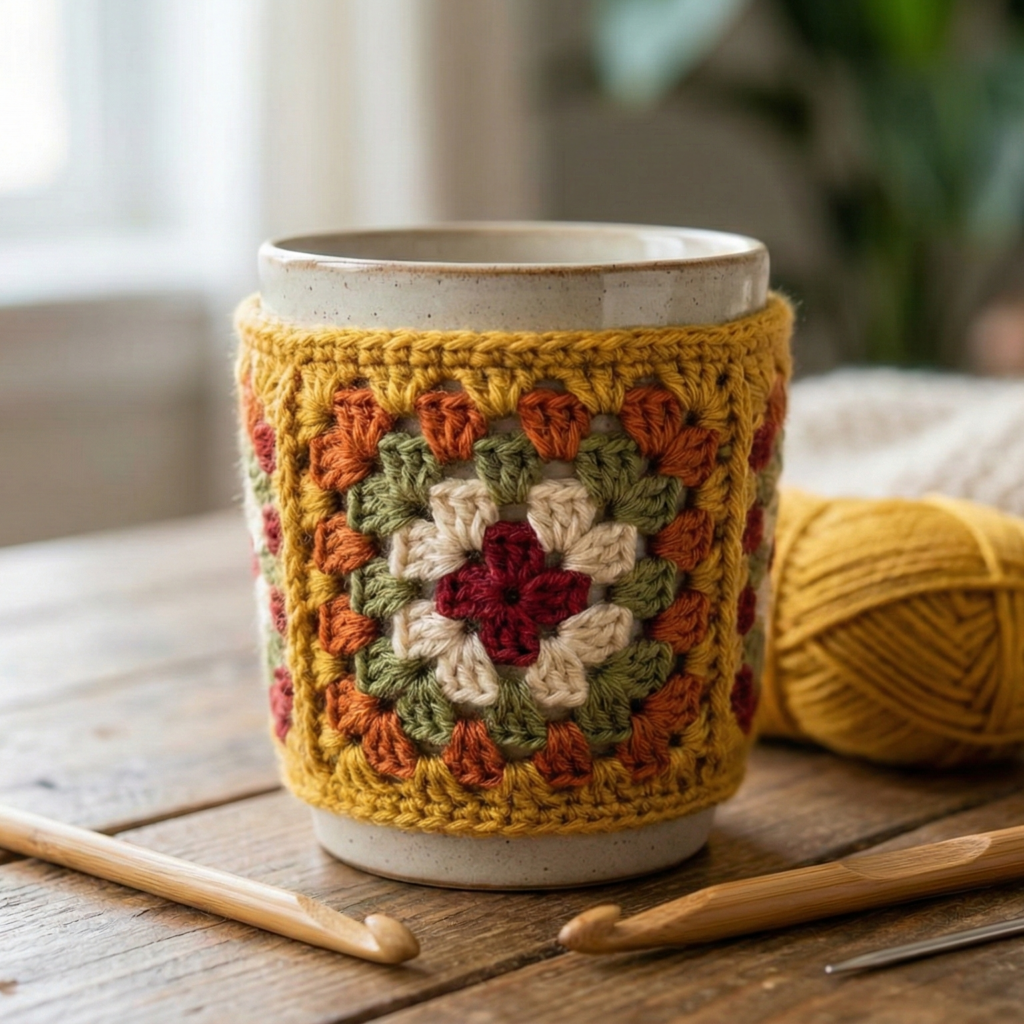
Style: Graphic, retro cozy using tiny granny squares joined into a wrap-style sleeve. Great scrap-busting and customizable.
Skill level: Confident beginner
Materials
- DK or worsted cotton/acrylic scraps — about 30–80 yd total depending on square count and size.
- Hook: 3.5–4.5 mm depending on yarn.
- Tapestry needle, small snap or button for closure (if making wrap-style).
Finished size example
- Make a band of granny squares in two rows (3 across × 2 down) to create a 3″ tall × 9″ circumference sleeve; adjust number of squares for other sizes.
Step-by-step
A. Make tiny granny squares
- Classic mini granny square: MR; Round 1: ch3, 2 dc, ch2, 3 dc, ch2 ×3; join. Fasten off. For a 1.25–1.5 in finished square use 2 rounds (add a second round of (3 dc, ch1) along sides and (3 dc, ch2, 3 dc) in corners). Make the number of squares necessary: e.g., 6–8 small squares for a snug cozy.
B. Block squares
2. Lightly block each square to the same size to make seaming neat — pin to shape and mist with water or steam depending on fiber.
C. Join squares
3. Layout the squares in your pattern (alternating colors). Join squares using join-as-you-go (JAYG) or whipstitch from WS for an invisible seam. If you prefer no seam, join with slip stitch for a raised join line.
D. Make tube
4. Once a rectangle is formed (e.g., 3 squares across × 2 down), seam short ends together to form a tube that fits the cup circumference. If you want an adjustable wrap instead, do not seam fully; instead stitch only a short section and add buttons/snaps.
E. Optional lining or reinforcement
5. Add a narrow sc border around the top and bottom of the assembled tube to tidy edges. Sew a felt circle inside the bottom for extra insulation (optional).
F. Finishing & fastening
6. If you prefer a removable cozy, attach tiny button loops or a snap: on a rectangle wrap-style cozy, sew a snap at each short end so it can be opened and closed. For permanent tube, skip closures.
Variations & tips
- Use 2 rounds for larger squares and fewer joins for a chunkier vintage look.
- Create a mismatched “boho” effect by varying colors and scales of squares.
Care
- Cotton squares: machine washable; wool squares: hand wash. Always weave in ends well to prevent unraveling at seams.
4. Crochet Polar Bear Cup Sleeve Pattern
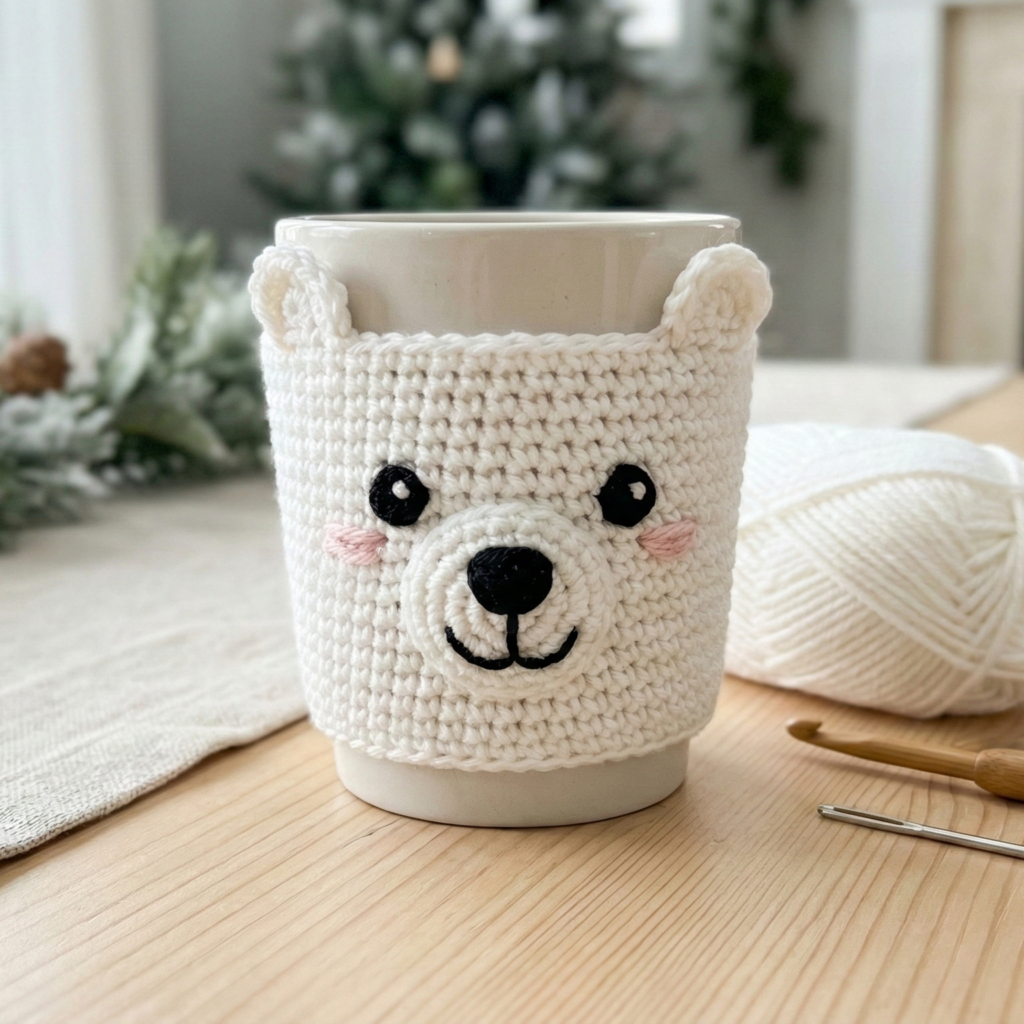
Style: Cute animal cozy with a polar bear face appliqué and ear tabs — adorable for winter or gift markets.
Skill level: Intermediate (appliqué shaping & secure sewing)
Materials
- DK yarn: white (main sleeve) ~40–60 yd; black small amount for eyes/nose; pink/peach small amount for inside ear or blush. Cotton or acrylic recommended for washability.
- Hook: 3.5–4.0 mm.
- Felt for backing (optional), tapestry needle, small buttons for eyes (or embroider eyes for child-safe version).
Finished size example
- Circumference ~9 in; Height ~3 in. Polar bear face about 2.25–2.5 in diameter.
Step-by-step
A. Make the sleeve (tube method for neatness)
- Determine stitch count (e.g., 38 sc) and work tube: ch 38, join in circle. Rounds: sc each st for 8–10 rounds until 3 in height. Consider working the first round (inside edge) in BLO for inner grip.
B. Make polar bear face applique
2. Face (white): MR; R1: 6 sc in MR (6). R2: inc around (12). R3: sc 1, inc around (18). R4: sc around (18). Fasten off leaving long tail for sewing. Flatten and shape to a small disk.
- Ears (make 2): ch 6; sc in 2nd ch from hook and across (5 sc), Row2: sc across 5, shape top with dec row if needed; fasten off. Or make small semicircles from MR (MR; 6 sc; sl st in next; fold and sew to create ear cup). Lightly stuff ears if you want a three-dimensional effect.
- Nose & muzzle: small oval — ch 5, sc 4 across, 2 rows, seam ends and sew to face center. Embroider nose in black on the muzzle.
- Eyes: embroider small ovals or use small black safety eyes (3–4 mm) inserted before closing the face seam; if using safety eyes, ensure they are secure and not given to small children.
C. Attach features
6. Position face on sleeve front and sew through face base into sleeve fabric with multiple passes; stitch ears onto top edge so they slightly protrude above the sleeve top (position ears so the top of the ear is visible above the cup rim when worn). Sew muzzle and nose over center. Embroider mouth, blush cheeks with pale pink yarn or embroidery floss.
D. Optional lining
7. Sew a small felt circle behind the face on the inside of the sleeve to support the applique and to prevent bits from showing through.
E. Finishing
8. Weave in all tails. Block lightly to flatten face if needed.
Variations & tips
- Make themed sets — polar bear with pom-pom snowflake on the reverse.
- For toddler-safe versions, embroider all features and avoid attachable beads or safety eyes.
Care
- Acrylic or cotton: machine wash gentle and lay flat to dry. Wool: hand wash. Remove sleeve before microwaving cups or using very hot tumblers.
5. Crochet Ruffle Border Cup Sleeve Pattern
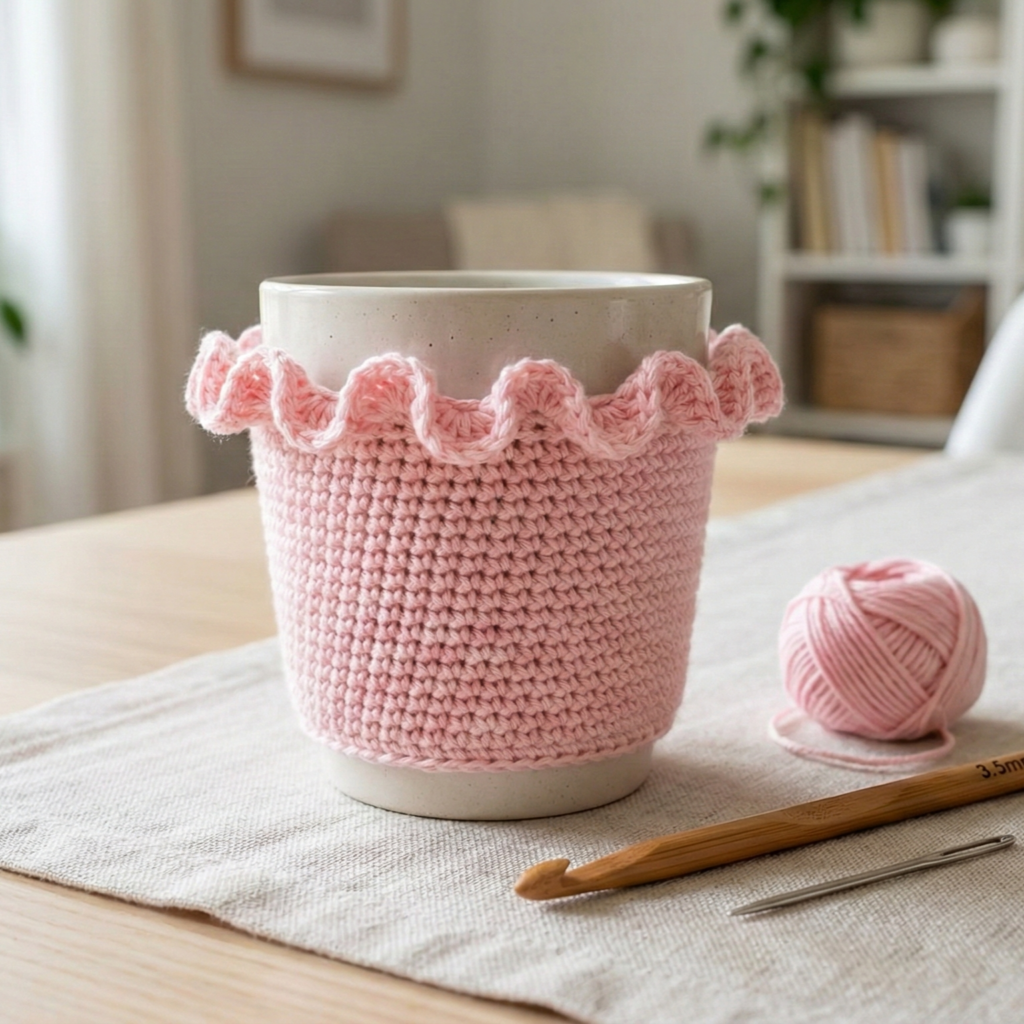
Style: Feminine, decorative cozy with a ruffled border along the top edge. The ruffle adds a flouncy finish while the main body remains simple and practical.
Skill level: Confident beginner
Materials
- DK yarn: main color ~35–60 yd; optional contrast for ruffle ~10–20 yd. Cotton or cotton blend is ideal for crisp ruffles.
- Hook: 3.5–4.0 mm.
- Tapestry needle.
Finished size example
- Circumference: ~9 in; Height main body 2.25 in + ruffle 0.75–1.25 in.
Step-by-step
A. Make the sleeve body
- Compute stitch count then work tube or flat panel. Example: ch 38, join and sc for 8–10 rounds to reach 2.25 in height. Keep edge neat (work first round in BLO if you want an inner grip).
B. Add ruffle border (worked on top edge)
2. Join contrast color at top edge with sl st to first stitch. Ruffle row 1: sc in next st, ch3, 2 dc in next st repeat around to make base loops for ruffle; join. (This makes small loops every 2 stitches.)
3. Ruffle row 2 (build ruffle): In each ch3 space work (sc, hdc, 3 dc, hdc, sc) to form a full petal-like ruffle. Fasten off and weave in ends. For a fuller ruffle, repeat row 2 in the spaces (i.e., work a second layer of shells offset between first layer shells).
C. Alternative quick ruffle (one-row)
4. If you prefer a quick ruffle in same color: attach yarn at top edge and work 5 dc in each st across — this will cause immediate ruffle due to multiple dc per base stitch.
D. Neaten interior
5. To prevent ruffle raw edges from rubbing on hands, whipstitch a small seam along the inside top edge with matching yarn or add a narrow inner sc round in main color.
E. Finishing
6. Weave ends and trim. Block lightly to set ruffle curves if needed (pin gently while damp).
Variations & tips
- Make a contrasting ruffle for pop or same-color ruffle for a subtle upscale look.
- Add a narrow row of beads at the base of the ruffle for sparkle (pre-string beads on yarn if using a thin thread).
Care
- Cotton ruffles maintain shape well after washing; reshape after laundering. For wool ruffles avoid heat.
Conclusion
You now have five complete and varied cup sleeve designs that range from whimsical to elegant. A few professional tips to finish strong and make these patterns blog-ready:
Finishing quality
- Weave ends carefully: use a tapestry needle to bury yarn tails through several plies and stitch lines so they don’t pop out in laundering.
- Reinforce appliqués: sew appliqués through the cozy fabric and optionally through a small felt backing to distribute stress.
- Test fit: place the finished sleeve on the target cup and test for snugness. If it slides, reduce circumference slightly in your next version or add an interior grip row in BLO. If too tight, add 1–2 stitches per inch or use a softer, stretchier yarn.
Lining & hygiene
- If you plan to sell or gift sleeves for repeated use, consider offering an optional thin, washable felt lining that is stitched in (no adhesive) to improve durability and cleanliness. This also hides seams and gives a tidy interior.
Photography suggestions
- Show a set of photo shots for each pattern: flat lay (full cozy), on-cup scale shot (with a neutral cup), detail shot (appliqué/ribbon/ripple), and lifestyle shot (cozy on a table beside a book/mug). Natural light, shallow depth of field for detail, and neutral backgrounds work best.
- For Pinterest, create a vertical 9:16 image with a bold title overlay and a closeup image of the most charming feature (bow, bear face, ruffle).
Selling & gifting
- Offer multi-packs with themes (holiday set: gingerbread + polar bear + ruffle) or mix-and-match color options. Add a small custom tag with yarn content and care instructions. For markets, display on standardized cups so customers can see the fit.
Care & labels
- Provide clear care instructions in your listing or gift tag. Example: “Cotton cozy: machine wash gentle, lay flat to dry. Remove prior to microwaving or use with insulated sleeve only.”