Crochet claw clips are one of the sweetest ways to turn a simple hair accessory into something personal, pretty, and handmade. They take an everyday item and give it a soft, charming makeover, which makes them perfect for quick styling, thoughtful gifts, and small items that still feel special. Because claw clips are already practical and easy to wear, adding crochet details makes them feel even more stylish without losing their usefulness.
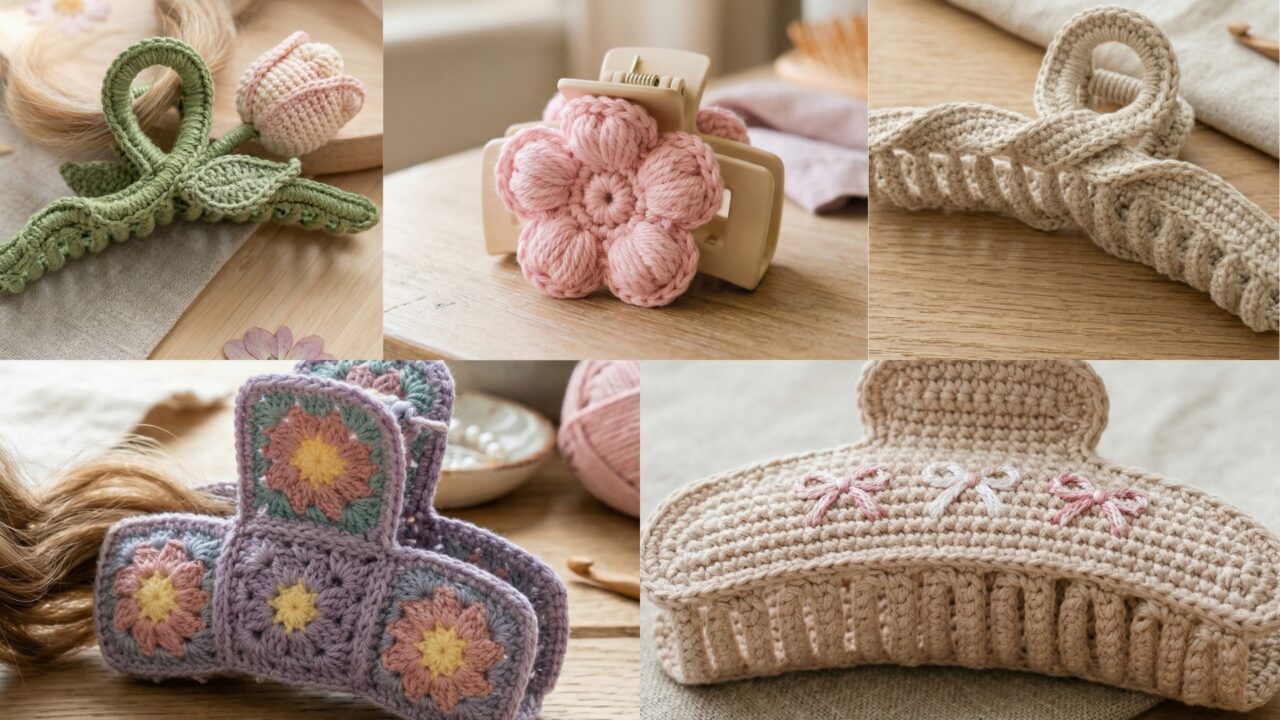
What makes crochet claw clips especially fun is how much personality you can add in such a small space. A puffy flower clip can feel sweet and feminine. A tulip flower design adds a fresh spring touch. A floral granny square clip brings in a classic handmade look. A knot claw clip feels simple and modern. A mini bow embroidered clip adds a delicate, decorative finish. Each one has its own mood, but all of them can make a simple hairstyle look more polished and playful.
In this post, you will find five cute crochet claw clip patterns with detailed step-by-step guidance, helpful notes, and practical finishing tips. Each design is written to be easy to follow while still giving you enough detail to create clips that look neat, secure, and adorable. If you love small projects that are quick to make and fun to wear, these claw clip ideas are a perfect place to start.
Quick Notes
Project type: Crochet claw clip covers and decorations
Best for: Everyday hair styling, gifts, craft fairs, and stash-busting
Skill level: Beginner to intermediate, depending on detail and attachment
Hook size: Usually 1.75 mm to 3.0 mm, depending on yarn weight
Yarn weight: Lace, fingering, crochet thread, or lightweight cotton works best
Best yarn choice: Cotton thread or lightweight cotton yarn for crisp shape and low bulk
Finished size: Small decorative clip covers and embellishments sized to fit standard claw clips
Time to complete: About 20 to 90 minutes per clip
Helpful stitches: Chain, slip stitch, single crochet, half double crochet, double crochet, magic ring, picot, puff stitch, appliqué shaping, embroidery stitches, small sewing joins
Common Materials
Most crochet claw clips can be made with a simple set of supplies.
- Lightweight yarn or crochet thread
- Small crochet hook
- Yarn needle
- Scissors
- A plain claw clip base
- Small stitch markers, if needed
- Fabric glue or strong thread, optional
- Embroidery thread for details, optional
- Small felt backing, optional
Since claw clips are small accessories that get handled often, lightweight yarn works best. Cotton thread or fine cotton yarn gives you neat detail without making the clip too bulky. It is also important to keep the crochet part secure so it stays attached to the clip during use.
1. Crochet Puffy Flower Claw Clip Pattern
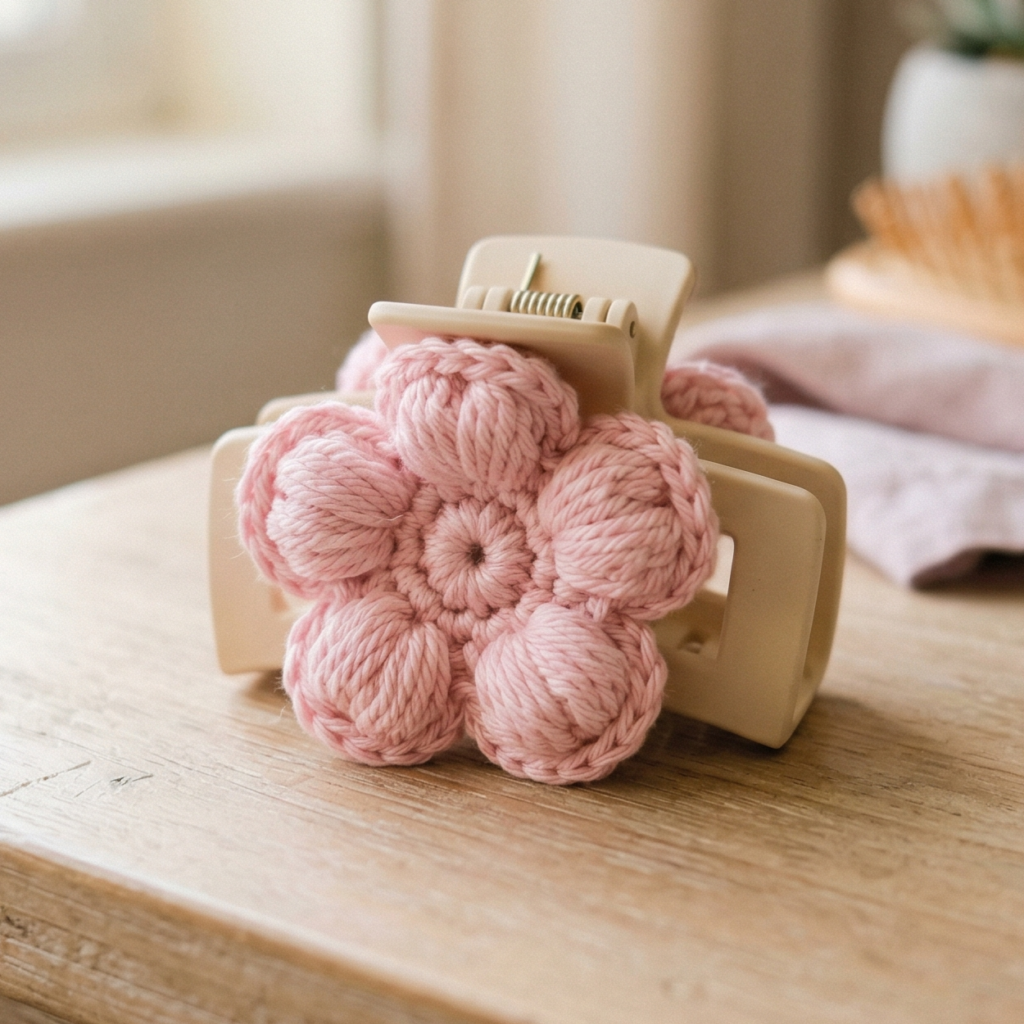
A puffy flower claw clip is soft, feminine, and instantly eye-catching. It adds a little texture and volume to the clip, which makes it look cute without being too complicated. This is a lovely pattern if you want something playful and pretty for everyday wear.
Quick Notes
Skill level: Beginner to intermediate
Finished size: Small decorative flower to fit a standard claw clip
Style: Sweet, textured, feminine, playful
Best colors: Pink, cream, lilac, peach, white, pastel blue
Materials
- Fine cotton yarn or thread
- Small crochet hook
- Yarn needle
- Scissors
- Plain claw clip
- Optional felt circle for backing
Step-by-Step Guide
Step 1: Crochet the flower center
Start with a small magic ring or tight circle for the flower center. Keep it compact so the flower stays neat and proportional. This center will anchor the puffed petals and help the design stay balanced on the clip.
A small center gives the flower a clean shape.
Step 2: Make the puffy petals
Use puff stitches or small cluster stitches to create rounded petals around the center. The petals should look full but not too large. Since the flower sits on a claw clip, it needs enough dimension to be visible while still staying lightweight.
The puff stitches are what give the flower its signature softness.
Step 3: Add an outer flower round
If you want a fuller flower, crochet a second layer of petals or a tiny border around the first set. This creates more dimension and makes the flower feel more decorative. Keep the outer layer balanced so the flower does not become too bulky.
A second layer can make the flower look extra cute.
Step 4: Shape the petals
Once the flower is complete, gently shape the petals with your fingers so they sit evenly. If a petal curls too much, adjust the tension or flatten it lightly. A neat flower shape will make the claw clip feel more polished.
Step 5: Prepare the clip base
Decide where the flower will sit on the claw clip. Usually, the center top or one side of the clip works best. If needed, add a small felt circle or backing to help the crochet piece attach more securely.
A stable base helps the flower stay in place.
Step 6: Attach the flower to the clip
Use strong thread or yarn to sew the flower onto the clip. Make sure it is centered and secure. Take a few extra stitches through the middle of the flower and around the clip base if necessary.
A firm attachment keeps the accessory wearable.
Step 7: Finish and check comfort
Trim all loose ends and make sure the clip opens and closes comfortably. The flower should not block the clip’s grip or add too much weight. Adjust the placement if needed so the clip stays practical.
Helpful Tips
This design looks especially beautiful in soft pastel shades. If you want a more elegant version, use cream or ivory. If you want a cheerful spring style, use a mix of pink and lilac. Keep the petals small so the clip remains comfortable in the hair.
2. Crochet Tulip Flower Claw Clip Pattern
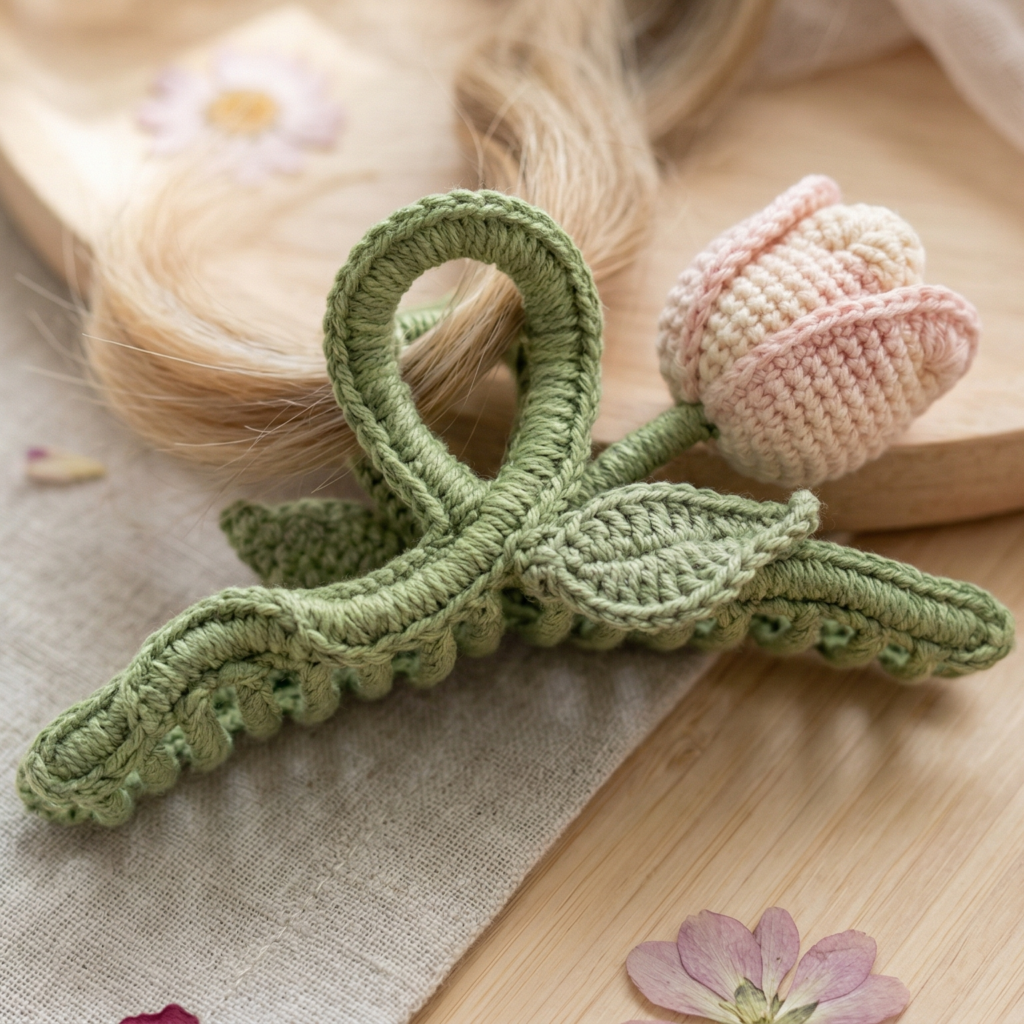
A tulip flower claw clip feels fresh, delicate, and full of spring charm. The tulip shape is simple enough for beginners but still looks elegant and sweet when worn. It is perfect if you want a floral clip that feels soft and natural rather than overly decorative.
Quick Notes
Skill level: Beginner to intermediate
Finished size: Small tulip motif for a standard claw clip
Style: Floral, fresh, gentle, spring-inspired
Best colors: Pink, red, lavender, peach, soft yellow, green
Materials
- Cotton yarn in flower and leaf colors
- Small crochet hook
- Yarn needle
- Scissors
- Plain claw clip
- Optional embroidery thread
Step-by-Step Guide
Step 1: Make the tulip bud
Begin with a small rounded or slightly elongated shape for the tulip bud. This should feel soft and upright, like the closed bloom of a tulip. Keep it compact because the clip itself is small.
The bud is the main flower shape.
Step 2: Add the petals
Crochet small petal sections around the bud or create a folded floral shape that resembles a tulip bloom. Tulips look especially pretty when the petals are smooth and slightly curved. Avoid making them too wide so they do not overpower the clip.
The petals define the flower’s identity.
Step 3: Crochet the stem
Make a short green stem using a narrow strip or tiny crochet cord. The stem should be small enough to sit neatly against the clip. Keep it simple and firm so the flower remains easy to attach.
A short stem helps the tulip stay balanced.
Step 4: Add a leaf detail
Create one small leaf and sew it near the stem. The leaf can be slightly pointed or gently curved. Even a tiny leaf adds a lot of charm and makes the tulip feel more botanical.
The leaf gives the design a natural finish.
Step 5: Position the tulip on the clip
Lay out the flower, stem, and leaf on the claw clip before sewing everything down. Make sure the composition feels balanced and the flower sits in a natural position. Tulips usually look lovely slightly angled rather than completely upright.
Good placement helps the clip look polished.
Step 6: Attach all the pieces securely
Use yarn or thread to sew the flower and leaf firmly onto the clip. Make sure the stitches are hidden as much as possible. This keeps the clip neat and comfortable to wear.
Strong stitching is especially important for small accessories.
Step 7: Shape and trim
Once attached, gently adjust the petals so the tulip sits neatly. Trim any loose ends and check that the clip can still open and close properly.
Helpful Tips
Tulip clips look especially lovely in spring colors like soft pink and green. If you want a more romantic look, use blush and cream. If you want a fresh modern style, keep the flower simple and clean with just one leaf detail.
3. Crochet Floral Granny Square Claw Clip Pattern
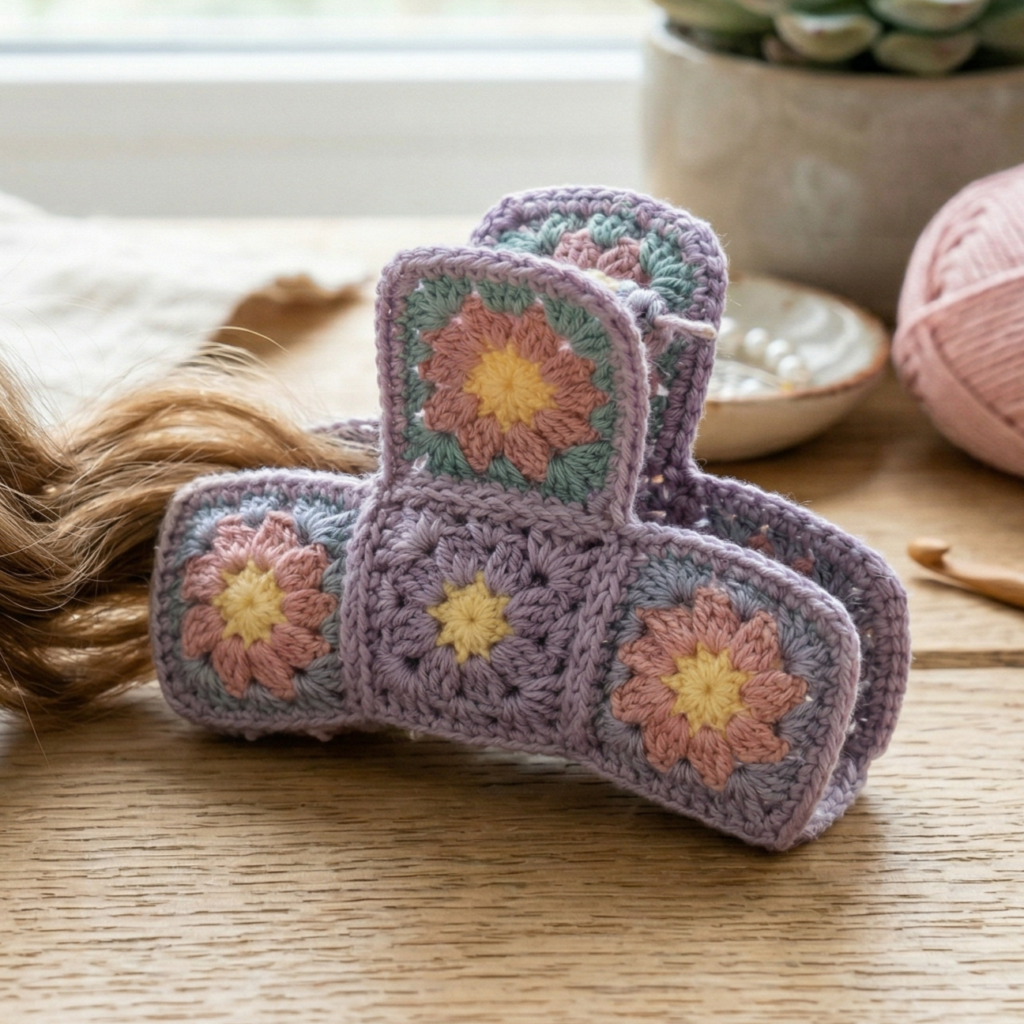
A floral granny square claw clip combines a classic crochet motif with a fun modern accessory. It brings a handmade, nostalgic feel to your hair styling and is a wonderful way to use tiny motifs in a practical way. The granny square can be made very small so it fits neatly on the clip.
Quick Notes
Skill level: Beginner
Finished size: Mini granny square for a claw clip
Style: Retro, handmade, colorful, charming
Best colors: Cream, yellow, pink, teal, lavender, soft multicolor combinations
Materials
- Fine cotton yarn in several colors
- Small crochet hook
- Yarn needle
- Scissors
- Plain claw clip
- Optional felt backing
Step-by-Step Guide
Step 1: Crochet the flower center
Start with a tiny center round in a bright or contrasting color. This is what gives the granny square its floral look. Keep it compact so the motif remains small and easy to wear.
A small center keeps the motif delicate.
Step 2: Build the square rounds
Add one or two rounds around the center to form the granny square shape. Use small chain spaces and clusters to create the classic square corners. Since the piece is tiny, do not make it too large or it will cover the clip too much.
The square shape gives the clip a retro charm.
Step 3: Add floral colors
Use different colors in the center and outer rounds to create a flower-inspired granny effect. A soft petal shade around a bright center often looks lovely. Keep the color transitions neat so the square remains clean and stylish.
Color choices make the motif more playful.
Step 4: Keep the square flat
Make sure the granny square stays flat and even as you crochet. If it starts to curl, adjust the stitch count or tighten your tension. A flat square will sit more neatly on the clip and feel less bulky in the hair.
Step 5: Choose the clip placement
Lay the granny square on the claw clip and see where it fits best. One side or the top center usually works well. The clip should still be able to open and close easily after the decoration is attached.
Good placement keeps the clip functional.
Step 6: Sew the square to the clip
Use matching yarn or strong thread to stitch the granny square securely onto the clip. Take extra care around the corners so they do not lift or fold.
A secure attachment keeps the clip durable.
Step 7: Finish the edges
Weave in all ends carefully and flatten the square with your fingers. If you want, add a tiny border or one small flower stitch in the center for extra detail.
Helpful Tips
This design is especially cute in bright spring colors, but muted tones can make it feel more sophisticated. A tiny granny square can look very stylish when it is kept neat and centered on the clip.
4. Crochet Knot Claw Clip Pattern
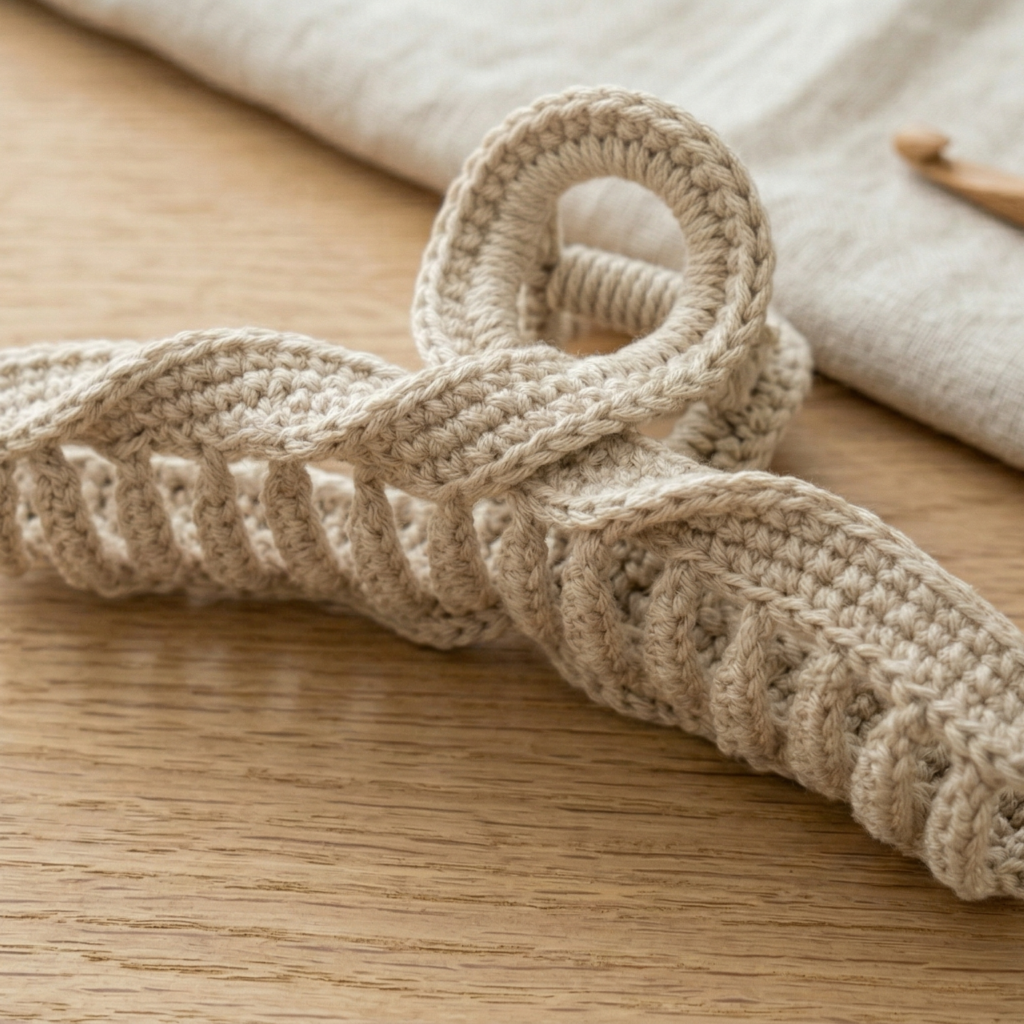
A knot claw clip feels simple, modern, and stylish. It has a clean decorative look that works well for everyday wear and is easy to pair with different outfits. This is a great option if you want a fast project that still feels polished and trendy.
Quick Notes
Skill level: Beginner
Finished size: Small knot detail for a standard claw clip
Style: Minimal, modern, chic, simple
Best colors: Beige, black, cream, brown, dusty rose, olive
Materials
- Lightweight cotton yarn
- Small crochet hook
- Yarn needle
- Scissors
- Plain claw clip
- Optional felt backing
Step-by-Step Guide
Step 1: Crochet a slim strip
Start by crocheting a narrow strip that will become the knot shape. Keep it smooth and flexible so it can fold neatly. The strip should not be too thick, since the knot should remain small and wearable.
A slim strip is the foundation of the knot.
Step 2: Form the knot shape
Fold or loop the strip into a knot-like design. You can create a simple tied look by wrapping one side over the other and sewing the center securely. Make sure the knot looks balanced from the front.
The knot shape is what makes the design stylish.
Step 3: Secure the center
Use yarn and a needle to stitch the knot in place. The center should be firm so the shape does not loosen over time. A few hidden stitches can help keep the knot neat and tidy.
Strong sewing keeps the knot looking polished.
Step 4: Flatten the knot
Gently press the knot into a shape that sits comfortably against the clip. It should look smooth rather than bulky. This is especially important because the claw clip needs to remain easy to use.
A flat knot feels more modern and refined.
Step 5: Attach to the clip
Place the knot on the top or side of the claw clip and sew it securely in place. Make sure the knot does not interfere with the grip or opening of the clip. The accessory should still be functional and comfortable.
Step 6: Finish the back neatly
Check the back of the clip for loose ends or uneven stitching. Tidy the back so the clip feels comfortable in the hair and looks neat from all angles.
Step 7: Adjust shape if needed
If the knot twists or looks uneven, gently reshape it with your fingers. A clean knot shape will make the clip feel more expensive and elegant.
Helpful Tips
Knot claw clips are perfect if you want something minimal and easy to wear every day. Neutral colors work especially well because they make the shape feel chic and versatile. This is also one of the fastest patterns in the collection.
5. Crochet Mini Bow Embroidered Claw Clip Pattern
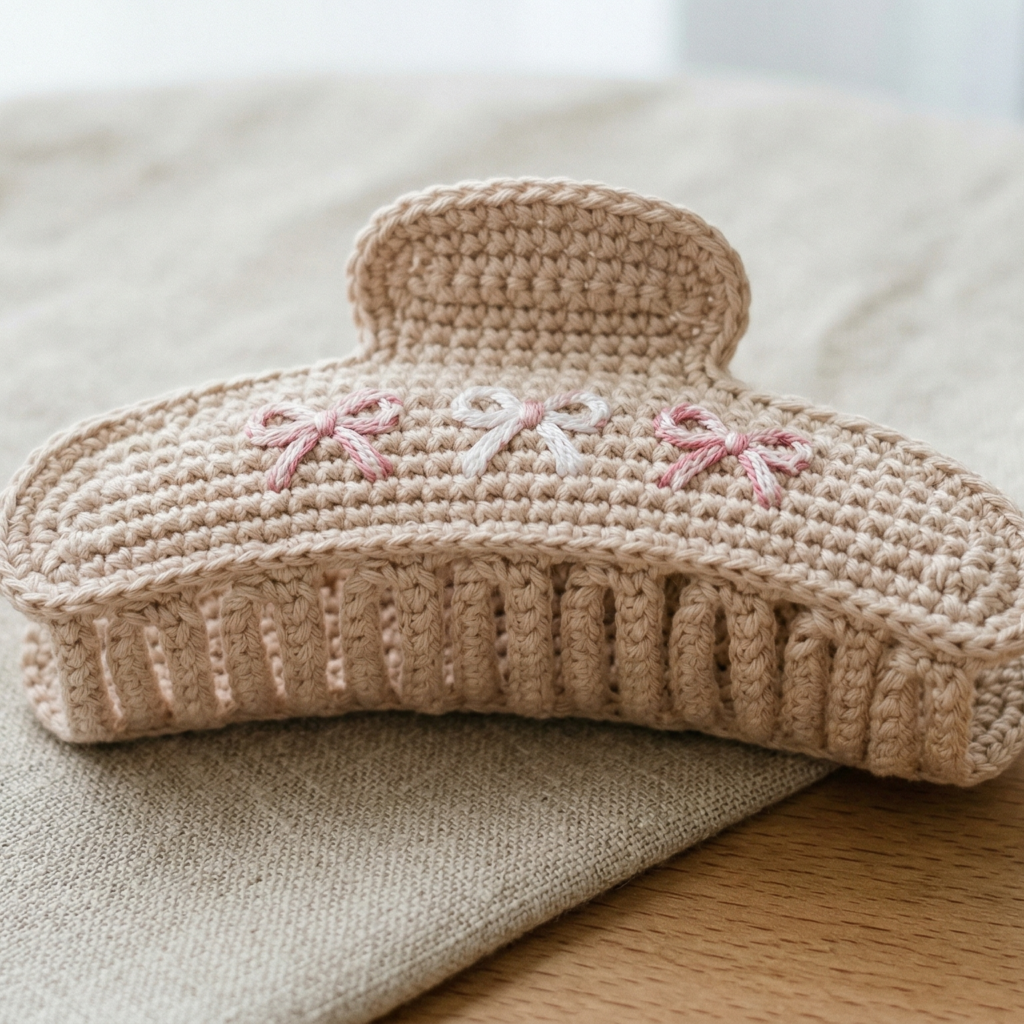
A mini bow embroidered claw clip is delicate, cute, and wonderfully feminine. The bow can be made as a tiny crochet motif or embroidered detail, adding a soft decorative touch to the clip. It is a lovely choice if you want something elegant and dainty without being too large.
Quick Notes
Skill level: Beginner to intermediate
Finished size: Tiny bow detail for a standard claw clip
Style: Sweet, elegant, dainty, decorative
Best colors: Pink, cream, white, lavender, red, soft blue
Materials
- Fine cotton yarn or thread
- Small crochet hook
- Embroidery thread, if desired
- Yarn needle
- Scissors
- Plain claw clip
- Optional felt backing
Step-by-Step Guide
Step 1: Decide whether to crochet or embroider the bow
You can make the bow as a tiny crochet appliqué or embroider it directly onto a base piece. A crochet bow gives more dimension, while embroidery gives a flatter, more delicate finish. Both can look beautiful depending on the style you want.
The method changes the overall feel of the clip.
Step 2: Create the bow loops
If you are crocheting the bow, start by making two small loops or rectangular sections that will become the bow ends. Keep them neat and evenly sized. The bow should be tiny enough to stay lightweight and easy to wear.
Small loops give the bow its shape.
Step 3: Add the center knot
Wrap or stitch a small center section around the loops to create the bow shape. This center knot should hold the bow together firmly. Keep the center small so the bow does not become too thick.
The knot helps the bow look complete.
Step 4: Embroider details if needed
If you want to add extra charm, use embroidery thread to outline the bow or add a tiny decorative line in the center. This can make the bow feel more delicate and polished without adding bulk.
Tiny embroidery can elevate the design.
Step 5: Attach the bow to the clip
Sew the bow securely onto the claw clip, usually at the top or slightly off-center for a cute look. Make sure it does not block the clip’s opening or grip. The bow should enhance the shape, not interrupt it.
A well-placed bow feels feminine and neat.
Step 6: Check the edges
Make sure all loops and ends are sewn down tightly. Since bows are small, they need to hold their shape well. Trim any loose threads and smooth the bow with your fingers.
Step 7: Finish lightly
If the bow feels soft or uneven, reshape it gently. A tidy little bow can make an everyday clip feel very charming and special.
Helpful Tips
Mini bow claw clips look especially lovely in soft pastel colors. If you want a more classic style, use white or cream. If you want something bolder, use red or deep pink. A small bow detail is a simple way to make a hair accessory feel elegant and handmade.
Conclusion
Crochet claw clips are such a fun way to combine beauty and practicality. They take a simple everyday accessory and turn it into something handmade, personal, and stylish. Because they are small, they are quick to make and perfect for trying out new textures, shapes, and decorative ideas without much commitment.
These five claw clip patterns each offer a different kind of charm. The puffy flower clip feels soft and playful. The tulip flower clip is fresh and floral. The granny square clip brings retro handmade style. The knot clip is modern and minimal. The mini bow embroidered clip is delicate and elegant. Together, they show how much personality can fit into such a tiny project.
A handmade claw clip can brighten up a simple hairstyle and make everyday styling feel more special. With the right yarn, neat finishing, and secure attachment, these clips can become favorites you reach for again and again. They also make lovely gifts, since they are quick to make but still feel thoughtful and unique.