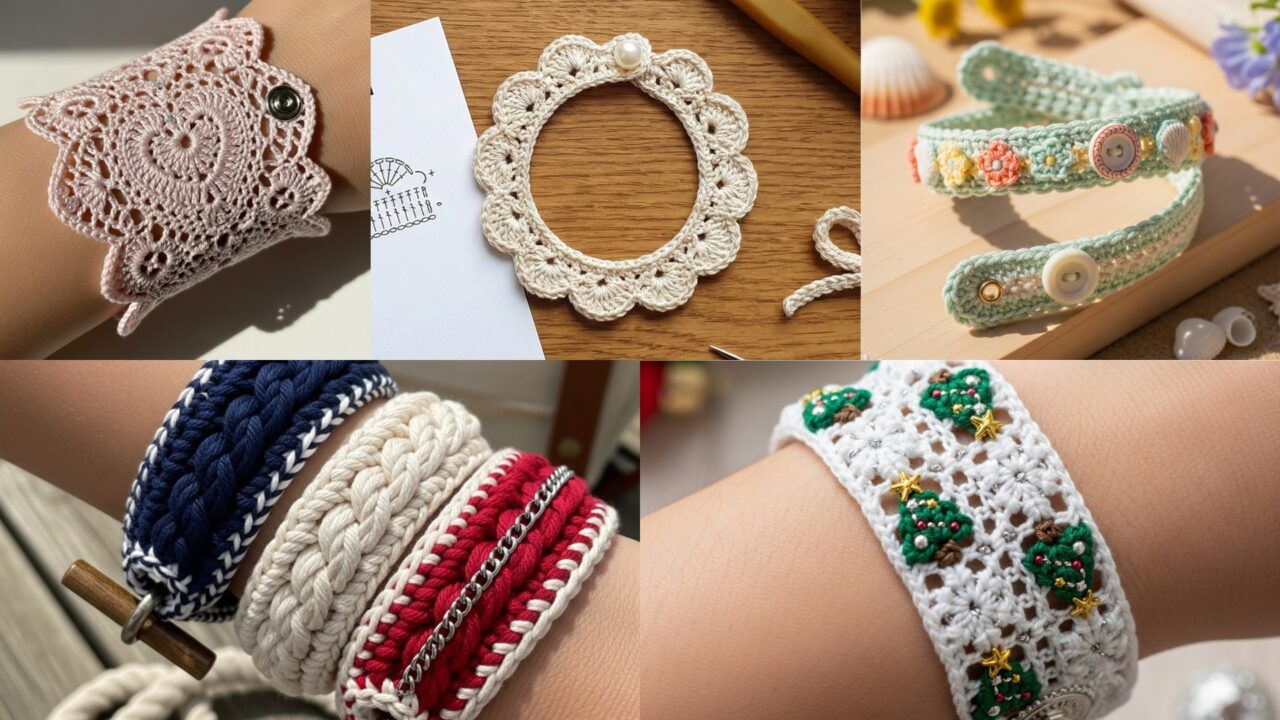
A set of handmade crochet bracelets is the quickest way to add personality to an outfit — they’re small, fast to make, and perfect for mixing textures and colors. Below you’ll find one helpful introduction (materials, sizing + a careful digit-by-digit conversion example, abbreviations and finishing notes), then five full patterns. Each pattern contains: skill level, materials & tools, finished size guidance, a precise step-by-step construction, variations, finishing, and care. Read the primer first, then pick a pattern (or make them all!).
materials, sizing, and quick math primer
Yarn & tools (general)
- Yarn weights: Fingering/sport for delicate lace; DK for versatile cuffs; worsted for bold, structured cuffs. Cotton and cotton blends give crisp stitch definition; mercerized cotton adds sheen; soft acrylic blends are easy-care.
- Hooks: Use the hook suited to your yarn — if you want a firm cuff, choose one size smaller than the yarn label suggests.
- Closures & notions: small snaps, magnetic clasps, tiny buttons + loop, toggle closures, lobster clasps and jump rings (for chain attachments), tapestry needle, small beads (optional).
- Extras: narrow elastic thread (for discreet stretch inside cuff), cotton lining fabric (for comfort), interfacing (if you want rigid shape).
Sizing — measure + convert to stitches (digit-by-digit)
Measure the wearer’s wrist circumference (W). Decide desired finished circumference (FC):
- snug fit: W − 0.25–0.5 in
- comfortable: W (no change)
- loose: W + 0.25–0.5 in
Then convert FC to stitches using your swatch’s stitches per inch (spi). Do the math digit-by-digit (this avoids mistakes).
Example: wrist = 6.75 in, you want comfortable FC = 6.75 in. Your swatch shows 6 stitches per inch (spi = 6).
Compute: 6.75 × 6.
- Split 6.75 into 6 + 0.75.
- 6 × 6 = 36.
- 0.75 × 6 = (3/4) × 6 = 4.5 → we handle halves by doing 0.5 and 0.25 separately:
- 0.5 × 6 = 3.
- 0.25 × 6 = 1.5.
- 0.75 × 6 = 3 + 1.5 = 4.5.
- Add: 36 + 4.5 = 40.5 → round to nearest whole stitch based on pattern multiple (for example to 40 or 41). If pattern requires a multiple (e.g., multiple of 4), round to the nearest valid number (40 is divisible by 4).
If your chosen stitch multiple requires a different number, adjust FC slightly or change hook/yarn until the count falls into pattern multiple without compromising fit.
Abbreviations (US)
- ch = chain
- sc = single crochet
- hdc = half double crochet
- dc = double crochet
- tr = treble crochet
- sl st = slip stitch
- st(s) = stitch(es)
- BLO / FLO = back loop only / front loop only
- inc = increase (2 sc in same st)
- dec = decrease (sc2tog)
- MR = magic ring
- RS / WS = right side / wrong side
Finishing & comfort notes
- If the bracelet rubs, add a thin fabric lining sewn in before adding the closure.
- For a semi-stretch fit without elastic showing, sew a thin strand of fine elastic inside one seam before closing.
- Reinforce closure anchors with a small patch of interfacing or extra stitching.
1. Crochet Heart Cuff Lace Bracelet Pattern
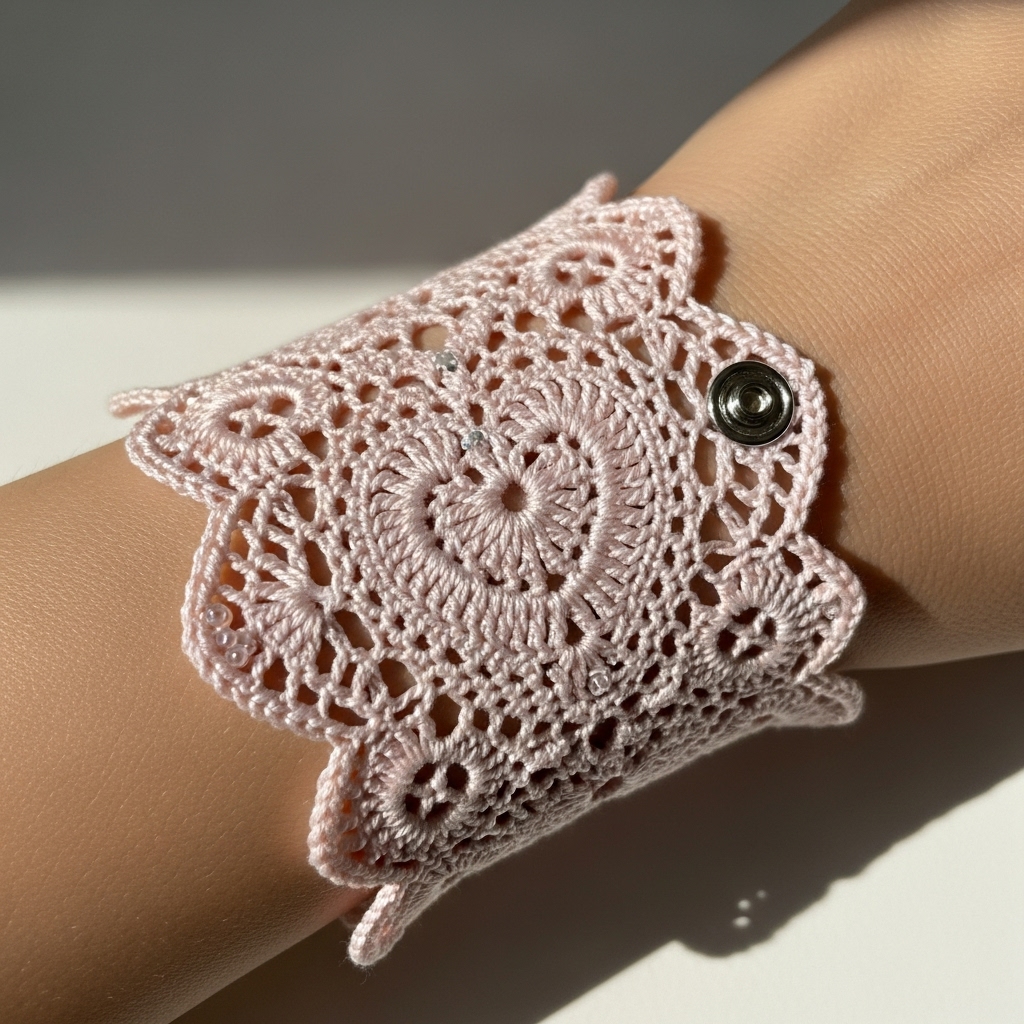
Skill level: Intermediate — lace chart or applique heart, careful centering.
Finished width: 1.5–2.0 in (adjust by adding vertical lace rows).
Finished circumference example: 6.75 in (use the sizing math above).
Materials & tools
- Fingering or sport-weight mercerized cotton — ~25–40 yards.
- Hook: 2.5–3.25 mm (adjust for your lace openness).
- Small snap or button + loop (about 8–10 mm).
- Tapestry needle. Optional: tiny seed beads for accent.
Construction overview
Worked flat as a long lace panel with a centered heart motif. Panel is seamed with a small overlap and fitted with snap/button closure. Two ways to create the heart: (A) integrated lace chart, or (B) crocheted appliqué heart sewn on — both included below.
Step-by-step — Method A: Integrated lace heart (chart-free instruction)
- Swatch & repeat
- Make a small lace sample of the main repeat (for this pattern use an 8-chain repeat). Measure repeats per inch. Using the example math earlier, convert wrist to repeats (instead of raw stitches) and chain foundation = (repeat count × 8) + 1.
- Foundation chain
- Example: if you need 40 stitches and each repeat is 8 sts, you might chain 40 + 1. Use foundation sc or ch + sc first row to stabilize.
- Border rows
- Row 1 (RS): sc across to build a firm base. Turn. Work 4 rows of sc (or sc in BLO) — these create the top/bottom borders that frame the lace.
- Lace repeat (body)
- Row 5 (RS): ch3 (counts as dc), skip 2, dc in next st, ch2, sc in next st — repeat across. Turn.
- Row 6 (WS): sc across, placing sc in dc and ch spaces to anchor. Turn.
- Repeat these two rows for 4 rounds to establish pattern before heart.
- Heart placement (center)
- Count repeats across and mark center. The heart occupies ~7 repeats (adjust by your width). Begin the heart by changing the central groups as follows:
- Heart Row A (RS): in heart zone replace the usual dc, ch2 sequence with (dc3 in same st, ch1) 3 times to form lobes — on surrounding repeats keep the main lace repeat.
- Heart Row B (WS): sc across and catch the larger lobes, keeping the rest of fabric consistent.
- Heart Row C (RS): work decreases toward a point (dc2tog clusters or sc2tog over center stitches) to form the bottom tip.
- Work the heart chart across 6–8 rows (the sequence above will form a soft heart). If you prefer exact chart instructions I will provide them on request.
- Count repeats across and mark center. The heart occupies ~7 repeats (adjust by your width). Begin the heart by changing the central groups as follows:
- Mirror and finish
- After the heart rows, repeat the earlier lace repeats to mirror the top border (4 rows). Then do 3–4 rounds sc for a neat bottom/top.
- Edging
- Work a scalloped edge if desired: sl st, ch1, (5 dc in next st), ch1, sl st next st — space evenly. This decorative edge makes the heart pop.
- Closure & seaming
- Fold panel with 0.5 in overlap. Hand-seam with mattress stitch. Attach snap to overlapped edge or graft a small button and make a loop of ch 6–8 for closure. Reinforce stitches where snap/button attaches with additional sewing through a small piece of woven fabric.
Step-by-step — Method B: Appliqué heart (simpler)
- Make a plain lace panel without integrated heart as above but omit the heart rows; keep uniform lace.
- Crochet a small heart appliqué:
- MR, R1: 6 sc in ring (6). R2: ch2, in next st (sc, hdc, dc, hdc, sc) to form a petal — repeat to make two lobes and a tail, or follow a 2-round tiny heart pattern: ch4, sl st to form a loop, then ch2, 3dc, ch2, sl st into base to make each petal.
- Flatten and shape; fasten off.
- Center and sew appliqué to panel with fine stitches. Add a few beads if you like (securely) or embroider highlights.
Variations
- Add tiny seed beads along the heart lobes (work beads onto yarn before the stitch where they sit).
- Make a double-layer cuff: stitch two panels together inside-out leaving a small gap for a narrow elastic if you want stretch.
Finishing & care
- Block gently to open lace; steam or pin damp cotton to shape scallops.
- Hand wash or machine wash gentle inside laundry bag; reshape and dry flat.
2. Crochet Tree & Snowflake Christmas Bracelet Pattern
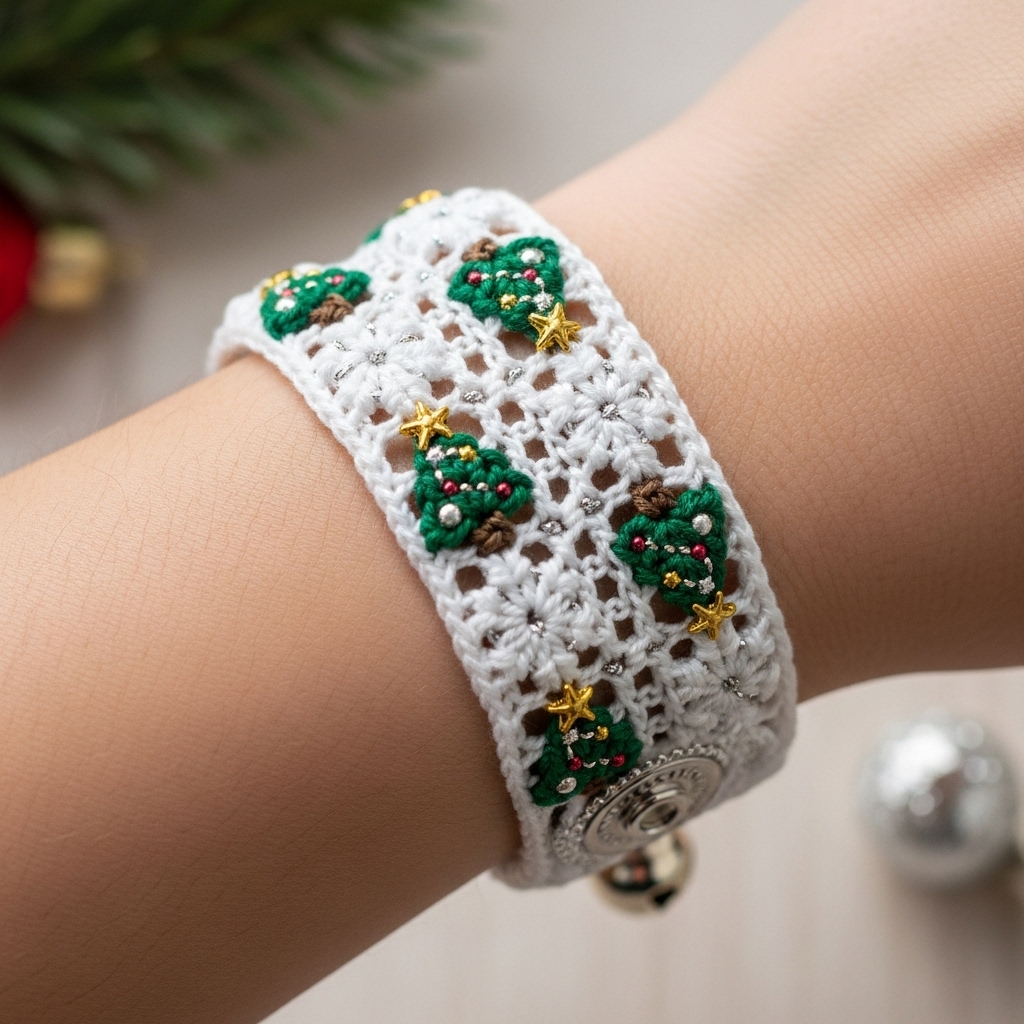
Skill level: Intermediate — colorwork (tapestry) or appliqué motifs.
Finished width: 1.25–1.75 in (choose height by how many rows you work).
Holiday-ready: make several as stockings stuffers.
Materials & tools
- Sport-weight cotton in background color (BC) + green (trees), white (snowflakes), optional metallic for accents.
- Hook: 2.75–3.5 mm (use small hook for tight tapestry work).
- Magnetic snap or small snap; tapestry needle.
Two construction approaches
A — Tapestry crochet band (single-crochet fabric with colorwork)
B — Textured band with appliqué motifs sewn on
Approach A — Tapestry band (dense, reversible-ish)
- Swatch & counts
- Swatch in single crochet carrying floats to find sc per inch. Example: 8 sc = 1 in → convert wrist as earlier. For FC = 6.75 in → 6.75 × 8 = 54 sc (round to multiple required by motifs).
- Foundation chain + rows
- Chain 55 (54 + 1) or foundation sc 54. Row 1: sc across in BC. Turn.
- Work rows of sc in tapestry style: change color within a row per motif chart. Charts (small pixel art) best for trees and snowflakes. Example: a 7-stitch wide tree repeated across band with one-row separation of snowflakes.
- Motif layout
- Create a simple graph: a tree is a triangle 5–7 sc wide and 5–7 rows high; snowflake is a small 5×5 pixel motif. Space motifs so band looks balanced. Repeat motifs in alternating order.
- Edge finish
- Work a round of sc in BC around panel to tidy. Fold and seam with 0.5 in overlap for snap placement. Attach magnetic snap with reinforced stitching.
Approach B — Textured band + appliqués (quicker, less colorwork)
- Band
- Work the base band in moss stitch or hdc for a cushy band: ch foundation for wrist stitches, work 12 rows for ~1.5 in height.
- Mini appliqués
- Mini tree: ch 6; R1 sc across to make a tiny triangle. Or MR with 6 sc then increase rounds to form small cone. Add tiny chain trunk and secure.
- Mini snowflake: MR, ch3, work 5 tiny points of (dc or hdc clusters) separated by sl st to ring; block flat.
- Attach
- Block appliqués, center on band, sew securely through the band and an inner lining for durability. Place them evenly.
Variations & finishing
- Add very fine metallic thread as tree garland by couching small embroidery stitches on top.
- Sew tiny jingle bell inside cuff (stitched to lining) so it jingles when worn — ensure bell is sewn through lining and not exposed.
Care
- Hand wash recommended due to metallic or applique details. Dry flat.
3. Crochet Summer Buttons Bracelet Pattern
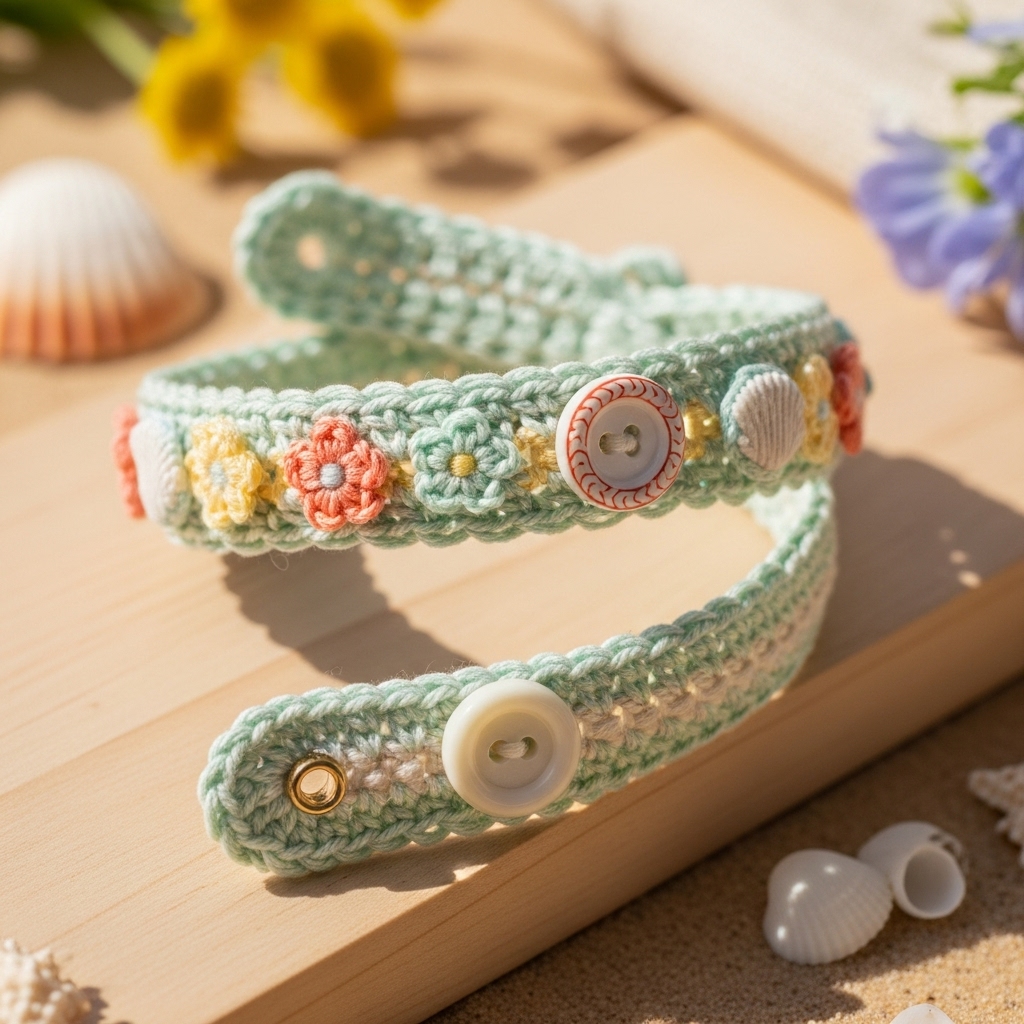
Skill level: Confident beginner — fast, textured band with button closure.
Finished width: narrow ~0.5–1 in (or make wider by adding rows).
Speedy project: makes a great gift; stack several in contrasting colors.
Materials & tools
- Sport/DK cotton (one color for band + optional accents).
- Hook: 3.5–4.0 mm.
- Small decorative buttons (10–12 mm).
- Tapestry needle.
Step-by-step
- Measure & foundation
- Convert FC to stitches by swatch. Example: FC = 6.5 in, spi = 4 hdc/in → 6.5 × 4 = 26 hdc. Chain 27 (26 + 1) as foundation.
- Work body (linen/moss stitch)
- Row 1: hdc in 2nd ch from hook and across (26 hdc). Turn.
- Row 2: ch1, sc in next st, ch1, skip next st across. Turn.
- Repeat Row 2 until band reaches desired height (6–10 rows for a neat ~1 in band).
- Buttonhole loop
- On final row: leave a loop for a button: when you reach the placement stitch, ch 4 (or ch size of your button plus small allowance), skip same number of sts on subsequent row and continue. Alternatively add a small horizontal bar buttonhole: at the edge chain 3 and skip 3 sts, work sc in next — next row sc across to stabilize.
- Sew buttons
- Fold band ends so button and loop align. Sew buttons to the opposing end with multiple passes of sewing thread for security. Make sure buttons are firmly attached to resist first-time wear.
- Accents (optional)
- Sew on tiny crocheted flowers across the band: tiny 5-petal flower = MR, ch3, (3 dc, ch2, sl st in MR) × 5 petals. Flatten and sew.
Variations
- Make a set of 3 narrow bracelets in complementary colors — mix solids & stripes to stack.
- Use natural wood buttons for beachy vibe; mother-of-pearl for a polished look.
Care
- Machine wash gentle; lay flat to dry.
4. Crochet Captain Cuff Bracelet Pattern
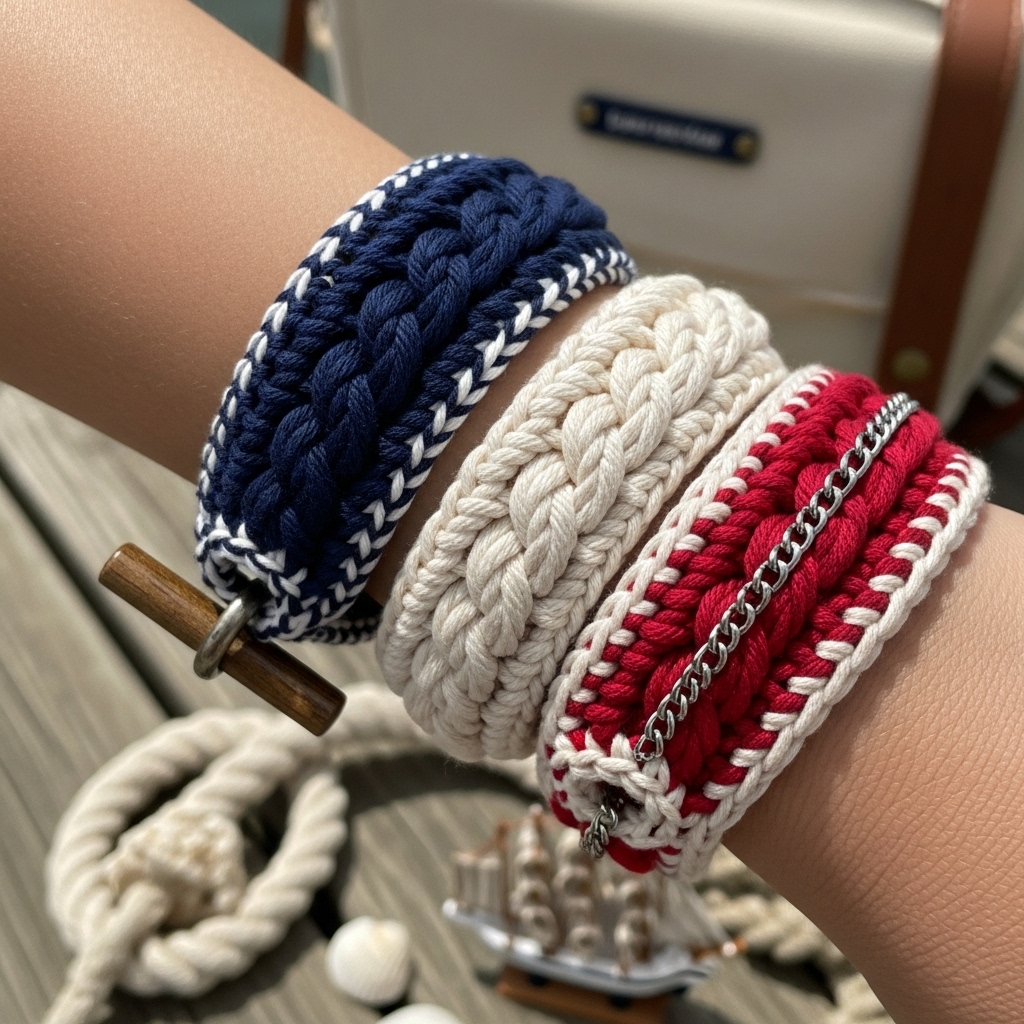
Skill level: Intermediate — textured ribbing with post stitches and toggle closure.
Finished width: 1.5–2 in (rope-like ridges).
Look & feel: bold, nautical — pairs well with canvas or denim bags.
Materials & tools
- DK or worsted cotton (choose sturdier yarn).
- Hook: 4.5–5.5 mm (bigger for chunkier rope ridges).
- Small wooden toggle or heavy-duty snap.
- Tapestry needle, small inside patch for reinforcement.
Step-by-step
- Swatch & repeat
- Work a small sample of fpdc/bpdc ribbing pattern. The pattern repeat is commonly a multiple of 4 sts (4 stitches form one rope column). Measure repeats per inch. Example: 3 repeats/in. For FC = 6.75 in → 6.75 × 3 ≈ 20 repeats. If each repeat is 4 sts → foundation = 20 × 4 = 80 ch + 2 turning = 82 ch.
- Foundation & first row
- Ch foundation per above. Row 1: hdc across to set base; turn.
- Ragged rope texture
- Row 2 (RS): fpdc in next 4 sts, bpdc in next 4 sts across. Turn.
- Repeat Row 2 for 8–10 rows (this will create a substantial height; add rows for a taller cuff).
- Edge stabilization
- Work one round of sc around the panel to tidy; this also prevents post stitches from flattening.
- Toggle loop & attachment
- On one narrow end create a sturdy toggling loop: ch 6, sl st back to anchor (sew into place and reinforce). On opposite end sew toggle through body of cuff (sew through several layers or through a small patch of interfacing). Reinforce both sides with extra sewing to prevent tugging out.
- Seam
- Fold panel to overlapped position. Seam using mattress stitch leaving toggle loop exposed. Optionally add an inner lining to hide the seam and protect the wrist.
Variations
- Add a small leather tab or metal plate across the cuff with initials for personalization.
- Make a matching shoulder strap using same rope stitch pattern.
Care
- Machine wash gentle, reshape while damp. Avoid hot dryer if leather/metal accents present.
5. Crochet Scallop Bracelet Pattern
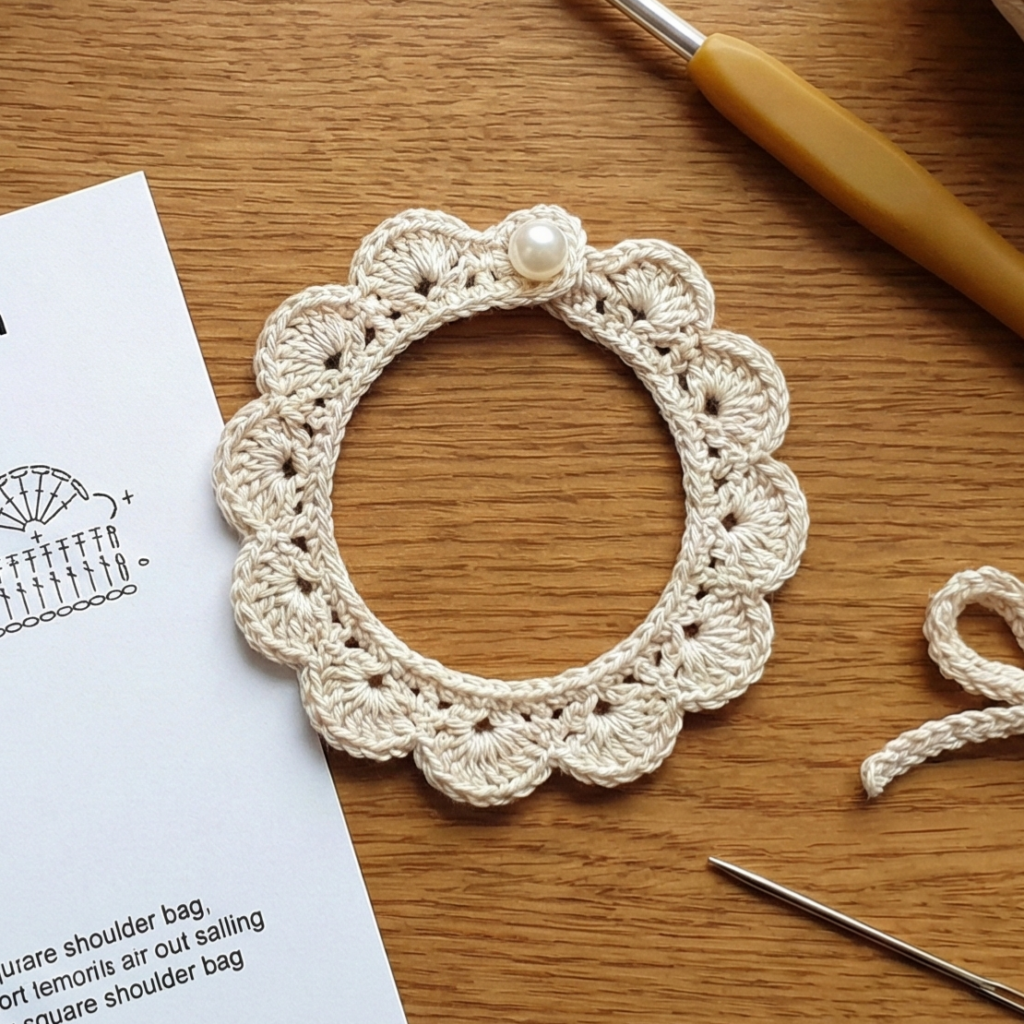
Skill level: Confident beginner — shells + neat finishing.
Finished width: 0.75–1.5 in for narrow to medium scallop; increase rows for wider.
Materials & tools
- Fingering or sport cotton for delicate scallops; DK for bolder scallops.
- Hook: 3.0–3.75 mm.
- Small button or snap for closure.
- Tapestry needle.
Step-by-step
- Measure & foundation
- Convert FC to stitches using spi. Example: FC = 6.75 in, spi = 6 sc/in → chain 41 (6.75 × 6 = 40.5 → 41). Use even number if pattern requires.
- Body rows
- Row 1: sc in 2nd ch from hook across. Turn.
- Rows 2–4: repeat sc across until desired band height before scallop (3–6 rows depending on width).
- Scallop (shell) row
- RS: sc in next st, skip 2 sts, (5 dc) in next st, skip 2 sts, sc in next st across. Adjust skips at ends so shells center nicely. Turn.
- Optional: work a picot row on inner edge to mirror scallops: sc across with picot every 4th stitch: sc, ch3, sl st in same st.
- Buttonhole
- Make a loop on one narrow end: ch 6, sl st to secure and reinforce; on other end sew a small button.
- Finishing
- Block gently to make scallops crisp. Weave in ends.
Variations
- Stack two scallop bracelets for a layered, romantic look.
- Embellish each shell center with a small French knot in contrasting thread for dot accents.
Care
- Wash gentle; reshape scallops while damp.
Conclusion
You now have five polished crochet bracelet patterns that cover a wide stylistic range — delicate lace, festive motifs, casual summer bands, bold nautical cuffs, and feminine scallops. A few final styling and production tips:
- Mix & stack: Combine narrow bands (Buttons + Scallop) for a layered, curated look; use one bold cuff (Captain) as a statement and stack a tiny lace cuff beside it for contrast.
- Match your bag: Echo the bag’s fiber and hardware. Cotton bracelets pair beautifully with cotton/granny bags; metal toggles harmonize with brass bag hardware.
- Gift sets: Make 3 bracelet sets in coordinated palettes — they’re fast, inexpensive to ship, and lovely as stocking stuffers or craft-market items.
- Photographing for the blog: photograph bracelets flat and on-wrist; include close-ups of the stitch detail and a styled shot with the matching shoulder bag (fabric lining or bag hardware in frame helps show the coordinated set).
- Durability: reinforce closure points and, for frequently worn cuffs, consider a thin inner lining or interfacing to reduce distortion over time.