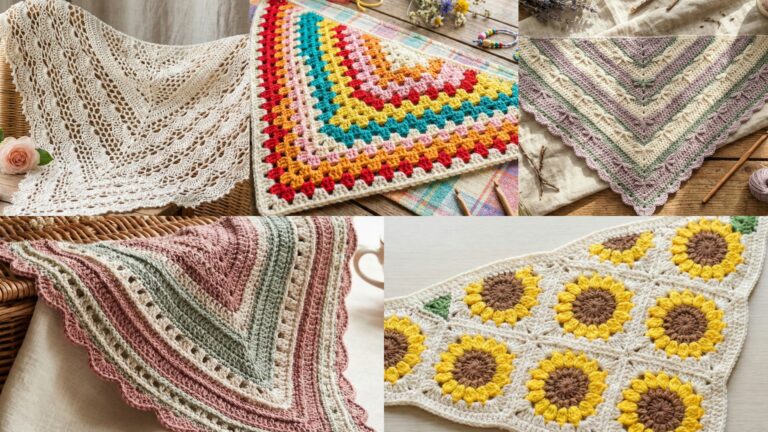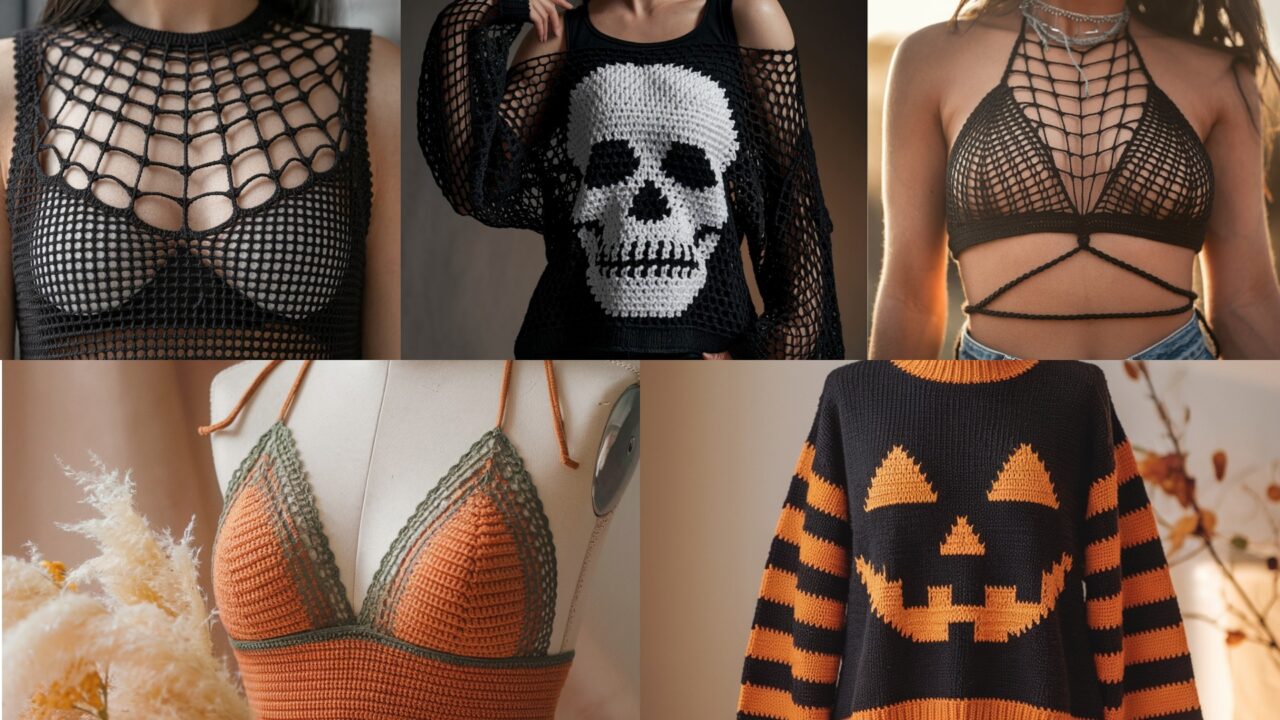
Sweet, spooky, and stitch-forward — these five crochet tops blend Halloween motifs with wearable design. Below you’ll find a long, friendly, and highly practical set of patterns: step-by-step instructions, materials, sizing notes, shaping and assembly, finishing touches, and ideas for personalizing each piece. I interpreted your final heading “Barlette” as bralette (light, wireless crop/bra top) — if you did mean something else, tell me and I’ll adapt. Wikipedia
Quick preface (how to read these patterns)
- All patterns use US crochet terms. If you want UK terms I can convert.
- Try a swatch when gauge matters (fitted tops, bralettes). Where gauge is less critical I’ll say so.
- Each pattern gives a size range (S–M–L or one-size with notes). To size up/down, I include simple adjustment rules.
- Abbreviations used: ch = chain, sc = single crochet, hdc = half double crochet, dc = double crochet, tr = treble (UK = tr), sl st = slip stitch, sk = skip, st(s) = stitch(es), FLO/BLO = front/back loop only, dec = decrease (usually sc2tog), inc = increase (2 sc in same st), RS/WS = right side / wrong side.
Now — let’s stitch!
1. Crochet Peek-a-boo Spiderweb Top Pattern
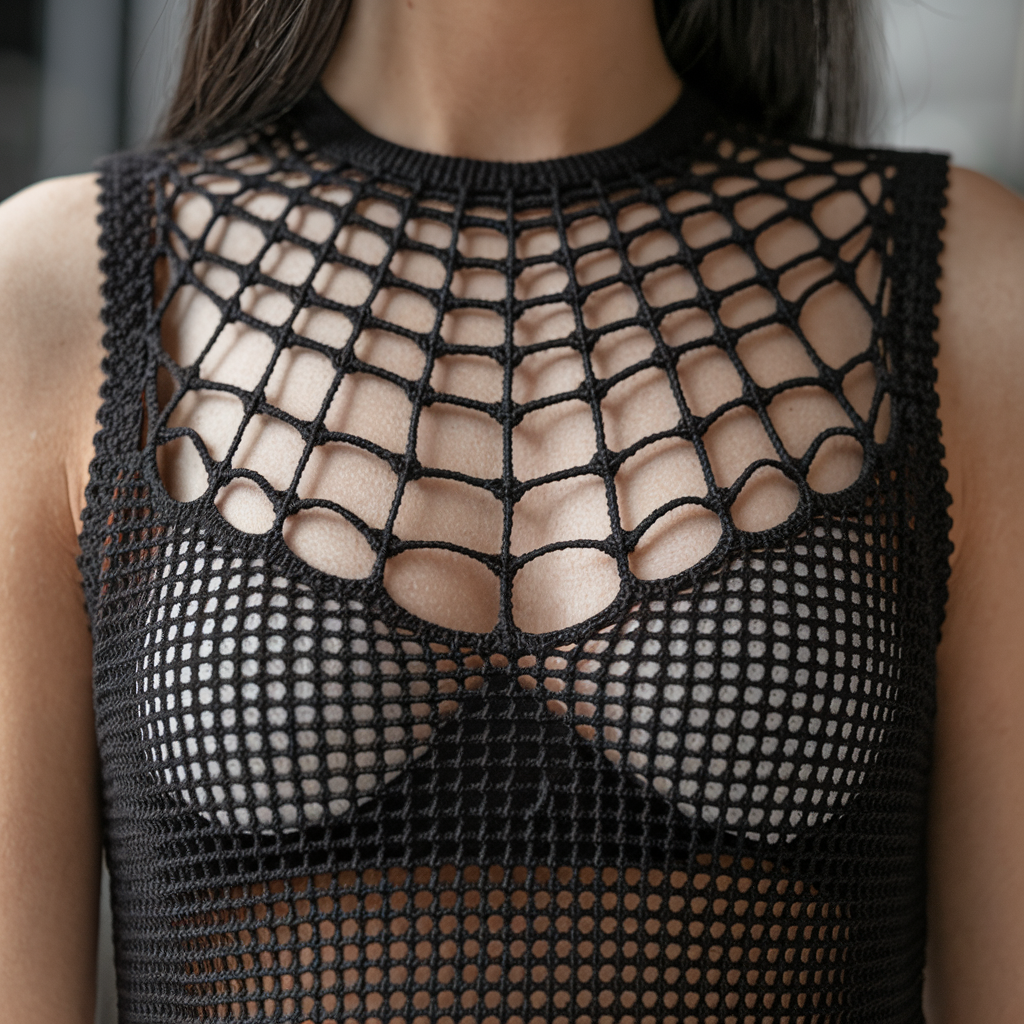
A lightweight, slightly sheer top with spiderweb motif panels that peek through layered outfits. Wear it over a camisole for subtle spookiness or over black for full effect.
Skill: Intermediate (lace shaping + reading charted repeats)
Finished sizes: S (bust 34″), M (38″), L (42″) — negative ease 0–2″ recommended for drape.
Materials
- Fingering / sport yarn (weight 2–3) for drape — ~350 (400, 450) yards. Cotton or cotton blends work nicely.
- Hook: 3.5 mm (E) recommended; adjust for gauge.
- Tapestry needle, scissors, stitch markers.
Gauge (important for fit)
- 22 dc × 12 rows = 4″ in pattern mesh (blocked, measured lightly).
Notes & construction overview
- Worked top-down in one piece until underarm, then split for front/back and finish separately. Spiderweb lace panels are worked into the body as motif repeats (no seaming for panels). Short raglan shaping creates a flattering shoulder line.
Stitch glossary for motif (mesh + web):
- Mesh (base): dc, ch 1, skip 1 repeat — creates open net.
- Web spoke: worked as chains anchored into mesh intersections to form triangular web segments; anchored with sc or sl st.
Abbreviations specific to this pattern
- MW = mesh window (repeat across body), SP = spider loop (decorative small loop), Rag-row = raglan decrease row.
Measurements to choose size
- Measure bust at fullest point. Choose pattern size equal to bust measurement minus 0–2″ (for lightweight drape). Example: 36″ bust → pick M (38″) for looser, S (34″) for fitted.
Step-by-step (Top-down raglan with spiderweb panels)
1. Yoke foundation (neckline)
- Ch 80 (90, 100) — this is the neck opening; join with sl st being careful not to twist. Mark beginning.
- Tip: If you want a boat neck, ch 90 (100, 110).
- Round 1 (RS): Ch 2 (does not count as dc), dc in same st, ch 1, sk 1, dc in next across; join with sl st. This starts a light mesh around neckline.
2. Establish raglan increase markers
- Decide raglan points: Place stitch markers at four quarter points along the round — these become raglan seams. For even placement, count sts and place markers so there are 4 equal sections between them. (E.g., with ch 80: place markers after 20th, 40th, 60th, and at end.)
- From now on, raglan increases occur at each marker to create the yoke flare.
3. Yoke rounds with spiderweb placement (work until yoke depth = 8 (8.5, 9) inches)
- Round structure (repeat rounds):
- At each raglan marker: work (dc, ch 1, dc) into marker stitch — this creates a neat increase cluster.
- Between markers: work mesh across: dc in next st, ch 1, sk 1 across to next marker.
- Spiderweb panels: on Rounds 3, 7, 11 (spaced as desired), replace sections of mesh between two adjacent markers with the spiderweb motif:
- Example motif over 12 sts: Row A: create a radial spoke by anchoring chains — dc 1, ch 4, sl st to anchor two rows below — build spokes over the next 2–3 rounds and then add decorative loop rounds (SP) with small picots or ch-3 loops. The spokes are anchored into mesh intersections so they appear to float in the fabric. (If you prefer, choose every other yoke section for a single front web, or both fronts for mirrored webs.)
4. Split for body
- Once desired yoke depth reached (measure from base of neck over shoulder to underarm), stop increases and work two even rounds, then mark underarm separation: slip stitch across to cast off ½ the sts for front, leave remaining on holder for back (or place marker and work back and forth).
- Alternatively continue in the round and then work raglan decreases to shape sleeve openings — both approaches work; here we split to create a simple sleeveless tee.
5. Body (front and back completed separately)
- Join yarn at front side (RS). Work mesh pattern across until desired length from underarm: 14 (15, 16) inches from underarm to hem. Finish with one round of dc, then an optional scallop edge: skip 1, 5 dc in next, skip 1, sl st next around. Fasten off and weave ends.
- Repeat for back.
6. Sleeves & finishing
- For sleeveless look: crochet a 3/4″ band in sc around armhole (pick up stitches evenly), or for short sleeves:
- Rejoin at armhole edge, ch 1, sc evenly around to form the sleeve cap (~6–8 rounds depending on desired sleeve depth). For a flutter sleeve, switch to shell stitch for the last round.
- Weave ends, block lightly to open the lace and set shape.
Fit adjustments & tips
- To size up by one: increase starting ch by 10 and re-space raglan markers accordingly.
- For denser, less sheer fabric: use heavier yarn and larger hook but keep gauge swatch; you’ll need more yarn.
- Want sleeves? After splitting, pick up evenly around the armhole and work in the round decreasing slightly at top for set-in cap.
Styling & customization
- Add a small crocheted spider (tiny 6-leg amigurumi) sewn to one web.
- Use metallic thread for a glinting web effect.
- Make the web panels removable by working them as appliqués and sewing on — great for washing.
2. Crochet Jack-o’-lantern Top Pattern
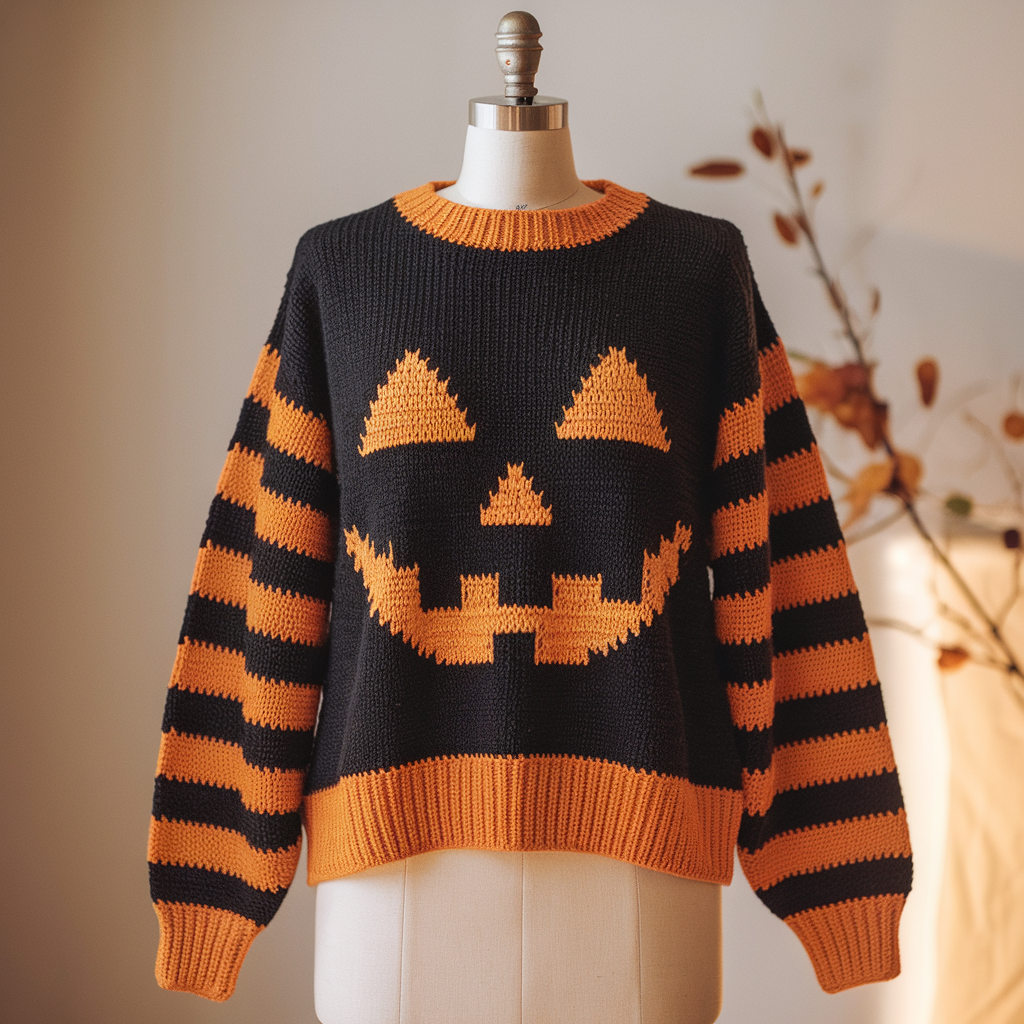
A playful pullover with pumpkin face intarsia on the front panel. Built as a simple boxy sweater with eye-catching jack-o’-lantern colorwork.
Skill: Intermediate (colorwork skills: tapestry/intarsia, sweater construction)
Finished sizes: S (36″), M (40″), L (44″) — relaxed/boxy fit.
Materials
- Worsted weight yarn (#4): Main (black or deep orange) 600 (700, 800) yds; Contrast (pumpkin orange) 150–200 yds; Small amount black/white for face details if needed.
- Hook: 5.0 mm (H/8) for body, 4.5 mm for ribbing.
- Stitch markers, tapestry needle, scrap yarn for provisional cast-on (if top-down).
Construction overview
- Worked bottom-up in panels (back and front), seamed at shoulders and sides. The jack-o’-lantern face is worked in tapestry crochet (stranding or intarsia depending on preference) into the front panel center.
Gauge
- 16 sc × 18 rows = 4″ in single crochet (unblocked).
Step-by-step (Boxy pullover with center pumpkin chart)
1. Front and back panel foundation
- Back panel: ch 72 (80, 88) — this width yields approx. 18 (20, 22) inches across.
- Row 1 (RS): sc in 2nd ch from hook and across. (71, 79, 87 sc) Turn.
- Rows 2–20 (or until yoke placement): sc across for lower body. For longer torso, add rows.
2. Armhole shaping
- To create armholes, work even until piece measure ~16 (17, 18) inches from hem. Bind off 4 (4, 6) sts at each side for armholes and continue in sc across remaining sts for another 6–8 rows to form armhole curve (or leave straight for drop shoulder).
3. Front panel with pumpkin chart
- Prepare or draw a simple 20×20 (or appropriately scaled) chart of a jack-o’-lantern face — triangular eyes, nose, toothy grin. Center chart on front panel: calculate center by measuring foundation chain/row and subtracting half chart width; place chart start accordingly.
- To work colorwork in sc: carry unused color along WS (or use intarsia bobbins for large color blocks). Work sc in orange for pumpkin, switching to background color (black) for negative space. When changing colors, complete last yarn over of previous st with the new color to avoid floats.
- Continue working rows until front panel matches back height.
4. Shoulder seaming
- Block front and back if you like. Align shoulders and seam with mattress stitch or whip stitch leaving neck opening of desired width. For crew neck: leave 12 (12, 14) inches for neckline and seam the rest. For wider neckline, leave more.
5. Neckline & ribbing
- Join yarn at neckline edge, ch 1, sc around neck for 2 rounds. Switch to 4.5 mm hook and work 6–8 rounds of 1×1 rib (use hdc in FLO / sc in BLO alternating to create stretchy rib) to create neat finished neck.
6. Sleeves (drop-shoulder)
- For drop shoulder simple sleeve: pick up sts along armhole edge and work in sc in the round decreasing gradually if you want tapered sleeve. For short sleeve, work 6–8 rounds and finish with rib.
7. Hem finishing
- Work 4–6 rounds of ribbing at hem on RS using hdc in FLO for knit-like appearance. This stabilizes the bottom.
Tips for colorwork success
- Tension: maintain even tension across color changes. If you’re new to intarsia, practice on a small swatch.
- Blocking: colorwork benefits from gentle blocking — pin to shape and steam (if fiber allows).
- Cartoon vs subtle: for a bold pumpkin, use bright orange with black background; for subtlety, try cream pumpkin on charcoal.
Variations & ideas
- Make pocket pumpkins — add small pouch pockets with face motifs.
- Use eyelid flaps or sequined lids for sparkle.
- Knit pumpkin ribs into body using post stitches (front post/ back post) for texture around the pumpkin.
3. Crochet Halloween Skull Mesh Sweater Top Pattern
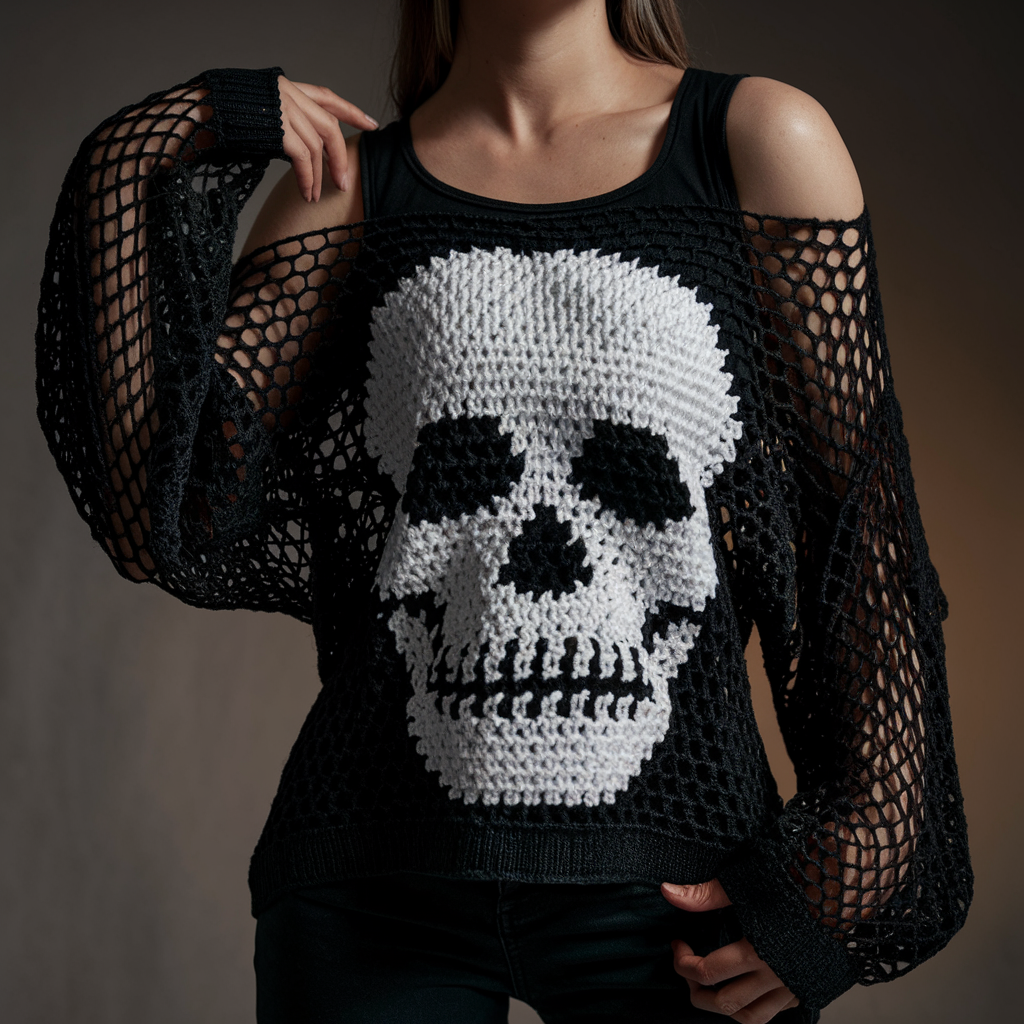
An airy, gothic-chic sweater with a skull motif worked into an open mesh. Oversized, slouchy, and perfect layered over tank tops.
Skill: Advanced beginner → Intermediate (mesh, basic shaping, motif placement)
Finished sizes: One-size relaxed (fits 34–46″) — easy to adjust.
Materials
- Bulky/light worsted yarn (#5/#4) depending on drape — 700–900 yds. For a drapey look, use a blend with viscose or silk.
- Hook: 6.0 mm (J) or 5.5 mm (I).
- Yarn needle, circular needle for provisional cast-on if you prefer.
Construction overview
- Worked flat in panels (back and front), large skull motif is crocheted in tapestry method or as an appliqué and sewn on after. The body is mesh to keep the sweater lightweight.
Mesh stitch used
- ch 2, sk 2, sc in next st repeat — open airy pattern.
Step-by-step (Boxy mesh sweater with sewn-on skull)
1. Back panel
- Ch 80 (or ch to desired back width; each ch counts roughly 0.6″ with bulky yarn).
- Row 1: sc in 3rd ch from hook, ch 2, sk 2 ch, sc in next across; turn. This creates a lacy ladder mesh.
- Repeat Row 1 until panel length = 20 (22) inches or desired back length. Fasten off.
2. Front panel & skull placement
- Work front the same as back except leave a wider neckline: at end, shape neckline by stopping 2” earlier on both sides and work rows only on the center 60% of stitches for 6–8 rows before resuming full width. Alternatively, work full panel and cut a neckline after blocking.
- Skull motif: Option A = appliqué — find or chart a skull pattern (approx 12–14″ wide for bold graphic) and crochet in worsted weight yarn (smaller hook) as a flat piece; block, then sew to center front. Option B = tapestry work — prepare skull chart and carry contrasting yarn across rows while working mesh base (this is trickier because mesh breaks chart grid; appliqué is easier and cleaner).
3. Shoulder joining
- Seam shoulders with mattress stitch leaving 8–10″ neck opening, or join left open for slouchy off-shoulder. Try on and adjust the neck opening before final seaming.
4. Sleeves
- For droppy batwing look: pick up sts along side edges (both front + back sides) and work mesh in the round, gradually decreasing toward cuff for slight shaping. For long wide sleeves, work even until desired sleeve length and finish with rib cuff (hdc in FLO rounds).
5. Hem & neck finishing
- Single crochet around neck and hem to tidy raw edges; for extra definition use a decorative reverse single crochet (crab stitch) on neck and cuffs.
Styling & finishing touches
- Sew black beads into skull eyes for a hollow gleam or use small LED lights behind appliqué for an eerie glow (battery pack hidden inside lining).
- Add long fringe at hem for a witchy silhouette.
- Make the skull out of a fuzzy yarn (eyelash) for an eclectic texture contrast.
4. Crochet Spiderweb Crop Top Pattern
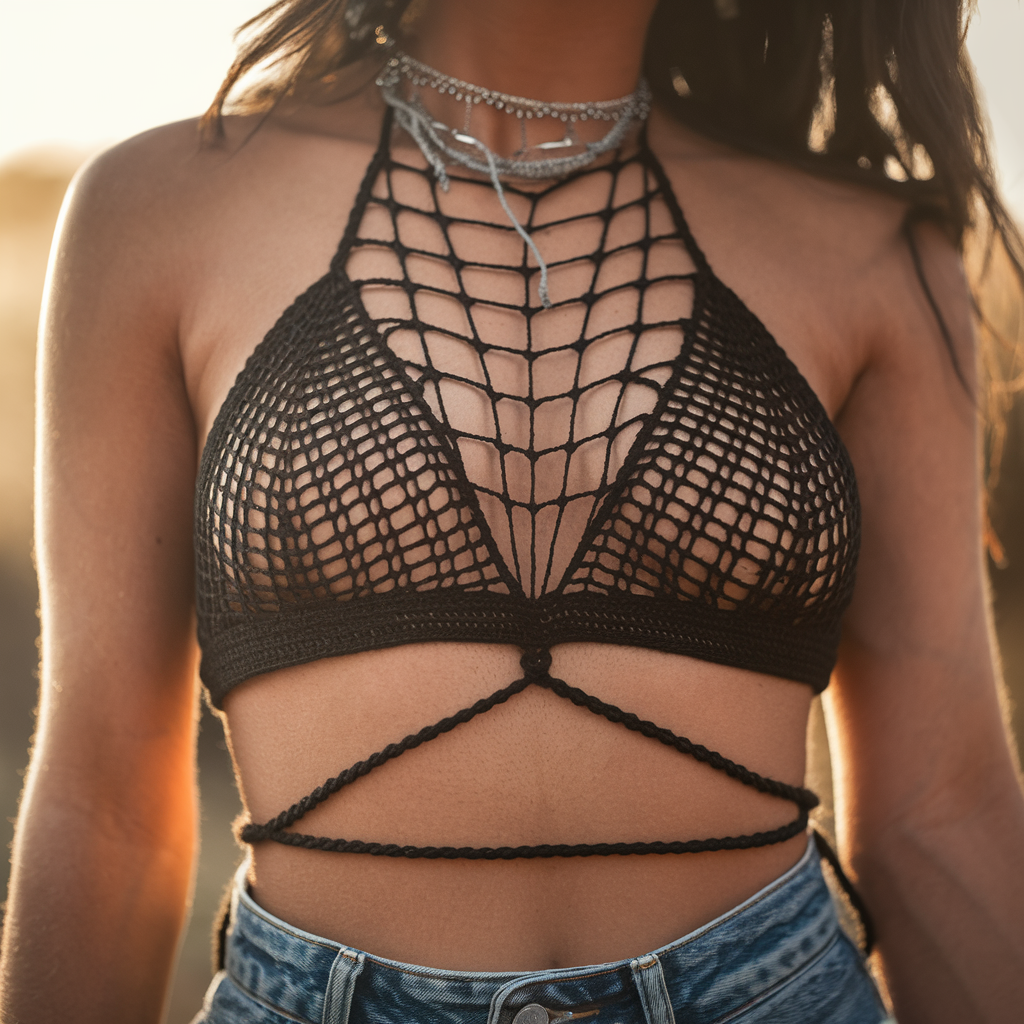
A festival-ready, cropped halter top with openwork spiderweb panels — perfect for layering over bandeaus or bralettes.
Skill: Advanced beginner (lace shaping, halter ties)
Finished sizes: XS–S (30–34″ bust), M–L (34–40″ bust) — adjustable tie closures allow more flexibility.
Materials
- Sport / DK weight yarn — 200–300 yds. Cotton or bamboo blends are breathable.
- Hook: 3.5–4.0 mm.
- 60–80″ of cord or make ties from same yarn.
Construction overview
- Worked flat in two triangular cups with integrated spiderweb motifs, joined with a central band and tied at neck/back.
Step-by-step (Triangular spiderweb cups + band)
1. Cup foundation (make 2)
- Ch 4, sl st to form ring or MR (magic ring). R1: ch 3 (counts as dc), 11 dc into ring — join (12 dc). R2: ch 3, dc, ch 1, dc around to form spokes — this round forms base spokes for the web (work the number of spokes you like: 8–12).
- R3–R6: Build the web by working rounds of ch X, sl st to earlier spoke to create concentric arcs, anchoring to spokes to form the web mesh. Example: R3: ch 3, sl st to next spoke, ch 4, sl st to next spoke (this makes larger arcs). Adjust arc length for open or tight web.
2. Shape cup edges
- Once web is built to desired diameter (about 6–8″ across for crop top), work 3 rounds of dc working into arcs and spokes as base to create a solid rim. Then switch to mesh: dc, ch 1, sk 1 across to extend cup downward for coverage (2–4 additional rows). Fasten off leaving tail.
3. Center band & joining
- Lay cups so points meet at center front. With RS facing, join yarn and sc across bottom edges connecting both cups with a 2–3″ band (measure desired underbust fit) — ch 1, sc across each cup bottom edge, connecting both so band is continuous. Work in rounds for a stretchier band: join ends with sl st for continuous tie or leave open for tie closure.
4. Ties & finishing
- Neck ties: make two cords (i-cord or 3-strand braid) of approx. 28–36″ each; attach to top corners of cups. Back tie: make a longer cord (40–60″) and attach to band ends. Alternatively crochet a wide strap of 1.5–3″ and tie.
- Finish edges with picot or shell if desired for feminine edge.
Fit guidance & adjustability
- Want more coverage? Increase web diameter by continuing web rounds before rim.
- Want more support? Add a crocheted lining band with firm hdc rounds or insert a non-stretch ribbon into the band casing.
Decorative ideas
- Add tiny crocheted spiders suspended from one web — secure with clear thread.
- Use glow-in-the-dark yarn for thread segments of the web.
5. Crochet Pumpkin-Style Halloween Fall Bralette Pattern
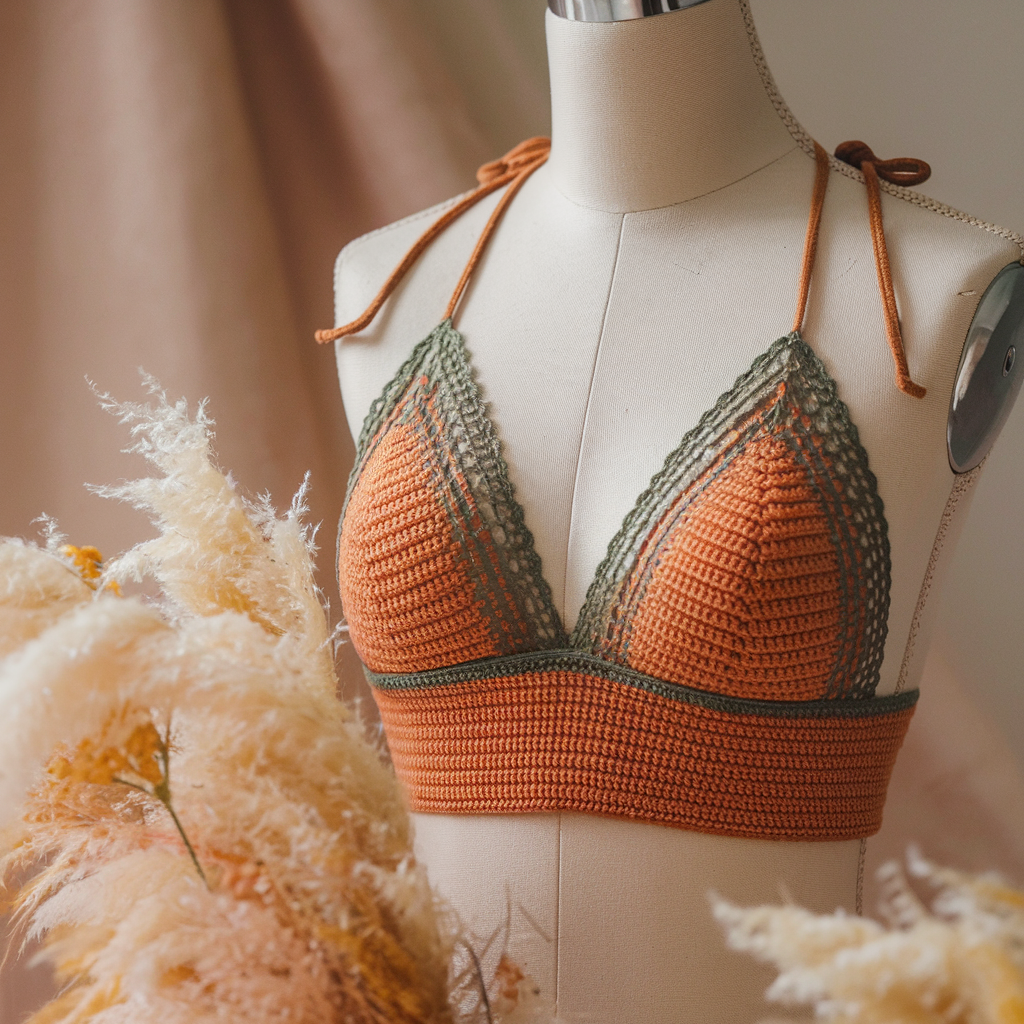
A knit-like pumpkin bralette (bralette) with ribbed underband and little pumpkin appliqué. Light support, great as a layering crop or playful festival top.
Skill: Intermediate (cup shaping, ribbing)
Finished sizes: Small (32–34″ bust), Medium (34–36″), Large (36–38″) — adjustable straps and tie back allow flexible fit.
Materials
- Sport / light worsted yarn (#3/#4) — main color (pumpkin or your choice) 300 yds; contrast (stem/leaf) 30 yds. Cotton or cotton blends give good structure.
- Hook: 4.0 mm for body, 3.5 mm for cups/ribbing if you want firmer texture.
- Elastic or non-stretch ribbon for optional underband support.
Construction overview
- Two triangular cups worked from bottom up (sewn to ribbed underband), or crocheted cups joined to a ribbed underbust band worked back and forth for stretch. Bralette straps tie at neck/back for sizing flexibility.
Gauge
- 18 hdc × 12 rows = 4″ (hdc worked in rows).
Step-by-step (Ribbed underband + shaped cups)
1. Underband (ribbed, worked flat)
- Ch 52 (58, 64) — this length before stretching yields underbust approx 28–34″ depending on yarn and stretch.
- Row 1: hdc in 3rd ch from hook and across (50, 56, 62 hdc). Turn.
- Row 2–12: hdc in BLO across — working hdc in back loop only creates a flexible rib. Adjust rows for band height: 6–8 rows = narrow band, 10–14 rows = wider support band. Fasten off but do not weave ends.
2. Cups (make 2) — bottom-up cup shaping
- Attach yarn to top edge of underband where you want cup to start (leaving gap for center front). Ch 2, 6 hdc in same st — join to work a small semicircular base.
- R2: inc in each st (12 hdc). R3: hdc 1, inc around (18). Continue increasing rounds until cup width equals desired cup base (usually 16–22 hdc depending on size). Then work even for 2–4 rows to establish cup depth.
- Decrease to shape apex: hdc 4, dec repeat until apex closes, or leave an open apex for a plunge style and finish with tied strap attachment. Fasten off leaving long tail for sewing.
3. Attach cups to band
- Position cups evenly on the band leaving 1–2″ gap at center front. Sew cups along bottom edge to band with mattress stitch or whipstitch. Make sure to stretch the band slightly while sewing so it remains snug when worn.
4. Straps & closure
- Tie straps: Make 2 cords for neck ties (28–36″) and 1 long tie for back closure (40–60″) or use elastic + hook closure. Attach cords to top corners of each cup and to band ends. For racer or halter styles, adjust placements.
5. Pumpkin appliqué
- Make a small pumpkin applique (as described in previous message/pattern):
- MR, 6 sc (6) → R2: inc (12) → R3: sc 1, inc (18) → R4–5 sc around → gather with long tail pulled through center to create segments → stem ch 4, sl st back.
- Sew applique to one cup off-center for cute accent. Add embroidered face if you like.
Fit & support tips
- For more support: insert a soft underband elastic inside the ribbed band or add a second inner band of firm DC worked in tighter tension.
- For bigger cup sizes: increase cup rounds and widen band for stability. Use side seams (small gussets) under the arm for extra shaping.
Conclusion
There you go — five detailed crochet top patterns that run the Halloween style spectrum: lacey spiderwebs that reveal and conceal, graphic jack-o’-lantern colorwork, a skull-stamped mesh sweater for moody layering, a festival-ready spiderweb crop, and a pumpkin bralette that’s equal parts cute and creepy. Each pattern includes practical construction choices so you can adapt yarn, fit, and decoration to your taste and comfort level.
A few final tips to make these projects sing:
- Swatch & try on early. For fitted bralettes and pullovers, a quick swatch + measurement saves frogging later.
- Layer cleverly. Many of these tops are designed to be layered — pair with camisoles, bodysuits, or under a leather jacket for instant Halloween style.
- Personalize. Add tiny spiders, LEDs, beads, or a name tag for a unique finish.
- Care instructions. Follow yarn manufacturer washing recommendations; cotton tops will soften but may shrink without gentle care—consider a lingerie bag for machine washing or hand wash and air-dry.