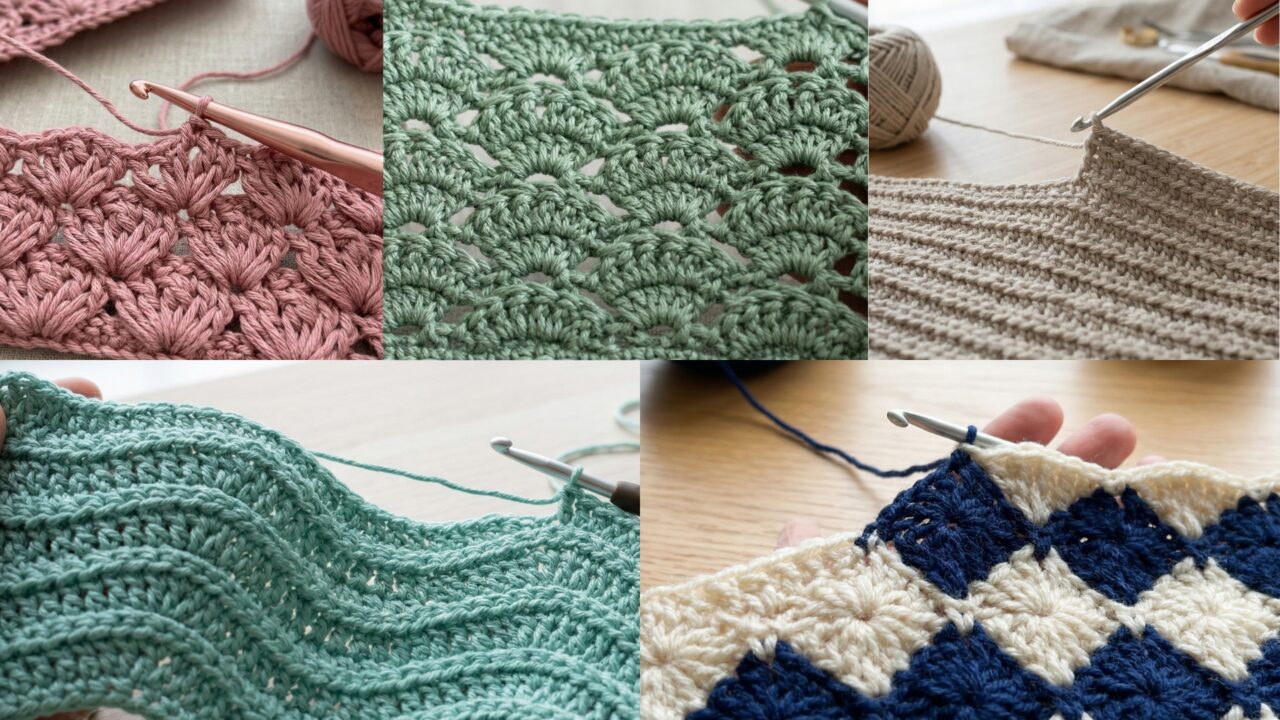
One of the best parts of crochet is that a single stitch pattern can completely change the feel of a project. The same yarn can look soft and airy in one stitch, rich and textured in another, bold and graphic in a third. That is what makes stitch patterns so useful: they are the building blocks that turn simple ideas into beautiful finished pieces.
The five stitch patterns in this post are the kind you will reach for repeatedly because they are versatile, eye-catching, and satisfying to work. Some create texture that feels almost woven. Some bring a graceful, layered look. Some give you strong geometric shapes or a gentle wave effect. Whether you are making blankets, bags, garments, scarves, or home decor, these stitches can help your work stand out without needing complicated shaping.
This post breaks down each stitch in a clear, practical way so you can understand how it works, what makes it special, and how to get a polished result. The steps are written to be easy to follow, even if you are still building confidence with texture and stitch repeats. By the end, you will have a handful of stitch patterns that can become staples in your crochet toolkit.
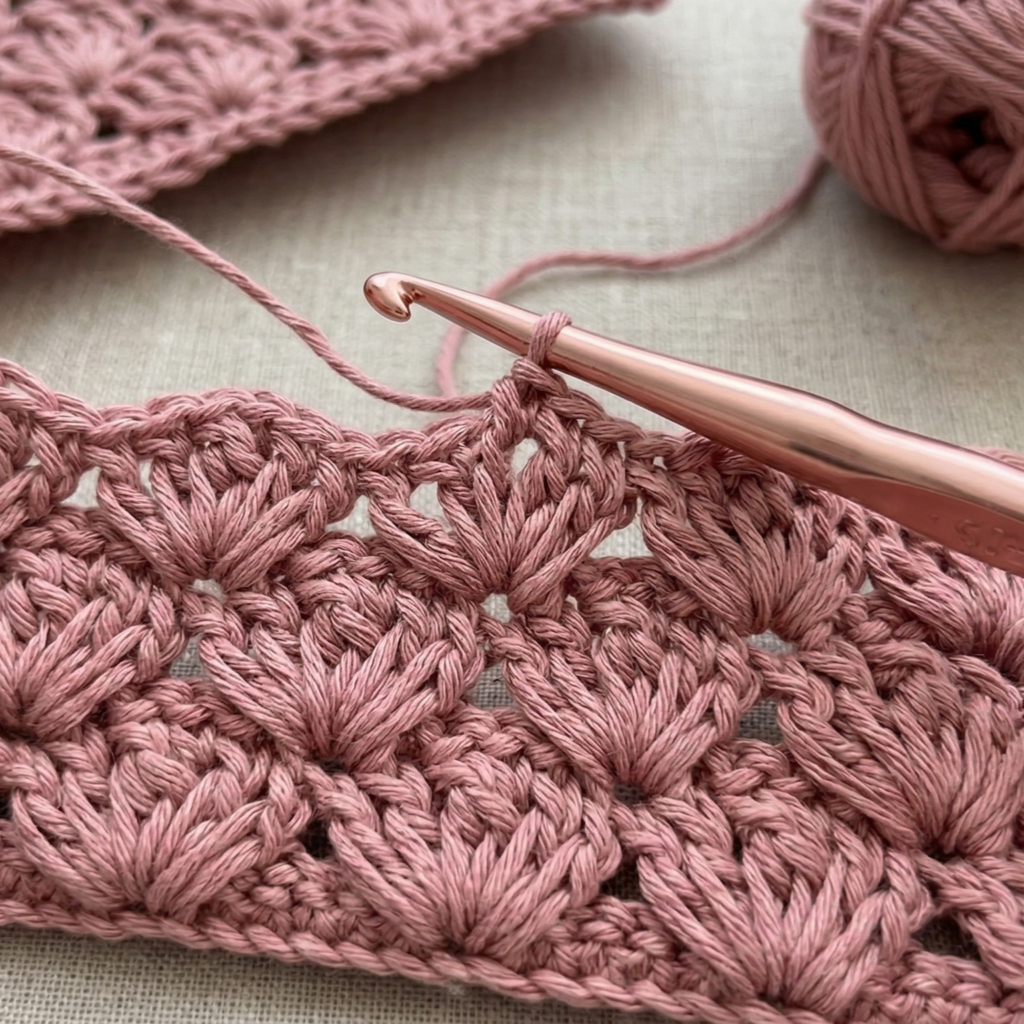
1. Crochet Crown Stitch Pattern

The crown stitch has a regal, textured look that feels elegant and decorative. It creates a raised, repeating motif that resembles little crowns or scalloped peaks, which makes it especially appealing for blankets, accessories, and statement panels. It is a lovely stitch when you want something that feels detailed but still manageable to repeat.
Step-by-step guide
Step 1: Start with a foundation row
Begin with a row that gives the crown stitch a stable base. Usually, this means a foundation chain or a simple row of single crochet or double crochet. The base should be even and not too tight, because the crown stitch needs room to open and form its shape.
A smooth foundation helps the stitch pattern look balanced from the start.
Step 2: Learn the crown repeat
The crown stitch is built from repeating clusters and chain spaces that create the pointed, crown-like shapes. Before starting a full project, it helps to make a small swatch so you can see how the stitch moves across the fabric. Focus on keeping the clusters the same height and size so the crowns look uniform.
The repeat is what gives the stitch its signature appearance.
Step 3: Keep your tension consistent
Because the stitch has both open spaces and taller sections, tension matters a lot. If your chains are too tight, the crowns may curl. If they are too loose, the pattern can look uneven. Try to keep the same hand tension throughout the row so the shapes stay even.
Consistent tension makes the texture look crisp.
Step 4: Repeat row by row
Once you understand the pattern, continue repeating it across the fabric. Watch how the points line up from one row to the next. The best crown stitch pieces usually have a steady rhythm, with each crown sitting neatly under or beside the last.
Repetition is what makes the pattern feel polished.
Step 5: Check the edges
The edges can be tricky with decorative stitches, especially if the stitch repeat is not naturally square. Keep an eye on the sides as you go and make sure the piece does not pull inward or flare out too much. If needed, add a small border later to help frame the design.
A tidy edge makes the whole stitch look more refined.
Step 6: Finish with a border if needed
A simple border can give the crown stitch a more finished look. Single crochet or half double crochet usually works well because it keeps the focus on the textured middle. The border also helps the stitch pattern feel more grounded in the final project.
Step 7: Block the swatch or project
Blocking is especially helpful with decorative stitch patterns because it opens the texture and evens out the shapes. If you are making a blanket square, scarf, or panel, blocking can help the crowns stand out much more clearly.
Helpful tips
The crown stitch looks especially beautiful in solid colors, because the texture becomes the star. Neutral yarns make it feel elegant, while deeper jewel tones can make the pattern feel rich and dramatic. This is a great stitch for projects where you want the fabric to feel a little special.
2. Crochet Bar Stitch Pattern
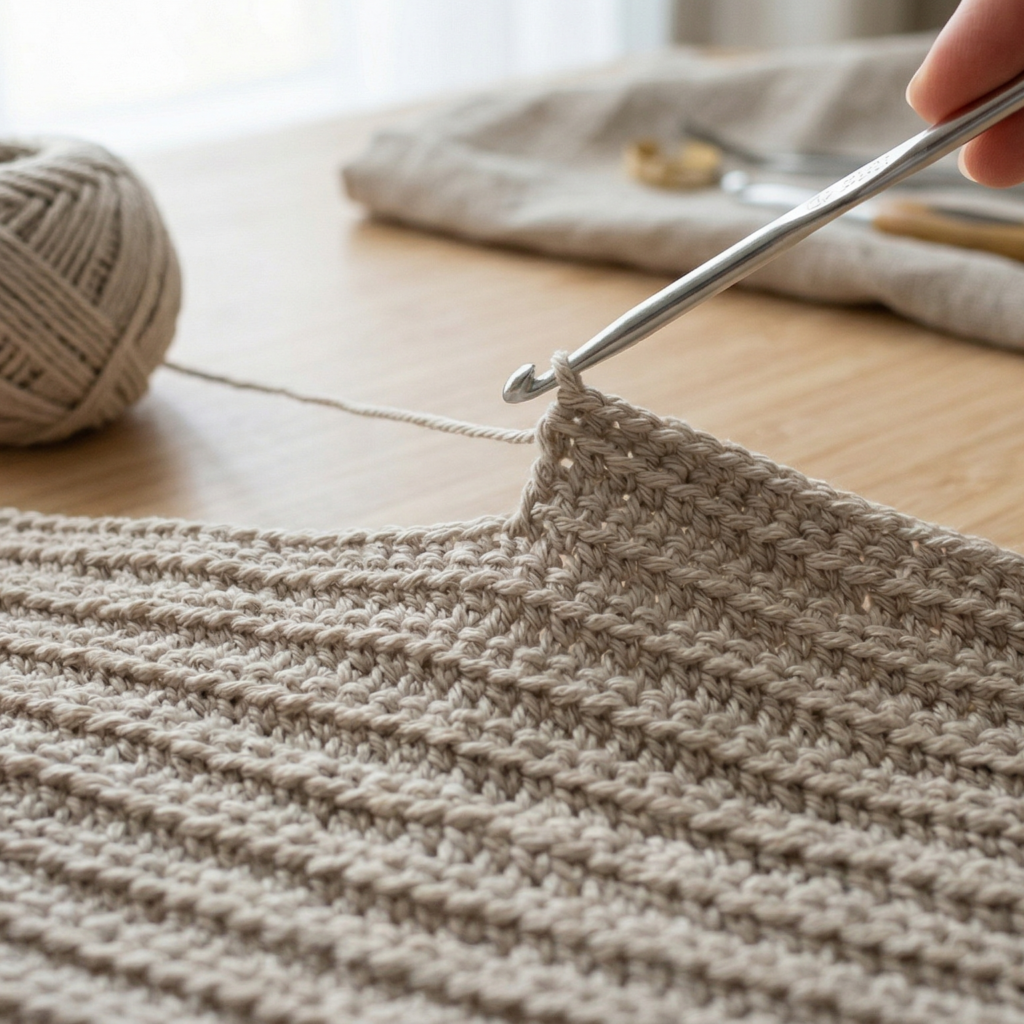
The bar stitch has a clean, structured look that feels strong and modern. It creates rows of horizontal texture that resemble little bars or ridges, giving the fabric a stylish and slightly architectural feel. It is a great stitch for projects that need both texture and a sense of order.
Step-by-step guide
Step 1: Build a firm base row
Start with a foundation row that is even and stable. The bar stitch usually works best when the first row gives it enough support to hold the horizontal texture. A row of single crochet, half double crochet, or another firm stitch is often a good beginning.
A sturdy base helps the bars sit neatly.
Step 2: Learn the placement of the bars
The bar stitch works by repeating stitches in a way that creates distinct horizontal lines. Take a moment to understand where each bar is formed, especially if the pattern uses front or back post placement. A small practice swatch will help a lot here.
Knowing where the bars form makes the stitch easier to repeat.
Step 3: Maintain even spacing
The bar stitch looks best when the spacing between rows stays consistent. If the spacing varies too much, the fabric can lose its clean striped effect. Try to keep each repeat the same height and width so the bars align well.
Even spacing gives the pattern its tidy look.
Step 4: Keep the rows straight
This stitch often benefits from careful row counting because the texture can make it harder to see where the edge is. Check your sides often and make sure the fabric stays straight. Straight edges are especially important if you plan to use this stitch in garments or structured home decor.
A straight fabric makes the bars stand out more clearly.
Step 5: Repeat for texture
As you work row after row, the bar pattern will begin to create a subtle woven effect. This is one of the reasons crocheters love it: it feels strong, durable, and timeless. Keep repeating the same sequence until the texture is fully visible across the piece.
The texture develops beautifully through repetition.
Step 6: Add color if desired
Bar stitch is lovely in solid colors, but it can also look striking in stripes or color blocking. The clean horizontal lines make it easy to showcase contrasting yarns. If you use several colors, keep the transitions neat so the bars stay visually clear.
Step 7: Finish with a clean border
Because the stitch itself is already structured, a simple border often works best. It frames the fabric without distracting from the texture. If you are making a blanket or scarf, a clean border can make the whole piece look more intentional.
Helpful tips
Bar stitch is a great choice for projects that need a modern or minimalist feel. It works especially well in muted shades, earthy tones, or two-color combinations. If you want a fabric that feels smooth, structured, and repeatable, this is a wonderful stitch to return to again and again.
3. Crochet Aligned Lotus Stitch Pattern
The aligned lotus stitch has a beautiful layered look that feels soft, floral, and balanced. It creates a repeating motif that resembles petals or lotus blossoms, arranged neatly across the fabric. This stitch is especially lovely for decorative blankets, pillow covers, and accent pieces where you want the texture to feel graceful and elegant.
Step-by-step guide
Step 1: Make a stable starting row
Begin with a row that provides a solid base for the lotus shapes. The aligned lotus stitch often depends on spacing and height, so the foundation row should be even and strong. A consistent base helps the motifs line up correctly.
A steady starting row supports the floral structure.
Step 2: Understand the lotus motif
Each lotus shape usually builds from grouped stitches and chain spaces that create layered petal-like sections. Before making a full project, practice a small swatch so you can see how the motif stacks. The aligned design depends on each lotus sitting in a neat row beneath the last.
The motif is the center of the stitch’s identity.
Step 3: Keep each repeat aligned
The most important part of this stitch is alignment. Make sure each lotus sits directly in line with the next so the pattern looks organized rather than scattered. This creates a calming, symmetrical effect across the fabric.
Alignment gives the stitch its elegant appearance.
Step 4: Use consistent stitch height
Because the stitch combines open spaces with taller sections, keeping the stitch height consistent is essential. If your rows vary too much, the petals may lose their shape. Work carefully and keep each motif the same size.
Consistency helps the lotus shapes stay crisp.
Step 5: Watch the spacing between motifs
The spaces between lotus shapes should remain even so the whole fabric feels balanced. Too much space can make the design look sparse, while too little can make it look crowded. Aim for a steady, repeating flow.
Balanced spacing makes the pattern feel refined.
Step 6: Repeat across the fabric
Continue building the aligned lotus pattern row by row. As the fabric grows, the motifs will start to create a very graceful, almost woven floral effect. This is one of those stitches that looks far more intricate than it is once you get into the rhythm.
Step 7: Block to open the petals
Blocking is extremely helpful with this stitch because it opens the motifs and helps the petals stand out. Once blocked, the stitch looks softer and more defined. This is especially useful for any project where the flower-like texture is part of the appeal.
Helpful tips
Aligned lotus stitch looks beautiful in soft, layered colors. A single solid shade feels elegant, but tonal color changes can make the petals look even more striking. It is a wonderful stitch when you want something feminine, calm, and decorative.
4. Crochet Harlequin Stitch Pattern
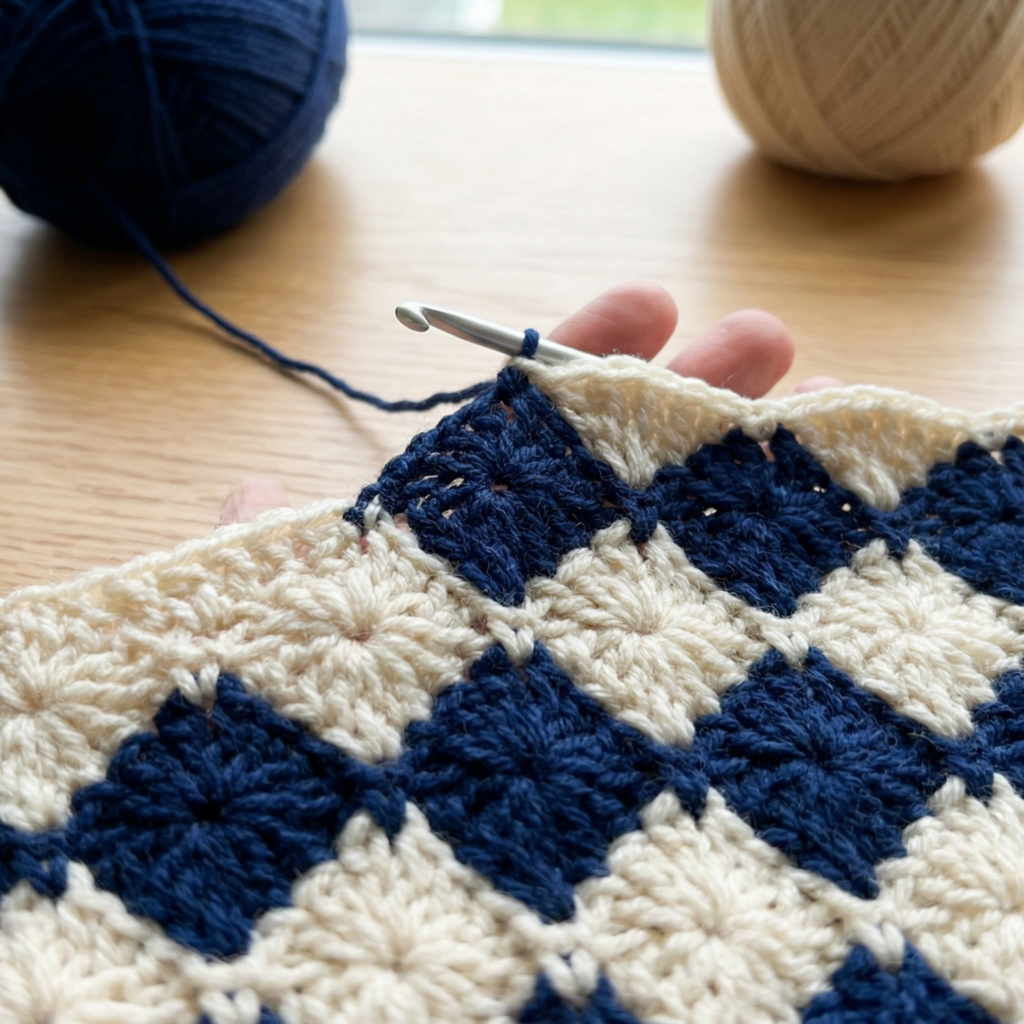
The harlequin stitch is bold, graphic, and full of personality. It creates diamond-like shapes or staggered clusters that give the fabric a strong visual rhythm. This is a fantastic stitch if you want a design that feels vintage-inspired, theatrical, or simply more eye-catching than a basic texture.
Step-by-step guide
Step 1: Start with a simple foundation
The harlequin stitch usually needs a foundation row that is easy to count and evenly spaced. Since the pattern relies on visual symmetry, the start of the fabric should be neat and accurate. A chain or base row with a repeat count is often necessary.
A reliable foundation is important for the geometry to work.
Step 2: Understand the diamond placement
This stitch creates a repeating diamond or staggered shape through grouped stitches and offset spacing. Before you work a large project, practice a swatch to understand how the diamonds are formed and where each repeat begins. Once you see the structure, the pattern becomes much easier.
The diamond layout is what defines the harlequin look.
Step 3: Keep the offset even
Harlequin stitch often depends on a staggered placement from row to row. This offset creates the characteristic pattern. Keep the offsets consistent so the diamonds look neat and intentional rather than random. Careful counting is your best friend here.
Even offsets make the design feel balanced.
Step 4: Watch the fabric shape
Because the stitch creates a strong visual pattern, tension can affect the shape quite a bit. Keep the fabric from pulling too tightly on one side. The piece should lie flat and keep its rectangular or square form if that is your goal.
A flat fabric helps the geometry look clearer.
Step 5: Repeat carefully
This stitch is all about repeat and placement. Once you get into the rhythm, keep your pattern consistent across the entire piece. The repetition creates the beautiful harlequin effect that makes the stitch so memorable.
Step 6: Try contrasting colors
Harlequin stitch looks especially good in two-tone or high-contrast color pairings. This helps the shapes pop. If you want a softer version, choose tonal shades instead. Either way, the stitch itself brings a strong decorative presence.
Step 7: Finish with a clean border
A neat border will help frame the harlequin pattern and keep the piece looking finished. Since the stitch is already very graphic, a simple edging is usually the best choice.
Helpful tips
Harlequin stitch is excellent for statement pieces. It works especially well in blankets, bags, and cushion covers where you want the pattern to really stand out. If you enjoy structured designs with visual impact, this is a stitch you will likely use again and again.
5. Crochet Long Wave Stitch Pattern
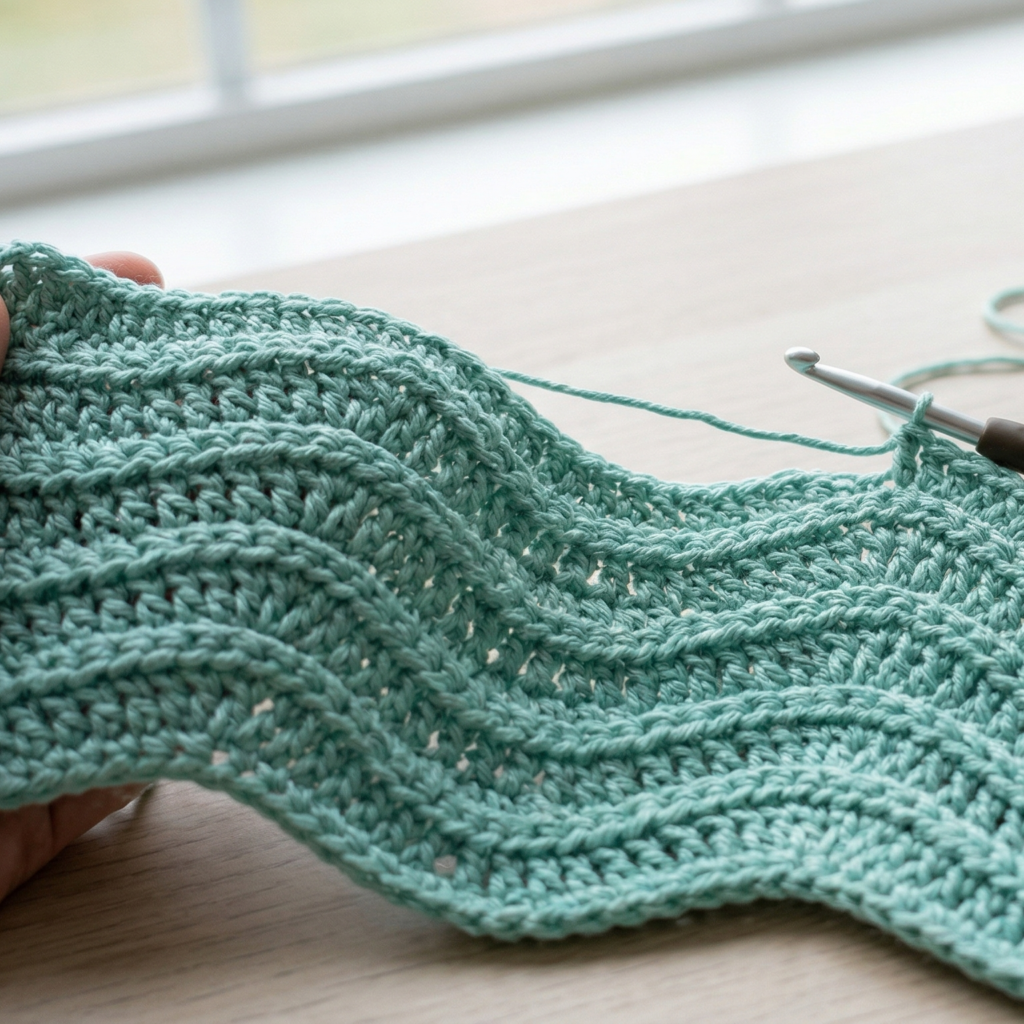
The long wave stitch is graceful, flowing, and relaxing to work. It creates sweeping curves across the fabric, giving the piece movement and softness. This stitch is perfect when you want a design that feels calm and organic, almost like gentle ripples in water or smooth rolling hills.
Step-by-step guide
Step 1: Choose a base row
Start with a foundation row that is even and easy to count. Long wave stitches rely on smooth transitions, so a stable start is important. A simple foundation helps the waves rise and fall more clearly.
A balanced base gives the waves room to flow.
Step 2: Learn the wave repeat
The long wave stitch usually uses increases and decreases or varying stitch heights to create the curved effect. Before starting a large project, try a swatch so you can see how the waves form. Once you understand the repeat, the stitch becomes very relaxing to work.
The wave repeat is what creates the motion.
Step 3: Keep the curves smooth
The best wave stitches have gentle transitions rather than sudden spikes. Try to keep the rises and dips balanced so the fabric flows naturally. If the waves become too sharp, the pattern may lose its soft look.
Smooth curves make the stitch feel elegant.
Step 4: Watch the row tension
Because the stitch uses movement across the row, tension can affect whether the waves lie flat or curl. Keep your hands relaxed and even. This helps the fabric remain soft and drapey instead of stiff.
Even tension supports the fluid look.
Step 5: Repeat the wave pattern
Continue repeating the same wave sequence row after row. As the fabric grows, the waves will create a soothing and rhythmic effect. This is one of the most satisfying stitches to work because the movement feels natural and continuous.
Step 6: Use color to enhance the flow
Long wave stitch looks beautiful in ombré shades, gentle stripes, or tonal yarns. Color changes can make the waves feel even more dynamic. If you want a quiet, calming look, stay with a single color family.
Step 7: Finish with a soft border
A simple border can help frame the flowing waves and keep the edges neat. Since the stitch has such a soft character, an understated border works best. It should support the design rather than interrupt it.
Helpful tips
Long wave stitch is especially lovely for blankets, scarves, and decorative wraps. It gives projects a calm, flowing rhythm that feels soothing to make and pleasant to look at. If you want a stitch that feels fluid and relaxing, this is a beautiful one to keep on hand.
Conclusion
The best crochet stitch patterns are the ones you keep coming back to because they work beautifully across different projects. A great stitch can make a simple shape feel special, turn a plain yarn into something eye-catching, and give your work a sense of style without requiring complicated shaping. That is what makes these five stitch patterns so useful.
The crown stitch brings elegance and decorative texture. The bar stitch offers a clean modern look. The aligned lotus stitch feels balanced and floral. The harlequin stitch creates bold geometric charm. The long wave stitch gives you movement and softness. Together, they show how much variety crochet can offer when you start exploring stitch texture and repeat patterns.
Whether you are making blankets, scarves, bags, or home decor, these stitches are the kind you will return to often because they are versatile, attractive, and satisfying to work. They each bring something different to the table, and learning them gives you more confidence to design projects that feel personal and polished.