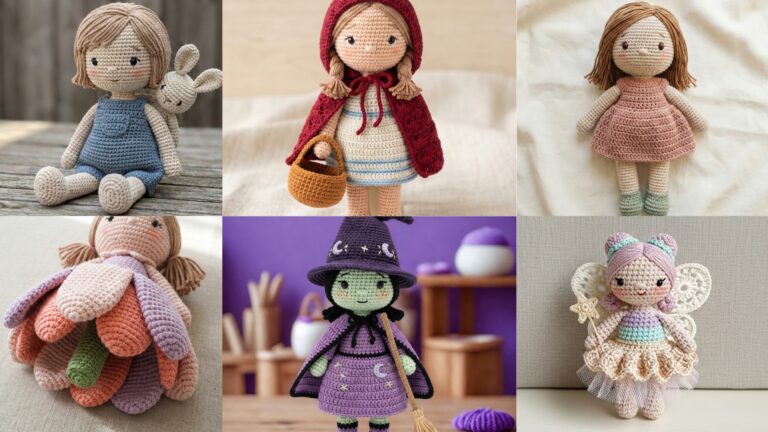
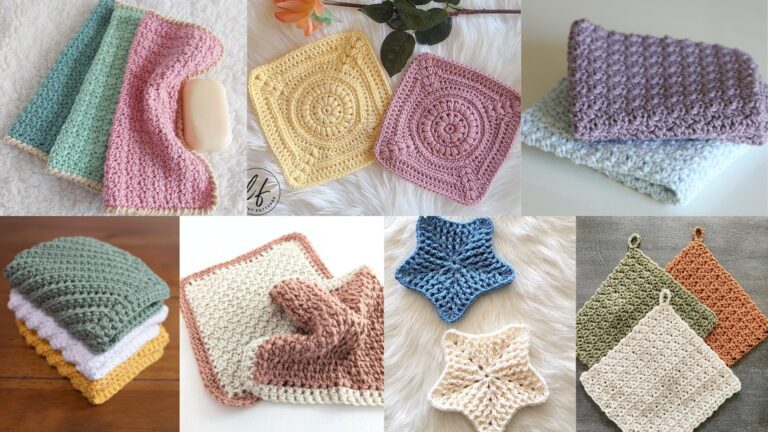
Small, quick, and endlessly useful — coasters are the perfect project to practice new stitches, use stash yarn, and make fast handmade gifts. Below you’ll find five complete coaster patterns aimed at beginner → intermediate makers: Boho Coaster, Vintage Coaster, Boho Square Coaster, Petunia Flower Coaster, and Sunshine Round Coaster. Each pattern section includes:
- Skill level
- Materials & finished size
- Gauge guidance and how to adapt size
- Full step-by-step instructions (US terms) with per-round stitch counts so you can follow exactly
- Variations, finishing, and care tips
Read the short general notes first (abbreviations, yarn choices, blocking tips) and then dive into the patterns.
Quick notes (applies to all patterns)
Abbreviations (US terms): ch = chain, sc = single crochet, hdc = half double crochet, dc = double crochet, tr = treble crochet, sl st = slip stitch, st(s) = stitch(es), rep = repeat, MR = magic ring, sk = skip, BLO / FLO = back/front loop only, inc = 2 sc in same st, dec = sc2tog (single crochet 2 together), sp = space, pic = picot (ch3, sl st in 1st ch).
Yarn & hook choices:
- For coasters I recommend 100% cotton or cotton blend for absorbency and heat resistance.
- Typical yarns: sport/DK cotton or worsted-weight cotton depending on the texture you want. For tighter, more durable coasters use worsted cotton + 4.0 mm hook (G/6) or a slightly smaller hook. For lacy vintage coasters use cotton thread size 10 + 1.75–2.25 mm hook.
- The examples below use worsted cotton + 4.0 mm hook as the baseline unless otherwise noted. This gives a sturdy coaster ~4″ diameter.
Finished size target: ~4″ (10 cm) diameter for round coasters; ~4″ square for square coaster. If you prefer larger or smaller, change hook/yarn or add/remove rounds/rows — guidance is given per pattern.
Gauge quick check (example baseline): With worsted cotton + 4.0 mm hook you should get roughly 16 sc = 4 in in a dense sc fabric. If your gauge differs, multiply your stitches-per-inch × desired width to calculate foundation counts where needed.
Blocking & finishing: Block your coasters flat (wet or steam per yarn label) and pin to shape. Blocking evens stitches, opens lace, and helps motifs lie flat.
1. Crochet Boho Coaster Pattern
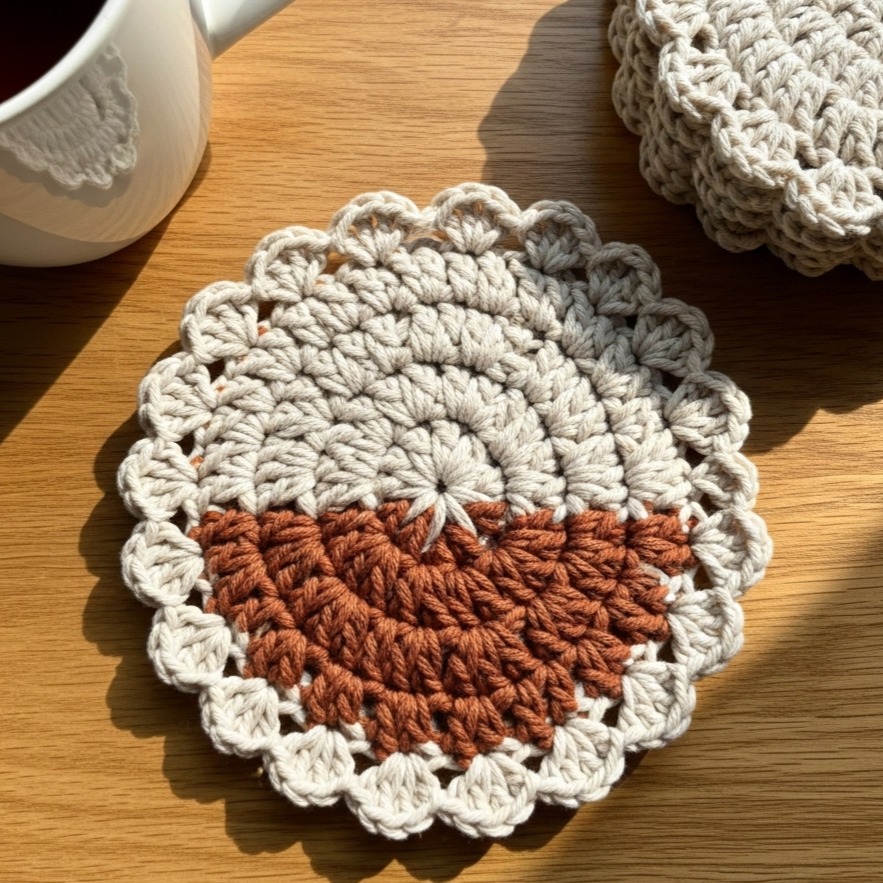
Skill level: Confident beginner — basic rounds, shells, and bobble/puff stitches.
Materials
- Worsted-weight cotton yarn (weight 4), approx. 20–30 yds per coaster.
- 4.0 mm (G) crochet hook.
- Tapestry needle, blocking pins.
Finished size: ~4″ (10 cm) diameter (after blocking).
Construction concept: A round center of dc rows, a textured body using puff/bobble stitches for boho texture, and a scalloped shell edging for a stylish rim.
Pattern (worked in continuous rounds or joined rounds — I give joined rounds for clarity)
Make a small sample if you want exact fit; otherwise follow the rounds below.
Round 1 — Centre (MR): MR, ch 1, work 8 sc into ring. Sl st to first sc. (8)
Round 2 — Increase: Ch 1, 2 sc in each st around. Sl st to first sc. Number of sts: 8 × 2 = 16. (16)
Round 3 — Even round: Ch 2 (counts as hdc), hdc in same st, hdc in next 15 sts. Sl st to top of ch2. (16 hdc)
Round 4 — Texture start (puff cluster row): Ch 1, [yo, insert hook, pull up loop] 3 times (you have 7 loops on hook), yo and pull through all 7 loops, ch 1, sl st into same st to secure puff; sk 1 st, sc in next st; rep * across to end. (You’ll get alternating puff + sc. Work evenly so texture spaces distribute.) Estimate stitch count remains ~16 puffs + 16 sc positions but puffs occupy multiple stitches — focus on pairing puff into every other stitch.
Round 5 — Solid round to stabilize: Join yarn, ch1, sc in each st and into each ch1 space across to even fabric. Aim for 32 sc if using one sc around every puff and sc position. (Count to confirm; adjust by adding sc in puff bases as needed.)
Round 6 — Shell placement: Shell pattern: (skip 1 st, 5 dc in next st (shell), skip 1 st, sc in next st) — rep around, ending so shells are evenly spaced. If you started Round 5 with 32 sc, doing skip1, shell in next, skip1, sc in next will give 8 shells around.
Round 7 — Shell edging finish: Sl st into center dc of first shell to anchor, ch 1, sc into that center, ch 3, picot (ch3 sl st into 1st ch of ch3) at shell peaks if desired, sc into shell center — repeat to decorate peaks. Fasten off and weave in ends.
Notes about counts: Because puff stitches compress and occupy stitches irregularly, Round 5 evens the fabric: you should land on a multiple that suits shell repeat (here I used 32 sc to allow 8 shells). If your Round 5 count differs, choose a shell repeat that divides your stitch count (e.g., 32 / 8 shells = 4-sc per shell section).
Variations
- Make the body all puff rows for an extra textured boho coaster.
- Use a 2-color motif: MC for center and shells in AC to highlight the scallop.
- Replace puff with bobble (5 dc bobble) if you prefer a more pronounced bump.
Finishing & care
- Block to flatten puffs slightly and shape scallops. Hand washing is safe; cotton tolerates machine washing on gentle but reshape while damp.
2. Crochet Vintage Coaster Pattern
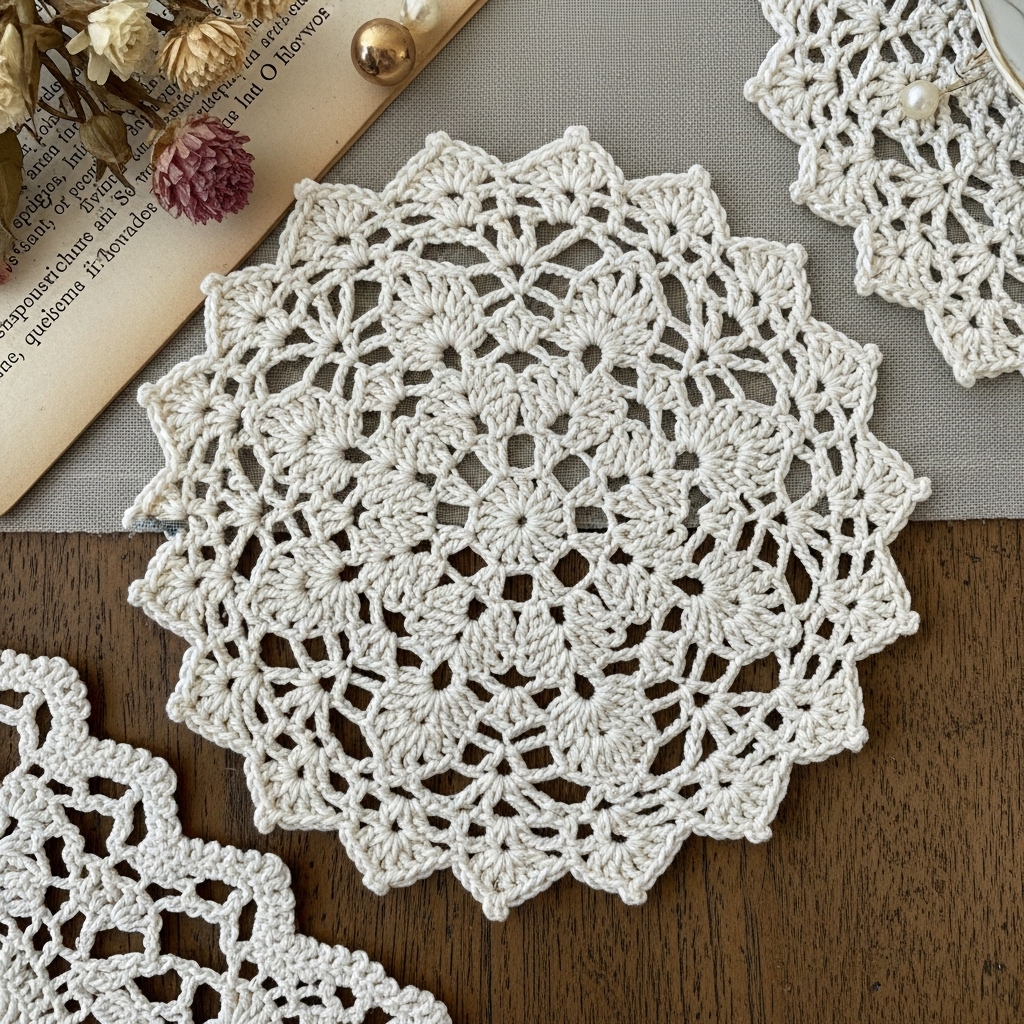
Skill level: Intermediate — working in fine thread or small hook, lace repeats and picot edging.
Materials
- Size 10 mercerized cotton thread (or fingering cotton) and a 1.75–2.25 mm hook.
- Tapestry needle, blocking tools (lots of pins).
Finished size: ~4″ (10 cm) diameter (cotton thread will make a slightly smaller finished coaster than worsted).
Construction concept: A tightly worked lace medallion built in rounds with openwork chains and small picot scallop for a vintage look.
Pattern (work in joined rounds; adjust tension for size)
Round 1: MR, ch3 (counts as dc), 11 dc into ring, sl st to top of ch3. (12 dc)
Round 2: Ch4 (acts as tr + ch1), dc in next st, ch1 rep around. (You will have 12 dc and 12 ch-1 spaces.) Sl st into 3rd ch of beg ch4. (12 dc + 12 ch-1)
Round 3: Sl st into next ch-1 sp, ch3, 2 dc in same ch-1 sp, ch1, 3 dc in next ch-1 sp, ch1 around. Sl st to top of ch3. (Creates 12 clover-like clusters.) (12 clusters)
Round 4 (mesh): Ch1, sc into first dc of cluster, ch5, sc into center dc of next cluster repeat around to create open diamond mesh; adjust ch count to get mesh that will expand evenly. Aim for ch5 but if your gauge is denser, ch4 may look better. (12 sc + 12 ch-spaces)
Round 5 (lace fill): Work shells into ch-spaces: [(sc, ch3, 3 dc, ch3, sc) into ch-space] around. This forms a ring of delicate shells.
Round 6 (picot edging): Ch1, sc around shell tops working sc, ch3, sl st in 1st ch of ch3 (picot), sc in each shell peak. Fasten off and weave ends.
Sizing tips: If your coaster is too small, repeat an extra mesh round before shells to add diameter. If too large, reduce mesh ch count.
Variations
- Work Round 4 as ch3 spaces for denser look.
- Add a tiny metallic thread on the edge for a subtle sheen for gifts.
Finishing & care
- Wet-block vigorously: pin each picot and shell so edges are crisp and dry completely. Thread coasters are fragile in machine wash; hand wash recommended.
3. Crochet Boho Square Coaster Pattern

Skill level: Beginner — great first coaster pattern; uses granny clusters and simple joining.
Materials
- Worsted-weight cotton, 4.0 mm hook.
- Tapestry needle.
Finished size: ~4″ square (works well as coaster or mug mat).
Construction concept: Classic square worked in rounds from the center out using granny clusters; finish with a firm sc border to help it lie flat.
Pattern (make one square)
Round 1 — centre: MR, ch3 (counts as dc), 2 dc, ch2, 3 dc into ring, sl st to top of ch3. This makes the first corner cluster. (one corner of 3 dc – ch2 – 3 dc)
Round 2 — create 4 corners: Ch3, 2 dc in same corner ch-2 space, ch2, 3 dc in same space (corner formed). Ch1, (3 dc, ch2, 3 dc) in next corner space repeat around 3 more times. Sl st to top ch3. You now have 4 corner clusters forming a small square.
Round 3 — expand: Ch3, 2 dc in same ch-2 corner sp, ch2, 3 dc in same sp (corner made), ch1, 3 dc in next ch-1 space between clusters, ch1, 3 dc, ch2, 3 dc in next corner sp, ch1, 3 dc in next ch-1 sp repeat around. Sl st to join. This round produces side cluster between corners. Continue expanding until square reaches ~4″ across after blocking (typical 3–4 rounds beyond center depending on yarn and hook).
Final round — solid border: Ch1, sc in each st around working 3 sc in each corner ch-2 space to keep corner angle. Work 2 rounds of sc for a firmer edge. Fasten off and weave ends.
Variations
- Use a contrasting color for the final border to make the square pop.
- Work more rounds to make a 5″ trivet or placemat.
Finishing & care
- Block to square sides; press gently if fiber allows. Machine washable if using machine-washable cotton.
4. Crochet Petunia Flower Coaster Pattern
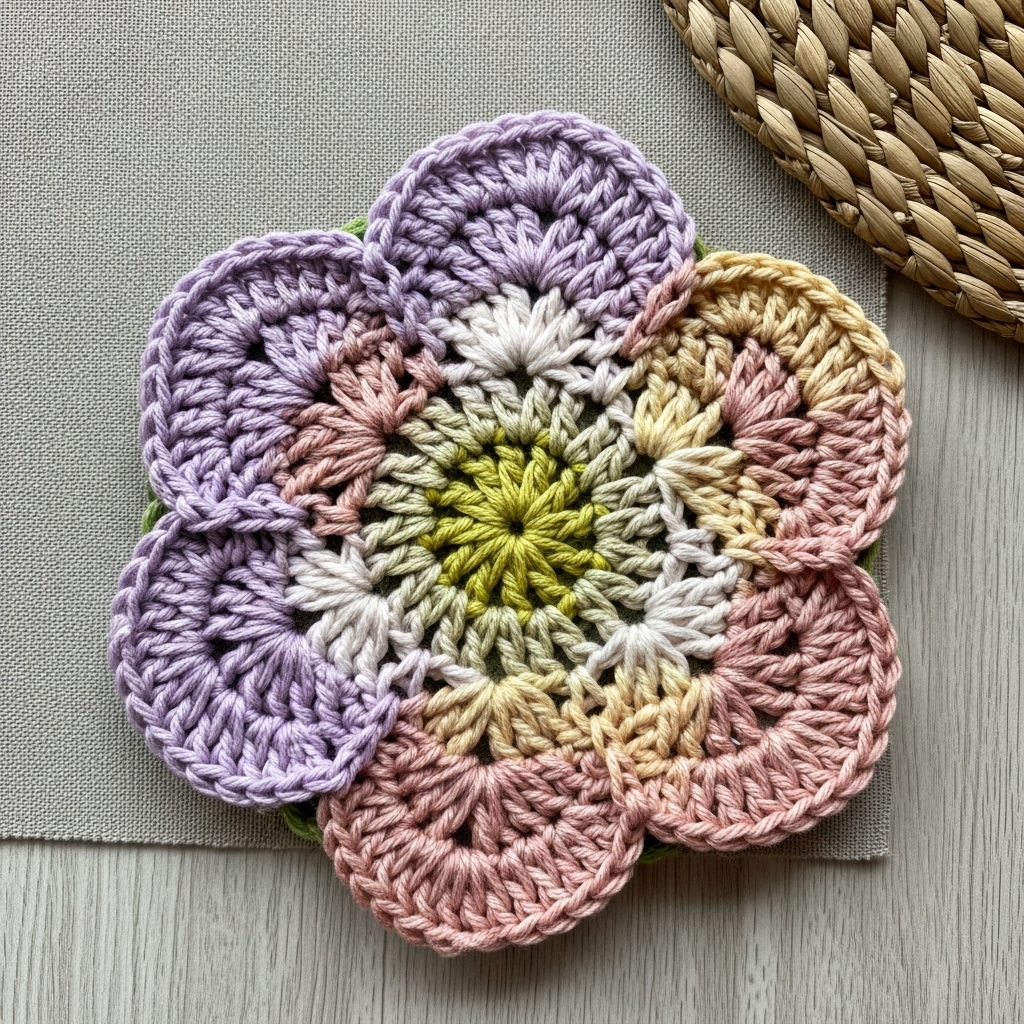
Skill level: Intermediate — working layered petals and small shaping.
Materials
- Worst ed cotton or DK-weight cotton, 4.0 mm hook. (Use sport/DK if you want slightly smaller flowers.)
- Tapestry needle, optional small piece of felt for backing (to protect surfaces from moisture).
Finished size: ~4″ diameter with slightly raised petals (flat enough for cups when pressed).
Construction concept: Work a flat circular base, then make a layer of petal clusters in rounds to create a petunia look. Optionally attach a small felt disc on the underside for absorbency and surface protection.
Pattern
Round 1 (base): MR, ch1, 8 sc into ring. Sl st to first sc. (8)
Round 2 (increase): Ch1, 2 sc in each st around. Sl st to join. (16)
Round 3 (even): Ch1, sc around in each st (16 sc). Sl st.
Round 4 (petal loops): ch6, sl st into next st repeat around to make 8 loops—space loops evenly. Sl st to join. (Make 8 loops if starting from 16 base sts; adjust loops if you have different counts — aim for 8 petals.)
Round 5 (petal shaping): In each ch-6 loop work: sc, hdc, dc, tr, dc, hdc, sc (or sc, hdc, dc, dc, hdc, sc for smaller petal). Fasten off at end of last petal. You will have 8 petals.
Round 6 (petal top row – optional ruffle): Join contrasting color at the base of a petal, in the top of petal work (2 dc, ch2, 2 dc) to create a little ruffled tip — do this on each petal for added dimension. Fasten off and weave ends.
Backing (optional): Cut a felt circle ~3.5–3.75″ diameter and whipstitch to the underside of the coaster. This protects tabletops and adds stability.
Variations
- Make center a contrasting color: after Round 3 embroider a small knot cluster or attach a crocheted small puff for center.
- Work two petal layers (inner smaller petals then outer larger petals) to create a fuller flower.
Finishing & care
- Block flat with gentle pressure so petals rest horizontally for practical usability. If very three-dimensional, press petals slightly so mugs sit evenly. Felt backing can be glued or hand-stitched.
5. Crochet Sunshine Round Coaster Pattern

Skill level: Intermediate — puff stitches and starburst increases.
Materials
- Worsted cotton and 4.0 mm hook.
- Tapestry needle, blocking tools.
Finished size: ~4″ diameter.
Construction concept: A small central starburst of puff stitches radiating outward into dc rounds and finished with a tidy sc rim — cheerful and modern.
Pattern
Round 1 – Center star (MR): MR, ch1, work 8 sc into ring. Sl st to join. (8)
Round 2 – Puff star: Ch1, [yo, insert hook into next st, pull up loop] 4 times (you have 9 loops on hook), yo pull through all 9 loops, ch1, sl st into same st to secure puff; ch1, sc in next st; rep around creating 4–5 puff clusters alternating with sc. This will give a textured sun center. You should have 8 puffs + 8 sc spacing if placed into every st.
Round 3 – Even round: Ch2, hdc in each st and into each ch-1 spacing to even out the round. Aim for a total of 16–20 hdc depending on how many puffs you placed and how dense they are. Adjust to reach a tidy round.
Round 4 – Radiating dc round: Ch 2, dc twice in each hdc or sc around to create growth: dc2 in each st will increase quickly. If you had 16 sts, dc2 in each would be 32 dc. Alternatively do dc in next st, dc2 in next to space increases and keep shape flat. Choose scheme that lays flat.
Round 5 – Gentle shell finish: [skip 1 st, shell (5 dc) in next st, skip 1 st, sc in next] repeat around to create sun-like scallops. Work shells spaced to match your dc count (if 32 dc, doing skip1, shell in next will produce 8 shells).
Round 6 – Sc border: Ch1, sc in each st around; work picot at shell peaks if desired: (sc in shell center, ch3, sl st in 1st ch — picot). Fasten off and weave ends.
Variations
- Make the puff star in a bright color (sun center) and the shells in a contrasting pastel for a summer vibe.
- Use a larger puff (5 loops) for a chunkier center.
Finishing & care
- Block gently to open shells and flatten puff center. Hand wash or gentle machine wash per yarn instructions.
Final finishing notes (all patterns)
- Blocking: Wet-block coasters on a towel and pin flat to the target shape. For stiff cotton coasters, light spray/blocking is enough. For vintage lace coasters, pin each picot and leave to dry fully. Blocking evens edges and helps motifs sit flat.
- Backing: If you expect wet glasses or want extra protection, add a small circle of felt sewn to the bottom. Felt also prevents slipping and protects table surfaces.
- Sealing & stability: For coasters used with very wet glasses, consider a thin layer of coastersafe waterproofing sprayed on the underside only (test on a scrap first) or use a laminated coaster underlay.
- Gifting: Package sets of four in a neat stack with twine and a small tag explaining yarn fiber and wash instructions. Coasters make excellent quick gifts and market items.
Conclusion
These five coaster patterns cover a broad stylistic range — boho texture, heirloom lace, stash-friendly granny squares, floral 3D petunias, and sunny puff starbursts — and are practical patterns that can be completed in under an hour to a couple of hours each depending on stitch complexity. Each design is easy to adapt for size, color, or thickness: use thicker yarn or more rounds for trivets, or finer thread and smaller hooks for delicate teacup mats.