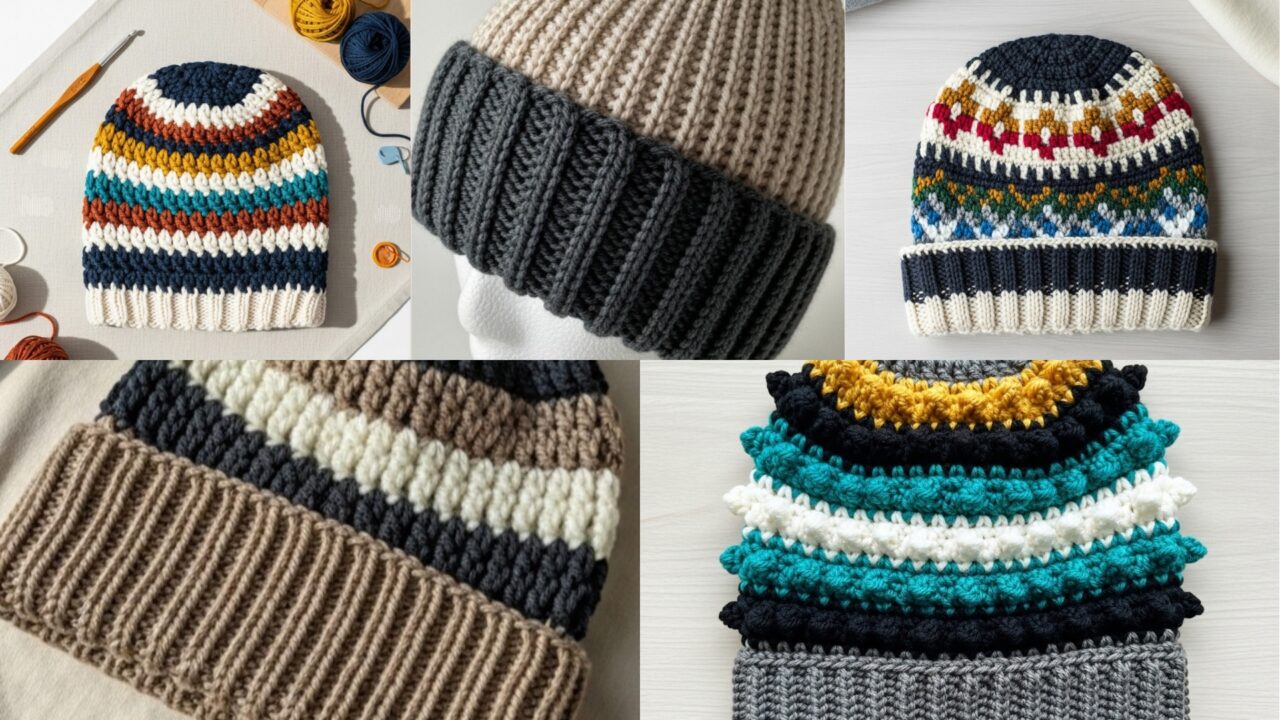
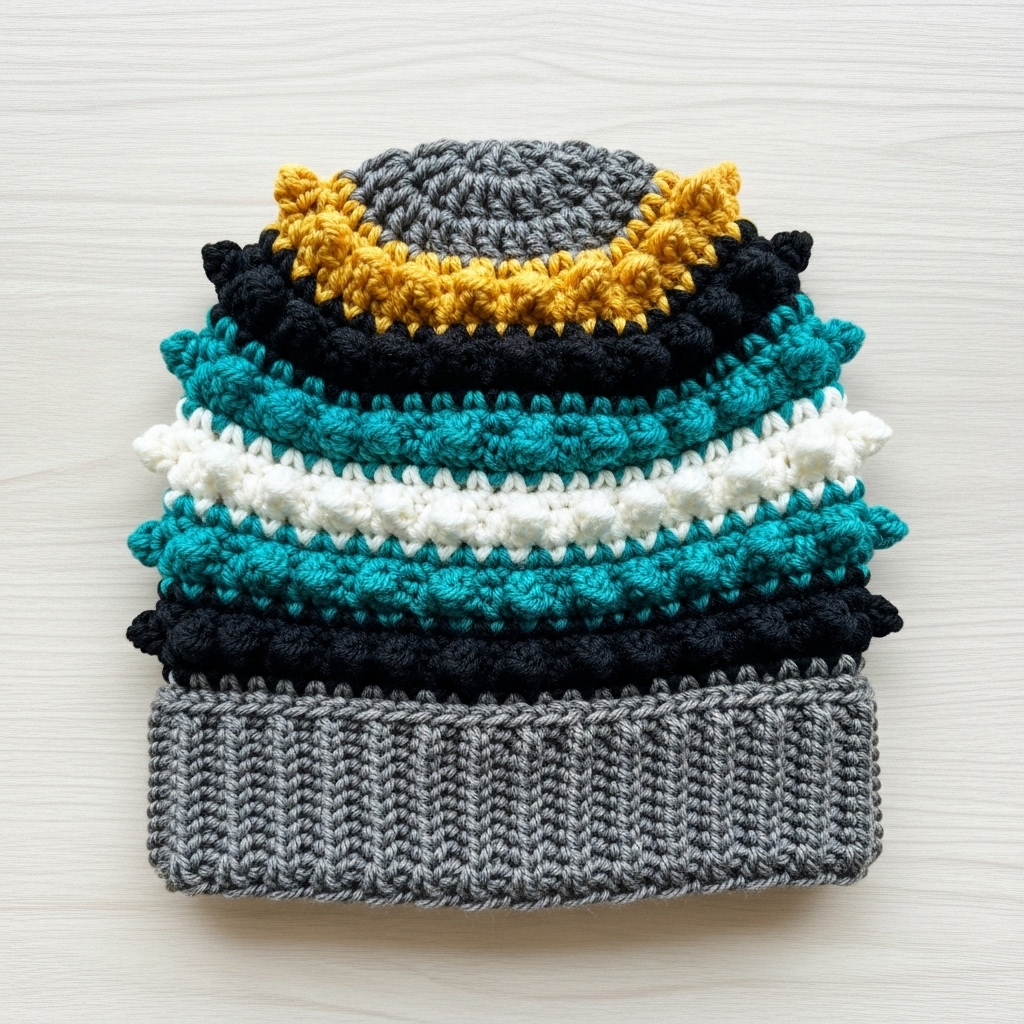
Crocheting a beanie is one of the most satisfying wearable projects: quick to make, endlessly customizable, and highly practical. In this post you’ll find five distinct beanie designs — from geometric mosaic to cozy ribbed — each with a clear materials list, skill level, sample gauges and stitch counts, full step-by-step instructions (crown, body, brim), variations, finishing notes, and styling suggestions. I give a sample sizing method and worked examples so you can scale these patterns to any head size.
All patterns use US crochet terms. Where I give numeric stitch counts I base them on a sample gauge explained below; if your gauge differs, I show exactly how to calculate your own counts.
Quick general notes before you start
- Abbreviations used: ch = chain, sc = single crochet, hdc = half double crochet, dc = double crochet, tr = treble (UK = treble; US = double treble), st(s) = stitch(es), sl st = slip stitch, sk = skip, rep = repeat, BLO = back loop only, FLO = front loop only, dec = sc2tog (single crochet 2 together), RS/WS = right side/wrong side.
- Yarn & hook: Most examples below use worsted weight (Aran/weight 4) yarn and a 5.0–5.5 mm (H–I) hook for the body and a smaller hook for firm ribbing if desired. Adjust hook size for a different gauge or a slouchier/dense fabric.
- Sizing basics: Measure the head circumference you want to fit (elastic beanies compress a little). Typical target circumferences:
- Newborn: ~14 in
- Child: ~17 in
- Adult (average): ~21 in
- Sample swatch & formula: Make a 4 in × 4 in swatch in the stitch used for the body. Count stitches per inch (st/in). Multiply st/in by the desired head circumference to get the number of stitches for the main body round. If the pattern’s stitch repeat requires the number of stitches to be a multiple of N, round the total to the nearest number divisible by N and adjust head circumference or tension slightly if necessary.
Example default gauge I use in the worked examples below (worsted yarn, 5.5 mm hook):
14 sc = 4 in → 3.5 sc per inch.
Using 3.5 sc/in as a concrete worked example, the rough target stitch counts are:
- Newborn (14 in) → 14 × 3.5 = 49 sts (nearest multiple advice below).
- Child (17 in) → 17 × 3.5 = 59.5 → 60 sts (rounded).
- Adult (21 in) → 21 × 3.5 = 73.5 → 74 sts (rounded).
Practical note about repeats: Many decrease schemes and stitch patterns are easiest when the stitch count is divisible by a small number (6, 8, 10, etc.). If your computed stitch count isn’t divisible by the repeat, round to the nearest number that is divisible by the repeat (for example: 72 or 78 for a multiple of 6 near 74). I’ll flag repeat requirements in the pattern sections.
1. Crochet Mosaic Beanie Pattern
Overview: Clean, geometric colorwork using mosaic crochet creates a striking beanie that looks complicated but is simple to stitch. Mosaic technique is worked in single-color rows while carrying an accent color for slipped-stitch mosaics — no stranded floats across the whole round.
Skill level: Intermediate (comfortable with slipped stitches and carrying yarn); confident beginner can follow along.
Materials
- Worsted-weight yarn: Main color (MC) ~150–200 yds; Accent color (AC) ~50–100 yds.
- Hook: 5.5 mm for body; 5.0 mm or 5.5 mm for brim depending on desired tension.
- Stitch marker, tapestry needle, measuring tape.
Gauge (sample): 14 sc = 4 in (3.5 sc/in). Use this if you want to follow the stitch counts below exactly; otherwise swatch and calculate.
Repeat requirement: The mosaic chart below works best with stitch counts divisible by 6; I’ll use Adult = 72 sts in the worked example (closest multiple of 6 to the example adult count computed earlier).
Finished sizes (worked example stitches)
- Newborn: 48 sts (6 × 8)
- Child: 60 sts (6 × 10)
- Adult: 72 sts (6 × 12)
If your computed stitch count is not divisible by 6, round to nearest divisible by 6 (see Quick notes).
Construction overview
A fitted beanie usually consists of: (A) the crown decreases worked in rounds (worked from the top outward) or (B) bottom-up construction with ribbed brim first and crown decreases at the end. Here we’ll build top-down (center crown first) because mosaic colorwork stacks nicely when worked top-down.
Step-by-step (adult example, 72 sts circumference)
Crown (top down, closed at top)
- MR, R1: ch 1, 6 sc in ring. (6)
- R2: inc in each st around (12).
- R3: sc in next st, inc in next around (18).
- R4: sc 2, inc around (24).
- R5: sc 3, inc around (30).
- R6: sc 4, inc around (36).
- Continue increasing with same progression (add one sc between increases each round) until the crown circle is approximately 2.75–3 inches across. For example, continue to rounds hitting 42, 48, 54, 60, 66, 72 sts. Stop increasing when you reach your target main-body stitch count (72 sts).
Note: Because mosaic patterns are worked in slipped stitch rows, it’s helpful to have the flat sewn crown first so the mosaic rounds run horizontally without interrupting the motif repetition. If your mosaic chart repeats every 6 stitches, make sure the number of stitches at the base of the crown equals the chart repeat multiple.
Body — mosaic colorwork
8. Join MC if not already attached. Work 1 round sc in MC (even round) to set a base.
9. Begin mosaic chart: mosaic crochet typically uses one dominant color per round and slipped stitches to carry the accent. A simple two-color mosaic repeat to try (each block 2×2):
- Round A (MC): sc in each st across, carrying AC as needed and slipping the next st when chart calls for it.
- Round B (MC): sl st in next st using MC (skip working in that st), sc in next st in MC; use AC for slipped stitches when the chart indicates.
- For a clear pattern, follow a small 6-st chart: e.g., [MC: sc, sl; MC: sc, sl; MC: sc, sl] repeated.
- Continue working mosaic chart rows until 6–7 inches total height from crown for a standard beanie height (or up to 8–9 inches for slouch). Sample adult height: aim for 8.5–9.5 inches total including brim for fitted adult beanie; for slouch add 1–2 inches.
Brim (ribbed or folded)
11. For a neat, elastic brim: work 1–2 rounds of sc in BLO (back loops only) to create a ribbed effect, then work a folded brim by making an extra set of rows:
– Round 1 brim: with MC work sc in BLO around for 3–4 rounds (this gives a flexible rib).
– Fold the brim up 1 inch and seam inside or continue to work additional rounds to create a double-thick brim. Alternatively, work a tall 1×1 rib in front/back loop slip stitches: (sc in BLO, sc in FLO next st) repeating across for a deep rib.
Finishing
12. Weave in ends; block lightly to set mosaic stitches flat. For a slouchier hat, use a larger hook for the body rounds and a smaller hook for the brim.
Variations & styling
- Use three colors for stepped mosaic motifs.
- Make a cuffed (folded) brim for a warm beanie.
- For a fitted look, remove 1–2 rounds of body height; for slouch add length.
Tips
- Carry unused color loosely along the wrong side or use bobbins to avoid long floats. Keep floats ≤ 6 sts; otherwise cut and weave in.
2. Crochet Lucien Slouchy Beanie Pattern

Overview: A relaxed, slouchy beanie with a textured body and a wide, folded ribbed brim. The Lucien is designed for those who like a soft crown with extra fabric at the back — very flattering worn off-center.
Skill level: Confident beginner (basic increases, front post/back post stitches help create texture).
Materials
- Worsted-weight yarn ~200–250 yds.
- Hook: 5.5 mm for body; 5.0 mm for brim if you want firmer ribbing.
- Stitch marker, tapestry needle.
Gauge (sample): 3.5 sc per inch (same sample). Example adult stitch count used below: 74 sts is what we computed earlier as a raw estimate; for this design choose a multiple of 2 or simply measure to fit — I’ll use 74 sts and provide adjustments.
Construction concept
Top-down crown shaping, then textured body in post stitches for drape, then a wide brim worked in ribbing to fold up. Slouch comes from extra body length: about 10.5–11.5 inches total height before brim for a relaxed slouch.
Step-by-step (adult example, 74 sts)
Crown
- MR, R1: ch1, 6 sc (6).
- R2: inc each st (12).
- R3: sc1, inc around (18).
- R4: sc2, inc around (24).
- Continue increasing by 6 sts each round (add an additional sc between increases each round) until you reach 74 sts around. You can stop at a smaller multiple and then add a round of even sc to reach the exact stitch count.
Body — textured stitches (raised rib or puff texture)
6. Example textured repeat: Row A (RS): ch1, sc across; Row B: ch2, fpdc around next st, bpdc around next st repeating — this creates vertical ridges.
- Work alternating rounds of fpdc (front post double crochet) and bpdc (back post double crochet) in alternating columns to create a ribbed texture that stacks vertically.
- Continue textured rounds until the beanie body reaches about 9.5–10.5 inches from crown (for a slouchier fit aim for 10.5–11.5 inches). Try the hat on or measure against a slouch target.
Brim — wide folded rib
8. Switch to smaller hook (optional). Work 10–12 rounds of sc in BLO to form a deep rib that folds. Another attractive option is to work a 1×1 front/back loop rib:
- Round 1 of rib: sc in BLO around (gives immediate horizontal ridges).
- Optionally, work an additional 8 rows of alternating sc in BLO/FLO to build a 2–3 inch tall rib; fold up and secure inside with a few stitches.
Finishing
9. Tidy crown if needed: if your crown is open, gather remaining sts with yarn needle and weave tail inside.
10. Weave in ends and block lightly to define texture.
Variations
- Use a slouchy intention: add 1–2 inches to the body length for more drape.
- Add a pompom to the top for a playful accent.
- Use chunky yarn and larger hook to speed up the project and increase slouch.
Styling
- Pair with a long coat and boots — Lucien looks great worn slightly back on the head.
3. Crochet Fair Isle Beanie Pattern

Overview: Classic, cozy Fair Isle (stranded colorwork) beanie. This pattern uses small, repeating color motifs worked in the round with two (or more) colors per round. For this technique you carry floats across the wrong side and keep float lengths short.
Skill level: Intermediate (colorwork technique and tension control required).
Materials
- Worsted-weight yarn in 3–4 colors (MC + 1–3 contrasting colors) total ~200–250 yds.
- Hook: 5.0–5.5 mm.
- Stitch markers, tapestry needle.
Gauge (sample): 3.5 sc/inch (sample). Choose a multiple that suits your chart repeat; many Fair Isle charts use repeats of 8 or 10. For our adult worked example we’ll use 80 sts (10 × 8), which is a good round number near our sample adult count and divisible by 8.
Construction concept
Top-down increases with stranded colorwork beginning after the crown increases. To maintain clean colorwork, join floats on the wrong side and twist yarns at color changes to avoid long floats.
Step-by-step (adult example 80 sts)
Crown
- MR, 6 sc.
- Increase rounds as before until your base round equals 80 sts (or the multiple required by your chart). For example: 6→12→18→24→30→36→42→48→54→60→66→72→78→84 — stop when you hit or a round near 80 and adjust with a round of sc to reach 80.
Fair Isle chart rounds
3. Once at the desired base count, switch to MC and begin following a simple 8-st motif chart. A small motif example (each round):
- Round 1: MC pattern row with color A accents in selected sts (work sc in MC but change color for accent sts).
- Round 2: All MC sc to set base.
- Round 3: Colorwork with color B forming diamonds or crosses.
- Repeat chart rows to desired depth.
- Continue colorwork until beanie measures 7–8 inches from crown (for fitted adult hat) or 9–10 inches for slouch.
Crown shaping with stranded yarns
5. Start decreases while keeping chart in mind: decrease rounds should be done in MC when possible to avoid complicated stranded decreases. When decreasing in colorwork rows, maintain correct floats and twist colors at the decrease points.
Brim
6. For a classic finished look, make a folded brim:
- Work 2–3 inches in 1×1 rib using sc in BLO alternating with sc in FLO or use hdc in BLO for a softer, less bulky fold.
Finishing
7. Close crown by cutting yarn and running tail through remaining loops; weave in ends. Use a duplicate stitch to tidy small color ends if floats were clipped.
Variations & tips
- Chart complexity: start simple (one accent color) then add more detailed motifs once you’re comfortable.
- Carry floats no longer than 4–5 sts; catch floats on wrong side every 2–3 sts if needed.
- Use removable stitch markers and place them at chart repeats so you don’t lose place.
Styling
- Timeless look for winter: pair with a matching fair isle scarf.
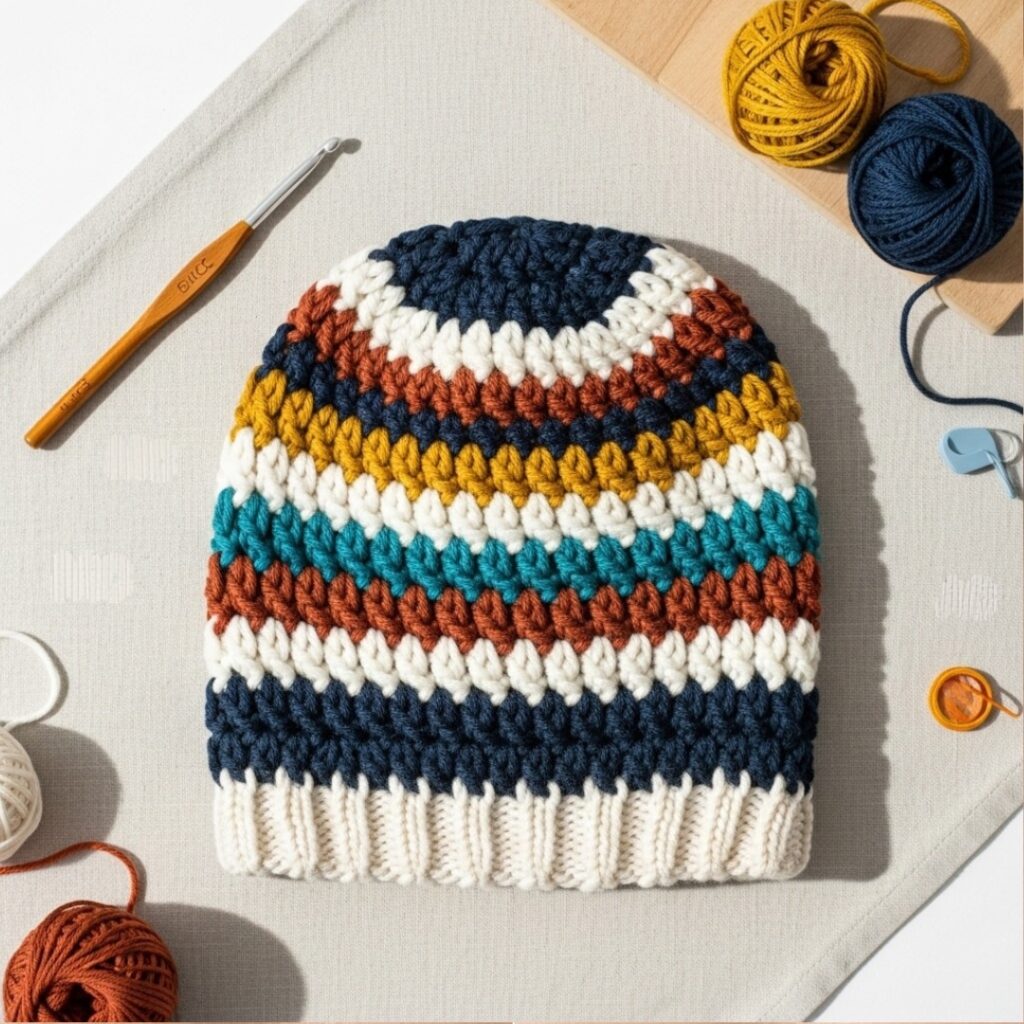
4. Crochet Spike Striped Beanie Pattern
Overview: A bold, modern beanie with alternating spike stitch texture and color stripes. The spike stitch gives a vertical spike or “leafy” texture which adds height and elasticity.
Skill level: Confident beginner (basic stitch combos and spike stitches).
Materials
- Worsted yarn (two contrasting colors recommended) ~200 yds.
- Hook: 5.5 mm.
- Tapestry needle.
Gauge (sample): 3.5 sc per inch; choose a stitch multiple based on your stripe repeat—no strict divisibility requirement for spike.
Construction concept
Top-down crown, spike stitch rounds for body, finished with a ribbed brim. Spike stitch is formed by inserting hook into a previous row’s foundation (2–3 rows below) and working a dc/hdc as a spike.
Step-by-step (adult example; use computed adult count rounded to nearest even number: 74 sts)
Crown
- MR, 6 sc; increase till you reach 74 sts (or preferred circumference divisible by 2).
Body with spike texture
2. Choose stripe sequence: e.g., 3 rounds MC, 2 rounds AC, repeat.
3. Spike stitch round example (create vertical elongated stitches):
- Round X (spike round): ch2 (counts as hdc), insert hook two rows down into the stitch directly below and hdc (spike), sc in next st — repeat across to create staggered spikes. Alternatively, for a more dramatic spike use dc into 2–3 rows below.
- Work color stripes: change color at beginning of a round and carry yarn up inside if stripe length short (or fasten off and weave ends).
- Continue alternating spike rounds with normal rounds until you reach desired height (adult fitted ~8–9 in).
Brim
6. Work 2–3 inches of hdc in BLO or sc in BLO for folded brim. Spike texture already gives elasticity; a narrower brim will lay flat inside or outside.
Finishing
7. Close top as usual, weave in ends. For pronounced vertical spikes, block with pins to help spikes stand slightly.
Variations
- Make spikes longer by working into 3 rows below.
- Use gradient yarn for stripes that softly change.
Styling
- Modern street style: spike striped beanies pair well with denim jackets and sneakers.
5. Crochet Ribbed Beanie Pattern
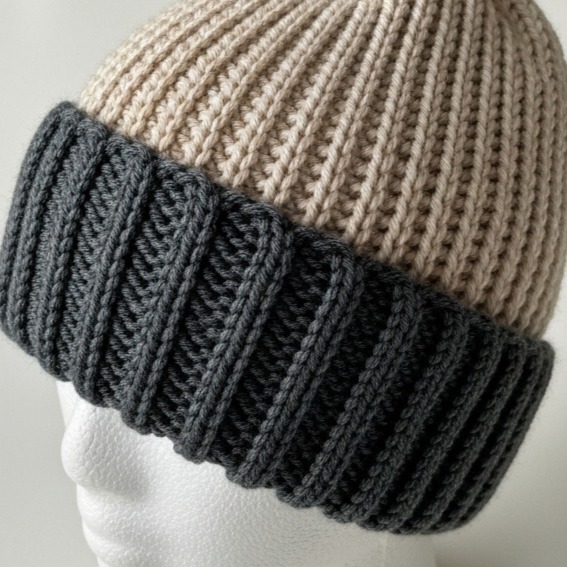
Overview: The ribbed beanie is the classic, unisex staple: deep elastic ribbing (front/back post stitches or alternating loops) and a snug fit. This is the pattern to choose if you want a simple, fast, and flattering hat.
Skill level: Beginner (post stitches are optional; you can get rib with BLO sc too).
Materials
- Worsted-weight yarn ~175–225 yds.
- Hook: 5.5 mm for body; 5.0 mm for firm rib if desired.
- Tapestry needle.
Gauge & counts (sample): Because ribbing often uses FPDC/BPDC or BLO sc, gauge will differ. Using the sample sc gauge (3.5 st/in), an adult count of 72 sts or 74 sts works. For rib stitches (FPDC/BPDC), an even number (multiple of 2) is preferred — choose 72 for an adult for easy repeat.
Construction concept
You can make the ribbing either bottom-up (brim first) and then work the body and crown in dc/hdc, or make top-down and finish with a ribbed brim. Many ribbed patterns are easiest bottom-up.
Bottom-up method (recommended): adult example 72 sts
Brim (cast-on style)
- Ch 72, join to work in the round (do not twist). Place marker.
- Round 1: fpdc around next st, bpdc around next st repeat around. This creates a 1×1 vertical rib that looks like knitted ribbing.
- Repeat Round 1 for 12–14 rounds to make a wide folded brim (about 2.5–3.25 inches). For a single-layer brim work 6–8 rounds.
Body
4. After brim, switch to hdc or dc in the round for the body for some structure or continue FPDC/BPDC for full textured body. Work even rounds until body height reaches about 6–6.5 inches above brim for a fitted adult beanie (or 8–9 inches for slouch).
Crown decreases
5. Start decreases: Work decrease rounds to taper the crown. Example decrease scheme for 72 sts with hdc body:
- Round 1 decrease: hdc 5, hdc2tog repeat (12 decreases) → new total 60 sts.
- Round 2: hdc 4, hdc2tog repeat → 50 sts.
- Round 3: hdc 3, hdc2tog repeat → 40 sts.
- Round 4: hdc 2, hdc2tog repeat → 30 sts.
- Round 5: hdc 1, hdc2tog repeat → 20 sts.
- Round 6: hdc2tog repeat → 10 sts.
- Fasten off and weave tail through remaining loops, pull tight.
Adjust decrease spacing per stitch counts; the numeric example above assumes starting at 72 sts. If you chose 74 sts, adapt the number of hdc between decreases accordingly so decreases are distributed evenly.
Finishing
6. Weave in ends; fold the brim up and tack at sides for a clean uniform cuff. Block lightly if needed.
Variations
- Use sc in BLO for a less pronounced rib that’s still elastic.
- Make tall ribbing for a chunky look or short ribbing for minimal cuff.
Practical tips
- For best elasticity use FPDC/BPDC rather than sc in BLO when you want knit-like stretch.
- If you’re using bulky yarn, reduce the number of rounds for brim and body accordingly.
Finishing touches & blocking for all beanies
- Weave in ends securely — for crowns where many ends meet, weave each tail back and forth under several stitches before trimming.
- Blocking: For stitch definition (mosaic, fair isle, spike stitches) block the hat lightly by steaming or wet-blocking on a rounded form (e.g., a bowl or balled towel) to preserve shape. Don’t over-stretch.
- Seaming the brim: If you folded the brim and sewed it inside, use even stitches to avoid lumps. Mattress stitch on the inside gives a neat finish.
- Pompom or toggle: Add a faux fur pompom or a leather toggle to personalize the hat.
Troubleshooting & fit adjustments
- Too tight/too loose: Adjust hook size up or down 0.5–1 mm and re-swatch. Alternatively change yarn weight.
- Crown puckering: If decreases pull in sharply, try smoothing decreases by spacing them more gradually (use more decrease rounds).
- Pattern repeat mismatch: If your stitch count doesn’t match the required multiple for a stitch repeat, either choose a different multiple close to your calculated count (increase/decrease by 1–6 sts) or alter your gauge slightly by changing hook size.
Conclusion
These five beanie patterns — Mosaic, Lucien Slouchy, Fair Isle, Spike Striped, and Ribbed — give you a flexible toolkit for crochet headwear across seasons and styles. Use the ribbed beanie as your go-to cozy staple, try the fair isle or mosaic designs for colorwork practice, and grab the Lucien or spike striped versions when you want something more relaxed and textural. Each design can be adapted for newborn, child, or adult sizes by adjusting stitches per inch and rounding to the nearest repeat multiple where necessary.