Crochet anklets are such a lovely little accessory because they feel playful, feminine, and easy to wear without being overdone. They are the kind of handmade piece that can instantly make a summer outfit feel more thoughtful and stylish, whether you are wearing sandals, barefoot on the beach, or just adding a delicate detail to your everyday look. Because anklets are so small, they are quick to make, fun to personalize, and ideal for trying out new stitches, beads, and tiny motifs without committing to a bigger project.
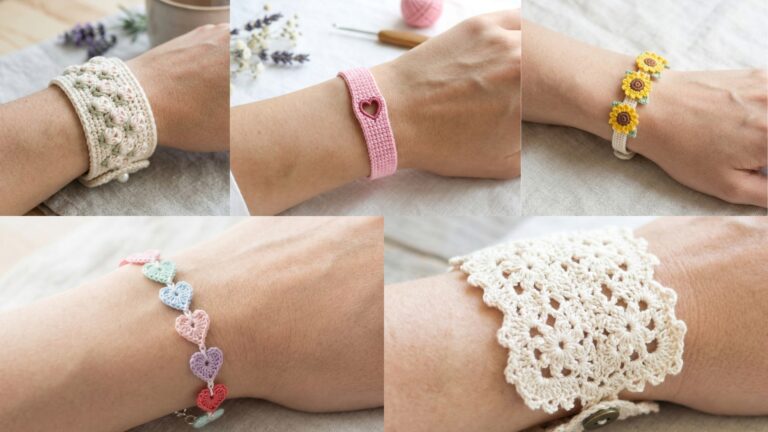
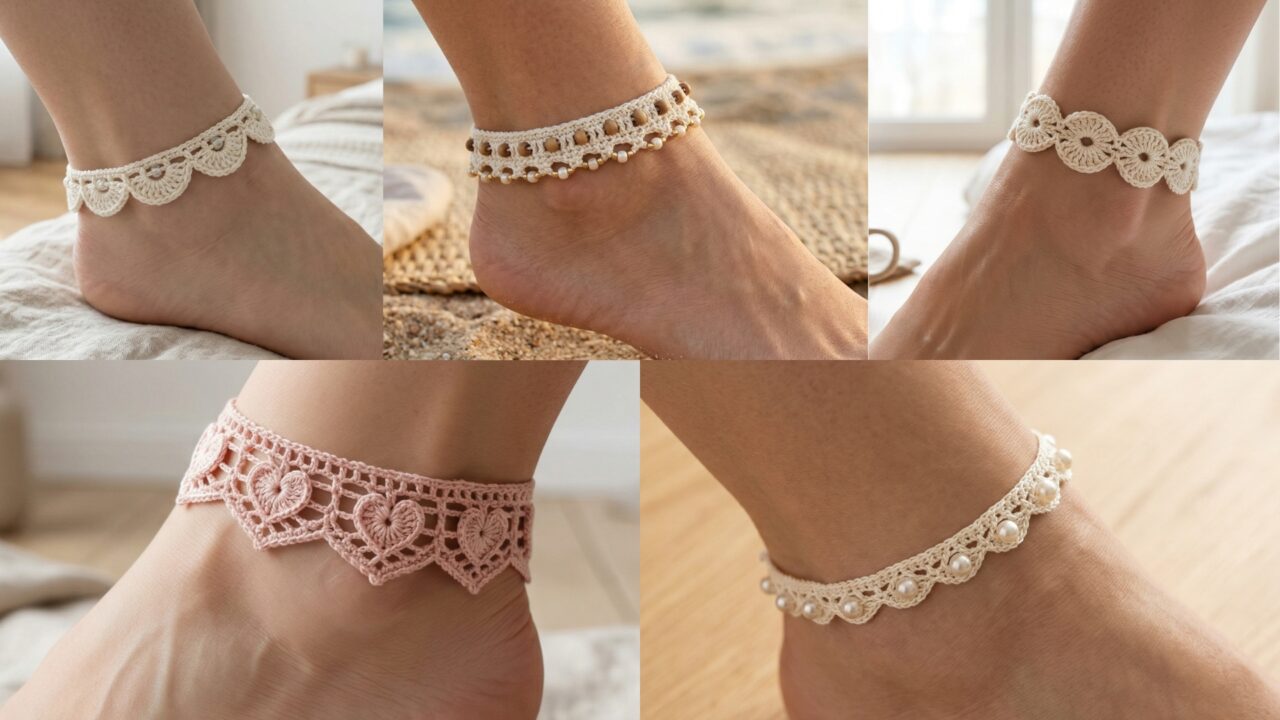
What makes crochet anklets especially charming is how much personality you can fit into such a small design. A boho beaded anklet feels relaxed and artsy. A shells stitch anklet brings in a soft coastal mood. A pearl bead anklet feels elegant and timeless. A scallop glass beaded anklet adds sparkle and detail. A lacy heart motifs anklet feels sweet and romantic. Each one has its own vibe, but all of them are lightweight, comfortable, and perfect for warm weather.
In this post, you will find five crochet anklet patterns with detailed step-by-step guidance, practical tips, and finishing notes to help you create anklets that look beautiful and feel comfortable to wear. These designs are easy to adapt and fun to make, which makes them perfect for gifts, beach outfits, summer markets, or simply adding a handmade touch to your own accessory collection.
Quick Notes
Project type: Crochet anklets
Best for: Summer outfits, beach walks, gifts, festivals, and handmade accessories
Skill level: Beginner to intermediate, depending on decorative detail
Hook size: Usually 1.5 mm to 3.0 mm, depending on yarn weight and desired delicacy
Yarn weight: Crochet thread, lace weight, fingering weight, or very lightweight cotton
Best yarn choice: Cotton thread or lightweight cotton yarn for crisp stitch definition and comfort
Finished size: Adjustable to ankle circumference, usually a slim delicate fit
Time to complete: About 20 minutes to 1 hour per anklet
Helpful stitches: Chain, slip stitch, single crochet, double crochet, shell stitch, picot, chain spaces, bead attachment, motif joining, small closure finishing
Common Materials
Most crochet anklets can be made with the same basic supplies.
- Lightweight yarn or crochet thread
- Small crochet hook
- Yarn needle
- Scissors
- Small beads, pearls, or glass beads
- Optional clasp, button, or tie closure
- Optional stitch markers
- Optional fabric stiffener if you want a firmer result
For anklets, yarn choice matters a lot because the piece needs to feel soft on the skin and light on the ankle. Cotton thread or fine cotton yarn is often the best option because it creates neat stitches and stays comfortable in warm weather. Since anklets are small, details like beads and motifs can really shine without making the accessory feel heavy.
1. Crochet Boho Beaded Anklet Pattern
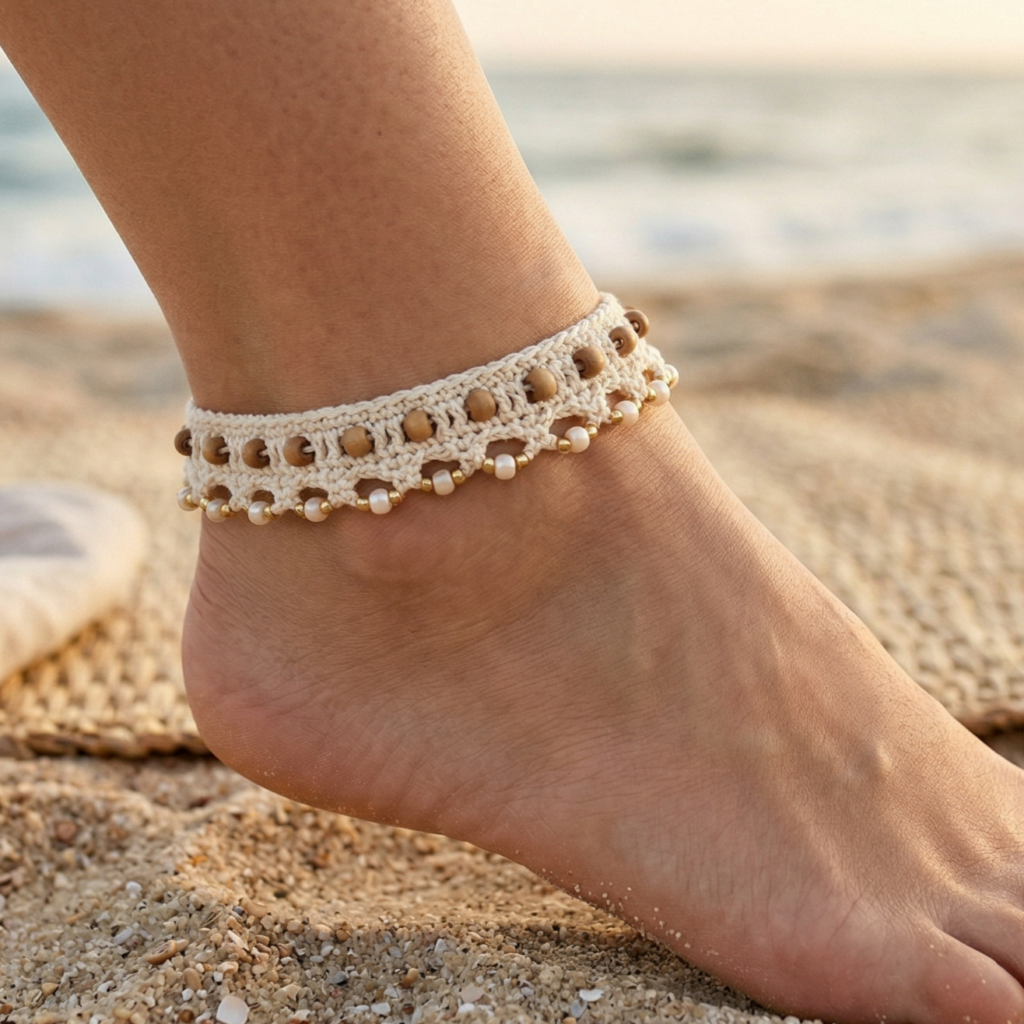
A boho beaded anklet feels relaxed, stylish, and full of summer personality. The beads add movement and a little shine, while the crochet base keeps it soft and handmade. This is a great pattern if you want something casual enough for everyday wear but special enough to stand out with sandals or beach outfits.
Step-by-step guide
Step 1: Choose your boho palette
Start by selecting colors that feel earthy, natural, or sunlit. Cream, tan, soft gold, dusty rose, olive, and pale blue all work beautifully for a boho style. The beads can match the yarn or provide a subtle contrast if you want the anklet to feel a little more detailed.
The color palette sets the whole mood of the anklet.
Step 2: Measure your ankle
Before you begin, measure around your ankle so the anklet fits comfortably. It should sit softly without being too loose or too tight. Since many anklets are worn with sandals or bare feet, the fit should feel light and easy.
A good fit makes the anklet comfortable for all-day wear.
Step 3: Crochet the base chain
Create a chain long enough to wrap around the ankle, leaving a little room for a closure if needed. Keep the chain flexible and not too tight so the anklet drapes nicely. This foundation will hold the beadwork and decorative stitches.
A smooth chain makes the anklet easier to shape.
Step 4: Add the beaded sections
Thread your beads onto the yarn before crocheting or sew them on later depending on your method. Place them evenly along the anklet so the design feels balanced. Boho beaded anklets often look best when the beads are spaced softly rather than packed tightly together.
The beads are what give the anklet its decorative sparkle.
Step 5: Work the crochet body
Use a simple stitch such as single crochet or double crochet to form the body of the anklet. Keep the stitches neat and consistent so the beads remain the focus. A light textured row or chain-space pattern can also work beautifully if you want a more relaxed boho feel.
The body should support the bead details without overpowering them.
Step 6: Keep the design flexible
The anklet should be soft enough to move comfortably with your foot and ankle. Do not make the fabric too stiff, especially if you want to wear it on beach walks or warm days. If the beads make it feel too heavy, use smaller beads or fewer accents.
Comfort matters just as much as style.
Step 7: Finish with a closure
Add a small button, tie, clasp, or loop closure to secure the anklet. Choose a closure that matches the boho style, such as a small wooden button, a tiny shell-like bead, or a simple crochet tie. Keep the closure light and easy to fasten.
Step 8: Weave in ends neatly
Once the anklet is finished, trim and secure all yarn ends carefully. Because this is a small accessory, a neat finish makes a big difference. The final piece should feel clean, soft, and ready to wear.
Helpful tips
Boho beaded anklets look especially lovely in natural tones and small mixed bead colors. If you want a festival-ready version, use a slightly bolder bead mix. If you want a more subtle beach look, keep the beads small and the yarn soft and neutral.
2. Crochet Shells Stitch Anklet Pattern
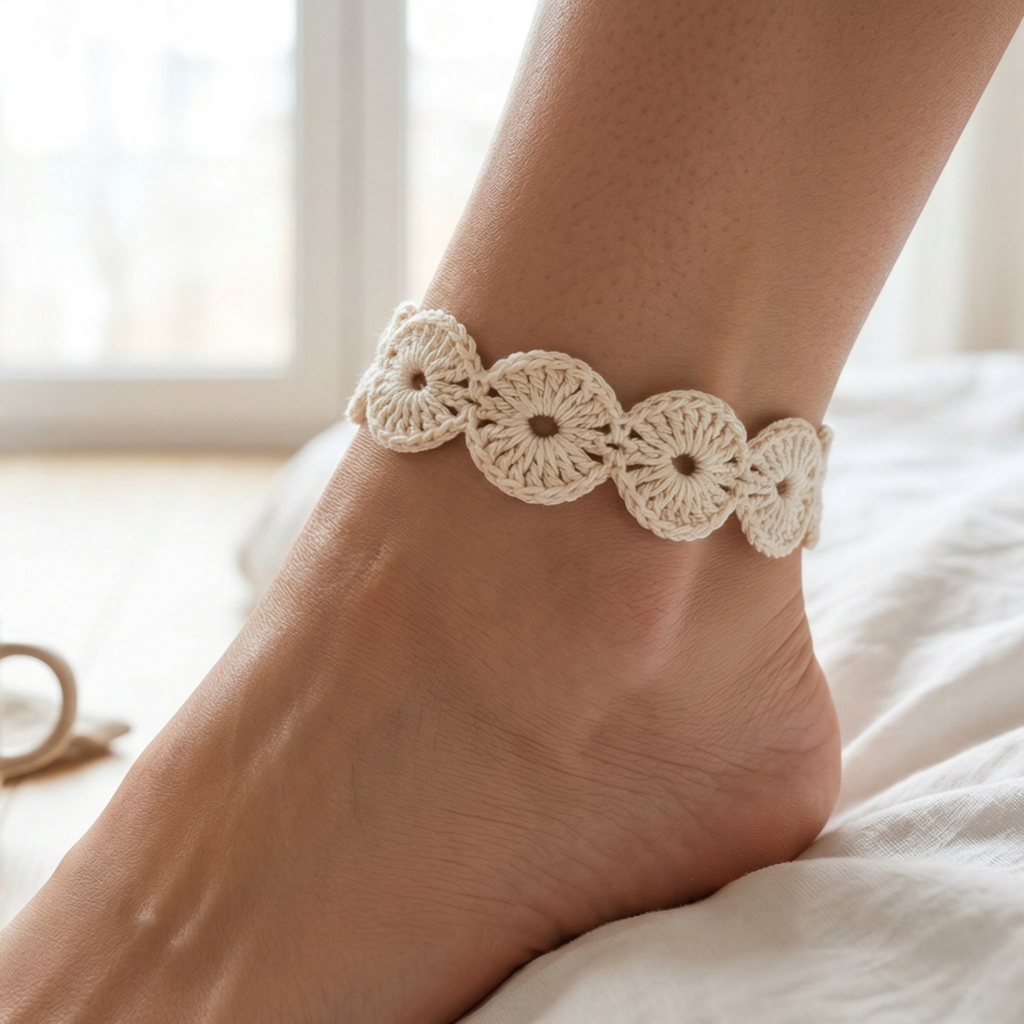
A shells stitch anklet feels delicate, feminine, and slightly coastal. The shell texture creates a gentle flowing look that is perfect for summer days and barefoot beach walks. This design is lovely if you want something pretty but still simple enough to make quickly.
Step-by-step guide
Step 1: Pick a soft summer color
Choose a color that feels fresh and easy to wear. White, cream, pale aqua, soft peach, or light pink all work beautifully with shell stitch. Since the texture is the main feature, a solid color usually lets the pattern show best.
The color should highlight the shell shape.
Step 2: Measure the ankle
Measure the ankle so the anklet can sit comfortably. Shell stitch can have a little stretch, so keep the final size slightly fitted but not tight. The piece should feel light and wearable, even when worn with sandals.
A well-sized anklet will sit more neatly.
Step 3: Create the foundation row
Start with a chain or a slim foundation that wraps around the ankle. The stitch count should be even and appropriate for the shell repeat. Keep the chain loose enough to prevent the edge from pulling.
The foundation gives the shell pattern a clean base.
Step 4: Crochet the shell stitch repeat
Begin working the shell stitch rows. Shells are usually made by placing multiple stitches into the same space, creating a fan-like shape. Keep the shells even and consistent so the anklet has a balanced, flowing texture.
The shell shapes are the heart of the design.
Step 5: Keep the row edges neat
Shell patterns can sometimes fan outward too much if the tension changes, so watch the edges carefully. The anklet should remain slim and delicate, not too wide or bulky. If it starts to flare, adjust your stitches for the next repeat.
A neat edge keeps the anklet elegant.
Step 6: Continue until the anklet reaches the right length
Work the shell stitch repeat until the ankle measurement is complete. The anklet should feel like a soft band rather than a thick cuff. Keep the design light and comfortable.
Step 7: Add closure or finishing ties
You can finish with a button, clasp, or crochet tie. A simple closure works best because the shells are already decorative. Make sure the closure is secure and comfortable against the skin.
Step 8: Shape the shells
Gently stretch and shape the anklet with your fingers so the shell pattern lies evenly. If needed, lightly block it so the shells open and settle into a more polished shape.
Helpful tips
Shell stitch anklets are beautiful in light summer shades. If you want a more coastal look, choose seafoam or soft blue. If you want a soft romantic feel, cream or blush works perfectly. The shell texture makes this design feel elegant with very little effort.
3. Crochet Anklet with Pearl Beads Pattern
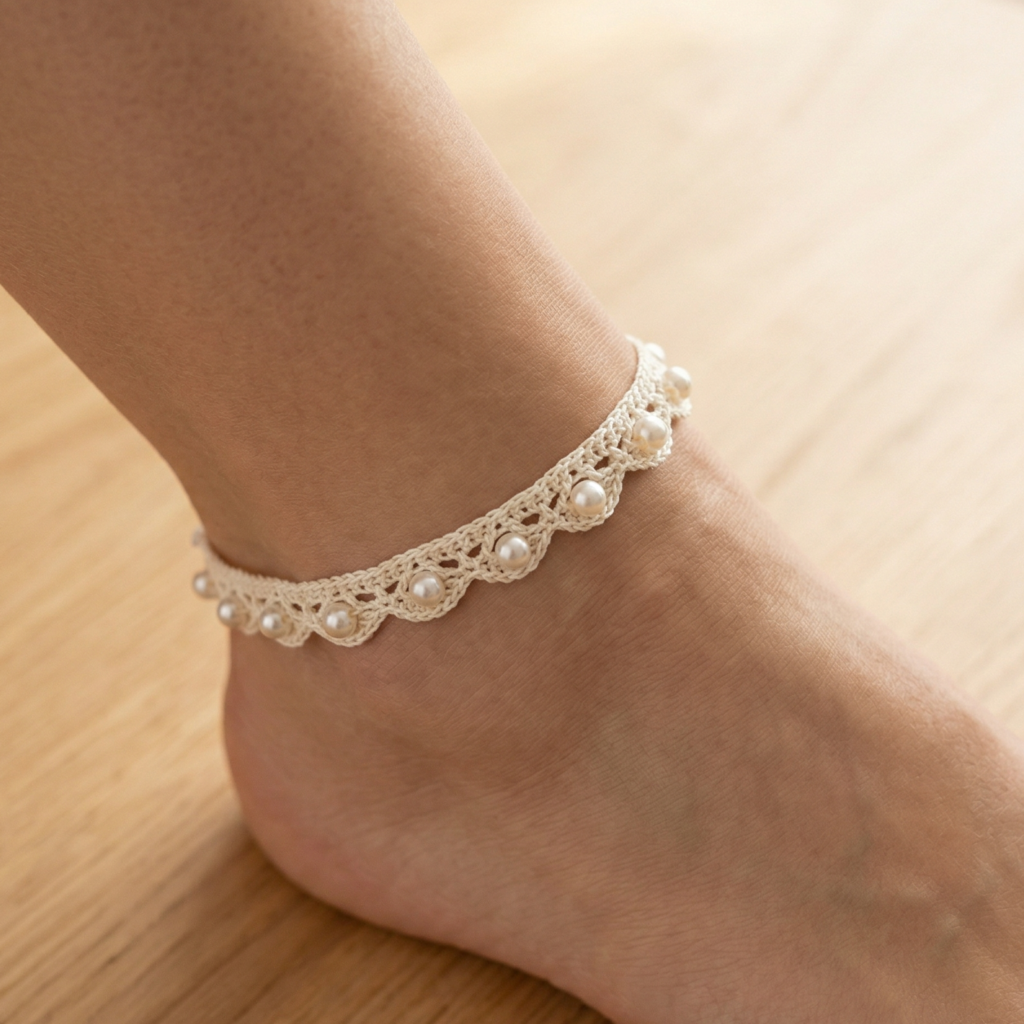
A crochet anklet with pearl beads feels classic, graceful, and a little more dressy than a simple summer anklet. Pearls add a timeless look that makes the accessory feel special, while the crochet base keeps it soft and handmade. It is a wonderful pattern if you want something simple but elegant.
Step-by-step guide
Step 1: Choose your pearl style
Decide whether you want small pearl beads, faux pearls, or pearl-like accents. Smaller pearls usually work best because anklets need to stay light. The pearls should complement the yarn without making the piece too heavy.
The pearl choice gives the anklet its refined feel.
Step 2: Measure the ankle
Take a comfortable ankle measurement and decide how fitted you want the anklet to be. Since pearls add a little weight, make sure the base is secure enough to stay in place without slipping.
A good fit helps the pearls sit evenly.
Step 3: Crochet the base row
Create a slim and tidy crochet band. A simple row of single crochet or double crochet works well for this style because it keeps the focus on the pearls. The base should feel smooth against the skin.
A clean base lets the pearls stand out.
Step 4: Add the pearl beads
Attach the pearls evenly along the anklet. You can place them in a line, in small groups, or at intervals around the band. Try to keep the spacing symmetrical so the beads feel balanced and elegant.
The pearls are the highlight of the design.
Step 5: Keep the anklet lightweight
Because pearls can add a little weight, use them sparingly so the anklet remains comfortable. A few pearls placed thoughtfully can look much more elegant than too many clustered together.
Light decoration keeps the anklet wearable.
Step 6: Add any extra crochet detail
If you want a little more texture, add a tiny lace-like row or a simple decorative stitch near the edges. Keep it subtle so the pearls remain the main focus. The crochet details should support the pearls, not compete with them.
Step 7: Finish with closure
Use a button, clasp, or tie closure that feels neat and secure. A small pearl accent near the closure can make the design feel even more polished. Make sure the anklet is easy to fasten and remove.
Step 8: Tidy the back
Check the underside of the anklet carefully and weave in all ends securely. Since pearls are often worn for dressier occasions, the finish should look clean from every angle.
Helpful tips
Pearl anklets are lovely with white, cream, pale pink, or silver-toned yarn. If you want a more bridal or special-occasion version, keep the design very delicate. If you want a casual summer version, use fewer pearls and a slightly softer yarn tone.
4. Crochet Scallop Glass Beaded Anklet Pattern
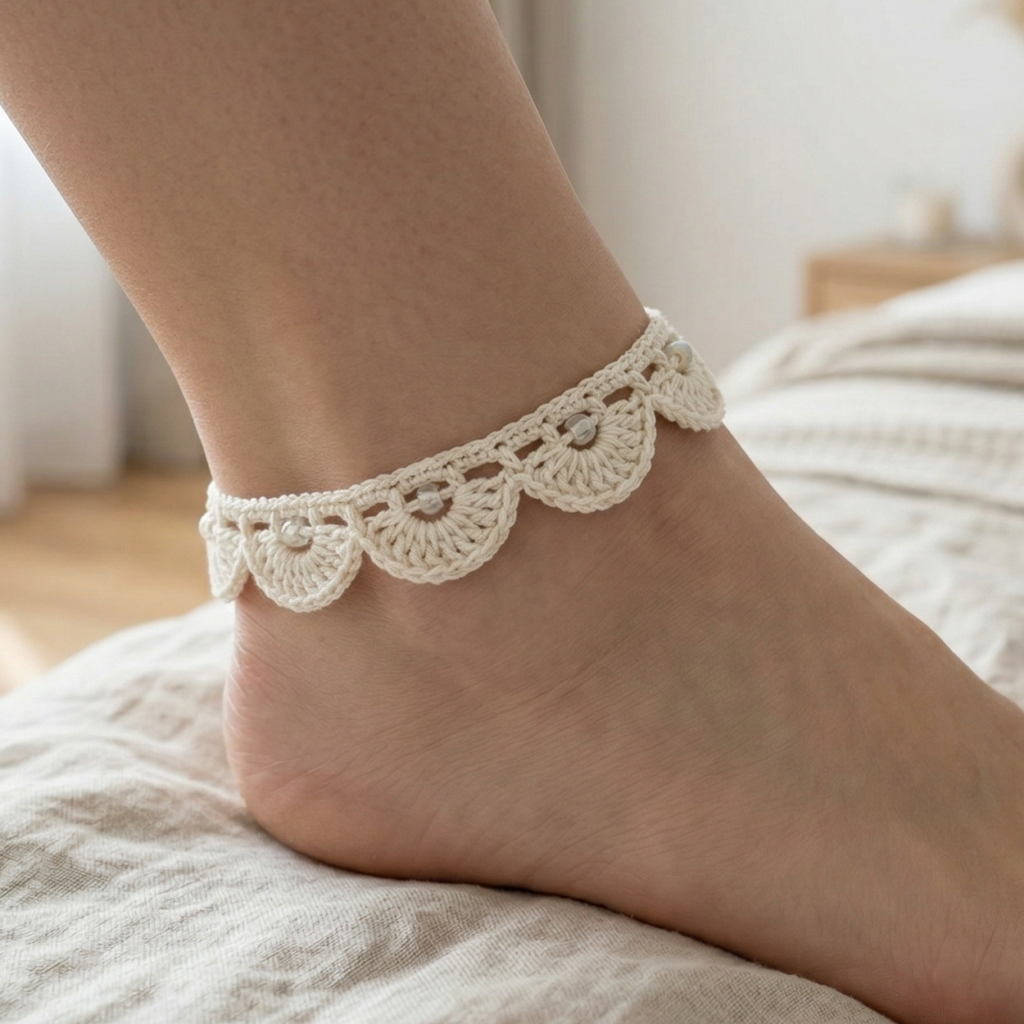
A scallop glass beaded anklet feels decorative, bright, and just a little sparkling. The scalloped edge gives the anklet a soft feminine shape, while the glass beads add shimmer and texture. This is a beautiful pattern if you want something eye-catching for summer outings or special warm-weather looks.
Step-by-step guide
Step 1: Choose the bead and yarn combination
Pick glass beads that match your yarn color or offer a gentle contrast. Small transparent, pearl-like, or lightly colored glass beads work especially well. The yarn should be fine and light enough to support the beadwork without becoming bulky.
The combination sets the overall sparkle level.
Step 2: Measure the ankle
Take a snug but comfortable measurement so the anklet sits nicely around the ankle. Since the scallop shape adds a little volume, the base should remain slim and well-fitted.
A balanced fit keeps the anklet neat.
Step 3: Crochet the base band
Start with a narrow crochet band that will form the foundation of the anklet. Keep the stitches even and smooth. This base gives the scallop edges a strong starting point and helps the beadwork sit properly.
A tidy base is important for the decorative border.
Step 4: Add the scallop stitch pattern
Work a scalloped border around the anklet using shell or fan stitches. The scallops should be even in size and spacing. This rounded edge creates a soft, graceful frame for the bead details.
The scallops are what make the anklet feel pretty and feminine.
Step 5: Attach the glass beads
Add the glass beads along the scallops or at regular intervals across the band. Keep them evenly spaced so the piece feels balanced. The beads should catch the light gently without making the anklet feel too heavy.
The glass beads add shimmer and visual interest.
Step 6: Check comfort and flexibility
Make sure the beads do not scratch or pull against the skin. The anklet should be soft enough for summer wear and flexible enough to move comfortably. If needed, place the beads only on the outer-facing side of the anklet.
Comfort is very important for anklet wear.
Step 7: Add the closure
Finish with a clasp, button, or tie that feels secure and easy to use. Try to keep the closure simple so the scallop and bead details remain the focus.
Step 8: Shape the scallops
Gently adjust the scallops with your fingers so they open evenly. If they curl, lightly block the piece or smooth it flat by hand. A neat scallop shape will make the anklet look more polished.
Helpful tips
Scallop glass beaded anklets look especially beautiful in pale summer colors like cream, blush, aqua, or silver-gray. If you want a more festive style, choose colorful beads that catch the light. This pattern is lovely for beach evenings or dressier summer looks.
5. Crochet Lacy Heart Motifs Anklet Pattern
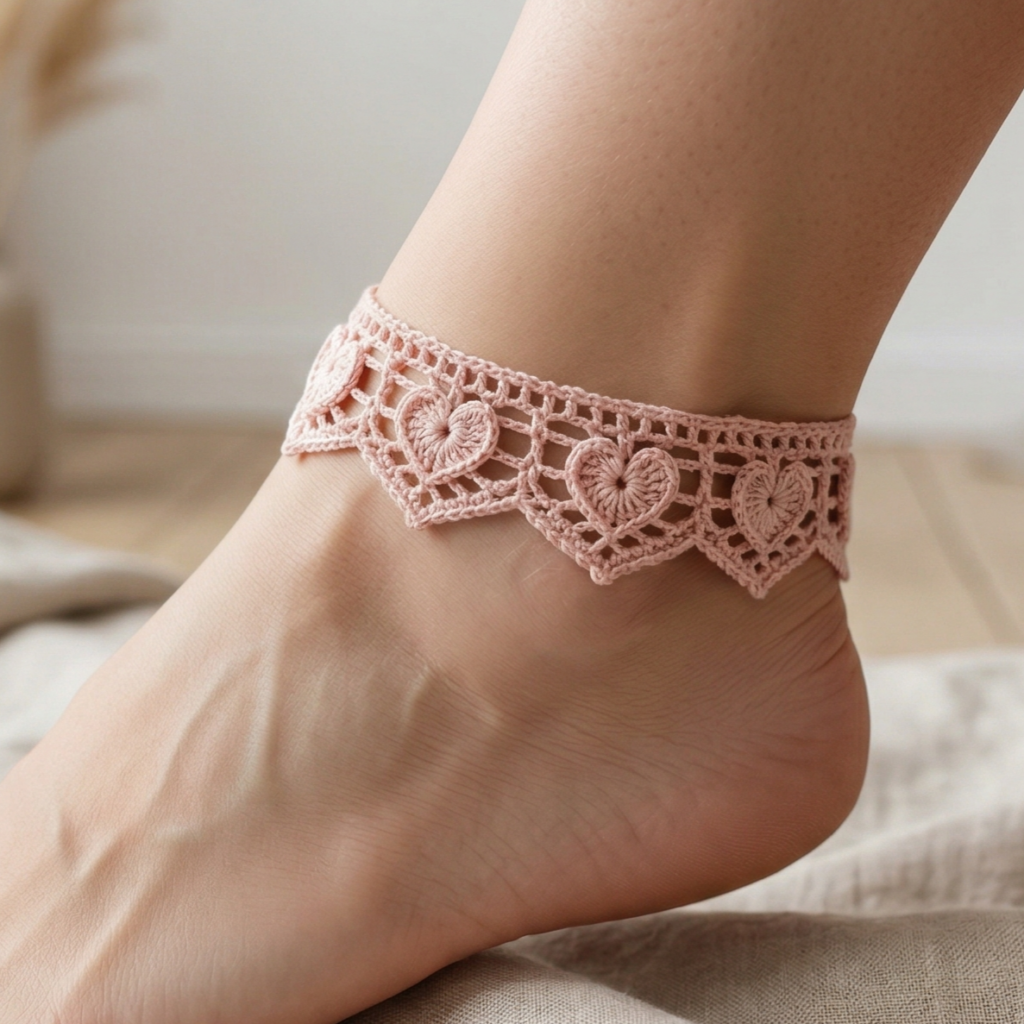
A lacy heart motifs anklet feels sweet, romantic, and full of charm. The tiny heart shapes make it playful and feminine, while the lace gives it a soft, airy look that is perfect for summer. This is a wonderful pattern if you want an anklet that feels delicate and lovely without being too complicated.
Step-by-step guide
Step 1: Pick a soft romantic color
Choose a color that feels sweet and light. White, blush, pale pink, cream, or lavender all work beautifully for a heart motif anklet. Since the motifs are delicate, a soft color will help the design feel even more graceful.
The color should match the romantic mood.
Step 2: Measure the ankle
Before crocheting, measure the ankle so the anklet fits comfortably. Because lace can stretch a little, keep the fit slightly snug. The anklet should be secure but not tight.
A proper fit makes lace more wearable.
Step 3: Crochet the lace base
Start with a narrow lace band or chain-space pattern that will hold the motifs. Keep the stitches open and light so the anklet feels airy. The lace base should be delicate enough to match the heart details.
A soft lace foundation supports the motifs.
Step 4: Make the heart motifs
Crochet small heart motifs separately or as part of the lace repeat depending on your pattern style. Keep the hearts tiny and neat so they remain cute and easy to wear. The motifs should feel balanced and not too large for the ankle.
The hearts are the emotional center of the design.
Step 5: Attach the hearts
Sew or join the hearts onto the anklet at evenly spaced intervals. You can place them in a repeating line or cluster them softly across the band. Keep the spacing consistent so the pattern looks polished.
The placement shapes the whole look.
Step 6: Keep the anklet light
Because this design is delicate, make sure it stays soft and flexible. Avoid adding too many heavy embellishments. The anklet should feel like a light summer accessory rather than a stiff ornament.
Step 7: Finish with closure
Use a small button, tie, or clasp to finish the anklet. Keep the closure simple so it does not distract from the heart motifs. A tiny decorative bead or loop can be a lovely finishing touch.
Step 8: Shape and block
Once finished, gently block the anklet or smooth it flat with your fingers so the lace and hearts sit neatly. A tidy shape will help the motifs stand out beautifully.
Helpful tips
Lacy heart anklets look especially lovely in soft feminine colors. If you want a more romantic version, use blush and cream with tiny lace spaces. If you want something sweet and playful, pale pink or lavender works beautifully. This is a perfect choice for a gentle, pretty summer accessory.
Conclusion
Crochet anklets are a beautiful way to add a handmade touch to your summer wardrobe. They are small enough to make quickly, but charming enough to feel special every time you wear them. That balance of simplicity and style is what makes them such a rewarding accessory project.
These five crochet anklet patterns each bring a different mood. The boho beaded anklet feels relaxed and artistic. The shells stitch anklet has a soft coastal charm. The pearl bead anklet feels timeless and elegant. The scallop glass beaded anklet adds sparkle and detail. The lacy heart motifs anklet is sweet and romantic. Together, they show how much personality can fit into a small handmade piece.
Whether you are making anklets for yourself, for gifts, or for summer market pieces, these patterns are a wonderful place to start. With the right yarn, a comfortable fit, and a careful finish, your crochet anklets can become favorite accessories that feel light, pretty, and easy to wear.