Crochet pencil pouches are one of the most useful small projects you can make. They are quick to finish, easy to personalize, and perfect for using up leftover yarn while still creating something that feels thoughtful and practical. A handmade pencil pouch can be used for school supplies, makeup brushes, crochet hooks, stationery, paint tools, or even small travel items, which makes it a great gift for students, teachers, artists, and anyone who loves cute handmade accessories.
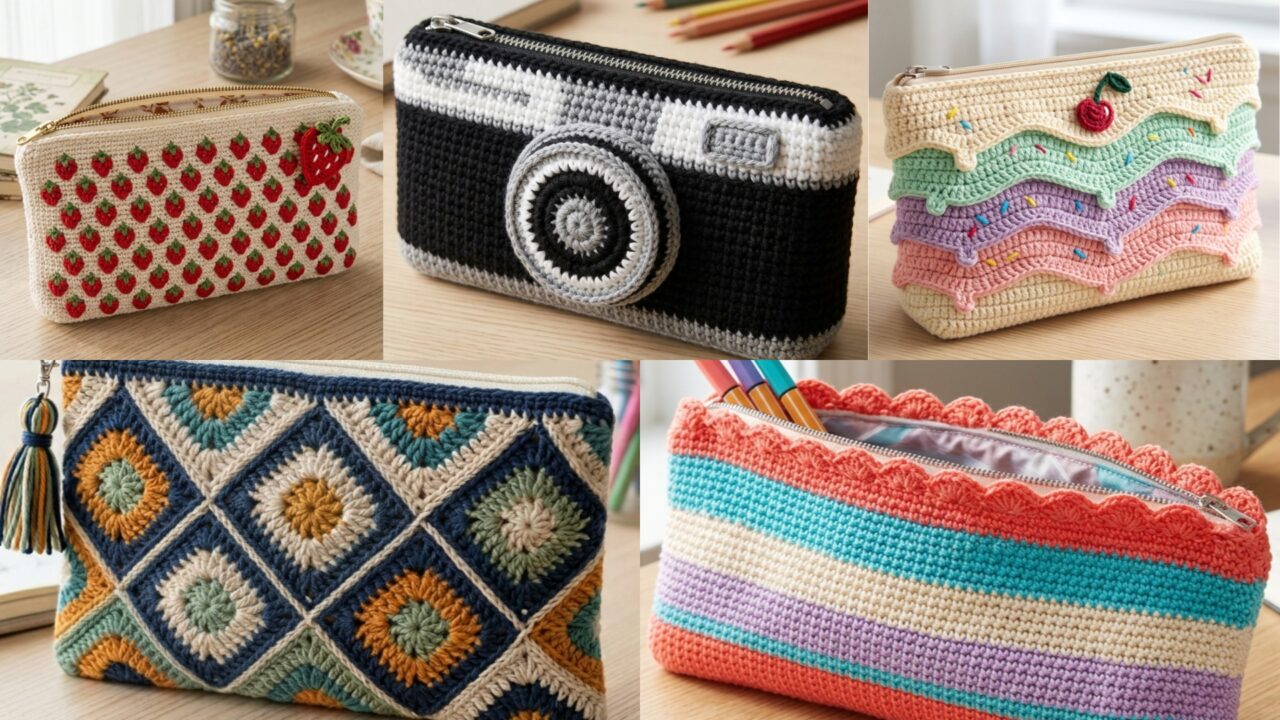
The five designs below are all different in style, so there is something for every taste. You will find a camera-inspired pouch, an ice cream layered pouch, a diamond granny square pouch, a scalloped striped pouch, and a strawberry stitch cottagecore pouch. Each pattern is written in a clear step-by-step format with materials, size guidance, stitch notes, and finishing tips so the project feels easy to follow from start to finish.
A few quick tips before you begin:
Use a smaller hook than usual if you want the pouch to be firm and structured. Cotton yarn works especially well because it gives the pouch a neat shape and makes it durable for everyday use. Adding a lining is optional, but it can make the pouch stronger and help it last longer.
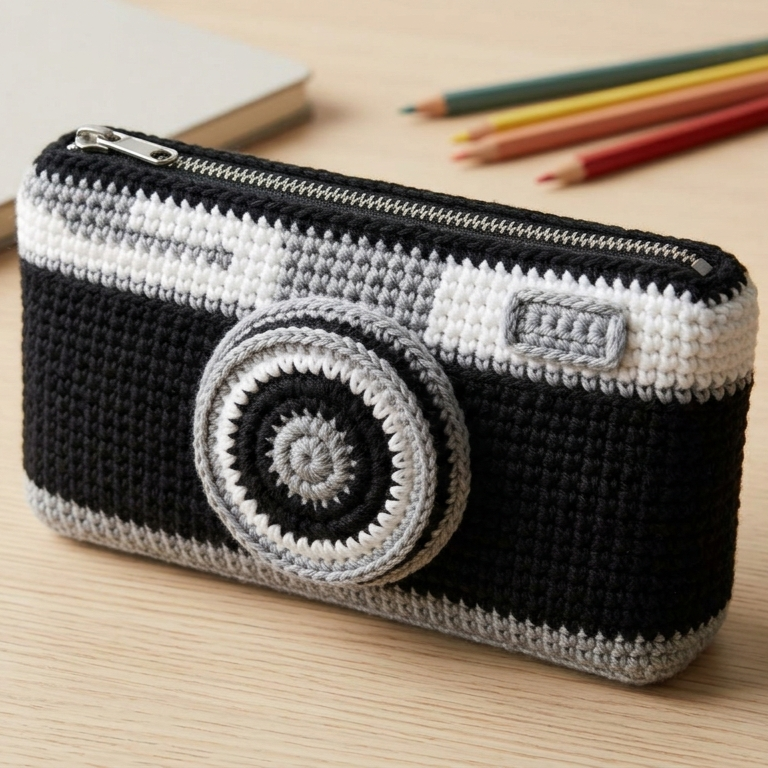
1. Crochet Camera Inspired Pencil Pouch Pattern
Skill level: Beginner to intermediate
Style: Fun, playful, camera-shaped pouch
Finished size: about 8 to 9 inches wide and 5 to 6 inches tall
This pouch is inspired by the shape of a classic camera, which makes it extra charming for photography lovers or anyone who likes novelty designs. It is simple enough to make, but the shape gives it a very creative finish.
Materials
- Cotton yarn in black, gray, white, or any camera-inspired colors
- Crochet hook, usually 3.0 mm to 4.0 mm
- Tapestry needle
- Scissors
- Lining fabric
- Zipper
- Optional embroidery thread for camera details
Step-by-step guide
Step 1: Make the front panel
- Chain the width you want for the pouch.
- Work rows of single crochet to create a firm rectangle.
- Continue until the panel reaches the height needed for the camera body.
- Keep the stitches tight so the pouch holds its shape.
Step 2: Shape the camera details
- Crochet a small circle for the camera lens.
- Crochet a smaller circle for the inner lens detail.
- Add a tiny rectangle or square for the flash detail if you want more realism.
- Sew these pieces onto the front panel.
Step 3: Make the back panel
- Crochet a second rectangle the same size as the front.
- Keep the stitch count even so both sides match.
- If you want a thicker pouch, use the same stitch pattern throughout.
Step 4: Assemble the pouch
- Place the front and back panels together.
- Sew or crochet the side seams and bottom seam.
- Leave the top open for the zipper.
Step 5: Add the zipper
- Sew the zipper to the top edge of the pouch.
- Keep it centered and neat.
- Reinforce the ends so it opens and closes smoothly.
Step 6: Add the lining
- Cut lining fabric to the same pouch shape.
- Sew the lining pieces together.
- Place the lining inside the pouch and hand stitch it to the top edge.
Finishing tips
- Use black or dark gray for a classic camera look.
- Add a tiny embroidered button detail near the top.
- A silver zipper works especially well with this design.
Style ideas
This pouch looks cute in black and white, but pastel camera versions are also charming for a softer look.
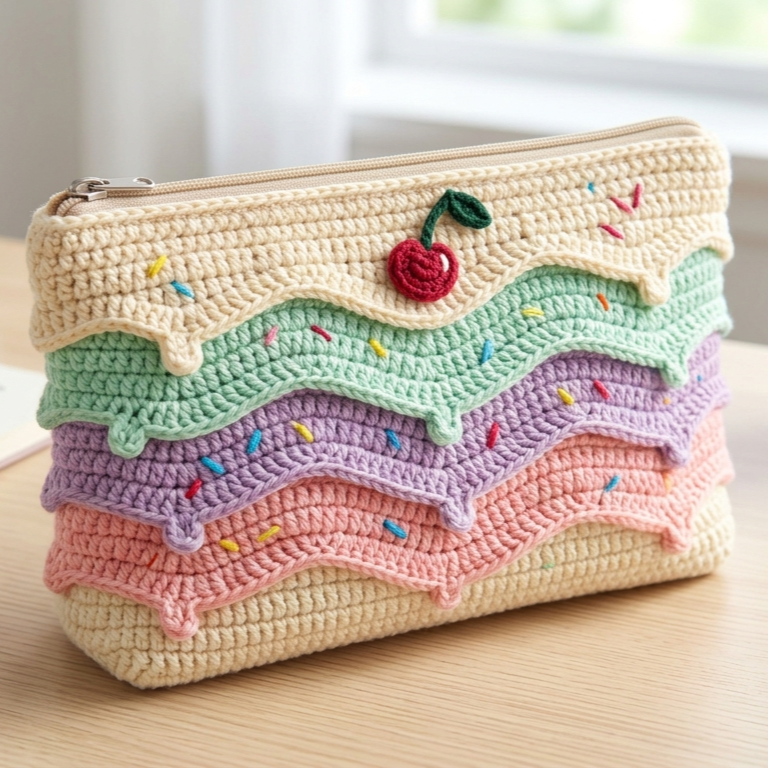
2. Crochet Ice Cream Inspired Layered Pencil Pouch Pattern
Skill level: Beginner to intermediate
Style: Sweet, colorful, layered, and playful
Finished size: about 8 inches wide and 5 to 6 inches tall
This pencil pouch looks like a layered ice cream treat, which makes it a fun project for summer colors or pastel lovers. The layers can be made in different shades to mimic a scoop-and-drip style.
Materials
- Cotton yarn in 2 to 4 colors
- Crochet hook, 3.0 mm to 4.0 mm
- Tapestry needle
- Scissors
- Zipper
- Lining fabric
- Optional tiny applique or embroidery for sprinkles
Step-by-step guide
Step 1: Make the base panel
- Chain the width you want for the pouch.
- Work rows of single crochet or half double crochet.
- Continue until the panel is tall enough for the base section.
Step 2: Add the layered ice cream effect
- Switch colors every few rows to create layered sections.
- Use soft rounded stitch rows to make the top look like scoops.
- If you want a drip effect, let one color extend slightly lower than the other.
Step 3: Crochet the second panel
- Make a matching back panel.
- Keep the rows the same length.
- Use the same or coordinating colors for a balanced finish.
Step 4: Join the pouch
- Place the panels together.
- Sew the side and bottom seams.
- Keep the stitches even so the pouch stays neat and sturdy.
Step 5: Add the zipper and lining
- Sew the zipper to the top edge.
- Add a lining to protect the inside.
- This helps the pouch keep its shape and makes it stronger for daily use.
Step 6: Add decorative details
- Embroider tiny sprinkles with colorful yarn or thread.
- Add a small cherry or whipped topping applique if you want a fuller ice cream look.
- Sew all decorations firmly.
Finishing tips
- Pastel pink, mint, lavender, and cream work beautifully.
- A cream top section can look like whipped topping.
- Keep the decorative details lightweight so the pouch stays functional.
Style ideas
A strawberry ice cream version in pink and white is especially sweet, but rainbow pastel layers also look lovely.
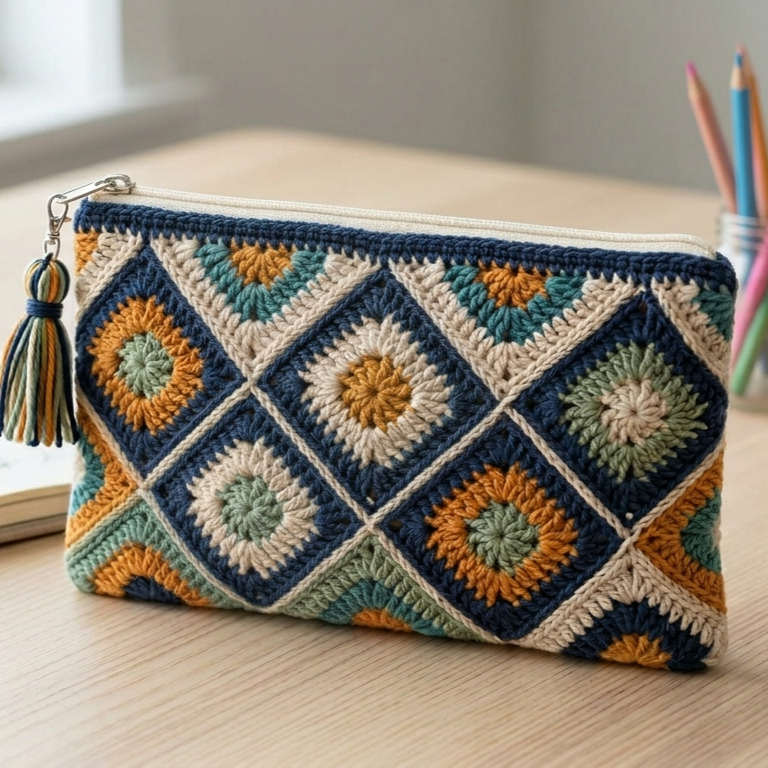
3. Crochet Diamond Granny Square Pencil Pouch Pattern
Skill level: Beginner to intermediate
Style: Classic, geometric, and easy to customize
Finished size: about 8 inches wide and 5 to 6 inches tall
This pouch uses diamond granny motifs or a diamond-inspired square design, which makes it a great stash-busting project. It has a timeless handmade feel and works well in many color combinations.
Materials
- Cotton yarn in several colors
- Crochet hook, 3.0 mm to 4.0 mm
- Tapestry needle
- Scissors
- Zipper
- Lining fabric
- Optional button or tassel
Step-by-step guide
Step 1: Make the granny diamond motif
- Begin with a magic ring or chain ring.
- Work the first cluster round to form the center.
- Continue adding rounds with color changes to create a diamond pattern.
- Keep the shape even and centered.
Step 2: Turn the motif into a pouch front
- Continue the motif until it reaches the right size for the pouch front.
- Make sure the edges are straight enough to match the back panel.
- Block lightly if needed to make the shape more even.
Step 3: Make the back panel
- Crochet a second panel in the same size and shape.
- You can keep it plain or use the same diamond pattern.
- Matching panels make the pouch look polished.
Step 4: Join the pouch
- Place the panels together.
- Sew the side seams and bottom seam.
- Keep the stitches snug so there are no gaps.
Step 5: Add the zipper and lining
- Sew the zipper to the top.
- Add the lining inside and stitch it to the upper edge.
- The lining helps the pouch stay neat over time.
Step 6: Finishing details
- Add a small tassel to the zipper pull if you like.
- Weave in all loose ends.
- Smooth the panel before using.
Finishing tips
- Use strong color contrast to make the diamond pattern stand out.
- Soft neutrals create a more mature look.
- Cotton yarn keeps the pouch firm and durable.
Style ideas
This design looks beautiful in earthy tones, rainbow colors, or a single bold color with cream accents.
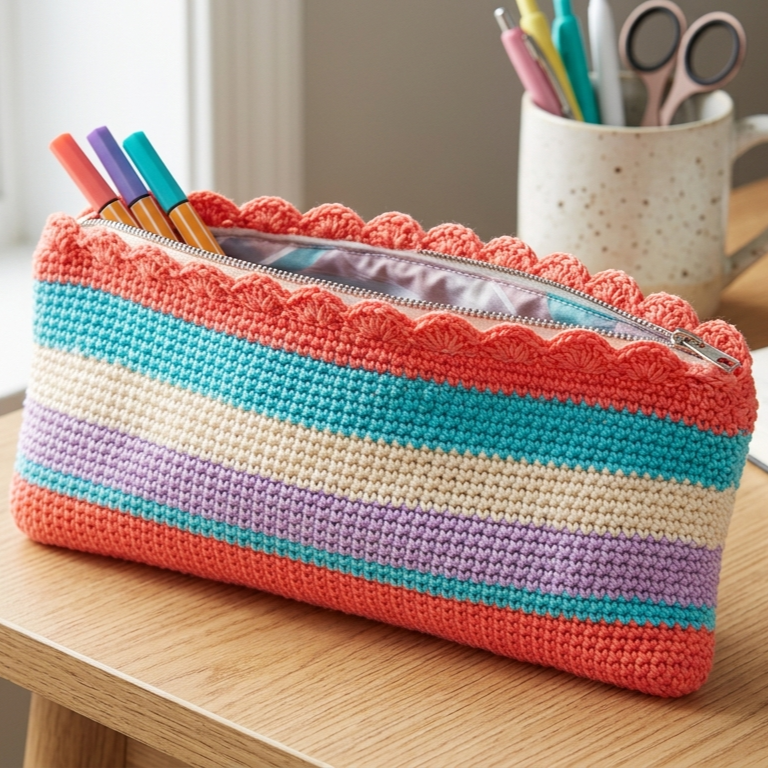
4. Crochet Scalloped Edge Striped Pencil Pouch Pattern
Skill level: Beginner
Style: Sweet, textured, and tidy
Finished size: about 8 inches wide and 5 inches tall
This striped pencil pouch is a great beginner project because it uses simple rows, but the scalloped edge gives it a polished and decorative finish. It is perfect for school, office, or gift use.
Materials
- Cotton yarn in 2 to 4 colors
- Crochet hook, 3.0 mm to 4.0 mm
- Tapestry needle
- Scissors
- Zipper
- Lining fabric
Step-by-step guide
Step 1: Make the striped base
- Chain the width of the pouch.
- Work rows of single crochet or half double crochet.
- Change colors every few rows to create stripes.
- Repeat until the panel is tall enough.
Step 2: Crochet the scalloped edge
- On the top row, work a scalloped border.
- A scallop can be made by placing several double crochet stitches into one stitch or space.
- Repeat evenly across the top edge.
- This gives the pouch a pretty finished look.
Step 3: Make the back panel
- Crochet a second panel with matching stripes.
- You can repeat the same color order or reverse it for a fun effect.
- Make sure both pieces are the same size.
Step 4: Assemble the pouch
- Place the panels together.
- Sew the sides and bottom with small even stitches.
- Leave the top open for the zipper.
Step 5: Add zipper and lining
- Sew the zipper along the top edge.
- Add the lining so the inside is smooth and strong.
- Stitch the lining in place by hand.
Finishing tips
- Use clean, bright stripe combinations for a school-ready look.
- Keep the scallops small and even.
- A pastel stripe palette gives the pouch a softer style.
Style ideas
Try pink, white, and yellow for a cheerful design or blue, cream, and gray for a more neutral look.
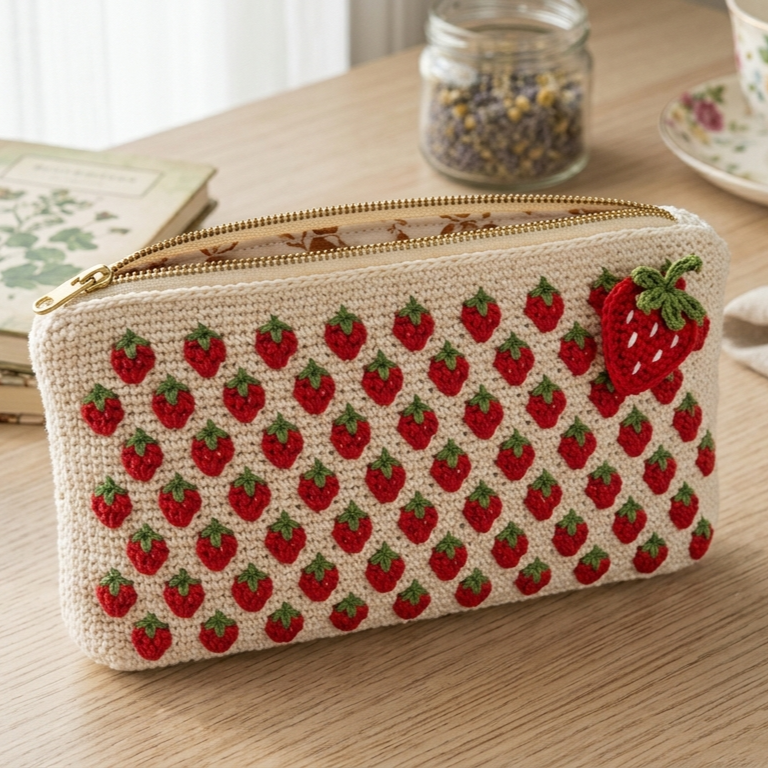
5. Crochet Strawberry Stitch Cottagecore Pencil Pouch Pattern
Skill level: Intermediate
Style: Cottagecore, floral, sweet and textured
Finished size: about 8 inches wide and 5 to 6 inches tall
This pouch has a soft, romantic feel and fits beautifully into a cottagecore style. Strawberry stitch adds a textured surface that feels charming and handmade.
Materials
- Cotton yarn in red, green, white, or pink
- Crochet hook, 3.0 mm to 4.0 mm
- Tapestry needle
- Scissors
- Zipper
- Lining fabric
- Optional strawberry applique or embroidery details
Step-by-step guide
Step 1: Make the pouch base
- Chain the width you want.
- Work rows of sc or hdc to create a firm base.
- Continue until the panel reaches the needed height.
Step 2: Add strawberry stitch texture
- Begin the strawberry stitch using small cluster-like shapes.
- Work the stitches in neat rows so the texture resembles seeds or berry surface.
- Repeat until the front panel is fully covered.
Step 3: Make the back panel
- Crochet a second panel in the same size.
- Keep the stitch pattern consistent if you want a matching look.
- You can also make the back plain for contrast.
Step 4: Join the pouch
- Place the front and back together.
- Sew the side and bottom seams.
- Make sure the texture lines up evenly.
Step 5: Add the zipper and lining
- Sew the zipper to the top edge.
- Insert the lining and stitch it in place.
- This helps the pouch feel smooth inside and makes it more durable.
Step 6: Add strawberry details
- Crochet a small strawberry applique if you want extra decoration.
- Add green leaves at the top for a sweet cottagecore finish.
- Sew the applique securely onto the front.
Finishing tips
- Red with green accents gives the pouch a true strawberry look.
- Soft pink and cream can make it feel more romantic.
- Keep the decoration balanced so the pouch remains easy to use.
Style ideas
This pouch looks especially lovely in dusty rose, strawberry red, sage green, and cream.
Conclusion
Crochet pencil pouches are such satisfying projects because they are small enough to finish quickly but still useful enough to enjoy every day. They also let you explore different styles, from playful novelty designs to soft cottagecore textures and classic granny square patterns. Whether you like the camera-inspired pouch, the ice cream layered look, the diamond granny square design, the scalloped stripes, or the strawberry stitch style, each project gives you a chance to make something practical and personal.
The best results come from choosing firm yarn, keeping the stitches even, and adding a lining for extra strength. A good zipper, neat seam, and smooth shape can turn a simple crochet pouch into a polished handmade accessory. These make wonderful gifts for students, friends, teachers, or anyone who loves cute stationery and handmade items.