Crochet garlands are such a joyful way to add color, texture, and handmade charm to a room. They are quick to make, easy to customize, and perfect for decorating shelves, mantels, nursery walls, party tables, windows, headboards, and seasonal displays. Unlike larger home décor projects, garlands are lightweight and flexible, which means you can make them as simple or as decorative as you like without needing a huge time commitment.
What makes crochet garlands especially fun is how much personality you can pack into a small decorative piece. A ribbon bow garland can feel soft and sweet. A scallop garland brings a pretty, classic look. Peppermint candy motifs make a space feel festive and cheerful. Bell-shaped flowers on a vine create a soft botanical mood. A boho party garland gives you a relaxed, stylish look that works almost anywhere. Each one can transform a blank space into something more inviting and personal.
In this post, you will find five creative crochet garland patterns with detailed step-by-step guidance, practical notes, and helpful finishing tips. These designs are written to be easy to follow while still giving you enough detail to create garlands that look polished and display beautifully. If you want a small project that can brighten a room, decorate for a season, or add a handmade touch to an event, these garland ideas are a wonderful place to start.
Quick Notes
Project type: Crochet garlands
Best for: Home décor, nursery styling, parties, seasonal decorating, gifts, and craft fairs
Skill level: Beginner to intermediate, depending on motif detail
Hook size: Usually 2.0 mm to 4.5 mm, depending on yarn weight and desired delicacy
Yarn weight: Lace, fingering, cotton thread, or lightweight cotton yarn
Best yarn choice: Cotton or cotton blends for crisp shape and durability
Finished size: Customizable length, usually small decorative pieces
Time to complete: A few hours to a day depending on motif count and assembly
Helpful stitches: Chain, slip stitch, single crochet, half double crochet, double crochet, picot, shell stitch, magic ring, appliqué, simple joining, chain loops, vine shaping
Common Materials
Most crochet garlands can be made with the same basic supplies.
- Yarn in your chosen colors
- Crochet hook suited to the yarn
- Yarn needle
- Scissors
- Measuring tape
- Stitch markers
- Twine, ribbon, or yarn for hanging, optional
- Small wooden dowel, branch, or string for display, optional
- Beads, buttons, or embellishments, optional
For garlands, the yarn should be lightweight enough to hang nicely without sagging too much, but sturdy enough to hold its shape. Cotton yarn is often the best choice because it gives clear stitch definition and works well for decorative motifs. If you want a more delicate garland, thinner yarn or thread can create a lovely airy look.
1. Crochet Interlocked Ribbon Bow Garland Pattern

An interlocked ribbon bow garland feels sweet, playful, and elegant at the same time. The bows create a soft decorative line that works beautifully in nurseries, bedrooms, gift tables, or party backdrops. It is a lovely pattern if you want something feminine and charming without making the project overly complicated.
Step-by-step guide
Step 1: Choose your ribbon colors
Select one or more colors that match the mood you want. Pastels feel soft and romantic, while brighter colors make the garland feel more festive and lively. Since the bows will be the main focal point, choose shades that stand out clearly against the background where you plan to hang the garland.
The color palette helps define the garland’s mood.
Step 2: Crochet the first bow
Begin by making a small crochet strip or loop that can be folded into a bow shape. You can create a simple center wrap and two loops, then stitch the shape together. Keep the bow compact so it remains light and does not droop when hanging.
A small, neat bow gives the garland a polished look.
Step 3: Make multiple bows
Repeat the process until you have enough bows for the length of your garland. Try to keep each bow the same size so the finished piece looks balanced. If you want a slightly handmade, whimsical feel, you can vary them very slightly, but consistency usually makes the garland look cleaner.
Matching bows make the garland feel cohesive.
Step 4: Interlock the bows
Join the bows together by attaching them through the center or by linking them with a small chain between each one. The interlocked effect helps the garland hang nicely and keeps the bows evenly spaced. Decide whether you want the bows touching or slightly separated depending on your desired style.
The interlocking arrangement is what creates the garland shape.
Step 5: Add a hanging chain or cord
Crochet a long chain or use a thin cord, yarn, or ribbon to connect the bows into a full garland. Make sure the chain is sturdy enough to support the pieces but not too thick to distract from the bows. Keep the spacing consistent so the garland hangs smoothly.
A neat hanging line keeps the design elegant.
Step 6: Shape the bows
Once the bows are attached, gently shape them with your fingers. Flatten the loops if needed and make sure the centers are neat. If any bow looks twisted, adjust it before hanging. The better the bow shape, the more polished the garland will appear.
Step 7: Finish and hang
Weave in all ends and check that the garland hangs evenly. If needed, attach a loop at each end so it can be tied easily to a wall, shelf, or bedframe. A clean finish makes the bows look more refined.
Helpful Tips
This garland looks especially beautiful in cream, blush, lavender, or soft blue. If you want a party-ready version, use bright rainbow tones. If you want a nursery garland, keep the bows small and soft in pastel shades.
2. Crochet Scallop Garland Pattern
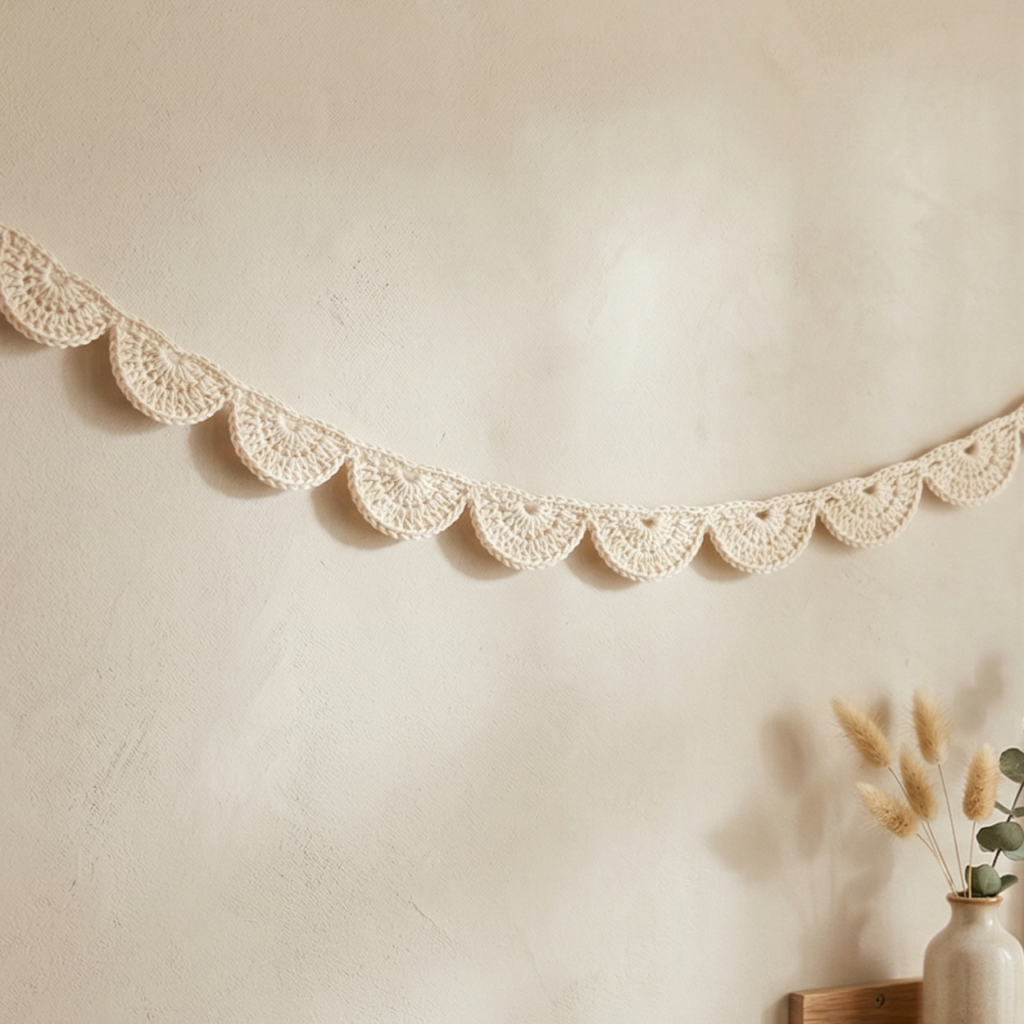
A scallop garland is classic, pretty, and easy to style in many rooms. The rounded shell-like shapes create a soft decorative line that feels elegant without being fussy. This pattern is perfect if you want a simple garland that still feels polished and handmade.
Step-by-step guide
Step 1: Decide on the garland length
Before you begin, decide how long you want the garland to be. A shorter garland works well for shelves, mirrors, or small wall spaces, while a longer one looks lovely across a mantel or window. Knowing the length helps you estimate how many scallops you need.
A clear length goal makes planning easier.
Step 2: Crochet the first scallop
Start with a small chain loop or base and create your first scallop using shell stitches or curved clusters. Keep the shape rounded and even so it sits nicely in the sequence. This first scallop sets the tone for the entire garland.
A neat first scallop helps the rest follow evenly.
Step 3: Repeat the scallop shape
Continue making matching scallops one after another. Keep the size and spacing consistent so the garland looks balanced. If you want a gentle, flowing look, connect each scallop closely. If you want a lighter look, leave a little space between them.
Consistency is what gives the garland its rhythm.
Step 4: Add a connecting chain
Join the scallops with a simple chain or narrow cord so they can hang naturally. The chain should be light and flexible. It should not pull the scallops out of shape. A thin connection lets the decorative edge remain the focus.
Step 5: Shape the scallops
Once the garland is assembled, gently adjust each scallop so they curve evenly. Shell stitches or curved rows may need a little smoothing with your fingers. If a scallop curls too much, lightly block it or flatten it by hand.
Step 6: Add decorative variation if desired
You can make the garland all one color for a classic look, or alternate colors for a more playful style. Soft color shifts can make the scallops feel even more special. If you prefer a more elegant design, keep the colors subtle and consistent.
Step 7: Finish the ends neatly
Add loops or ties at the ends so the garland is easy to hang. Weave in all loose ends carefully to keep the whole piece looking tidy. A clean finish will make the scallops stand out beautifully.
Helpful Tips
Scallop garlands are especially lovely in white, cream, blush, or soft gray. They work beautifully in nurseries, bedrooms, and bridal or party décor. If you want a more festive feel, try a two-color scallop pattern for extra charm.
3. Crochet Peppermint Candy Garland Pattern
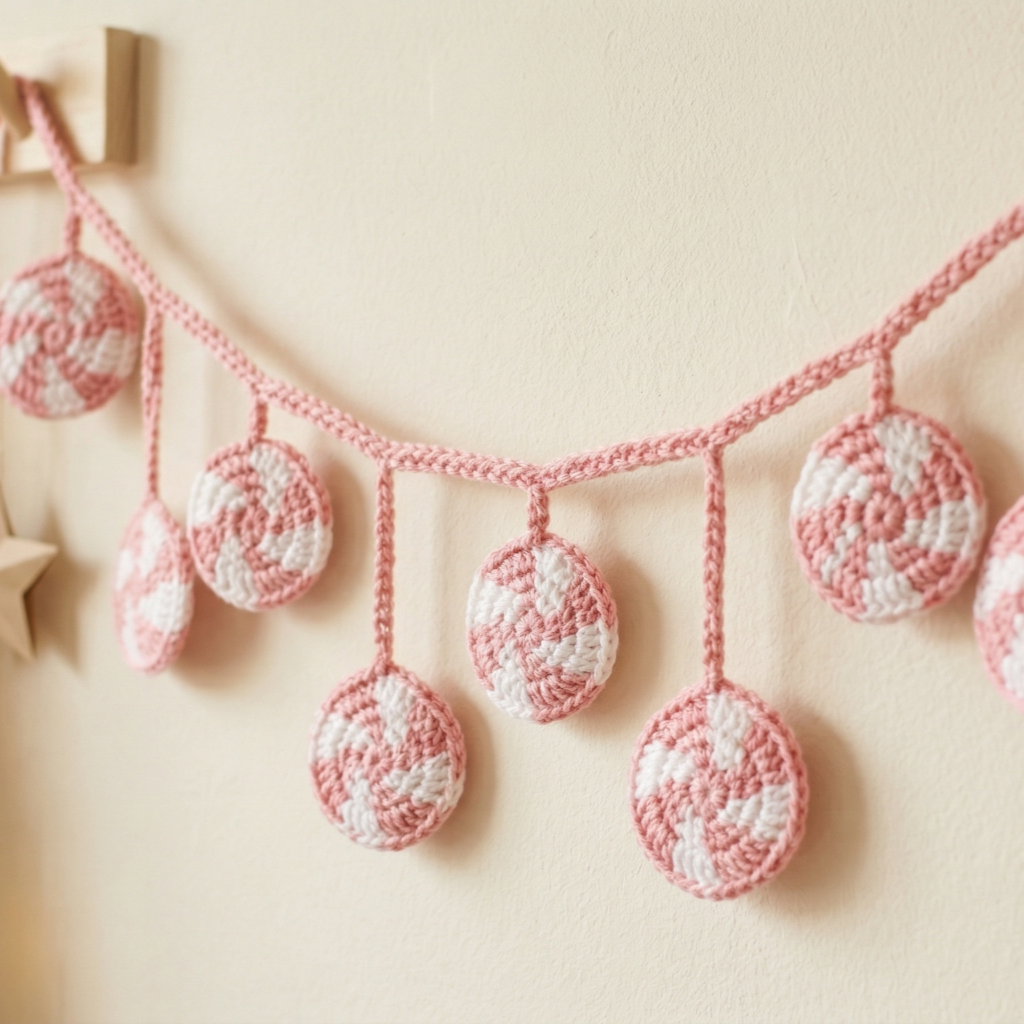
A peppermint candy garland is cheerful, festive, and full of holiday spirit. The round candy shapes and striped look make it perfect for winter decorating, Christmas parties, or seasonal displays. It is a fun pattern if you want a garland that feels bright and playful.
Step-by-step guide
Step 1: Choose your candy colors
Classic red and white are the traditional peppermint colors, but pink and white or green and white can also look lovely. Choose a high-contrast pairing so the candy motif is easy to see. The colors are a big part of what makes the garland recognizable.
Strong contrast gives the candy its classic look.
Step 2: Crochet the round candy base
Start with a small round base using a magic ring and increases. This will form the peppermint candy shape. Keep the circle flat and even so it looks neat when repeated along the garland.
A clean round base is essential for the candy shape.
Step 3: Add the peppermint stripes
Use color changes or surface crochet to create the spiral striped effect. The striped pattern is what makes the motif look like peppermint candy. Keep the lines even and organized so the design stays crisp and festive.
The stripes are the signature peppermint detail.
Step 4: Make several candy motifs
Repeat the candy shape until you have enough pieces for the desired garland length. Keep the motifs the same size so they hang evenly. You can make them all the same colorway or mix shades if you want a more playful version.
Matching motifs make the garland look polished.
Step 5: Add a hanging cord
Connect the candy shapes with a crochet chain, thread, or ribbon. Keep the spacing consistent so the candies sit evenly. If you want the garland to feel fuller, place the candies closer together.
A neat string keeps the garland balanced.
Step 6: Shape each candy
Smooth each motif with your fingers so the round shape stays even. If the stripes twist a little, adjust them before hanging. The garland should feel festive and tidy, not floppy.
Step 7: Finish the ends
Add loops, ties, or knots at each end so the garland can be hung easily. Weave in all yarn ends securely. Since holiday garlands are often reused, a strong finish is important.
Helpful Tips
Peppermint garlands look beautiful on mantels, windows, tree walls, or festive shelves. If you want a softer holiday style, use pink and white instead of red and white. This is a wonderful quick project for seasonal decorating or holiday markets.
4. Crochet Bell Shaped Flowers Vine Garland Pattern
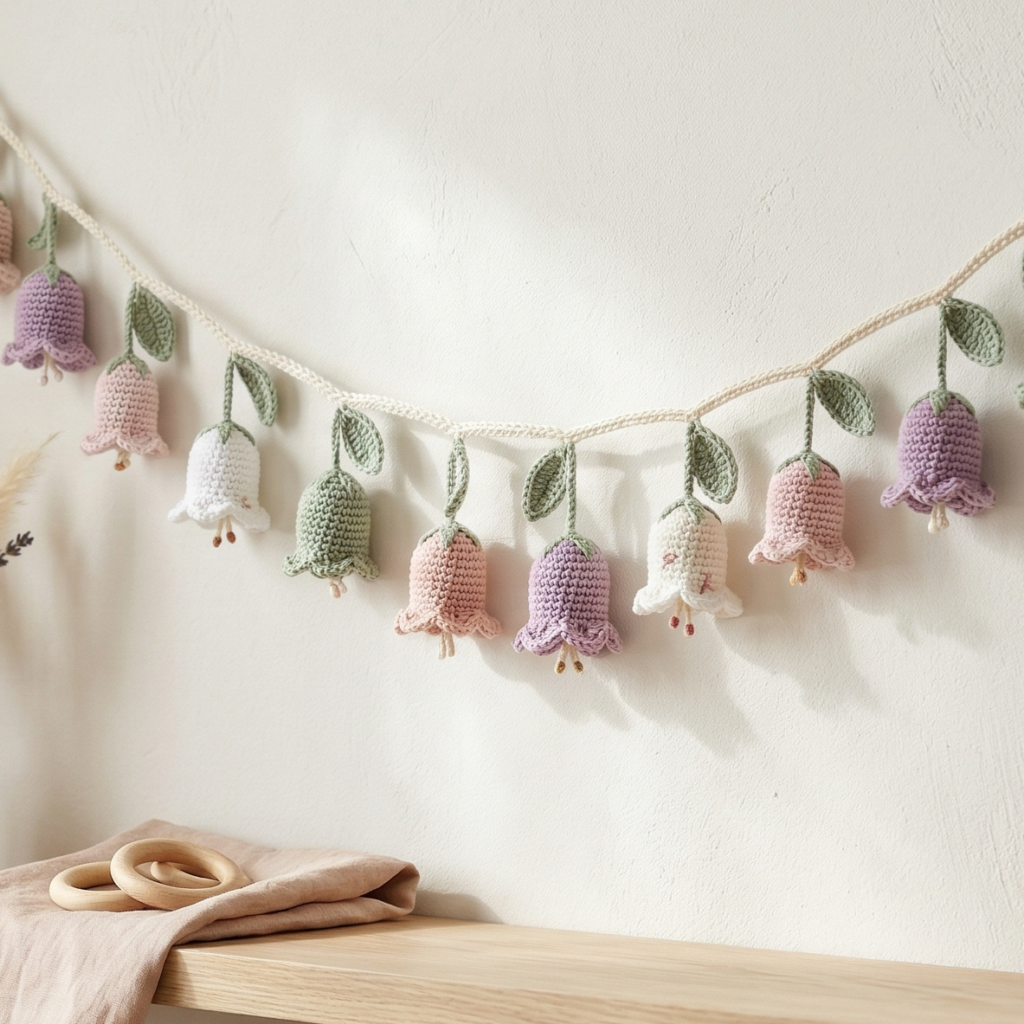
A bell-shaped flowers vine garland feels soft, botanical, and elegant. The tiny flower bells and vine structure give it a romantic, natural look that works well in nurseries, bedrooms, entryways, or garden-inspired décor. This is a lovely choice if you want a garland that feels graceful and handmade.
Step-by-step guide
Step 1: Plan the vine layout
Decide how long you want the vine to be and how many bell flowers you want to attach. A garland with a few larger blooms feels airy, while a denser vine feels lush and decorative. Plan the spacing before you begin to keep the design balanced.
A thoughtful layout creates a natural flow.
Step 2: Crochet the vine base
Start with a long chain or thin crocheted cord that will serve as the vine. Keep it light and flexible so it can drape naturally. The vine should be strong enough to hold the flowers without sagging too much.
The vine is the foundation of the garland.
Step 3: Make the bell flowers
Crochet small bell-shaped flowers separately. These can be made with curved petals or tiny cup-like shapes that open slightly at the bottom. Keep them small and delicate so they resemble hanging blossoms.
The bell flower shape is the main decorative element.
Step 4: Add flower centers or details
If desired, add tiny centers, leaves, or subtle embroidery to the flowers. A small stitch or bead in the middle can make the blossoms feel more realistic. Keep the details delicate and not too bulky.
Tiny details help the flowers feel alive.
Step 5: Attach the flowers to the vine
Sew the bell flowers onto the vine at even intervals or in small clusters. You can let some flowers hang slightly lower for a natural trailing effect. This helps the garland feel organic and airy.
The placement should look natural rather than rigid.
Step 6: Add leaves if desired
Crochet a few small leaves and attach them between the flowers. Leaves help the vine look fuller and more botanical. Keep them small enough that they do not overpower the blossoms.
A little greenery makes the garland feel lush.
Step 7: Shape and hang
Once all pieces are attached, gently shape the vine so it curves naturally. Add loops or ties at the ends to make hanging easy. The finished garland should feel soft, graceful, and balanced.
Helpful Tips
This garland looks especially beautiful in white, cream, blush, lavender, or soft green. It is perfect for delicate room styling or event décor. If you want a more whimsical look, mix in a few different flower shades along the vine.
5. Crochet Boho Party Garland Pattern
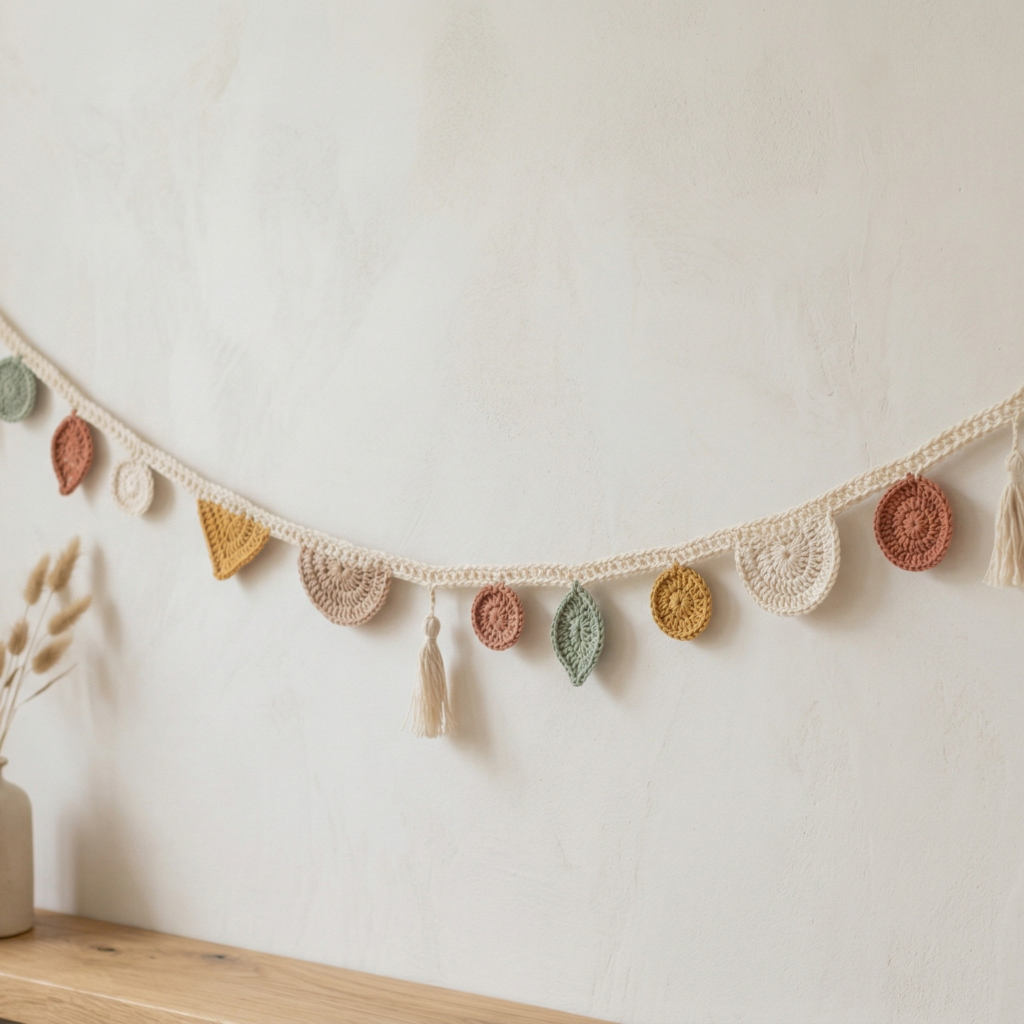
A boho party garland is relaxed, colorful, and full of creative personality. It is a wonderful option for celebrations, nursery styling, or adding a handcrafted bohemian touch to a room. Because boho style mixes texture, shape, and gentle color variation, this garland can be as simple or detailed as you like.
Step-by-step guide
Step 1: Choose a boho color story
Start by selecting a color palette that feels earthy, soft, or sunset-inspired. Warm neutrals, dusty pastels, terracotta, mustard, sage, and cream all work beautifully. Boho garlands often look best when the colors feel coordinated but not too strict.
A relaxed palette gives the garland its boho feel.
Step 2: Plan the motif mix
Decide which shapes you want to include. You might use small tassels, mini fans, circles, triangles, leaves, or tiny floral pieces. Boho garlands often look best when several different shapes are repeated in a balanced way.
A variety of motifs adds visual interest.
Step 3: Crochet the base string
Make a long chain or cord that will hold the decorative pieces. Keep it flexible and light so the garland drapes easily. This base should be strong enough to support all the motifs without stretching.
The cord is the backbone of the design.
Step 4: Crochet the boho motifs
Make each motif separately, keeping the sizes mostly similar so the garland feels cohesive. You can make small leaves, tassel-like pieces, circles, or little shell motifs. The pieces do not need to be identical, but they should feel related.
The motif variety creates the boho personality.
Step 5: Attach the pieces along the cord
Sew or tie the motifs onto the base string at regular intervals. You can alternate shapes or group them in small clusters. Leave enough room so each piece can be seen clearly when the garland hangs.
The spacing affects the balance of the garland.
Step 6: Add fringe or tassels if desired
Small fringe accents or tassels can make the garland feel even more boho. Use them sparingly so they add movement without making the garland too heavy. A few well-placed tassels can completely change the mood of the piece.
Step 7: Finish and shape
Adjust the motifs so they hang evenly and the garland drapes nicely. Add loops or ties at the ends for easy hanging. Weave in all loose ends and trim any fringe so the piece looks clean and finished.
Helpful Tips
Boho garlands look beautiful in nurseries, party backdrops, shelf displays, or cozy corners. If you want a more modern version, keep the motif shapes simple and the colors soft. If you want a more festive version, mix in brighter earth tones or a few gold accents.
Conclusion
Crochet garlands are one of the most enjoyable ways to decorate with handmade pieces because they are quick, versatile, and full of personality. They can brighten a room, soften a wall, or add a festive touch to a special event without requiring a large amount of time or yarn. That makes them a perfect project for anyone who loves decorative crochet that feels fun and satisfying.
These five garland patterns each bring something different to the table. The interlocked ribbon bow garland feels sweet and delicate. The scallop garland is soft and classic. The peppermint candy garland brings cheerful holiday energy. The bell shaped flower vine garland feels romantic and botanical. The boho party garland is relaxed, creative, and full of charm. Together, they show how much variety you can create with a simple string of crochet motifs.
A handmade garland has a way of making a space feel more thoughtful and warm. Whether you are decorating for a season, styling a nursery, planning a party, or just adding a cozy touch to your home, these patterns offer a lovely place to start. With the right yarn, neat finishing, and a little imagination, your crochet garland can become a favorite decorative piece that brings joy wherever it hangs.