Cute, cozy, character-inspired hats are a brilliantly quick way to add personality to your wardrobe — and they make irresistible gifts. Below you’ll find a warm introduction (yarn, hooks, sizing, and safety), and then five full hat patterns with detailed, easy-to-follow step-by-step instructions: Soft Plush My Melody Lamb Hat, Cinnamon Roll Plush Hat, Pompompurin-Inspired Bucket Hat, Kuromi Plush Hat, and Froggy Plush Hat. Each pattern includes materials, gauge and sizing notes, construction (crown → body → ears/embellishments), finishing tips, and safe-always alternatives for small children.
I kept the instructions practical and readable so you can make these today — no assumptions. If you want any hat graded to specific sizes (baby → toddler → child → teen/adult) or converted into a printable one-page pattern, tell me which one and I’ll format it.
Quick primer — yarn, hooks, sizing, and safety
Yarn & hook choices
- Soft acrylic or plush chenille (for cuddly hats): gives a stuffed-toy look and is machine washable. Use chenille cautiously: it can be fuzzy and hides stitches.
- DK / worsted cotton blends or acrylic: good for structure and stitch definition when you want clearer features.
- Wool or wool blends: warm but demanding to care for (hand-wash).
- Suggested hooks: 3.0–4.5 mm for DK/worsted; 5.0–8.0 mm for bulky/plush yarns. Use a smaller hook than the yarn label suggests for a tighter fabric (especially important for amigurumi-like ears and small children’s hats).
Notions
- Tapestry needle, stitch markers, stuffing (small amounts for ear/pom-details), embroidery floss for safe facial features, small scissors.
- Optional: felt for backing, non-toxic fabric glue (sparingly), lining fabric (fleece) for extra warmth/structure.
Safety (very important)
- For children under 3 years: do not use glued or loose small parts, safety eyes, or buttons. Use embroidered features only, and sew on appliqués securely with many passes.
- For all hats: weave in and knot yarn tails securely (kids tug). Label wash instructions and fiber content if you sell/gift.
Sizing basics & quick gauge math (example)
Always make a 4″ (10 cm) swatch in the stitch you plan to use (same yarn + hook), blocked the same way you’ll finish the hat.
Example: you want an adult head circumference ~22 inches, and your swatch shows 5 stitches = 1 inch.
- stitches per inch = 5.
- desired circumference = 22 in.
- multiply: 5 × 22 = 110 stitches.
- If your stitch pattern needs a multiple (e.g., multiple of 4), divide 110 by 4 = 27.5 → round to nearest whole multiple: 28 × 4 = 112 stitches (gives ~22.4 in finished circumference).
For a hat worked top-down, plan decreases so the crown reaches the target stitch count at the circumferential point, then work body rounds until desired height.
Abbreviations (US)
- ch = chain
- sl st = slip stitch
- sc = single crochet
- hdc = half double crochet
- dc = double crochet
- tr = treble crochet
- inc = 2 sc (or 2 hdc/dc) in same stitch
- dec = sc2tog (single crochet two together)
- MR = magic ring
- BLO / FLO = back/front loop only
1. Crochet Soft Plush My Melody Lamb Hat Pattern
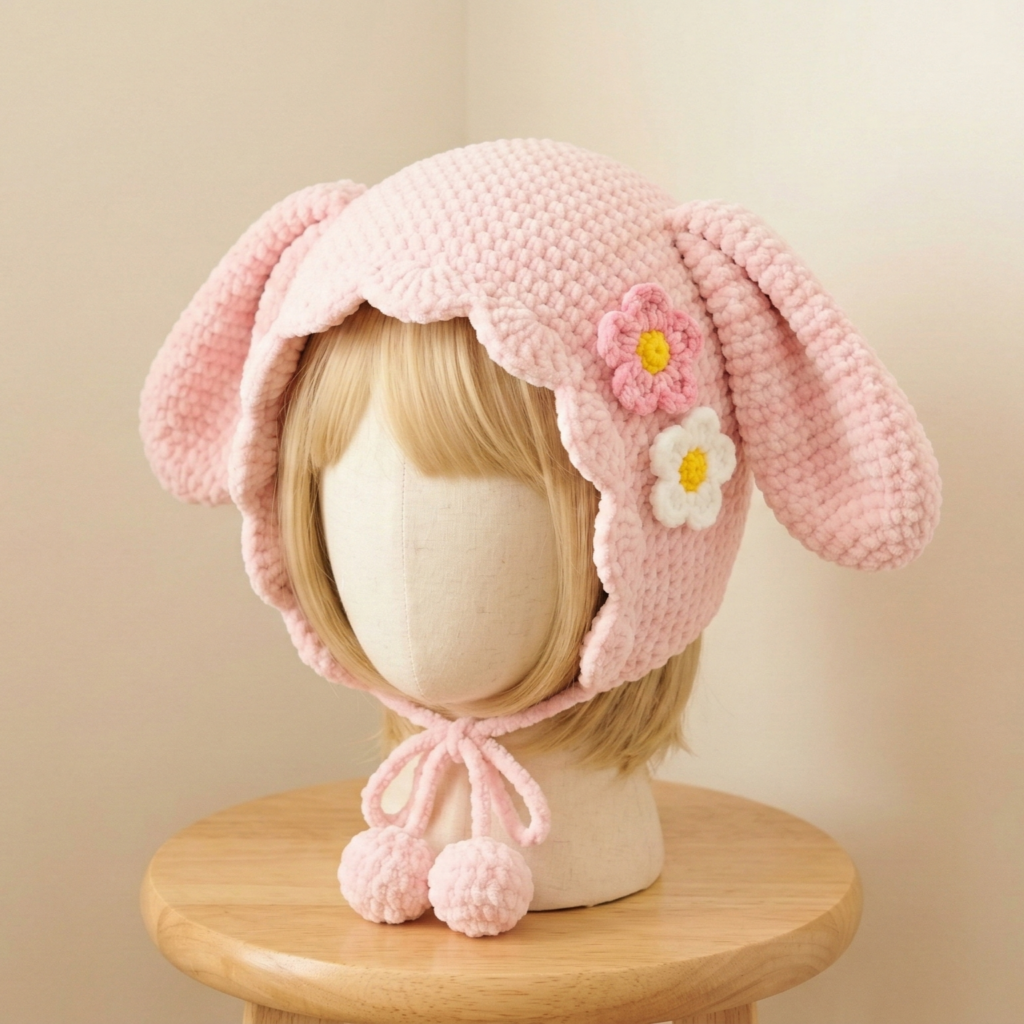
A sweet, plush lamb hat inspired by My Melody’s cozy look: rounded crown, hooded ear shaping, and cute lacy bow option. Plush yarn gives soft, toy-like texture; use embroidered face for kids.
Skill level: intermediate (shaping + plush yarn handling)
Finished sizes: sample shown for Adult (head 22–22.5″). Easily scaled smaller — see notes.
Materials (Adult sample)
- Bulky plush chenille or velvet yarn (super-bulky) — ~150–250 yd (depends on yarn)
- Hook: 6.0–8.0 mm (choose for tight, dense fabric)
- Small amount DK contrast for bow or inner ear (if used)
- Tapestry needle, stitch markers, stuffing for ears, embroidery floss for face (safe option for small children)
Gauge example (with plush bulky yarn in sc): 10 sc × 12 rows = 4″ (10 cm) — adjust as needed.
Construction overview
Worked top-down in the round:
- Crown increases to form dome.
- Body rounds to cover head.
- Hood/ear shaping: flatten ear flaps and work rounds to shape the lamb’s ear.
- Add bow or flower appliqué; embroider or attach felt face elements.
Step-by-step (Adult sample; scale by gauge)
Crown (start)
- MR. R1: 6 sc in MR — (6).
- R2: inc around — (12).
- R3: sc 1, inc around — (18).
- R4: sc 2, inc around — (24).
- R5: sc 3, inc around — (30).
- Continue increasing in this way (adding one more sc between increases on each round) until crown approx 7–8″ diameter (for adult head this is ~7–8″). That will usually land at 8–10 rounds depending on yarn.
Work increases evenly so the crown stays flat; check on your head as you go (or over a pillow).
Body / Head height
- Once crown diameter is reached, work even rounds of sc (no increases) until hat height reaches ~7–8″ from crown center (this covers ears and forehead). For a slouchier hat, add 1–2 more rows.
Ear flaps / lamb ears (make 2)
- Mark ear placement on either side of hat (about 2–3″ apart depending on size). Join yarn at first ear marker: ch 1, sc in next 10–12 sts across (adjust number for ear width), turn (you will work back and forth in rows to shape an ear panel).
- Row 1–5 (ear panel): sc across, decreasing every other row near the base to create a tapered bottom: e.g., Row 3 dec at each edge once; Row 5 dec again — test until ear forms a gentle teardrop. Fasten off leaving long tail for sewing. Make second ear the same.
- Lightly stuff ear tips (if using plush yarn, keep stuffing very small) and sew ear panels to hat securely, tacking only a small seam at base so ears flop.
Lamb fleece texture (optional)
- For extra lamb-like texture, work 1–2 rounds of loop stitch around the head or use tiny bobbles. With plush yarn this may not be necessary.
Bow or flower
- Small bow: ch 15, sc back across 2–3 rows to make a small rectangle, cinch center with yarn to make bow. Sew to one ear base or offset to the side. For babies, embroider a small heart instead of adding 3D attachments.
Face (kid-safe)
- Embroider eyes and nose with embroidery floss. Place eyes lower on crown for a cute look. Use satin stitch for nose, tiny straight stitches for mouth.
Finishing & notes
- Weave in all tails securely. Reinforce ear bases with multiple passes.
- For babies or toddlers, embroider all features and avoid 3D bows or plastic eyes.
- Machine wash on gentle if yarn permits; reshape while damp.
2. Crochet Cinnamon Roll Plush Hat Pattern
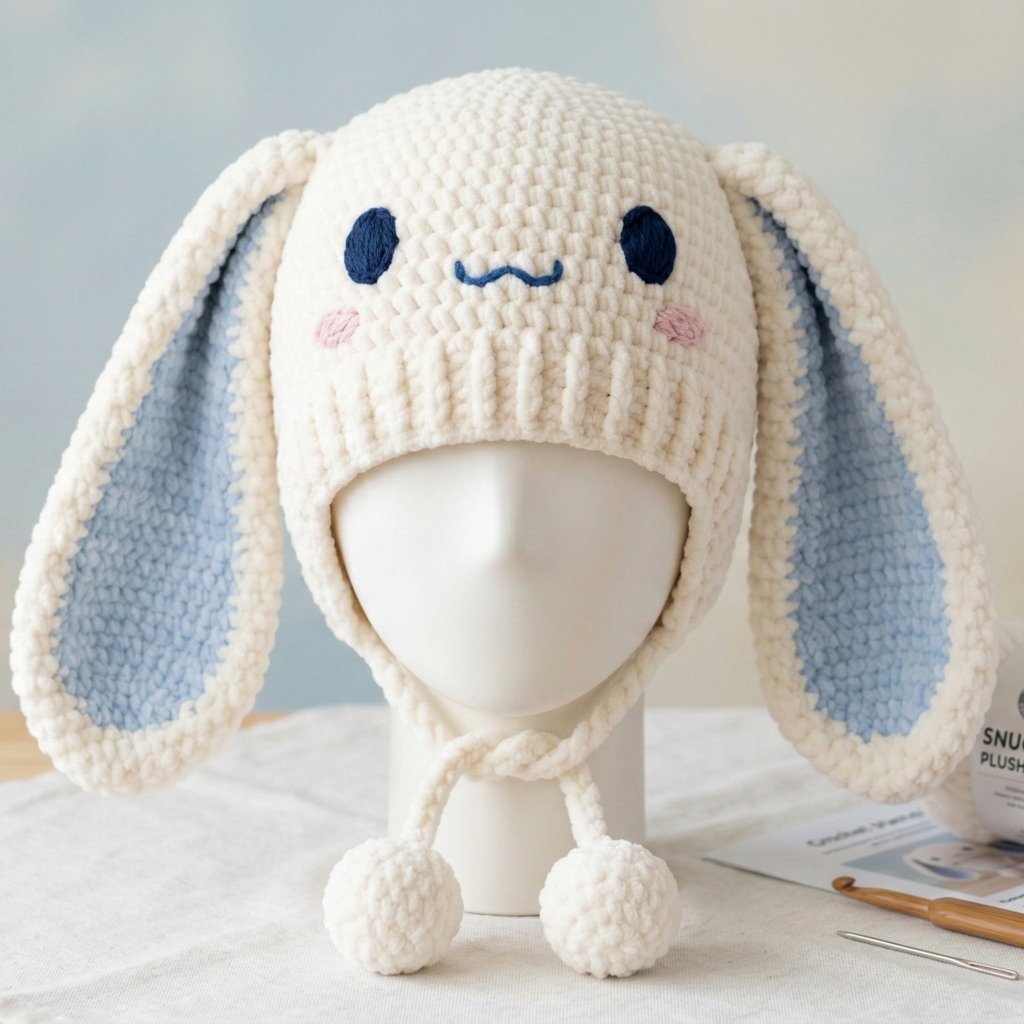
This fun hat mimics a cinnamon roll — a cozy round swirl on top with a rolled edge and a small pom or plush drizzle accent. Super cute as a novelty hat for all ages.
Skill level: confident beginner → intermediate
Finished size: adult sample (22″ head) — easily scaled
Materials (sample)
- Bulky DK/aran in warm “dough” color (beige/tan) — ~200 yds
- Contrasting brown/sugar color for the swirl detail — ~50 yds
- Hook: 5.0–6.5 mm
- Small pom maker or leftover yarn for drizzle/pom, tapestry needle
Construction overview
Work a domed hat (basic top-down), then create the visible swirl by surface crochet or sewn applique spiral that winds around the crown. Add a rolled brim for the pastry edge.
Step-by-step
Crown
- MR, R1: 8 sc in MR. (8)
- R2: inc around. (16)
- R3: sc 1, inc around. (24)
- R4: sc 2, inc around. (32)
- Continue increases until crown diameter ~7–8″ (same method as previous hat). Then sc in rounds until hat height is ~7″.
Swirl detail (surface spiral)
- With contrast color, attach yarn at crown center with a sl st and work a spiral outward across the hat surface using surface slip stitch: ch1, surface sl st into next stitch following a spiral path. Alternatively, chain a long cord (chain as long as you need), then lay it on hat in spiral and sew down with invisible stitches.
- For depth, work 2–3 rows of surface slip stitch or embroider in chain-stitched round. For a “glaze” effect, use shiny sport yarn for a thin stripe along the spiral.
Rolled brim (cinnamon bun edge)
- Work 4–6 rounds of sc in tighter tension at the lower edge. Then do a final round of reverse single crochet (crab stitch) for a rounded, rolled look. You can make the brim slightly ruffled by increasing: sc 2, inc around for one round before finishing.
Pom / drizzle
- Add a small yarn pom or little “icing drizzle” cord: braid 3 strands of sugar color, stitch across spiral in random pattern.
Finishing & notes
- For a child version, scale down by using fewer increase rounds for the crown and earlier finishing.
- Embroider small subtle freckles or a smile near brim for a kawaii look.
3. Crochet Pompompurin-Inspired Bucket Hat Pattern
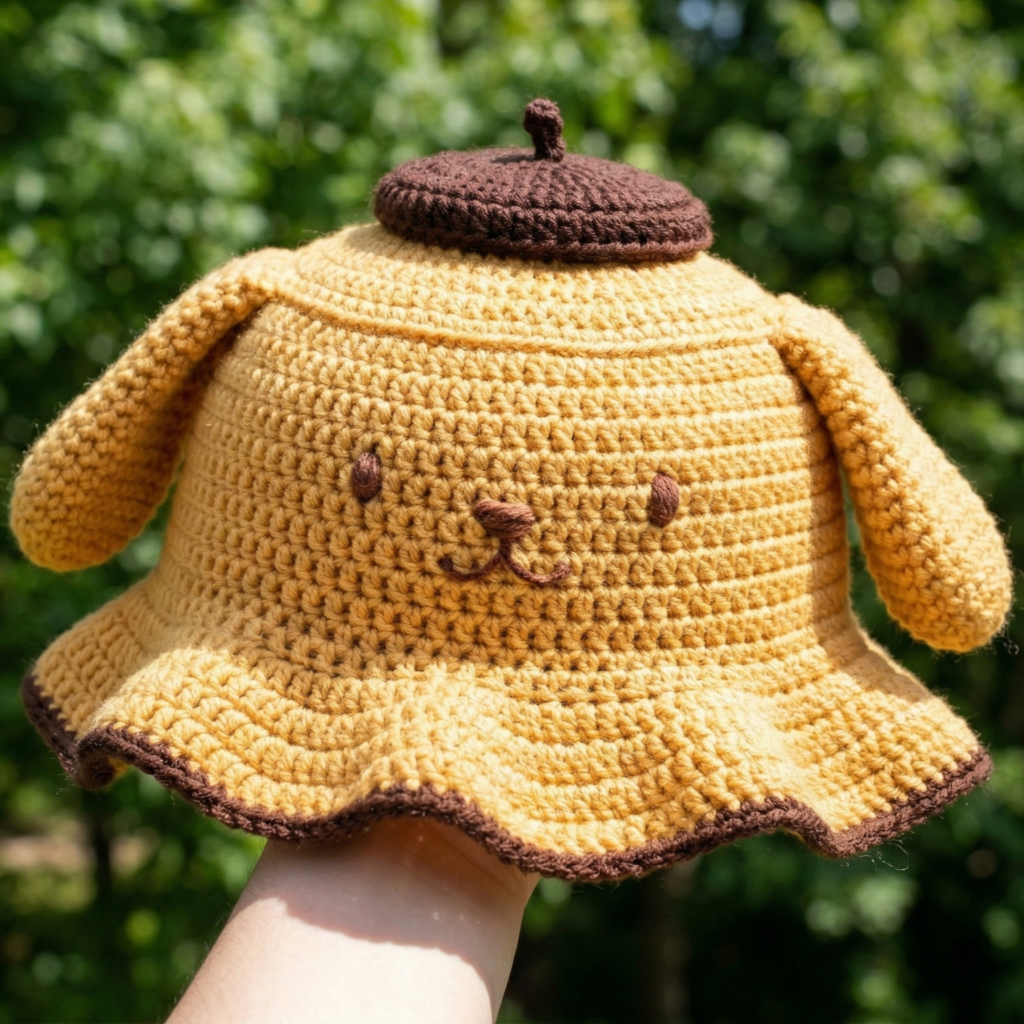
A relaxed bucket hat with a rounded crown and modest brim, topped with a jaunty beret-style little “cap” or pom — capture Pompompurin’s cozy pudding vibe.
Skill level: intermediate (brim shaping)
Finished size: sample adult 22″ head
Materials (sample)
- Worsted/bulky soft yarn in warm golden yellow — ~250–350 yds
- Hook: 4.5–6.0 mm depending on yarn
- Tapestry needle, optional small felt badge for decoration
Construction overview
Top-down crown → even rounds for head → increase for brim → shape brim with rounds in dc/hdc to create flexibility. Add small beret pom or felt “beret” sewn to side.
Step-by-step
Crown
- MR, 8 sc; inc around to 16; sc1, inc → 24; sc2, inc → 32; continue until crown diameter ~7–8″.
Head band & brim base
- After reaching crown diameter, work even rounds of hdc or sc for head height ~2.5–3.0″.
- Brim shaping: to flare out the brim, work rounds with increases:
- Brim R1: hdc 4, inc around
- Brim R2: hdc 5, inc around
- Adjust as needed; each round adding more hdc between increases increases the flare.
- Brim finishing: work one round in sc for sturdy edge and a second round in crab stitch for a tidy rolled brim.
Beret accent
- Make a small shallow disk in contrasting brown: MR, 6 sc, inc around to ~20 sc, sc a few rounds, flatten and sew atop hat offset to one side. Add a little pom or short stem (ch3, sl st).
Lining & stability (optional)
- For structure: sew a lightweight cotton lining to the inside crown and tack it in place. This keeps brim from collapsing.
Finishing
- Add a felt badge or small embroidered face if desired (for kids, embroider eyes/mouth).
4. Crochet Kuromi Plush Hat Pattern
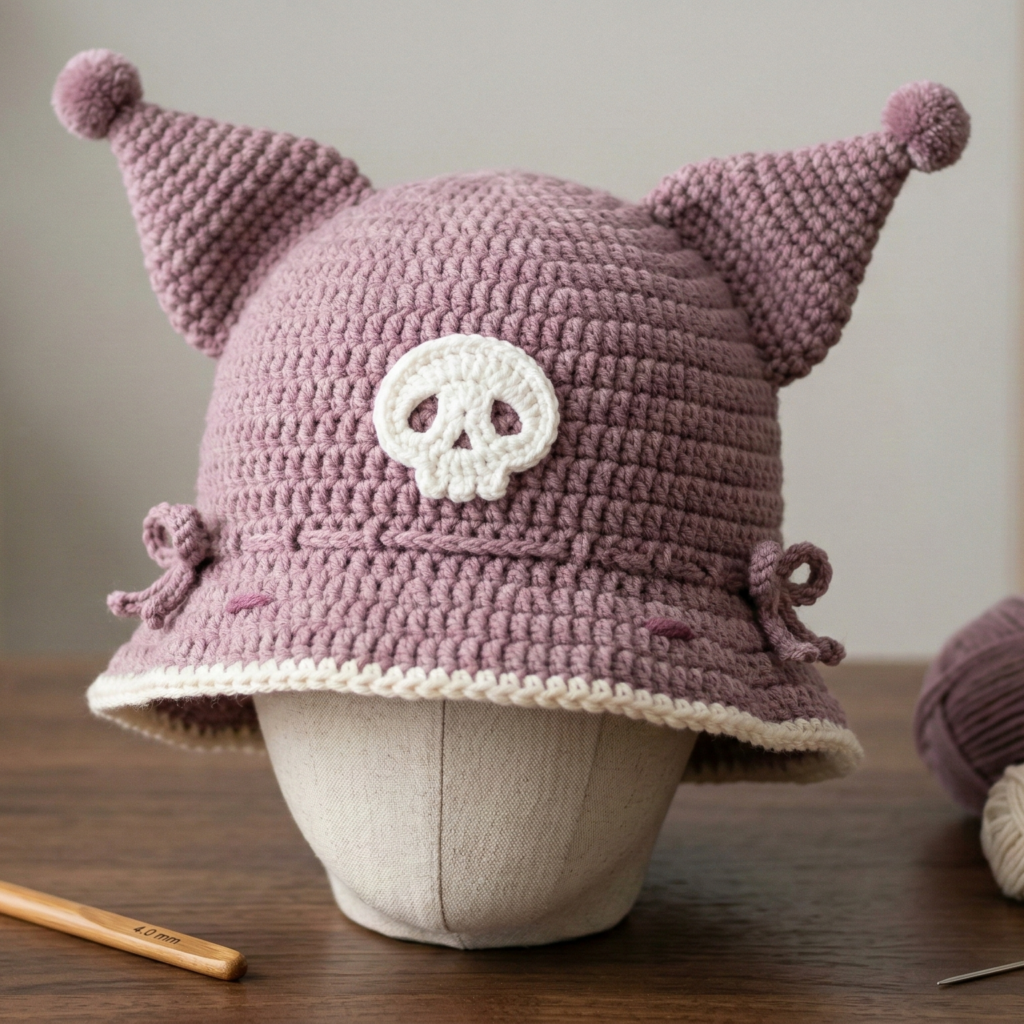
A bold, slightly mischievous hooded hat with pointed ear/hood features and skull appliqué — Kuromi style but family-friendly. Use embroidered features or appliqué for character details.
Skill level: intermediate (appliqué + hood shaping)
Finished size: adult sample 22″ head
Materials
- DK or worsted yarn (black/dark gray for hood, cream/pink for face), hooks 3.5–5.0 mm
- Small amount white yarn for skull appliqué, tapestry needle, felt optional for skull
Construction overview
Construct a snug beanie base, then shape a hood/point at top with added pointed ear triangles. Sew or crochet a skull appliqué and attach to front of hood. Embroider eyes/face or use felt (sewn).
Step-by-step
Beanie base
- MR, 8 sc; increase rounds (as earlier) until crown ~7–8″; sc rounds to height ~6–7″ for snug beanie.
Hood shaping / points
- To make the pointed look, extend two triangular ear/point panels from the top:
- Mark two opposite points on the crown (front left & front right). From each mark, work a tapered triangular panel by turning rows (sc decreasing at each end row) or by crocheting a tapered cone and attaching.
- Example triangular panel: ch 1, sc 10 across, turn; dec at each end every 2nd row until tip; finish by sewing to hat edge so the points sit above ears.
Skull appliqué
- Small skull: MR, 6 sc; R2: inc around → 12 sc; shape tiny bones by chaining and small sc rectangles if desired. Use felt for cleaner edges: cut skull shape, blanket stitch around edge with matching yarn and sew to hat secure.
Face (kid-safe option)
- Embroider eyes & mouth using satin stitch with black embroidery floss. For older kids/adults, you can sew tiny felt eyes.
Finishing & notes
- Reinforce attachments. For toddler versions, keep the skull small and embroidered border only.
- Add a liner for warmth or stability; sew it in with whipstitch and hide stitches inside.
5. Crochet Froggy Plush Hat Pattern
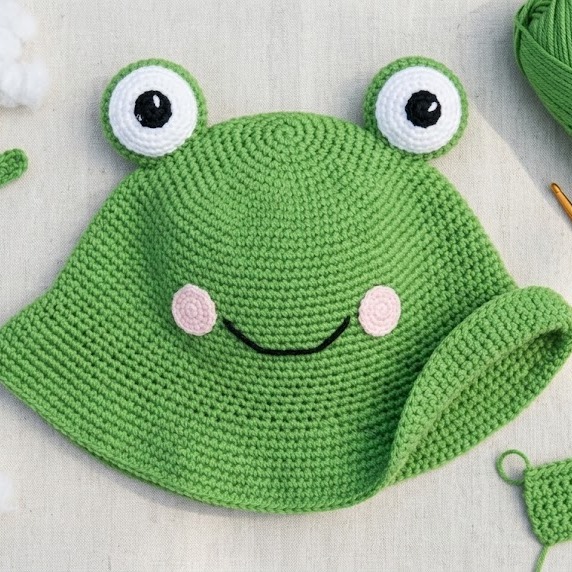
Playful froggy hat with big eyes and friendly mouth: fun for kids and adults who love kitsch. Use embroidered mouth and securely sewn eye domes.
Skill level: confident beginner → intermediate
Finished sizes: sample child & adult options (scale via gauge)
Materials
- DK cotton or soft acrylic green — ~200 yds
- White & black small amounts for eyes, hook 4.0–5.0 mm
- Stuffing for eye domes, tapestry needle
Construction overview
Top-down beanie base → two stuffed eye domes worked as small spheres or half-spheres, sewn to top front → embroidered smile.
Step-by-step
Crown / beanie base
- MR, 8 sc; increase rounds until crown ~6–7″ diameter (children) or 7–8″ (adults). Sc rounds to height ~6–7″ for child or 7–8″ for adult.
Eye domes (make 2)
- Small sphere (eye): MR, 6 sc; R2: inc around (12); R3: sc 1, inc around (16); R4: sc around; R5: dec rounds to close partially leaving small opening; lightly stuff; close fully. Make two and sew whites to top front of hat. Use black sc or small embroidered pupil on each dome.
Alternative flat eyes: make white ovals (MR 6 sc + 1 round) and sew over slightly stuffed backing for a “bulgy” eye that’s still flat enough to wash easily.
Mouth & cheek detail
- Embroider a wide relaxed smile in darker green/black yarn with satin stitch; add small blush circles with light pink yarn or felt.
Optional chin strap or earflaps
- For toddlers, add earflaps and ties: pick up stitches at ear area and work a triangular flap; make braided ties and add to ends.
Finishing & child safety
- For toddlers: use embroidered pupils (no buttons). For older children/adults you can use safety eyes if desired, but keep them secured and reinforced.
General Finishing & Care Notes (applies to all hats)
- Weave ends thoroughly and hide tails within the hat body. Use multiple passes for ear bases and appliqués.
- Blocking: plush yarns usually don’t block in the typical sense; shape while damp and let dry to set form. For cotton/acrylic hats, wet block subtly to even edges.
- Washing: follow yarn label. Most acrylics are machine-washable gentle; plush chenille often needs gentle cycles and low heat or air dry. Remove any felt before machine washing.
- Label: if you sell or gift, include fiber content and washing instructions and an age safety note (e.g., “Not suitable for children under 3 unless features are embroidered.”)
Quick scaling instructions (baby → toddler → child → teen/adult)
- Reduce or increase crown rounds by 1–3 rounds depending on size and gauge.
- Shorten or lengthen body rounds to adjust hat height.
- Keep ear/eye proportions in scale (smaller gauges → fewer stitches per feature).
Suggested finished head circumferences (approx):
- Baby (0–12 months): 15–17″
- Toddler (1–3 years): 17–19″
- Child (4–10 years): 19–20.5″
- Teen/Adult: 21–24″ (adjust for snug or loose fit)
Use the gauge math method from the intro to compute exact stitch counts for your yarn and pattern repeat.
conclusion
These five cozy-cute hats — Soft Plush My Melody Lamb, Cinnamon Roll, Pompompurin Bucket, Kuromi, and Froggy — balance character charm with wearable construction. Each pattern gives you a complete approach (crown shaping, body height, ears/embellishments, safe finishing), plus child-safe alternatives and scaling notes so you can make hats for every age. They’re perfect for gifting, market stalls, fancy dress, or just brightening up a cold day.