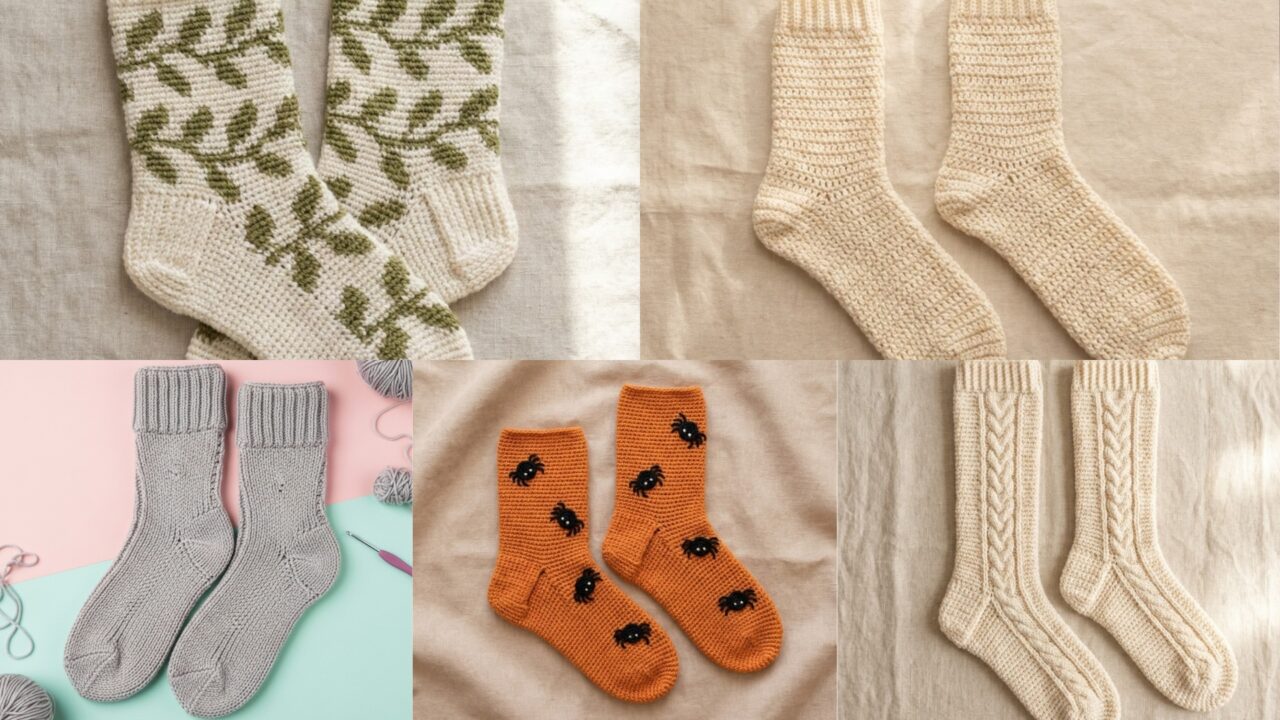
Crocheted socks are the perfect winter project: quick enough to be satisfying, warm enough to be useful, and endlessly customizable. Below you’ll find five full sock designs — from a reliable basic cuff-down sock to knee-high statement socks, colorwork vine socks, a playful spider-accent pair, and a knit-look Tunisian sock — each with a clear overview, skill level, exact materials, sizing guidance, a step-by-step construction method (with a formula so you can adapt to any foot size), plus variations, finishing and care notes. I wrote these so you can make a wearable pair today and customize the look to match your style.
Quick notes & how to use these patterns
- Choice of yarn & gauge: These patterns assume worsted / aran weight yarn (#4) for a cozy winter sock and a slightly chunky feel, using a hook in the 4.0–5.5 mm range depending on your tension and the pattern. If you prefer a slimmer sock, use fingering / sock yarn and follow the same construction but expect more rounds and a smaller hook/higher stitch count.
- Measure — don’t guess: Always make a small gauge swatch (8–10 stitches across) in the stitch you’ll use, measure stitches per inch and rows per inch, then plug those into the sizing formulas in each pattern. That keeps the math accurate for your yarn and hand tension.
- Sizing method: I give a formula and an example for a Medium adult (women’s US 8–9). To make a different size, measure foot circumference and length and use the stitches-per-inch number from your swatch.
- Construction style: All five patterns are written cuff-down with a short-row or gusset-heel construction unless otherwise noted (Tunisian uses Tunisian technique). Cuff-down is easy to try on as you go. If you prefer toe-up, use the same heel/gusset steps but start at the toe (I can convert any pattern on request).
- Safety & durability: For household socks you’ll want sturdy construction — use a tightish gauge, secure all tails, and reinforce heel/gusset joins. For decorative socks (costume, props), finishing may be lighter.
1. Crochet Basic Socks Pattern
Overview & use: A workhorse pattern that fits many feet comfortably. Use as your default base to adapt colorwork, bobbles, cables, or appliqués.
Skill level: Confident beginner (comfortable with rounds, short rows or heel flap, increases/decreases)
Materials (sample for one pair adult medium)
- Worsted / aran weight yarn, 150–250 g depending on leg length
- Hook 4.5–5.0 mm (choose size to meet gauge)
- Tapestry needle, stitch marker, scissors
Gauge (example)
- Make a swatch in single crochet (sc) or the main stitch you plan to use. Example gauge: 4 sc = 1 inch horizontally and 4 rows = 1 inch vertically (this is an example — measure your own swatch).
Sizing formula (use your swatch)
- Measure foot circumference at widest part (metatarsal). Multiply circumference (inches) × stitches per inch = total stitches around sock. Choose the nearest even multiple required by the pattern (most rounds like gusset are easier with a multiple of 2 or 4).
- Example medium: 9 in × 4 st/in = 36 sts around.
- Foot length determines the number of rounds in foot section; use rows per inch from swatch.
Construction — cuff-down, medium example (36 sts circumference)
1) Cuff
- Foundation: Chain 36, join to work in the round with care not to twist. Place marker at start.
- R1–Rnd 12 (cuff height): Ch1, sc in each st around (or work 1×1 rib in BLO: sc in back loop only around for 8–12 rounds for a stretchy cuff). Cuff height ~1.5–2 in.
2) Leg
- R13–R? (leg length): Continue working in chosen stitch (sc or hdc for a thicker fabric) until leg measures desired length from cuff to start of heel — e.g., 6 in for ankle sock, 8–10 in for short crew. Example: work 12–16 rounds more (depending on row gauge).
3) Heel — short-row heel (easy, no turning flap)
- Work short rows to shape a heel cup:
- Mark the center 1/2 of the stitches for short rows (e.g., for 36 sts, 18 sts = half). Work back and forth across half the stitches in rows, working short rows that gradually increase the wrap until you’ve built a heel cup that fits the back of the heel (typ. 6–8 short-rows depending on gauge). Then pick up stitches along the sides and resume working in the round, closing any gaps with wraps or small decreases.
- Alternative: use a heel flap & gusset (instructions below) if you prefer that traditional method.
(If you’d like precise short-row step counts for your gauge I can generate them from your swatch; short-row heels are very forgiving.)
4) Gusset & foot
- After heel is shaped and stitches picked up, you’ll have extra stitches along the instep (e.g., 36 sts total with some on instep and some on sole). Work rounds while decreasing 1 stitch at each gusset corner every other round until you’re back to your main round count (36 sts). Then work even in rounds until the foot reaches ~1 in shorter than desired total foot length.
5) Toe
- Start toe decreases: On next round, sc to last 2 sts on each side of toe area, sc2tog — repeat around in a symmetrical pattern reducing evenly until you have 8–12 sts left. Pull tail through remaining sts and close tightly. Weave in ends.
Heel flap & gusset alternative (more detailed)
If you want explicit step counts:
- Work leg and then set aside half the stitches for heel flap. For 36 sts: work across 18 sts in rows to make a heel flap (use sc in rows for 12–14 rows for a medium heel height).
- Turn heel by working short rows to round the shape (or do a simple slip-stitch heel).
- Pick up stitches along both sides of the heel flap (usually one pickup per row made) and then work the instep in rounds, decreasing for gusset until you return to 36 sts.
Variations & finishes
- Make the cuff ribbed (BLO sc) for snugness.
- Add a slip-stitch sole row (sl st back loop only) for extra durability.
- Make ankle socks by shortening the leg.
- For slipper socks, add a felted sole or non-slip vinyl dots.
Care
- Machine wash gentle on cool for most worsted acrylic/cotton blends; air dry to maintain shape. Use wool wash if using wool yarn.
2. Crochet Vine Colorwork Socks Pattern
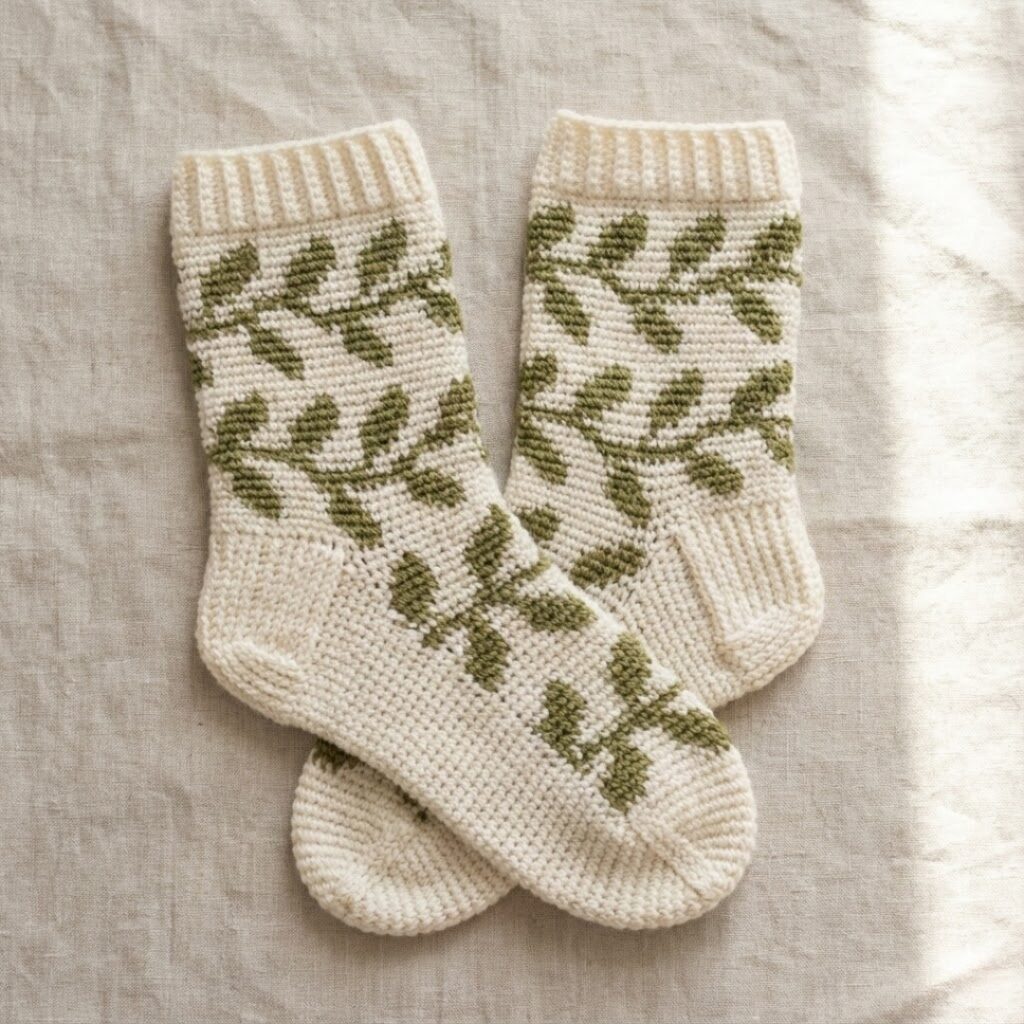
Overview: A cozy sock with an all-over vine motif worked in stranded colorwork (two colors). Lovely for home and a great gift — the vine pattern creates a rich, textured look without cables.
Skill level: Intermediate (stranded crochet / fair-isle technique, tension control)
Materials
- Worsted weight in Color A (background) and Color B (vine) — ~200 g total.
- Hook 4.5–5.0 mm.
- Stitch marker, tapestry needle.
Gauge & sizing (use swatch)
- Make a charted motif swatch in the stitch you’ll use (moss or single crochet). Count stitches per inch and rows per inch; determine circumference like in Pattern A.
Construction essentials
- Chart the vine: Draw or use a small repeatable chart (e.g., a 12-stitch repeat over 8 rows) — sample motif: a small diagonal vine that repeats around the leg. The vine is easiest in single-crochet in the round using the stranded method (carry unused color loosely across the WS).
- Cuff & leg: Work cuff in Color A with a few rounds of ribbing; then start colorwork rounds, following chart over the required number of rounds. Keep floats (carried strands) loose — do not trap them too tight, or sock will pucker.
- Incorporate heel: When shaping the heel, continue pattern on the instep only to keep a continuous vine; the heel flap (if worked) is usually in background color (solid) for strength.
- Gusset, foot & toe: After resuming rounds post-heel, continue the vine on the instep while the sole remains solid Color A to hide wear.
Tips for stranded crochet
- Maintain consistent tension for floats; use the yarn-under method to catch floats every 4–6 stitches if floats are long.
- Carry both yarns and twist at color changes to avoid laddering.
Variations
- Swap vine for leaves, hearts, or geometric motifs.
- Use a heathered background for depth and a high-contrast color for the vine.
Finishing & care
- Hand or machine wash gentle; colorwork may bleed on first wash — test a sample. Block lightly to settle stitches.
3. Crochet Valerie’s Knee-High Socks Pattern
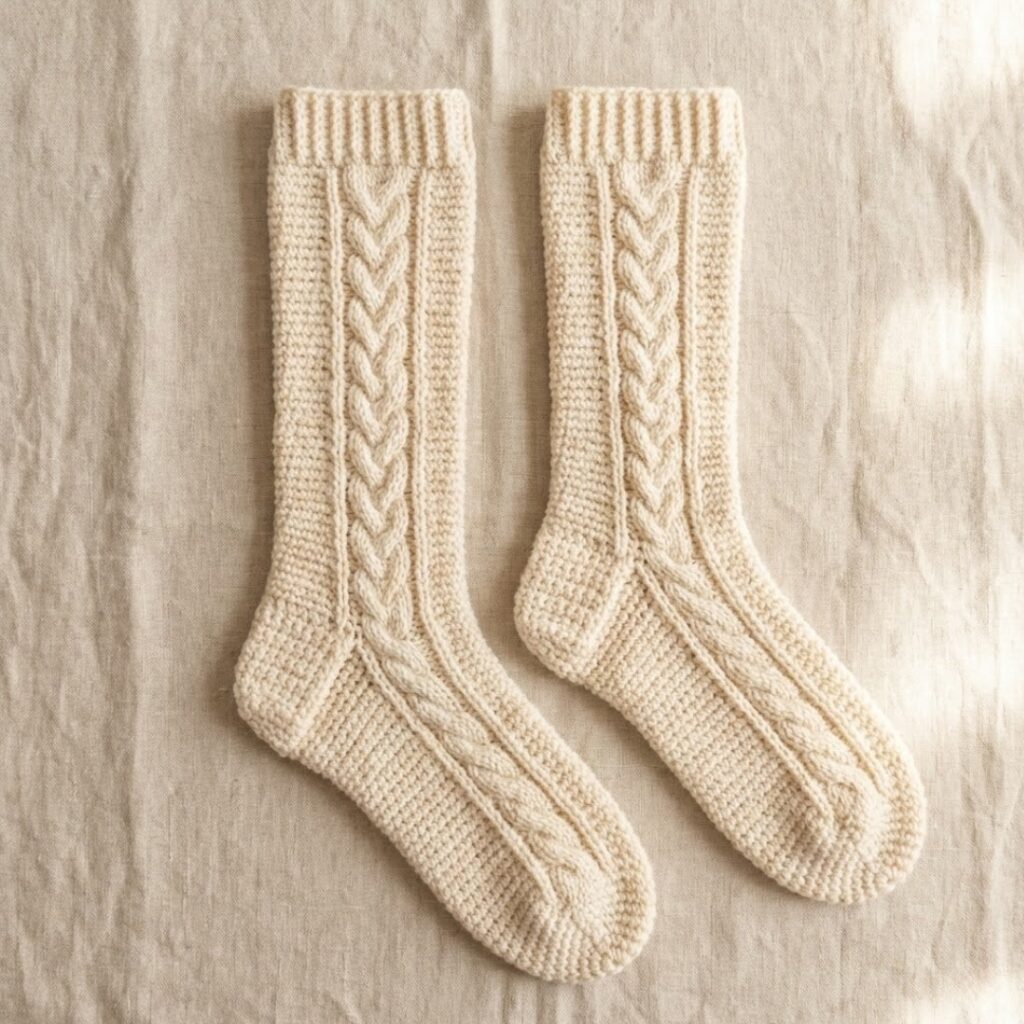
Overview: Knee-high socks with a textured cable-like panel (crochet cables using front-post/back-post stitches) down the front, ribbed back and snug top cuff. These make a statement and are extra warm.
Skill level: Intermediate → advanced (post stitches and shaping for knee-length)
Materials
- Worsted / aran yarn 300–400 g per pair (knee-highs use more yarn).
- Hook: 5.0 mm (match your gauge).
- Stitch markers, tapestry needle.
Construction outline
- Cuff & rib: Work 1×1 or 2×2 rib in BLO (front/back post hdc or sc) for a snug top — work ~2 in folded or 3–4 in unfolded depending on style.
- Leg length & cable panel: Work the leg in the round until you’re ~8–10 in below knee for a typical knee-high (measure the child/adult to be accurate). On the front side, designate a panel width (e.g., 12 sts) to work cable pattern: crossover achieved by FPdc/BPdc crosses every 6–8 rounds to simulate a cable.
- Heel & gusset: Use heel flap & gusset construction for stability (recommended for taller socks). Make heel flap in a sturdy stitch (hdc in rows). Pick up stitches for gusset and decrease back to main stitch count.
- Foot & toe: Work foot as in Pattern A; if wearing with boots, you can extend foot length slightly to accommodate layering.
Cable sample (12-st panel)
- Round 1–4: work sc or hdc in panel.
- Round 5 (cross): FPdc around next 4 sts, BPdc around previous 4 sts to create a left-cross; repeat across panel. You’ll need to experiment on a swatch to get the look you want; cables are about the appearance rather than strict counts.
Variations
- Make leg in two colors with cable in contrasting color.
- Add slip-stitch sole or fleece lining for extra warmth.
Finishing & care
- These socks are heavier; machine wash gentle OK for acrylic, but wool requires more care. Store folded; avoid hanging heavy socks by cuff as it will stretch.
4. Crochet Creepy Crawly Spider Socks Pattern
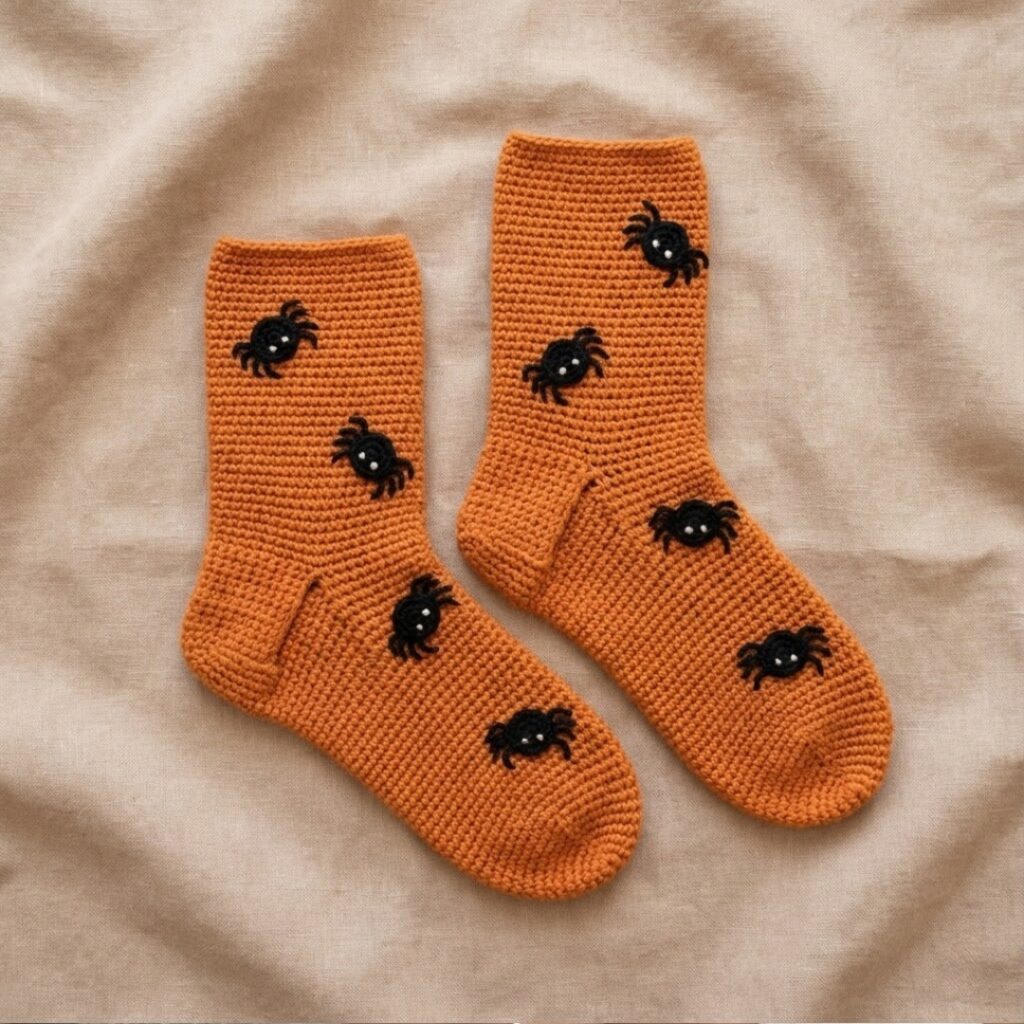
Overview: A fun, seasonal pair with a simple textured sock body and small crocheted spider appliqués sewn on as decoration. Great for Halloween or playful wardrobes.
Skill level: Confident beginner (sock basics) + simple motif making
Materials
- Worsted yarn main color, small amount black for spiders
- Hook 4.5–5.0 mm
- Yarn needle, small embroidery thread if you prefer embroidered spider legs
Construction
- Make the sock: Use the Basic Sock pattern (Pattern A) to make a base pair in your chosen color.
- Spider appliqué (mini) — make several small spiders:
- Body: MR, 6 sc in ring (6). Fasten off leaving tail to sew.
- Legs (8): Using thin yarn or embroidery thread, stitch 4 legs on each side of body by sewing short chain segments (ch3 then sl st to anchor) and trimming to length. For safety and durability, stitch legs well into sock fabric with multiple passes.
- Attachment: Sew each spider onto the sock surface with many tight passes. For very young children, prefer embroidered flat spiders (no 3-D parts) for safety.
- Placement: Position spiders along the upper front of the foot or along the calf — avoid the sole area to minimize abrasion.
Safety note
- For toddlers or small children, do not attach 3-D spiders with parts that could catch on objects or be pulled off; use flat embroidery instead.
Variations
- Make webs with surface crochet around spiders.
- For a subtler look, use tonal black on charcoal gray.
Finishing & care
- Turn the socks inside out to wash to protect appliqués; hand-wash if spiders are delicate.
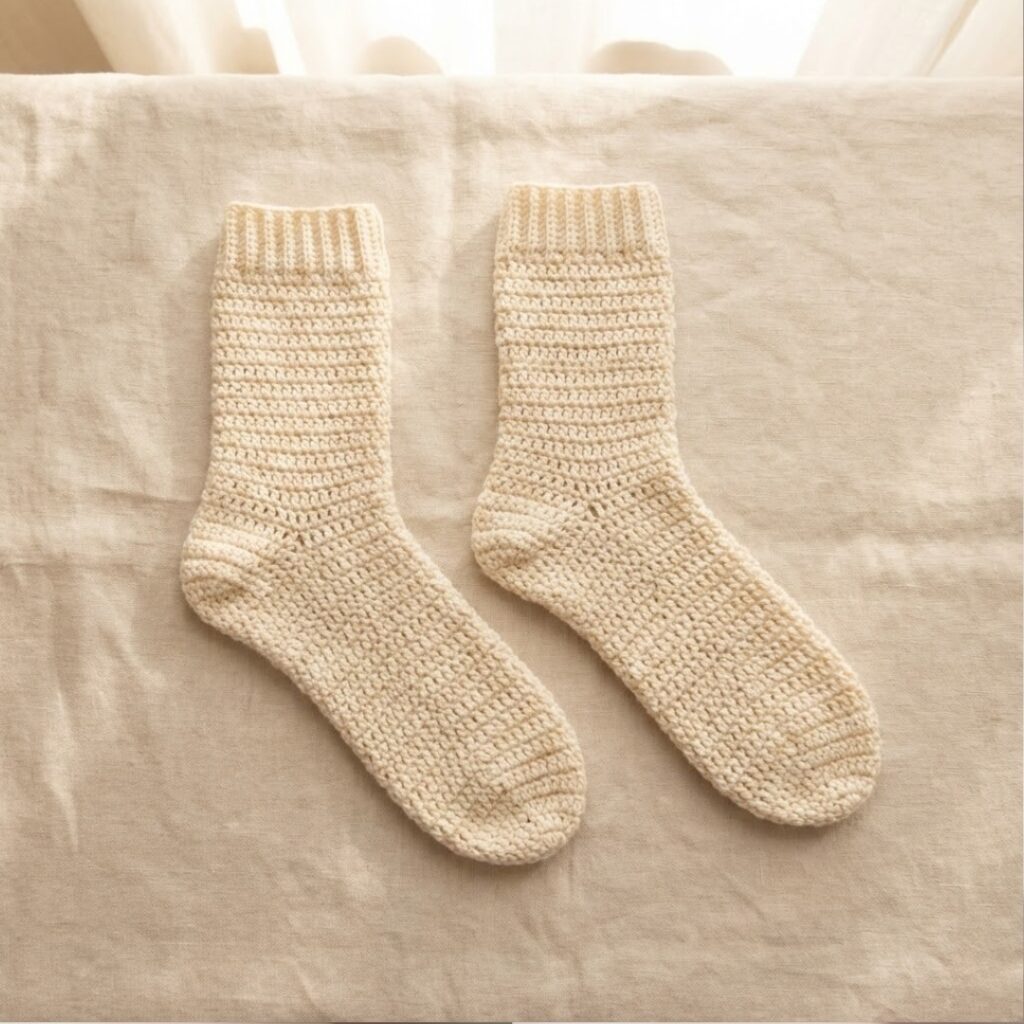
5. Crochet Knit-Stitch Tunisian Socks Pattern

Overview: Tunisian crochet can produce a knit-like fabric. These socks use Tunisian Simple Stitch (TSS) or Tunisian Knit Stitch to create a soft, dense fabric that behaves like knitted socks but crocheted. Great for knit-look texture and a warm, cozy feel.
Skill level: Intermediate (Tunisian technique + shaping & working in the round)
Materials
- Fingering or sport yarn if you want true sock density and stretch, or worsted for thick cozy socks.
- Tunisian hook with cable long enough to hold stitches in required stitch count (or use Flexi-hook).
- Stitch markers, yarn needle.
Gauge & planning
- Make a Tunisian swatch in your chosen stitch and measure stitches per inch and rows per inch for both forward/back passes. Tunisian fabric has less horizontal stretch than knit; plan circumference slightly looser or pick a more elastic stitch for cuff (BLO ribbing with Tunisian simple stitch works well).
Construction — toe-up Tunisian example (recommended)
- Toe (start small): Using Tunisian cast-on and working back & forth in TSS, increase at toe center on alternate forward passes to shape an oval toe. Continue until toe width matches foot width from formula.
- Foot: Once toe is wide enough, join in the round by working Tunisian in the round (requires technique changes — many crocheters prefer to switch to standard crochet rounds for foot and use Tunisian for leg). Alternatively do the entire sock as flat Tunisian and seam.
- Heel: Use short rows in Tunisian or pick up stitches and work a turned heel with Tunisian decreases — this is an advanced move; alternatively, after toe and foot worked in standard crochet rounds, switch back to Tunisian for leg.
- Cuff: Tunisian ribbing (use Tunisian simple stitch alternated with Tunisian purl-like techniques) gives a stretchy band.
Why choose Tunisian
- Produces a dense, warm fabric that behaves like knit.
- Great for people who prefer crochet over knitting but want knit-like look.
Variations
- Work the leg in Tunisian knit stitch for texture and the foot in sc rounds for stretch.
- Add slip-stitch colorwork for stripes without carrying floats.
Finishing & care
- Because Tunisian fabric is denser, it benefits from blocking to set shape. Hand-wash if using wool; dry flat.
Final finishing & professional polish tips (applies to all patterns)
- Weave & secure ends: Use a yarn needle to weave tails into seams and structure areas (especially gusset/heel). Double-stitch high-stress joins.
- Try on as you go: For cuff-down socks, try the sock on when you finish the gusset and adjust foot length before closing the toe.
- Reinforce soles/heels: Work one or two rows of slip stitch or herringbone slip stitch across the sole for added durability.
- Non-slip options: Add vinyl dots or a thin sueded sole for slipper versions.
- Labeling & care: When gifting, include a small card with yarn fiber, hook size, and care instructions (wash temp, dry method).
- Customization: Use the Basic Sock (Pattern A) as your template and add vines, cables, bobbles, or spiders from other patterns. I can supply charts for colorwork or cable crosses if you want a printable chart.
Conclusion
These five cozy patterns give you everything from a basic reliable pair you can make again and again to a knee-high statement sock and a knit-looking Tunisian alternative. Use the gauge-first approach and the formulas above to fit any foot precisely; once you have one pattern locked in, it’s easy to personalize color, texture, and finish.