Crochet rugs are a wonderful way to bring warmth, texture, and handmade charm into a room. They are practical, decorative, and satisfying to make, which makes them a favorite project for crocheters who want something useful but still creative. A rug can completely change the feel of a space. It can soften a hallway, brighten a bathroom, add personality to a bedroom, or make a reading corner feel more welcoming. Best of all, rug patterns let you play with shape, color, stitch texture, and size in a way that is both fun and rewarding.
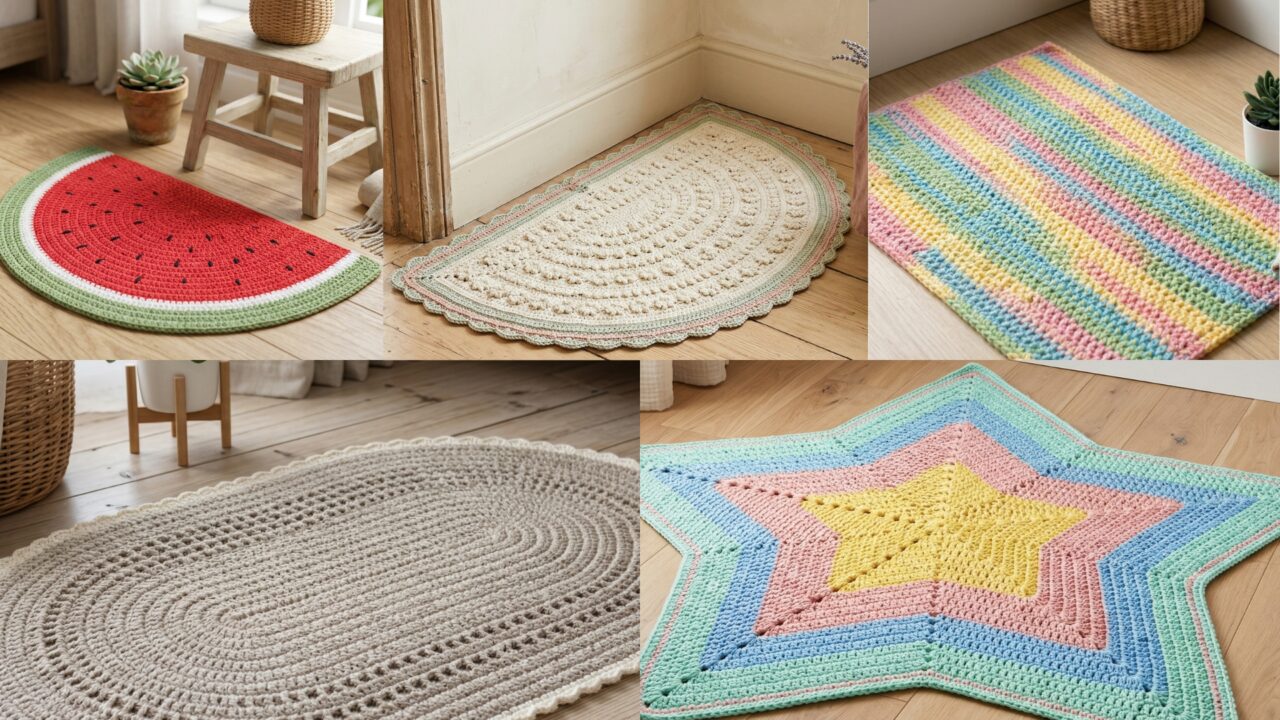
What makes crochet rugs especially appealing is how much variety you can create from simple shapes and stitches. A half round rug can feel clean and versatile. An ivory border wool oval rug brings a soft, classic look. A watermelon slice inspired rug adds a playful seasonal touch. A moss stitch rug feels calm and textured. A star shaped rug creates a bold decorative statement. Each one has its own style, but all of them can add comfort and handmade beauty to your home.
In this post, you will find five cozy crochet rug ideas with detailed step-by-step guidance, helpful notes, and practical finishing tips. These designs are written to be clear and beginner-friendly while still giving you enough detail to make something polished and durable. If you want a project that feels comforting, creative, and useful, these rug ideas are a great place to begin.
Quick Notes
Project type: Crochet rugs
Best for: Home decor, entryways, bathrooms, bedrooms, kitchens, gifts, and cozy corners
Skill level: Beginner to intermediate, depending on shape and stitch detail
Hook size: Usually 5.0 mm to 10.0 mm, depending on yarn weight and desired firmness
Yarn weight: Cotton rope, chunky cotton, bulky yarn, or rug yarn
Best yarn choice: Cotton or rug yarn for durability and easy cleaning
Finished size: Usually medium to large, customizable to your space
Time to complete: Several hours to several days depending on size and design
Helpful stitches: Chain, slip stitch, single crochet, half double crochet, double crochet, increases, decreases, color changes, tapestry crochet, post stitches, border finishing
Common Materials
Most crochet rugs can be made with the same basic supplies.
- Rug yarn, chunky cotton, or bulky yarn
- Crochet hook suited to the yarn
- Yarn needle
- Scissors
- Measuring tape
- Stitch markers
- Optional rug pad or non-slip backing
- Optional blocking tools
For rugs, yarn choice matters a lot because the finished piece needs to hold up to foot traffic and repeated use. Cotton yarn or thick rug yarn is usually best because it is sturdy, washable, and helps the rug keep its shape. A tighter stitch also helps the rug lie flat and feel more durable underfoot.
1. Crochet Half Round Rug Pattern
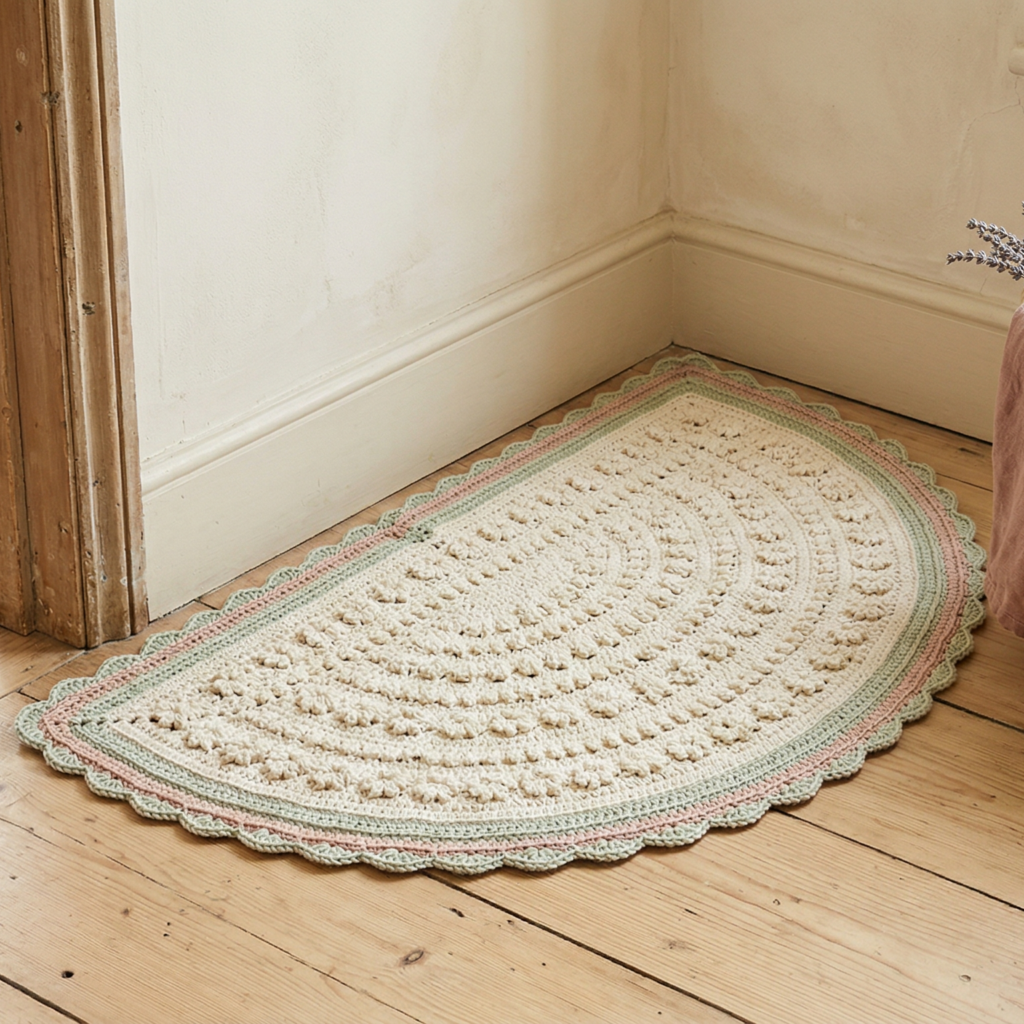
A half round rug is simple, elegant, and very easy to place in different rooms. Its shape makes it especially useful near doorways, sinks, beds, or stools because it sits neatly against walls and furniture. It is a great beginner project if you want a rug that feels practical but still polished.
Step-by-step guide
Step 1: Decide the rug size
Before you start, think about where the rug will go. A half round rug can be small enough for a bathroom sink or large enough for an entryway. Measure the space so you know how wide and deep the rug should be. Since the shape is open on one side, it should fit naturally against a wall or piece of furniture.
A clear size goal makes shaping much easier.
Step 2: Start with a curved foundation
Begin by crocheting a semicircle or half-oval foundation. This can be done by starting with a chain and increasing evenly along the curved edge. Keep the curve smooth and balanced so the rug lays flat later. This foundation creates the rounded top of the rug.
The curved base is what gives the rug its shape.
Step 3: Build the straight edge
Once the curve is wide enough, continue working rows along the straight edge. This part should stay even so the rug looks neat and sits well against a wall or cabinet. A straight edge adds structure and keeps the rug from looking uneven.
The straight side makes the rug practical for placement.
Step 4: Repeat the stitch pattern
Use a simple stitch pattern such as single crochet, half double crochet, or a gentle texture repeat. Keep the stitches even and firm so the rug stays durable. Since rugs get a lot of use, a sturdy texture is more important than a lacy look.
A consistent texture helps the rug last longer.
Step 5: Add color changes if desired
If you want a decorative look, add stripes, subtle shading, or a contrast border. A half round rug looks especially beautiful with a soft neutral body and a slightly darker edge. Keep the color changes clean so the shape remains the focus.
Step 6: Check that the rug lies flat
As you work, lay the rug flat every so often to make sure it does not curl or wave. If the curve starts to puff up, adjust your stitch count. A flat rug will be more comfortable and safer to use.
Step 7: Finish with a border
Add a neat border around the curved outer edge and the straight side. A border helps define the shape and makes the rug feel complete. You can use a simple round of single crochet or a slightly more decorative edge.
Helpful tips
Half round rugs are especially useful in spaces where a full circle or rectangle may not fit well. Neutral colors create a clean, modern look, while bolder shades can make the rug more decorative. If the rug will be used on a smooth floor, consider adding a non-slip backing.
2. Crochet Ivory Border Wool Oval Rug Pattern
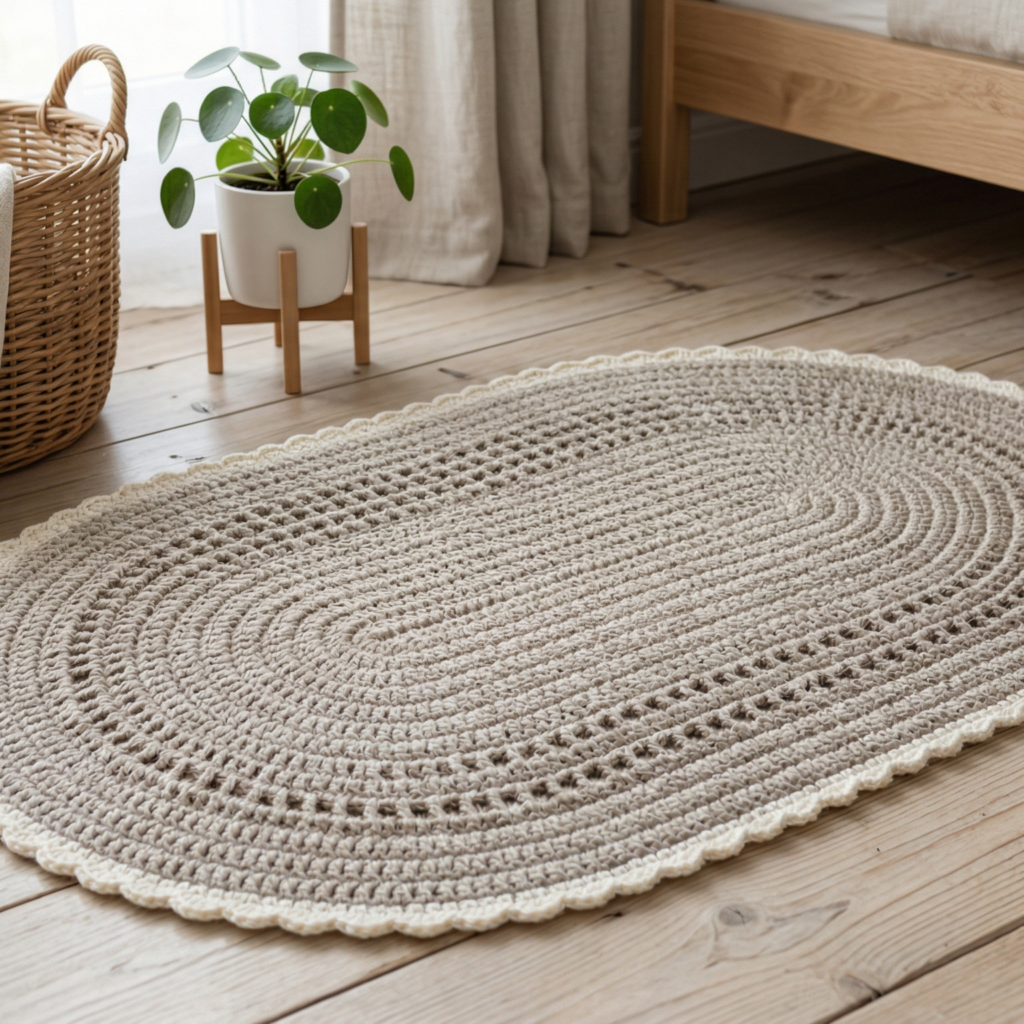
An ivory border wool oval rug feels soft, classic, and timeless. The oval shape makes it versatile for bedrooms, bathrooms, or hallways, and the ivory border gives it a calm, elegant finish. This is a lovely pattern if you want a rug that feels warm and refined without being too busy.
Step-by-step guide
Step 1: Choose the main yarn and border yarn
Pick a wool or wool-blend yarn for the body of the rug and an ivory color for the border. The contrast should be soft rather than harsh so the border feels graceful. Wool gives the rug warmth and a cozy handmade texture.
A balanced color combination creates a calm look.
Step 2: Start the oval base
Begin with a chain foundation and work around it to create an oval shape. Oval rugs grow by increasing at both ends while keeping the middle section straight. Take your time here because a smooth oval foundation is the key to the whole rug.
A neat base keeps the shape balanced.
Step 3: Build the central rows
Work rows around the oval, adding increases at the curved ends and keeping the middle section even. This helps the rug grow smoothly without becoming lopsided. The body should remain flat and stable as it expands.
The oval shape gives the rug its classic look.
Step 4: Continue until the rug reaches the desired size
Work the oval until it is the right length for your space. Whether you want a small bedside rug or a larger floor piece, keep checking the measurements as you go. An oval rug often looks best when the ends are gently rounded and the center is long and even.
Step 5: Add the ivory border
Once the base is complete, switch to ivory yarn and crochet a border around the entire rug. This border frames the shape beautifully and gives the piece a soft, finished appearance. Keep the edging simple so it complements the wool texture.
The border is what makes the rug feel elegant.
Step 6: Check the edges
Make sure the border lies flat and does not pull the rug inward. If the edge begins to wave, reduce your tension or adjust the stitch count. A smooth border will help the rug sit properly on the floor.
Step 7: Block the rug if needed
Light blocking can help the oval shape settle and make the border sit more evenly. This is especially useful with wool yarn because it helps the stitches relax into a cleaner shape.
Helpful tips
This rug is beautiful in natural wool shades like oatmeal, taupe, gray, or brown with ivory edging. It is especially lovely for cozy farmhouse or minimalist decor. If you want a warmer feel, use a chunky wool blend for extra softness underfoot.
3. Crochet Watermelon Slice Inspired Rug Pattern
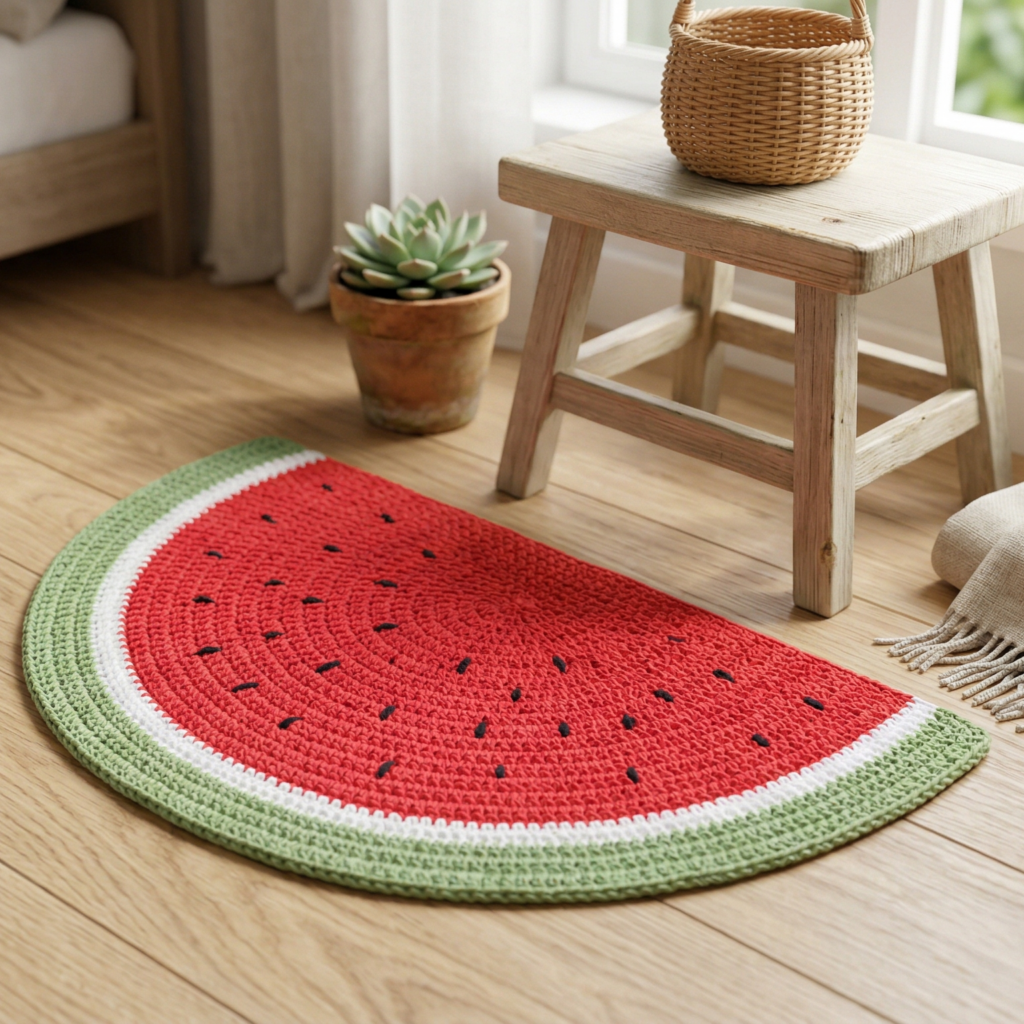
A watermelon slice inspired rug is playful, cheerful, and full of personality. It brings a fresh summer feel into your home and works wonderfully in a kid’s room, kitchen, bathroom, or casual corner. This rug is especially fun because the shape and color palette are instantly recognizable and very decorative.
Step-by-step guide
Step 1: Plan the watermelon colors
Choose classic watermelon colors: green for the rind, white for the light inner band, red or pink for the fruit, and black for the seeds. Decide how large each color section should be before you begin. A clear color plan will help the rug look neat and realistic.
The color palette is what makes the design fun.
Step 2: Start the curved slice shape
Begin with a curved foundation that resembles a slice of watermelon. This is usually a semicircle or half-oval shape. Work increases evenly so the curve grows smoothly. The shape should feel rounded and slightly playful.
The slice silhouette gives the rug its identity.
Step 3: Build the rind section
Crochet the outer green part of the slice. This section should frame the rug and create the familiar watermelon rind look. Keep the stitches even and firm so the curve remains clean.
The rind is one of the most recognizable features.
Step 4: Add the white band
Switch to white yarn and work a narrow band inside the green rind. This helps separate the rind from the fruit section and gives the rug a more realistic look. The white band should stay slim and neat.
The band adds contrast and definition.
Step 5: Crochet the fruit section
Use red or pink yarn to build the main body of the slice. This should be the largest part of the rug and feel soft and bright. Keep the rows even so the rug remains flat and balanced.
The fruit color brings the design to life.
Step 6: Add seed details
Embroider or crochet small black seed shapes across the red section. Keep the seeds simple and spaced naturally so the design feels playful rather than crowded. A few carefully placed seeds are enough.
The seeds make the slice instantly readable.
Step 7: Finish the border
Add a clean border along the curved edge and straight side. This helps the watermelon shape stay crisp and tidy. A simple finish works best so the fruit details remain the focus.
Helpful tips
This rug is especially fun in children’s spaces or summer-themed rooms. If you want a softer version, use pastel pink and green. If you want a bolder look, choose bright watermelon red and fresh green. A rug like this can be a cheerful accent piece that makes the whole room feel brighter.
4. Crochet Moss Stitch Rug Pattern
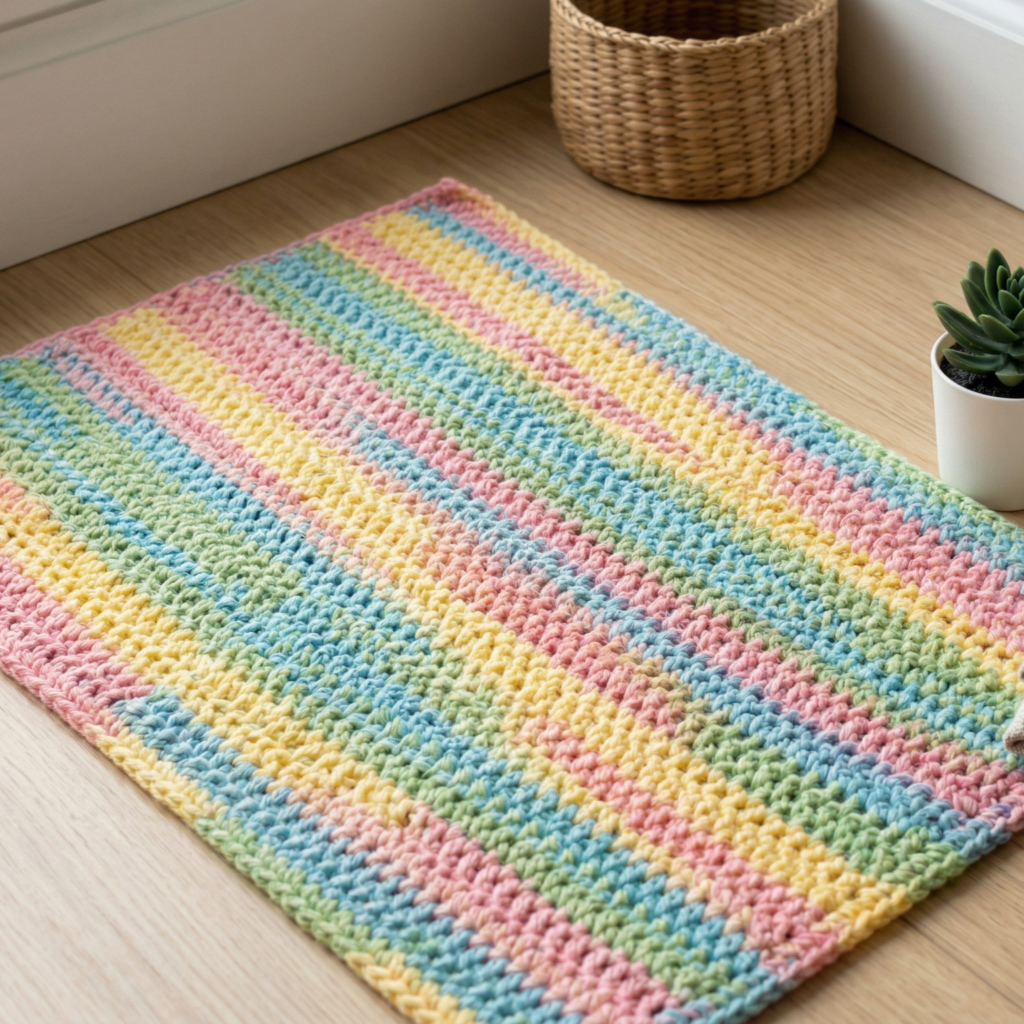
A moss stitch rug is calm, modern, and beautifully textured. Moss stitch creates a smooth, woven-like surface that feels understated but still interesting. This pattern is perfect if you want a rug that looks clean and works in almost any room.
Step-by-step guide
Step 1: Choose a sturdy yarn
For a moss stitch rug, choose yarn that can withstand frequent use. Cotton or rug yarn is ideal because the pattern will be dense and durable. A solid color or subtle variegated yarn works especially well here because the texture itself is the highlight.
The yarn should support the texture, not distract from it.
Step 2: Chain the foundation
Start with a chain that matches the width you want for the rug. Because moss stitch creates a fairly dense fabric, keep the chain loose enough so the rug does not feel too tight at the beginning. A relaxed foundation helps the fabric stay flexible.
A smooth start helps the rug lay flat.
Step 3: Work the moss stitch repeat
Begin the moss stitch pattern, usually a chain-one, skip-one repeat with single crochet sections. This stitch creates a woven effect that feels calm and balanced. Keep the row repeat consistent so the rug has an even, tidy look.
The moss stitch is the main visual texture.
Step 4: Continue row by row
Work the rows until the rug reaches the size you want. As you go, keep an eye on the edges to make sure they remain straight. Moss stitch can create beautiful structure, but only if the tension stays consistent.
Consistency gives the rug its polished look.
Step 5: Add color changes if desired
Moss stitch rugs look lovely in one solid color, but stripes or gentle color blocking can make them more personal. If you want a clean modern look, use one neutral tone. If you want more interest, add a couple of subtle stripes.
Step 6: Check for flatness
Because the stitch is dense, it is important to make sure the rug does not curl or tighten. Lay it flat often and adjust if necessary. A flat rug will feel much better underfoot and will be easier to place in the room.
Step 7: Finish with a border
A simple border can frame the moss stitch beautifully. Keep it understated so the texture remains the focus. A neat edge also helps the rug feel more complete and slightly more durable.
Helpful tips
This rug works especially well in earthy and neutral shades like sage, beige, gray, or cream. It is a wonderful choice for minimalist or cozy home decor. If you want something easy to match, this is one of the most versatile rug styles in the collection.
5. Crochet Star Shaped Rug Pattern
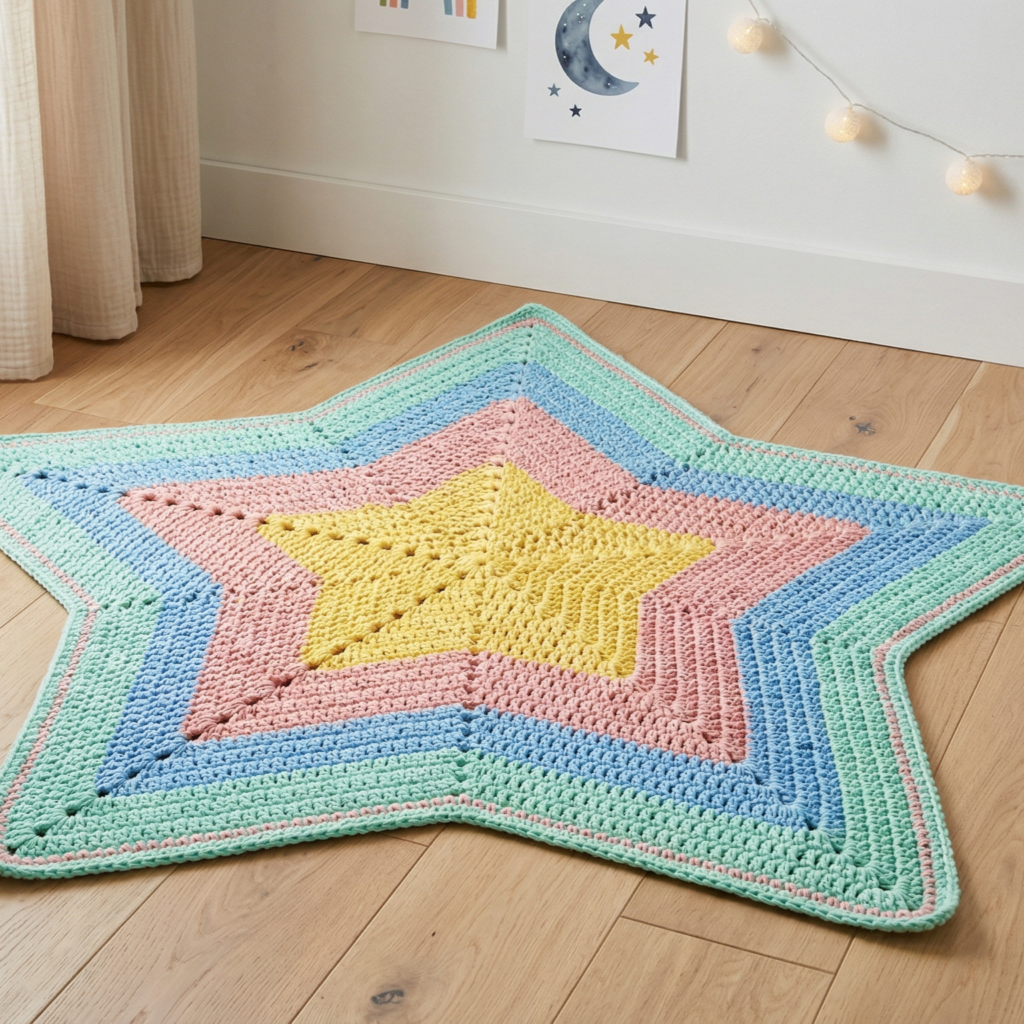
A star shaped rug is bold, charming, and full of character. It creates a strong decorative statement and can work beautifully in a child’s room, nursery, reading nook, or any space that needs a little whimsical style. Even though the shape is playful, the pattern can still be practical and durable.
Step-by-step guide
Step 1: Decide on the star size
Before starting, think about how large you want the rug to be. A small star can serve as an accent rug, while a larger star can become the center of a room. Planning the size ahead of time will help you control the points and shape more easily.
A clear size plan helps the star stay balanced.
Step 2: Begin with the center
Start with a magic ring or small round center. This is the core of the star and gives the design a stable beginning. Keep the center neat because all the points will grow from this section.
The center anchors the star shape.
Step 3: Form the points
Work outward from the center, increasing and shaping the points evenly. Depending on the pattern, you may make five or more points. Keep them similar in size so the star looks balanced from every angle.
The points are what define the rug.
Step 4: Fill in the sections between points
As the star grows, work the sections between the points so the rug stays flat. These areas should remain smooth and stable, helping the star keep its overall shape. Make sure the rug does not cup or curl as you go.
The in-between spaces help the star lie flat.
Step 5: Continue until the rug is the size you want
Keep expanding the star until it reaches your desired width. Larger stars may need more rows, but the pattern will begin to take shape quickly. Check the symmetry often so the points remain even.
Step 6: Add a border
A simple border can define the edges and help the star shape feel complete. You can use a matching color for a subtle look or a contrast color for a more dramatic effect. Keep the border neat so it does not soften the points too much.
Step 7: Block carefully
Blocking is very helpful for star shaped rugs because it sharpens the points and helps the shape lay flat. Shape the points gently while the rug dries so the star looks crisp and polished.
Helpful tips
Star rugs are wonderful in bright colors for children’s rooms, but they can also be beautiful in soft neutrals for a more modern accent. If you want a bold statement piece, choose a strong color and keep the point definition clear. This rug is especially fun because it turns a simple floor piece into a decorative focal point.
Conclusion
Crochet rugs are one of the best ways to add warmth and personality to a home. They are useful, decorative, and satisfying to make, especially when you want a project that feels substantial and rewarding. A handmade rug can brighten a room, soften a floor, and make a space feel more personal in a way that store-bought pieces often cannot.
These five rug patterns each bring something different to the table. The half round rug feels practical and versatile. The ivory border wool oval rug is soft and classic. The watermelon slice rug adds playful charm. The moss stitch rug is calm and textured. The star shaped rug makes a bold decorative statement. Together, they show how much variety you can create with crochet, even when working with a simple rug shape.
If you enjoy projects that are both beautiful and functional, these rug patterns are a wonderful place to start. With the right yarn, careful shaping, and a neat finish, your crochet rug can become a favorite part of your home decor.